Star Trek III Tricorder Project - Complete!

Re: Star Trek III Tricorder Project - Work In Progress

Great work!

Thanks! - I'm afraid it will be a bit rough, overall...

Blackbirdcd- I think that vacuform pulling the plastic into a negative form sounds like a good way to go. But at the moment, it's a lot harder for me to make a good negative than a positive- and I don't have a vacuform table. (At least not yet.)

Phase- Semicolon?! I guess I just didn't want to believe I'd really seen that... (Thanks for the great pics!)

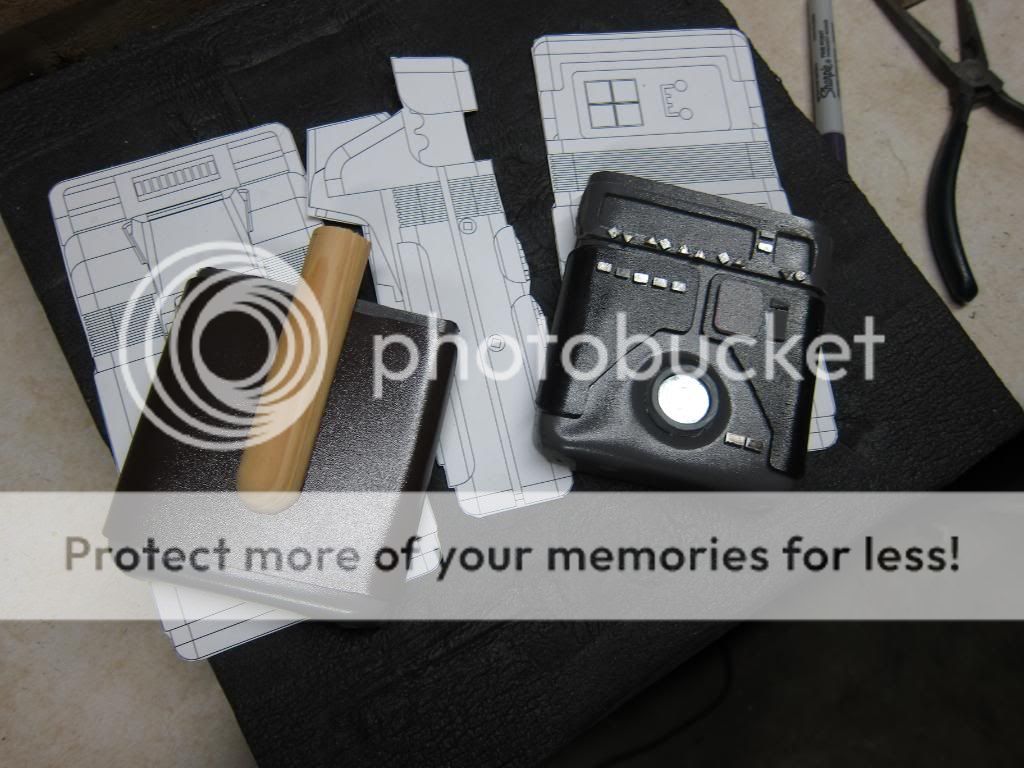
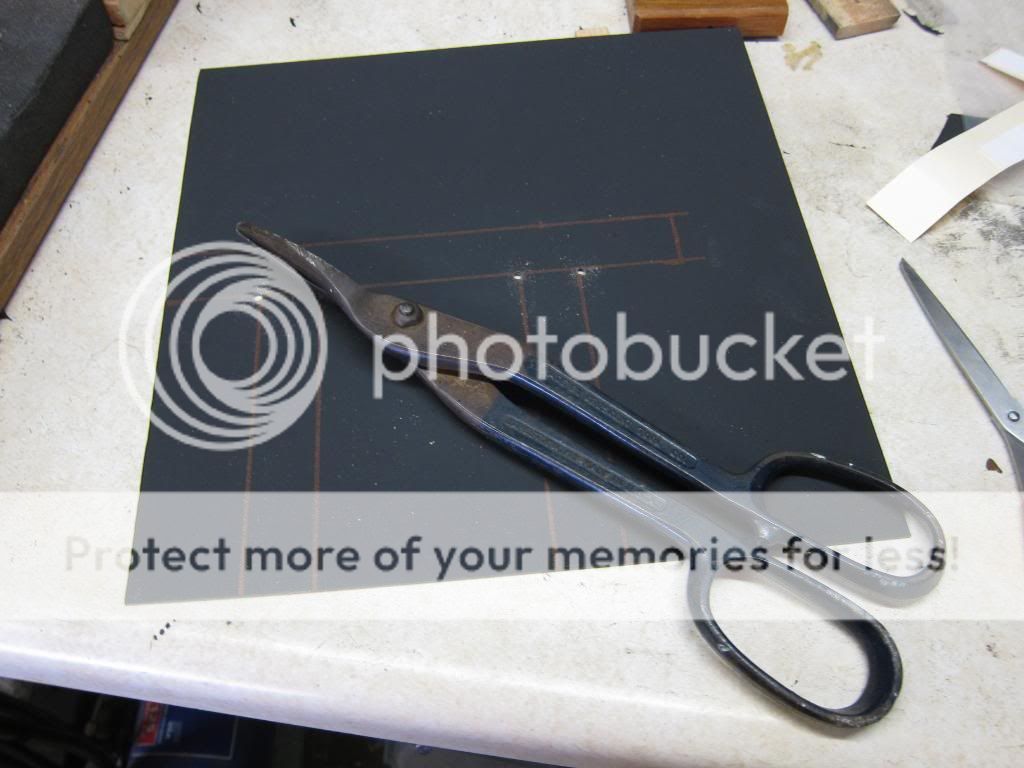
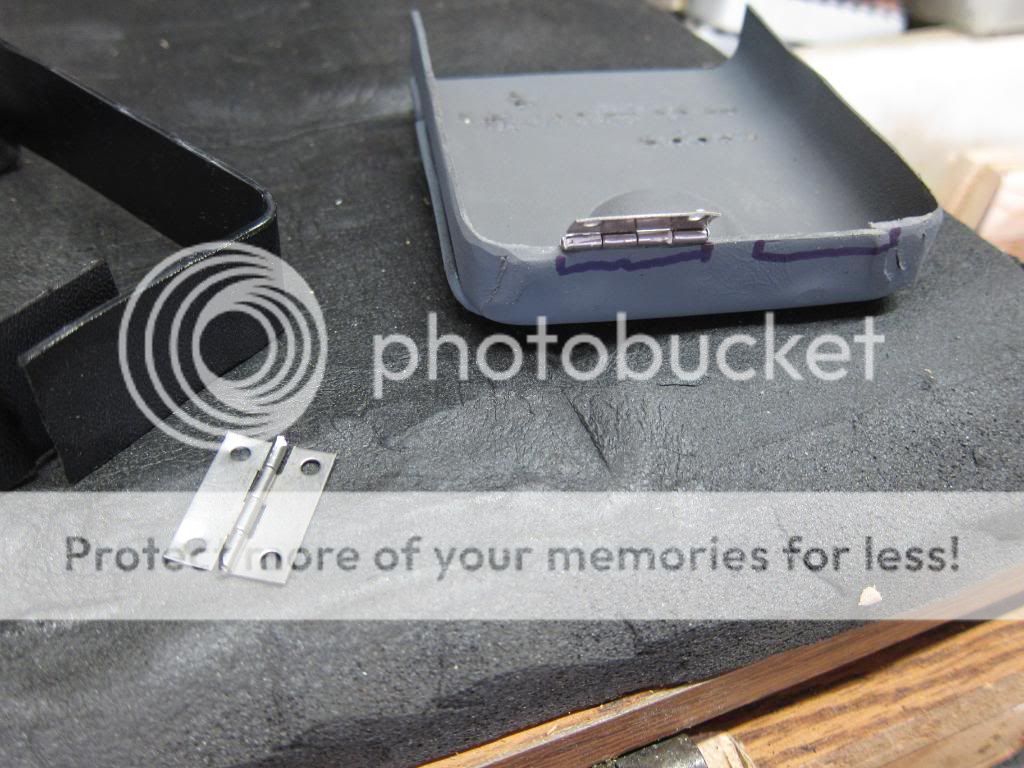
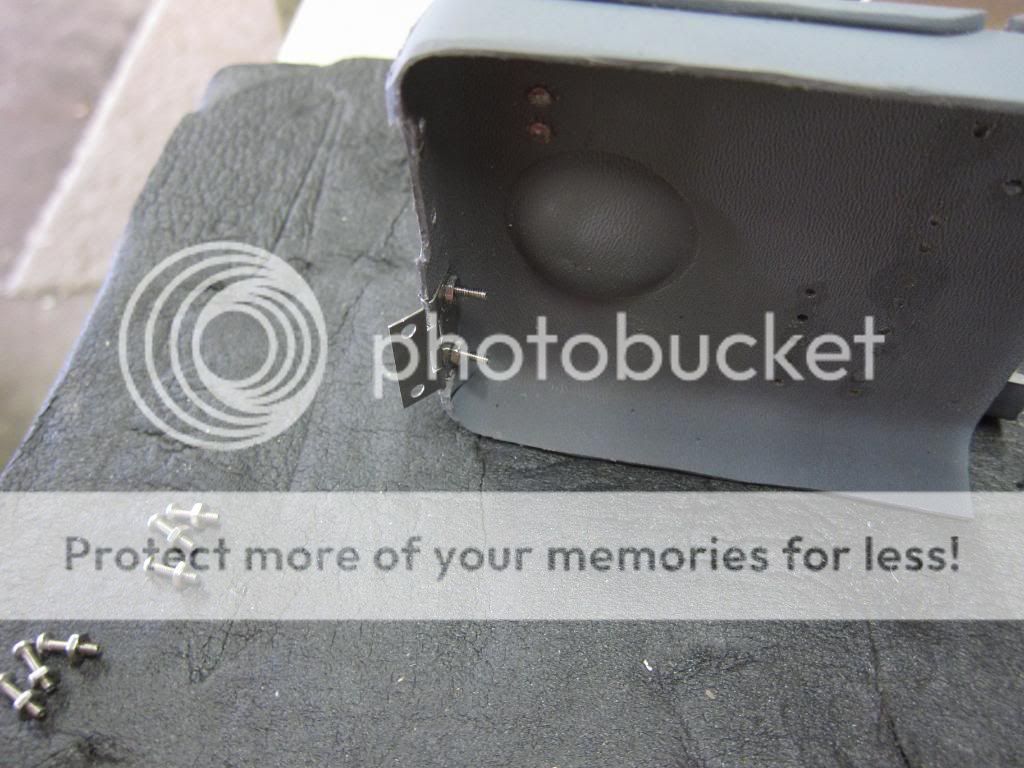
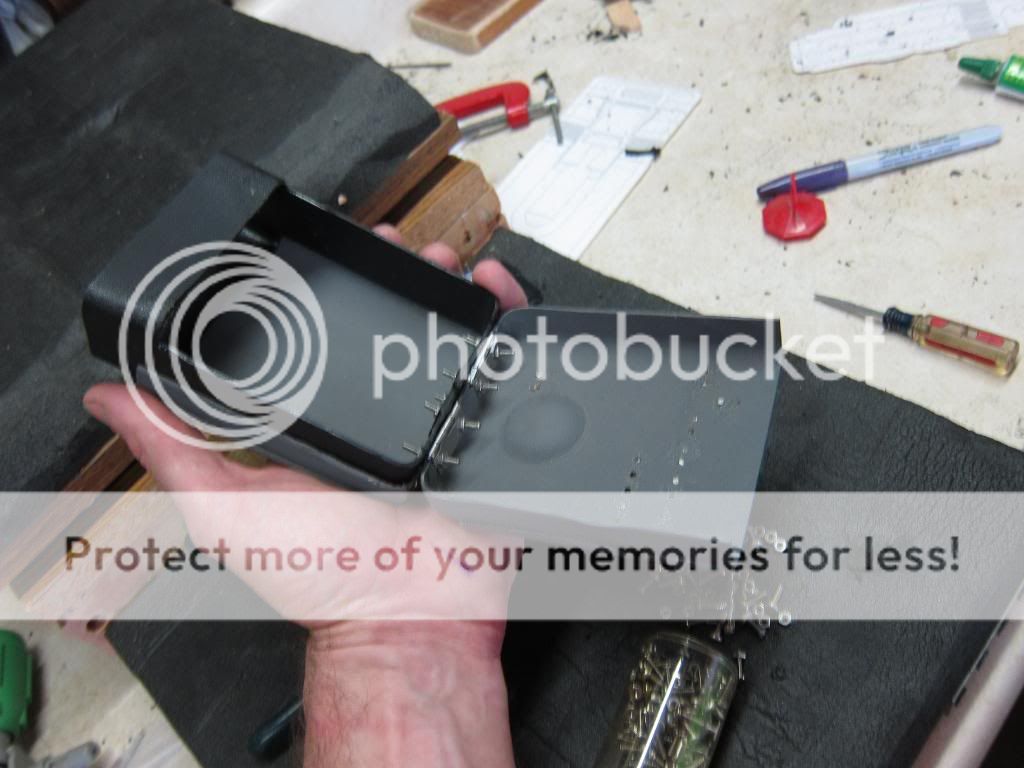
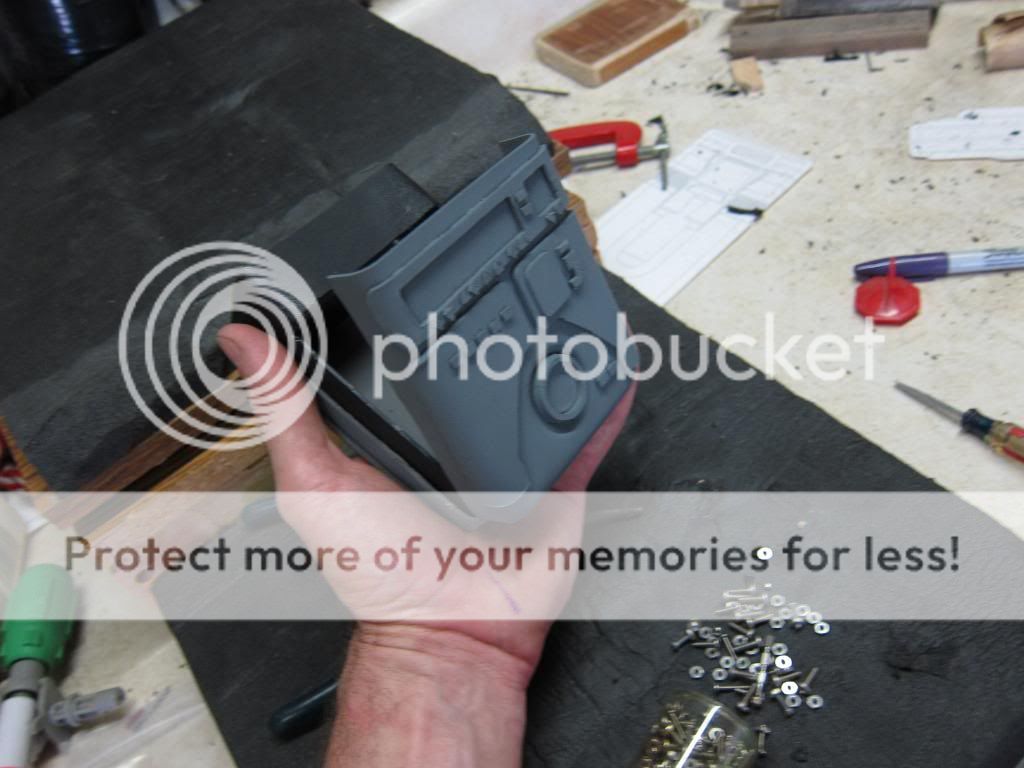
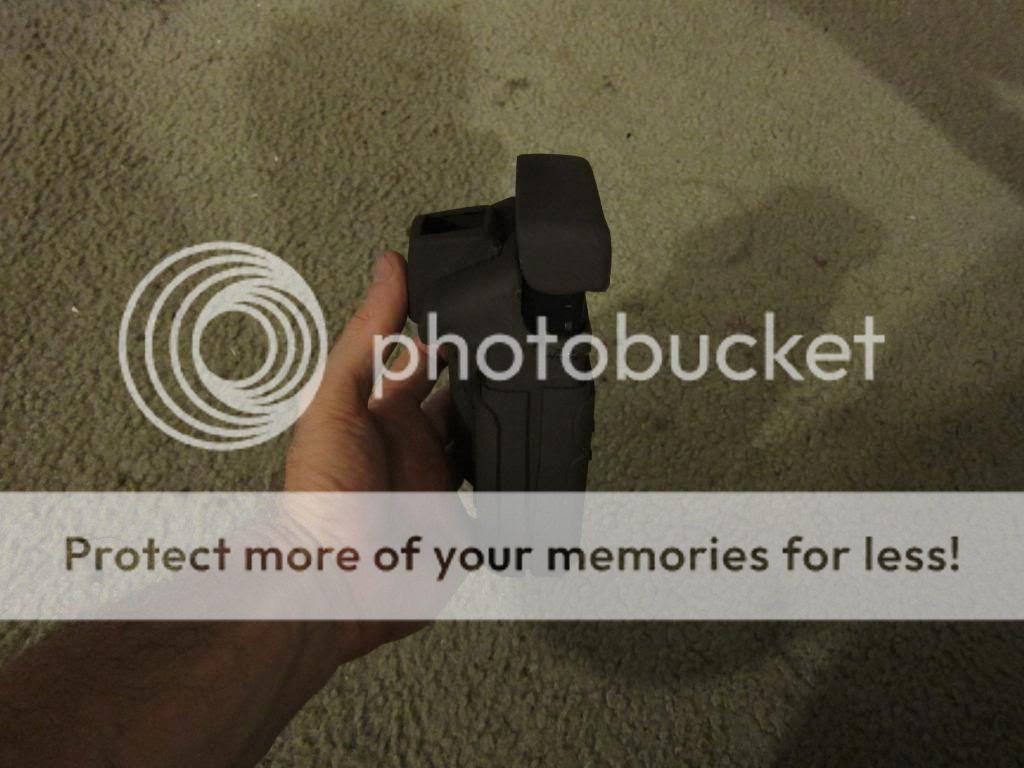
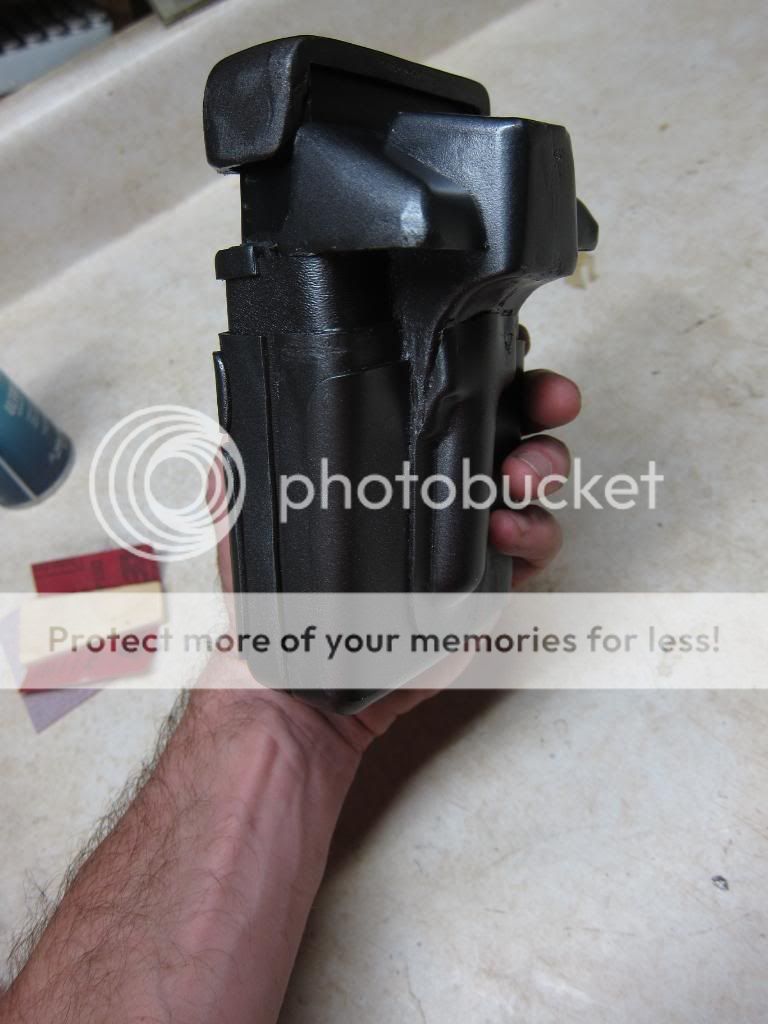
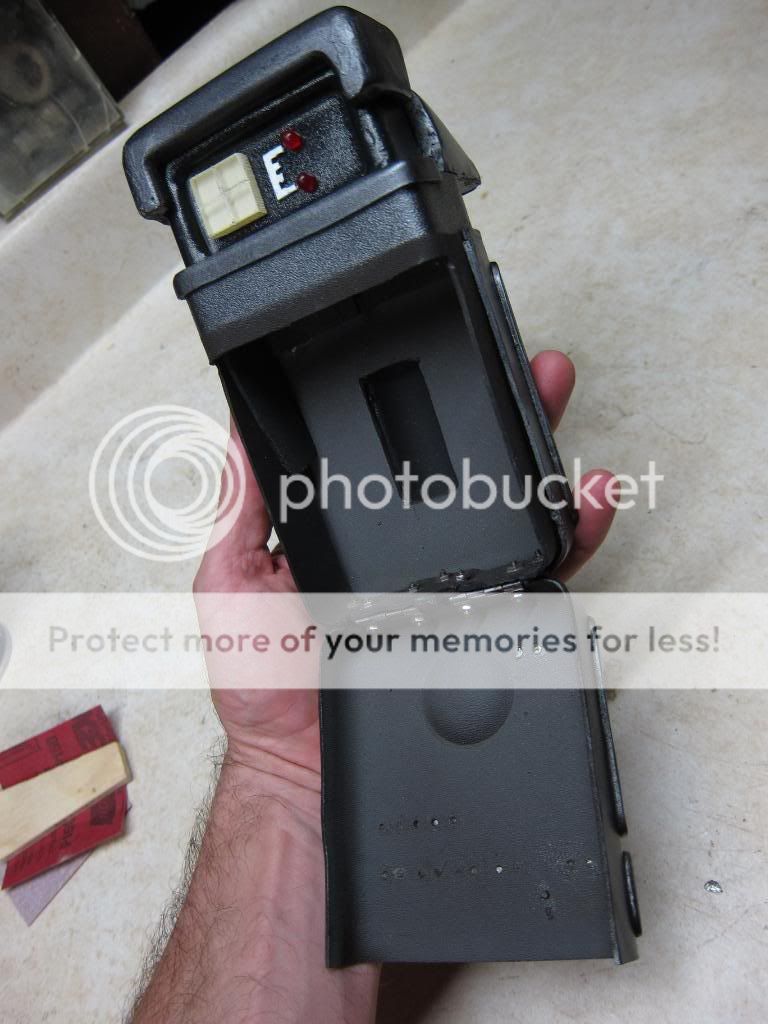
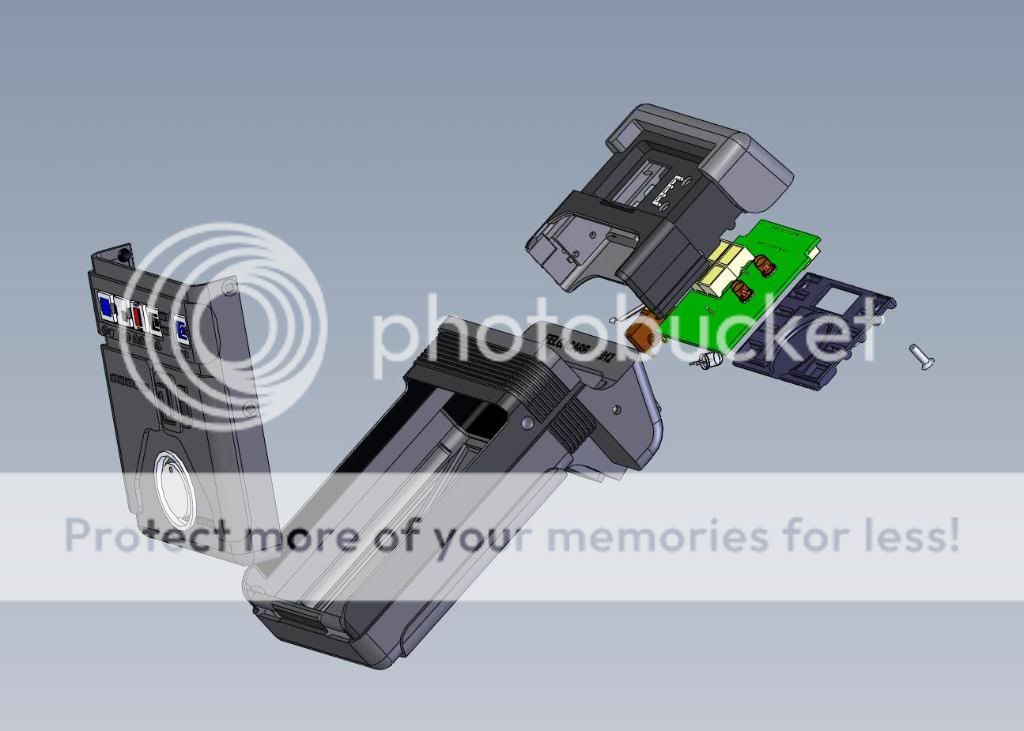
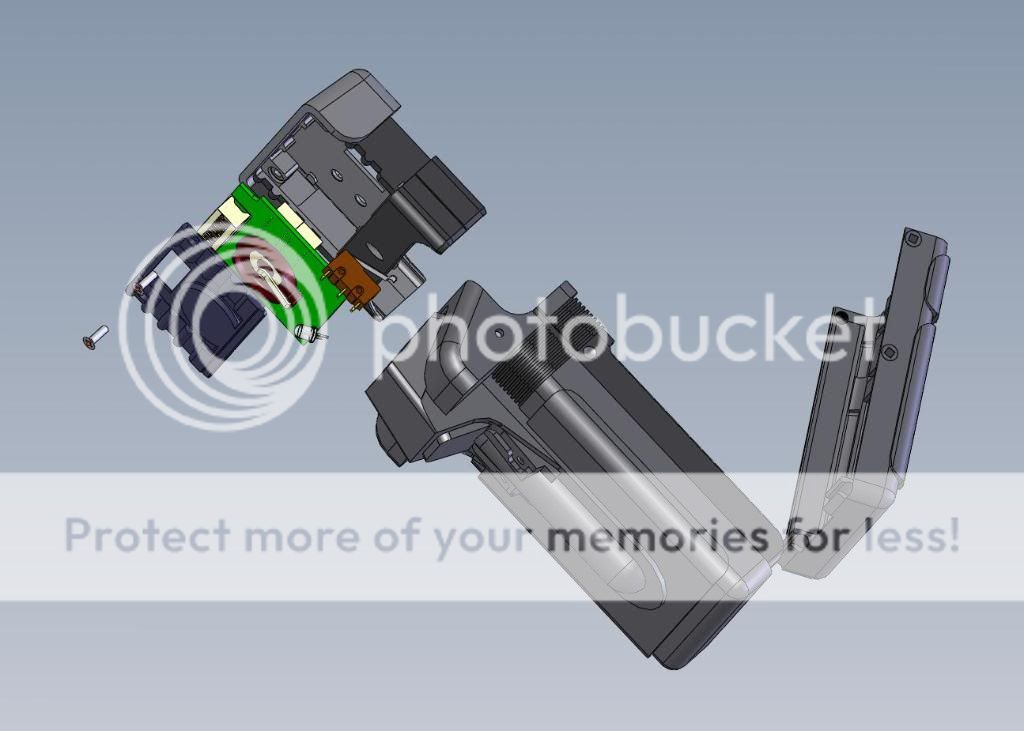
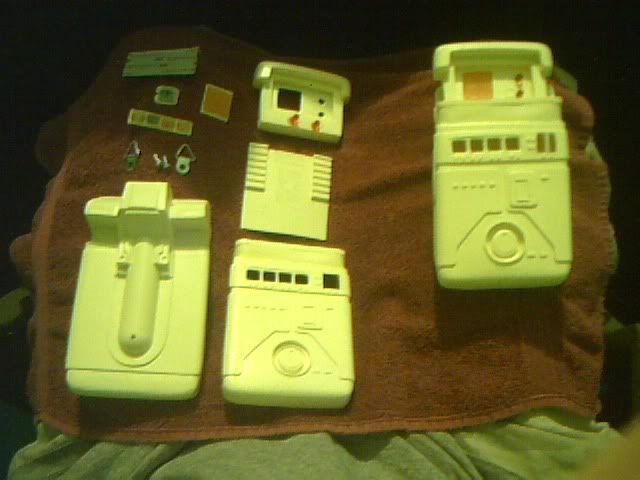
Here's what I managed to do in the last two evenings:

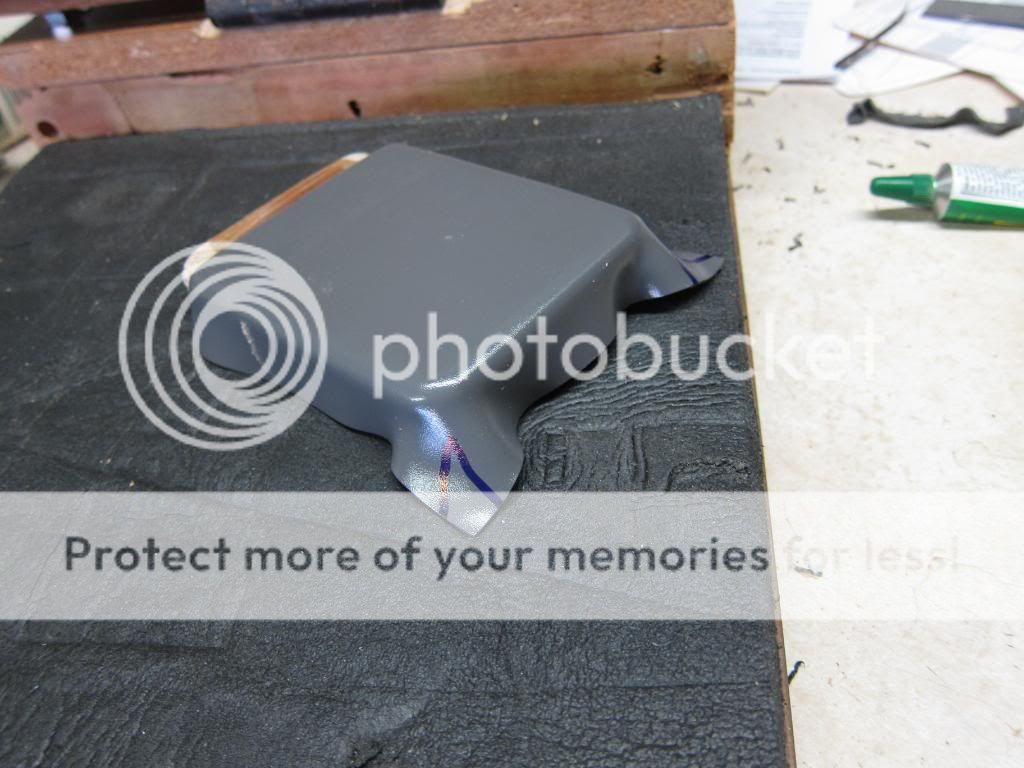
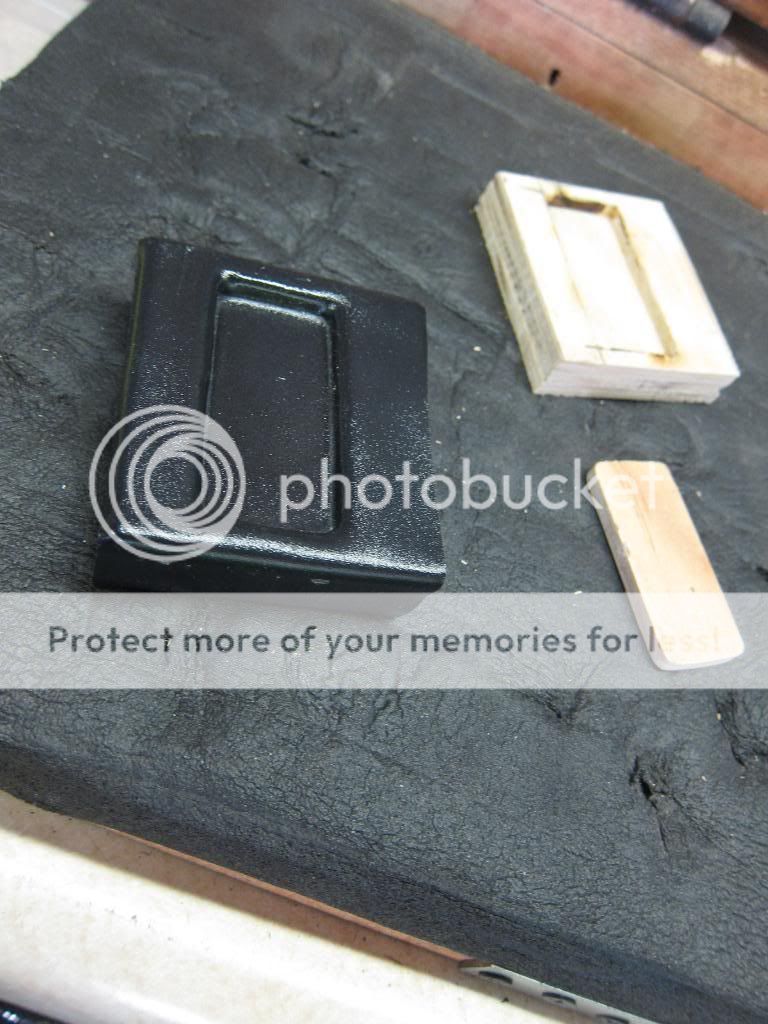
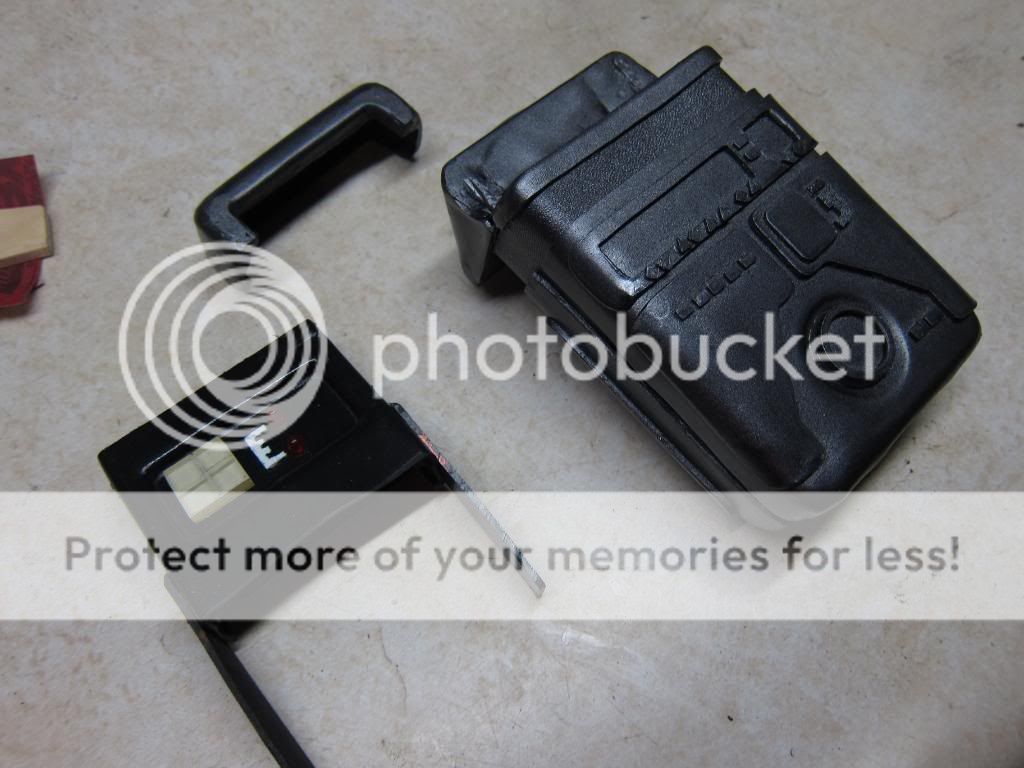
Pressed a new top shell-
03-tric4.jpg


and bottom shell-
03-tric24.jpg


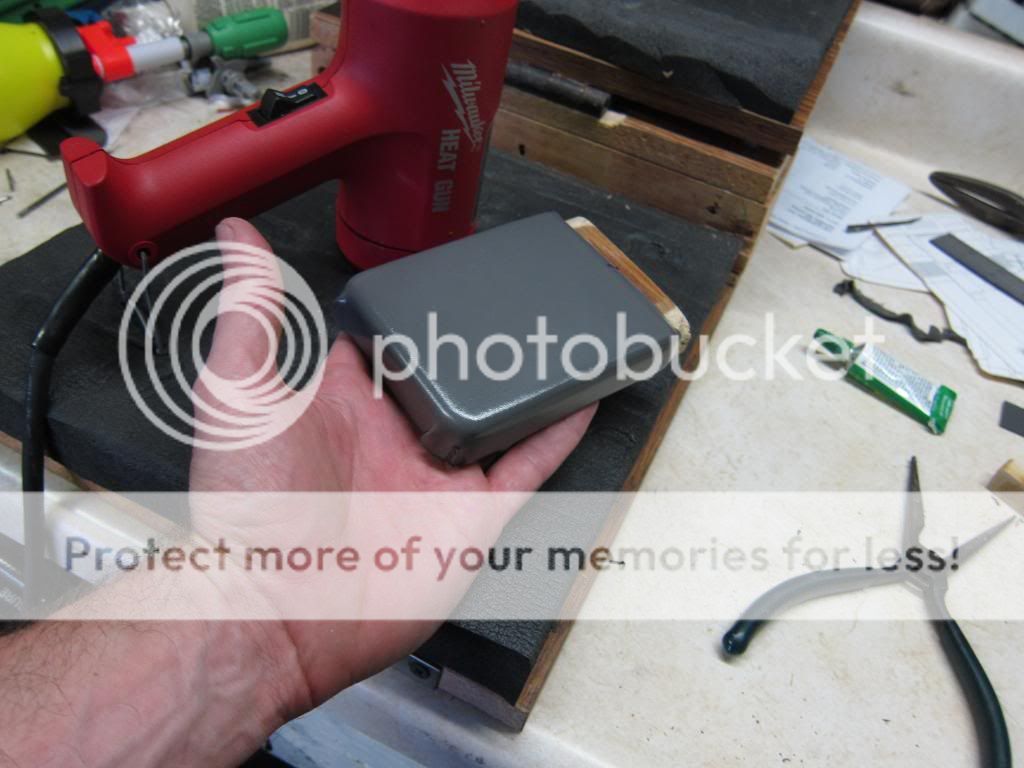
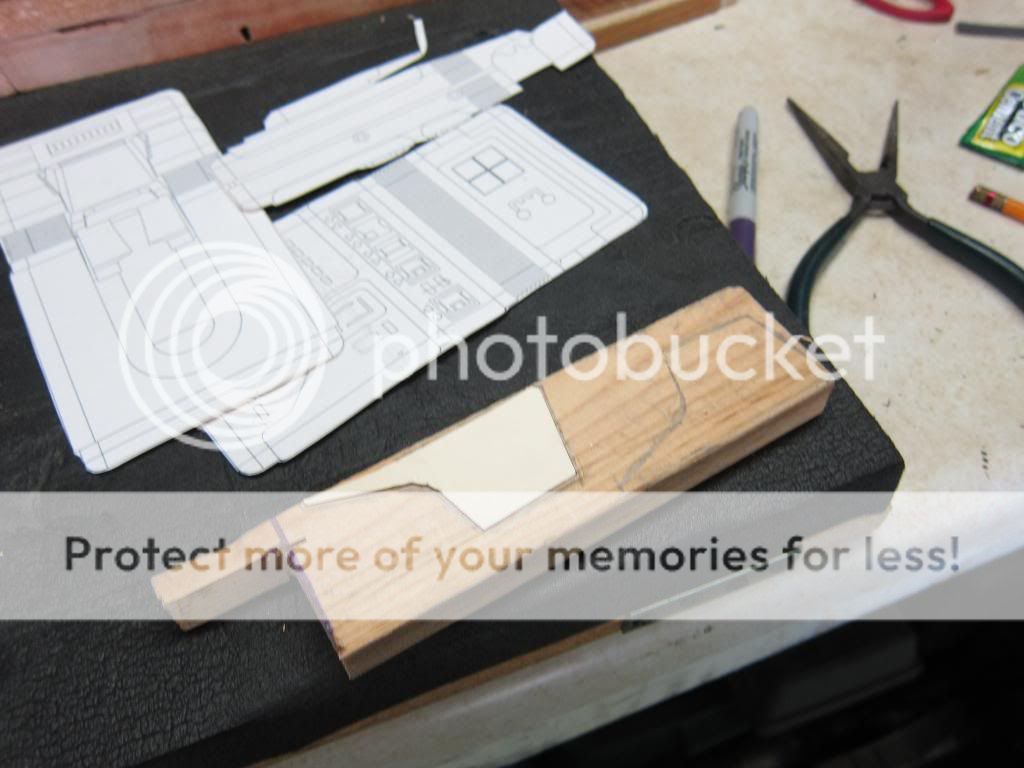
Heated and rolled the edges under-
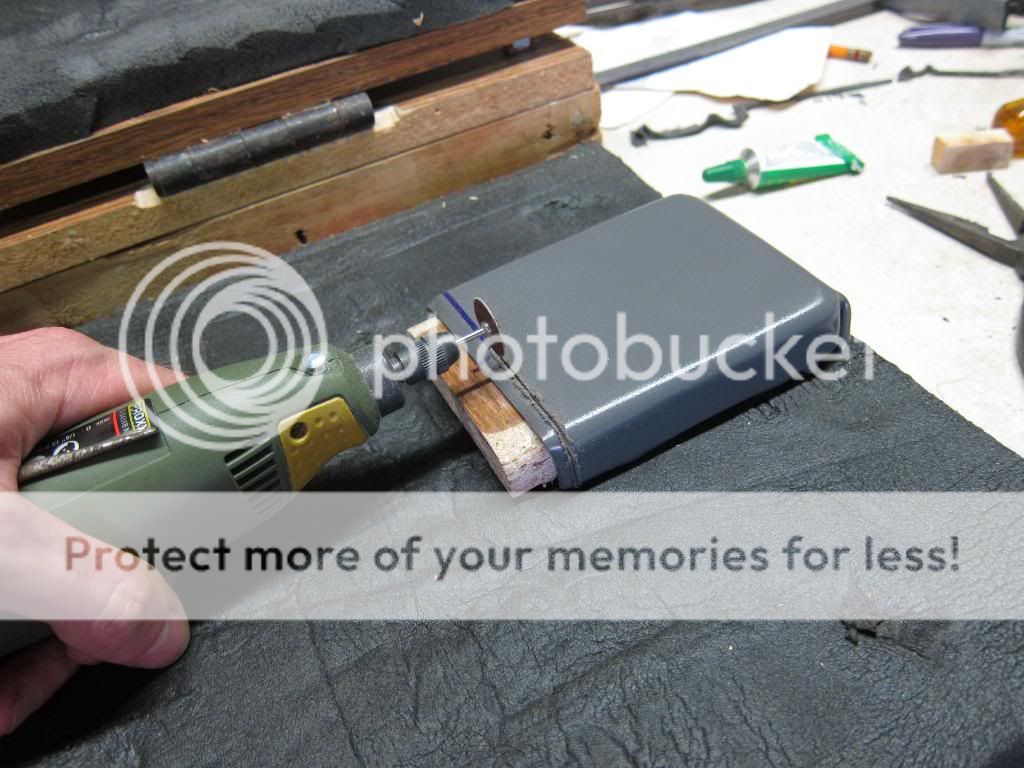
03-tric25.jpg


Cut off the excess-
03-tric26.jpg


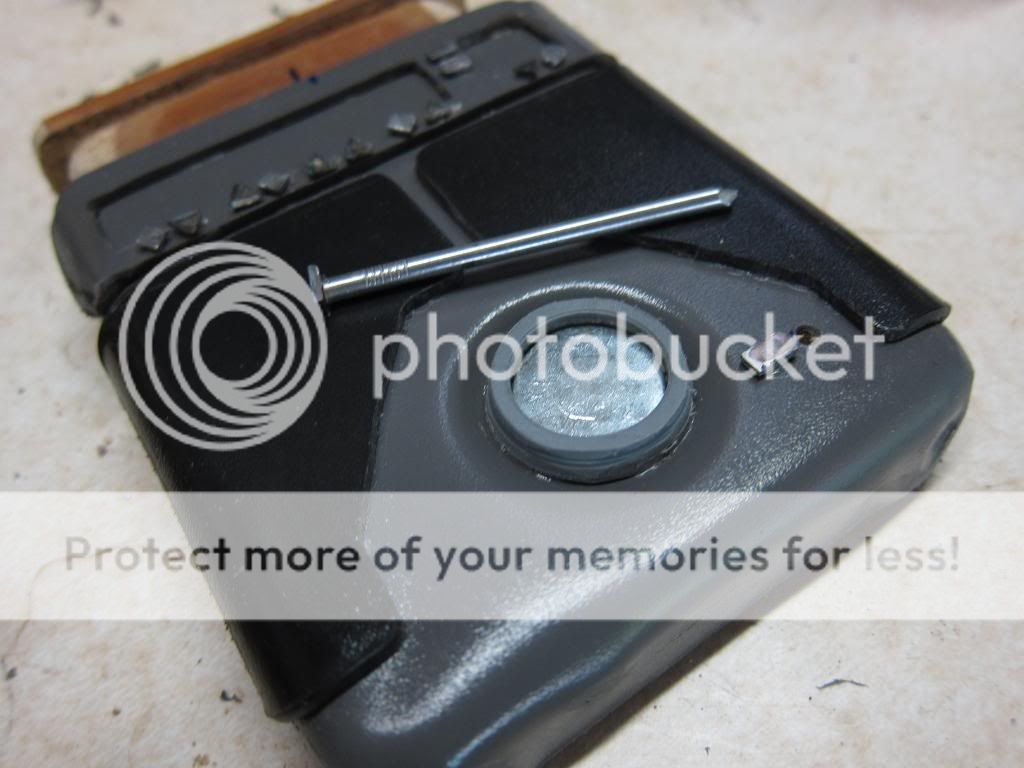
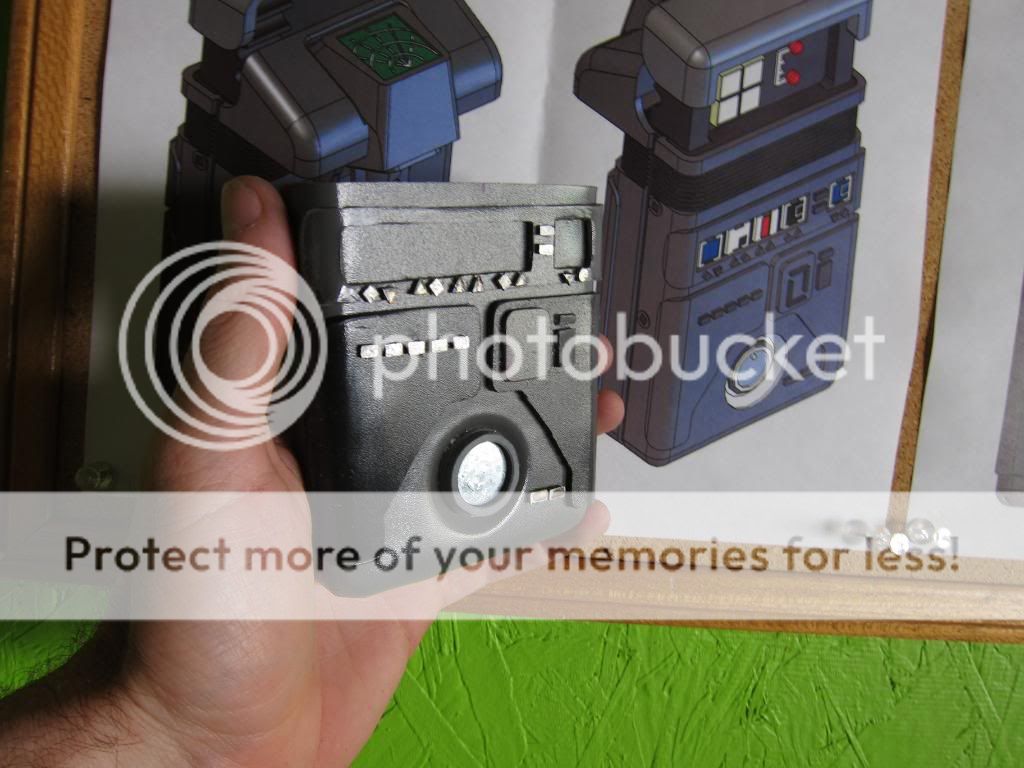
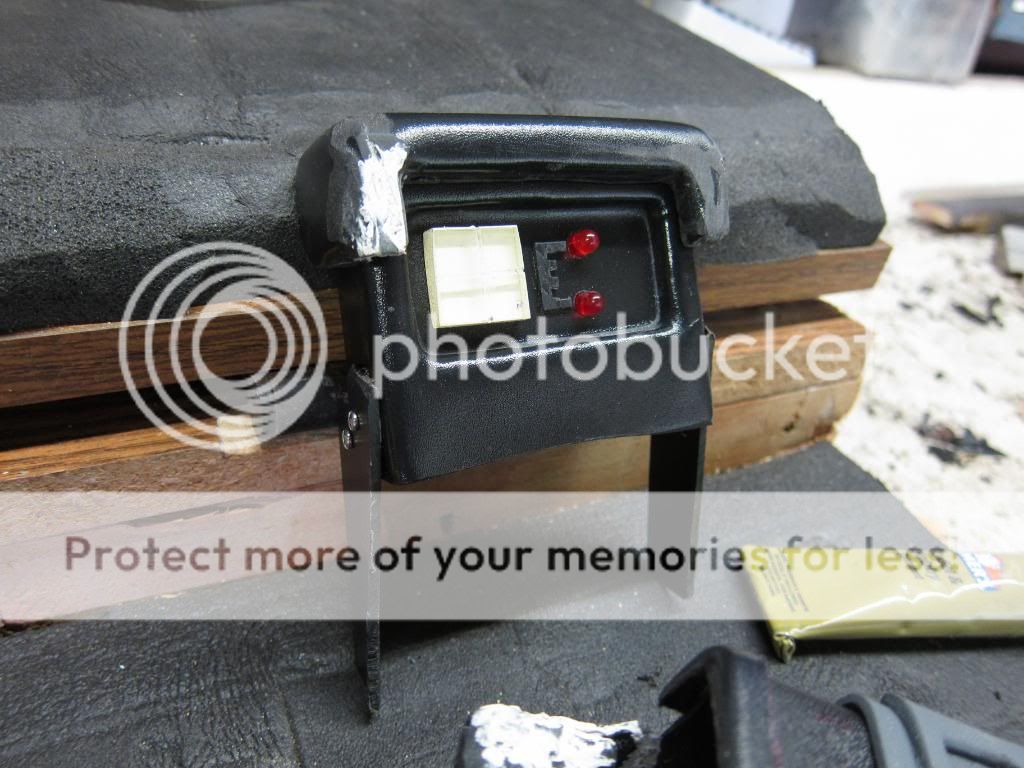
Then went crazy with the front details- mostly accomplished by filing the heads of nails into little triangles, squares, circles and rectangles, cutting them short, and gluing them into holes drilled into the shell-
03-tric10.jpg


03-tric14.jpg


03-tric20.jpg


03-tric23.jpg


Then, started on some of the back detail- but that's all for tonight.
03-tric28.jpg
 
Re: Star Trek III Tricorder Project - Work In Progress

This weekend, I've had more time for prop building, so here are some updates:

First off, I researched and experimented some more with a previously done 3D printed prop- It turns out, you can get the less expensive material (nylon) to take paint, if you primer the living daylights out of it... Using that material would drop the 3D printing costs for this project from approx. $400 to $150. That's almost starting to look tempting. It would still require a lot of finish work to make it look good, though. (And I'd need to do a lot more modeling to put all mechanical details inside to make it worth while- but I like modeling!) So now, I have an official "Plan C".

Meanwhile, "Plan B" is progressing: Here is starting the form for the screen hood-
04-tric1.jpg


Left and right side screen hood forms-
04-tric2.jpg


Initial hood pressing-
04-tric4.jpg


Pattern for the inner frame-
04-tric14.jpg


Bending the frame-
04-tric16.jpg


Hinge and fasteners for the opening front panel-
04-tric20.jpg


04-tric19.jpg


Lots of drilling-
04-tric22.jpg


And the front and back are bolted to the hinges and frame with tiny #2 fasteners-
04-tric25.jpg


04-tric26.jpg


Screen hood being glued on-
04-tric30.jpg


The back tube part in work-
04-tric9.jpg


That's where it is now. Lots and lots more to do...
 
Re: Star Trek III Tricorder Project - Work In Progress

I love this kind of build!

Thanks! -You do realize this is the 'glue tons of bent plastic together and hope you fill & sand it out at the end' kind of build, right?

Speaking of plastic, I got some more done.

Made a form for the sensor head-
06-tric2.jpg


And pressed the kydex around it-
06-tric6.jpg


Also did the 'inside' part of the head-
06-tric13.jpg


This is actually the first part that I felt really came out right. (Perhaps it is the only part that is truly suited to this kydex pressing technique...)
06-tric18.jpg


Some mechanical bits to get it to slide right and stop at the right spot-
06-tric22.jpg


Some LEDs and a plexigalss square- (Nothing is wired)
06-tric26.jpg


A coat of dark primer and a couple of quick pictures-
06-tric28.jpg


06-tric34.jpg


Next up: Days of filling and sanding! And thinking about electronics...
 
Re: Star Trek III Tricorder Project - Work In Progress

I've gotten a bit more work done this week on both the "Plan B" Kydex tricorder, and the "Plan C" 3D printed tricorder.

The B has been patched, sanded, and had primer put on multiple times, and last night got what may be the final shell color put on.

06-tric001.jpg


06-tric004.jpg


06-tric003.jpg


Still looks like it will make a good carry case-
06-tric005.jpg


It still needs a lot of detail work, and the electronics. Those are being developed for both B & C at the same time. (Worst case, I can just throw in a couple of blinking LED's on the face if I get into schedule trouble.)

As for the C, it still looks mostly the same on the outside. A lot of detail has been worked through the inside- And It looks like having 3D printed would still be under $200 in this configuration.

v5-stiii-tric-06.jpg


These give an idea of how it will assembled- It's mostly a snap-together! (There are two screws to hold on the electronics cover.

v5-stiii-tric-05.jpg


Also of how the electronics will be installed. For this home build, the electronics will probably consist of nothing more than a lot of LEDs, a resistor or two to keep from frying them, a small battery and a switch. Most of that can be mounted on one board. (And most likely hand wired- I'll have to look into etching a real PCB and see if it is worth while for such a basic circuit.)
 
Re: Star Trek III Tricorder Project - Work In Progress

This build is looking Great!!

Totally a fan.

Much better than mine..

STIIITrcorderKit1.jpg


I talked to Richard C. and he told me that the ribs between the Pop-up and the body was most likely old computer cable that had been cut to fit and then glued and painted:
cable.jpg


Keep it coming...

...............Jeremiah
 
Re: Star Trek III Tricorder Project - Work In Progress

I talked to Richard C. and he told me that the ribs between the Pop-up and the body was most likely old computer cable that had been cut to fit and then glued and painted:
cable.jpg


...............Jeremiah

Yikes! Thanks Jeremiah!! I was wondering how I would do those ribs- that is a big help, and perfectly timed!

I don't think mine (at least the B build) will be better than your kit- but it should be good enough for banging around at cons and carrying my camera & such in.

I found some simple schematics for making different type of blinking LED set ups, and some PCB places that do low cost prototype PCB's and even give out free software to design the boards. So, I'm off to see if I can learn the software and layout my little board for the possible future C build...
 
Re: Star Trek III Tricorder Project - Work In Progress

Yikes! Thanks Jeremiah!! I was wondering how I would do those ribs- that is a big help, and perfectly timed!

.............................................................

No problem Bro, I am a big fan of your Mad sewing skills and now your props.

If I had thought about it earlier before you cast your body, I would have told you that Rich also informed me that the dial at the bottom was a Chrome Rc Car/Truck wheel.

If the wheel was fitted properly it could be a turnable dial.

On another note I am toying with making my own Uniforms, A Novice at best.
Any Help you could give me would be Appreciated..

Pm me if you can................Thanks..Jeremiah
 
Re: Star Trek III Tricorder Project - Work In Progress

Did some more over the weekend.

I did happen to have some ribbon cable:

07-tric1.jpg


So I cut it up, painted it and glued it down. Then I added the two little "L" shaped pieces on the front, and the eye hooks for the strap. This thing is nearly ready to go (as a bang around at a con prop)

07-tric4.jpg


07-tric6.jpg


07-tric5.jpg


Next, will be changing the fake red LED's for blinking ones...
 
Re: Star Trek III Tricorder Project - Work In Progress

Glad the Ribbon Cable helped out..:)
Looking Great....

If you have enough can you put some of that Ribbon Cable aside for me as I do not seem to have anymore, And can't seem to find it anywhere...

Thanks........Jeremiah
 
Re: Star Trek III Tricorder Project - Work In Progress

Really nice job, it came out great. Now that it's finished, do you think the press technique is worth using again?
 
Re: Star Trek III Tricorder Project - Work In Progress

Really nice job!
But really, you Trek fans take this prop stuff too seriously.

:love:lol
 
Re: Star Trek III Tricorder Project - Work In Progress

If you have enough can you put some of that Ribbon Cable aside for me as I do not seem to have anymore, And can't seem to find it anywhere...

Sure, it wouldn't be any bother to jam half of it into an envelop for you. (If you don't want to wait you could pop into an computer store- it's really common stuff for connecting hard drives and such...)

Robn1-

For this project, maybe not. What I hoped for was a method to be able to press out a couple of sets, with all the real work in making the forms. As mentioned above, Negative molds and a vacuum forming table would probably do that, but this method really couldn't.

So, I only made one instead of two. As it stands, it was still a good method for getting a study, hollow prop made. And I think I may try it again to make a couple of STIII style communicators eventually...
 
Re: Star Trek III Tricorder Project - Work In Progress

Shame... I think this came out really well...

Since you have the bucks all ready to go, no chance you might make a few pulls as a kit for some of us?

-Skyler101
 
Re: Star Trek III Tricorder Project - Work In Progress

But really, you Trek fans take this prop stuff too seriously.

I see what you did there...

Since you have the bucks all ready to go, no chance you might make a few pulls as a kit for some of us?

Probably not. It turns out most of the contours of the bucks are a little too deep for the press method- 3/4" to 1", and the heat resistant foam that I use to press the Kydex down around the bucks is only 1"- this means that the top surface may come out OK (but too soft for any fancy details) but the sides require a lot more work- all heat forming by hand- before they are usable. And most of the corners require excess material being cut or sanded off, and any gaps filled. Then you still have to cut out, form, and glue on all the details...
 
Re: Star Trek III Tricorder Project - Work In Progress

Awww. So no chance we might see a kit of this awesome tricorder? :cry:lol

So you think you might tackle the ST3 communicator next?
 
Re: Star Trek III Tricorder Project - Work In Progress

Thanks, Caveneau-

Nope, no kit.

I will be trying out the ST:III coms next, though!
 
This thread is more than 10 years old.

Your message may be considered spam for the following reasons:

  1. This thread hasn't been active in some time. A new post in this thread might not contribute constructively to this discussion after so long.
If you wish to reply despite these issues, check the box below before replying.
Be aware that malicious compliance may result in more severe penalties.
Back
Top