You are using an out of date browser. It may not display this or other websites correctly.
You should upgrade or use an alternative browser.
You should upgrade or use an alternative browser.
Nike Mag V2 Mod Discussion (Page 58 Shopping List)
- Thread starter Taff83
- Start date
-
- Tags
- back to the future
- Status
- Not open for further replies.
YES !Just got word that the new bubble and other parts are all machined up.
New parts
DSplayer
Active Member
Just got word that the new bubble and other parts are all machined up.
Its time. To MOD!
http://i1256.photobucket.com/albums/ii495/airair1989/IMG_20160115_121909_zps4vkfegnc.jpg
This is what the Full EL panel system looks like. Will post images of the lights on soon. It is in correct Cyan shade, not blue aqua.
Those look great airair
Sent from my iPhone using Tapatalk
slowfinger33
Active Member
Just wanted to share. After 2 months of blood, sweat and tears (literally), I finally finished my V2 mods. 
Not an easy project at all! Lots of frustration, lots of errors, but the outcome is worth every moment.
Patience is the key word in this entire process. I learned so much from doing this (first time soldering, working with electronics, etc). For those that are starting mods for the first time, I promise you, read EVERY page in this thread and you cannot go wrong.
Big shout out to Cavx (Mark) and (Jedifyfe) Brad, along with the rest of this group, for contributing all your trials and errors, and assisting us noobs in a successful mod.
So happy to have a pair of these now! Just need to do the final touches (sealing with flex glue) and I'm off to give these wear pair their first test run.
Can't wait to work on the next pair ( cavx clear soles and cloneprop buckles are a must). Cheers!
DragonGalvy
Sr Member
Congrats on your mods, slowfinger33. Looks great! Be prepared to have random people taking photos of them, happens to me most times I wear mine - and I didn't even put EL in them
chrisguyver
Active Member
Just got word that the new bubble and other parts are all machined up.
Hey cavx I emailed u let me know thanks
cavx
Master Member
Hey cavx I emailed u let me know thanks
Thanks, I have already replied.
Does anyone know if theres a different in the left and right ankle buckles clone props made ? or is it just the same ?
Different parts for left and right.
I will be doing a rubber ankle buckle with (a plastic reinforced insert for strength) the more correct shape than the factory part. I am however going to make it slightly smaller than the slightly over sized buckle from CP.
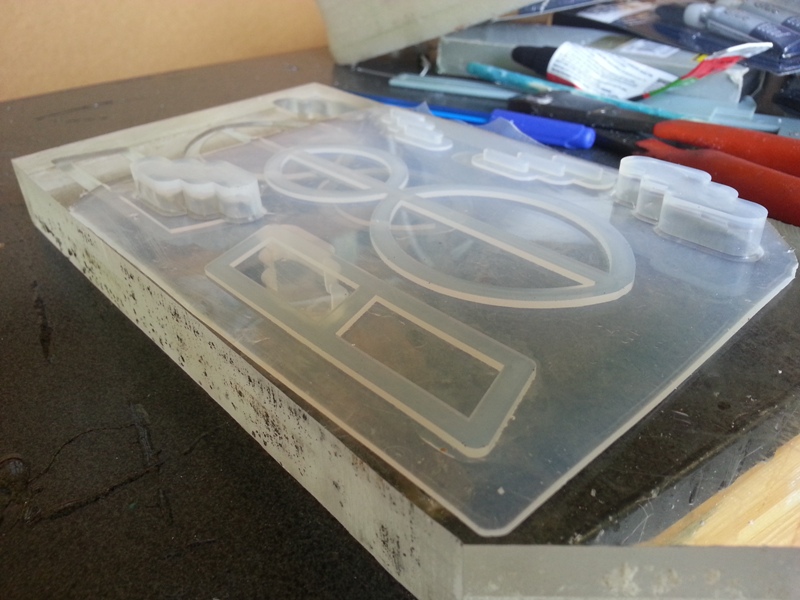
The block of machined parts.
So I am going to have to make both the front and the back of the bubbles to make a new master part that I can mold and cast. Due to the small size, I don't think the engineer would have been able to machine a "master part" from a solid block. It is just too small to be be held in the machine. So I'll make front and back and glue them together. Then mold and cast the new parts.
I figured I might as well have strap and sole lights made up for my GITD kits as well.
For right now, I need to get these new bubbles done, than get the new Heel cups done. Then I look at this buckle. The plastic insert I want to include is to make the part strong. I have torn the strap slot thing on my pair twice now. Lucky it super glues back together and hold up well, but to have a hard plastic embedded in the rubber would be better.
Attachments
So are you making a mounting plate for the LEDs ? So that would do away with the stryen sheets wouldn't it ? (The part next to the ankle bubble cutout), also how's making a new mid sole going ?Thanks, I have already replied.
Different parts for left and right.
I will be doing a rubber ankle buckle with (a plastic reinforced insert for strength) the more correct shape than the factory part. I am however going to make it slightly smaller than the slightly over sized buckle from CP.
The block of machined parts.
http://www.therpf.com/attachment.php?attachmentid=580349&d=1453434466
So I am going to have to make both the front and the back of the bubbles to make a new master part that I can mold and cast. Due to the small size, I don't think the engineer would have been able to machine a "master part" from a solid block. It is just too small to be be held in the machine. So I'll make front and back and glue them together. Then mold and cast the new parts.
I figured I might as well have strap and sole lights made up for my GITD kits as well.
For right now, I need to get these new bubbles done, than get the new Heel cups done. Then I look at this buckle. The plastic insert I want to include is to make the part strong. I have torn the strap slot thing on my pair twice now. Lucky it super glues back together and hold up well, but to have a hard plastic embedded in the rubber would be better.
cavx
Master Member
So are you making a mounting plate for the LEDs ? So that would do away with the stryen sheets wouldn't it ? (The part next to the ankle bubble cutout), also how's making a new mid sole going ?
Bubble - Not really. What I I am doing to recreate the three slots into the back of the part like the factory bubbles have so that those with LEDs have somewhere to place the bulbs. You will still need the board behind this.
Mid-sole - a work I progress. I think when I am done, that sand or kitty litter will be the best medium to add the texture to the master part. Sand is actually the choice because I can wash and dry that so it is clean on the parts. This way the Heel Cup will have the same texture.
Currently uploading a video showing how I make the decals.
cavx
Master Member
What kind of mix do yo do to make the rubber ? I'm looking for that mix to make some soles but I don't know nothing about rubber... Just beginning to learn about modeling and making molds for the moment. But I need to find out what (and where) to find the rubber to cast in :/
The stuff I use is a 1:1 by weight. I am now buying this in commercial volumes (8KG) and strongly considering even buying an industrial batch (2 40KG drums with taps.)
You do need a vacuum chamber though. I have just upgraded mine and I am uploading a video that shows this in action.
cavx
Master Member
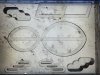
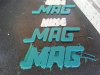
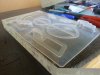
And here are some images from today's little play.
Stage 1 of the molding process.
A set of the new letters stuck to some shoes.
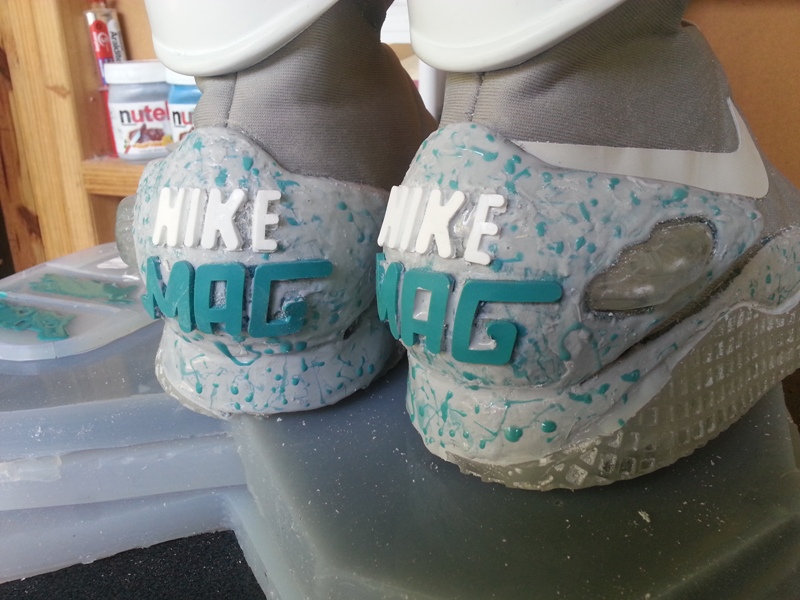
Notice that the end of the G almost touches the bubble now?
And why I degas in the molds

Stage 1 of the molding process.
A set of the new letters stuck to some shoes.
Notice that the end of the G almost touches the bubble now?
And why I degas in the molds
Attachments
rhodrijen
Active Member
And here are some images from today's little play.
Stage 1 of the molding process.
http://www.therpf.com/attachment.php?attachmentid=580393&d=1453449094
A set of the new letters stuck to some shoes.
http://www.therpf.com/attachment.php?attachmentid=580391&d=1453448924
Notice that the end of the G almost touches the bubble now?
And why I degas in the molds
http://www.therpf.com/attachment.php?attachmentid=580392&d=1453448924
These are looking great man! Will definitely be wanting to add these to mine.
cavx
Master Member
These are looking great man! Will definitely be wanting to add these to mine.
I have 4 sets now and one is going on my own shoes this weekend
DragonGalvy
Sr Member
Mid-sole - a work I progress. I think when I am done, that sand or kitty litter will be the best medium to add the texture to the master part. Sand is actually the choice because I can wash and dry that so it is clean on the parts. This way the Heel Cup will have the same texture.
Yep, go with sand, kitty litter pieces vary too much in size - I have 3 cats so I'm familiar with it
Although there may be different varieties I don't use - Home Brand clumping cat litter is much too big for texturing a midsole, see attached pic.

cavx
Master Member
Yep, go with sand, kitty litter pieces vary too much in size - I have 3 cats so I'm familiar with it
Although there may be different varieties I don't use - Home Brand clumping cat litter is much too big for texturing a midsole, see attached pic.
View attachment 580410
Sand it is then
- Status
- Not open for further replies.
Similar threads
- Replies
- 10
- Views
- 2,999
- Replies
- 5
- Views
- 1,120
- Replies
- 4
- Views
- 1,017
- Replies
- 12
- Views
- 1,720