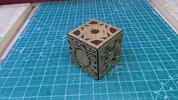
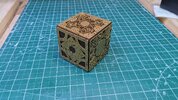
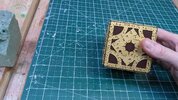
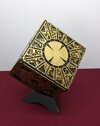
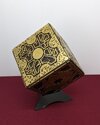
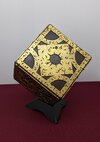
My 3D Printed Hellraiser 1987 Lament Cube (was: "Paint Roller for Raised Surfaces")

If you are going to roll a gold color, you might make a jig or use a large box to affix the thing upside down in. Then you can roll the gold paint. Gravity won’t be working against you for any drops that want to fall.

Another possibility, though perhaps a little wasteful, is to get a rubber sheet or make a large pad out of cardboard (not corrugated) and mount it to a very flat surface. Then attach the thing to be painted to a flat stiff board with handles on the opposite side so you can hold the board with the thing again upside down. Next coat the mounted sheet or pad surface with the gold paint. you would want the gold paint not too fast drying. Finally, pick up the board by the handles and press it into the sheet or pad. Lift it up to see how you did. If any unpainted spots, repeat. This technique is a sort of an old fashioned printing press approach.

The last one that comes to mind, though perhaps a bit more labor and mess, is to fill the voids with something like alginate. Alginate does not stick to non porous surfaces. Screed off the top to make sure it is flush with the top surface. After it dries, you may need to rub any alginate residue off the surface to be gold painted. Then paint with gold paint. When that is dry (I would wait a day perhaps, depending on the paint), then pick out the alginate with something not too hard like a toothpick. Alginate will shrink when dry so that should facilitate its removal. I would do a test piece first. Alginate is cheap.

Mark
Thanks so much for the suggestions! You're "printing press" suggestion is very similar to the "stamp pad" option, and I will certainly be giving it a go. As well as the upside-down rolling...good advice there!

As for alginate, that's something I've never heard of...will look into it!

Thank you!

Bill
 
Okay, it's been awhile, and this entire project has completely shifted gears thanks to basementdweller!

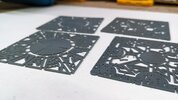
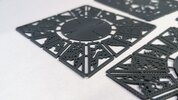
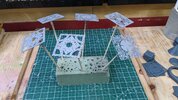
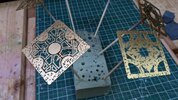
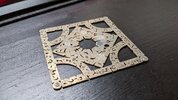
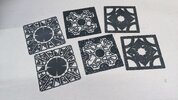
At basementdweller's suggestion, I used PrusaSlicer to slice off the tops into distinct 1mm plates. I then exported them as individual STL files and used ChituBox for the supports (65% coverage at 45 degrees) and final slicing.

PXL_20230929_151853639.jpg PXL_20230929_151926951.jpg PXL_20230929_151941115.jpg

Removing the supports was VERY difficult, but I after several broken plates, I finally figured out the best way to do it:
  1. Do not cure. The plate is more flexible and less likely to break while uncured.
  2. Cut off the raft at the base of the supports with a sharp, long-bladed knife.
  3. Lay the plate face down, with the supports in the air, angling away from you.
  4. Gently, hold down the plate surface with the fingernail (and then fingers) of the left hand, and "stroke" the supports gently upward with the right hand. This pulls them up from the plate with minimal tearing. Do this a few millimeters at a time..
  5. The whole process takes 1-2 minutes.
  6. To make things print a little easier, I also ensured that the part is a full 10mm above the raft. (The pic below is 5mm above).
PXL_20230920_041801215.jpg

For curing, I propped the plate up with a mini stand, with the underside of the plate facing the lights, for 5 minutes. No rotation. Then I flipped it around and cured the top side for one minute. The curing will cause the plate to bend just a little, but doing it in this fashion ensures minimal bending, and in the right direction.

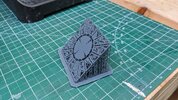
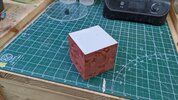
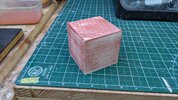
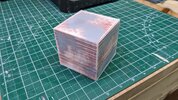
The cube I'm printing in PLA on my filament printer, because printing a perfect cube that large in resin is expensive and very, very difficult. Since the plates are 75mm on a side, my cube is 77mm on all sides. I sanded the cube and coated it with thinned Bondo Spot Putty. Once I sand it again, it should be ready for priming!

PXL_20230928_155907696.jpg

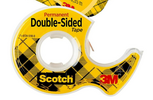
For adhering the plates to the cube, I'm going to literally try tiny pieces of Scotch double-sided tape:

1696002252551.png

Crazy, I know! But the plates mostly sit flat pretty nicely already, and so some strategic taping underneath should do it. And this prop is for display, NOT handling.

Again, thanks all for the great ideas! I'm very happy I don't have to try any of them (at least just yet)!

This leads me to decide to use the gold spray paint. The plates should not be extremely chrome-shiny, and they will be weathered a little, so spray gold should be fine.

Will share more pics as I progress!

Bill
 
Last edited:
Okay, some good progress to report!

For each of the printed plates, I sanded them with 600-grit, primed, and sprayed with Rustoleum gold. Very happy with the look!

PXL_20231002_212516276.jpg PXL_20231002_235001205.jpg

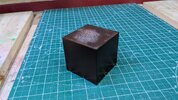
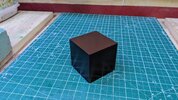
For the cube, I sanded down the Bondo Spot Putty, sprayed filler primer, sanded, sprayed black primer (when I prime more than once I like to change colors so that I can see the progress more clearly), sanded, and then sprayed four adjoining sides (left, right, front, back) with Rustoleum Painter's Touch Satin "Espresso" color (I don't like the lighter, reddish brown that some cubes have). I did not worry about overspray on the top and bottom.

PXL_20230929_171223119.jpg PXL_20231001_005009441.jpg PXL_20231002_235247924.jpg

I know the sides of the cube are technically supposed to be flat, not satin, but I feel that flat coloring looks too light under bright lights. Satin darkens it a little.

Tomorrow I will mask off the four sides, and spray the top and bottom in Satin Black.

It's gloves only from here on out! Still have to figure out a clearcoat that will not take out the sheen of the gold. Tomorrow I will try Rustoleum Crystal Clear and Alclad Aqua Gloss on a couple test pieces to see what I get.
 
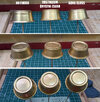
So after a test run with the clearcoats, this was my finding:

PXL_20231003_155803471 copy.jpg

The Rustoleum and Aqua Gloss are very close. IMO, the Aqua Gloss is a bit too shiny, and the Rustoleum had the effect of "warming" the gold color just a little, which I like.

So I will go with the Rustoleum!
 
Last edited:
Looks great!

That probably also would have been a great job for photoetch

Indeed, good idea! And there are also sellers out there who have nice laser-cut brass plates for sale as well. But the printer and the resin I already had, and I'm trying to find that "just right" balance between lower cost and higher quality. For me, the 3D printing, if properly finished, is high enough quality for a display-only item.
 
I'm in the home stretch!

Last night I warmed up a can of Satin clearcoat, and gave the cube its final coat. This morning it looked ready to go.

PXL_20231004_152922053.jpg

Time to apply the plates to the cube! After much thought, I used a combination of double-sided tape and CA glue. The tape in strategic places helps anchor the plate, while the CA in small dabs can take its time to cure:

PXL_20231004_174518486.jpg

Squeeze-out was very minimal, and any I couldn't pick up with toothpicks will disappear in the weathering phase tomorrow.

PXL_20231004_175824735.jpg

I'm very happy with the result so far. Weathering and done!
 
Last edited:
Tonight I drybrushed some fine gold paint across the plates using a flat foam brush with very little paint left on it, taking care not to get paint on the dark colors of the cube. The paint I used is acrylic, so I was able to pull off any mistakes with a cotton swab and water.

1696479235127.png PXL_20231005_040224715.jpg

I'm very happy with the effect! Not only is the whole thing more shiny and warmer in color, but the two distinct golds now create a little bit of a "layered" effect, which adds to the realism and makes the gold feel "older".

It's hard to capture on camera, but you can kind of see the effect here, when I angle it in a way that does not reflect the shine:

PXL_20231005_040023678.jpg

Tomorrow I will dirty it up a tiny bit more with a thin black wash, then we're done!
 
Last edited:
And done!

The black wash darkened the shine and cooled off the color just a bit, to where I think it's just right.

Here it is displayed in my shiny new (and empty) display cabinet:

PXL_20231005_214219598 (1).jpg PXL_20231005_214224778.jpg PXL_20231005_214236005.jpg

Thanks again to everyone for all the advice, and especially to basementdweller for the guidance on splitting it up. It made for a much better prop!
And my apologies to the folks who came here looking for a better "roll on" technique...I just never went there. :)

Take care,
Bill
 

Your message may be considered spam for the following reasons:

If you wish to reply despite these issues, check the box below before replying.
Be aware that malicious compliance may result in more severe penalties.
Back
Top