Amish Trooper
Sr Member
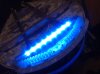
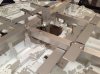
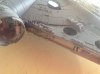
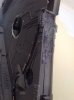
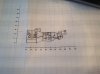
I think he used the bin as a lense for the leds
Spot onI think he used the bin as a lense for the leds
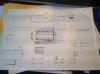
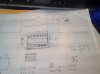
Hi it's IKEA Dioder system , multicolour straight led , very very bright 12v that you cannot look at directly in any colour
http://www.ikea.com/us/en/catalog/products/50192365/
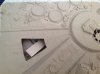
i am planning to combine them with other LEDs for the cockpit , I am playing with some white from Ikea , they have another system with round lights that could be great for the large x wing or blockade runner , althought the cost would be prohibative for 11 engines , but could be done.
Once Iam ready to mount in final config I'll post
As an aside the bin was also IKEA very cheap")
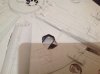
Hi R,Hey, are the LEDs dimmable?
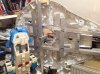
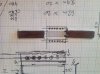
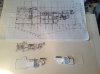
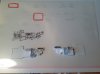
RE: the engine 'grill', a pattern I've been toying with is cut from a 'stitching craft canvas' material, (a plastic grid used to hold thread patterns.). I trimmed it into panels of the correct height but because it is of limited width (the 'canvas' I have is about 3 inches square), I had to use several pieces to cover the entire width of the 'sublight engine' exhaust. Because the plastic is semi-transparent, I figured it would work well to create a shadow pattern when back-lit. There may be larger pieces available, but I just used the junk I had on hand... here is an image of the 'thang' from a craft blog site: Roots and Wings
Hope this helps!
R/ Robert
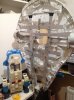
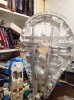
thanksVacformedhero, your build looks great. I was following this guys build on the same.
http://www.keeperoftheforce.com/viewtopic.php?f=6&t=1102
I also found this http://www.modelermagic.com/?p=65981
really like the 3d printed interior for cockpit. I am in the process of getting a 3d printer and hope to use it on my build as well as the hero x-wing build. Apparently there are some guys already doing PE kits for the falcon.
Hi R,
they are not dim able but can change colour, so for the party nights you can blink between colours or blend into each colour,
that engine grid idea is great , how much would a sheet of that be? Another type of shop to haunt
The falcon built for ANH is 5' and the ESB is 32" (slighty bigger than the Hasbro then).
Take a look at the other threads in this section to see how the models are made.
I think we will never see any studio scale Episode VII Falcon as it looks to be all CGI, so it doesnt fit the studio scale section. I would love to learn that a filming miniature was built for this movie though !
You can't move the thread by yourself, only a moderator can do that.
But, just because the model on film seems to be CGI - I'd support any attempt at a studio scale 5 foot episode 7 falcon as belonging in the studio scale thread .http://vimeo.com/51995786
this is stunning master class , adding to my thread as reference , motivation and awe ...my other want ship
... after rereading all the falcon threads I will go with the 5 foot falcon (weird how lorne Peterson calls it the 4 foot) being a scale of 1/20 (1/24 scale makes sense as some of the other fighters were 1/24) The hasbro being approx 1/48 scale...