FakeBritishAccent
Sr Member
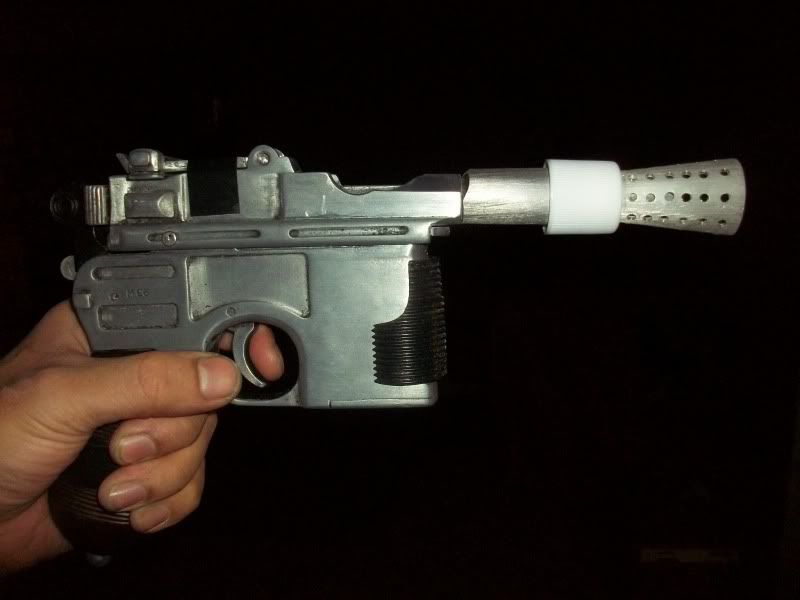
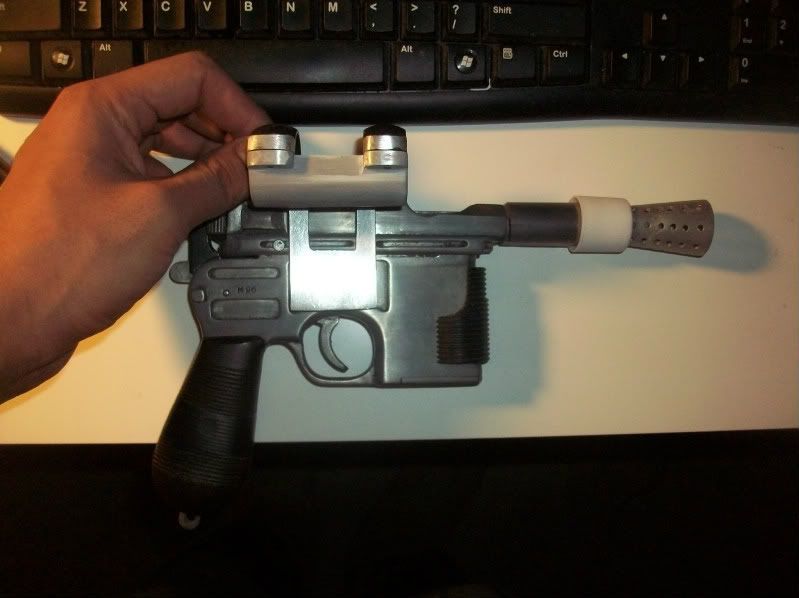
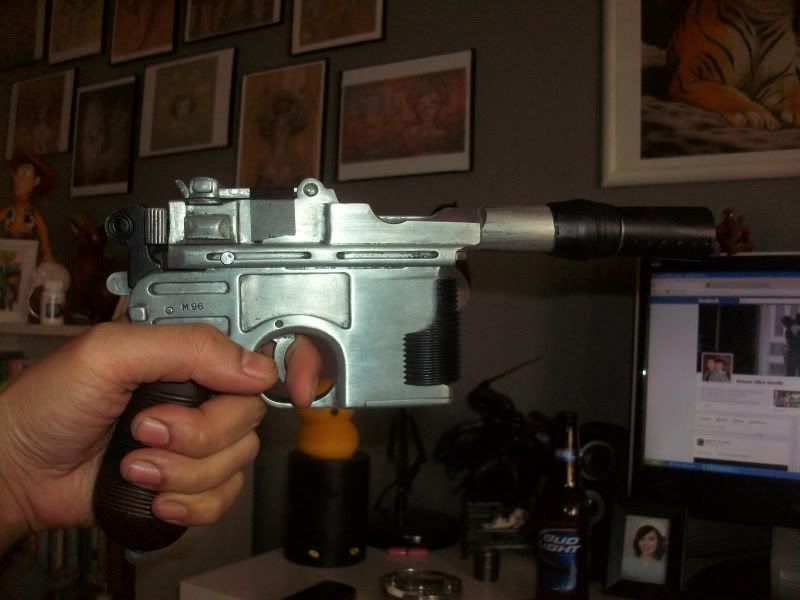
I'd never tried my hand at making Han's blaster before, despite it being one of my favorite props of all time. I never had any money in the past, so I couldn't afford Blast-Tech's replicas or parts, let alone the Master Replica releases. The sad part is now that I have a little extra cash, parts for replicas are nowhere to be found! After reading through Lichtbringer and Deadbolt's threads on the ANH Hero, I decided to give it a shot using no other tools but my Dremel, hacksaw and file set. This is only my second time making a metal prop, so I was a bit nervous.
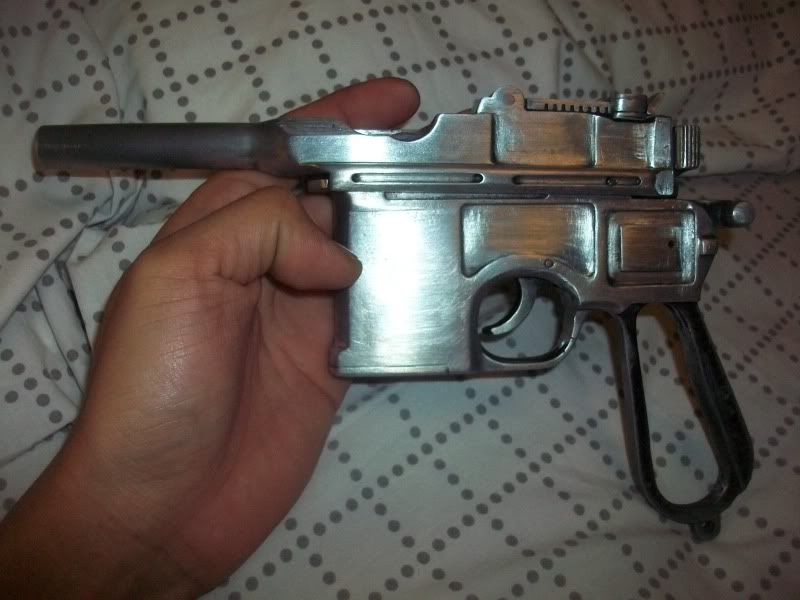
First things first...there was no way I could source an actual C96 or an MGC, so of course I settled on a Denix. But the Denix needed a little work. Using pics of Lichtbringer's MGC, I started hacking away at my Denix in an attempt to make it look as accurate as possible.
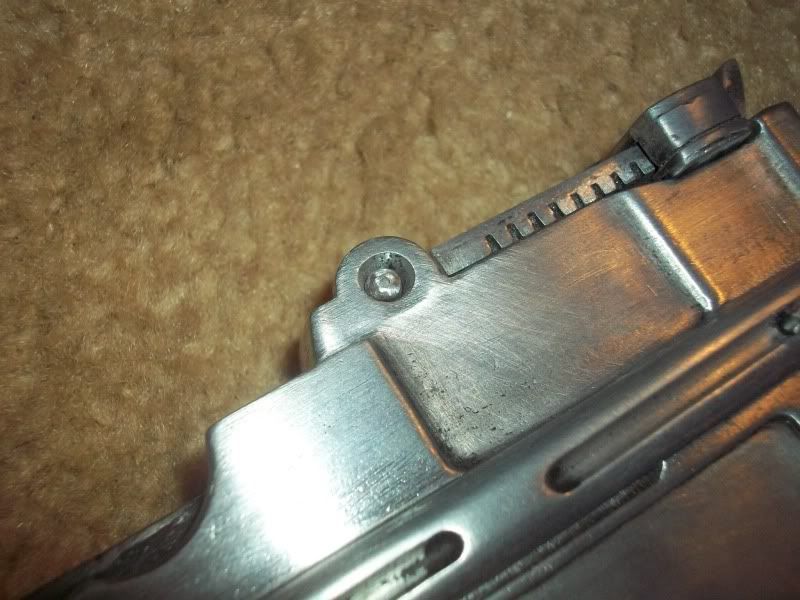
The bolt nub under the hammer was the first to go. I was careful to set the bolt first with a hammer so it wouldn't fly up at me if I Dremeled too deeply. The hammer itself was also reshaped. I'm thinking of scribing in lines as to match the safety on the MGC, but I don't think I have a steady enough hand.
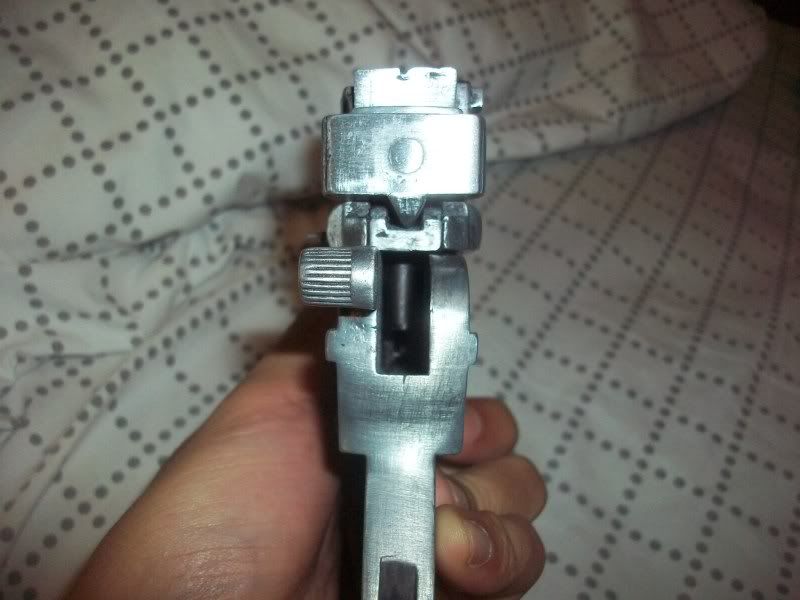
The Denix logo was sanded flush with my Dremel and then some 220 grit sandpaper. A lot of my time was spent just sanding down unslightly seams, especially on the Denix's sight.
I popped the pin out of the Denix's sight so I could grind it down. The gap exposing the pin will be filled with JB Weld and smoothed out. I decided that after painting/bluing, I'm going to JB Weld the sight to the receiver so it doesn't flop around.
I cut down the sights original pin and then rounded the ends. I used a tiny round drilling bit on my Dremel to make that "nipple" on the end of the pin. I used a conical carving bit to give the sight pin's hole a little bevel.
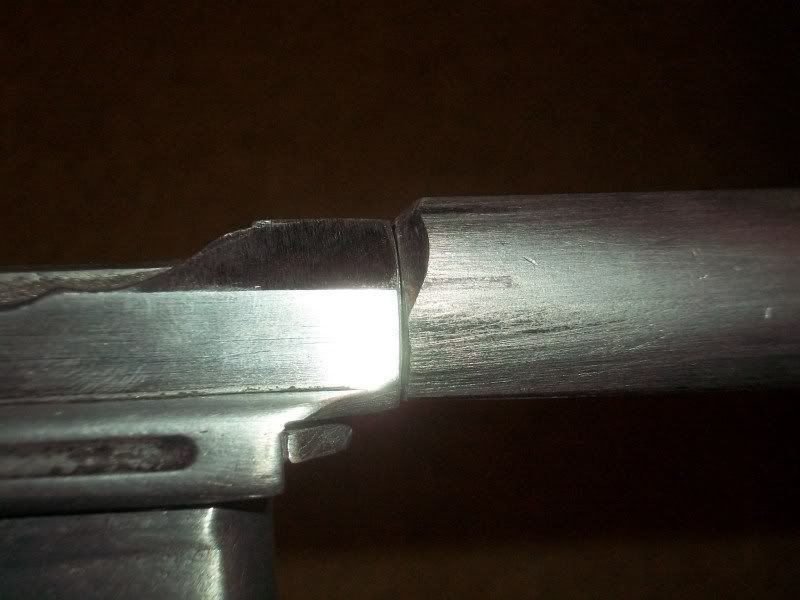
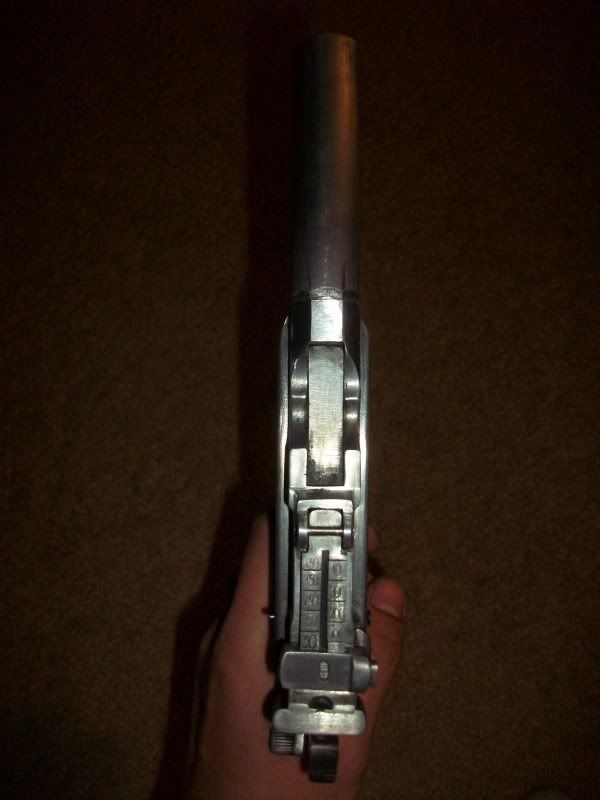
The Denix barrel was cut down and I used my flat file to sand the barrel and the receiver flush to where the bull barrel attaches.
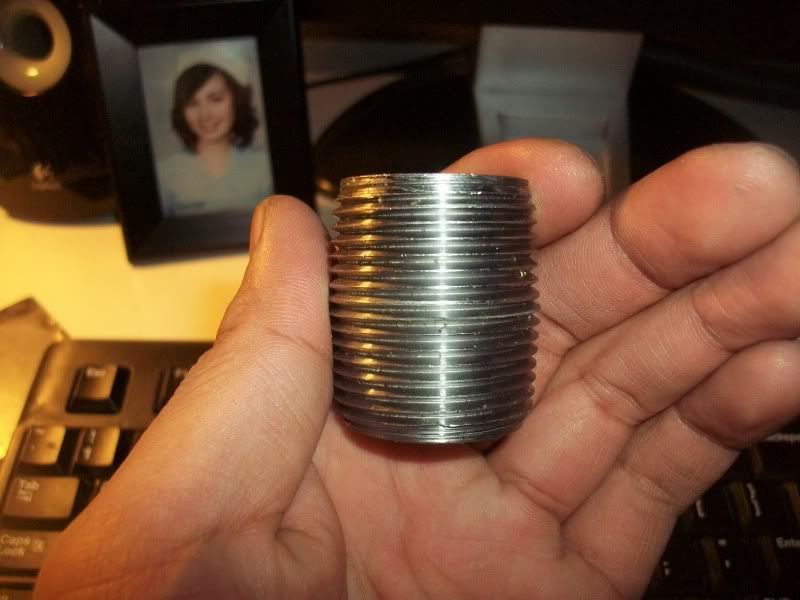
The bull barrel was made out of a 5-inch piece of steel pipe and I added the chamfered edge with my flat file. I need to put a bit more work into this section so the chamfered edge meets the lines of the receiver more to my liking.
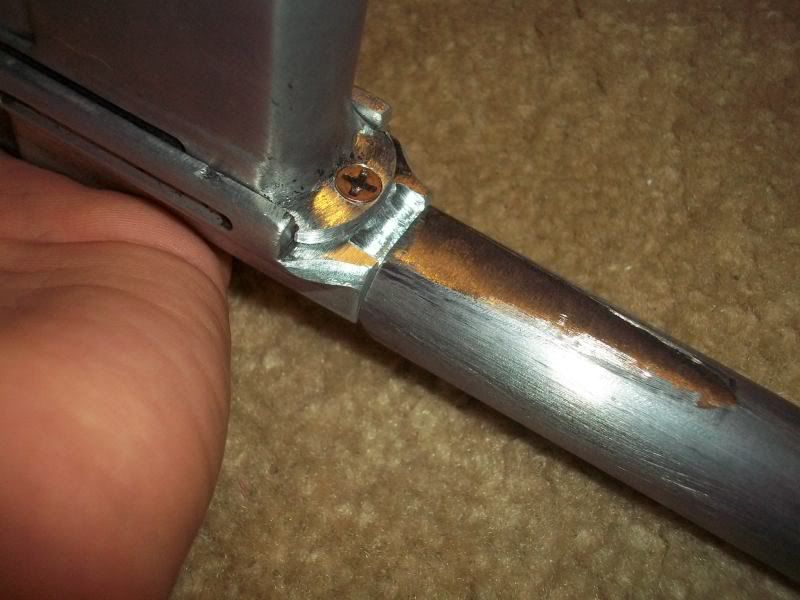
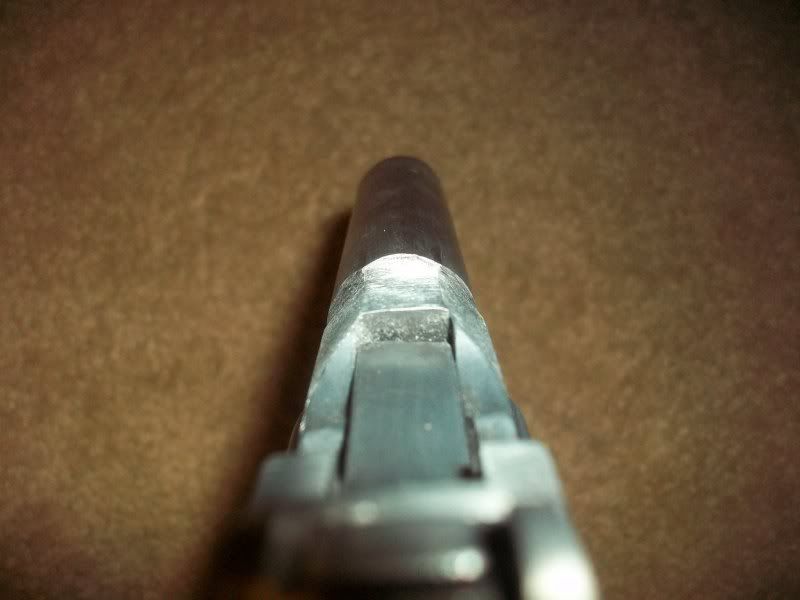
The most difficult part of converting a Denix is this little nub where the lower is screwed into the receiver. I sanded the nub down as much as possible and then switched out the original screw with a flat-headed one. I saw a post where kpax had mentioned how he was able to get rid of the nub by "melting" it down, but I've yet to ask him for more details. Still, since I was able to sand down the nub substantially, I was able to start laying in the recess underneath the receiver as well as the flat, tapered section of the bull barrel.
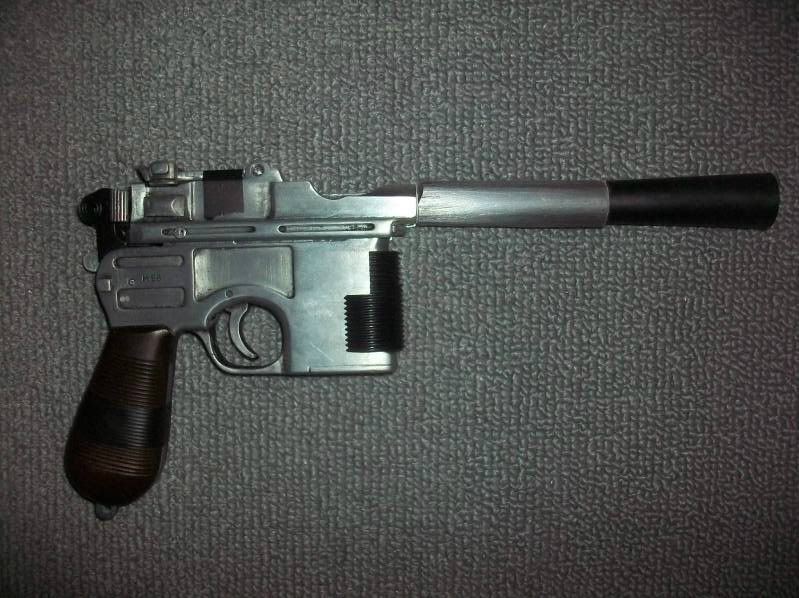
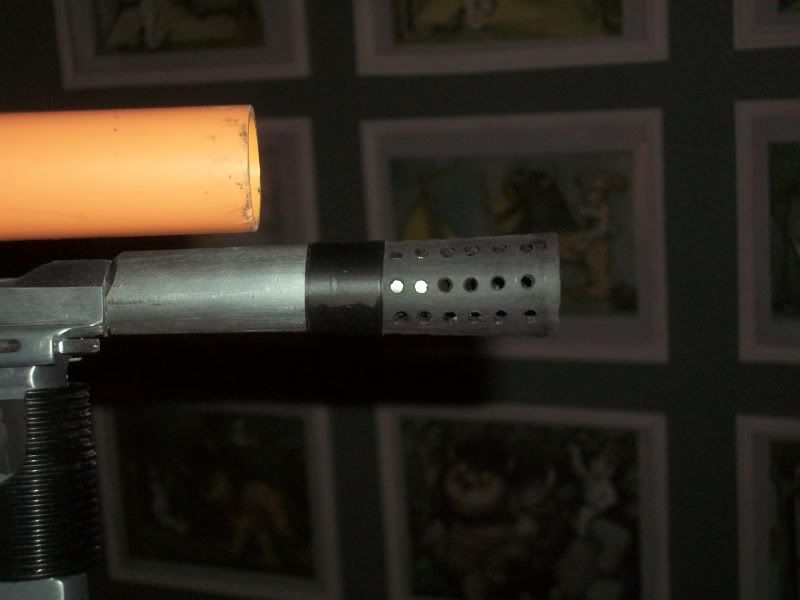
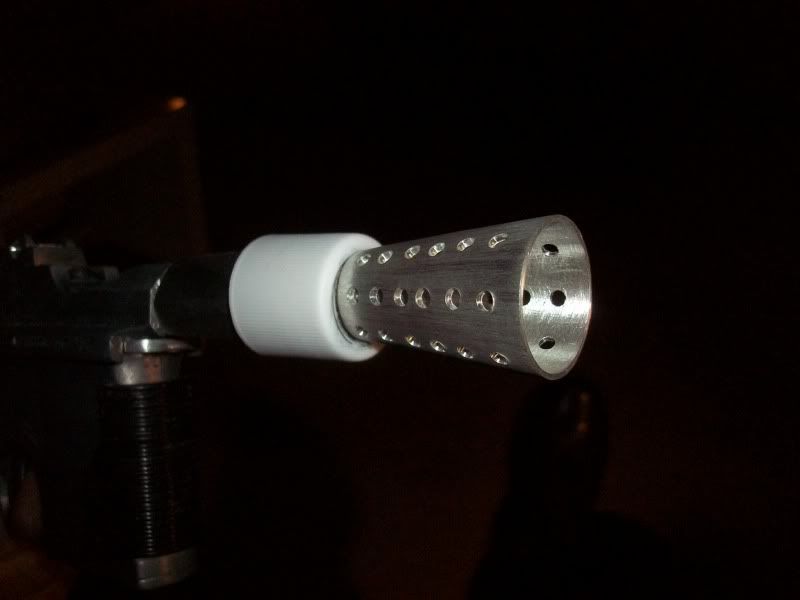
After seeing a thread that abumonkey started on making his own flash hider from a hose nozzle, paint roller handle and furniture leg for the cone, I started digging around the house for similar parts. Currently, I have only the cone section of the flash hider, which is a cut down paint roller handle. The current grill is from Blast-Tech, one of the only pieces John still had available.
I cut down the bull barrel and the cone section of the flash hider to the proper length. I used a bit of electrical tape to stand in for the mounting section of the flash hider just so I could make sure my proportions were correct. The cut sections of grill were sanded down to match the cut sections of the actual prop more accurately, despite the fact that the grill itself is inaccurate.
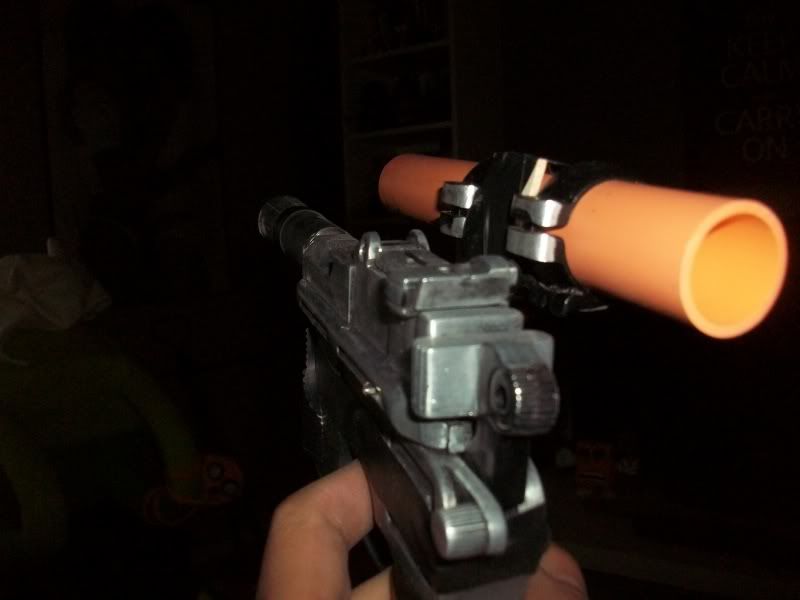
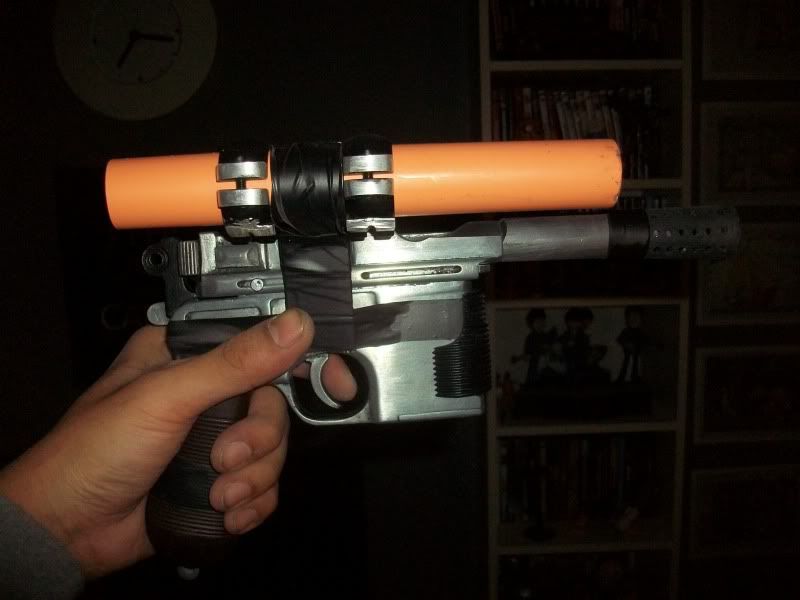
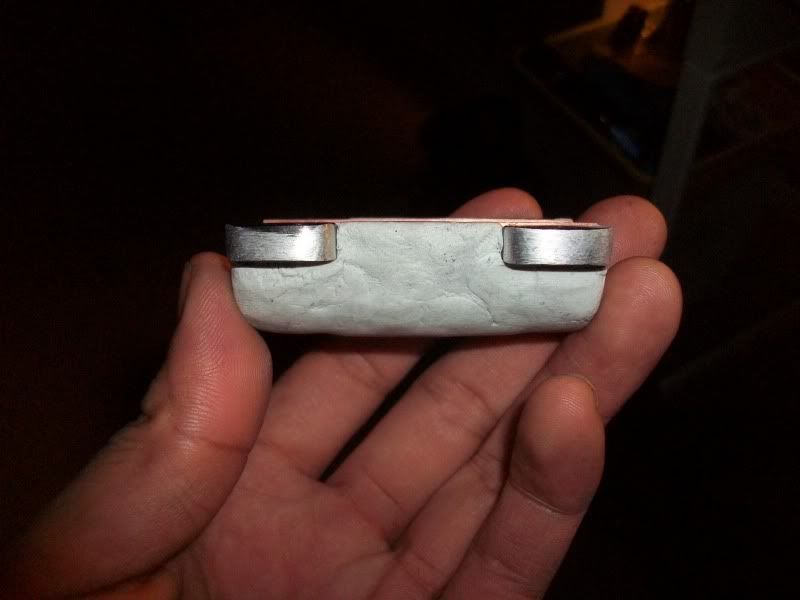
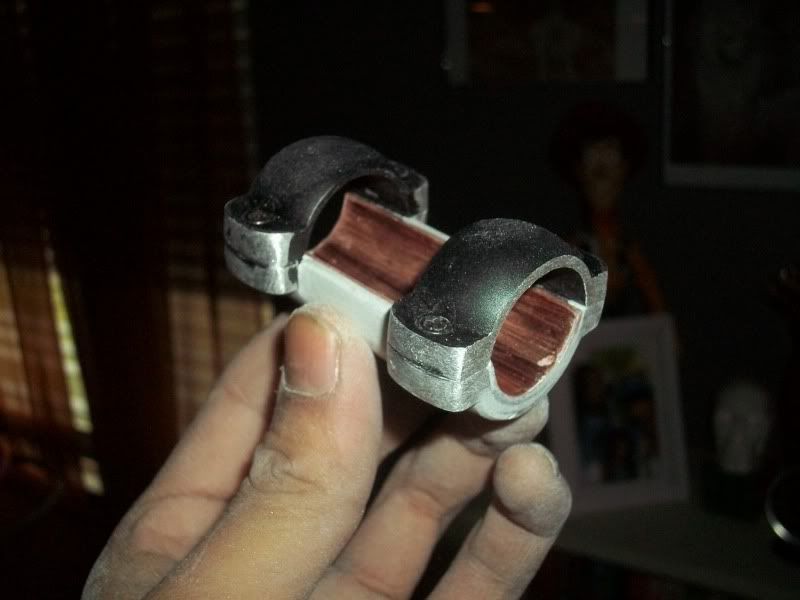
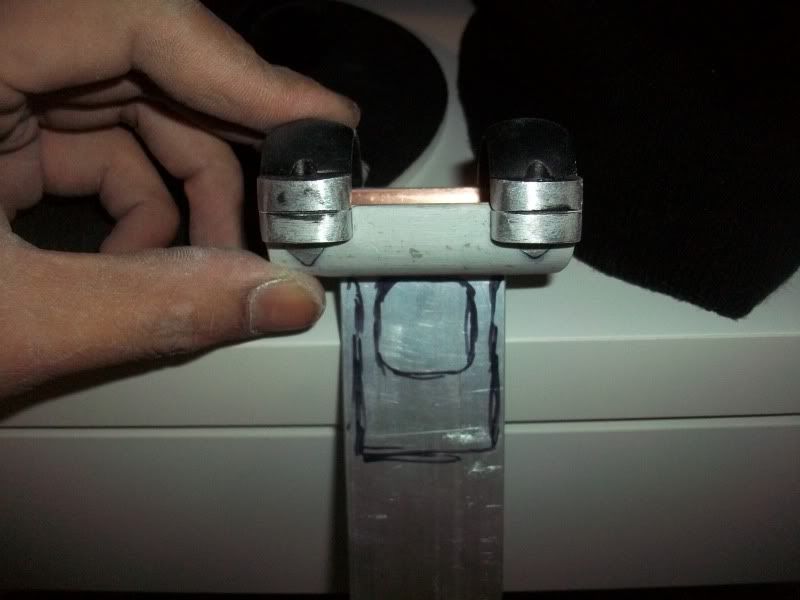
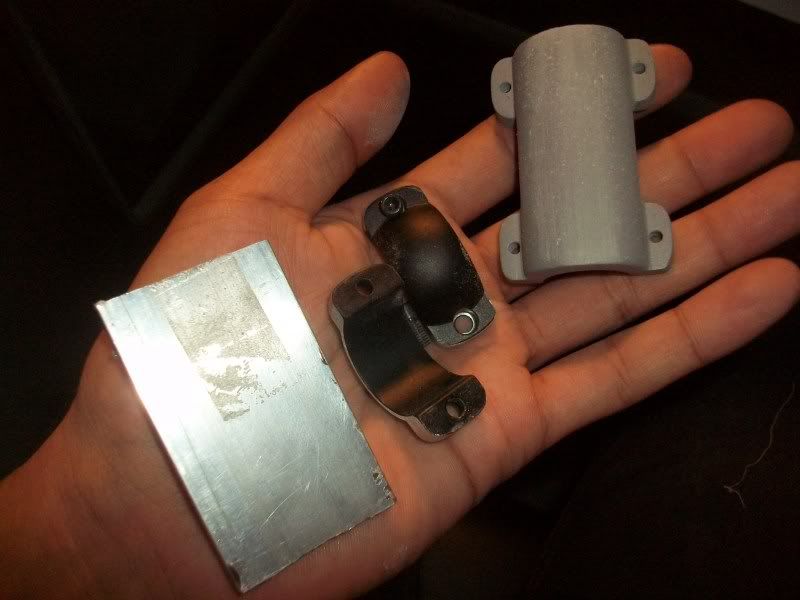
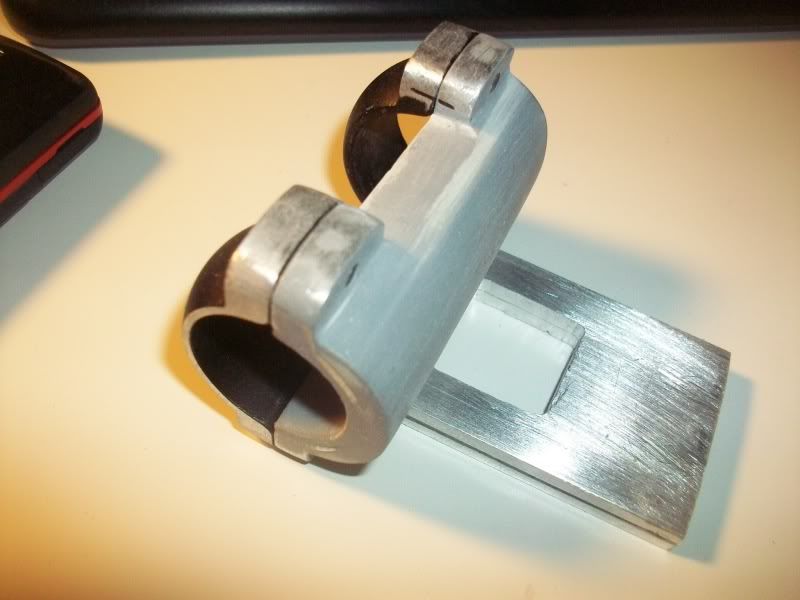
And that's where I'm at right now. I bought a set of scope rings that are very similar to the scope rings on the Hero, but I have to fabricate the scope mount myself. I ordered a set of wood grips from Sarco, but two days after my order was accepted, they told me they were actually sold out. Tonight, I'm going to go to work on the cone section of the flash hider, sanding down the threads on the inside of the cone and drilling holes.
Thanks for checking out my build and I'll post more pics as they come.
-Jonaas
First things first...there was no way I could source an actual C96 or an MGC, so of course I settled on a Denix. But the Denix needed a little work. Using pics of Lichtbringer's MGC, I started hacking away at my Denix in an attempt to make it look as accurate as possible.
The bolt nub under the hammer was the first to go. I was careful to set the bolt first with a hammer so it wouldn't fly up at me if I Dremeled too deeply. The hammer itself was also reshaped. I'm thinking of scribing in lines as to match the safety on the MGC, but I don't think I have a steady enough hand.
The Denix logo was sanded flush with my Dremel and then some 220 grit sandpaper. A lot of my time was spent just sanding down unslightly seams, especially on the Denix's sight.
I popped the pin out of the Denix's sight so I could grind it down. The gap exposing the pin will be filled with JB Weld and smoothed out. I decided that after painting/bluing, I'm going to JB Weld the sight to the receiver so it doesn't flop around.
I cut down the sights original pin and then rounded the ends. I used a tiny round drilling bit on my Dremel to make that "nipple" on the end of the pin. I used a conical carving bit to give the sight pin's hole a little bevel.
The Denix barrel was cut down and I used my flat file to sand the barrel and the receiver flush to where the bull barrel attaches.
The bull barrel was made out of a 5-inch piece of steel pipe and I added the chamfered edge with my flat file. I need to put a bit more work into this section so the chamfered edge meets the lines of the receiver more to my liking.
The most difficult part of converting a Denix is this little nub where the lower is screwed into the receiver. I sanded the nub down as much as possible and then switched out the original screw with a flat-headed one. I saw a post where kpax had mentioned how he was able to get rid of the nub by "melting" it down, but I've yet to ask him for more details. Still, since I was able to sand down the nub substantially, I was able to start laying in the recess underneath the receiver as well as the flat, tapered section of the bull barrel.
After seeing a thread that abumonkey started on making his own flash hider from a hose nozzle, paint roller handle and furniture leg for the cone, I started digging around the house for similar parts. Currently, I have only the cone section of the flash hider, which is a cut down paint roller handle. The current grill is from Blast-Tech, one of the only pieces John still had available.
I cut down the bull barrel and the cone section of the flash hider to the proper length. I used a bit of electrical tape to stand in for the mounting section of the flash hider just so I could make sure my proportions were correct. The cut sections of grill were sanded down to match the cut sections of the actual prop more accurately, despite the fact that the grill itself is inaccurate.
And that's where I'm at right now. I bought a set of scope rings that are very similar to the scope rings on the Hero, but I have to fabricate the scope mount myself. I ordered a set of wood grips from Sarco, but two days after my order was accepted, they told me they were actually sold out. Tonight, I'm going to go to work on the cone section of the flash hider, sanding down the threads on the inside of the cone and drilling holes.
Thanks for checking out my build and I'll post more pics as they come.
-Jonaas
Last edited:
")