HALF-LIFE 2 - Gravity Gun - Realistic Replica - 18.12. - VALVE HIT ME UP!

Re: HALF LIFE 2 - Gravity Gun Replica - 07.06. - Body finished... kinda!

I have video of my setup I posted in my thread if you want to see. It uses a class D amp which is a little bigger than a penny. I then use an 8 ohm .5 watt speaker with it.
 
Re: HALF LIFE 2 - Gravity Gun Replica - 07.06. - Body finished... kinda!

Only video I have of it in use (I think) are the DC-17 and the Nerf Maverick mod ones...

but again.. it will depend on the board itself that drives the speaker.

(I found that the Adafruit Waveshield by itself, (not my custom version one) volume is kinda low... (but there is a fix/hack to get it louder if I remember correctly)

Ah awesome to know! I think I will read me into that stuff a little bit more.

I have video of my setup I posted in my thread if you want to see. It uses a class D amp which is a little bigger than a penny. I then use an 8 ohm .5 watt speaker with it.

Of course I want! :) I'll check it out!
 
Re: HALF LIFE 2 - Gravity Gun Replica - 07.06. - Body finished... kinda!

This build is stunning! I'm following with keen interest man. Please continue!
 
Re: HALF LIFE 2 - Gravity Gun Replica - 07.06. - Body finished... kinda!

This build is stunning! I'm following with keen interest man. Please continue!

Thanks a lot man! Welcome onboard! :)

And on with the update!
It's not a huge one, but I got a lot of stuff done. It's the details that takes your time the most. I'm always underestimating how long this all takes.

The cages/casings for the Xen-crystals are two layered pieces of acrylic in different strengths. I sanded the inner edges where the parts come together to create a seam around the inner area which will get special treatment (worn, rusty, etc.) later on.
I had six 2,5mm holes lasered in every single on of them where tiny acrylic rods gets pushed into to keep the pieces aligned perfectly when stacking them.

_MG_4504.jpg


Here are all six of them nearly finished. The element which connects to the main ring on the front is left to be glued on.

_MG_4503.jpg


While all of the cages were drying I started creating the heat exchanger which is located at the bottom on the back - IKEA style!

_MG_4509.jpg


First of all the edges for the outer casing had to be cut at an angle to make them fit together nicely.
While the glue was drying again I had time to start sanding the heat-spreaders. The cut-outs of the part below are 2,2mm wide and the heat-spreaders are 2mm.
But because I use casted (and not extruded) acrylic for this build the thickness of the material isn't quite what you expect it so be.
All of the 16 spreaders had different thicknesses from 1,9 - 2,7mm...

_MG_4513.jpg


I also started a little bit of dremel work and did a few indents on the spreaders to make them more realistic.
More will be done later on of course.

_MG_4522.jpg


_MG_4523.jpg


Aaaand temporary layed out on the back :)

_MG_4546.jpg


My friend Michael came over too and brought me the first of the (now) finished Xen-barrels for the back. I asked him to drill some holes for the mounting system in them. THANK YOU SO MUCH BUDDY! They are gorgeous! :)
Those two will hold the whole structure together. One is already finished, the other one will be finished on Monday :)

_MG_4537.jpg


And a quick mockup! :) The outer barrels aren't aligned correctly btw.

_MG_4527.jpg


_MG_4529.jpg


_MG_4531.jpg


Hope you like it so far guys! I'll keep you updated! :)


Facebook: https://www.facebook.com/pages/PropBox/287740688037646
Deviantart: http://supermariio.deviantart.com
 
Last edited:
Re: HALF - LIFE 2 - Gravity Gun Replica - 11.06. - Acrylic madness!!

OMG i'm baffled. It looks amazing SupermaRiio. Seems like everything is measured to the mm. Amazing work. What is your plan for paint? Airbrush or regular brush?
And again, thoso photo's..... this is a whole new lvl of making threads. -.- .

Btw i finished my suit (quick suit up pics, better ones are coming) :
http://i.imgur.com/wBCCOvj.jpg
http://i.imgur.com/25exYhI.jpg

Best regards -Hopli-
 
Re: HALF - LIFE 2 - Gravity Gun Replica - 11.06. - Acrylic madness!!

That's a lot of acrylic! Good stuff.

It really is haha!

OMG i'm baffled. It looks amazing SupermaRiio. Seems like everything is measured to the mm. Amazing work. What is your plan for paint? Airbrush or regular brush?
And again, thoso photo's..... this is a whole new lvl of making threads. -.- .

Btw i finished my suit (quick suit up pics, better ones are coming) :
http://i.imgur.com/wBCCOvj.jpg
http://i.imgur.com/25exYhI.jpg

Best regards -Hopli-

HOLY MOLY you even LOOK like Gordon haha. SO awesome dude! This suit rocks!
Guess we should do a meet-up when I'm done to make your outfit complete ;) :D
Love your little buddy on your shoulder.

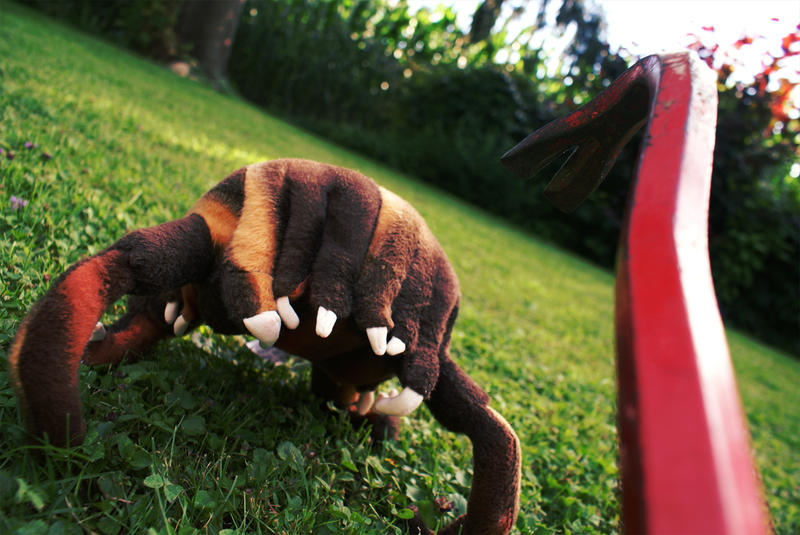
Got one too! :D Made this image back in 2009!

headcrab_by_supermariio.jpg


Thanks a lot for the nice words regarding my photos! To be honest it's just a little point'n'click with a extremly expensive lens haha.
Regarding the painting I'm not quite sure though.
I guess the main paintjob will be done with spray cans whereas details and weathering will be added with acrylics.
Not a big fan of airbrush even though I own one. Tried a little bit on my wooden Majora's Mask but in the end I felt a lot more comfortable just using acrylics and all kinds of brushes (and my fingers haha).
 
Re: HALF - LIFE 2 - Gravity Gun Replica - 11.06. - Acrylic madness!!

This acrylic work is spectacular, there is something to be said for over-engineered prop-making!
 
HALF - LIFE 2 - Gravity Gun Replica - 16.06. - HUGE UPDATE! Ton 'o pics!

This acrylic work is spectacular, there is something to be said for over-engineered prop-making!

Really appreciate your kind words man! Always nice to hear feedback on your work :)


Electronics!

And let's go on with the update! This time quite a huge one even though it won't look like it haha.

First of all I needed to mill a little blind hole for where the electronics of the upper part are going to reside.
The little holes are for leading the cables inside the main body.

_MG_4553.jpg


Here is the first one of the RGB-LED modules which are going to be used all over this built.
Each one will have a different fading/pulsing pattern running on them.

_MG_4590.jpg


_MG_4560.jpg


_MG_4558.jpg


Aaaaaand here's the bigger module for the main barrel.
I used some temporary mounting methods to show you what it's going to end up looking like.

_MG_4582.jpg


Assembled...

_MG_4587.jpg


...and hooked to the main chassis.

_MG_4592.jpg


_MG_4595.jpg


Sooo... all of the RGB-LEDs need to get their data-input from somewhere, righjt? Right!
I created a special shield for both of the Arduino micros which are going to get hooked up to all of the electronics later on.
Each of the shields supports 8 PWM outputs for LEDs and 2 analog ones for buttons and other manual input devices.
They will be placed in the outer barrels... soldering is left to be done yet! ;)

_MG_4572.jpg


Heavy metal!

I was facing another problem with the main barrel.
Since all the xen-crystals should get illuminated by LEDs aswell I had to mill some indents along the main barrel to have the stips flush with the outer diameter. Now I do not have to bug around with milling slots along the crystals since if they are going to end up in clear orange resin you will see every cut line in them.

My awesome friend Michael helped me out on this one too and again spent his spare time to get this thing going...
Asked him on Sunday afternoon, got it on Monday... this guy is simply crazy!
Without his insane help on all the lathing stuff I would not be able to create this project in the quality I had hoped it to end up in.
THANK YOU SO MUCH! I owe you one buddy! :)

_MG_4641.jpg


_MG_4637.jpg


He also finished the threading of the second one of the inner xen-barrels. Again Michael... awesome stuff! :)

_MG_4646.jpg


Now what's left to do is to cut an straight angle on both to fit them snuggly and flat to the back of the chassis :)
You can see the two M12 rods running inside the main body.

_MG_4650.jpg


Hope you guys like it so far! Prepare for the next update as it will be quite a huge one! ;)
I will try to get the main body going and start priming it.

Cheeeers,
Mario

Facebook: https://www.facebook.com/pages/PropBox/287740688037646
Deviantart: http://supermariio.deviantart.com
 
Last edited:
Re: HALF - LIFE 2 - Gravity Gun Replica - 16.06. - HUGE UPDATE! Ton 'o pics!

Amazing as always. Making my build feel like a kids toy. Fantastic work.
 
Re: HALF - LIFE 2 - Gravity Gun Replica - 16.06. - HUGE UPDATE! Ton 'o pics!

Little update... it took me ages to figure out a way to cut both of them with my chopsaw haha.
But it turned out A LOT better than I expected!
I won't be able to work on the gun this weekend but there will be some great updates next week!

Foto 18.06.15 17 59 55.jpg

Sorry for the bad quality. Crappy phone...

:) Take care!
 
Re: HALF - LIFE 2 - Gravity Gun Replica - 16.06. - HUGE UPDATE! Ton 'o pics!

UPDATE!

I hope all of you are doing great! :)
Since I'm on vacation and free of any kind of work I finally managed to spend a whole day in my workshop to get the ball rolling again.
After I finished glueing the whole main body dried over night with a subtle base coat covering it.
The main part today was just sanding, sanding and sanding. Even it's an kind repetitive task I really enjoy doing this kind of stuff. Dunno why... it's relaxing in a weird kind of way.
So let's jump straight to the point...

Like said... sanding and filling... ;)

_MG_4704.jpg


And more sanding... but it's coming along and starts taking shape!

_MG_4706.jpg


This is the upper section of the body which got exact cuts for the xen-barrels to fit through :)

_MG_4712.jpg


And here's the plate on the bottom which will have a latch on it. More on that later on :)
Switches are missing too but that will be done by tomorrow!

_MG_4720.jpg


After sanding and filling all the imperfections all the parts got base coated again.

_MG_4723.jpg


_MG_4725.jpg


Here you can see how the xen-barrels are going to fit the uper section.
It's not perfect though on this shot since it's only temporary mounted. It will be flush later on.

_MG_4733.jpg


Front barrel attached!

_MG_4735.jpg


_MG_4737.jpg


BOOOOOOOH!

_MG_4739.jpg


Anyway there's a lot of sanding left to be done!
Thanks for your time reading/looking! :)
Hope you like it so far!

Cheers,
Mario

Facebook: https://www.facebook.com/pages/PropBox/287740688037646
Deviantart: http://supermariio.deviantart.com
 
Re: HALF - LIFE 2 - Gravity Gun Replica - 24.06. - Main Body Ready!!

Amazing work man! I didn't know so much sanding was needed with laser cut parts. Looking awesome though! can't wait to see more :D
 
Re: HALF - LIFE 2 - Gravity Gun Replica - 24.06. - Main Body Ready!!

Wow! This is a really high quality build. It looks great already. Keep up the good work.
 
Re: HALF - LIFE 2 - Gravity Gun Replica - 24.06. - Main Body Ready!!

Amazing work man! I didn't know so much sanding was needed with laser cut parts. Looking awesome though! can't wait to see more :D

It totally is! The more thicker the acrylic sheets are the more likely it becomes that the laser gets some kind of drift to the cutting edge and slopes some of the edges.
That even begins at 6mm of thickness. And that's what most of the casing is made out of.

Thanks for liking this acrylic mess haha :D


Wow! This is a really high quality build. It looks great already. Keep up the good work.

Thanks man! Great you like it! :)


This should be an exciting week.

It is and will!
I spent the last two days in my workshop and the Gravity Gun is finally taking shape.
There will be a huge update coming today! :)

Cheers,
Mario
 
Re: HALF - LIFE 2 - Gravity Gun Replica - 24.06. - Main Body Ready!!

Hey everyone! :D

Huge update incoming! Since I had enough time this week I really made some immense progress on this project.
Won't talk about that too long now, just take a look at those PICZZZZZ!


On with the update :)
Here are the first bigger parts of the front section which got the sanding/filling/sanding/filling/sanding-treatment as the other parts did get.
It's mostly finished besides a few imperfections here and there but it turned out really great. The most work I had on these parts were to fill up the seams of the layered sheets of acrylic to make it look as if it was one single part.

_MG_4748.jpg


_MG_4753.jpg


I clamped both of the parts together to cut three threads along the outside, with 120° offset.

_MG_4759.jpg


Those threads are needed to mount the three bases where the arms of the gun extend from.
Like the rest of this stuff those little pieces are made up from eight different parts of acrylic to get to the final form :) I used some nails to keep both of the little outer elements aligned perfectly to each other.

_MG_4773.jpg


_MG_4774.jpg


On to the next bigger part which represents the final mouting system for the outer angled barrels on the back.
I had to machine some round polystyrene to create outer caps for the tube which is running between all the barrels at the back. It's kinda hard to explain, I know :(
Just take your time and look at the pictures as they might help you by understanding haha.

Tapping some holes...

_MG_4777.jpg


... to attach them to the outer barrel.

_MG_4781.jpg


And drilling/tapping again...

_MG_4785.jpg


...and again :)

_MG_4792.jpg


_MG_4796.jpg


FINALLY!

_MG_4797.jpg


_MG_4805.jpg


_MG_4810.jpg


_MG_4815.jpg


_MG_4817.jpg


I'm really excited as it is now finally taking shape! It's just a nice feeling to know that all this planning pays off! :)

Let me now what you're thinking :)

Cheers,
Mario

Facebook: https://www.facebook.com/pages/PropBox/287740688037646
Deviantart: http://supermariio.deviantart.com
 
Re: HALF - LIFE 2 - Gravity Gun Replica - 27.06. - Huge Update! - It's taking shape!

Holy crap! I wish I had something more articulate to remark. I'm still tinkering with electronics. I'm sure once I get passed that roadblock I'll...encounter another roadblock. Great work. Loving the updates.
 
Re: HALF - LIFE 2 - Gravity Gun Replica - 27.06. - Huge Update! - It's taking shape!

Thanks mate! :)
If I'd ever stuck for too long at one of all the points I just move on to the next one. While working on all the others things you might somehow get some inspiration kick on how certain tasks could be done. Try it!
 
This thread is more than 8 years old.

Your message may be considered spam for the following reasons:

  1. This thread hasn't been active in some time. A new post in this thread might not contribute constructively to this discussion after so long.
If you wish to reply despite these issues, check the box below before replying.
Be aware that malicious compliance may result in more severe penalties.
Back
Top