You are using an out of date browser. It may not display this or other websites correctly.
You should upgrade or use an alternative browser.
You should upgrade or use an alternative browser.
DeAgostini 1:1 Studio Scale Millenium Falcon Support Group and Info
- Thread starter LrdSatyr8
- Start date

Dang, I asked them to do just that when the $1 shipping offer was going on. Instead they said I could only order the next month as soon as each month shipped. So far, it's taken about two months to get up to month 9 which has yet to ship. I'm anxious to get up to speed.
-Gary
-Gary
HI Lear60man,
Where did you get your Bulk order? Is it from Deagostini or just a person selling his collection?
I called spaceModels/Deagostini direct. I said that I wanted to subscribe but didnt want to start from the beginning, is there any way I can buy everything up to the current subscription and have it all ship out at once? Rep said, no problem and we are running a promotion for $1 shipping so you will save a bunch right off the bat. My card has been charged the correct amount so well see in 6-8 business days if I get a big package or a small package haha.
It makes sense because they have all the months in separate bins in a warehouse. Employee just has to start at the first bin and go to the last bin. Easy Peasy.
Lighting
AAAGGGGHHHHHHHH!!!!!!!!!!!!!!!!!!!!!!!!!!!!!!!!!!!!!!!!!!!!!!!!!!!!!!!!!!!!!!!!!!!!!!!!!!! cry:thumbsdown
I need help and alcohol. I don't drink but is sounds good.:cheers
Lighting. OMG this is why I have avoided it in past projects.
Okay the stock Deago Cockpit I think looks fine. You really can not see much in the cockpit anyway. My plan was just to add Tony's nav chairs and a few bits and call it good, however unless I am doing something wrong the Deago lighting sucks. It looks terrible. Even using a super bright, best made ever flashlight, it looks terrible.
So the two options.
Tony's 3D back wall/console which requires lots of fiber optic lighting or
ParGrafix for the back wall and console. I looked over their site but could not find my answer.
Here is my question.
With the ParaGrafix am I right that once the metal is in place, you put the stickers over it and then just a couple LED lights that show through the stickers thus giving the effect Deago was going for but failed miserably??? Do I have that right????
If so I want to go with them for those parts to make lighting easier????
I have plenty of stuff I am going to get from Tony but if that lighting works that way with ParaGrafix it seams a lot easier???
Any help would be appreciated.
I am gonna do mine landed and light it like it is in Echo base as well so I am looking at simple LED lighting for that.
I will have to do fiber optic lighting eventually with my RC Star Destroyer but I want to put that part of the Star Destroyer off for a while.
Thanks.
Tom
AAAGGGGHHHHHHHH!!!!!!!!!!!!!!!!!!!!!!!!!!!!!!!!!!!!!!!!!!!!!!!!!!!!!!!!!!!!!!!!!!!!!!!!!!!
cry:thumbsdownI need help and alcohol. I don't drink but is sounds good.:cheers
Lighting. OMG this is why I have avoided it in past projects.
Okay the stock Deago Cockpit I think looks fine. You really can not see much in the cockpit anyway. My plan was just to add Tony's nav chairs and a few bits and call it good, however unless I am doing something wrong the Deago lighting sucks. It looks terrible. Even using a super bright, best made ever flashlight, it looks terrible.
So the two options.
Tony's 3D back wall/console which requires lots of fiber optic lighting or
ParGrafix for the back wall and console. I looked over their site but could not find my answer.
Here is my question.
With the ParaGrafix am I right that once the metal is in place, you put the stickers over it and then just a couple LED lights that show through the stickers thus giving the effect Deago was going for but failed miserably??? Do I have that right????
If so I want to go with them for those parts to make lighting easier????
I have plenty of stuff I am going to get from Tony but if that lighting works that way with ParaGrafix it seams a lot easier???
Any help would be appreciated.
I am gonna do mine landed and light it like it is in Echo base as well so I am looking at simple LED lighting for that.
I will have to do fiber optic lighting eventually with my RC Star Destroyer but I want to put that part of the Star Destroyer off for a while.
Thanks.
Tom
I was just watching a how to video of ParaGrafix. On the one I saw it looked like they were not stickers but panels you glue on?????
The Paragrafix cockpit set has water slide decals that you use just like any other decals that come in model kits. It's not difficult but you do need to be careful when applying them as they are very thin and can tear easly.
I have seen several builds using them and they do look great, it just will take a bit of skill to bend and glue the brass parts together as well as a bit of surgury to the DeAgo back wall to make the light able to shine thru and around the parts...although LrdSatyr8 has made a replacement back wall available on Shapeways that you can use if you do not want to cut up the DeAgo wall youself.
Just found it. God Bless him and all his Kin.
http://www.shapeways.com/product/BR...afix-pe-set?li=shop-results&optionId=58487267
I was not!!!!! looking forward to this mod so it will now be a lot easier.
On the decals the video said to use Micro Kristal Klear covering the surface and holes and then apply the decals????
Thanks for the info. The brain starts to freeze up after a while.
Tom
Cool, glad you found it (I was going to link to it for you but forgot, duh...)
The part about using Micro Kristal Klear, it is used to fill in the holes etched into the brass...It levels out the surface more so the decals can slide across them them without catching on the edges of the holes and tearing...it is basically a thin glue that dries clear so you can light thru it but still have a flat surface for decaling, like little windows...In fact you could use white PVA glue that dries clear as well, you just want as smooth a surface as possible to lay the decals on.
Hope that helps more
Necronaut
Active Member
A word of warning about the decals. They are pretty fragile and are prone to shattering. I cracked my back wall decal on my ParaGrafix cockpit as I was aligning it.
If if you have little experience with water slide decals, it may be worth your time to buy an extra decal set.
If if you have little experience with water slide decals, it may be worth your time to buy an extra decal set.
Little tip with fragile decals... if you want to strengthen them so they don't break apart while applying, spray a coat of clear lacquer over them before using them and allow it to dry completely before cutting them out to apply! The more coats you apply the stronger and thicker the decal will be.
Wow!!! Thank you for all the tips
I will order two sets for sure. I have done them before and they always suck.
Okay on the Micro Kristal Klear do you let it all dry first and then do the decals or put the wet decals on the wet Kristal Klear?????
Thanks so much for the help guys.
Tom
I will order two sets for sure. I have done them before and they always suck.
Okay on the Micro Kristal Klear do you let it all dry first and then do the decals or put the wet decals on the wet Kristal Klear?????
Thanks so much for the help guys.
Tom
Wow!!! Thank you for all the tips
I will order two sets for sure. I have done them before and they always suck.
Okay on the Micro Kristal Klear do you let it all dry first and then do the decals or put the wet decals on the wet Kristal Klear?????
Thanks so much for the help guys.
Tom
Always let it dry first completely beforehand. Can't go wrong if you do!
Always let it dry first completely beforehand. Can't go wrong if you do!
Okay we just finished presents. Taking a breather.
Christmas-Fun when your a kid.
A thing when your a young adult.
Exhausting when you are a parent.
So:
Put on the Kristal Klear stuff.
Let dry completely.
Spray clear coat on stickers
Let them dry completely.
Then attempt water slide nightmare.:wacko
Will the clear coat on the stickers be a problem in the water?????
Why can't they just be sticky stickers???????:facepalm
Thanks
Tom
Tom, If your really set on not wanting to do the decals as water slide there could be another option...You could scan (in color with at least 300dpi) the decal sheet, then print it at the same scale on white adhesive paper sheets, cut out the parts and place them on the PE like 'sticky stickers',,,Also, never tried this, but you may want to coat them with some flat clear lacquer after applying to seal them better to the PE??
It probley wont look as good as the decal sheets (too thick and not as good colors) but it would make it easy...just an idea
It probley wont look as good as the decal sheets (too thick and not as good colors) but it would make it easy...just an idea
Last edited by a moderator:
Ok Tommyboy... time to put on your big boy panties and model like a man! Move up to the next level so to speak... time to get off the easy level snap together prepainted crap and move up to something that put hair on your chest! LOL
Don't worry about it too much bro... it's really not that difficult. Decals are easy... the best way I've found to do them is by cutting them out and floating them upside down in hot water. Then you watch as the water soaks into the paper from behind. As soon as the water reaches the center, you pull it out of the water and wait a few moments and the decal will slide really easily off the sheet backing. If use your finger and nudge it gently and the decal doesn't more, just dip it in the water quickly and let it soak a few more moments... it will slide off but you don't want to leave it in the water until the ends start to curl off the paper... that's too long... don't submerge the decal underwater completely... just let it float on the surface upside down. Get yourself a cheapo car model at Walmart and practice with the decals that come on them. You want to cut the decal out of the paper as close to the detail as possible (there's usually a little clear halo around the printed decal that you want to get rid of). It's really not that hard.
LOLDon't worry about it too much bro... it's really not that difficult. Decals are easy... the best way I've found to do them is by cutting them out and floating them upside down in hot water. Then you watch as the water soaks into the paper from behind. As soon as the water reaches the center, you pull it out of the water and wait a few moments and the decal will slide really easily off the sheet backing. If use your finger and nudge it gently and the decal doesn't more, just dip it in the water quickly and let it soak a few more moments... it will slide off but you don't want to leave it in the water until the ends start to curl off the paper... that's too long... don't submerge the decal underwater completely... just let it float on the surface upside down. Get yourself a cheapo car model at Walmart and practice with the decals that come on them. You want to cut the decal out of the paper as close to the detail as possible (there's usually a little clear halo around the printed decal that you want to get rid of). It's really not that hard.
@Tom, If your really set on not wanting to do the decals as water slide there could be another option...You could scan (in color with at least 300dpi) the decal sheet, then print it at the same scale on white adhesive paper sheets, cut out the parts and place them on the PE like 'sticky stickers',,,Also, never tried this, but you may want to coat them with some flat clear lacquer after applying to seal them better to the PE??
It probley wont look as good as the decal sheets (too thick and not as good colors) but it would make it easy...just an idea
I was thinking about something like this but you are correct. It won't look as good. I started looking at this because I was unhappy with the Deago stock lighting and one of my few complaints with the MR Falcon was the rear lit sticker and nothing lit on the top, sides, console, etc. So if I am gonna do it, I'll do it right.
- - - Updated - - -
Ok Tommyboy... time to put on your big boy panties and model like a man! Move up to the next level so to speak... time to get off the easy level snap together prepainted crap and move up to something that put hair on your chest!
Don't worry about it too much bro... it's really not that difficult. Decals are easy... the best way I've found to do them is by cutting them out and floating them upside down in hot water. Then you watch as the water soaks into the paper from behind. As soon as the water reaches the center, you pull it out of the water and wait a few moments and the decal will slide really easily off the sheet backing. If use your finger and nudge it gently and the decal doesn't more, just dip it in the water quickly and let it soak a few more moments... it will slide off but you don't want to leave it in the water until the ends start to curl off the paper... that's too long... don't submerge the decal underwater completely... just let it float on the surface upside down. Get yourself a cheapo car model at Walmart and practice with the decals that come on them. You want to cut the decal out of the paper as close to the detail as possible (there's usually a little clear halo around the printed decal that you want to get rid of). It's really not that hard.
D:lol I have not laughed so hard since last week when someone said about TFA, "no one puts R2 in the corner."Yep I am gonna have to go find those darn big boy pants and get it done. I'll just buy an extra set of decals and then probably another set
Thanks guys
Tom
Thanks for the decal tips. I used to just let them sit on the bottom a while.
I have the 5ft markings from JT Graphics I want to add as well to this and/or my Hasbro so I will need to practice with them as well.
Thanks again
Tom
- - - Updated - - -
Since this is the support group thread I figure there are others like me who are terrified about painting this so I will post this here as well.
Aside from weathering my "Hasbo Studio Scale" 12" Speederbike and B wing I have zero experience in weathering a ship.
My plan was to completely finish my Old MPC Falcon first to develop my skills. Then my Hasbro 28" Falcon. Once those were done and I was happy I would then start on the Deago.
Well I said screw it and started on the Deago yesterday.
I am always having to wait to get this special paint, or this special glue, etc. and all that stuff adds up fast.
So,...again I said screw it and used my regular supeglue and my $1.50 black craft paint from Walmart.
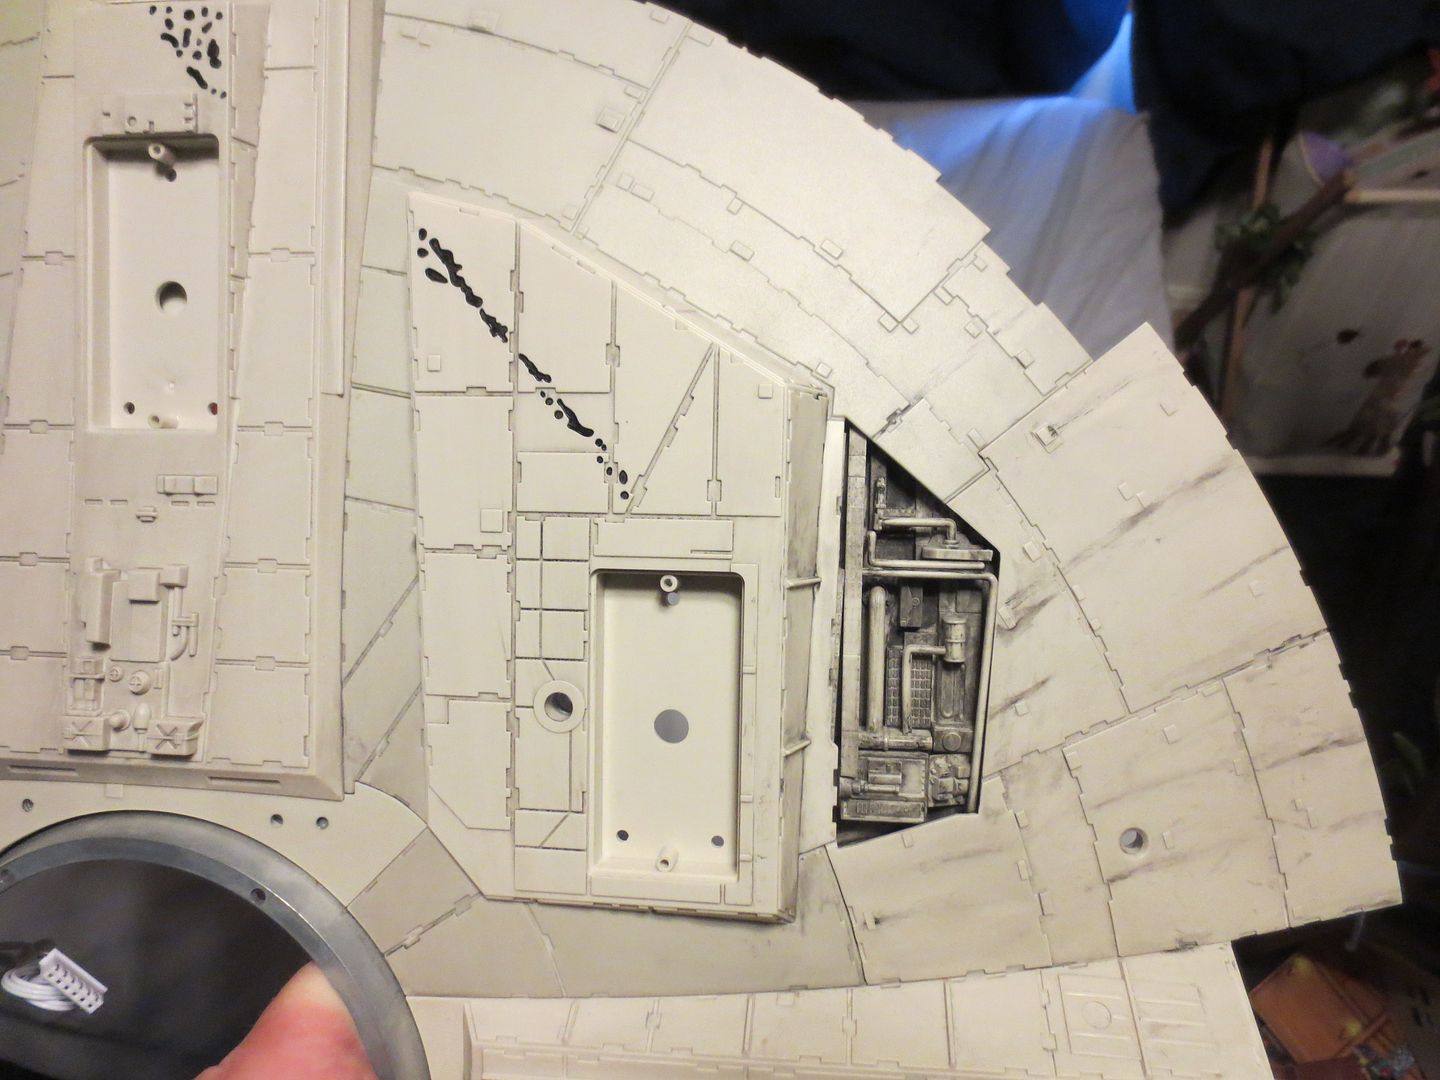
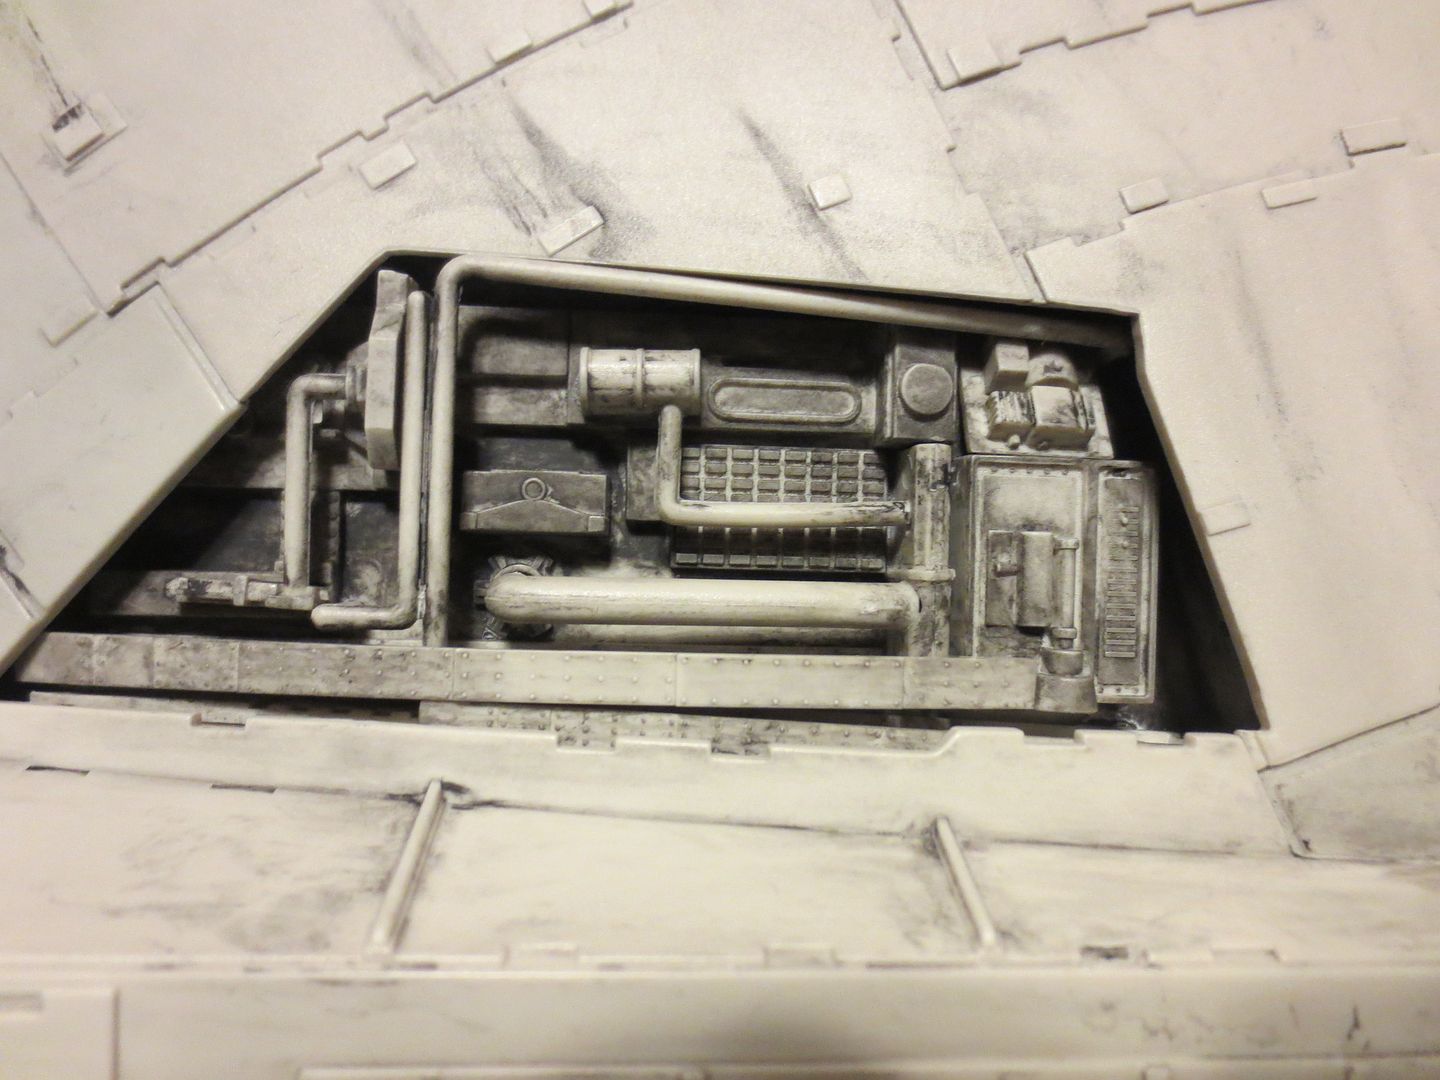
This is my first attempt. I am very happy with the pit. Need to add in a little rust, detail, etc.
The hull I am going to re-do in Tamiya Insignia white but I think for my first try this section came out pretty good.
The fun of this is since the Falcon is so messed up you can just go at it again and again.
The pit and weathering streaks, wash, etc. was done with the above mentioned paint, some regular old brushes, a lot of Q tips, paper towels and a spray bottle of water.
I hope you like it.
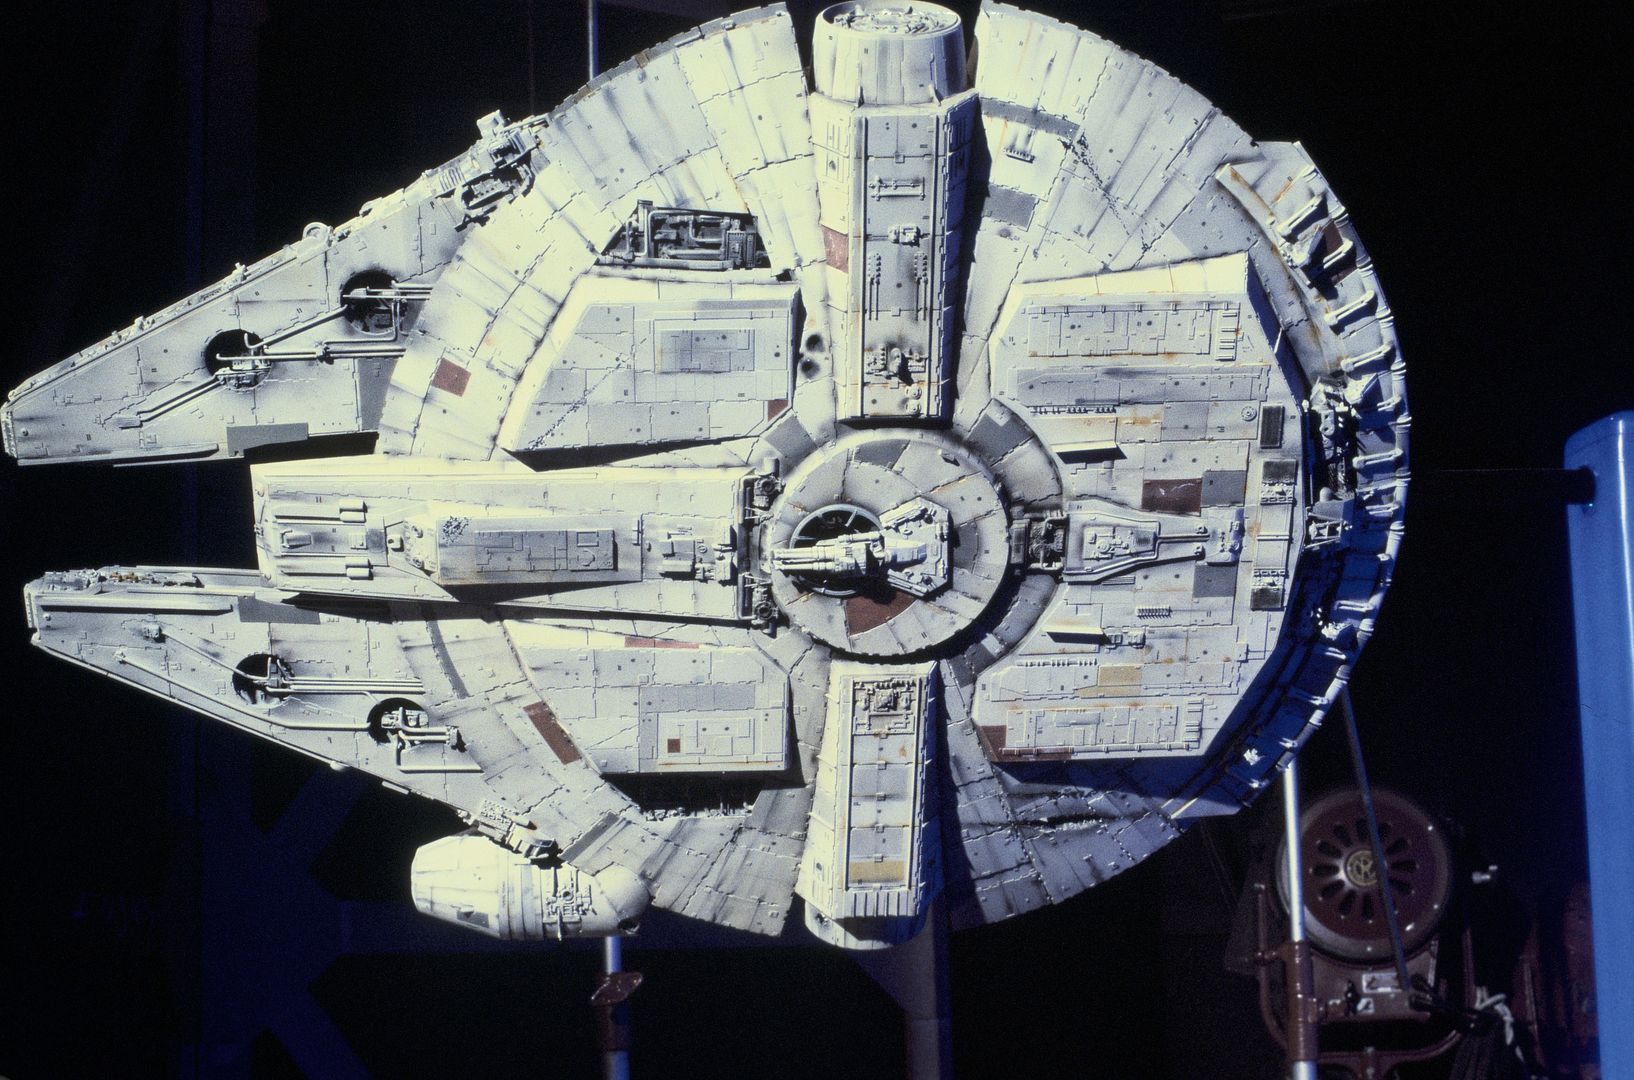
I used this pic as a reference. It's the bottom of the ESB 32" Filming model.
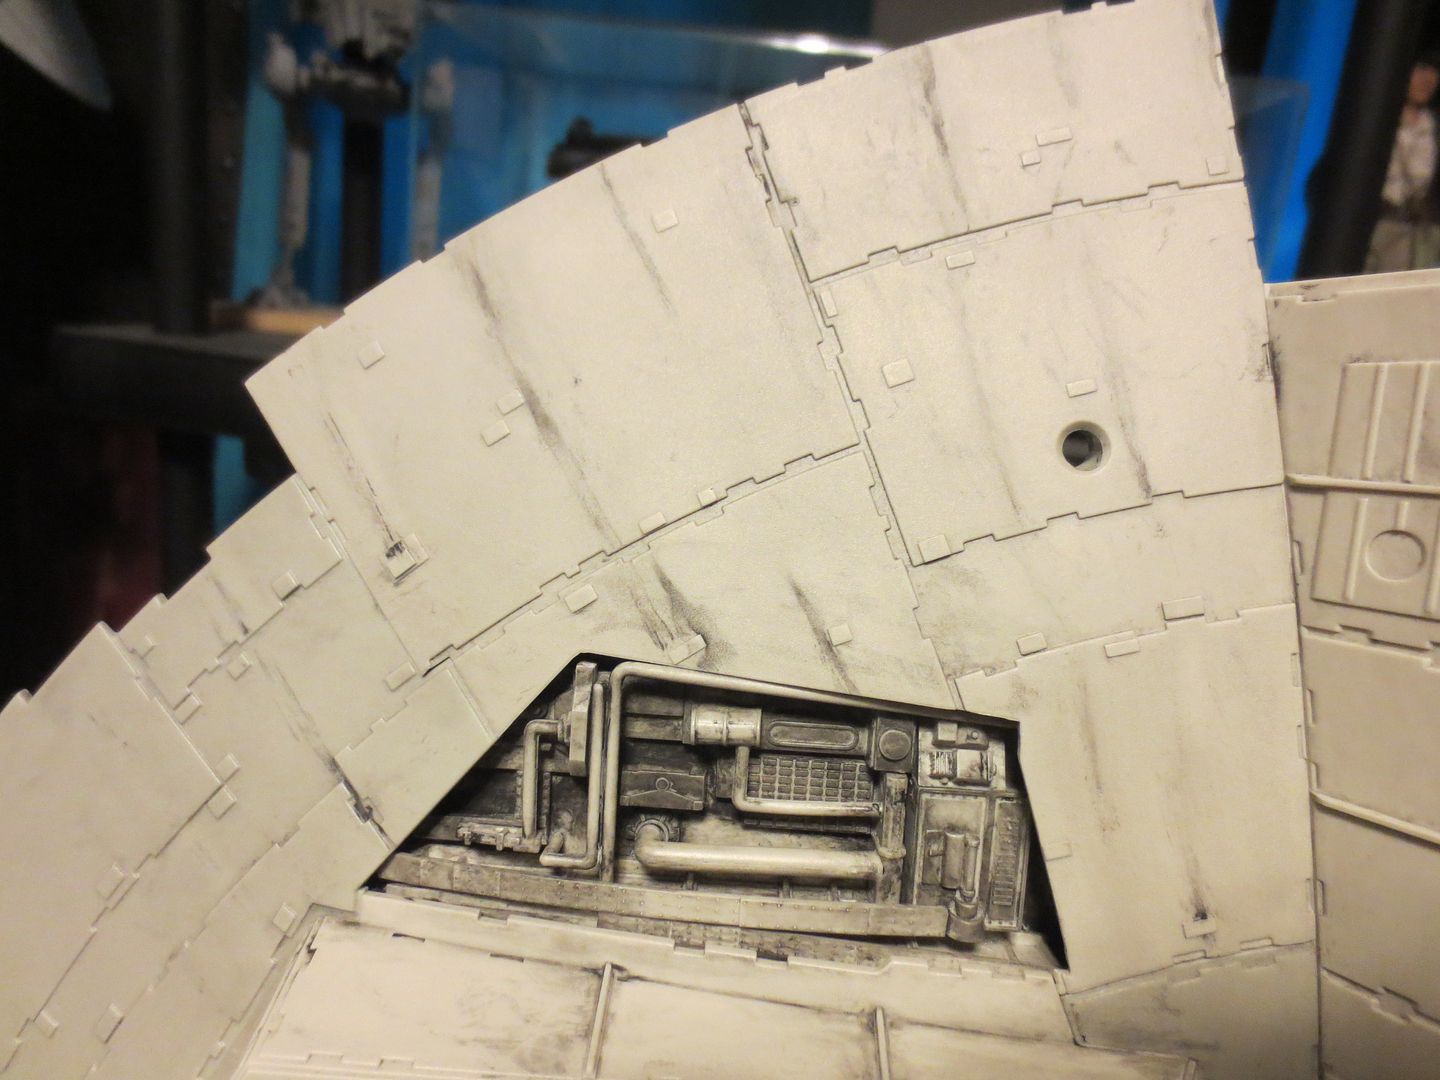
Mine. I just did the streaking to the right of the pit.
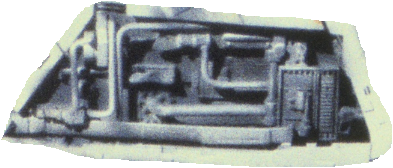
Close up of filming prop pit:
My Deago pit:
I have the 5ft markings from JT Graphics I want to add as well to this and/or my Hasbro so I will need to practice with them as well.
Thanks again
Tom
- - - Updated - - -
Since this is the support group thread I figure there are others like me who are terrified about painting this so I will post this here as well.
Aside from weathering my "Hasbo Studio Scale" 12" Speederbike and B wing I have zero experience in weathering a ship.
My plan was to completely finish my Old MPC Falcon first to develop my skills. Then my Hasbro 28" Falcon. Once those were done and I was happy I would then start on the Deago.
Well I said screw it and started on the Deago yesterday.
I am always having to wait to get this special paint, or this special glue, etc. and all that stuff adds up fast.
So,...again I said screw it and used my regular supeglue and my $1.50 black craft paint from Walmart.
This is my first attempt. I am very happy with the pit. Need to add in a little rust, detail, etc.
The hull I am going to re-do in Tamiya Insignia white but I think for my first try this section came out pretty good.
The fun of this is since the Falcon is so messed up you can just go at it again and again.
The pit and weathering streaks, wash, etc. was done with the above mentioned paint, some regular old brushes, a lot of Q tips, paper towels and a spray bottle of water.
I hope you like it.
I used this pic as a reference. It's the bottom of the ESB 32" Filming model.
Mine. I just did the streaking to the right of the pit.
Close up of filming prop pit:
My Deago pit:
Its alright Tom... sometimes I see people on here and on other sites whining and complaining about how they can't figure out how to do this right, or are too scared to do that right... I just wanna grab them by the short and curlies and smack em across the face and say MAN UP! You're not a kid anymore! Just start doing something... it don't matter if it's perfect... just start doing ANYTHING... You can always fix it later on and if you're not happy with it, get some Easy-Off oven cleaner... throw the parts in a bag and spray away and let it sit for a couple of hours to remove the paint and start over again! ORRRRRRRRR... Just spray another layer of primer on it and start over again. Even us pros make mistakes... but we don't sit around whining about it! We just wipe it off and do it again. That's how you learn how to do this stuff... just grab it and start messing with it. IF ya mess up, you can always fix it later! But you learn that whatever you did don't work and try something else. We all could sit here and give you all the tips in the world... a step-by-step guide and hold your hand like a little girl... but NO... You gotta be a man and go out there and kill that damn bear sometime or he's gonna kill you! Put down the sippy cup and grab a beer and just DO IT! Almost feel like that scene in Airplane where the woman is getting hysterical and everyone lines up to smack her across the face! LMAO!
Put down the sippy cup and grab a beer and just DO IT! Almost feel like that scene in Airplane where the woman is getting hysterical and everyone lines up to smack her across the face! LMAO!Its alright Tom... sometimes I see people on here and on other sites whining and complaining about how they can't figure out how to do this right, or are too scared to do that right... I just wanna grab them by the short and curlies and smack em across the face and say MAN UP! You're not a kid anymore! Just start doing something... it don't matter if it's perfect... just start doing ANYTHING... You can always fix it later on and if you're not happy with it, get some Easy-Off oven cleaner... throw the parts in a bag and spray away and let it sit for a couple of hours to remove the paint and start over again! ORRRRRRRRR... Just spray another layer of primer on it and start over again. Even us pros make mistakes... but we don't sit around whining about it! We just wipe it off and do it again. That's how you learn how to do this stuff... just grab it and start messing with it. IF ya mess up, you can always fix it later! But you learn that whatever you did don't work and try something else. We all could sit here and give you all the tips in the world... a step-by-step guide and hold your hand like a little girl... but NO... You gotta be a man and go out there and kill that damn bear sometime or he's gonna kill you!
OKAY!!!!!!!!!!!!!!!!!,............OKAY!!!!,....................YOU GOT IT. YOU WANNA SEE ME MAN UP?????? YOU WANNA SEE ME TAKE DOWN THE BEAR YOU GOT IT BUDDY.
I AM GONNA GO IN THERE AND TRY ,....not to tear the tiny little, fragile stickers.
cry:confusedDTom
Similar threads
- Replies
- 22
- Views
- 2,643
- Replies
- 5
- Views
- 1,145