You are using an out of date browser. It may not display this or other websites correctly.
You should upgrade or use an alternative browser.
You should upgrade or use an alternative browser.
ANH Hero DL-44 Discussion - Three ANH Greeblies Found
- Thread starter deadbolt
- Start date
Hot damn! That bull barrel fits perfectly. Very cool.
So your mauser is a pre-war commercial... the one I found is a war time commercial... I wonder how different they'll be. I'll know tomorrow when I go pick it up.
As for the scope mount... I'm not sure. I was going to run it by the gun shop smith to see what they thought. The scope mount doesn't take any real load so I'm not too sure you need great measures for the scope mount.
My main concern is the bull barrel, booster, and flash hider never moving.
I thought about once lining it all up, using some epoxy inside the bull barrel, but I don't want anything TOO permanent in case I need to service it or adjust.
VFX Freak
Sr Member
Yeah, I want to be able to swap parts out if I have to, so I don't want to permanently attach the barrel assembly either.
As for the scope mount, the wall of the magazine housing is so thin I can't see it surviving a blow to the scope if there isn't additional support. If Harrison was as rough on the prop as legend tells, then I'm convinced the scope mount was reinforced somehow. Either that or it was repaired a lot.
I need to change a few things to make my Mauser more accurate. I bought a safety without the drilled out hole, and I fitted the DEC walnut grips today. I have the Birchwood Casey Tru Oil on order, and of course there's lots of bluing and aging to follow.
But still, as incomplete as this thing is at the moment, it's awesome to hold!
Funny you mention that... my MGC based, has the threaded rods flush inside. I used every spare mm inside for the electronics, and all that holds it on is the tiny bit of threading into the soft MGC alloy.
Solid as a rock.
Gets handled a LOT...
So I was thinking, just threaded the steel body of the mauser might be enough....???
Solid as a rock.
Gets handled a LOT...
So I was thinking, just threaded the steel body of the mauser might be enough....???
kpax
Sr Member
...I think the recoil and mass of the parts is the issue. Lots of g forces from a heavy scope and mount tugging on the thin mag well threads with every shot.
I think that's why VFX is brazing a washer on the outside of the mag well to spread out the force. The rear prob has enough meat there but the brazed washer can't hurt!
Also a big Q to answer is the cycling. The mass of the steel barrel/booster and FH may inhibit the cycling, but the advantage to the Mauser is that only the bolt moves fully to the rear and not the whole slide...which may help.
The Real FH on the MG81 used a real recoil "booster" to boost the recoil and aid in the cycling.
Can't wait to see it in action VFX! I expect great videos! ; ) Some twilight shots where we can see the flash would be great too !
Last edited:
Just to clarify, the receiver/barrel moves rearward upon firing a couple millimeters which unlocks the bolt locking cam, and then the bolt blows the rest of the way back. Given the cavalry version Mauser made themselves, I don't imagine the weight of the bull barrel/booster/flash hider assembly will impede that initial rearward travel at all.
For ammunition, contact Fiocchi and find out who/where your closest rep/vendor is. They're who I get my 7.63mm Mauser ammo from.
If you've never fired one of these things, you'll love the noise and flash.")
--Jonah
For ammunition, contact Fiocchi and find out who/where your closest rep/vendor is. They're who I get my 7.63mm Mauser ammo from.
If you've never fired one of these things, you'll love the noise and flash.
--Jonah
Thanks! I hadn't thought of anything like that, Trillion. I'll have to give it a try.
Can RTV silicone handle lots of heat?
The black RTV (Room Temperature Vulcanization) that I use is a Wurth brand and it's good for 210*C/410*F. They do make a 'high temp' version that is red and it's good for 315*C/600*F. I'm sure other brands will be similar in comparison. I hope that helps out any?
Let's see some pics!
Got my Mauser.. ^_^ Spent a bit of time cleaning and oiling. LOOKS PERFECT!!! LOVE IT!
Found some ammo too. So anyone needing some PM me and I will share the link.
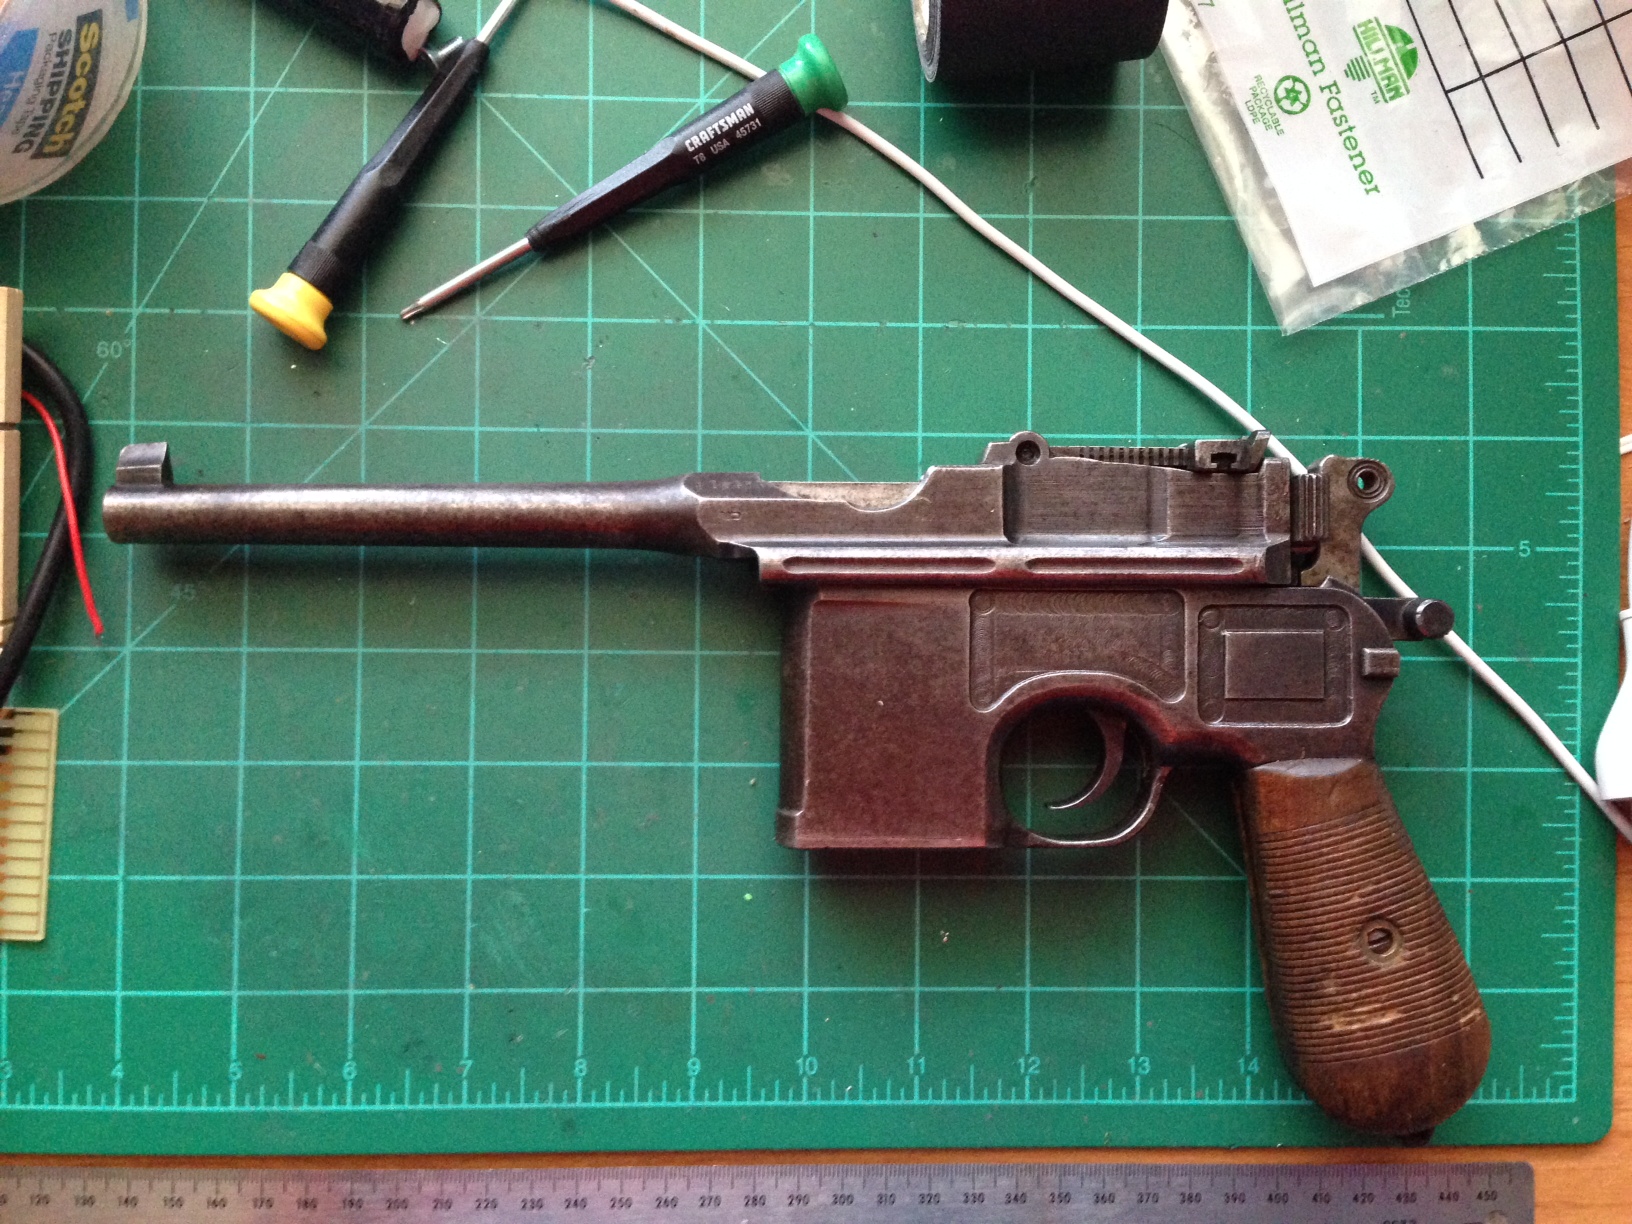
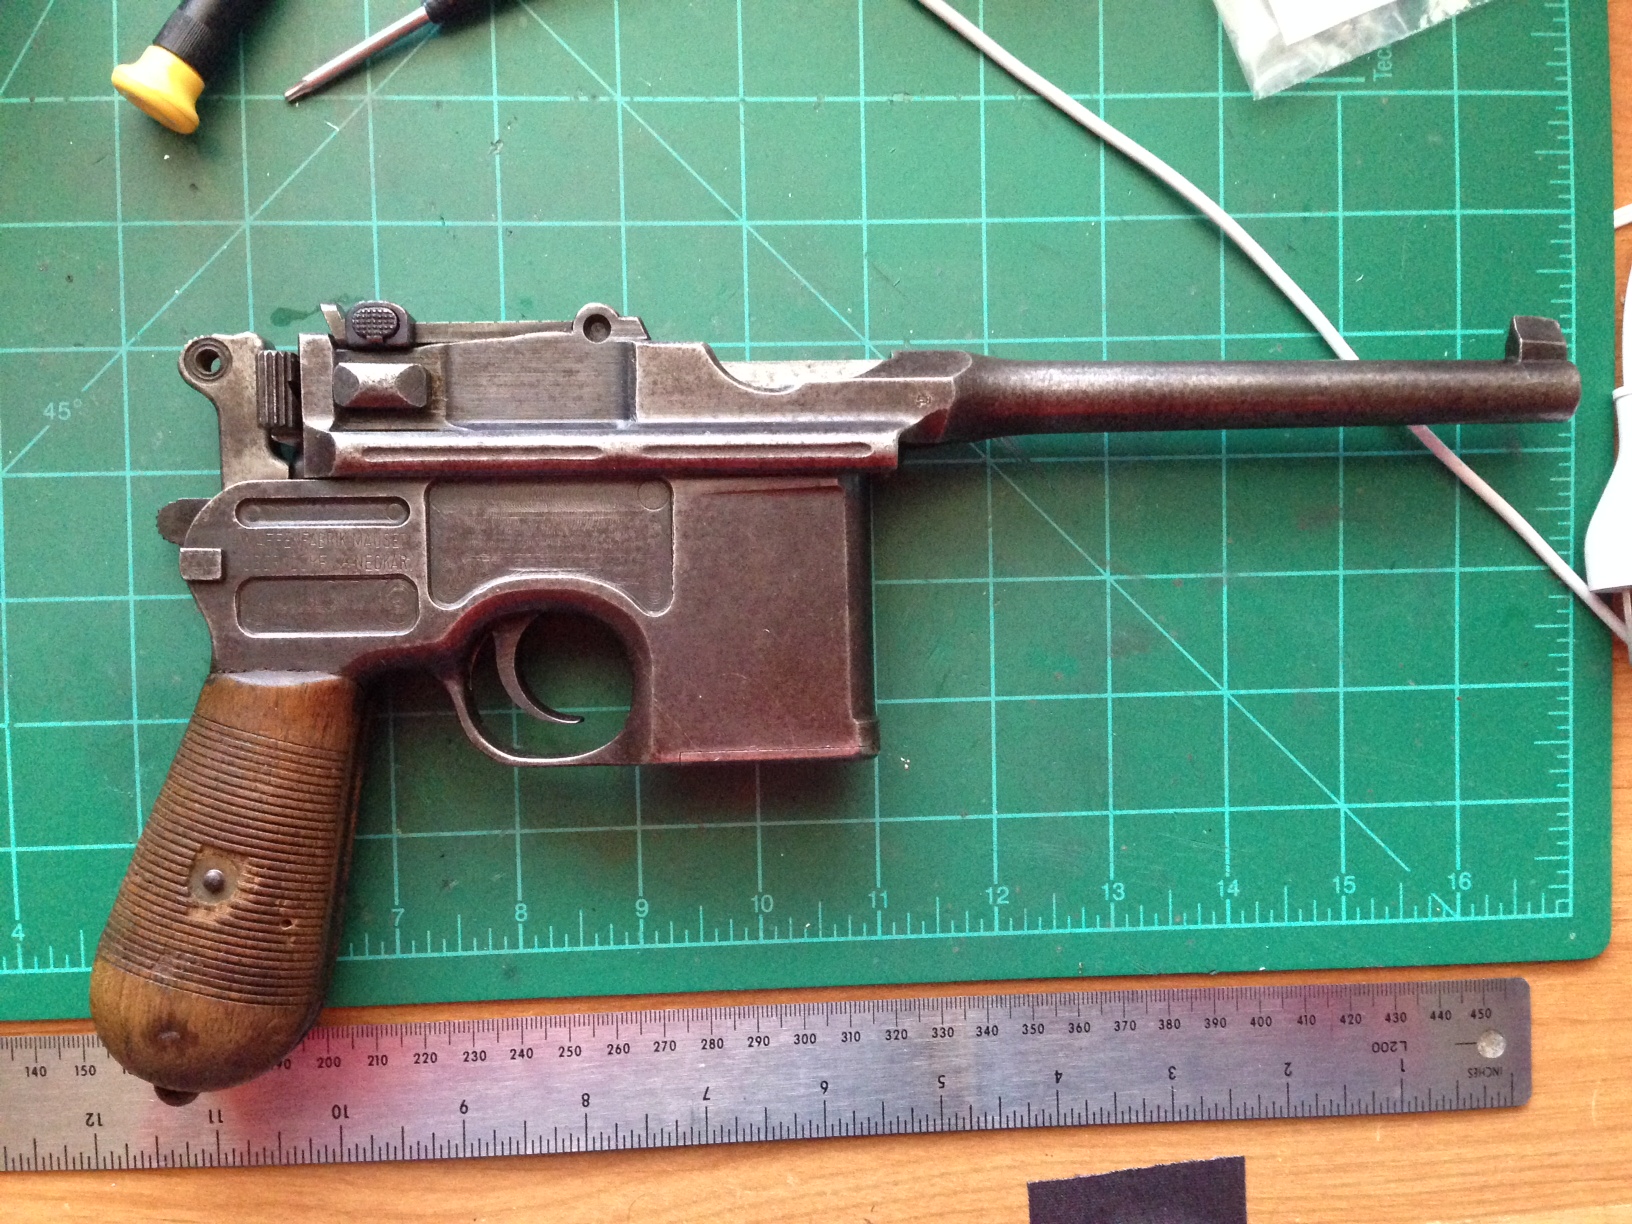
The action is MEGA Tight. Been learning stripping and cleaning today. ALL matching serial numbers... even the grips.
Anyone else have a wartime commercial? I'm curious how your safety works with the hammer back... my safety won't engage unless I pull the hammer back a little more, then it engages.
All the videos I see online are with the pre-war guns, or no one uses the safety.
Country Paul
Sr Member
Nice find, that looks fantastic
& to think of the trouble I have just to get a Denix here in the UK :lol
Can't wait to see what you do with it
& to think of the trouble I have just to get a Denix here in the UK :lol
Can't wait to see what you do with it
That looks great!
Recently my Dad pulled out this absolutely destroyed sword and asked if I wanted it. Apparently my Grandfather stole it off a German soldier in Holland during WW2. All I could think looking at it was "He couldn't have grabbed a mauser?".
Looks like I'll be working with a Denix as well.
Recently my Dad pulled out this absolutely destroyed sword and asked if I wanted it. Apparently my Grandfather stole it off a German soldier in Holland during WW2. All I could think looking at it was "He couldn't have grabbed a mauser?".
Looks like I'll be working with a Denix as well.
Noice. ^_^ Mine's a post-War Bolo. c.1924. Also matching serial numbers, even the internals and grips -- except for the magazine base plate. Which isn't surprising. Of all the bits that coupld be lost, that's probably ##1.
My safety works the same way. You'll also notice that if you engage it with the hammer un-******, the safety pushes it back from the firing pin slightly. How far down have you stripped it? Field-stripped (Magazine baseplate, spring and follower removed; frame removed; action removed from receiver)? Or all the way down to individual components? I took mine apart when I first got it, action and everything, and let it all soak in WD-40 for a couple days. Wiped it all down while wearing inspection gloves and rebuilt it (some of those springs were really fun :rolleyes ). It's just been lovely.
--Jonah
Noice. ^_^ Mine's a post-War Bolo. c.1924. Also matching serial numbers, even the internals and grips -- except for the magazine base plate. Which isn't surprising. Of all the bits that coupld be lost, that's probably ##1.
My safety works the same way. You'll also notice that if you engage it with the hammer un-******, the safety pushes it back from the firing pin slightly. How far down have you stripped it? Field-stripped (Magazine baseplate, spring and follower removed; frame removed; action removed from receiver)? Or all the way down to individual components? I took mine apart when I first got it, action and everything, and let it all soak in WD-40 for a couple days. Wiped it all down while wearing inspection gloves and rebuilt it (some of those springs were really fun :rolleyes ). It's just been lovely.
--Jonah
Thanks... yeah I did some reading, and the New Type Safety does work like that... apparently so you don't accidentally knock it into safe mode. Seeing as how it was a combat gun, I get it... but it's a pain to do.
I stripped it completely down, and yes some of those springs are challenging. The only things I didn't take apart were the sight and the trigger. Otherwise I took it all down and cleaned it. I'll do it again tomorrow and let it soak. The action on this one is SO tight, its hard to cock the bolt back. All surfaces are like new inside... just nuts.
oh I also did NOT take out the extractor. Found this: http://www.youtube.com/watch?v=ovG9bE_cwO0
and this: http://www.youtube.com/watch?v=_ZOEPZN_6W0
I'm not sure I'll shoot it before cutting the barrel and modifying it Solo style though...
I was also just watching videos and reading about silver solder/braze, and was thinking that maybe a washer brazed to the outside mag well for added thickness... then drill and tap for the threaded rod. mount flush to the inside then...
VFX Freak
Sr Member
I was also just watching videos and reading about silver solder/braze, and was thinking that maybe a washer brazed to the outside mag well for added thickness... then drill and tap for the threaded rod. mount flush to the inside then...
That's what kpax was advising me to do. I'm going into the shop tomorrow to drill and tap the holes for the threaded rods first so I get the scope located exactly how I want, then I'm going to have a metal-working wizard of an artist I know braze or silver solder a custom made threaded spacer on the outside of the magwell. I want the spacer to follow the slight curve of the magwell so I'll have to make it.
Good luck to both of us!
Similar threads
- Replies
- 0
- Views
- 204
- Replies
- 19
- Views
- 1,419
- Replies
- 38
- Views
- 2,175