My 11th Doctor's Sonic Screwdriver remote (Sort of) rebuild... FINISHED......

NakedMoleRat

Master Member
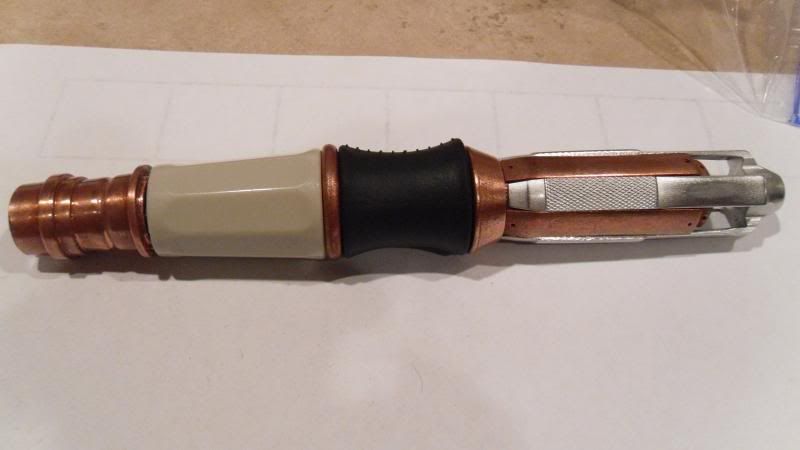
As the title says....So I wanted to re-do my sonic screwdriver remote control conversion that I did last year. My intent was to just add solid claws to my build. But in true geek fashion....

Before I go any further, a BIG THANKS to Dan (Anakin Starkiller) for his help! You, Sir are a gentleman and without you I literally would not be here.

I remembered Dan's post on his sonic build http://www.therpf.com/f9/11th-sonic-progress-update-1st-post-130064/In

In post number # 16 he mentioned that he had to have several claws made....so I PM'ed him asking if I could buy a set from him for my sonic.

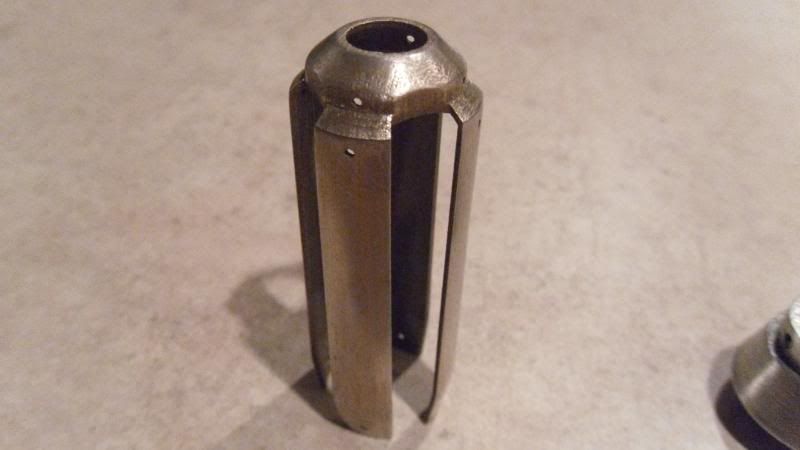
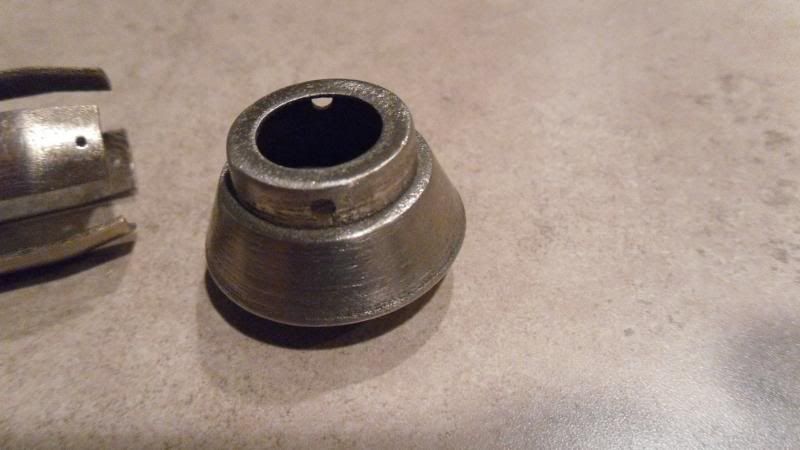
He sent me some, along with a couple accurate emitter tips.

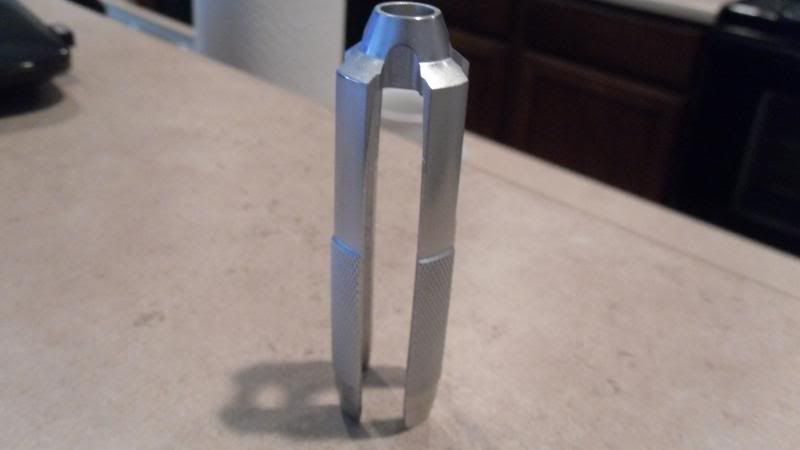
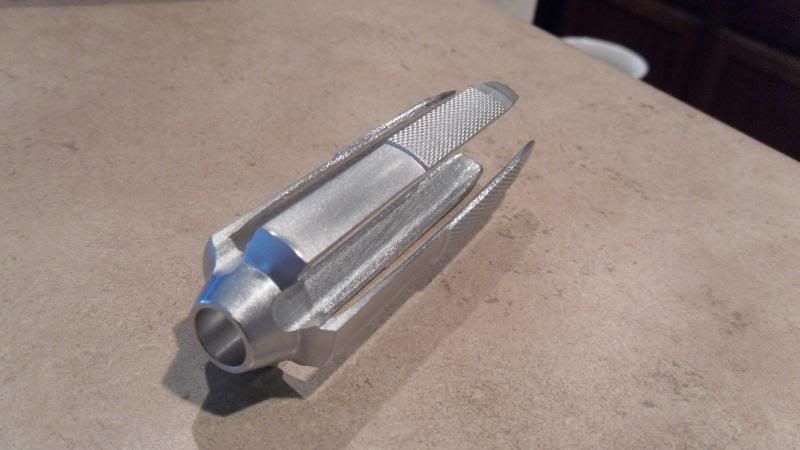
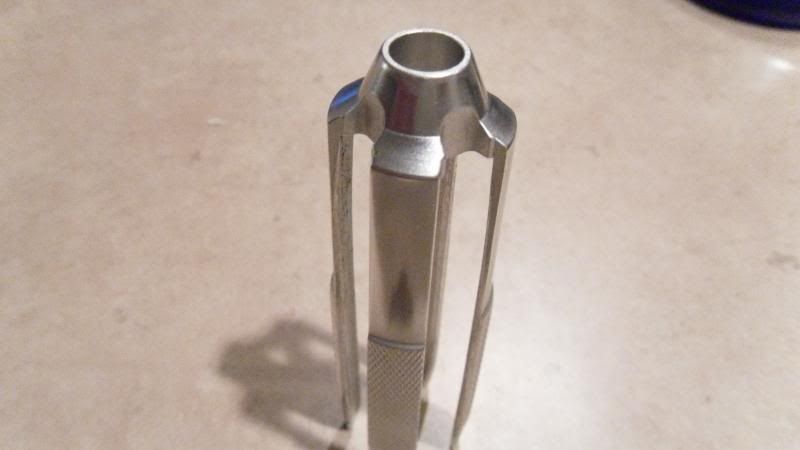
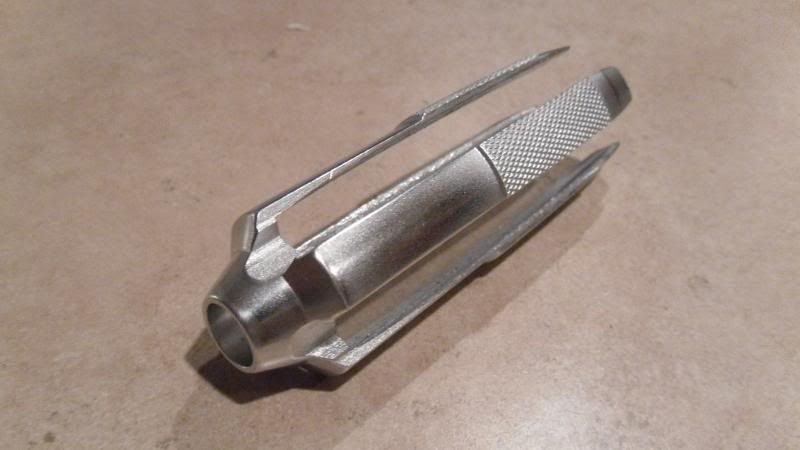
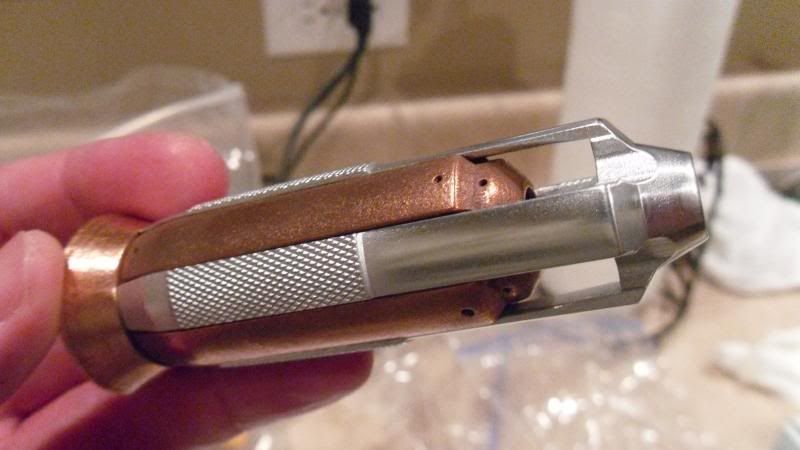
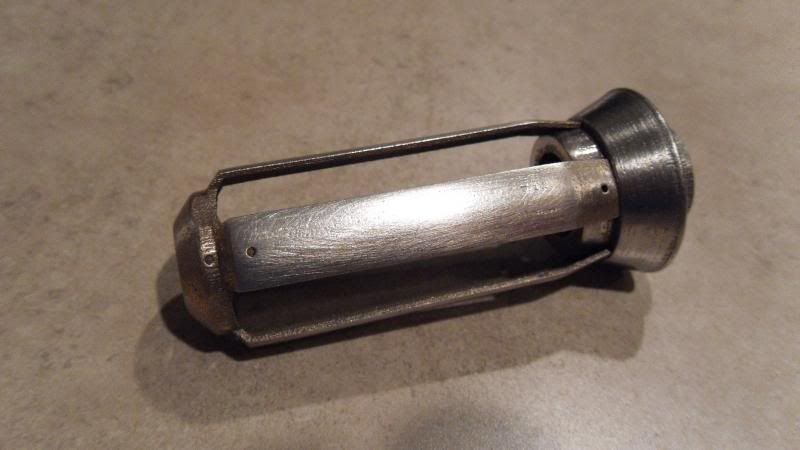
So getting going on that, well....it wasn't long before I realized that the claws were not going to work easily with the remote. The silver slider on the remote is a little too long which makes the solid aluminum claws too short to use with it. The 'neck' where the emitter sits is too thick and not tapered like the prop is supposed to be either.

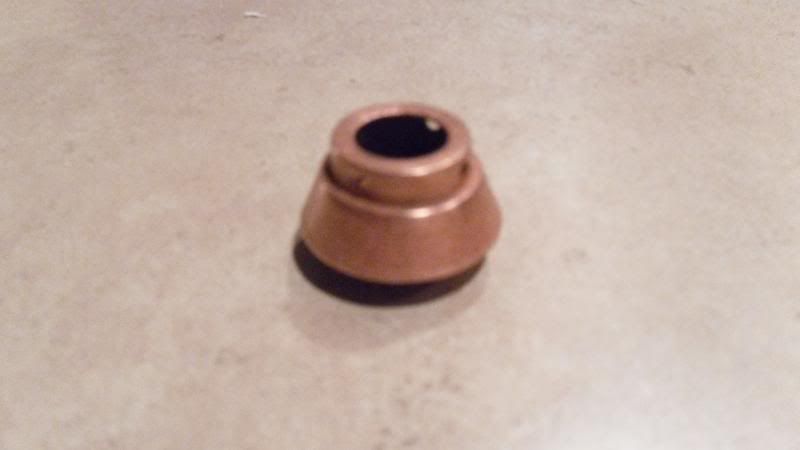
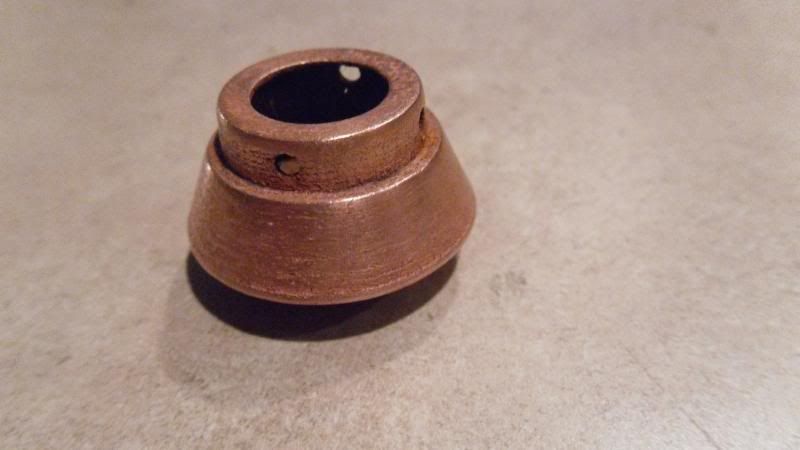
But I want to use the solid claws. So my thought is to modify the silver section to work. (It can be done, but will take a lot) Now my mind is telling me....fix the copper collar.....fix the copper collar.....

But to do that, I also need to redo the copper slider......so back to the PM's with Dan. And as a testimate to his nature of helping fellow proppers out.....he draws me 3D files for Shapeways (Since I cannot machine items, having no lathe or skills to machine them like he does) and I order a set of copper parts.

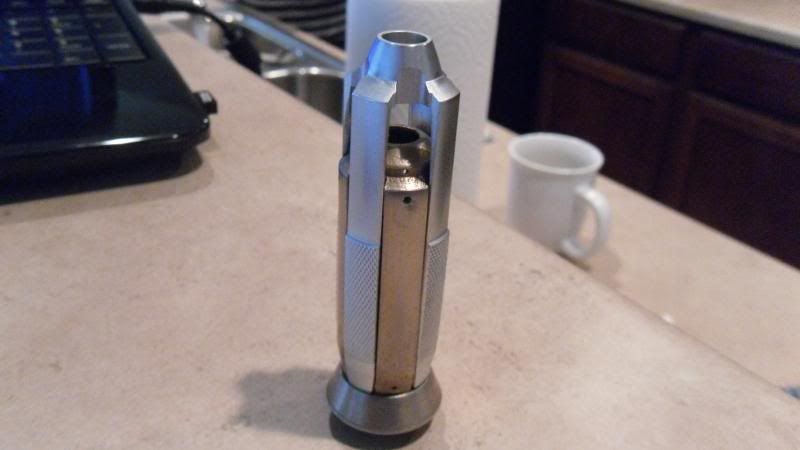
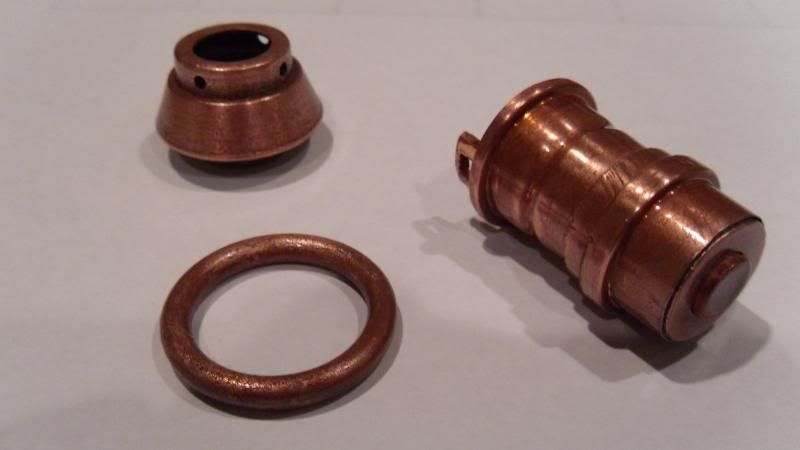
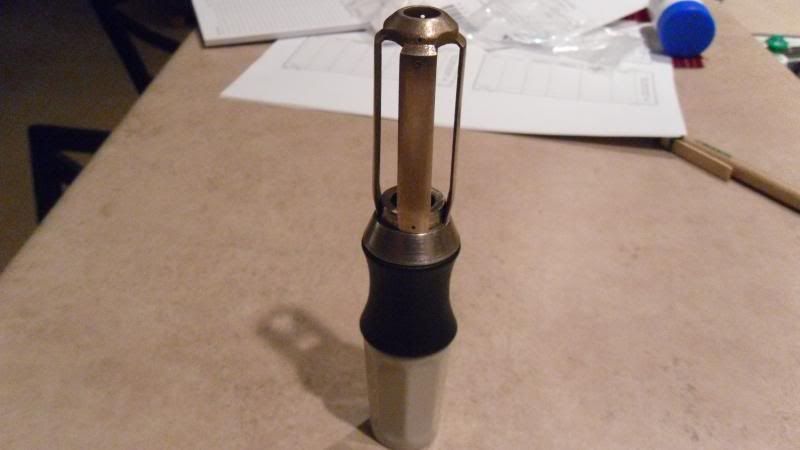
I am in the process of sanding off the print lines, etc. This is a WIP pic.


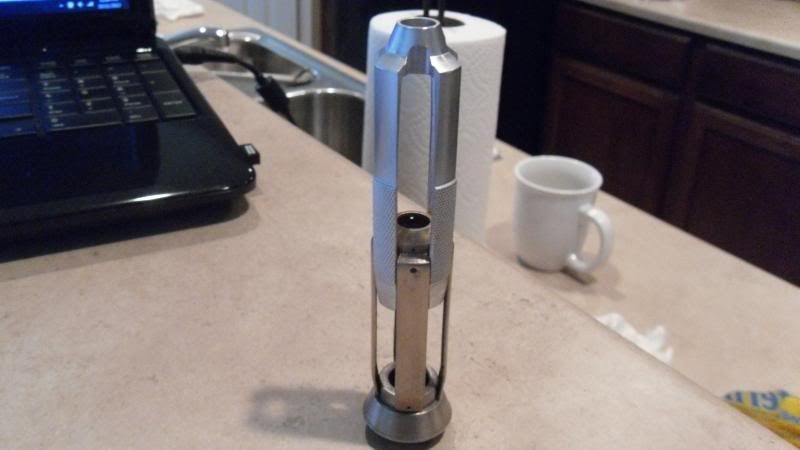
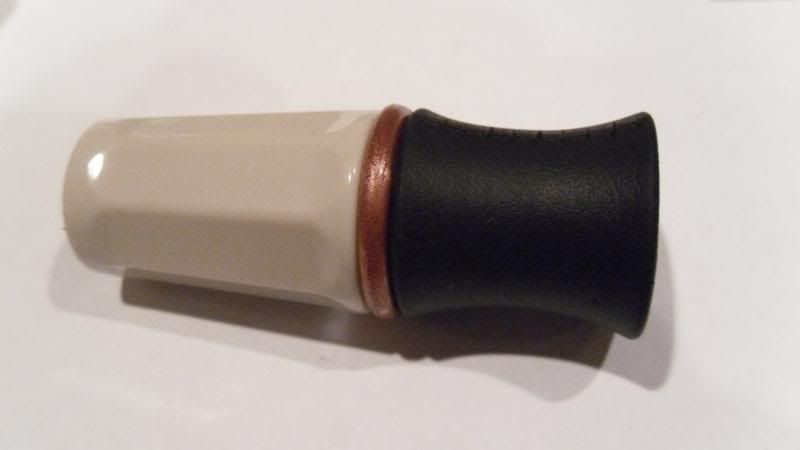
So, when I have them all finished, I will get them copper plated.Want to see how they look next to the remote grip and handle? Glad you asked.....


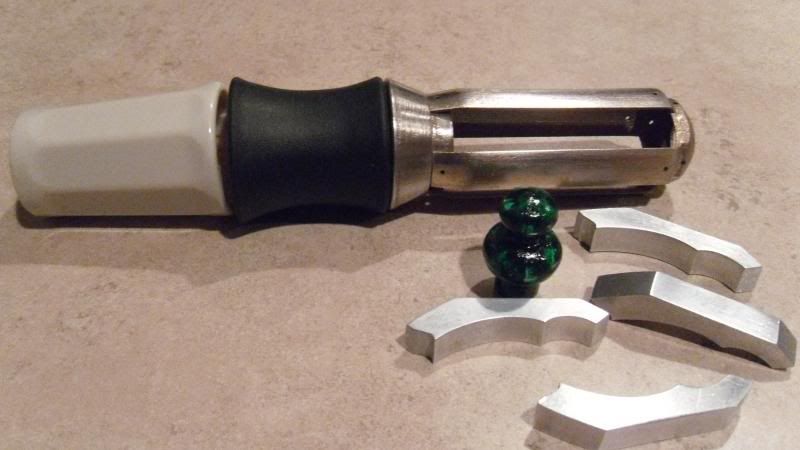
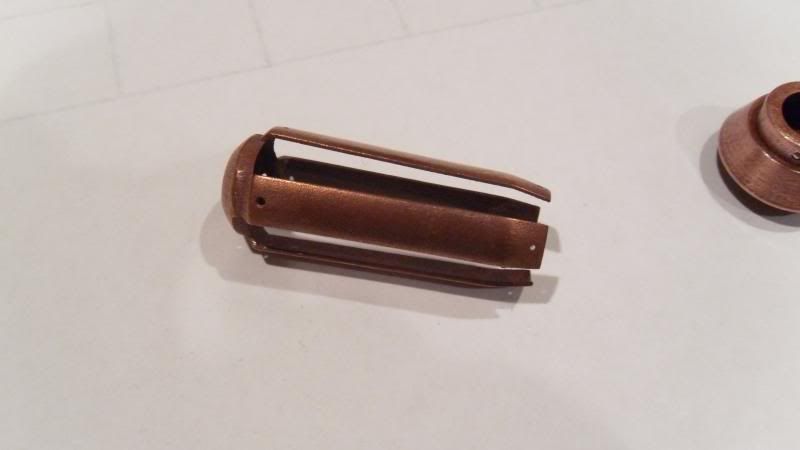
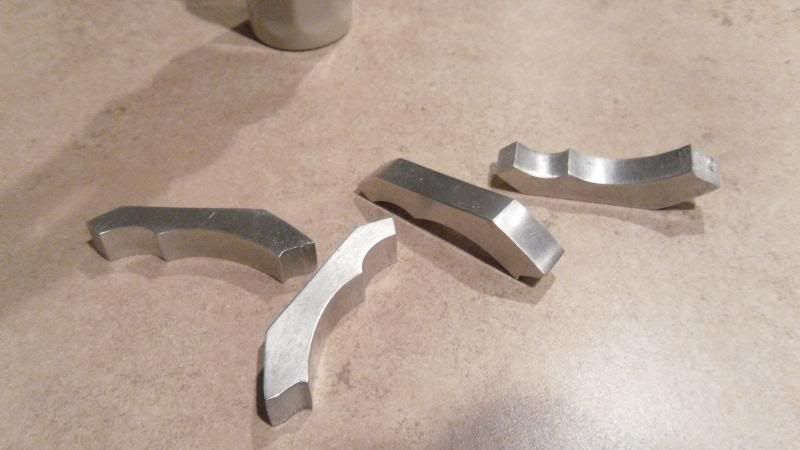
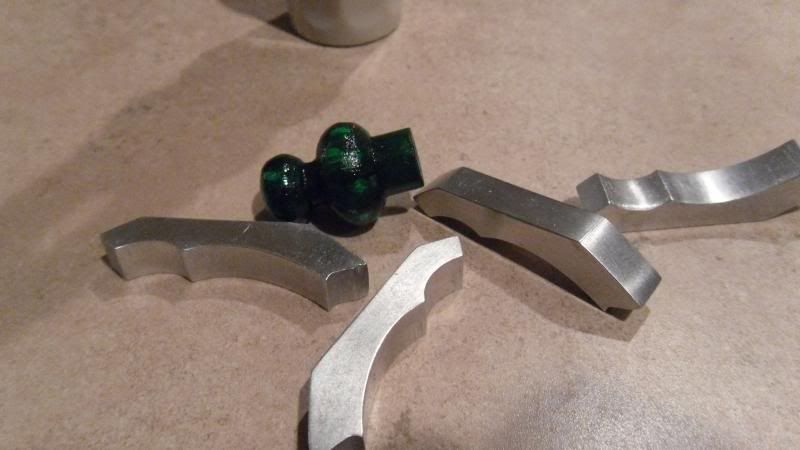
The earlier mentioned claws....WIP


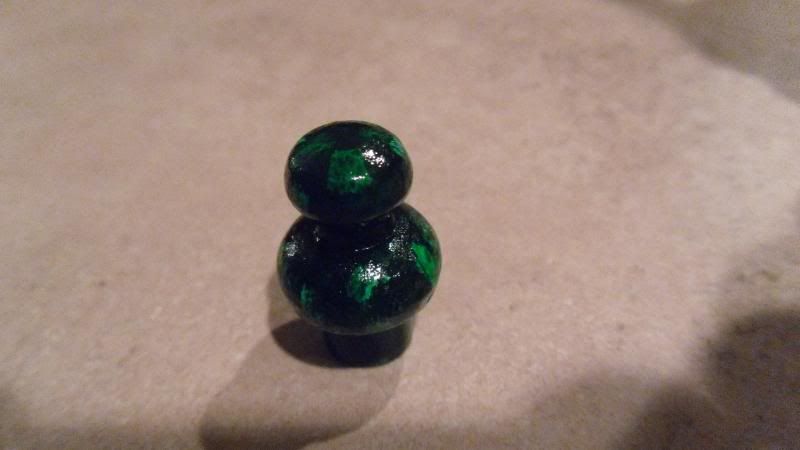
And here is an emitter painted with several washes of transparent green, a lite dry brush of white, then more washes of green. I tried to give it the marble look.....it sort of worked. With a bulb behind it, it looks pretty good.


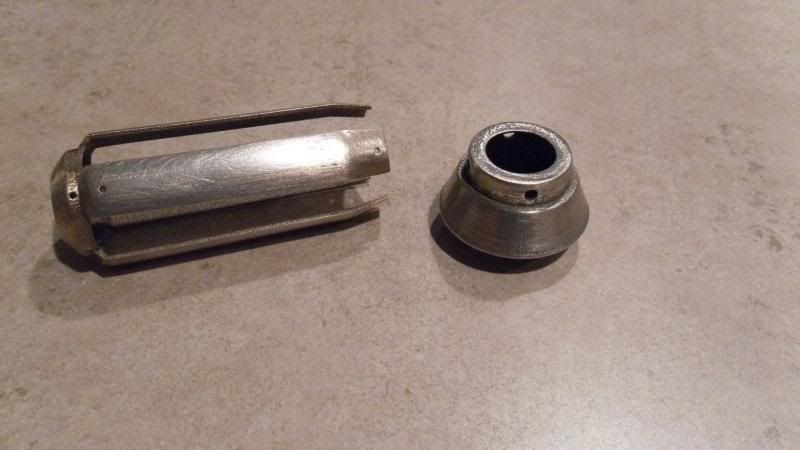
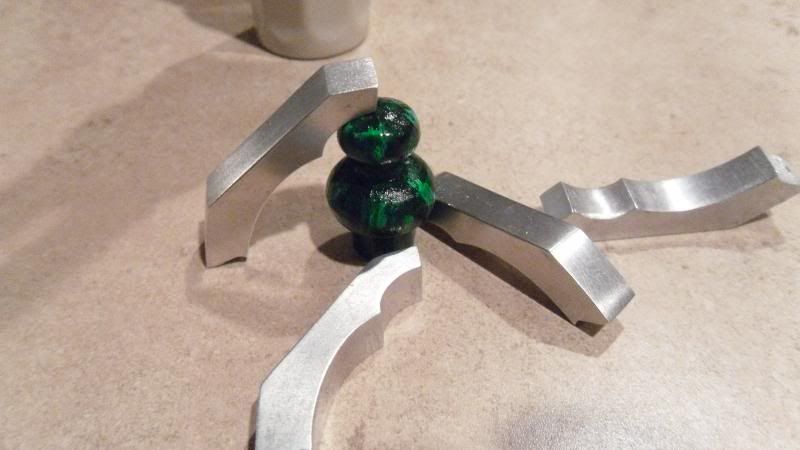
And claws and emitter together...


And lastly....a group shot.


More to come.....
 
Last edited:
Re: My 11th Doctor's Sonic Screwdriver remote (Sort of) rebuild (More like prop repli

NMR, don't want to spoil it at all for you , because I think the re-build so far is very good, but to get 'working claws' you need a method of fixing the torsion spring into the claw and allowing the claws to pivot ( or spring open) from the head. I followed Annakin's lead using a separate claw holder, as this can be fixed exactly as you need it to allow the springs to work for you as they rest on the claw holder., I used the original 'hollow' claws from the Wand Co's sonic as they already have the pivot holes in exactly the right position, as well as being ground at the ends to allow the claws to 'lock' into place around the emmiter head when the sonic is in the closed position. Fit the springs as shown in either Annakin's and Kurosawa's threads , ( in your case you'll have to drill out the ends to allow the springs to fit in , once in place, I filled the claws with jb weld ) or epoxy putty ) to lock the spring in place. I used an acryllic tube as a 'placement guide' in my 'copper' cage , this allowed the emmiter core and head to move smoothly up and down with little lateral motion. Once assembled this makes for a gentle 'flick of the wrist motion' to open the sonic, as can be seen on the video and in the photos on my forum post.

I also use glass acryllic opaque white paint, a quick pour into the emmiter head and then let it drain, and dry gives a good 'marbley' effect when lit with a high bright green LED.
 
Re: My 11th Doctor's Sonic Screwdriver remote (Sort of) rebuild (More like prop repli

Good advice. In my original build I used torsion springs for the claw action. As I am no longer using the hollow claws from the remote I am no longer going to use torsion springs. I will use the same method for the sping action claws as used in the filming prop! :D

The insides are something I am still working out as I want the gentle flick motion as well.

The emiter and acryllic paint......hmmmm.....

Thanks
 
Re: My 11th Doctor's Sonic Screwdriver remote (Sort of) rebuild (More like prop repli

Oh, so you mean exactly as Nick did, that's a bit ambitious as like you, I have no CNC or engineering tool access, I had to rely on what I could model and cast , so I do wish you well , if you've seem photos of Nicks build you 'll know he used brass tubing to set his base core and emmiter rod straight as one fit's inside the other telescopically , if that's the case, then I'm thinking it should look almost the same, as you have gone with the better shaped copper 'waist' ring , which will differentiate it from the Sonic Remote conversions , I do intend to cast the head and arms and the copper cage , separately in pewter and then assemble and electroplate the copper parts , as this is the only way I'll be able to recreate the more accurate shape of the original. . If you want a very smooth action , may I suggest using a hypo srynge , as this makes an excellent 'piston' I went and created my own inner core as I wanted to add a 'glowing core' effect and needed the room to add UV led's.
 
Re: My 11th Doctor's Sonic Screwdriver remote (Sort of) rebuild (More like prop repli

And I absolutely LOVE the glowing effect you did on yours! Top notch!

The claws.....well, I should have said.....'mostly' just like the original prop, but with my ability to make modifications.

Hmmmm.....piston......I'm still working out the inner core details. There is something brewing in the back of my mind......But I don't have a plan on how to do it just yet. I have more of a 'thing'....a thing is like a plan, just not fully formed!
 
Re: My 11th Doctor's Sonic Screwdriver remote (Sort of) rebuild (More like prop repli

Seeing as how the aluminum part on the remote is not accurate and will not easily work with the claws....

Back to Dan to see about printing one of those, or something and to my surprise and delight.....He has an extra one from the one he just built.

For the record, Dan's generosity and assistance and support in this project has been the ONLY reason I am where I am today. I literally would NOT be close to having a truly accurate metal replica without him. (I don't know if I will get 100% accurate out of this as I am combining remote parts with this, etc. but good enough for me)

SAM_1281_zps2ad8cf7e.jpg


SAM_1282_zps005385a8.jpg


"So happy together.........."

SAM_1283_zps1b97f593.jpg


SAM_1284_zpsfb1a2406.jpg
 
Re: My 11th Doctor's Sonic Screwdriver remote (Sort of) rebuild (More like prop repli

Is the aluminium part sanded in those photos or is it straight after the 3D printing process?
 
Re: My 11th Doctor's Sonic Screwdriver remote (Sort of) rebuild (More like prop repli

The aluminum parts isn't 3d printed, it is cnc machined
 
Re: My 11th Doctor's Sonic Screwdriver remote (Sort of) rebuild (More like prop repli

Not too much of an update.

After an hour or so of wet sanding with 800 grit paper, then buffing with .0000 steel wool. The aluminum slider looks like this.

SAM_1287_zps6cc61cff.jpg


SAM_1288_zpsbde11698.jpg


And on to copper plating 101. Googled a DIY site (Several actually)
And after some root killer (copper sulfate) a 9 volt battery, two alligator clips and a copper plumbing fitting.....and two hours or so.....

SAM_1289_zps06bceb5c.jpg


SAM_1290_zpsc10c68c2.jpg


And I found that you CAN leave them in too long. The cage part is plating right now. I put it in and got distracted with other stuff and went back 6 hours later. The plating was so thick it was lumpy! I had to get the Black and Decker mouse out and sand it all back down. It's in it's second dip as the next application did not cover it so well. Made up a fresh batch pf poison and started again!

And again, thanks to Dan, who I would not be doing this without! I started out asking for claws and he we began talking he started helping me beyond belief. I am only doing a minimal amount of work and assembly. He really put in all of the R&D and sweat on this. I am simply benefiting from it. It reminds me of the glory days of the RPF all those years ago.

Forever Grateful!
 
Re: My 11th Doctor's Sonic Screwdriver remote (Sort of) rebuild (More like prop repli

Have to say it's looking really good, remember you need to 'fix' the inner emitter core to the out side head an arms, so it extends out when you 'flick' . I do like the way you've machined the outer head and arms , care here, has meant you get a better more accurate outline , that really 'sells' it in my opinion , you' re going to have a cracking replica when you finish !


Sent from my iPad using Tapatalk HD

Thank you for the compliments. Again though, Dan (Anakin Starkiller) has done all of the work. He made the silver slider part, I am only a receipient of his kindness.
 
Re: My 11th Doctor's Sonic Screwdriver remote (Sort of) rebuild (More like prop repli

Dan is certainly an unsung hero , I did myself use a couple of his ideas in making mine, so "All hail to Dan!!" , you're not doing to bad yourself !!
 
Re: My 11th Doctor's Sonic Screwdriver remote (Sort of) rebuild (More like prop repli

NMR, out of curiosity, how much did it cost to get the cage printed up.

I'm currently staring at my 11th and 10th Doctors' remotes and thinking about how much I want to make my 11th remote as good as the 10th's now is. Your build is both giving me a lot of hope that, that is possible AND some ideas that will lead me to spend a good chunk of change converting it. I figured I'd ask at least so I could start planning ahead.

The build is seriously looking great though, and I'm really jealous of everything I'm seeing here. Can't wait for the next update.

-Nick

I was thinking about that too, though I would do this after my current conversion is completed
 
Re: My 11th Doctor's Sonic Screwdriver remote (Sort of) rebuild (More like prop repli

I didn't think anyone was following this thread so I have not updated it. I will have to post some progress pics soon then. Dan (Anakin Starkiller) did all the work, I just bought the parts from his Shapeways page. (ddstokes) I order them in stainless steel and then spent the next few days sanding. I'll throw some more progress pics up in a few days. Go check out his Shapeways page, you can order it from there.
 
Re: My 11th Doctor's Sonic Screwdriver remote (Sort of) rebuild (More like prop repli

I've been following from the beginning and have loved this build, it even got me inspired to look into electroplating methods. (This is what I think I'm going to follow: High Quality (and Safe) Copper Plating )

So I definitely look forward to any and all updates you have, and I'll try not to lurk so much so you actually know someone is here reading. :lol Even though you have some high quality milled pieces mixed in, the entire build seems more feasible than a scratch build like Anakin Starkiller's, which gives me hope for my eventual build. So keep going, man!

On another note, I can't seem to find ddstokes on Shapeways. Is it possible it's case sensitive?

-Nick
 
Re: My 11th Doctor's Sonic Screwdriver remote (Sort of) rebuild (More like prop repli

If anyone else is having trouble finding it, here is a link:
ddstokes on Shapeways
Some really awesome looking parts available.

The ones designated with a NMR at the end were the ones he drew specifically for my remote conversion, so you know, they fit nicely!

I'll try to get some more pics up tonight, if I get a chance.
 
Re: My 11th Doctor's Sonic Screwdriver remote (Sort of) rebuild (More like prop repli

The ones designated with a NMR at the end were the ones he drew specifically for my remote conversion, so you know, they fit nicely!

I'll try to get some more pics up tonight, if I get a chance.

Can't wait to see the latest progress. I'm going to start obsessively refreshing this page now so I don't miss it. Haha

-Nick
 
Re: My 11th Doctor's Sonic Screwdriver remote (Sort of) rebuild (More like prop repli

And so here we are with an update. Thanks again for looking.

Here are three of the copper pieces. The center collar, the ring between the handle and grip and the tail piece. The ring is a copper gasket from a 1976 moped. (Thanks again Dan) and has a nicer look to it than the ring the sonic came with. The end piece is the Wand Company part as it really is not far off. At least not so far that I can't live with it. I did have to strip off the clear coat and re-plate it as it was a much shinier copper than the other parts. I clear coated all of them to protect them from tarnishing.

SAM_1291_zpsd5318011.jpg


Here is the ring between the handle and grip.

SAM_1293_zpsa9f357f8.jpg


And here is the copper slider, now copper. I have not clear coated it yet.

SAM_1292_zpsb9331bcc.jpg


And the silver slider, copper slider and collar all together.

SAM_1295_zpsd83434e1.jpg


And a group shot....not connected yet.

SAM_1294_zps2d4b7b64.jpg


Next up, I went to hobby lobby and bought some rubber, resin and dye. MoleRat's gonna learn molding and casting!

I still need to figure out the springs and claws. A few attempts have not worked so well.
 
This thread is more than 8 years old.

Your message may be considered spam for the following reasons:

  1. This thread hasn't been active in some time. A new post in this thread might not contribute constructively to this discussion after so long.
If you wish to reply despite these issues, check the box below before replying.
Be aware that malicious compliance may result in more severe penalties.
Back
Top