Archive&Future
Sr Member
Okay so I'd like to preface this by saying that we are not trying to create a 100% 'accurate to the measure' gun here, there will be differences in its construction and shapes in areas that only the most seasoned PKD experts would notice. This is for fun and as a challenge to ourselves
Recently Blade Runner the Final Cut was showing at the Duke of York's cinema down in Brighton, where my good friend Jem works. We both went to see it with a small group of freinds (yes, it was an incredible experience) and both of us got all fired up about making a pair of Deckard's beautiful PKD, one for each of us. Our plans started off without massive ambition, but in the end we reckoned....go hard.....or go home.....
THUS, here is our work so far. It's been a steep learning curve already despite my modest experience in metalwork, but a very valuable learning curve.
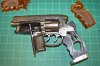
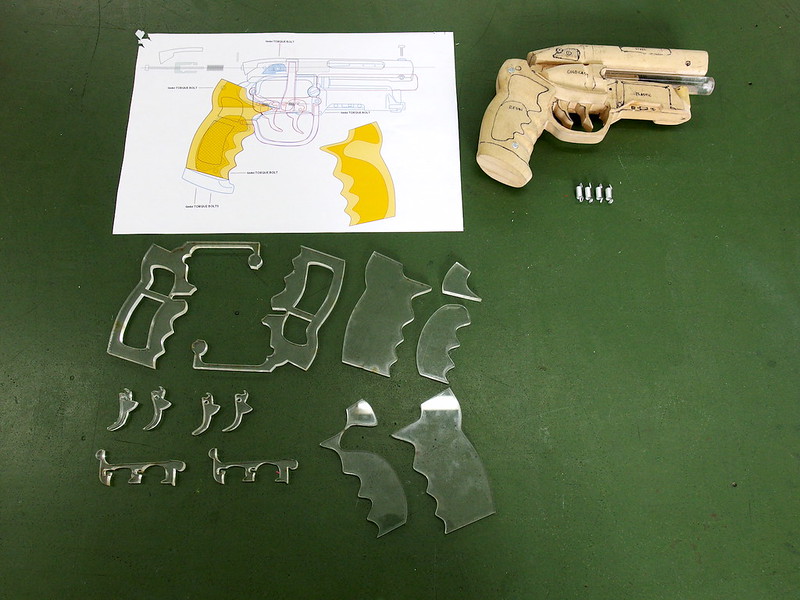
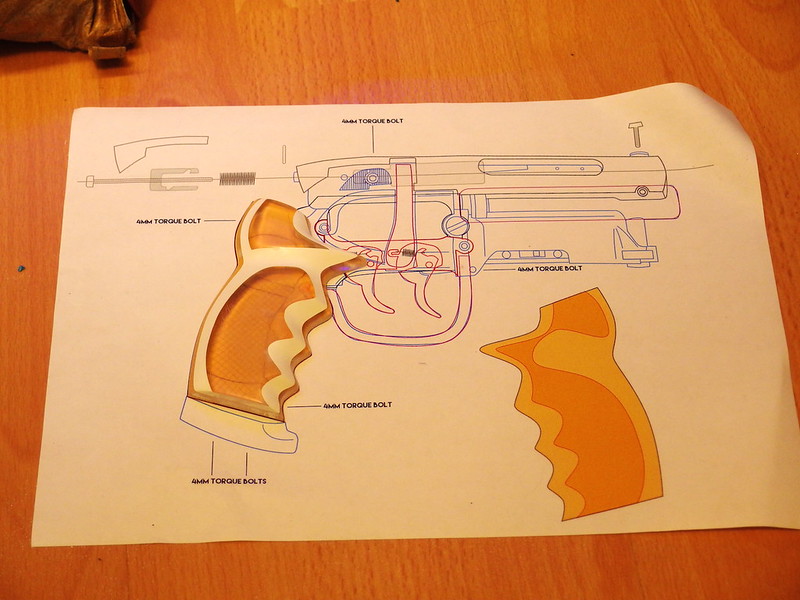
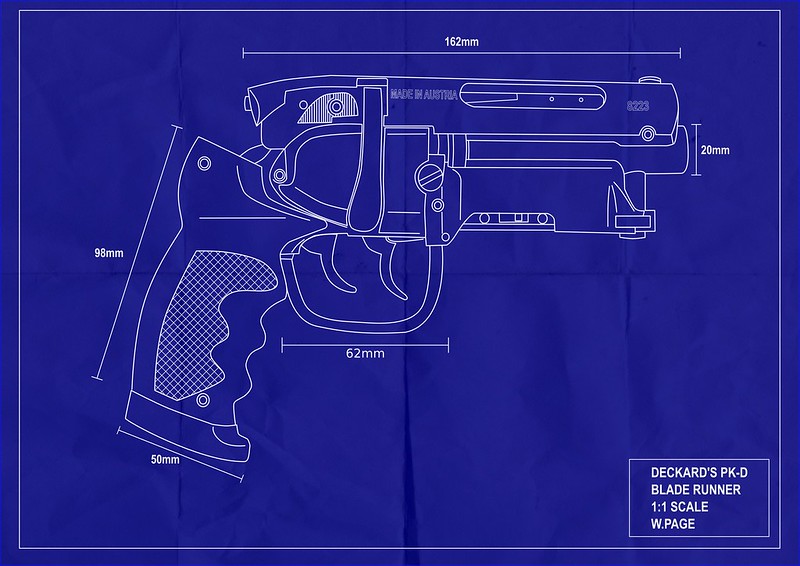
Several years ago I had small plans to start a PKD however I shelved the idea until a few weeks ago. I'd already drawn up a blueprint based on a conglomeration of the original, Adam Savage's collection, and the Tomenesuke blaster. I can't even remember where I got the measurements from though
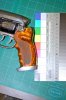
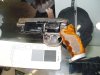
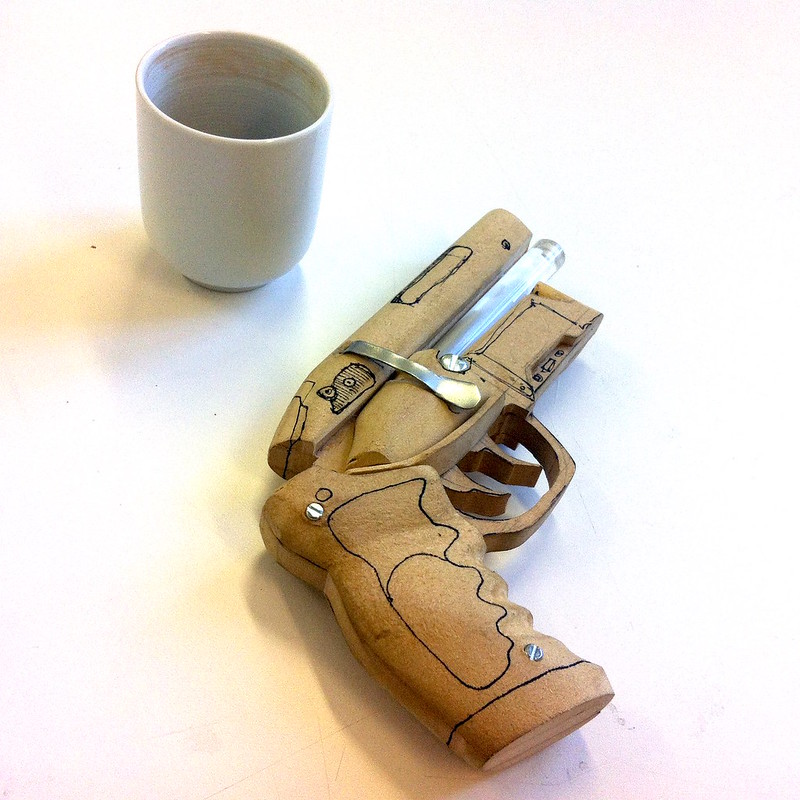
At any rate, after a pretty avid discussion with Jem I decided to mock up an MDF gun to get an idea of size and shapes
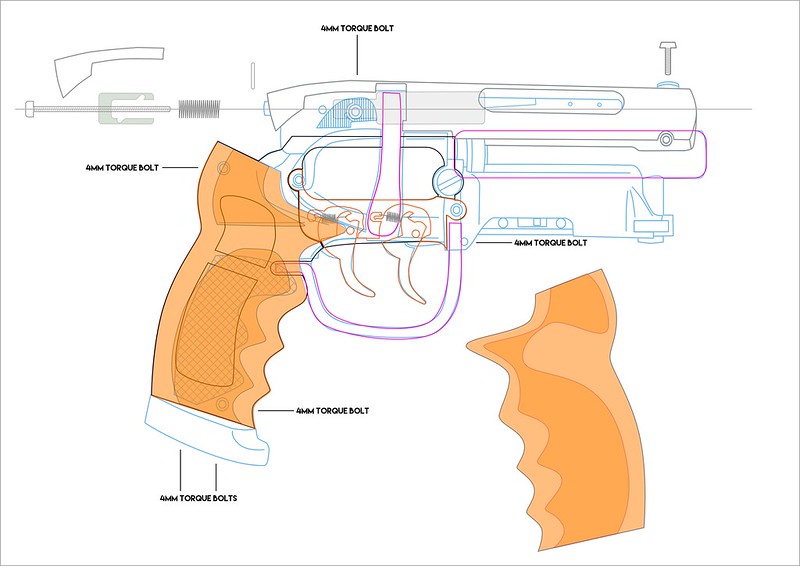
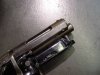
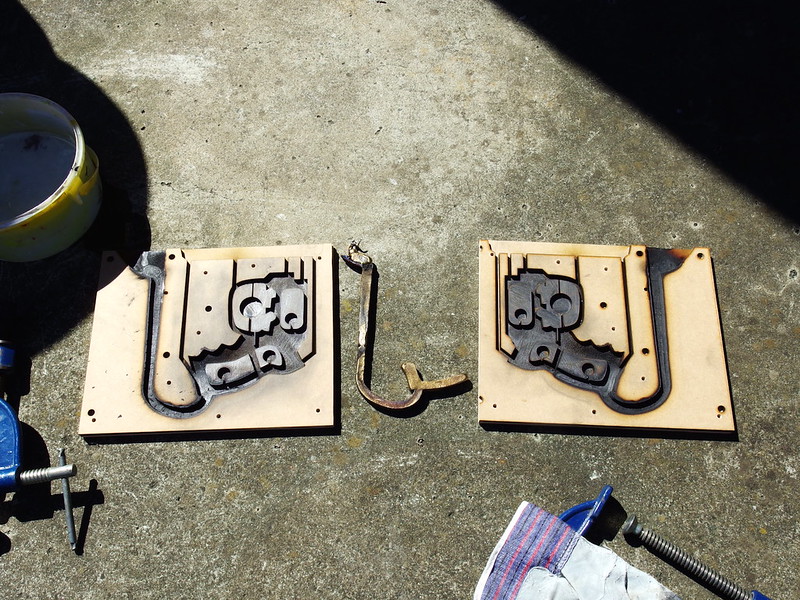
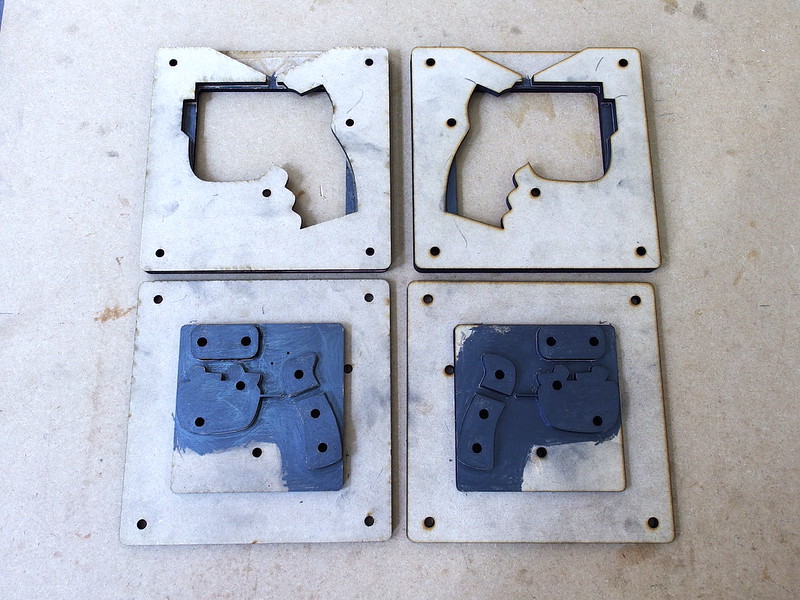
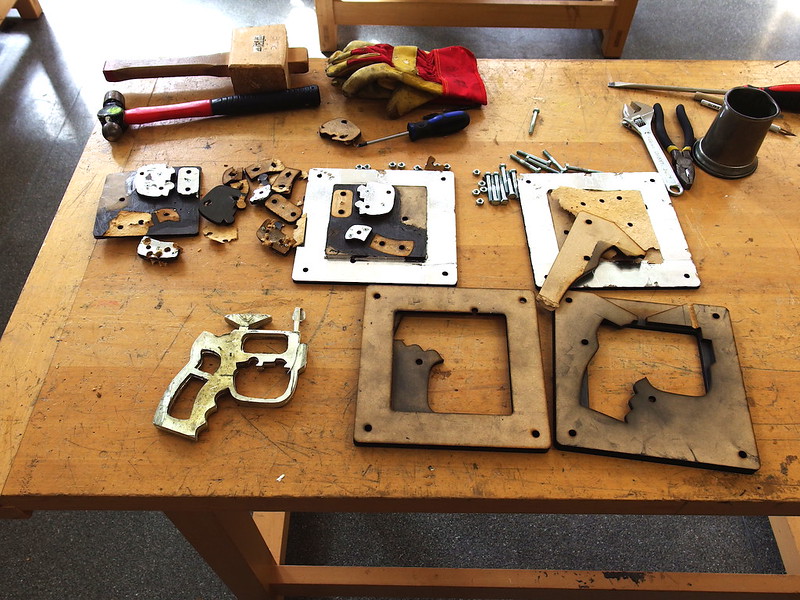
I decided how the gun should be broken down, as we both want this to be a glue-free prop as much as possible, nice and dismantle-able. From that, I laser cut a 2 part MDF mould which I would pour pewter into. I coated all the important parts in graphite to ease cast releasing.
However by the time I actually had the time to do the casting, I had been doing research on various metal casting techniques and metals.....my old secondary school workshop where John (yes I mean John, I'm not just misspelling Jem [they are two very separate people]) and I regularly go to use has a massive stack of aluminium ingots, as you can probably guess, John and I get on really well with our old teachers so they said it was fine for us to cut off a block and melt it down. It took 15 minutes, with two propane canister torches to melt down the aluminium, but it cooled so quickly that even during the pour it was hardening.
Then the MDF mould started billowing smoke and we had to rapidly break the mould apart and water cool the cast metal down. It was all very exciting, the teachers and the class were fully distracted in the best possible sense")
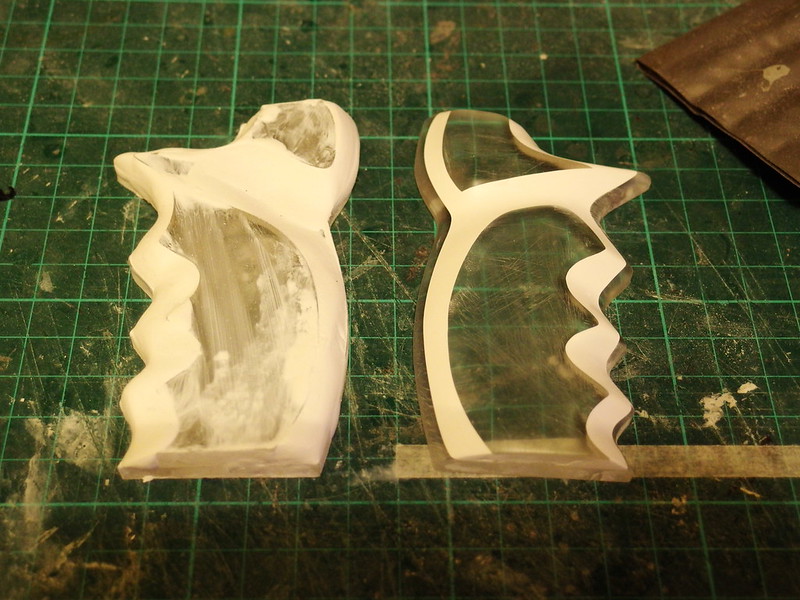
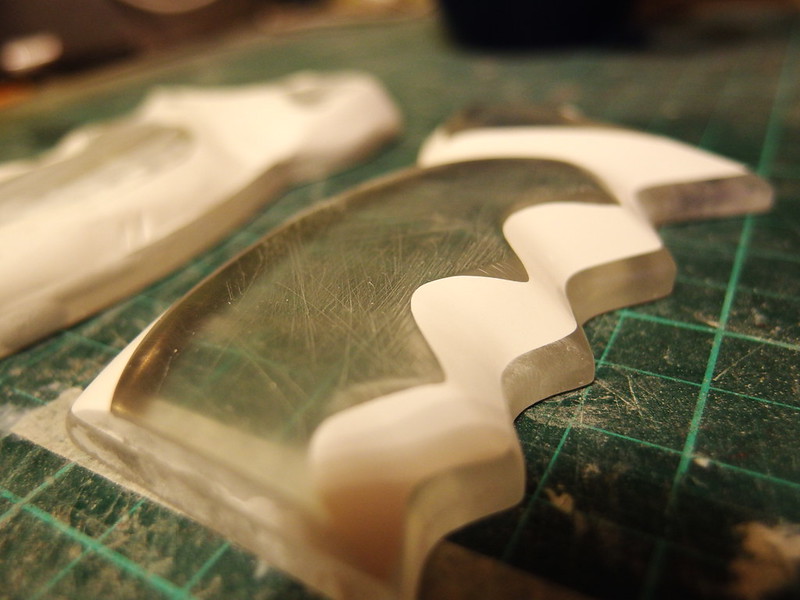
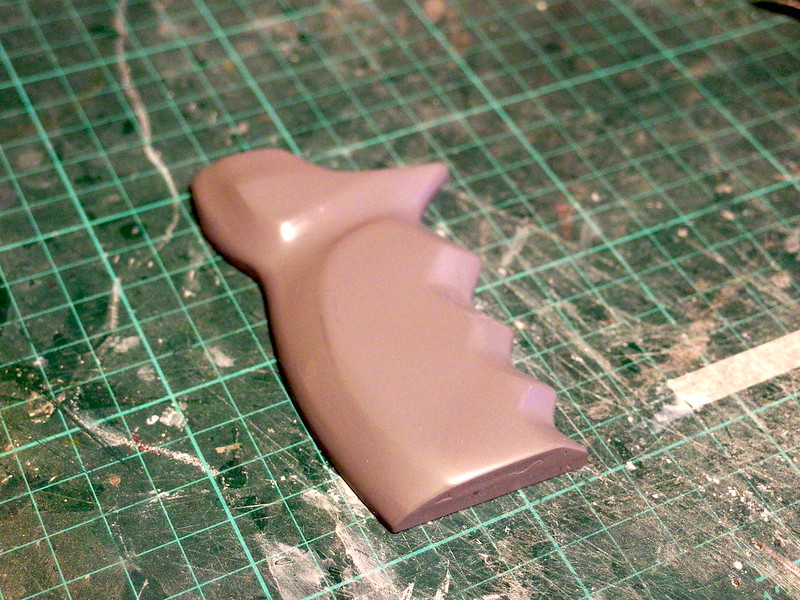
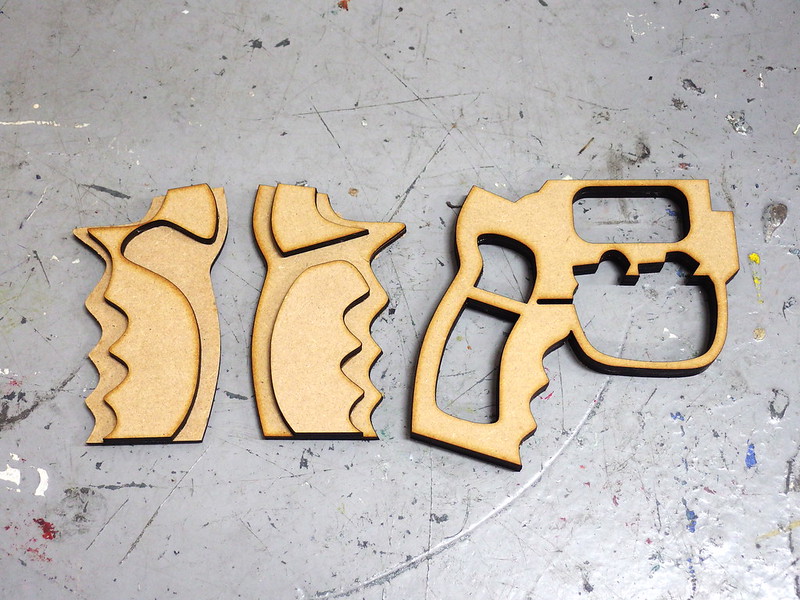
Jem and I decided to try sandcasting in aluminium the next day, so I laser cut a 'stamp' and also the handle grips which Jem is going to sculpt with Milliput and patience.
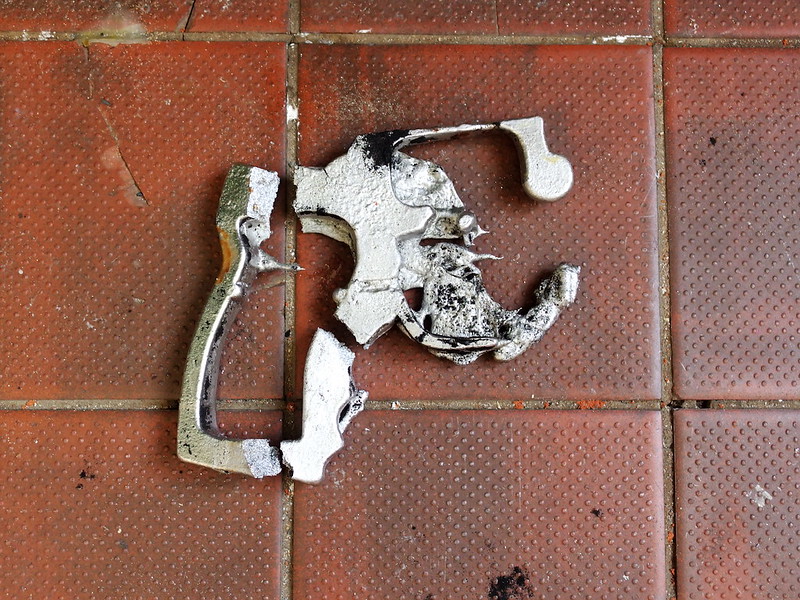
Anyway sand casting didn't work either, the SAND set alight and we ended up with a blob mess.
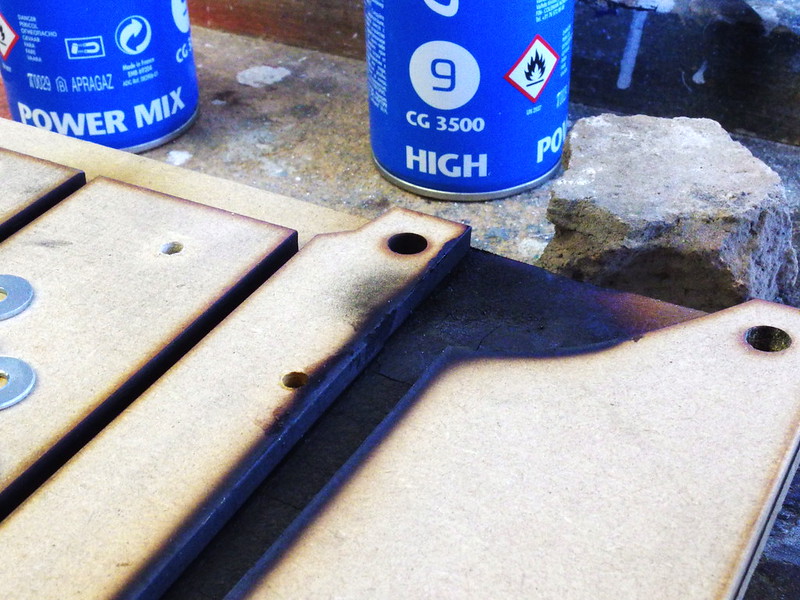
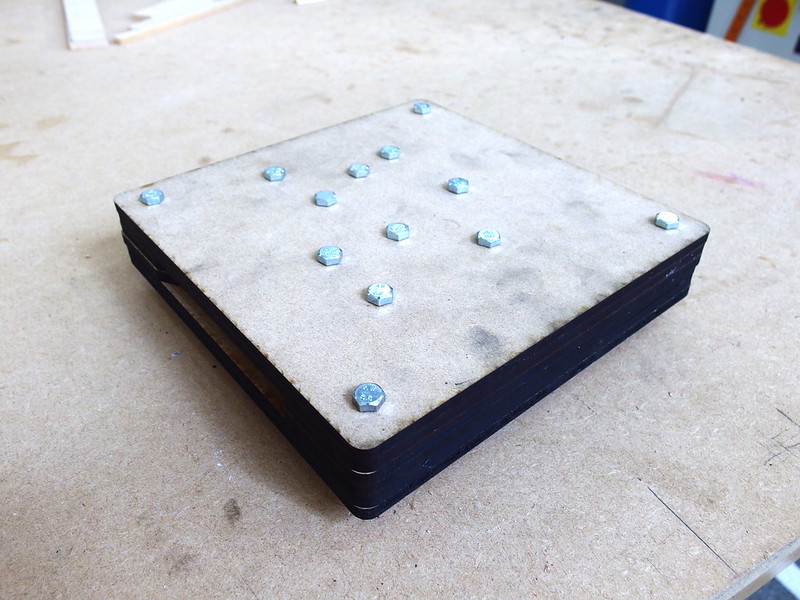
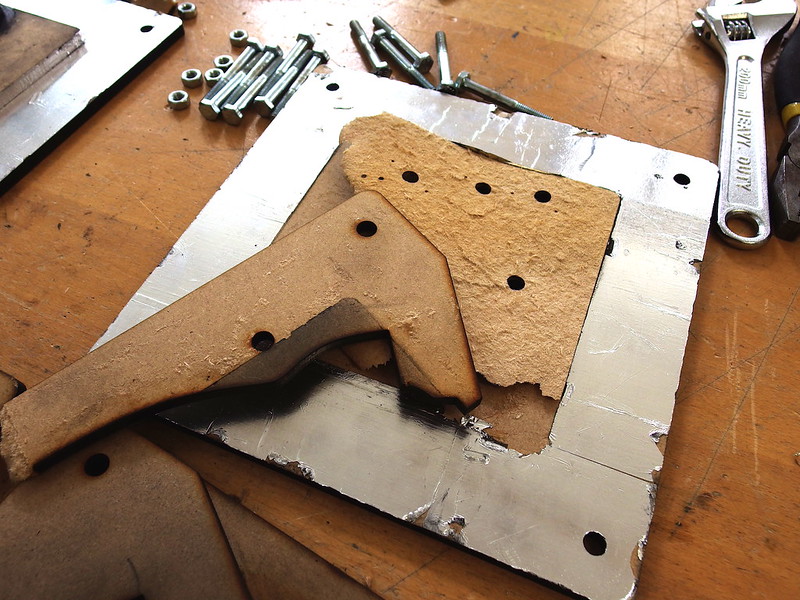
Pewter seemed the best bet, so I designed a new 4-part MDF mould, graphite and aluminium tape coated for release and heat protection (I forgot to take photos of it with the foil until afterwards)
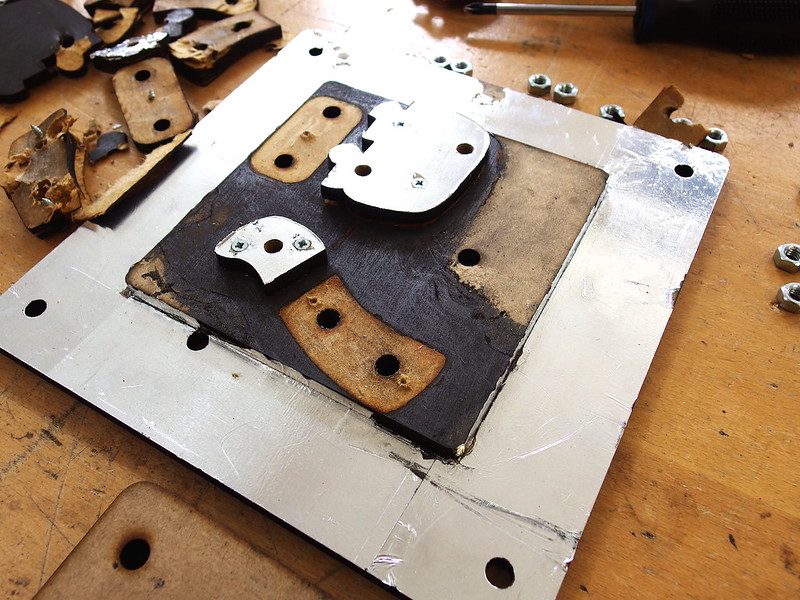
First cast had issues........mould was slightly damaged as the glue melted under the heat
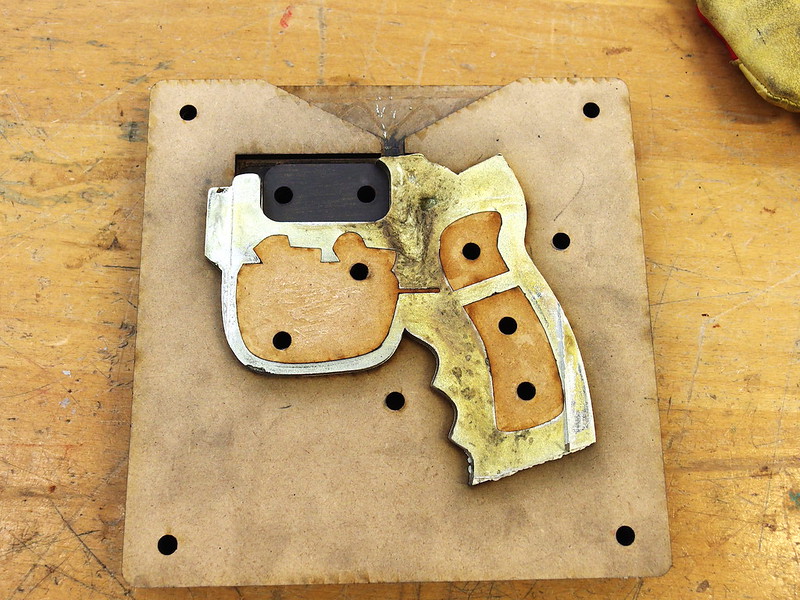
Second cast? Much better, but the mould was decimated! NICE
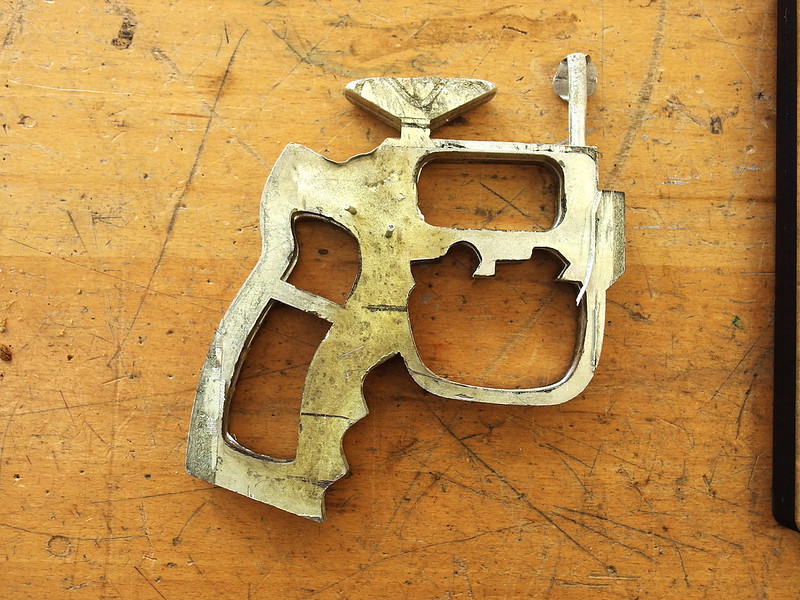
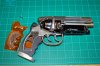
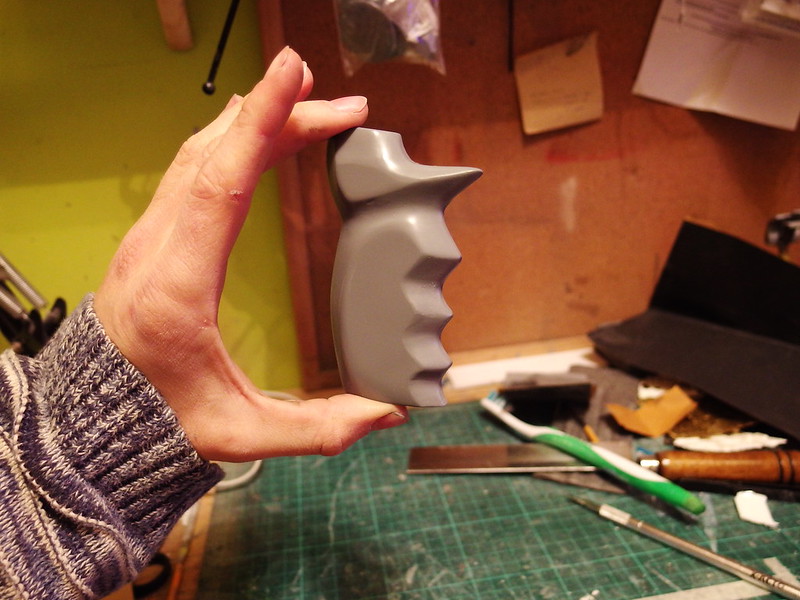
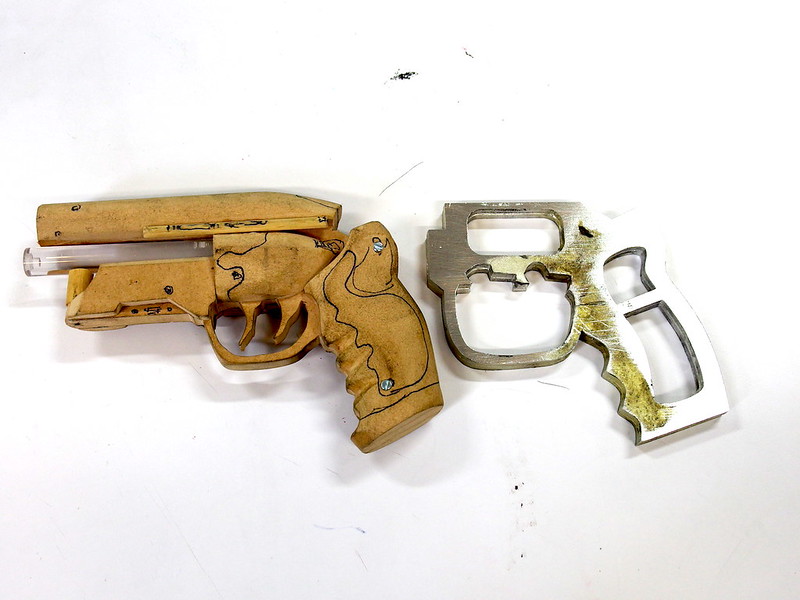
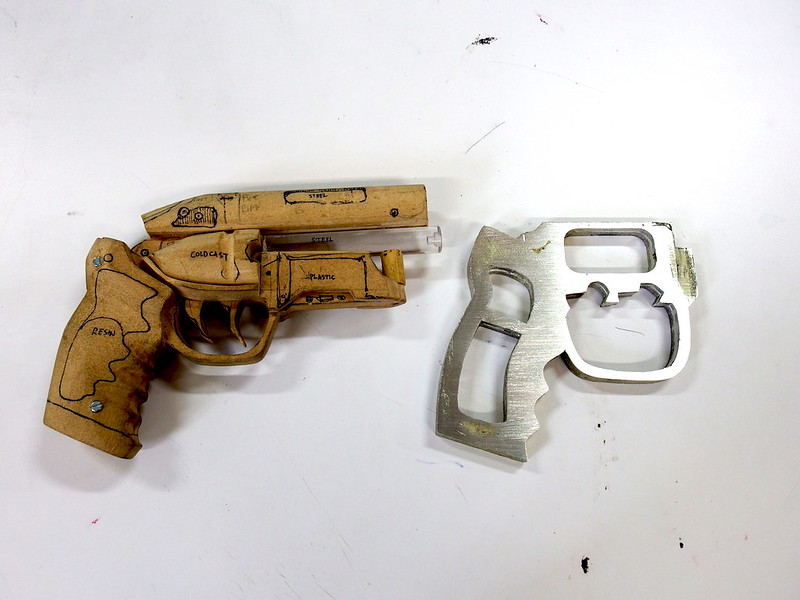
As you can see here, our MDF mockup was about 20% too small (I have very small hands). Anyway, thankfully we can make another set of moulds and get on with casting the second frame next week
Thanks for reading, subscribe for more!
Recently Blade Runner the Final Cut was showing at the Duke of York's cinema down in Brighton, where my good friend Jem works. We both went to see it with a small group of freinds (yes, it was an incredible experience) and both of us got all fired up about making a pair of Deckard's beautiful PKD, one for each of us. Our plans started off without massive ambition, but in the end we reckoned....go hard.....or go home.....
THUS, here is our work so far. It's been a steep learning curve already despite my modest experience in metalwork, but a very valuable learning curve.
Several years ago I had small plans to start a PKD however I shelved the idea until a few weeks ago. I'd already drawn up a blueprint based on a conglomeration of the original, Adam Savage's collection, and the Tomenesuke blaster. I can't even remember where I got the measurements from though
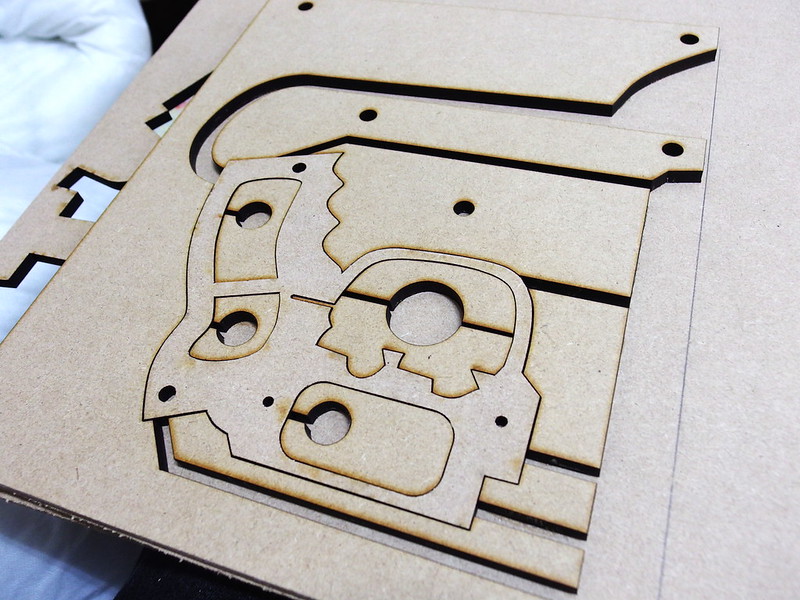
At any rate, after a pretty avid discussion with Jem I decided to mock up an MDF gun to get an idea of size and shapes
I decided how the gun should be broken down, as we both want this to be a glue-free prop as much as possible, nice and dismantle-able. From that, I laser cut a 2 part MDF mould which I would pour pewter into. I coated all the important parts in graphite to ease cast releasing.
However by the time I actually had the time to do the casting, I had been doing research on various metal casting techniques and metals.....my old secondary school workshop where John (yes I mean John, I'm not just misspelling Jem [they are two very separate people]) and I regularly go to use has a massive stack of aluminium ingots, as you can probably guess, John and I get on really well with our old teachers so they said it was fine for us to cut off a block and melt it down. It took 15 minutes, with two propane canister torches to melt down the aluminium, but it cooled so quickly that even during the pour it was hardening.
Then the MDF mould started billowing smoke and we had to rapidly break the mould apart and water cool the cast metal down. It was all very exciting, the teachers and the class were fully distracted in the best possible sense
Jem and I decided to try sandcasting in aluminium the next day, so I laser cut a 'stamp' and also the handle grips which Jem is going to sculpt with Milliput and patience.
Anyway sand casting didn't work either, the SAND set alight and we ended up with a blob mess.
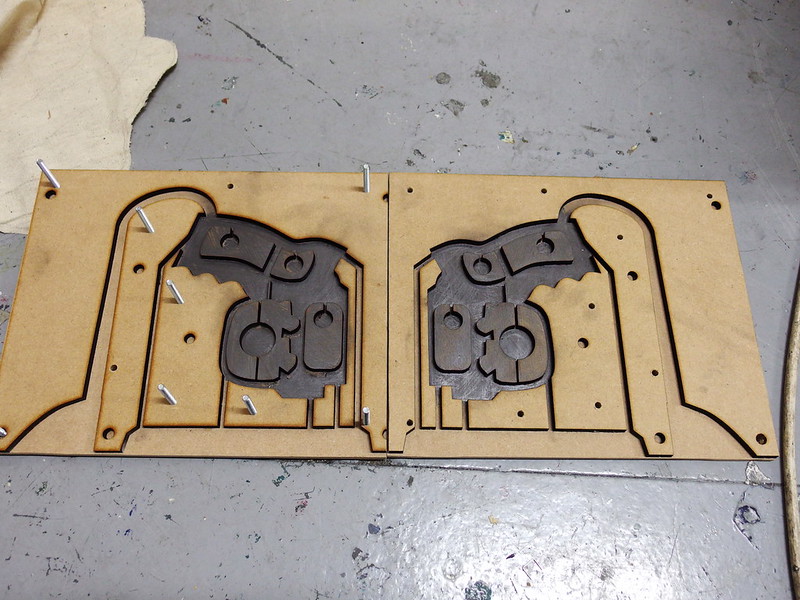
Pewter seemed the best bet, so I designed a new 4-part MDF mould, graphite and aluminium tape coated for release and heat protection (I forgot to take photos of it with the foil until afterwards)
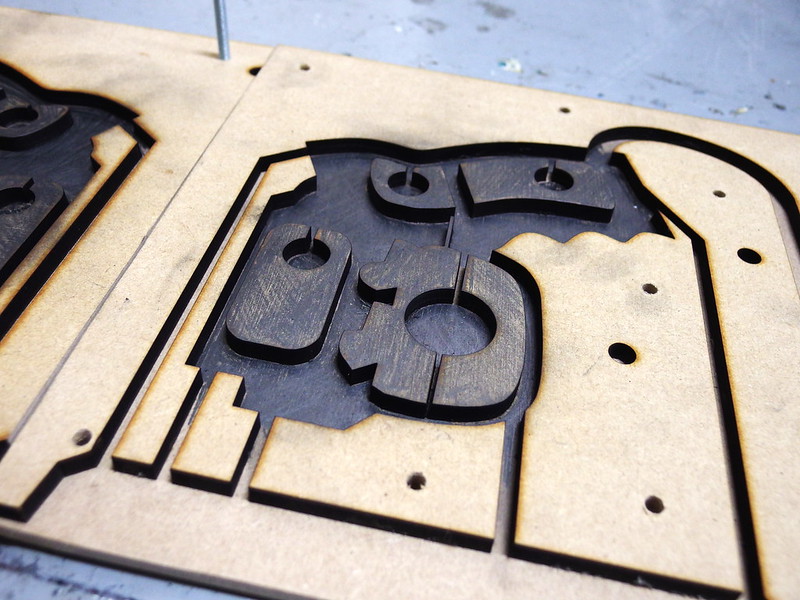
First cast had issues........mould was slightly damaged as the glue melted under the heat
Second cast? Much better, but the mould was decimated! NICE
As you can see here, our MDF mockup was about 20% too small (I have very small hands). Anyway, thankfully we can make another set of moulds and get on with casting the second frame next week
Thanks for reading, subscribe for more!