star-art
Sr Member
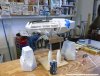
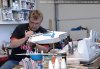
This has been in the works for quite a while. A few years ago I had the opportunity to study and measure a copy-casting made from the original studio miniature (courtesy of a good friend). I began making patterns for a scratchbuild and worked on them as time permitted.
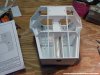
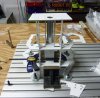
Earlier this year I wrapped up and delivered a battlestar body build for a client and I finally had time to get some work done on this shuttle project. It took over two months to develop the patterns, mainly because I wanted to include an authentic looking interior. As far as I know, this has never been done before.
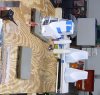
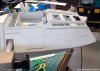
Even after pouring through screen captures and original set blueprints, it was very difficult to tell exactly how they configured the cabin set. I finally decided to just build it full size (in CG) and see how well I could match what we saw on screen. This turned out pretty well. Plus, I learned quite a bit about the original set in the process.
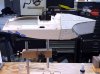
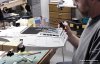
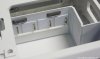
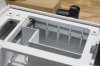
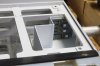
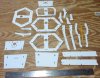
While creating this mockup, I was able to derive patterns for the instrument panel, console, pilot’s seats, and passenger seats. Those will be further fine-tuned prior to 3D printing. All that remains to build are the joystick controls and some misc. small details.
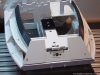
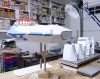
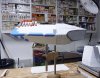
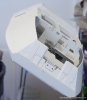
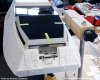
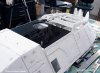
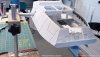
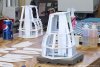
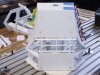
Once I was satisfied with the mockup, the next step was to see how well it would fit inside the studio miniature. Not surprisingly, it did not fit at all. The set is much too narrow — and WAY too long — to be placed inside a “real” shuttle. As a result, I was forced to shorten it dramatically. Then, I had to find a way to “cheat” the width to get the seats far enough outboard so they were underneath the windows.
While I had to make quite a few modifications in the process, the results still look pretty good. It may not be a perfect match to what we saw on screen, but I feel it is more than close enough to proceed.
Please see attached for some renders of the full-size set mockup and also the modified version test-fitted inside a (CG) replica of the studio model.
Earlier this year I wrapped up and delivered a battlestar body build for a client and I finally had time to get some work done on this shuttle project. It took over two months to develop the patterns, mainly because I wanted to include an authentic looking interior. As far as I know, this has never been done before.
Even after pouring through screen captures and original set blueprints, it was very difficult to tell exactly how they configured the cabin set. I finally decided to just build it full size (in CG) and see how well I could match what we saw on screen. This turned out pretty well. Plus, I learned quite a bit about the original set in the process.
While creating this mockup, I was able to derive patterns for the instrument panel, console, pilot’s seats, and passenger seats. Those will be further fine-tuned prior to 3D printing. All that remains to build are the joystick controls and some misc. small details.
Once I was satisfied with the mockup, the next step was to see how well it would fit inside the studio miniature. Not surprisingly, it did not fit at all. The set is much too narrow — and WAY too long — to be placed inside a “real” shuttle. As a result, I was forced to shorten it dramatically. Then, I had to find a way to “cheat” the width to get the seats far enough outboard so they were underneath the windows.
While I had to make quite a few modifications in the process, the results still look pretty good. It may not be a perfect match to what we saw on screen, but I feel it is more than close enough to proceed.
Please see attached for some renders of the full-size set mockup and also the modified version test-fitted inside a (CG) replica of the studio model.


")