You are using an out of date browser. It may not display this or other websites correctly.
You should upgrade or use an alternative browser.
You should upgrade or use an alternative browser.
1:1 Millennium Falcon Cockpit Replica - Group Build
- Thread starter SteveStarkiller
- Start date
Take a good look people... this is what a passionate fan is all about. The love that is put into every detail is simply amazing. The time is astounding and the work is unbelieveable. Greg... You are an inspiration not only to me, but to everyone around you. I just wish I had a 10th of the passion and dedication you have! I can't speak for everyone else, but THANK YOU! You really are one of my icons!
trainman
Well-Known Member
So at some point, it looks like you will need to work on this with the garage door closed. Otherwise, maybe you can remove some of your storage shelves in the back and move them to a different wall so that you can shove the whole cockpit back further. Whether or not that will fix your height vs. garage door issue, I guess only you know.
jbergenudd
New Member
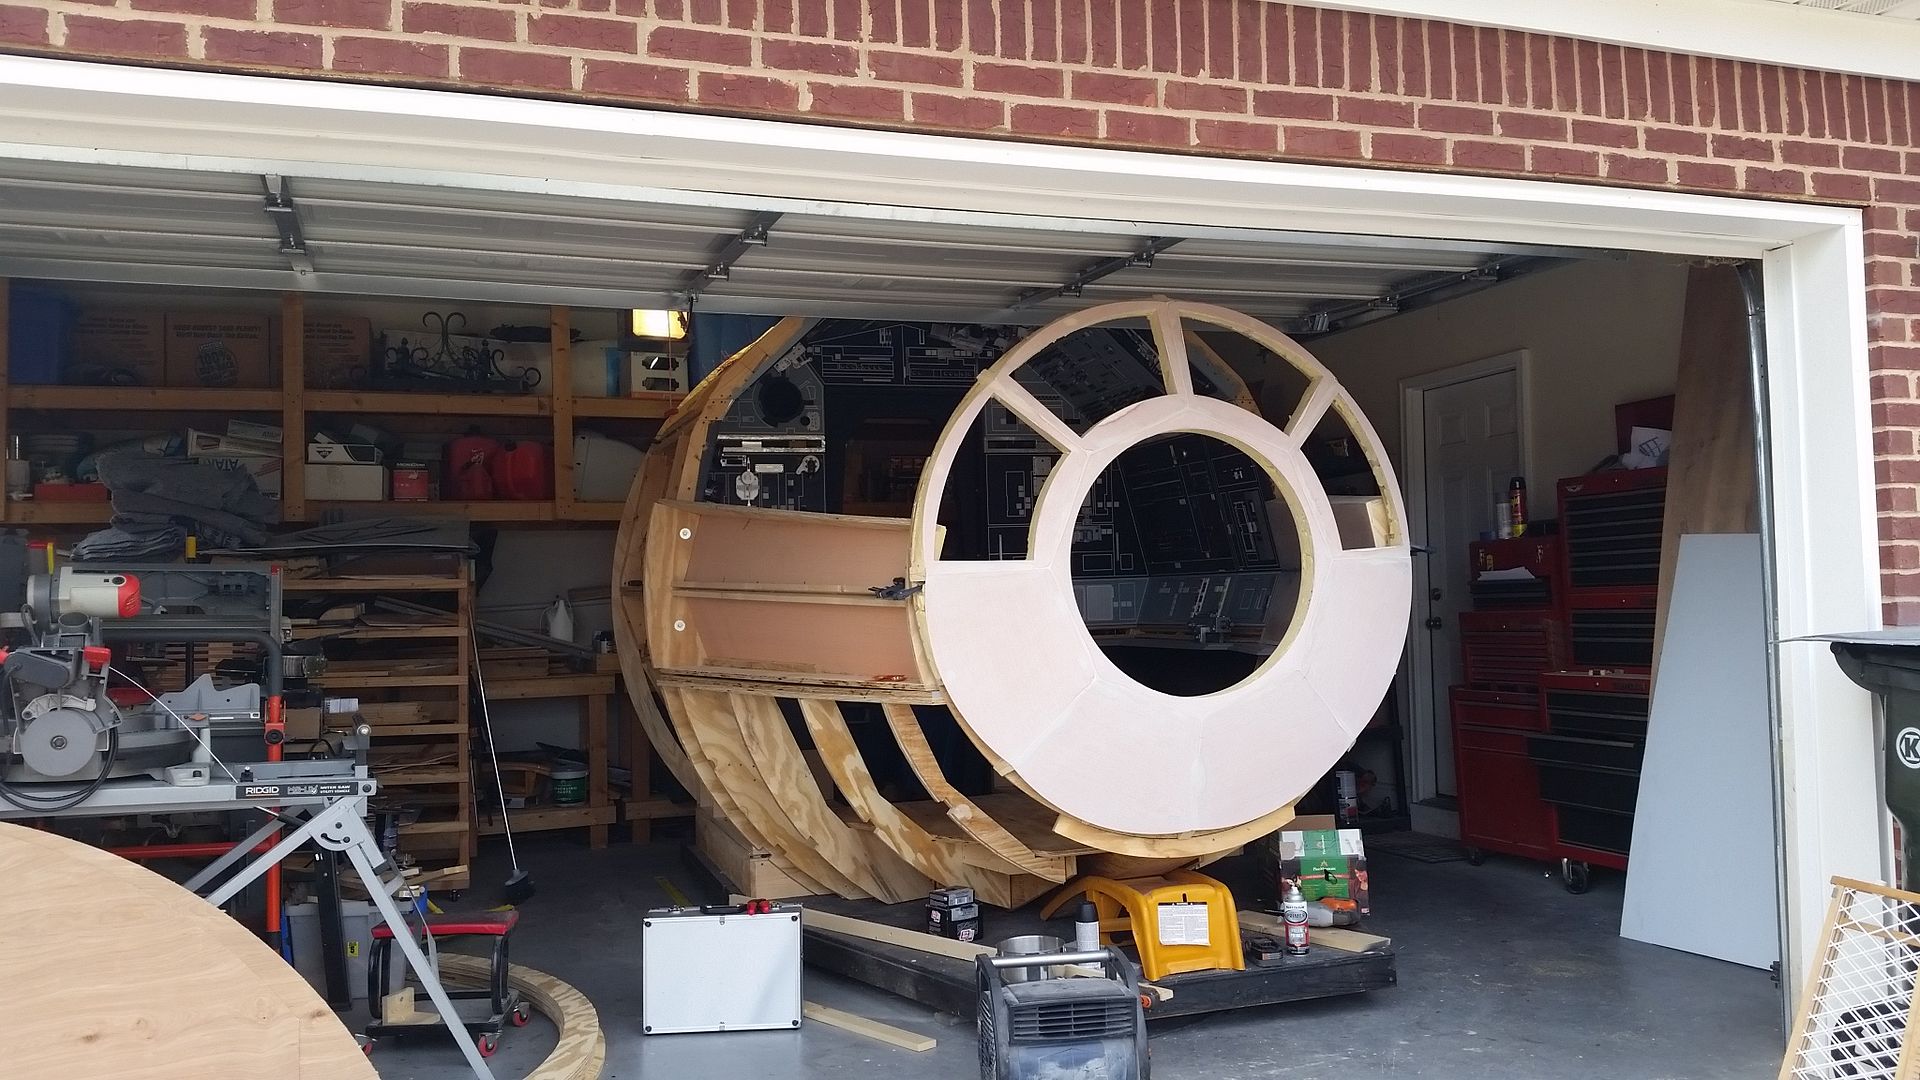
That's awesome! You can really see how massive it's going to be...
Smeeon
New Member
Hey Guys, Daniel here, I've been reading the comments and following loosely silently. But so many comments lately really got to me, you guys are why I keep helping on this project. The real fans of physical props and practical effects. If you had told me 10 years ago that I'd be working on such an amazingly accurate replica of the millennium falcon cockpit I don't think I would have believed any of it.
as our friend Wayne has stated "we're doing the kind of stuff and being the kind of people that our 12yo selves would high five"
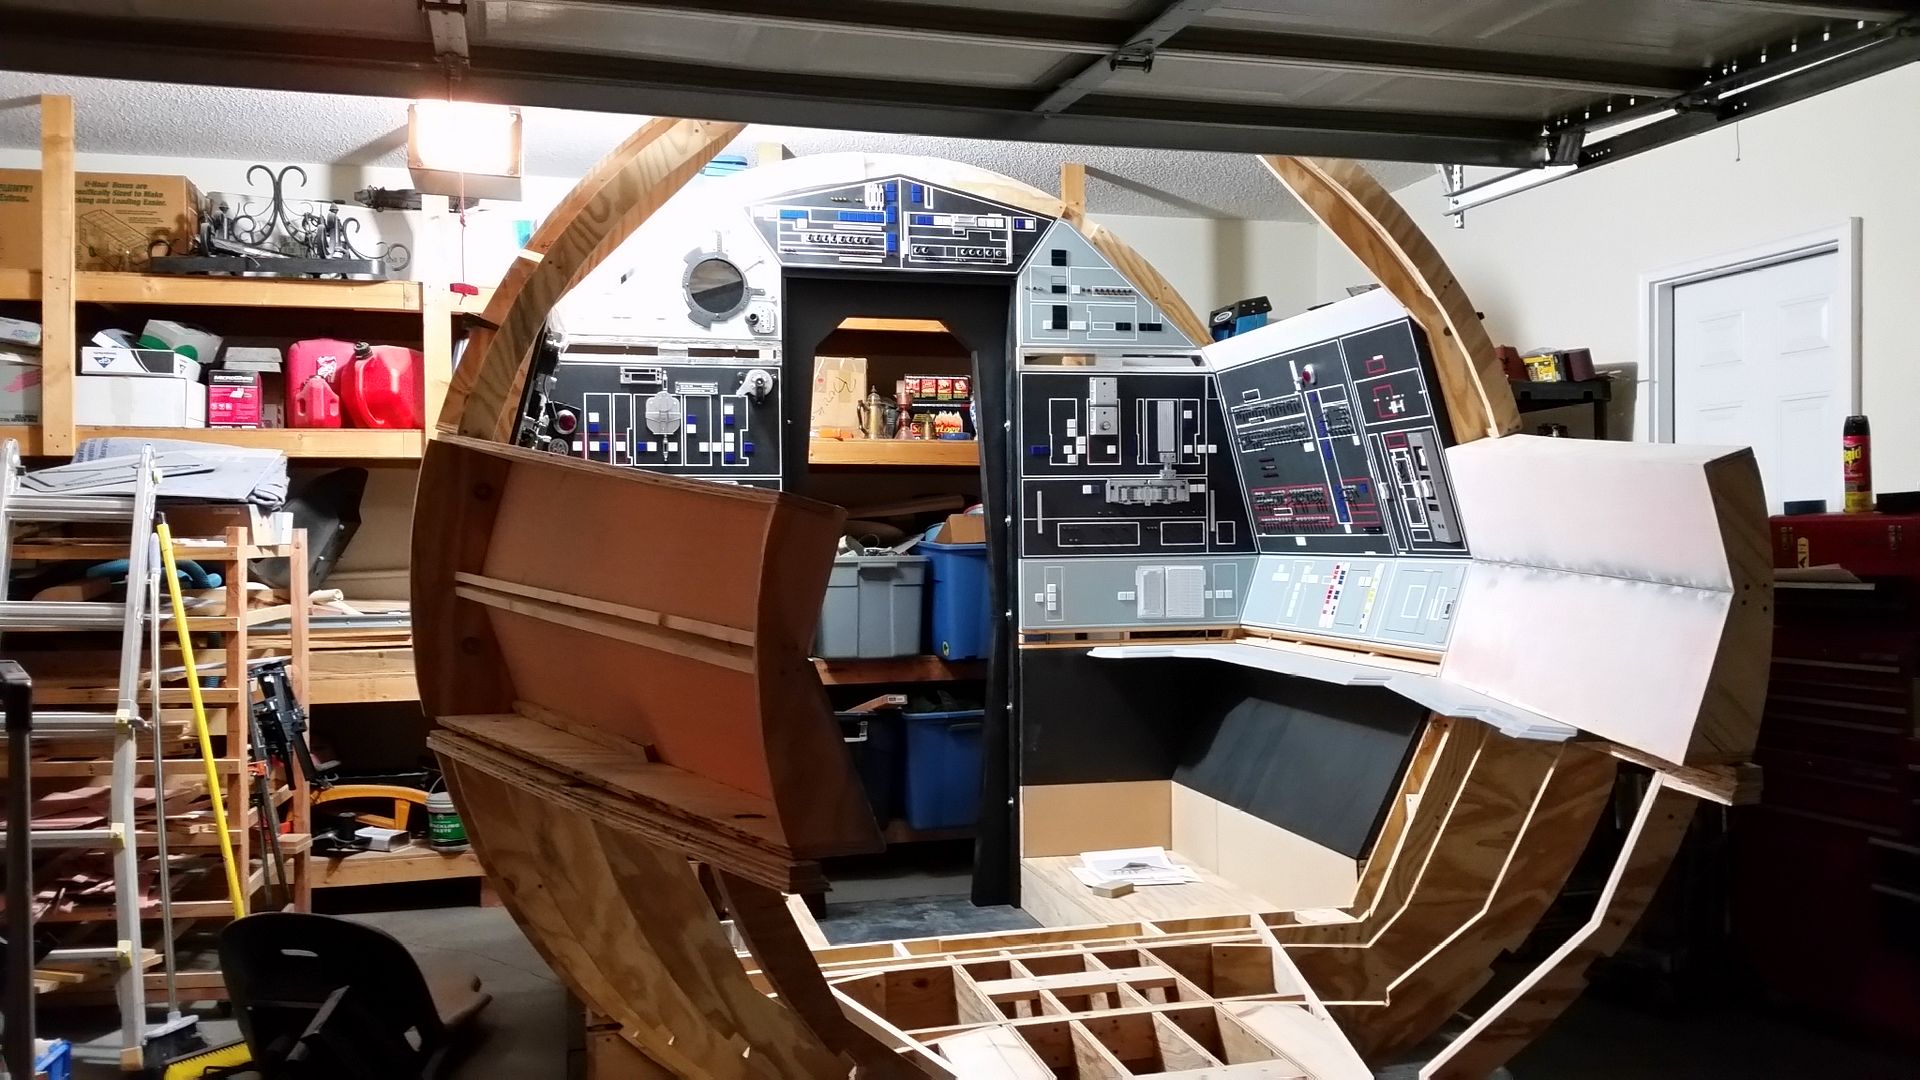
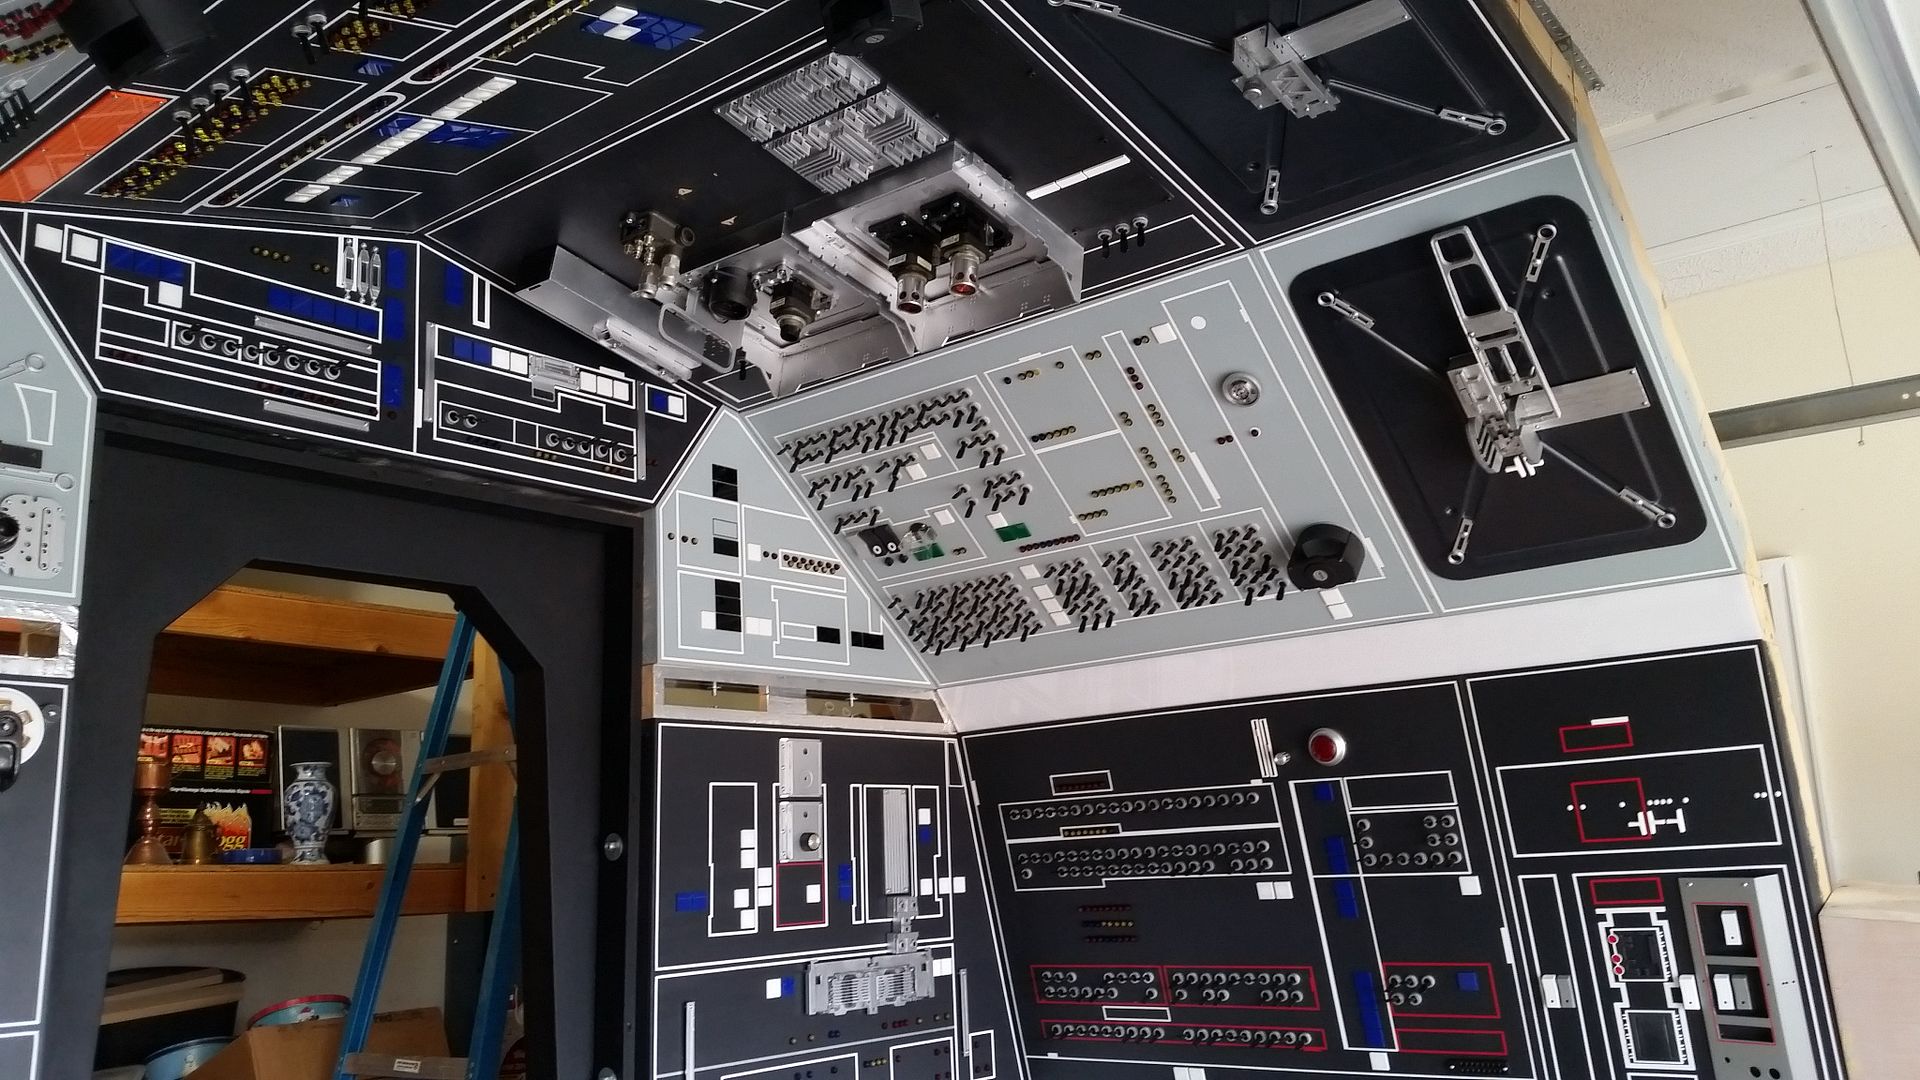
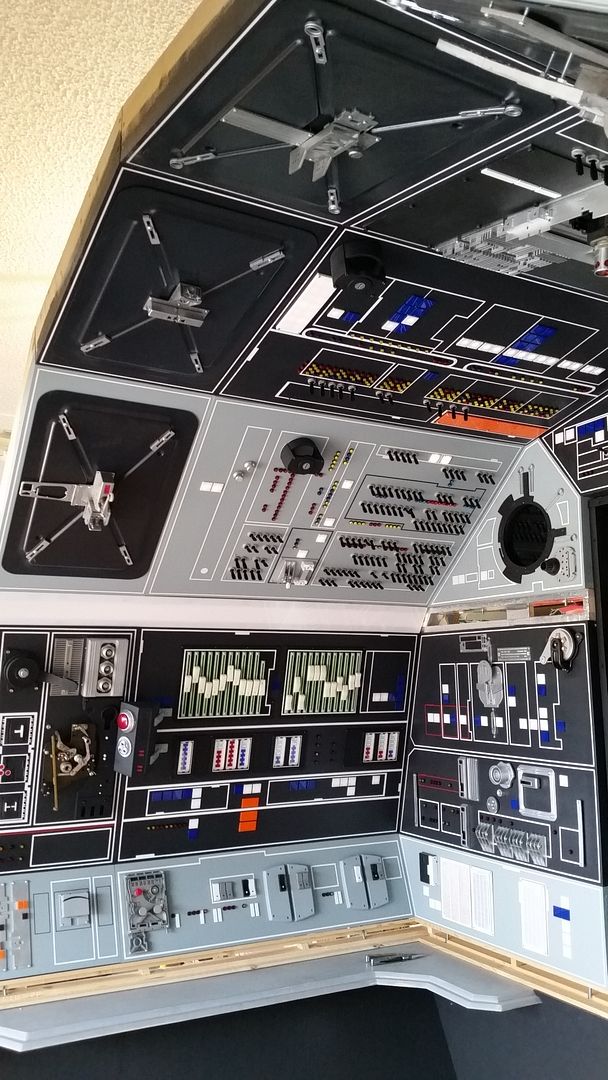
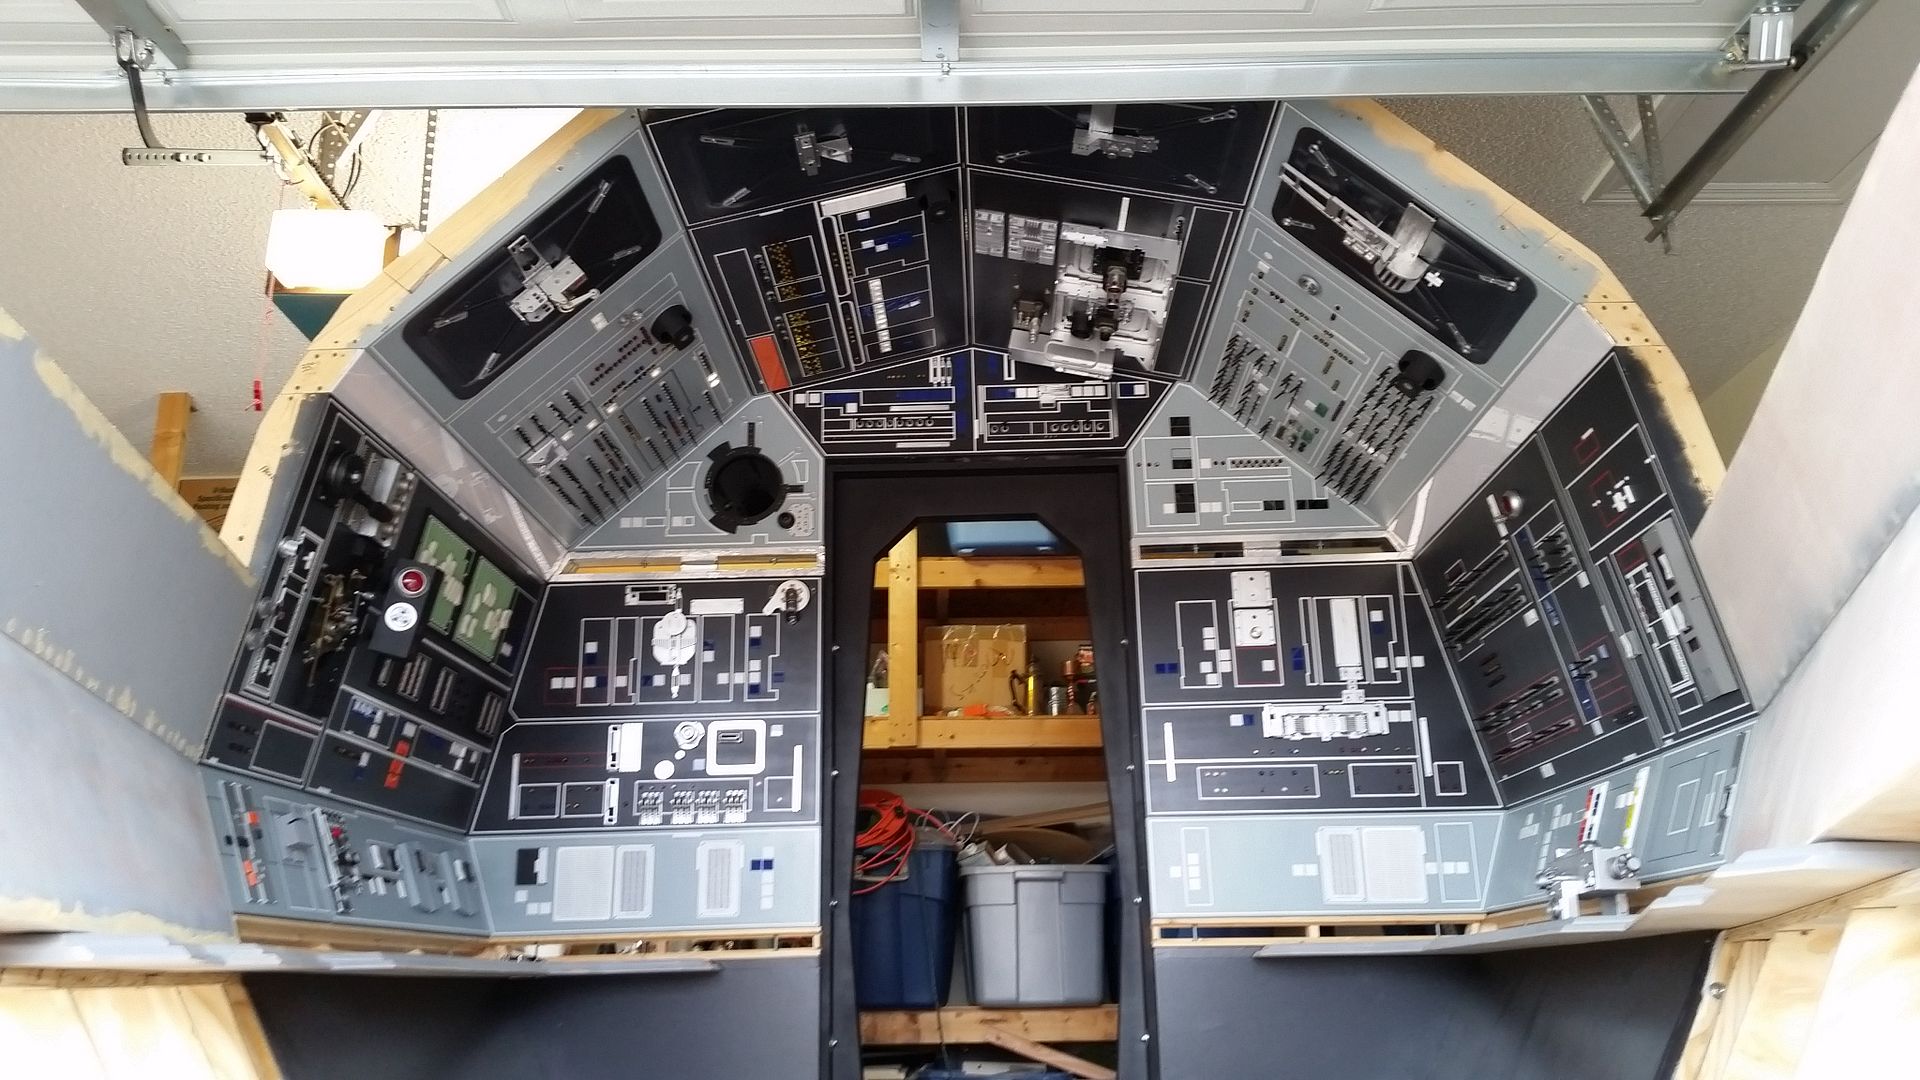
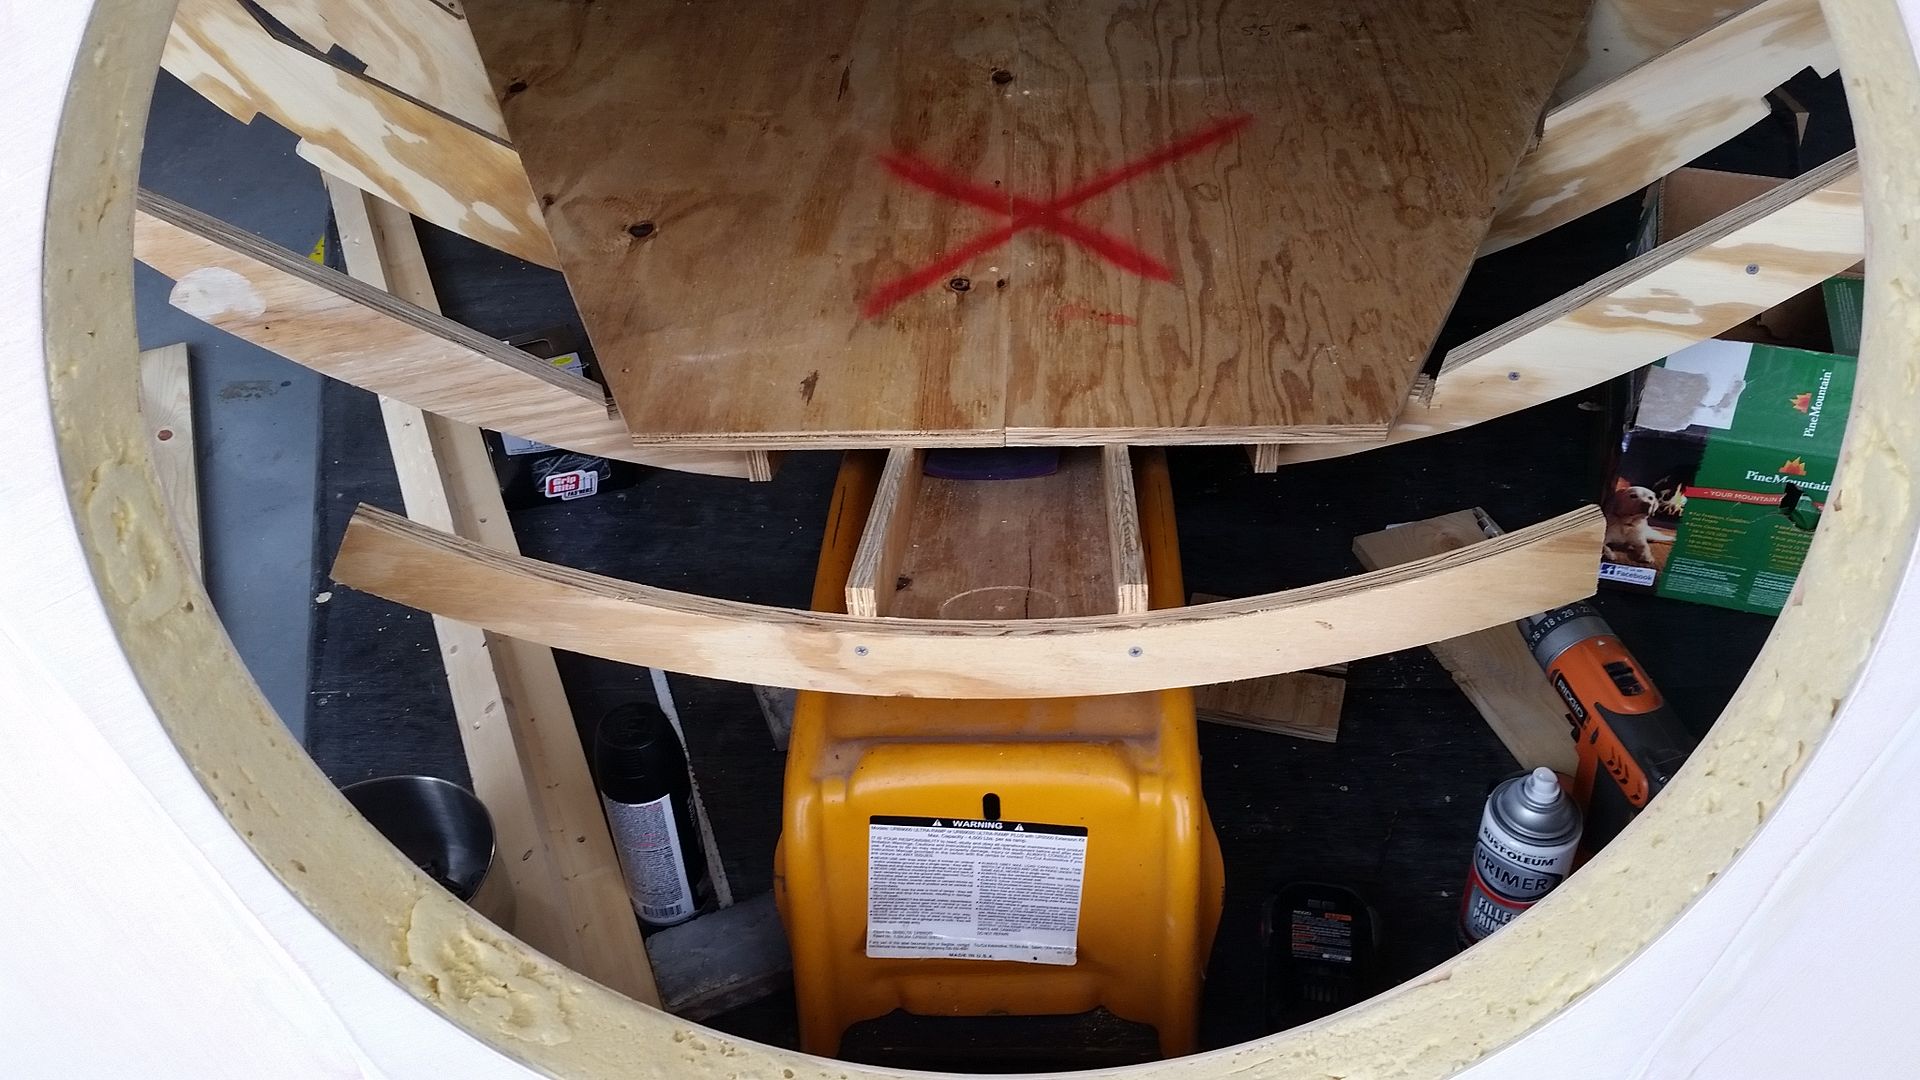
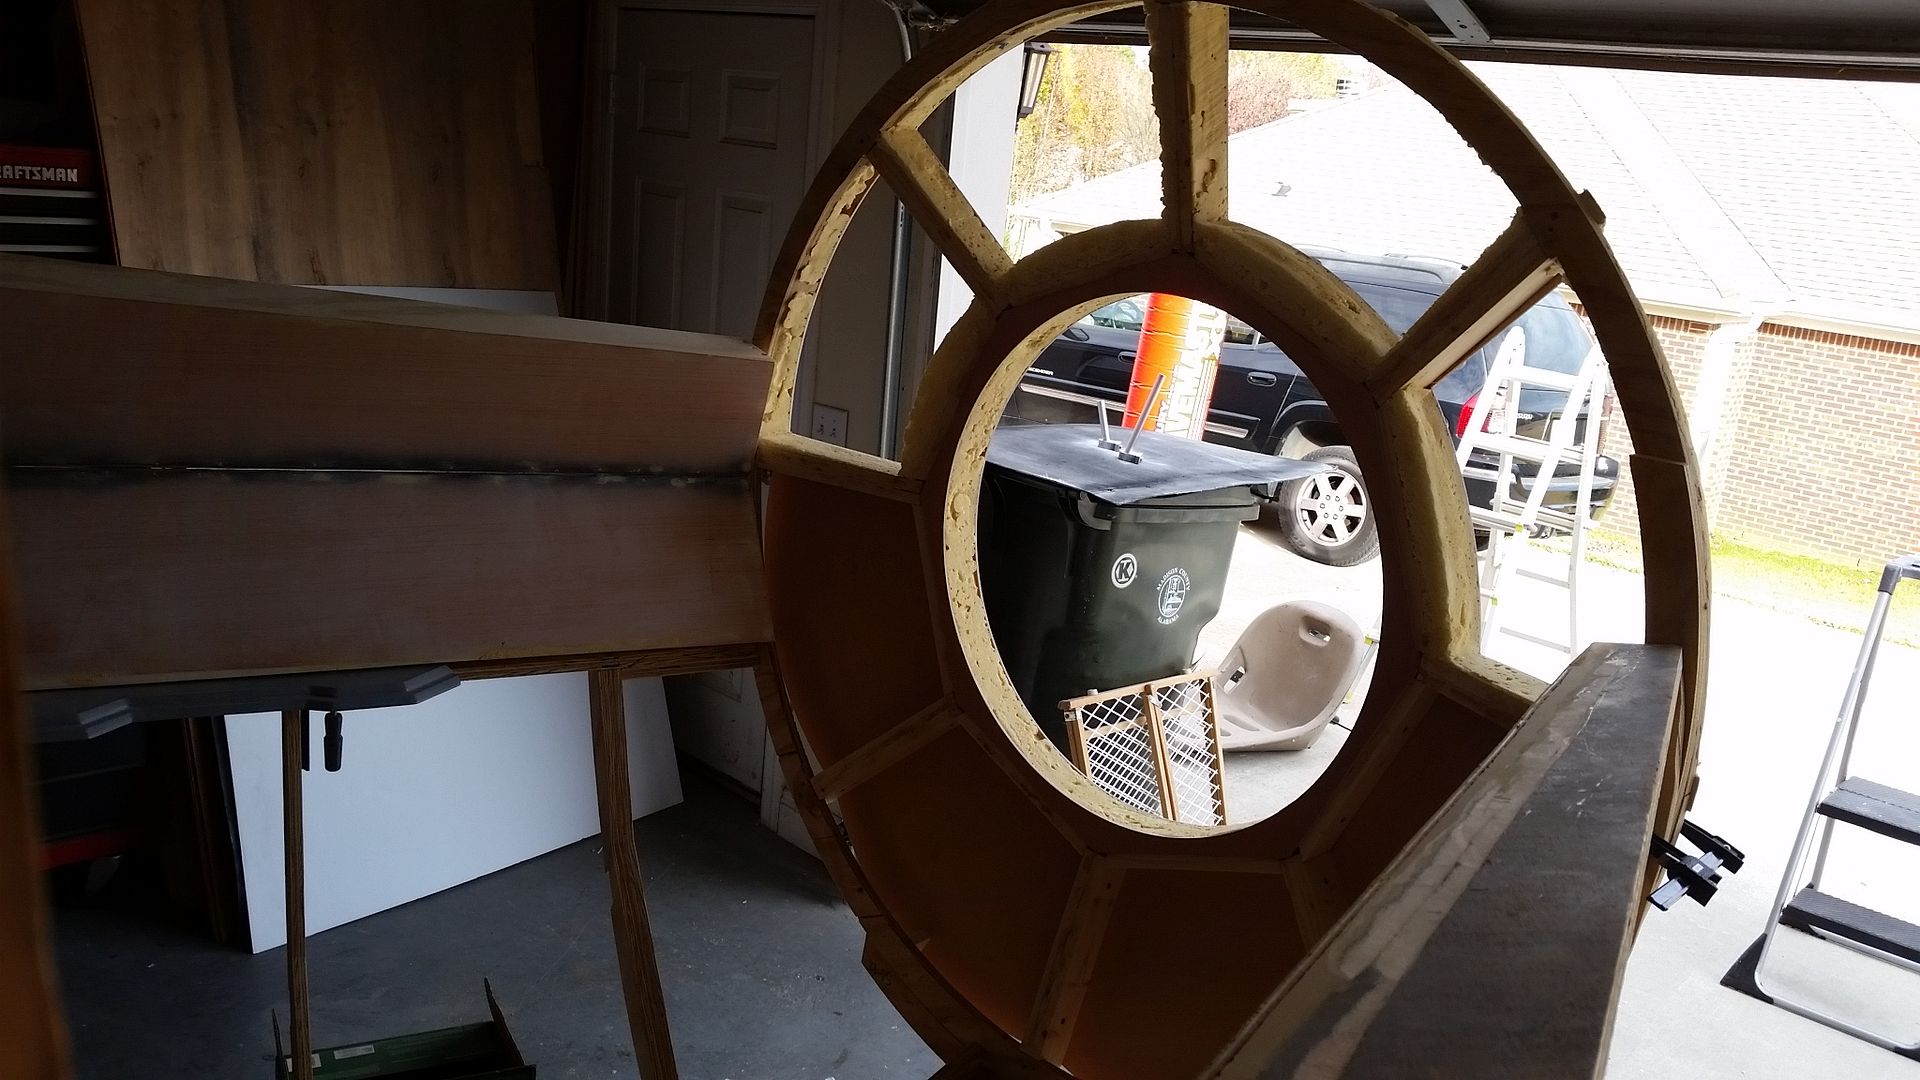
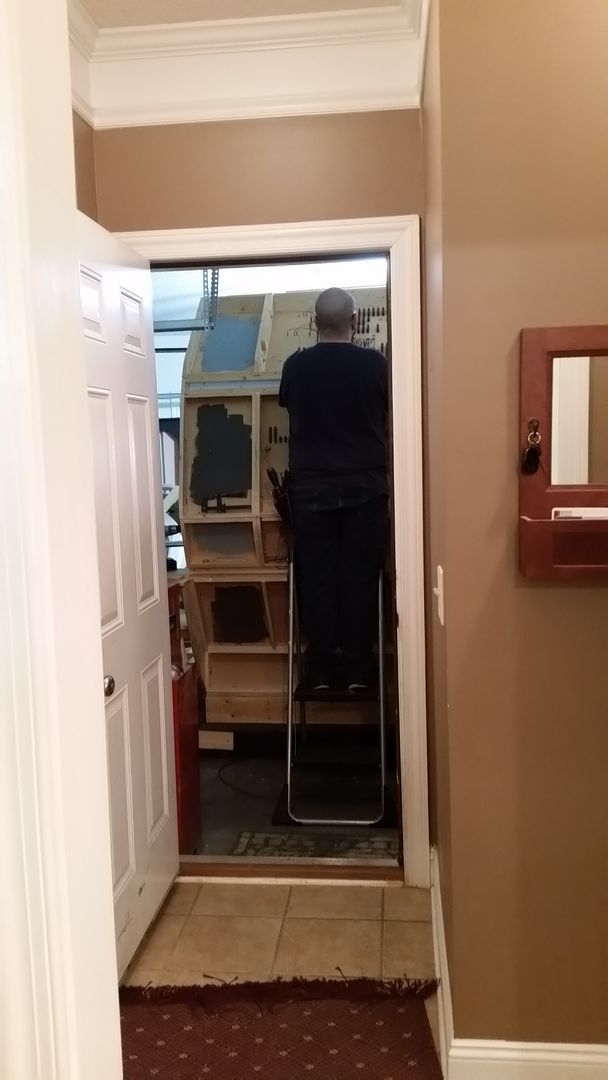
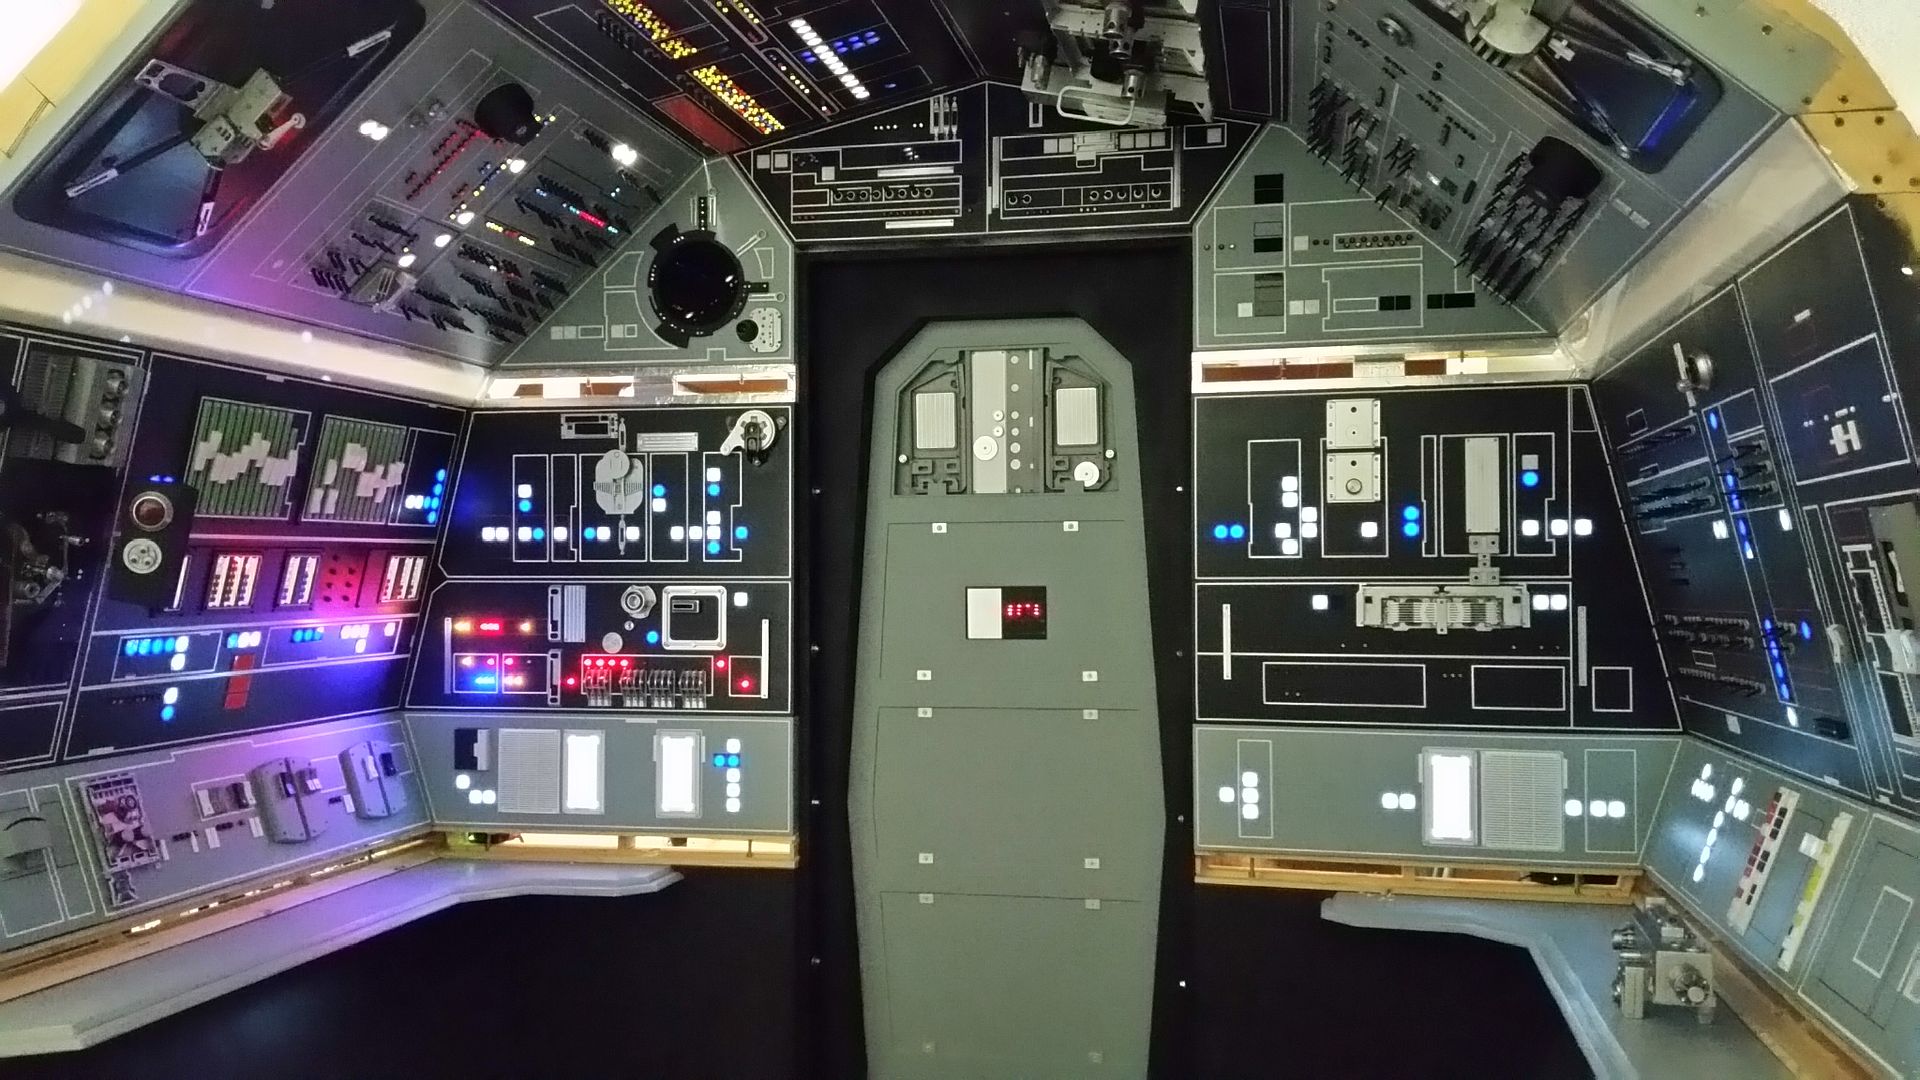
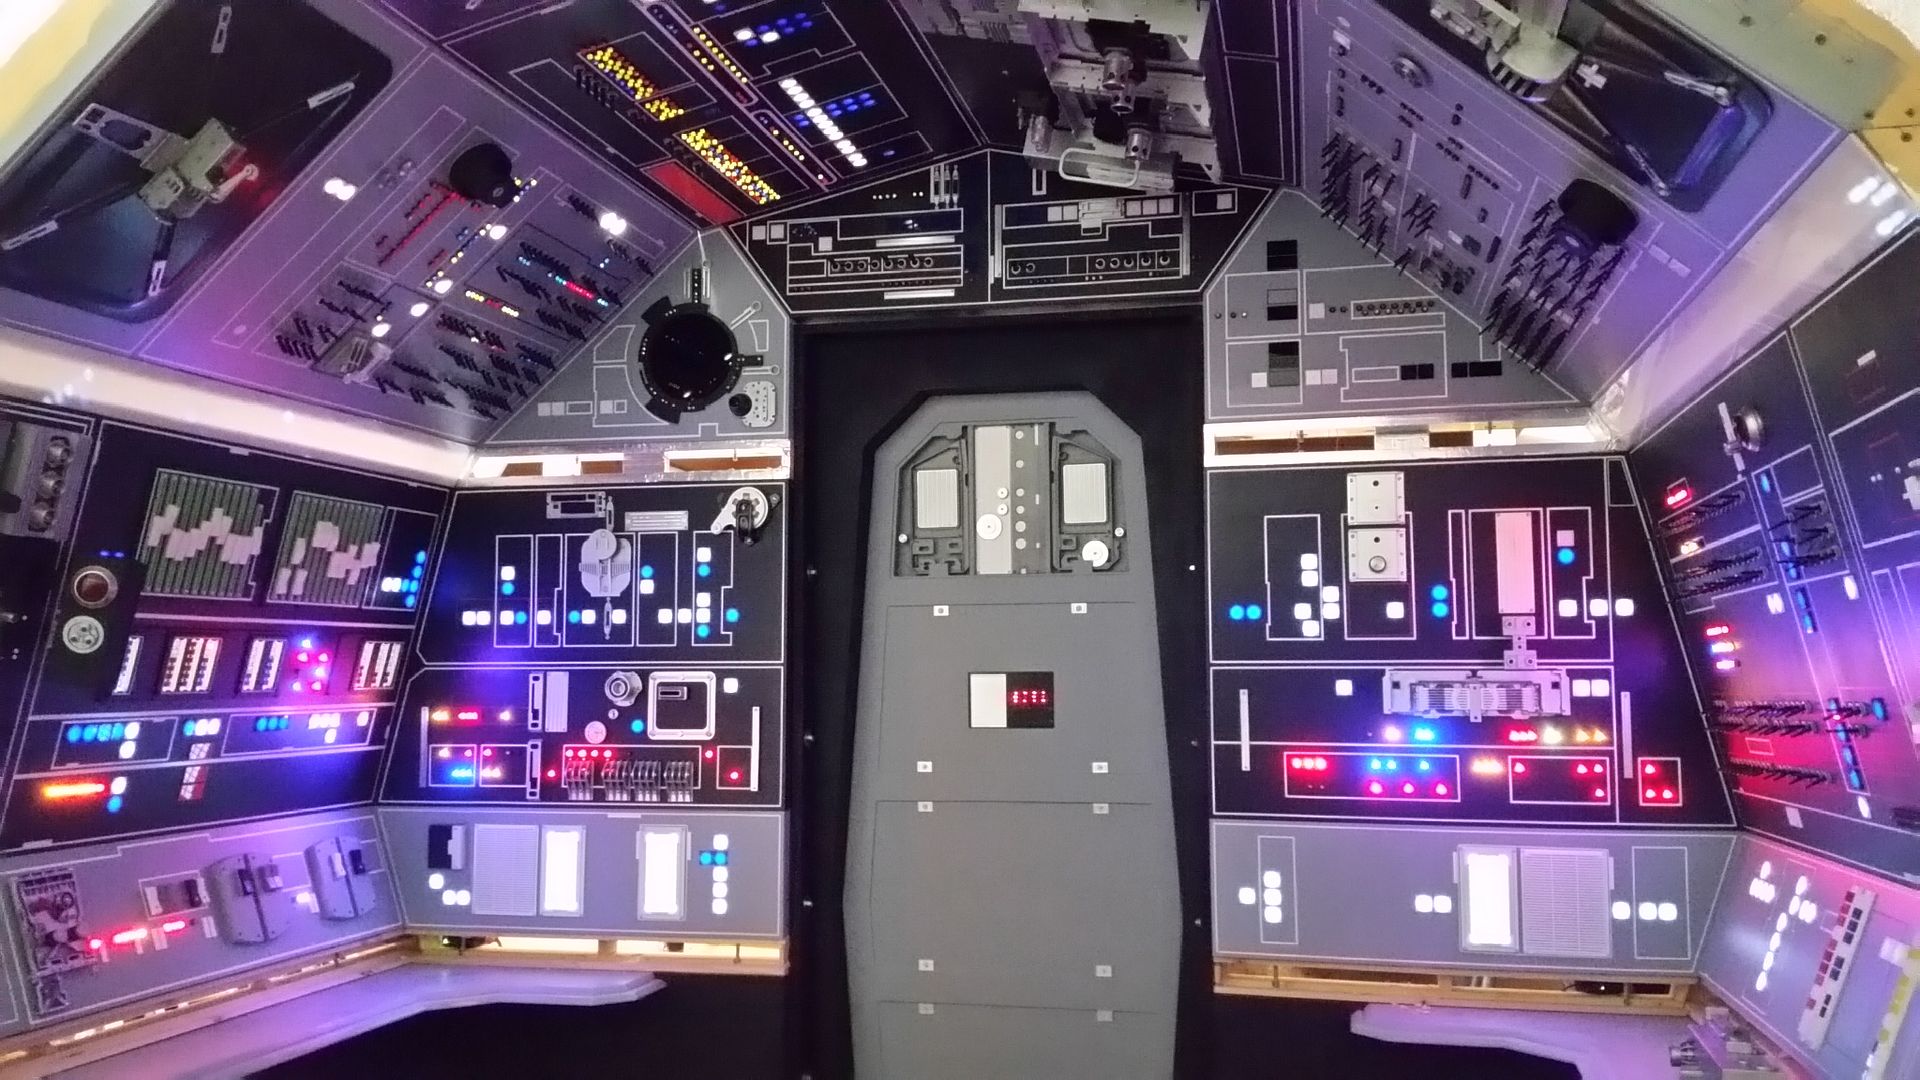
today was the first day that the entire cockpit canopy was installed overhead and the sheer scale of it is awe inspiring, standing inside gives chills.
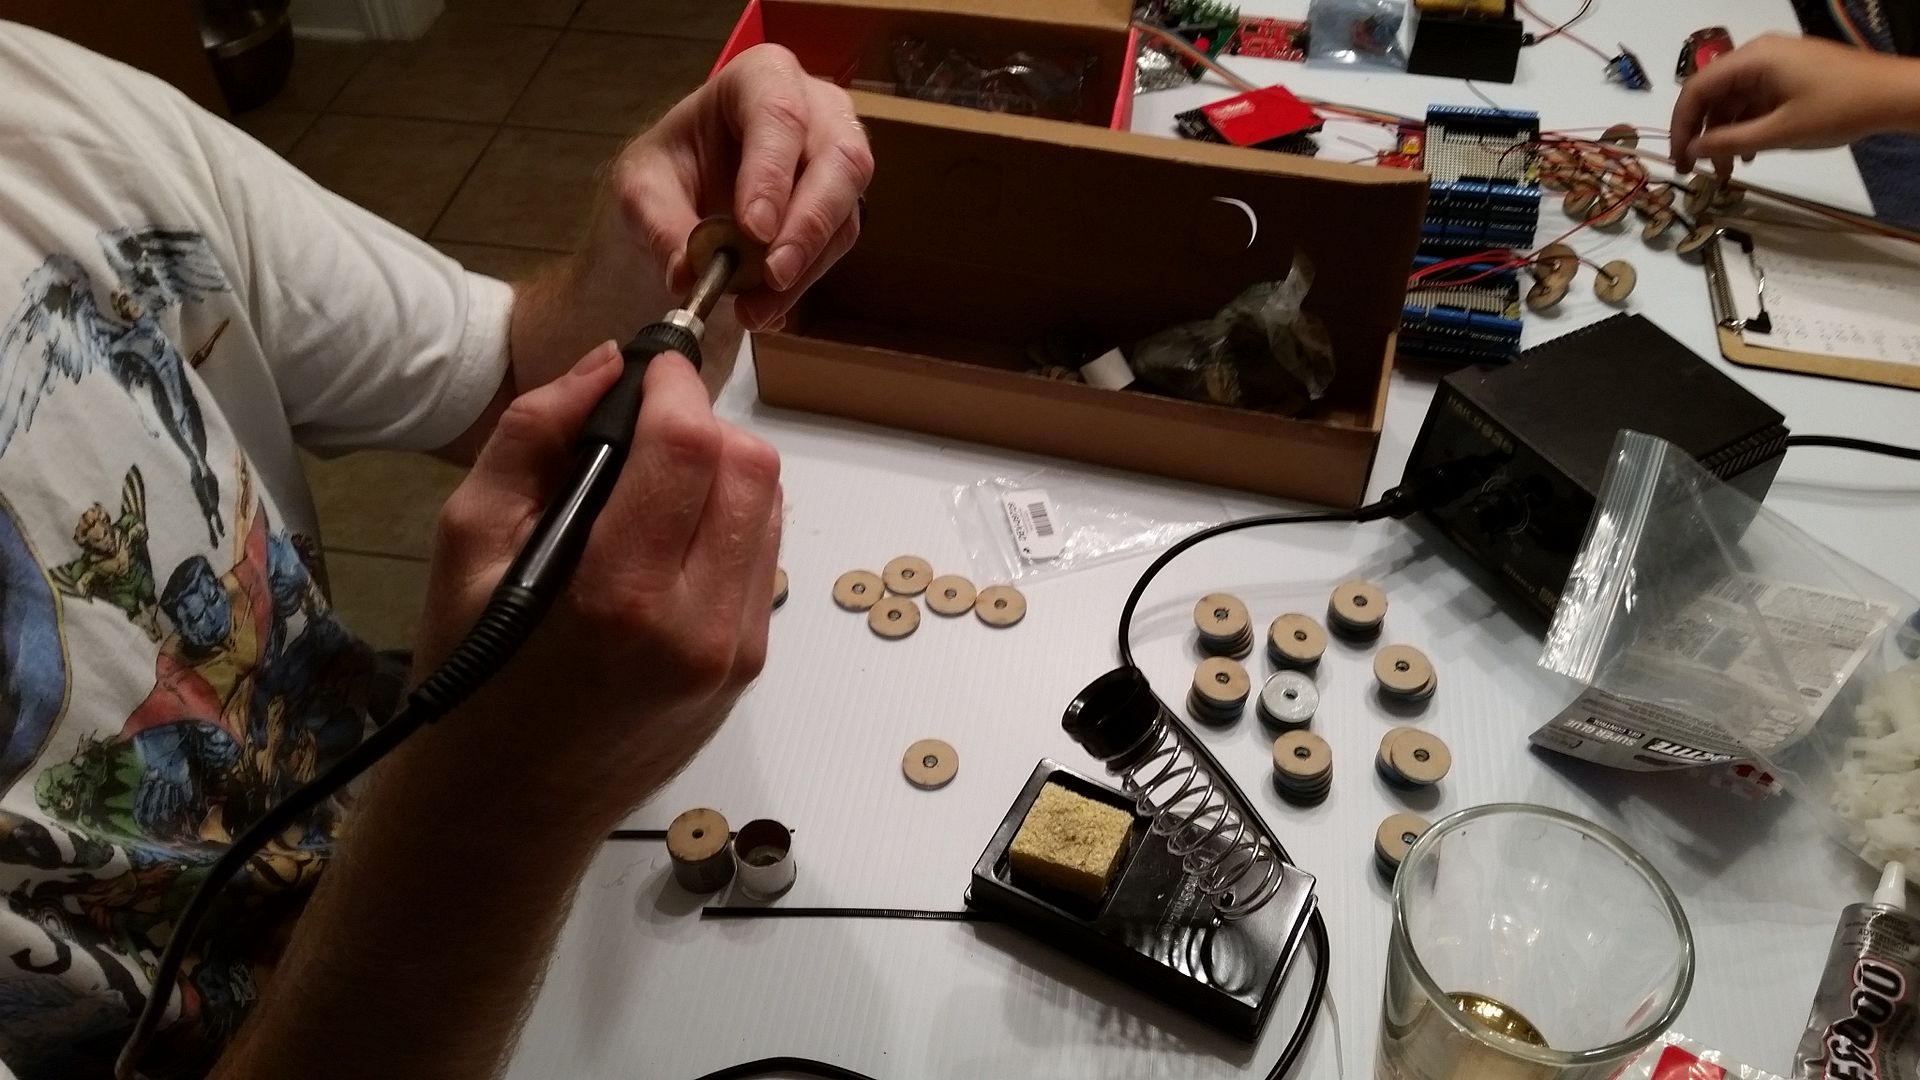
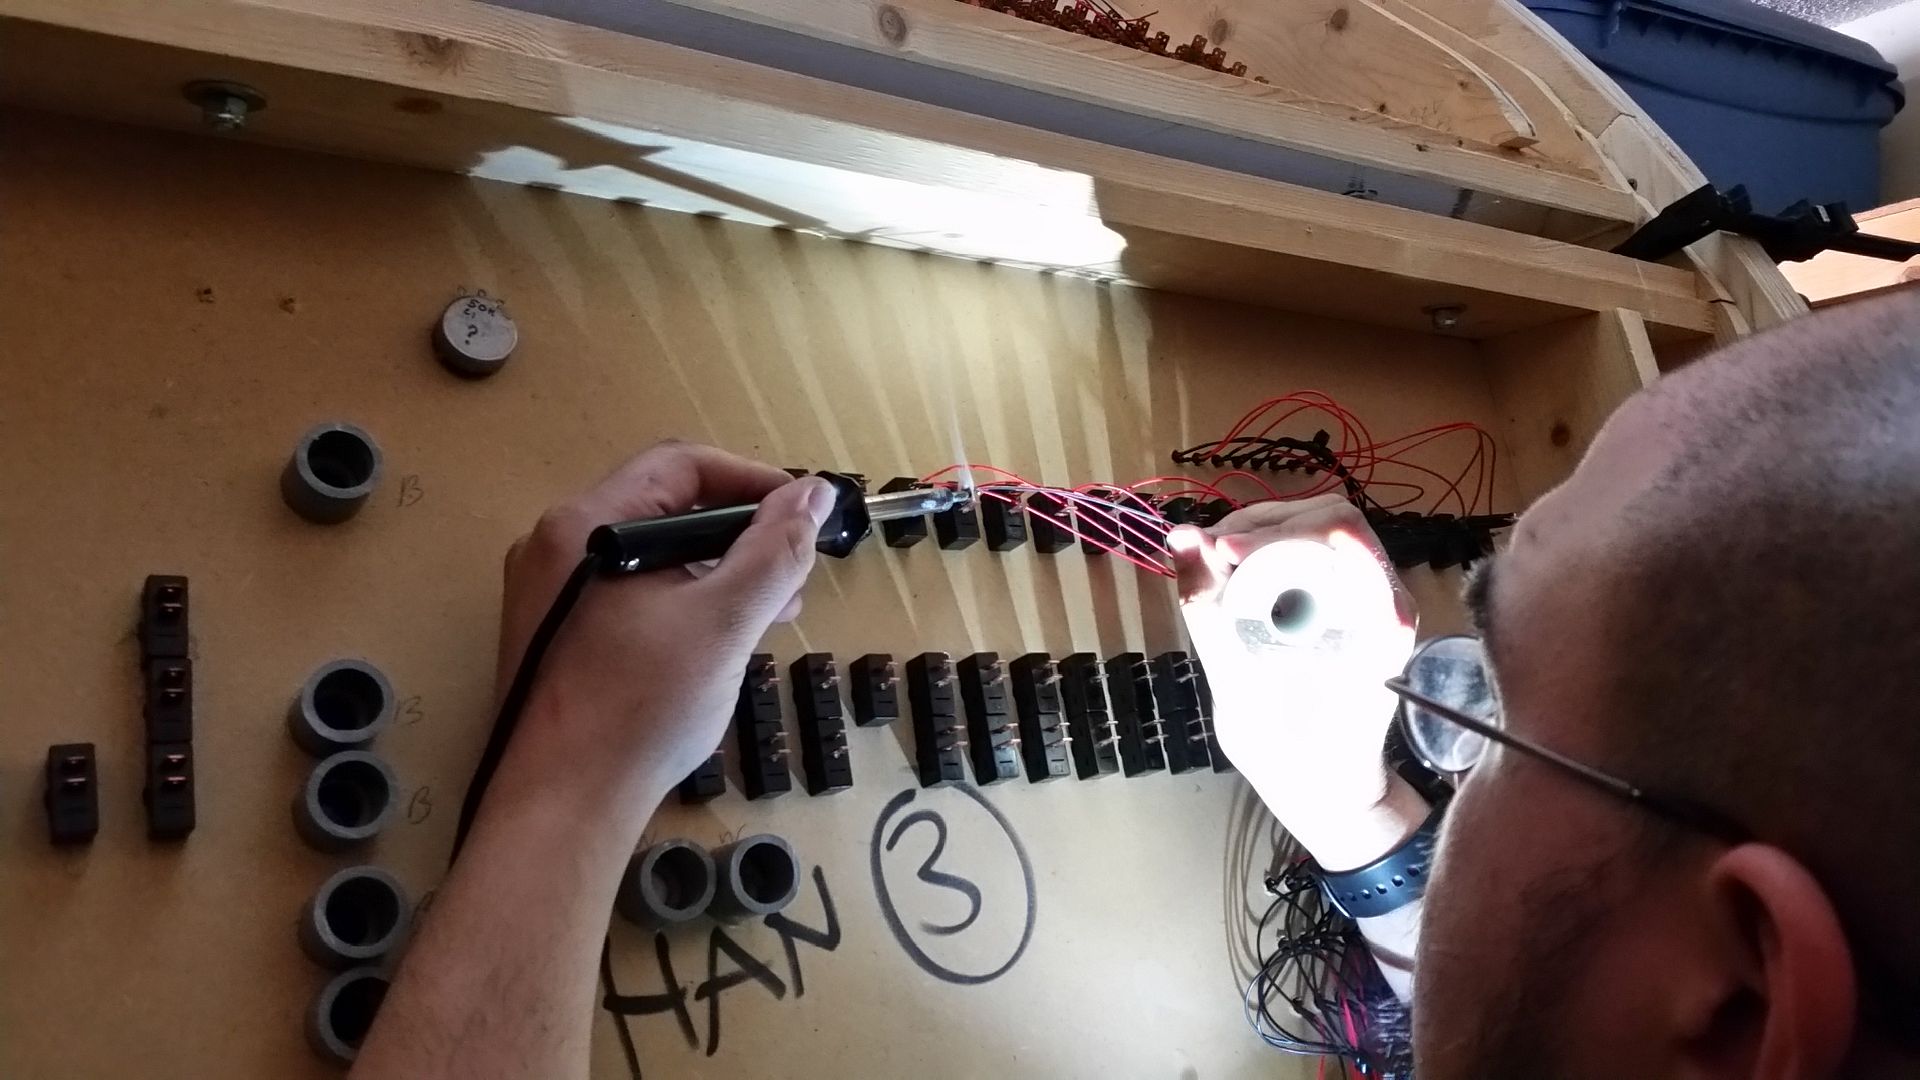
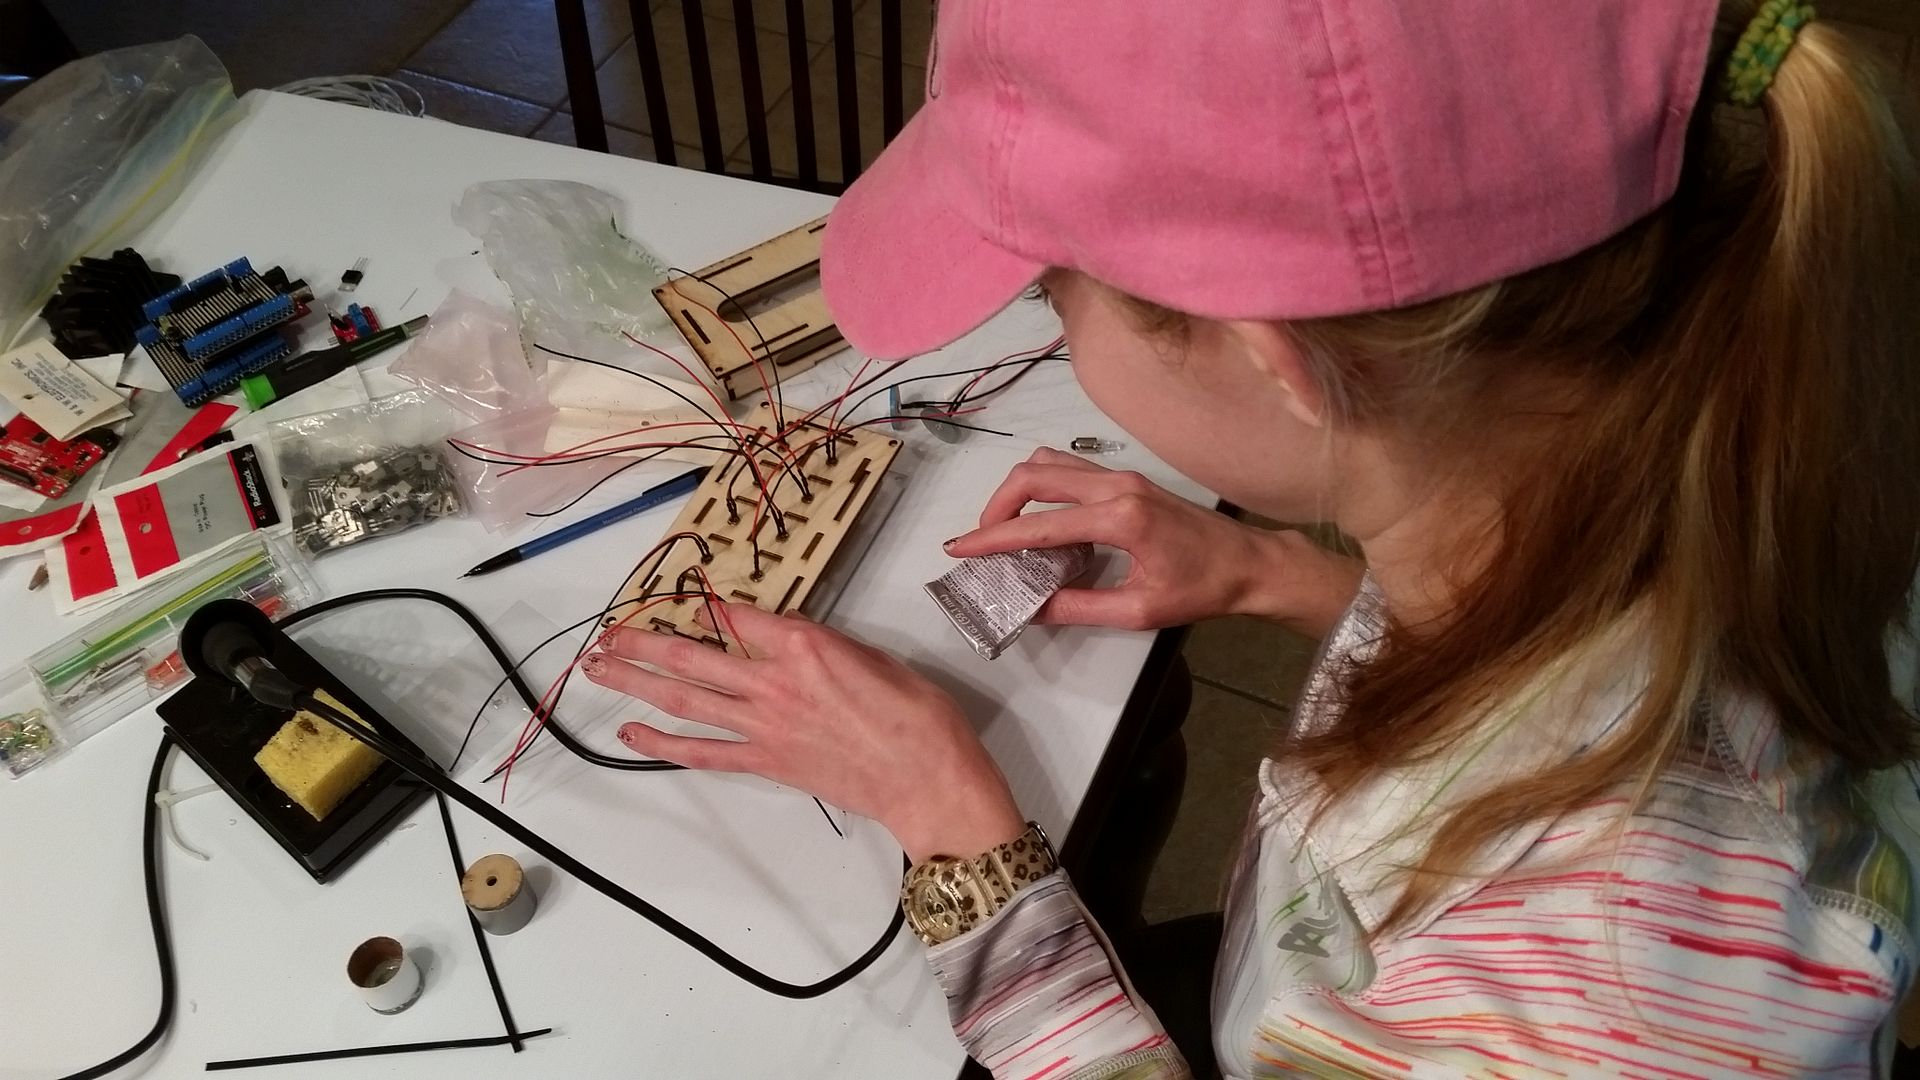
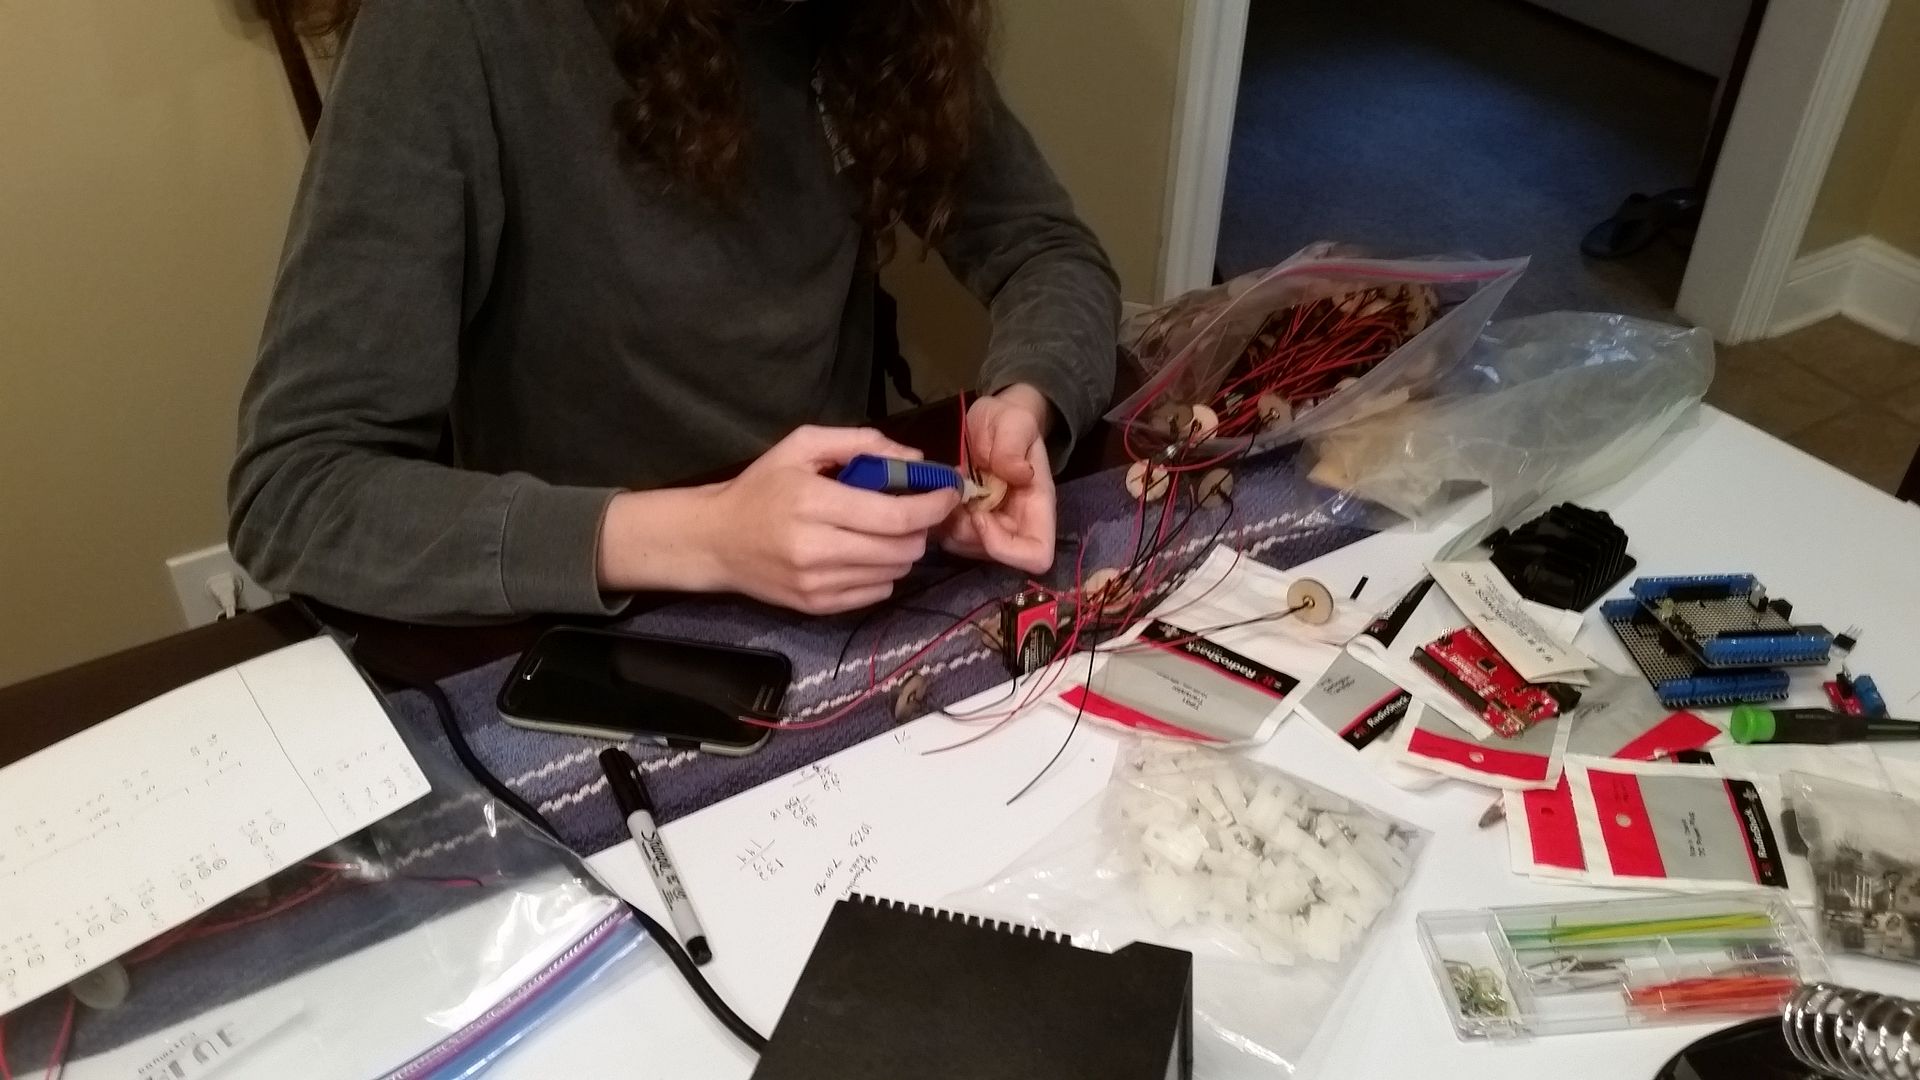
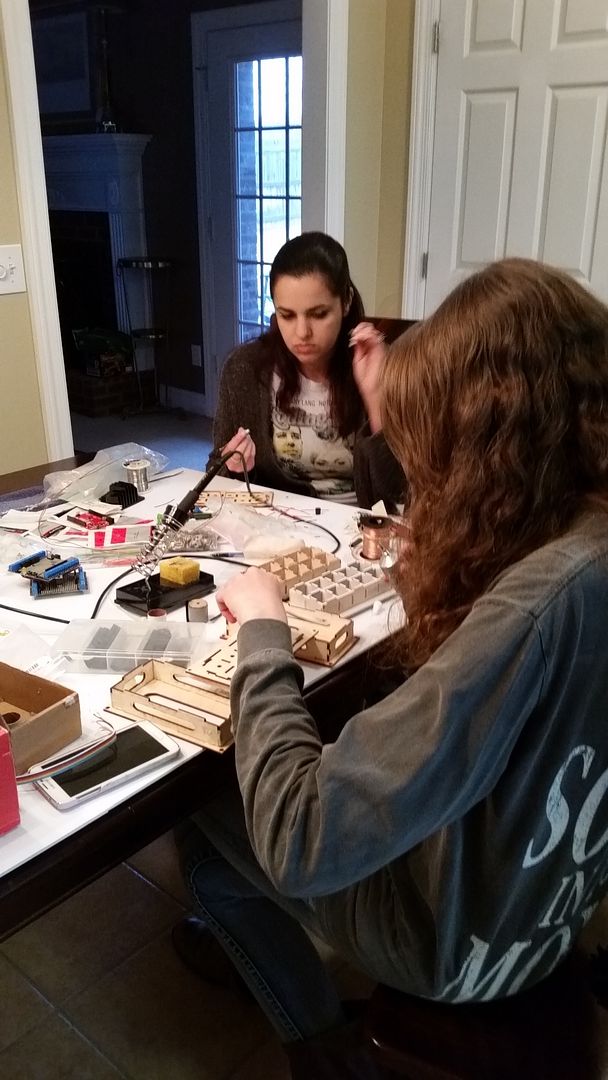
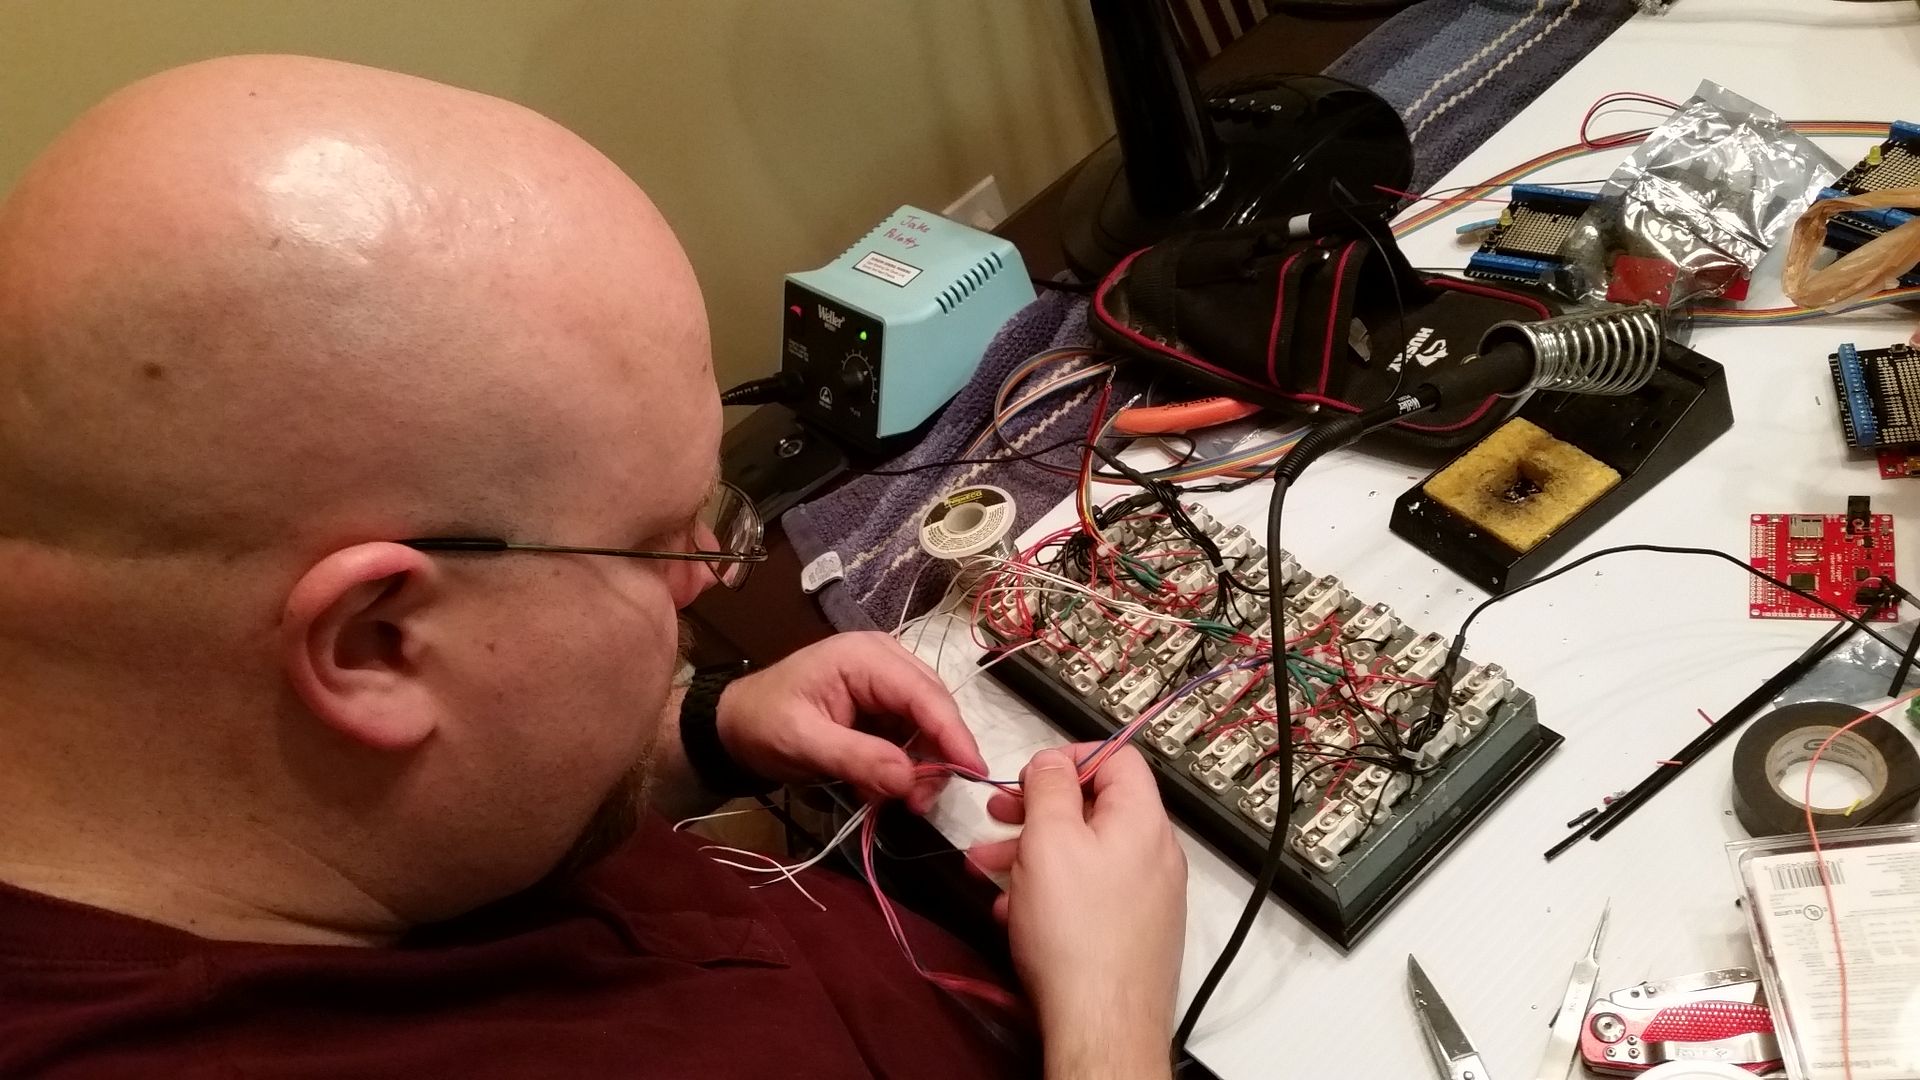
I sent a shout out on Facebook today for local help and surprisingly 4 people showed up to help solder, glue, wire and help Greg. Then they surprisingly offered to come back tomorrow hahaha. Awesome community!
stay tuned, lots of wiring to take place in the next few days.
as our friend Wayne has stated "we're doing the kind of stuff and being the kind of people that our 12yo selves would high five"
today was the first day that the entire cockpit canopy was installed overhead and the sheer scale of it is awe inspiring, standing inside gives chills.
I sent a shout out on Facebook today for local help and surprisingly 4 people showed up to help solder, glue, wire and help Greg. Then they surprisingly offered to come back tomorrow hahaha. Awesome community!
stay tuned, lots of wiring to take place in the next few days.
Early Morning Update!
WHEW... It's been a mad house trying to get everything finished! Enjoy!
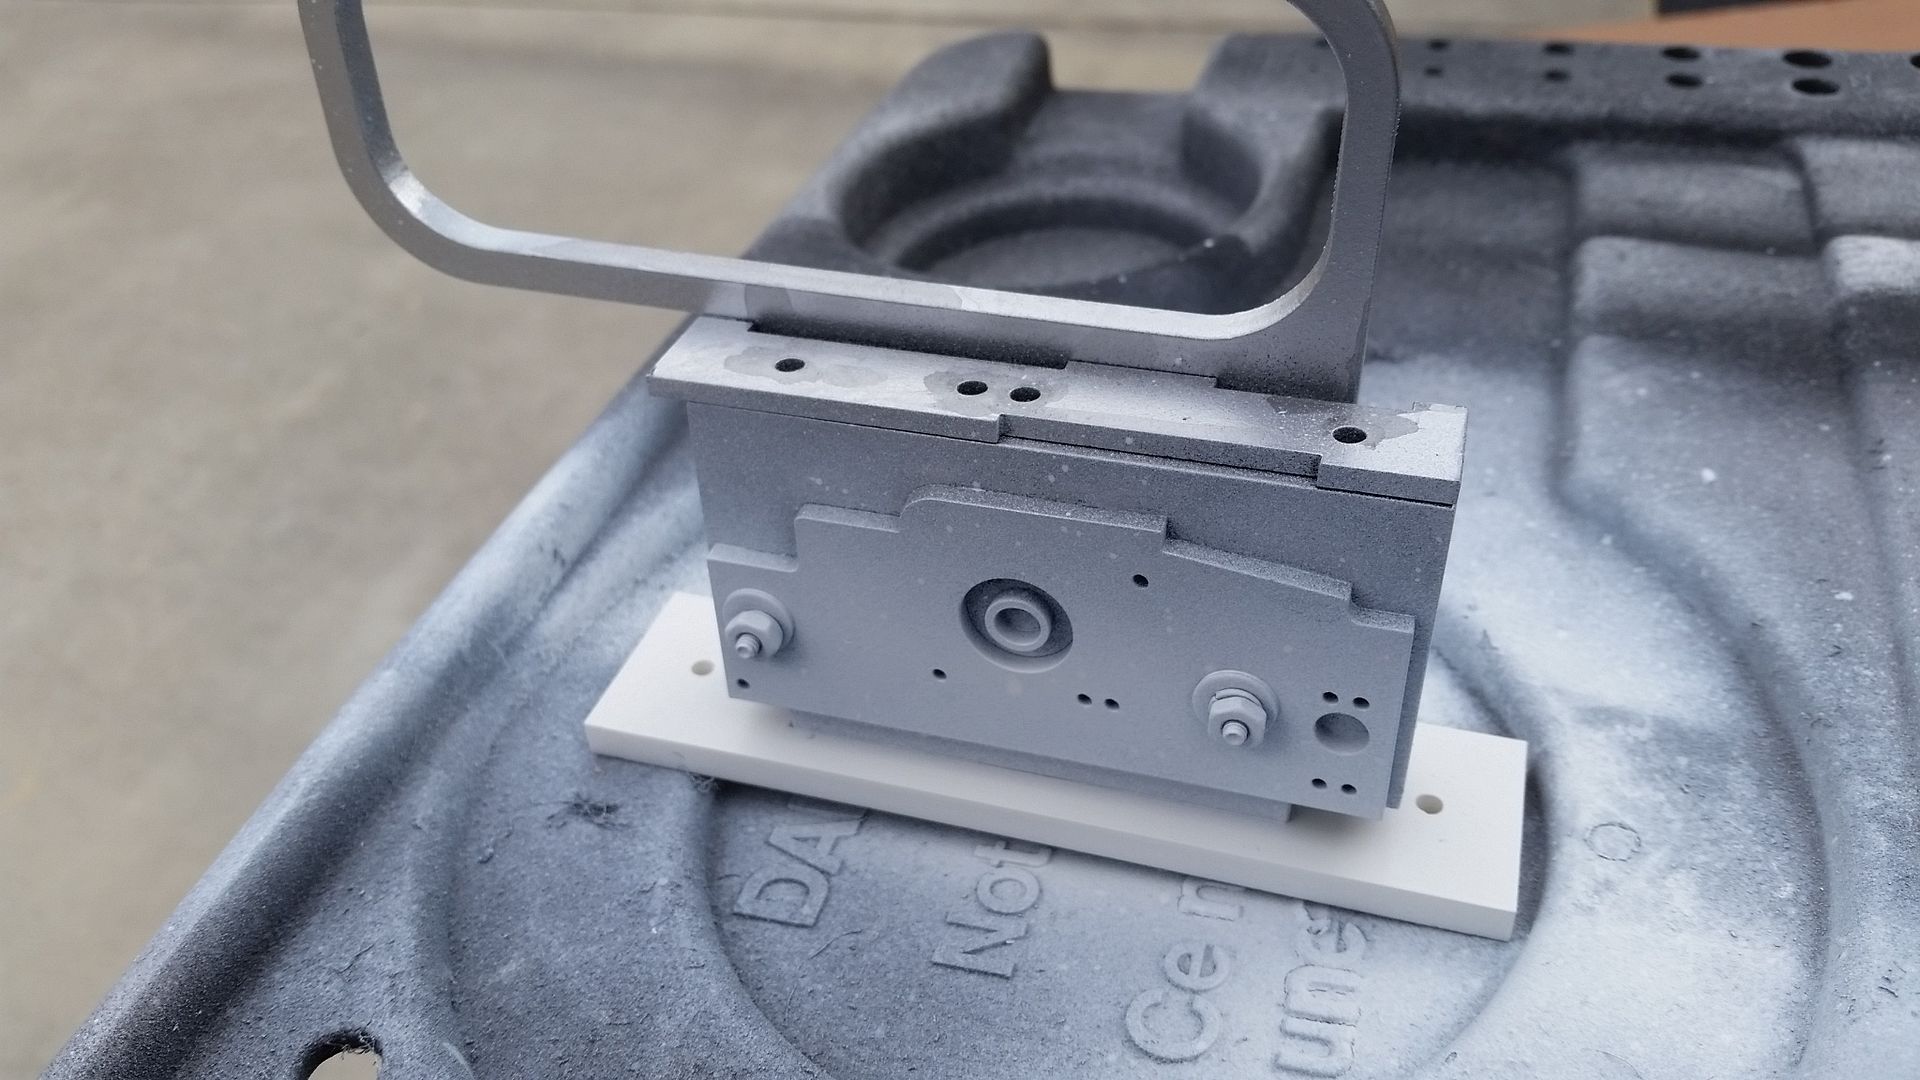
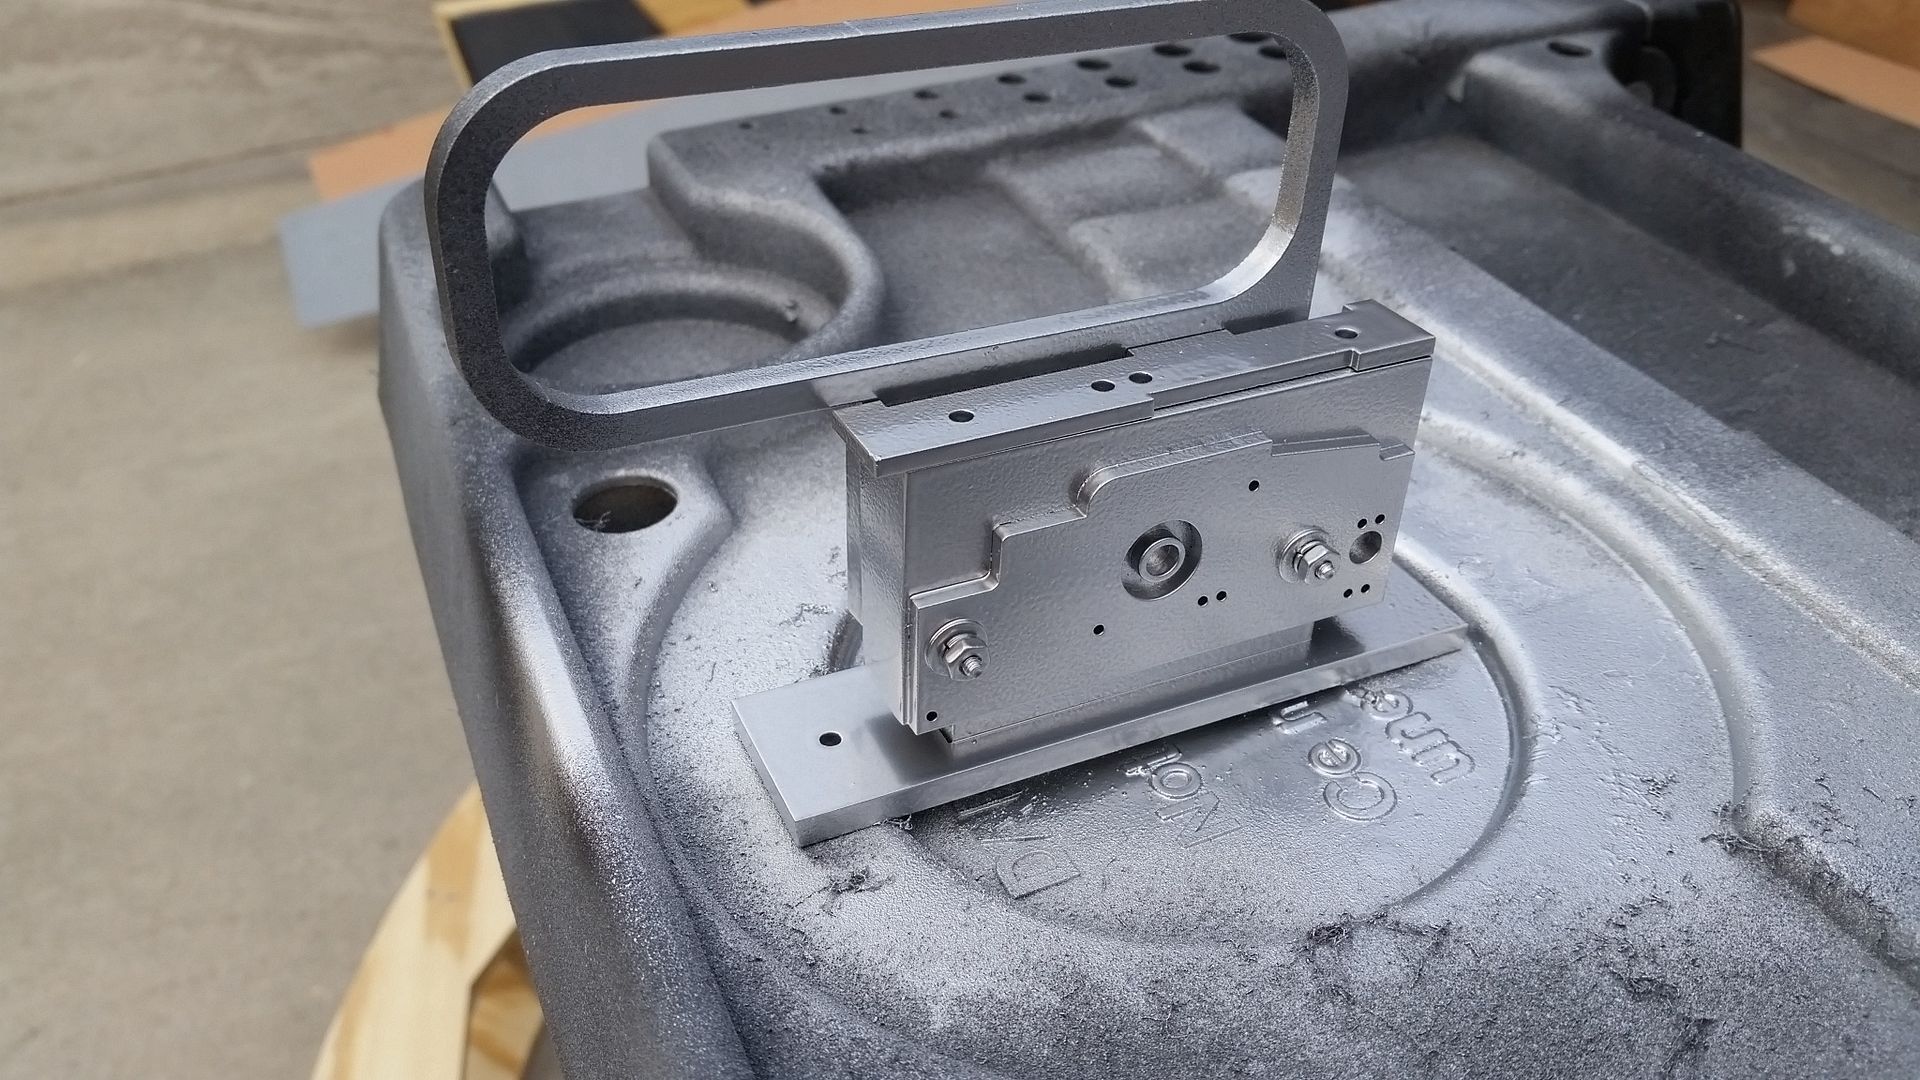
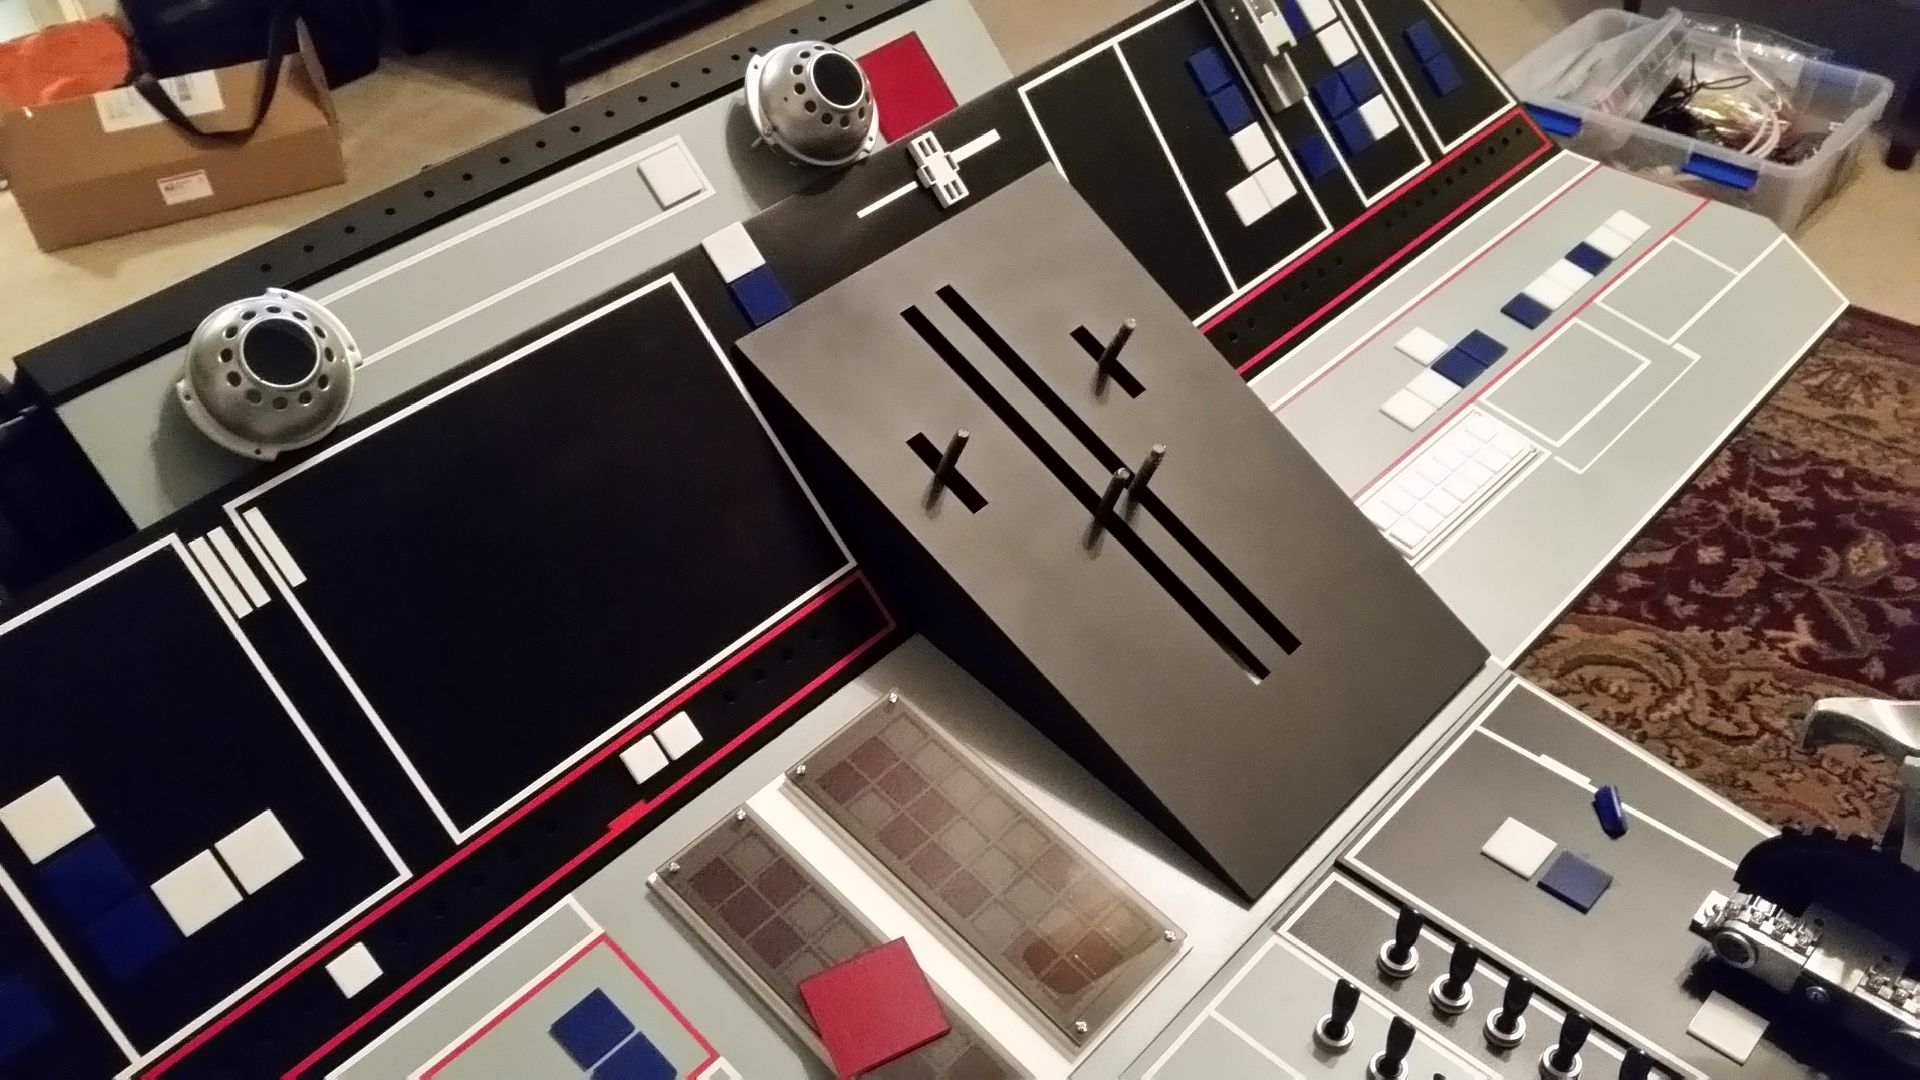
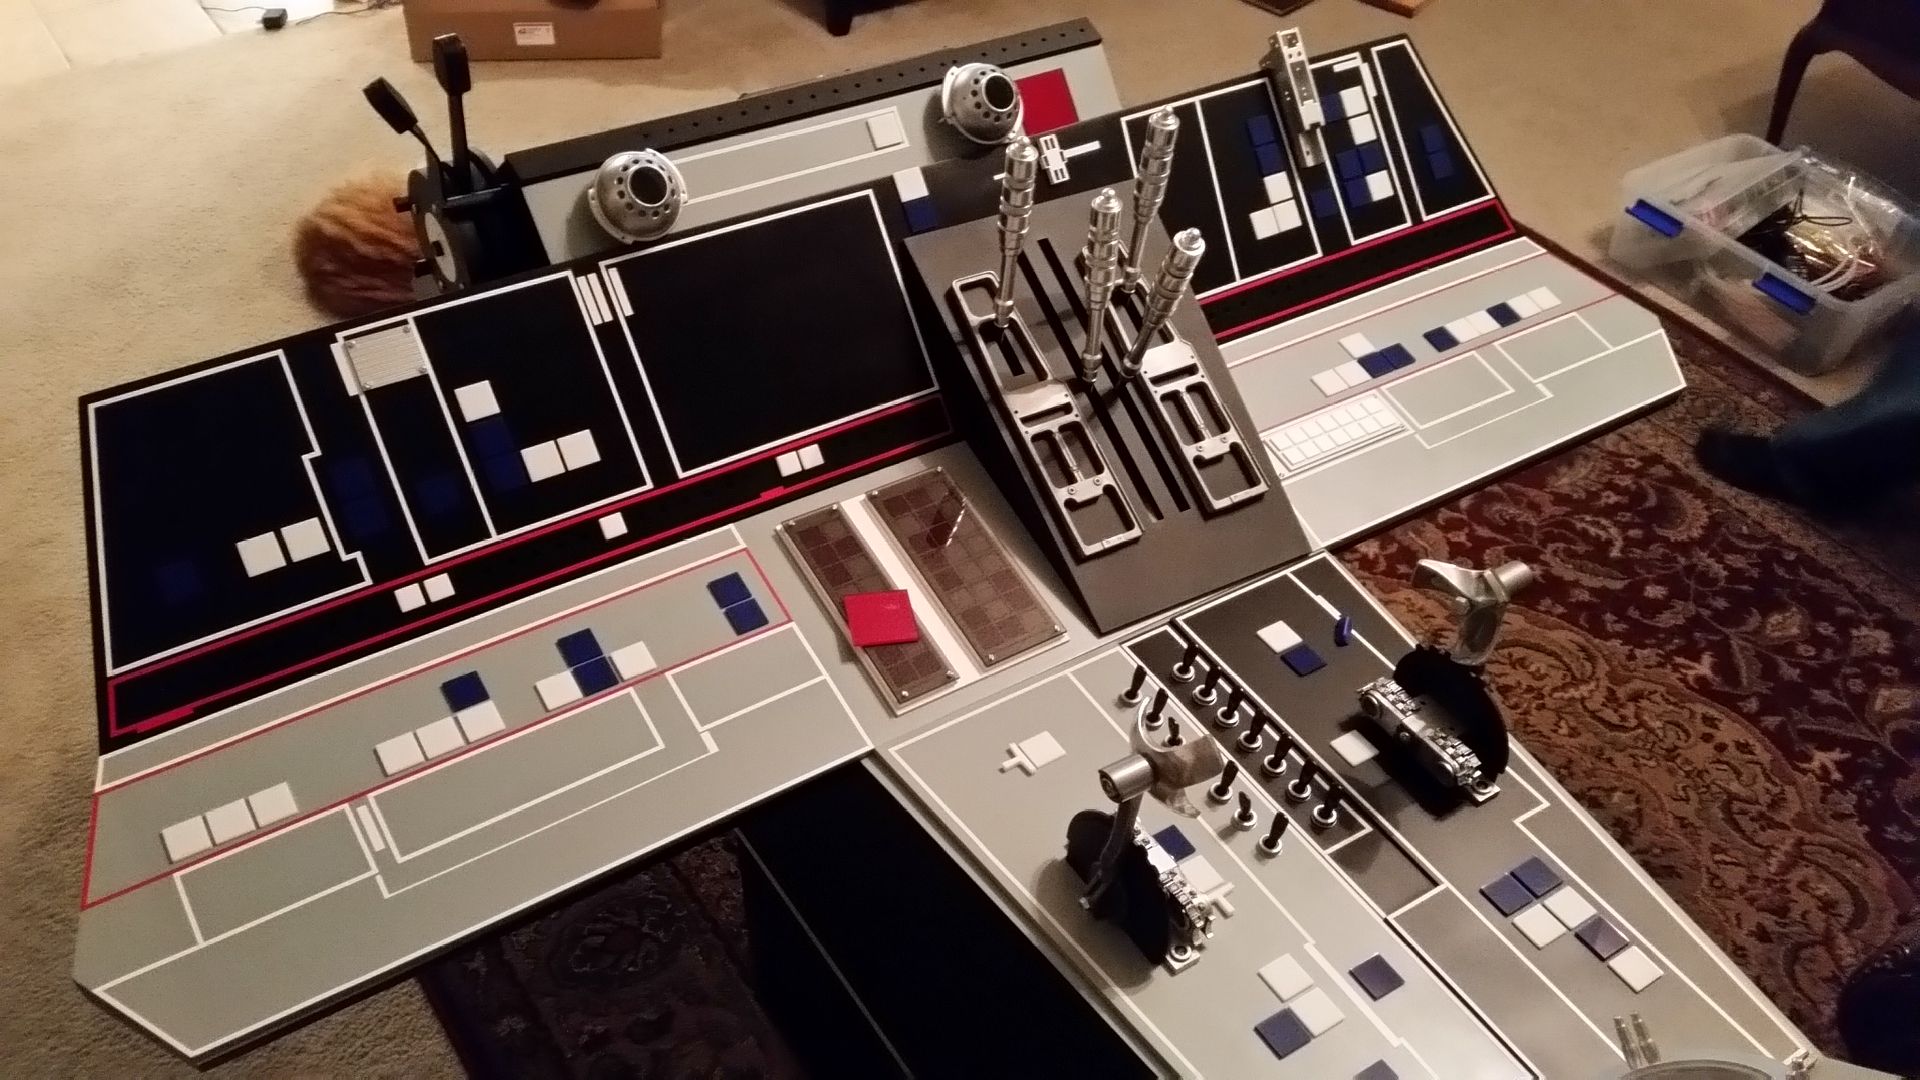
Installed the 2 lever greeblie
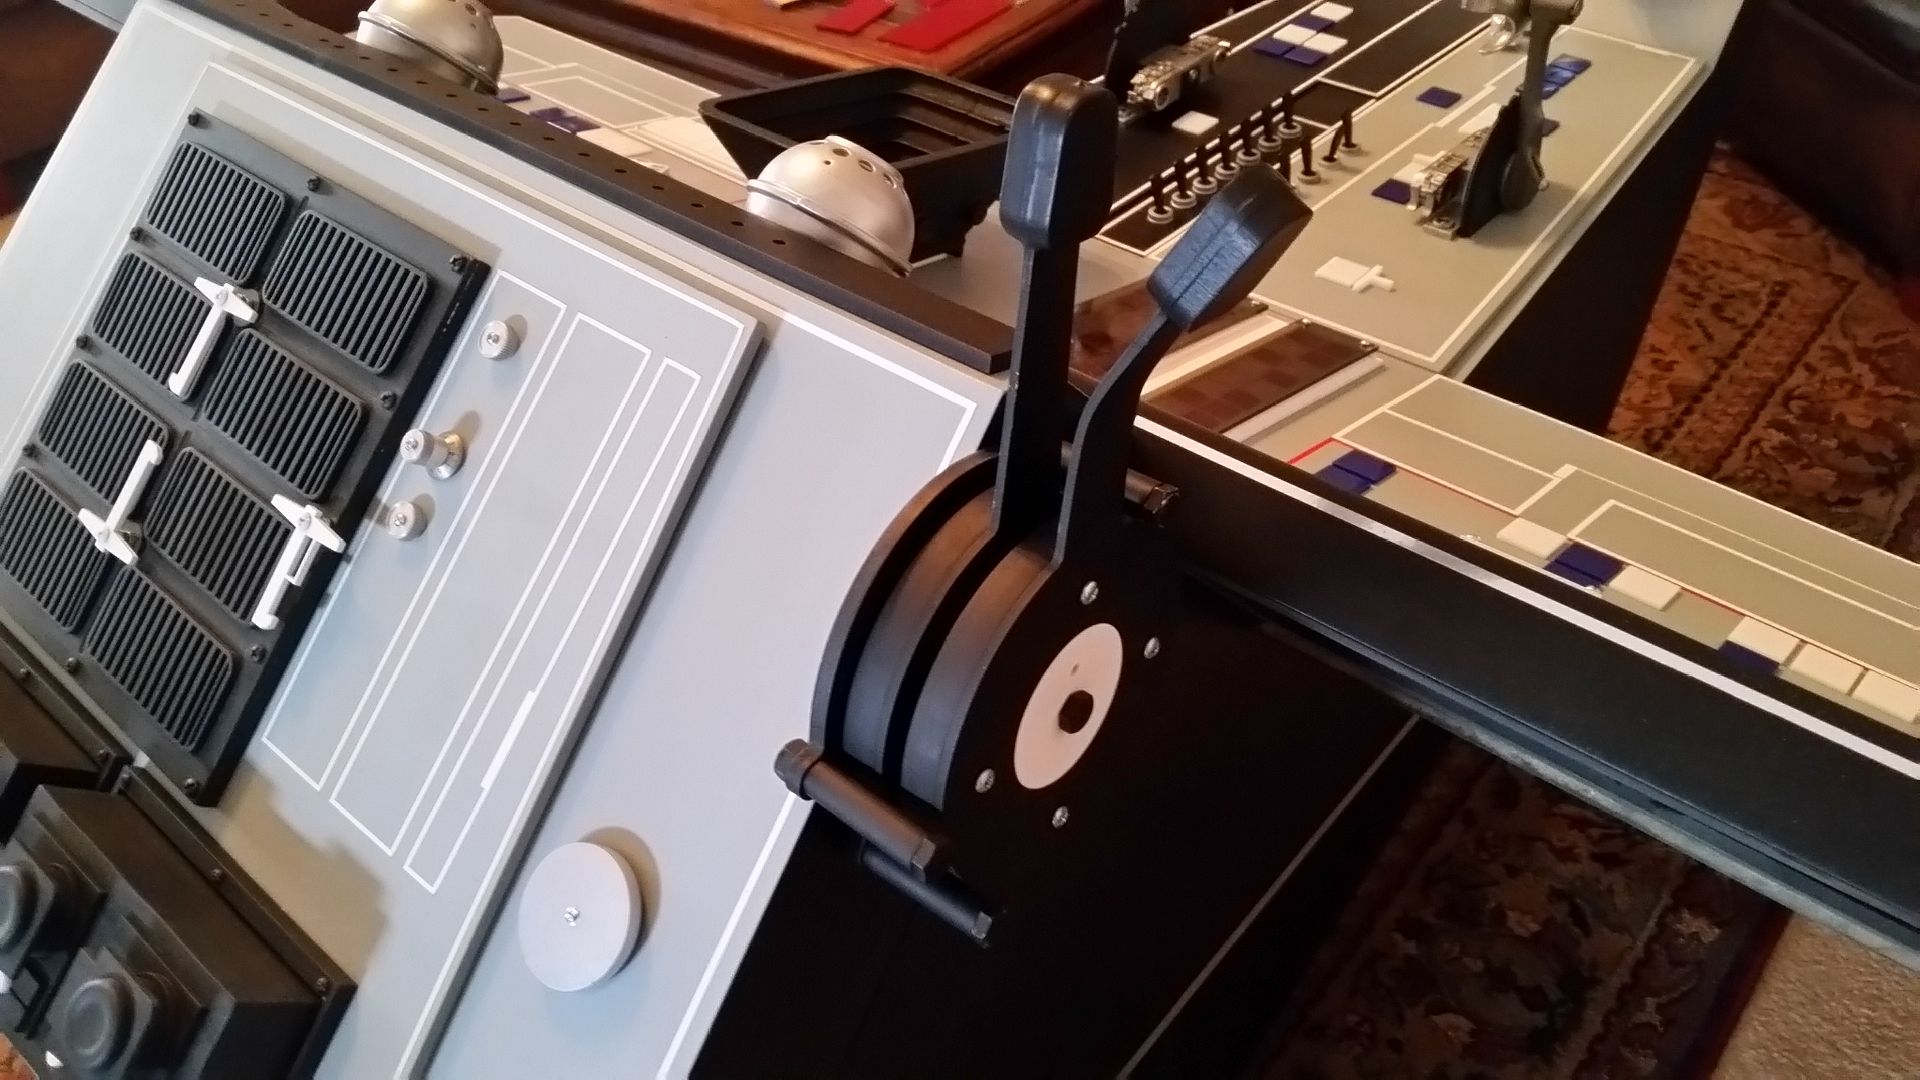
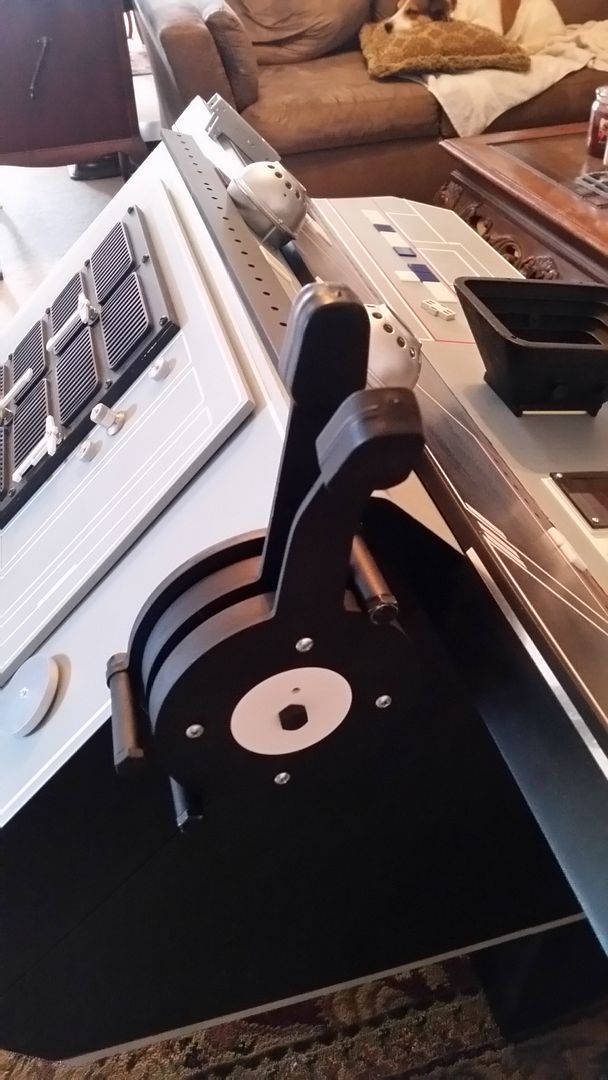
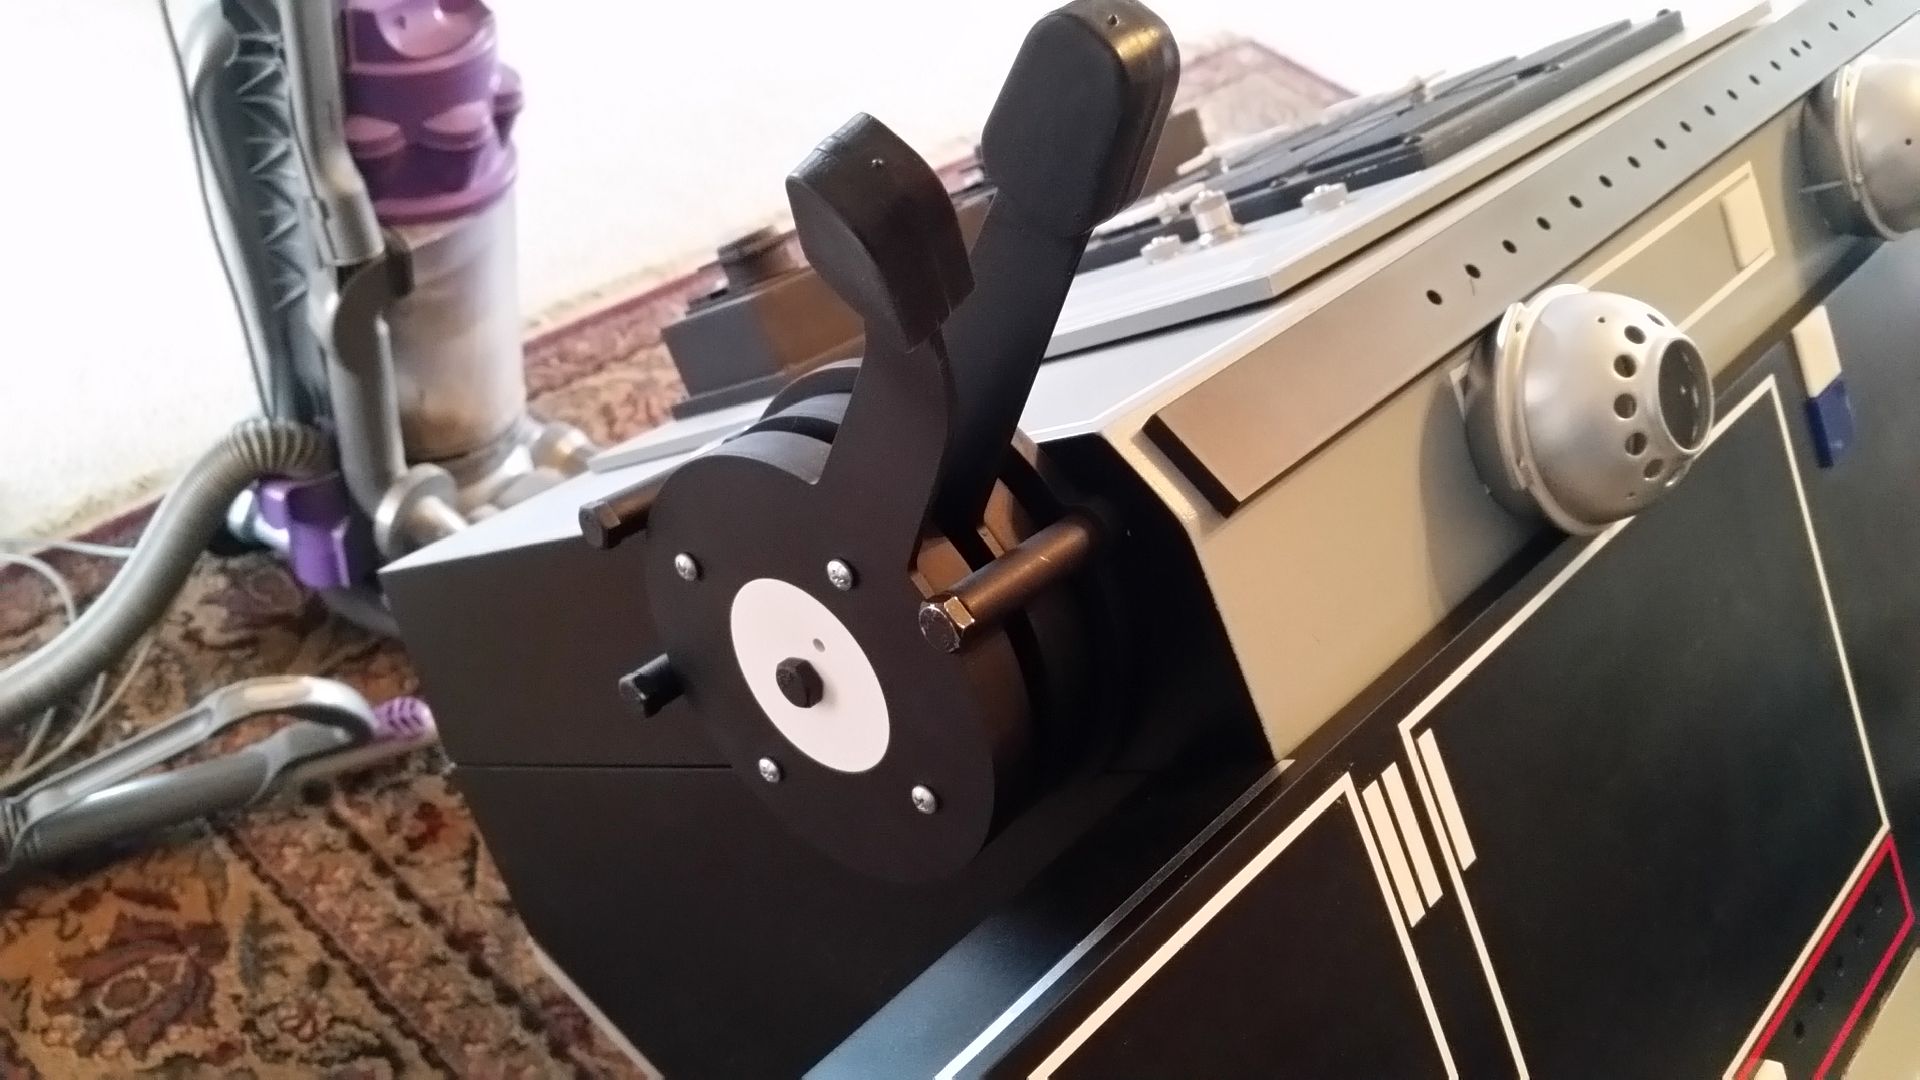
Working a new throttle lever mechanism
I'll be headed to the Makers to laser cut the remaining parts
Canopy Box lever dowel getting some attention
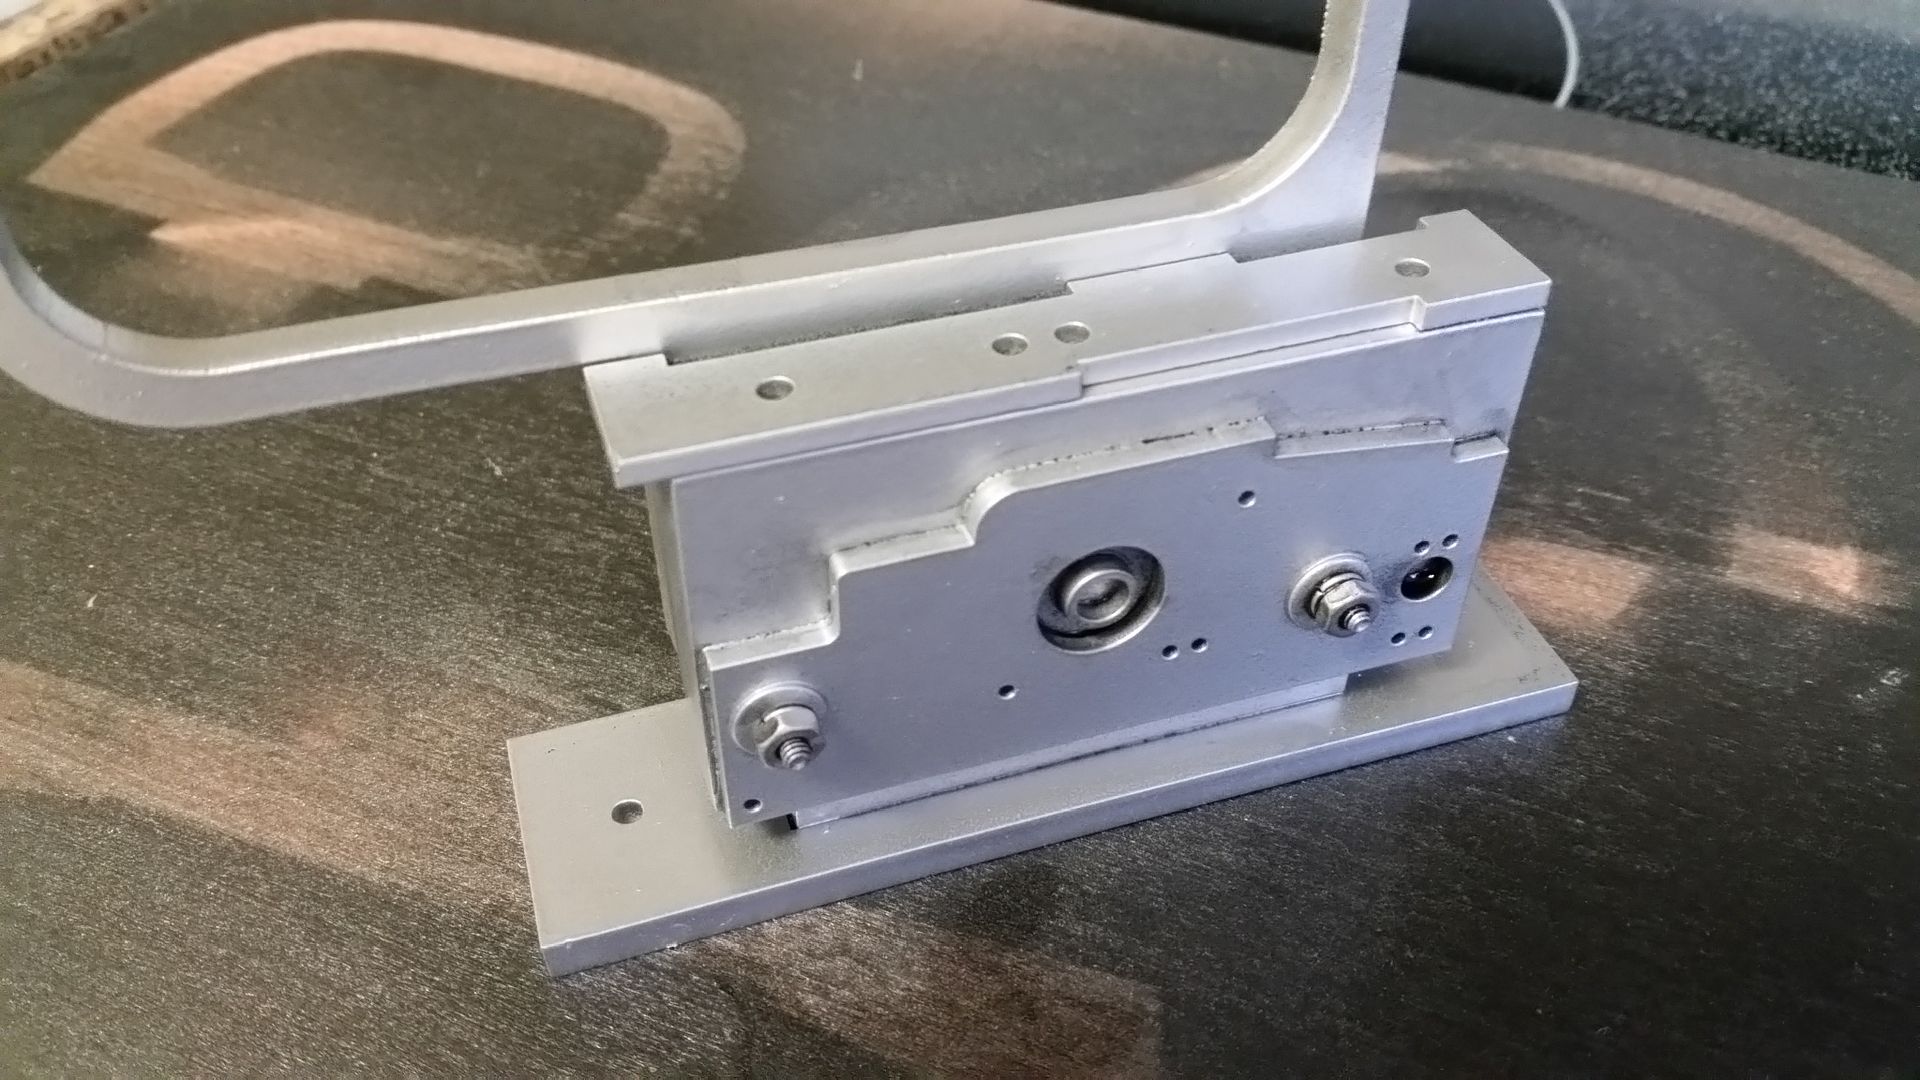
A new mounting plate was added to one of the pull handle greeblies
That's creepy....")

Silver
More Primer
Mounted and in place and ready for weathering

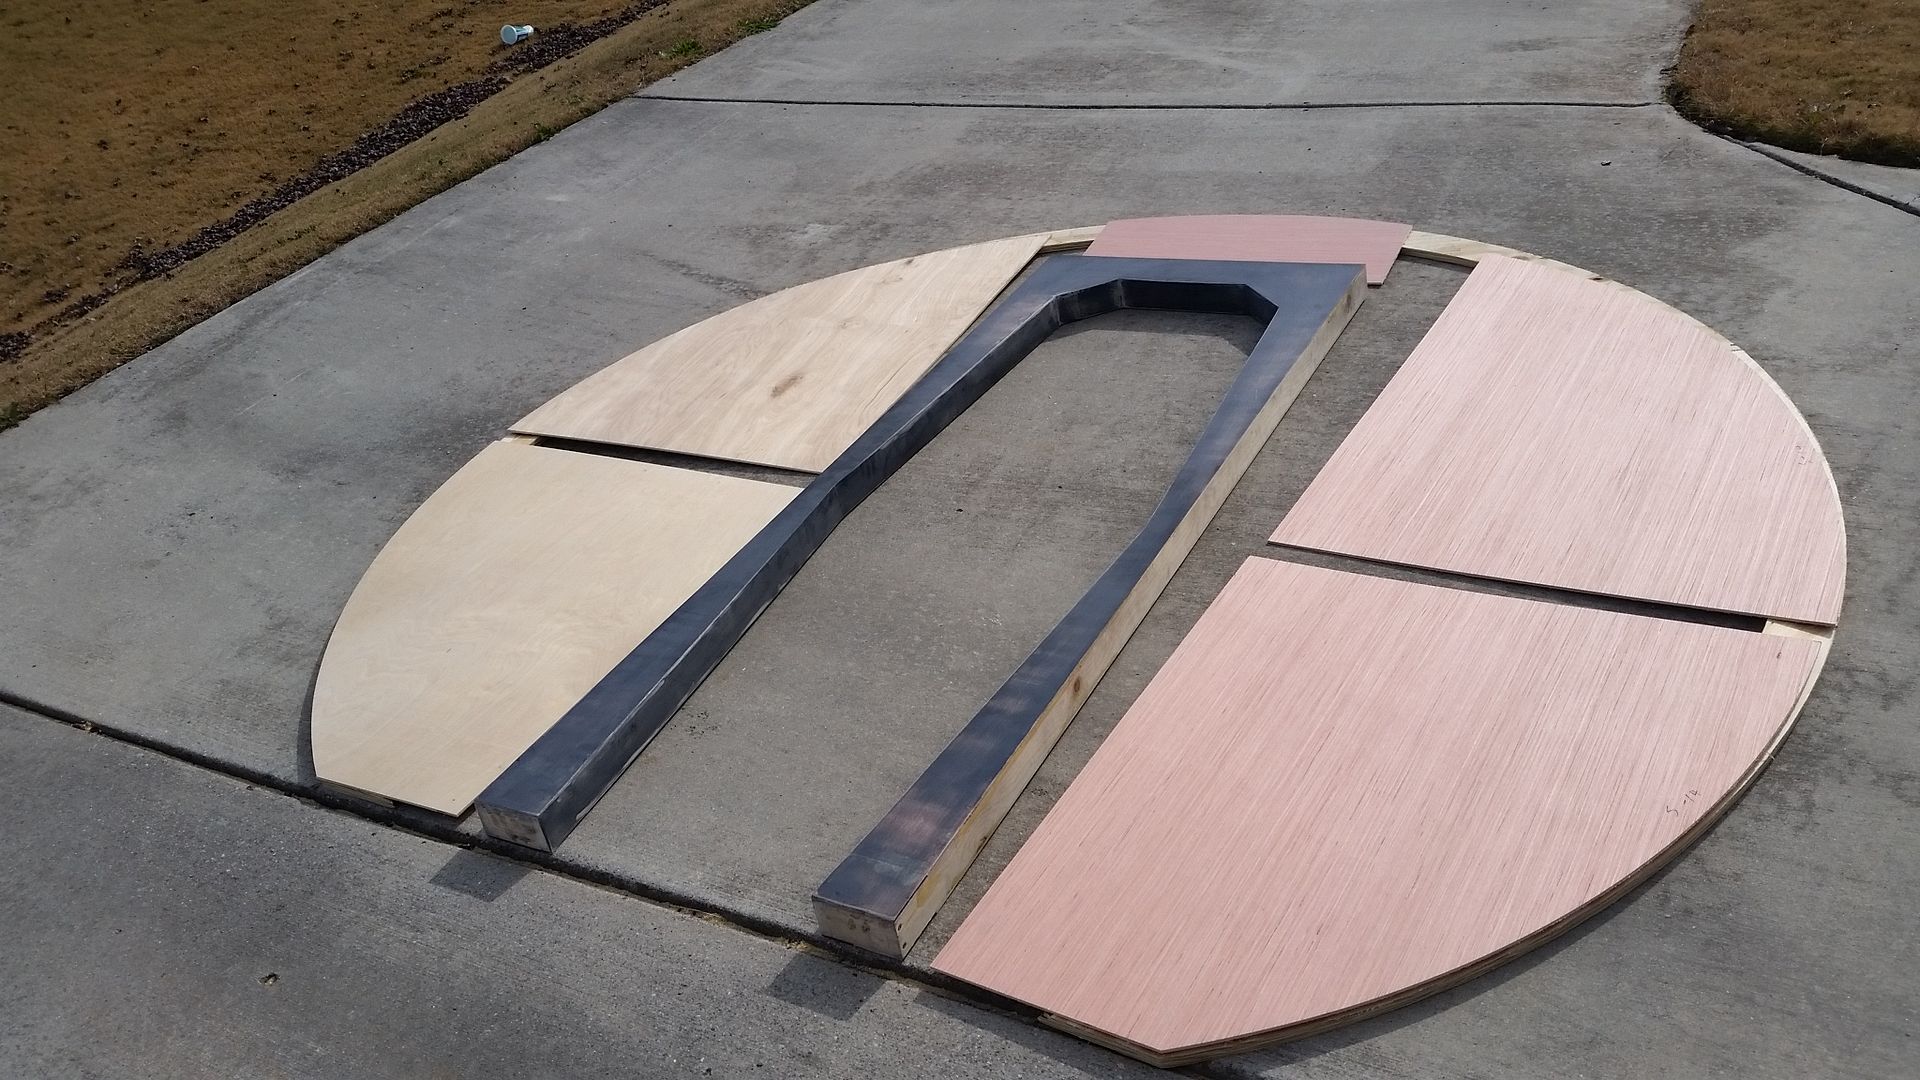
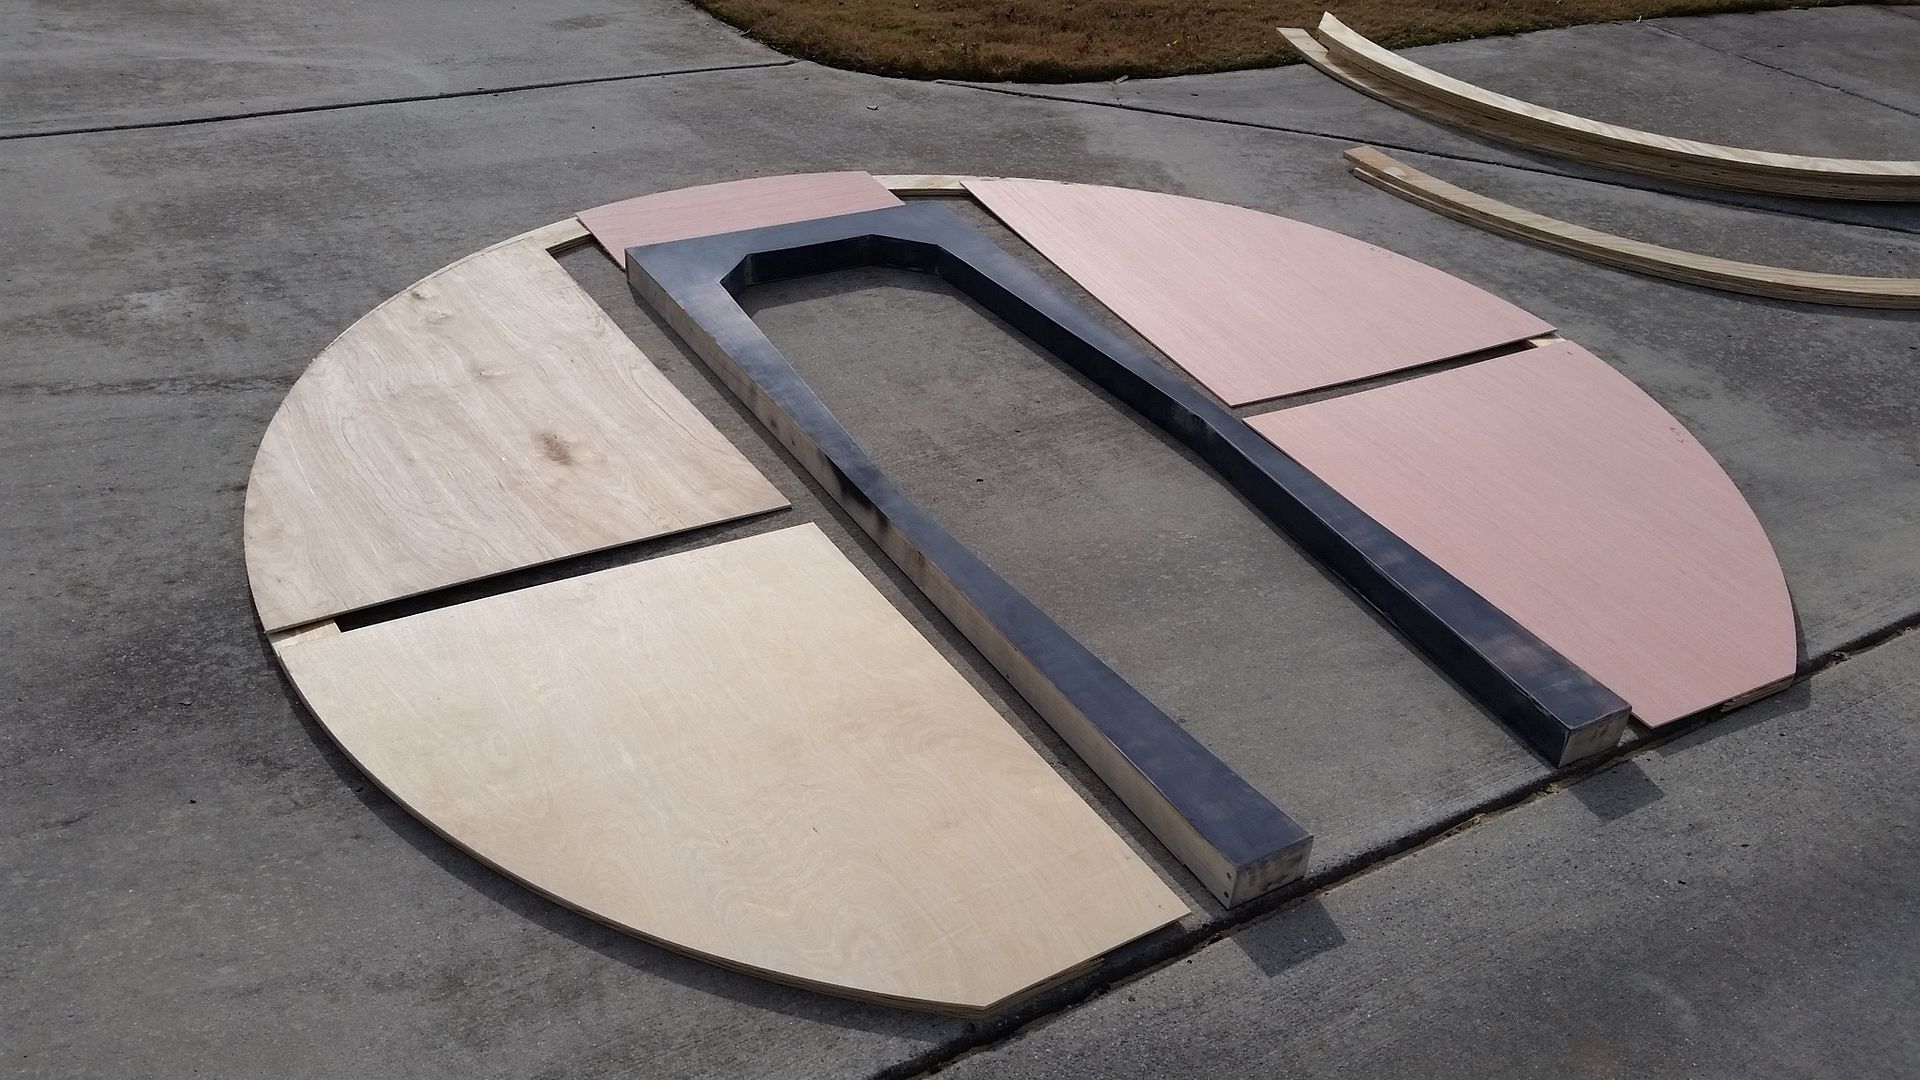
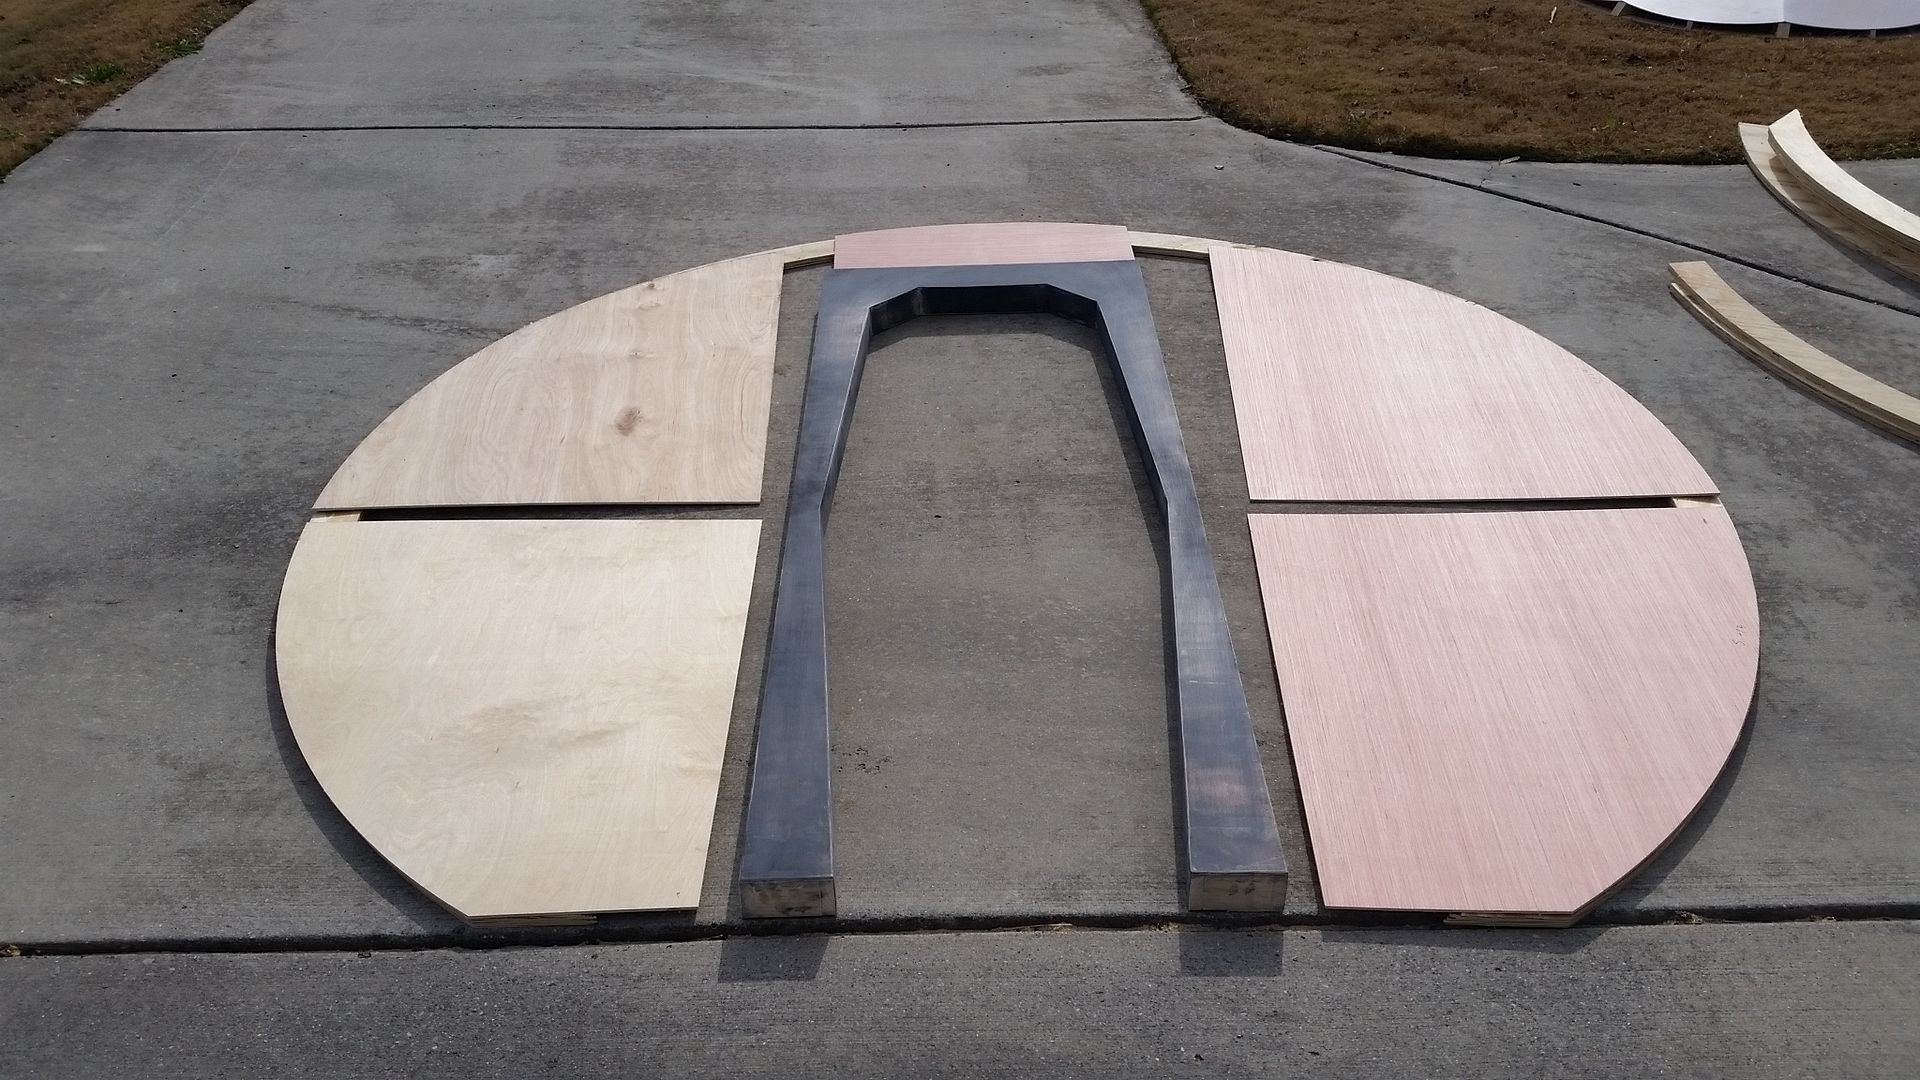
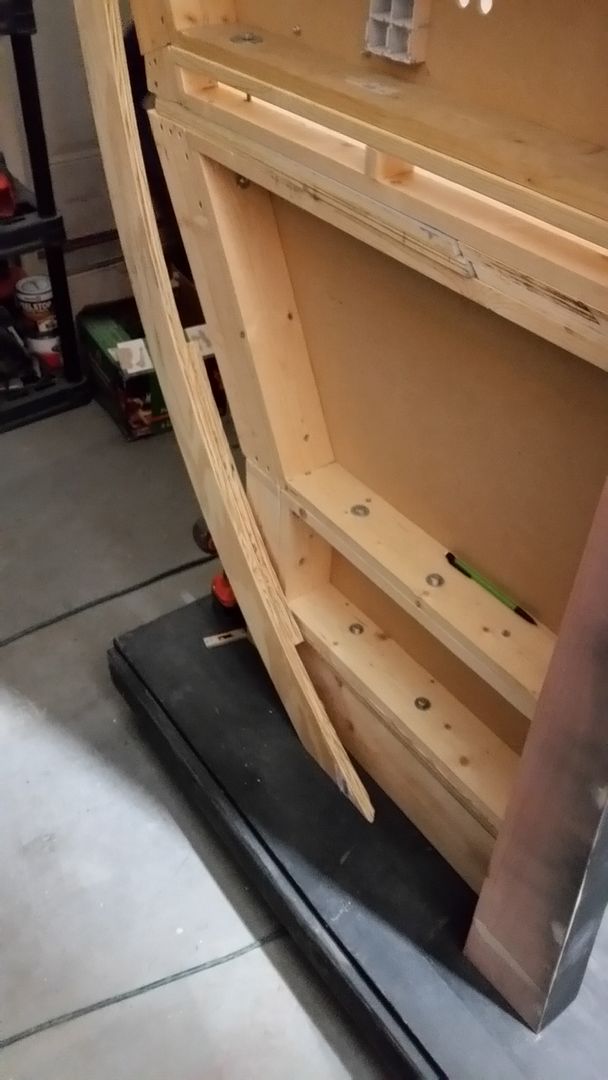
We then laid out the pieces required for the new back wall
Door frame painted
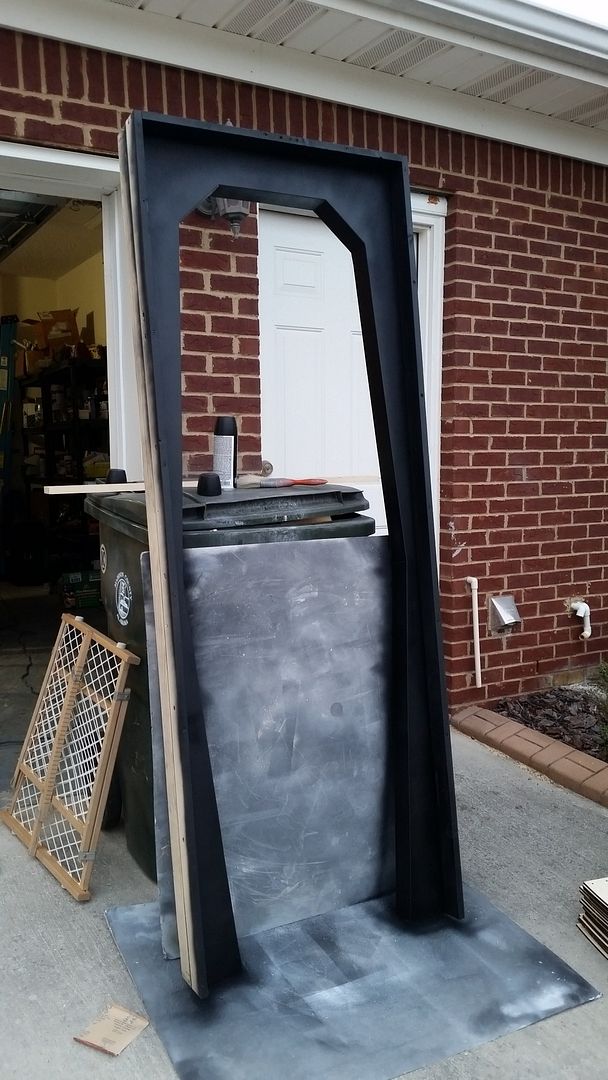
And installed - the bolts will be covered by the 4" foam pads
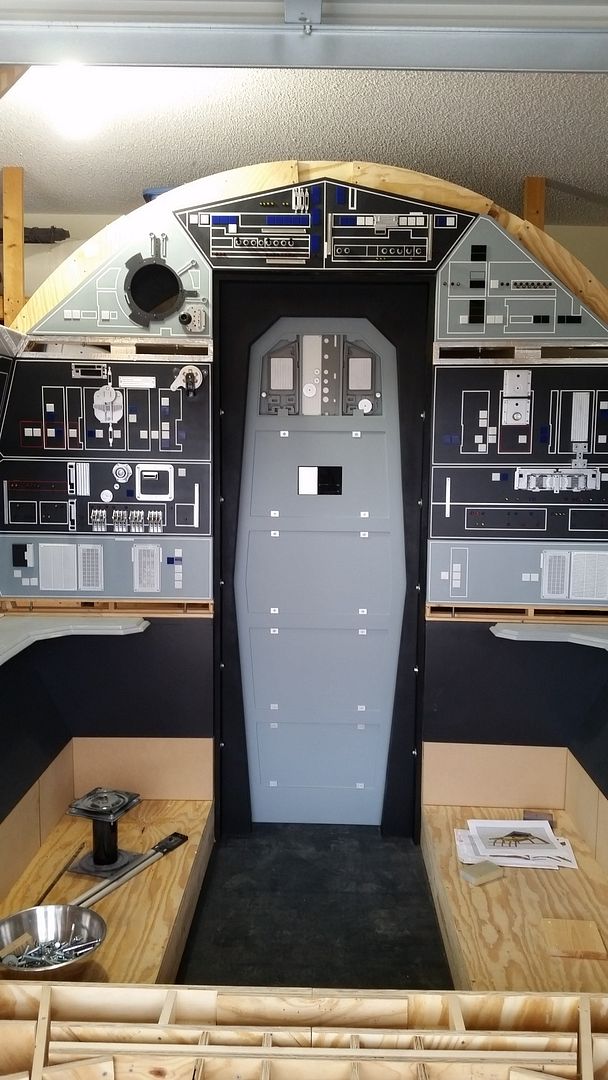
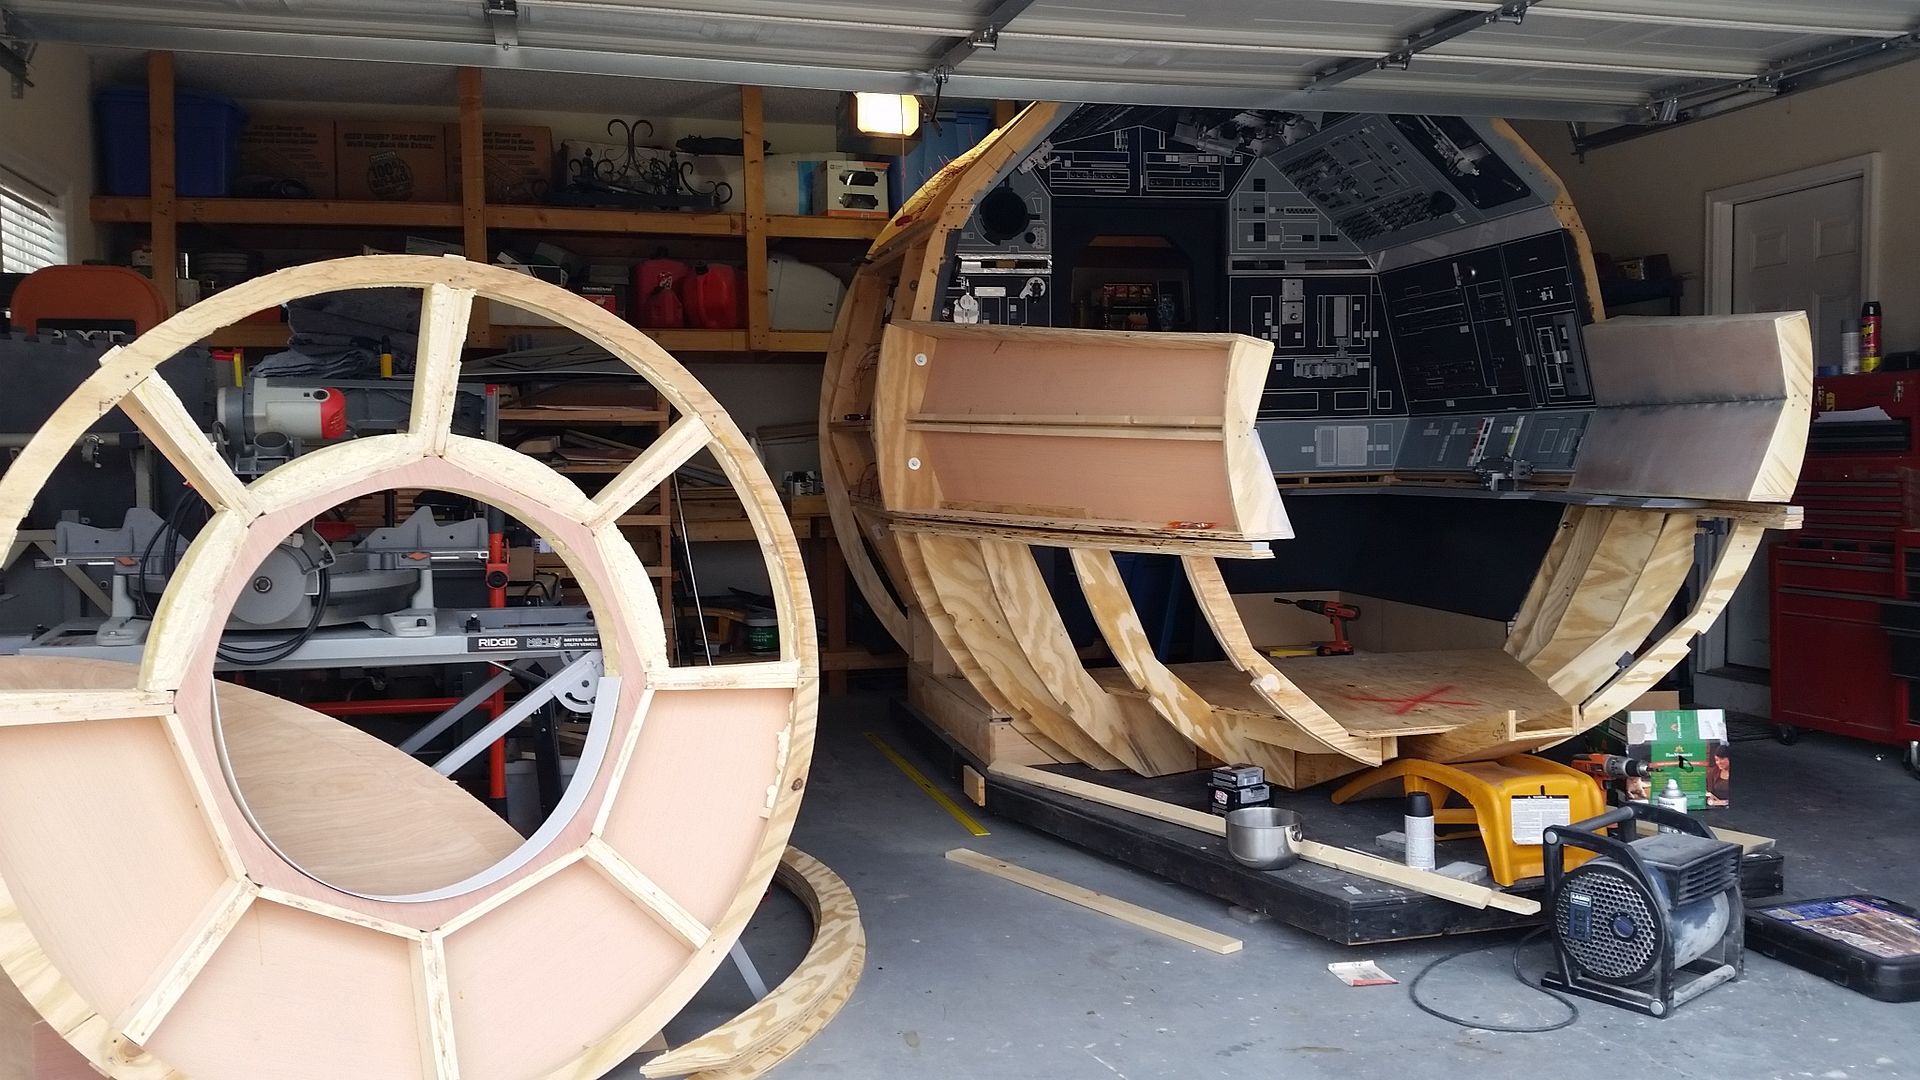
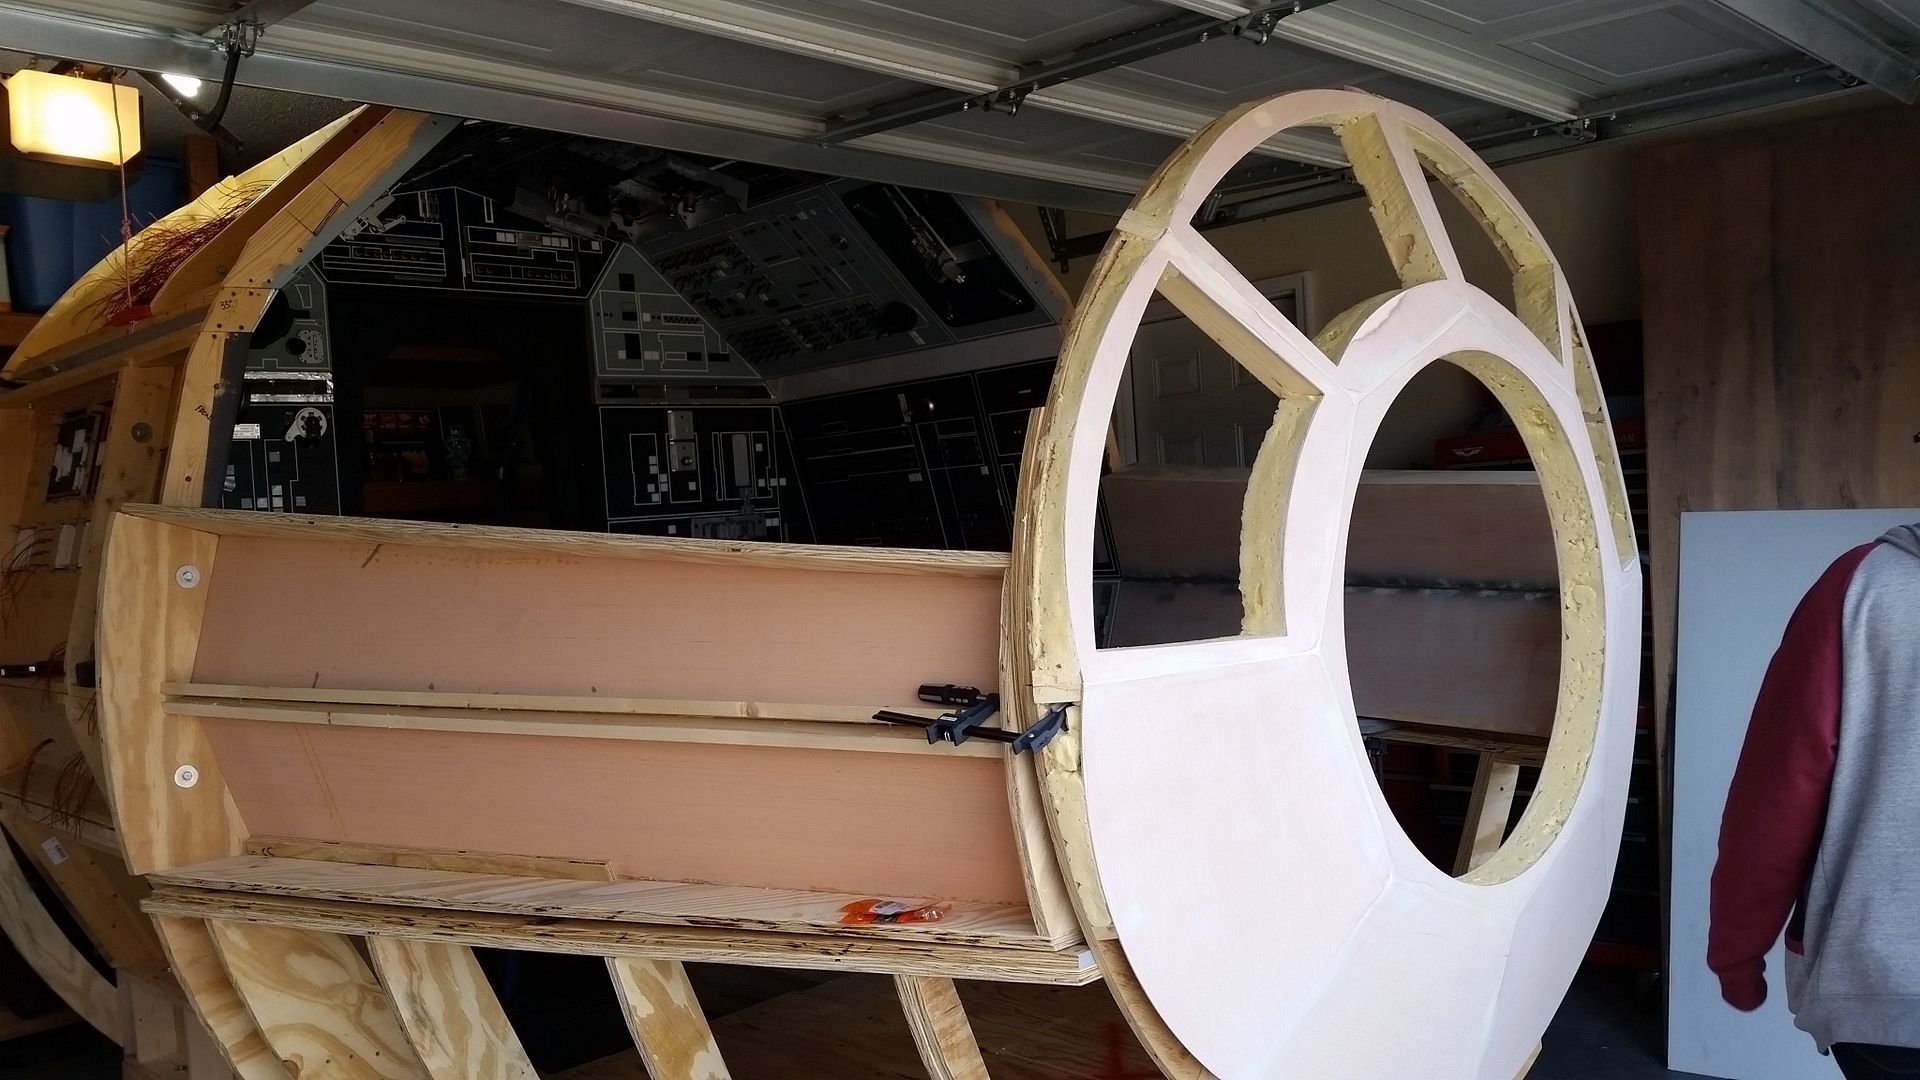
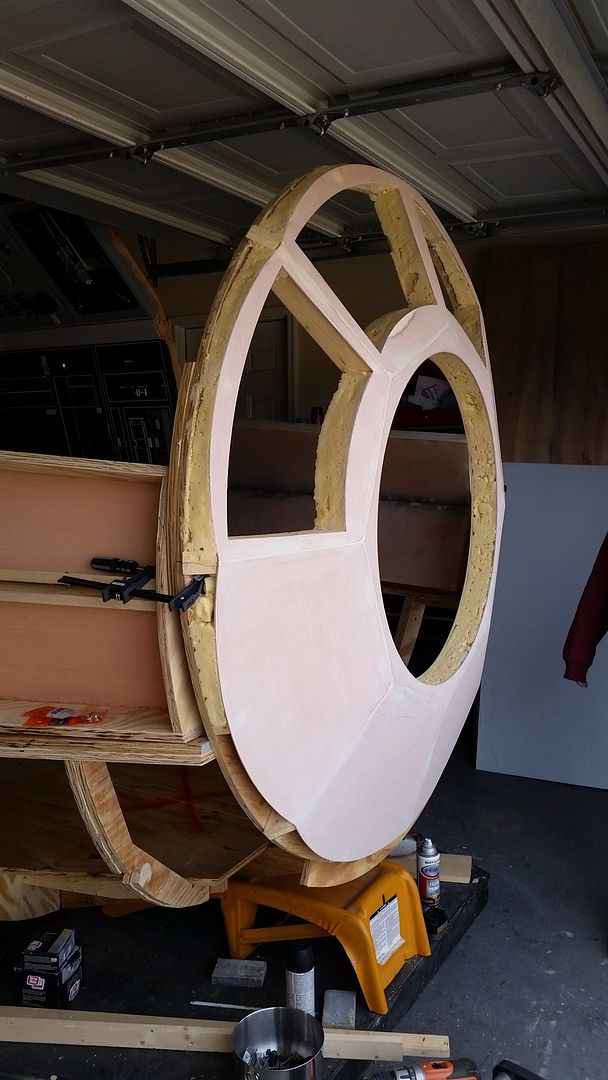
Back main arch built and temp in place
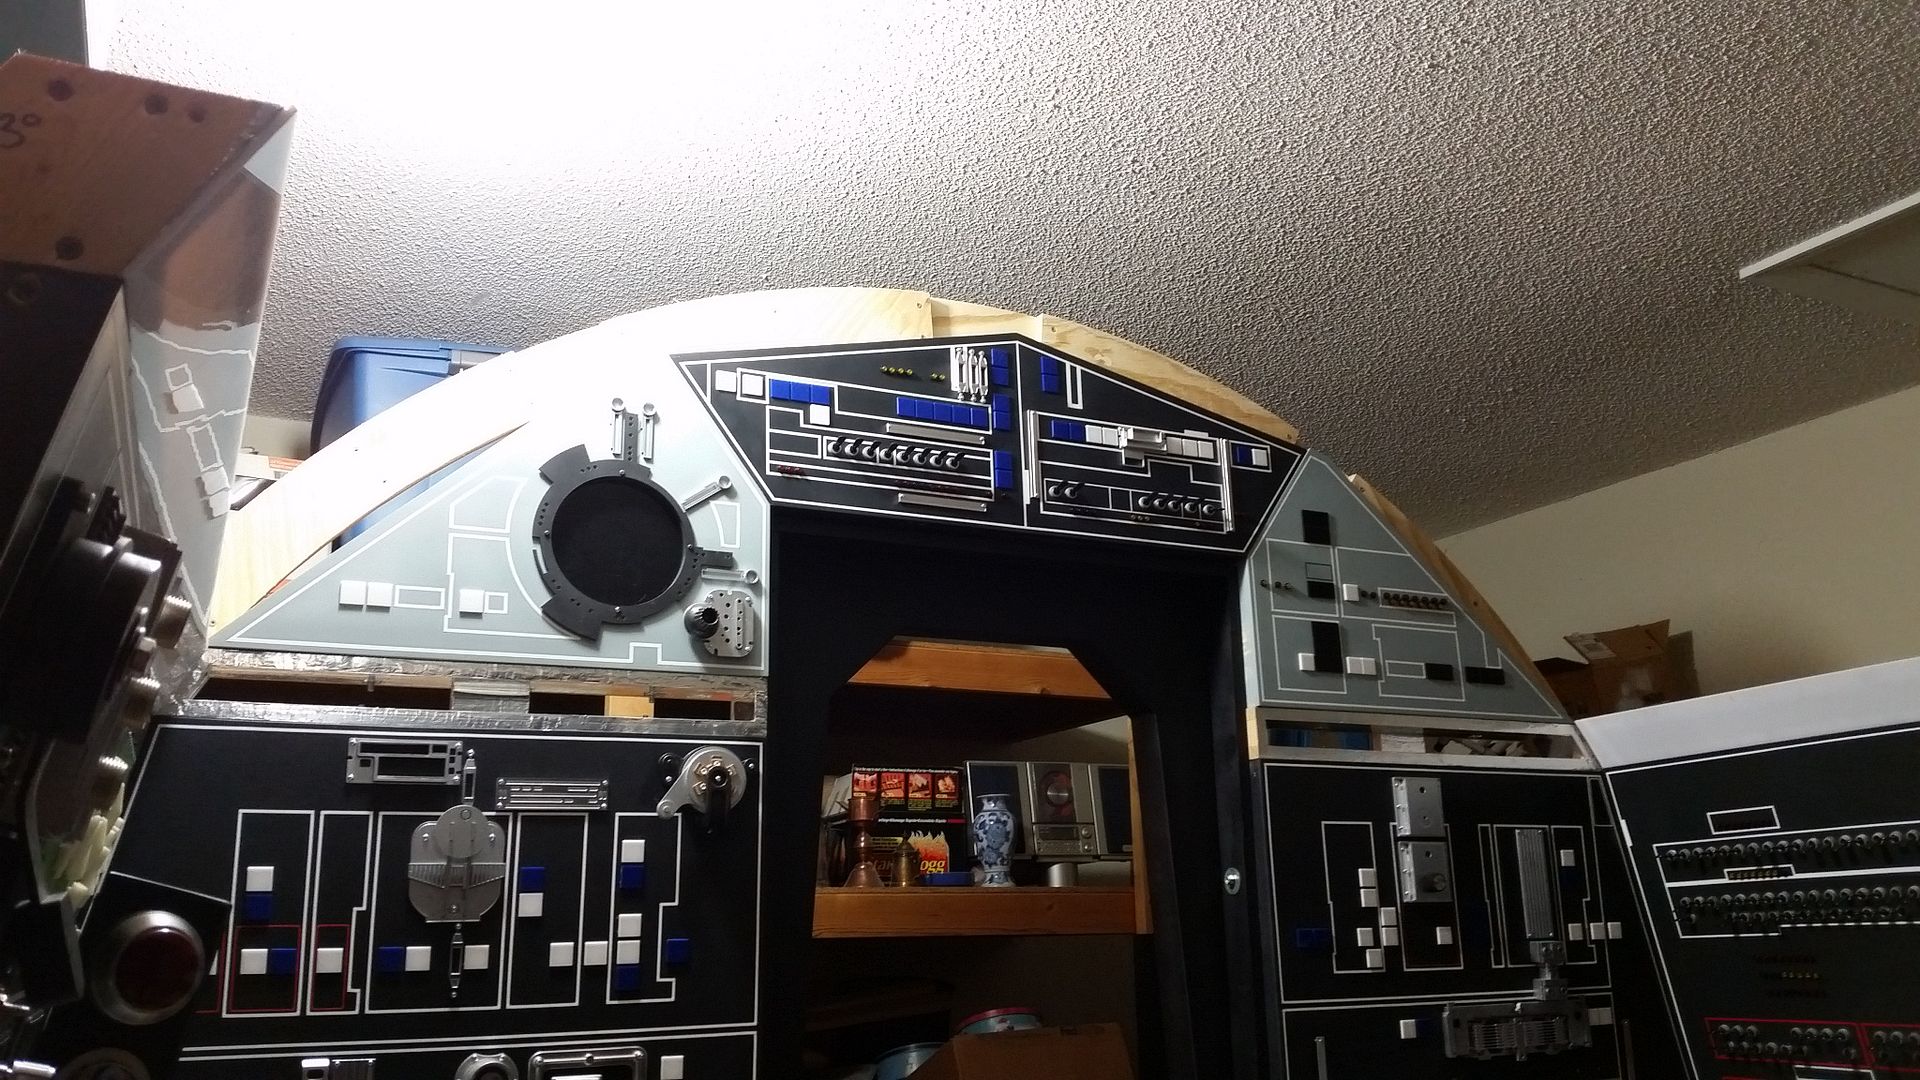

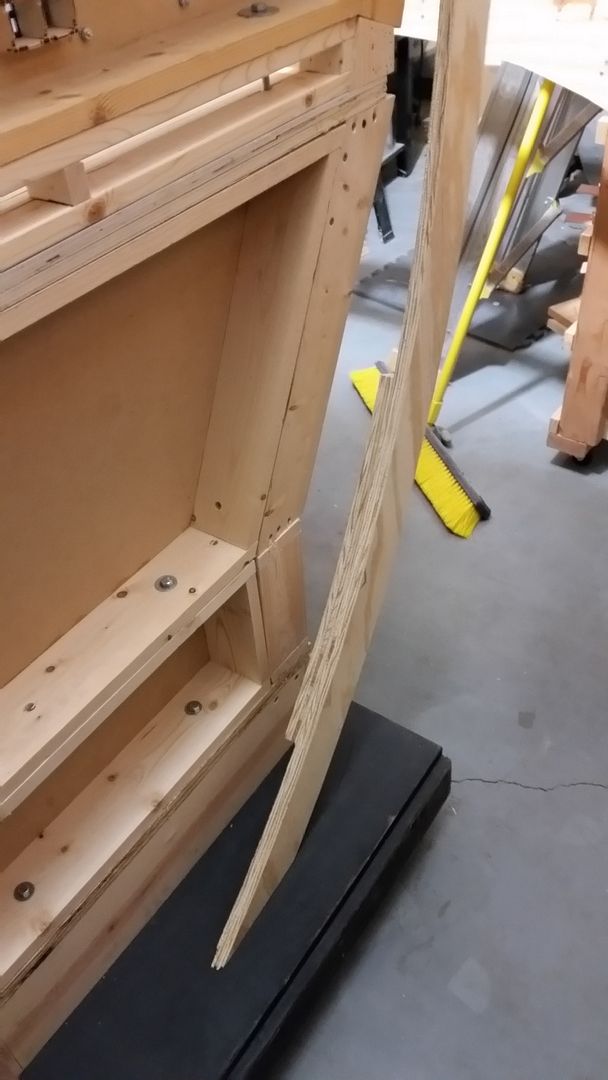
Main and canopy arch in place
Calling it a night...
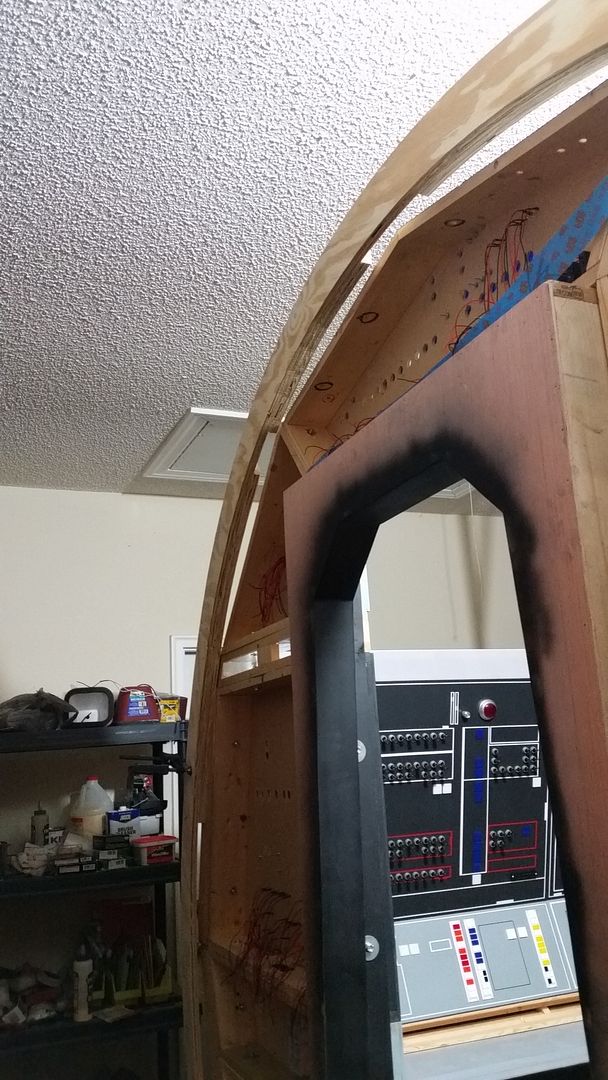
Early morning... Seeing how the door looks
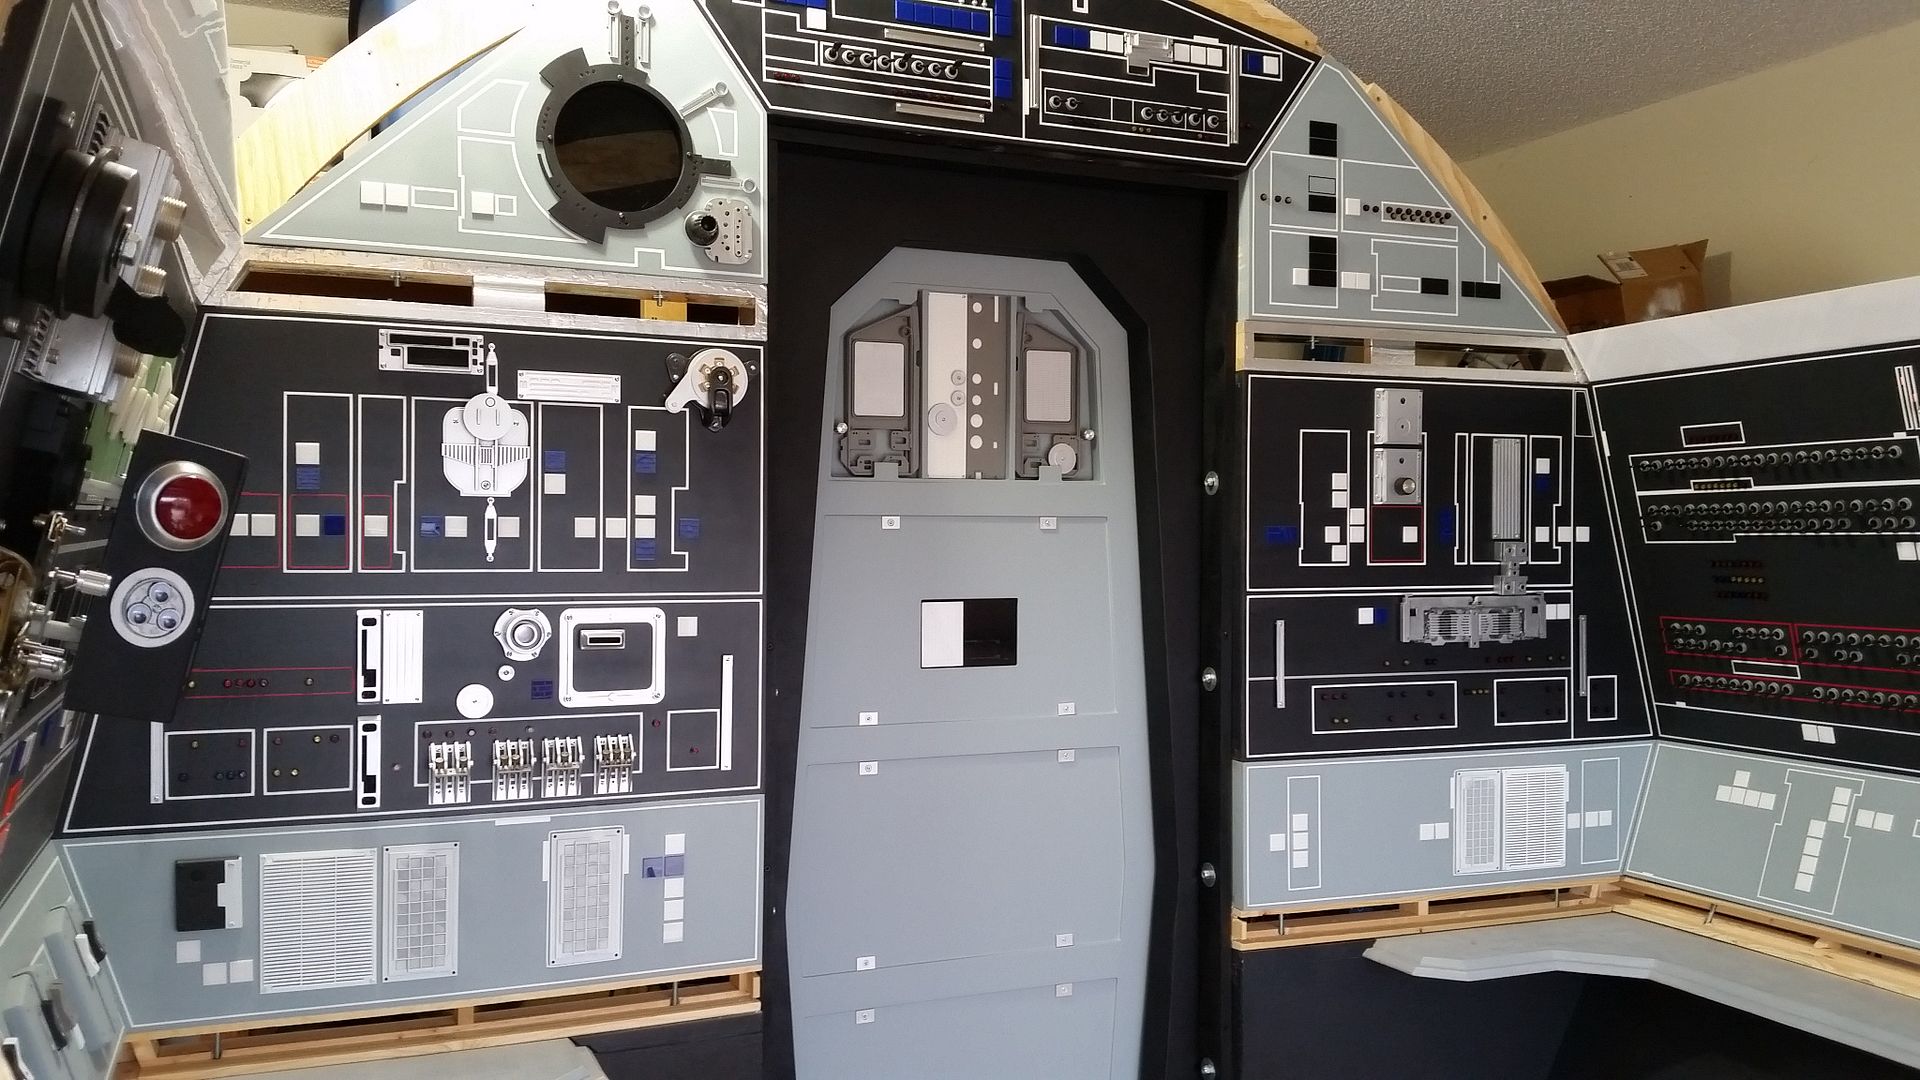
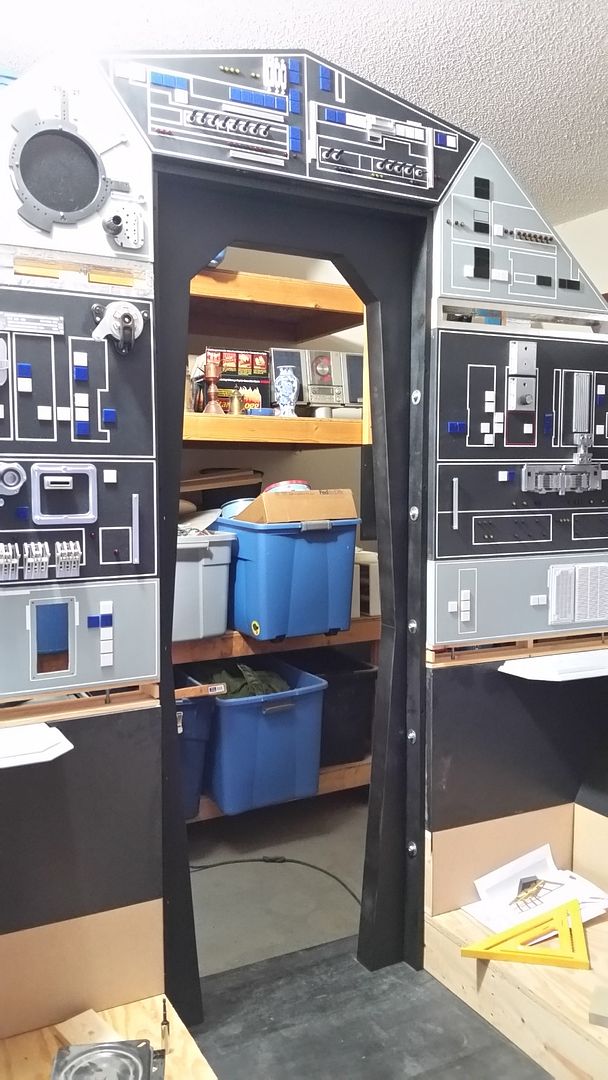
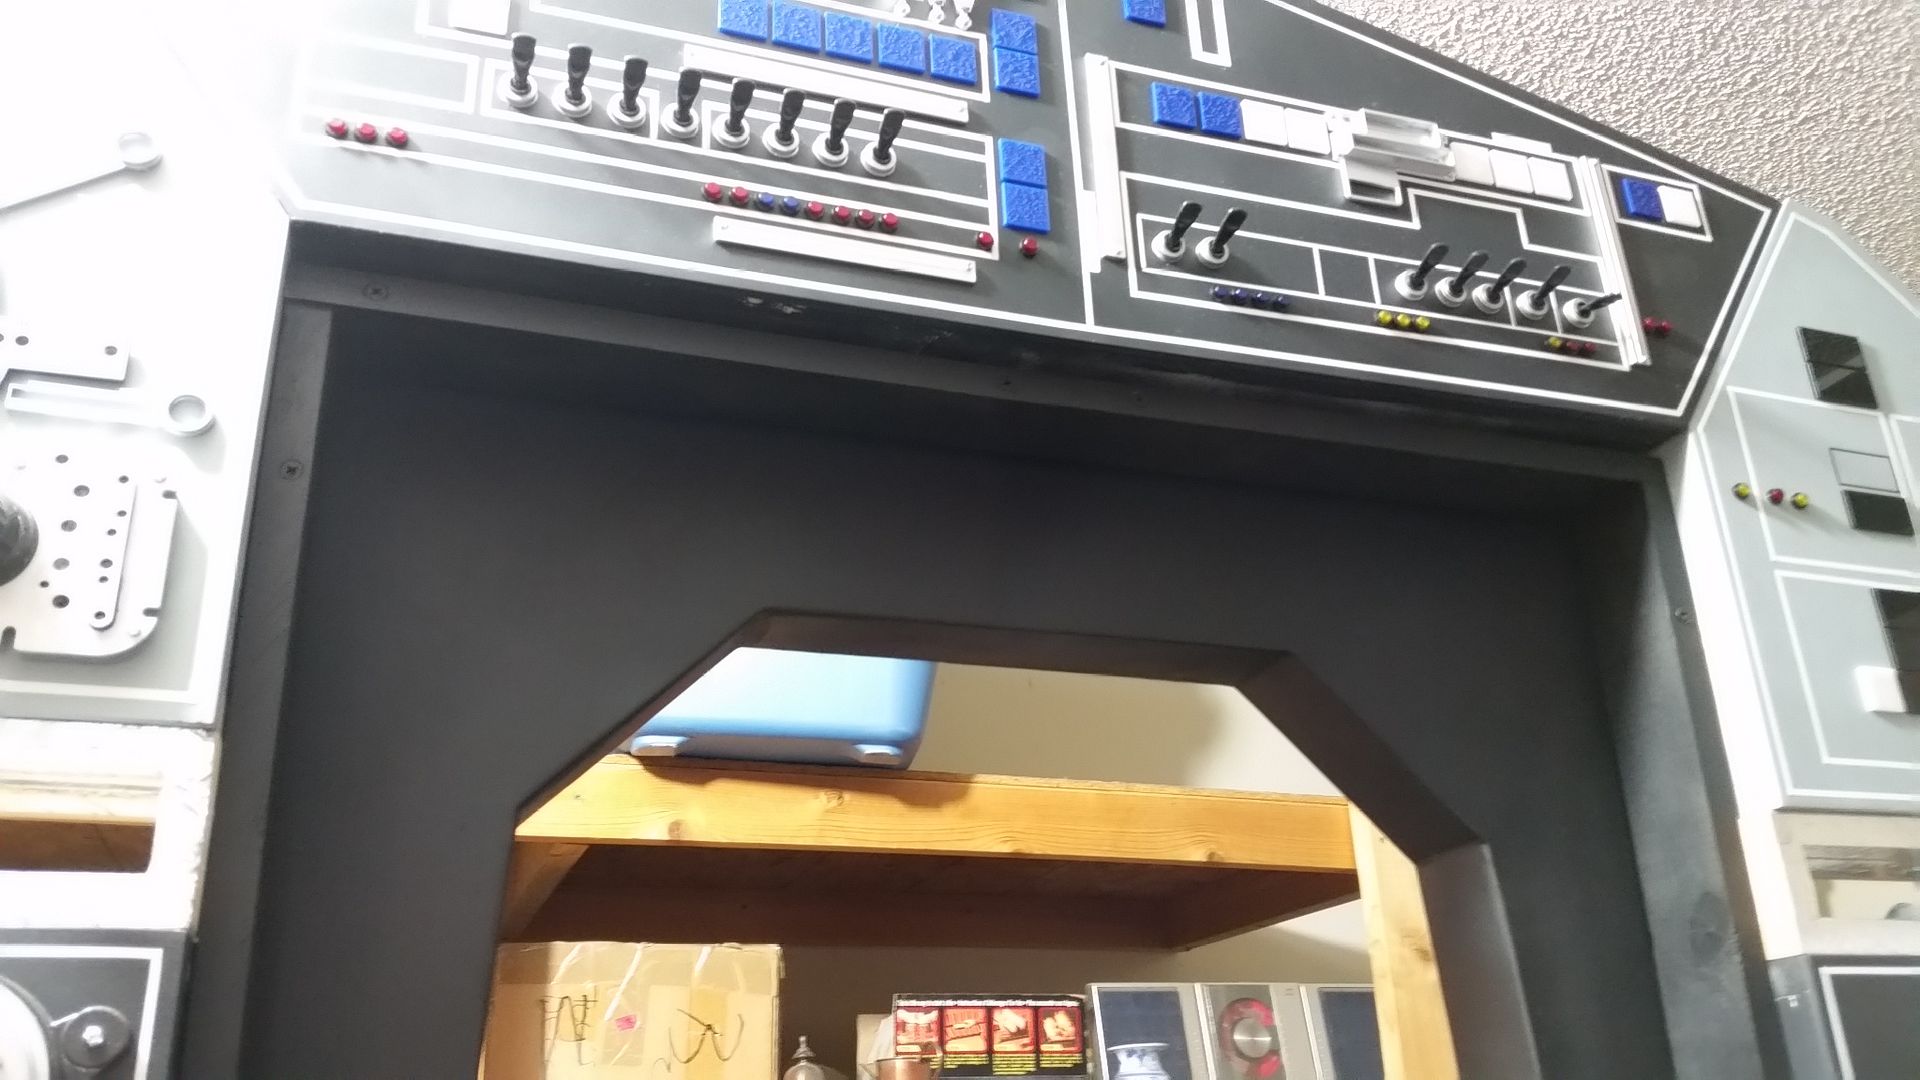
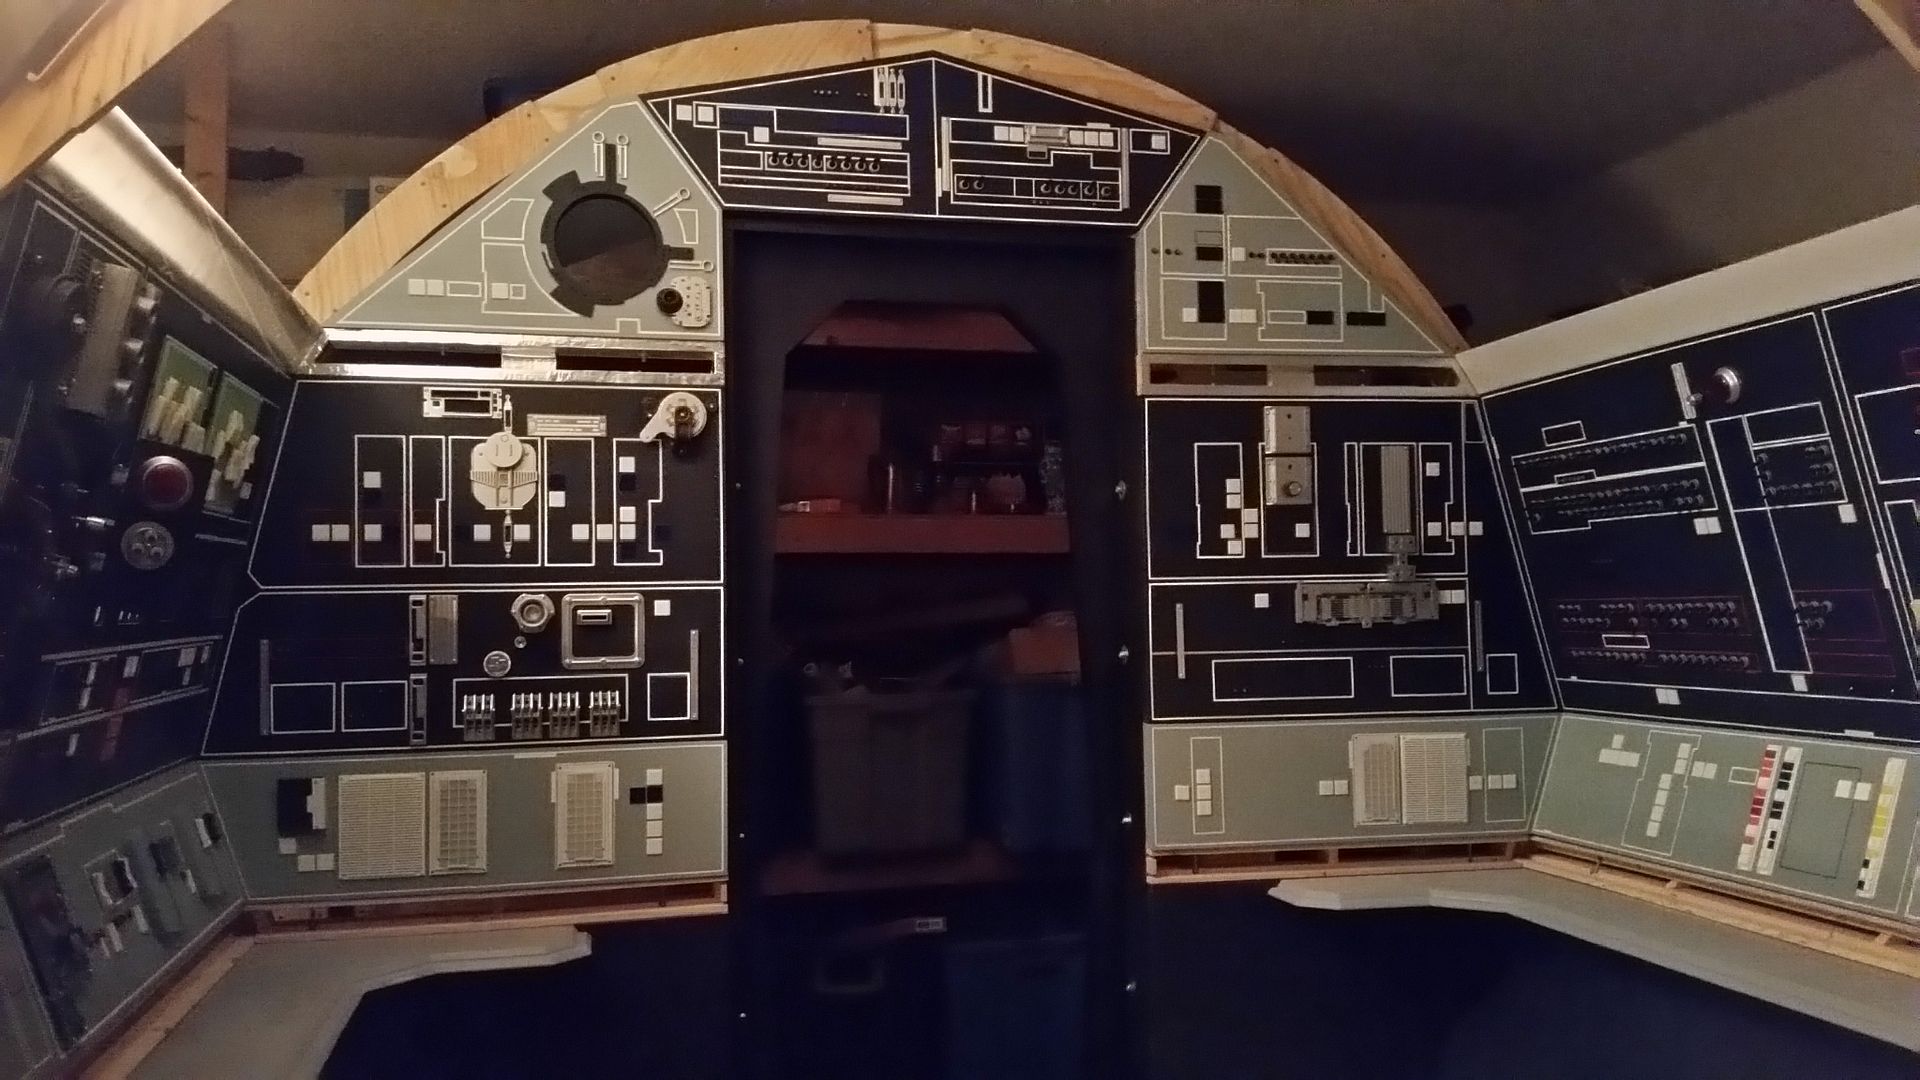
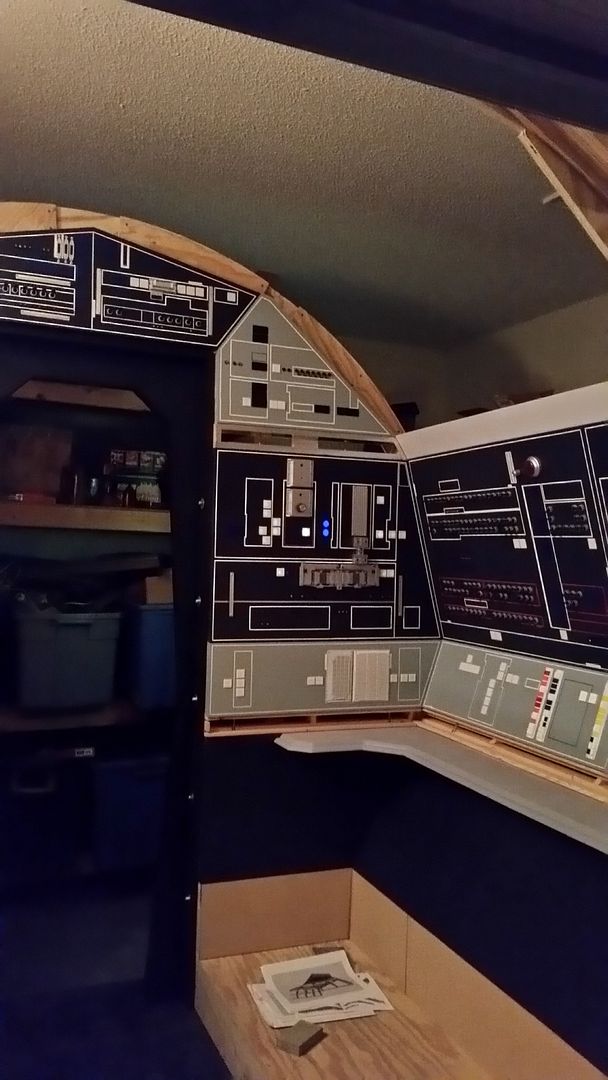
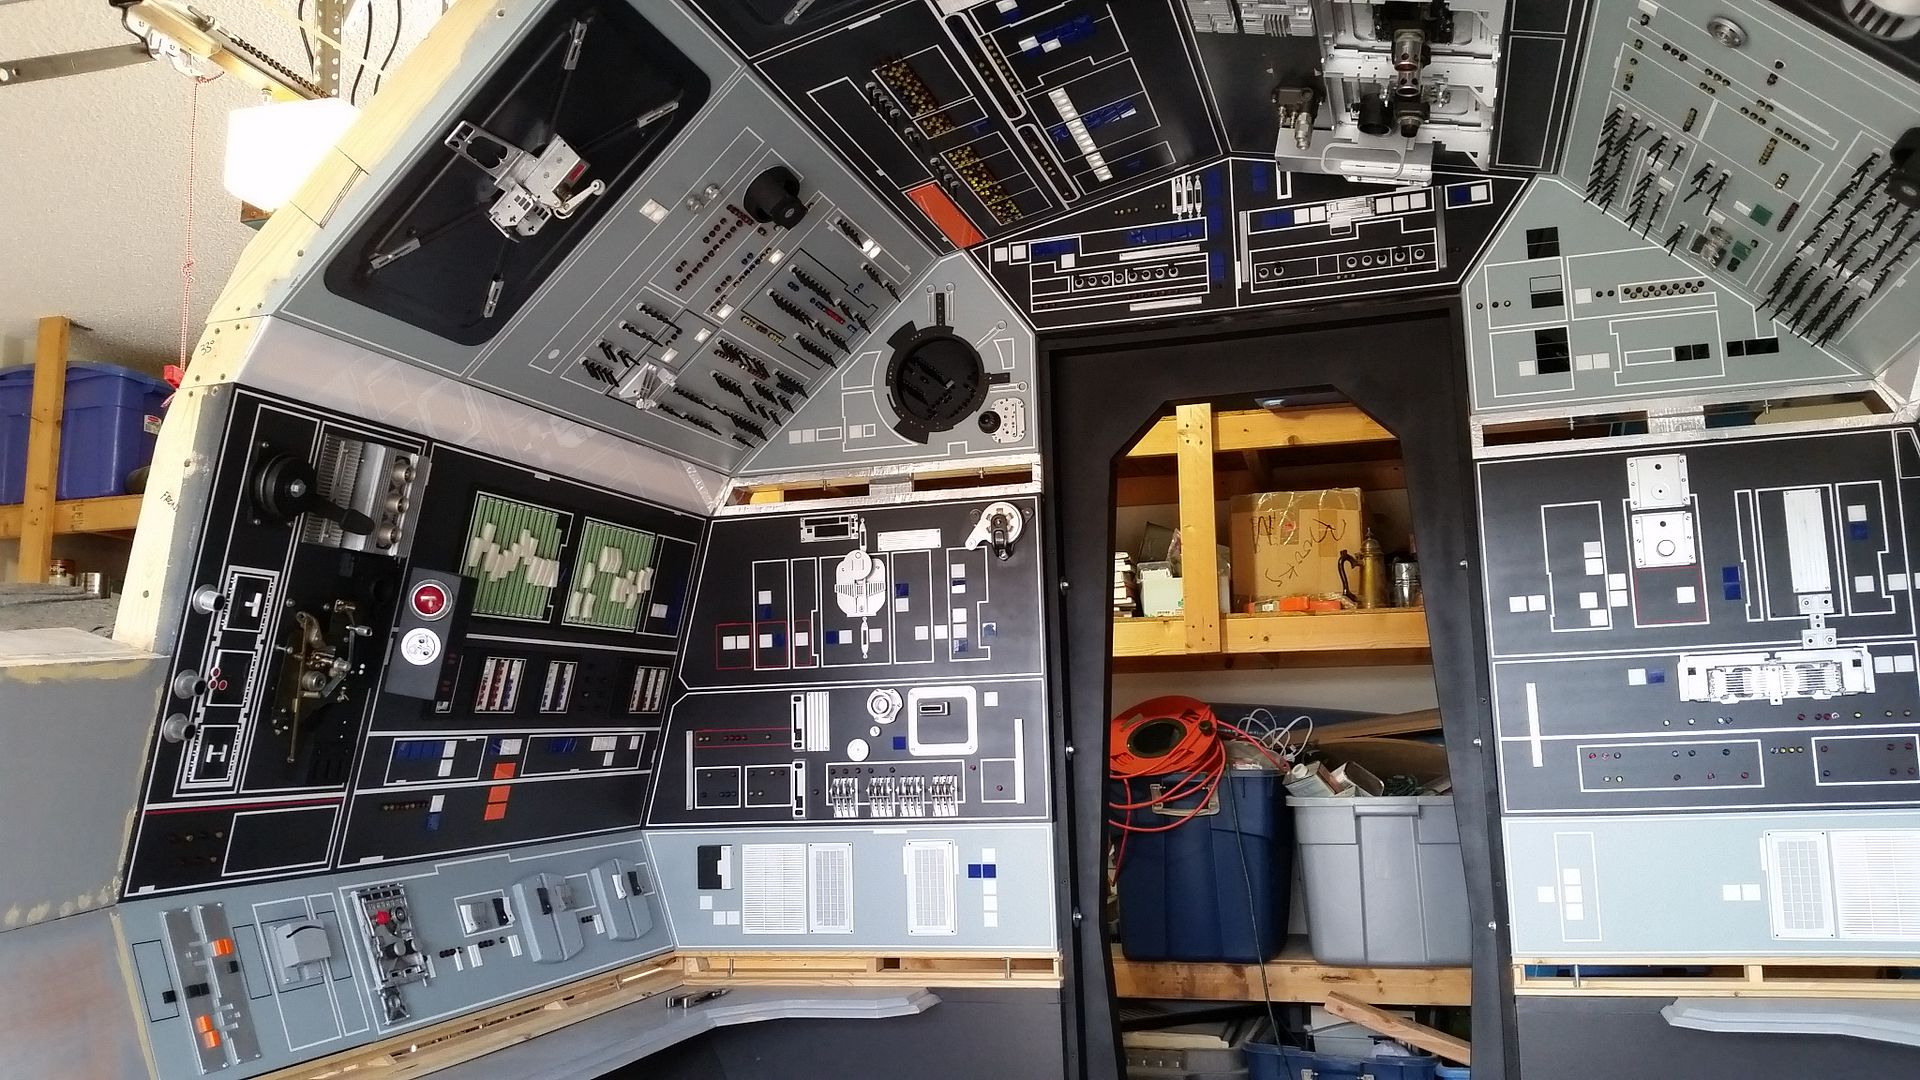
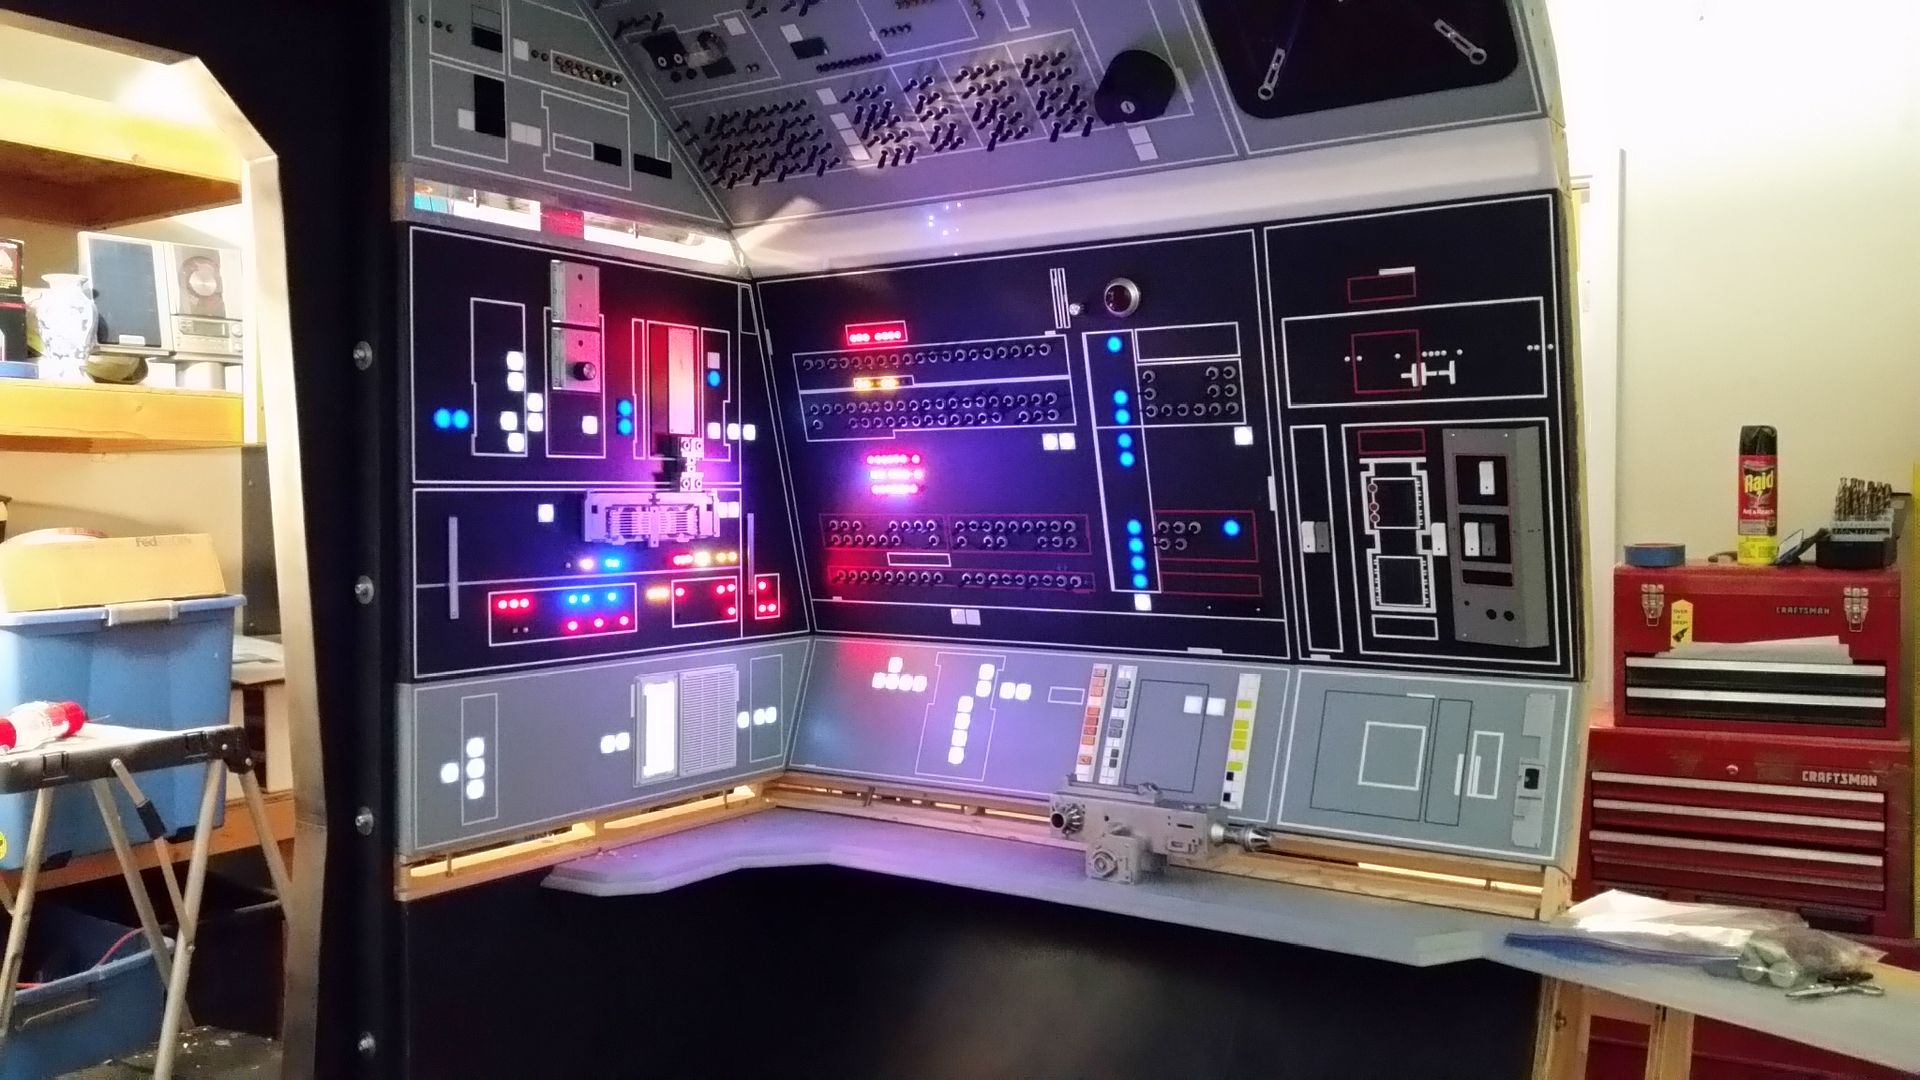
Daniel and I then installed the rest of the panels - this took a while to get everything aligned
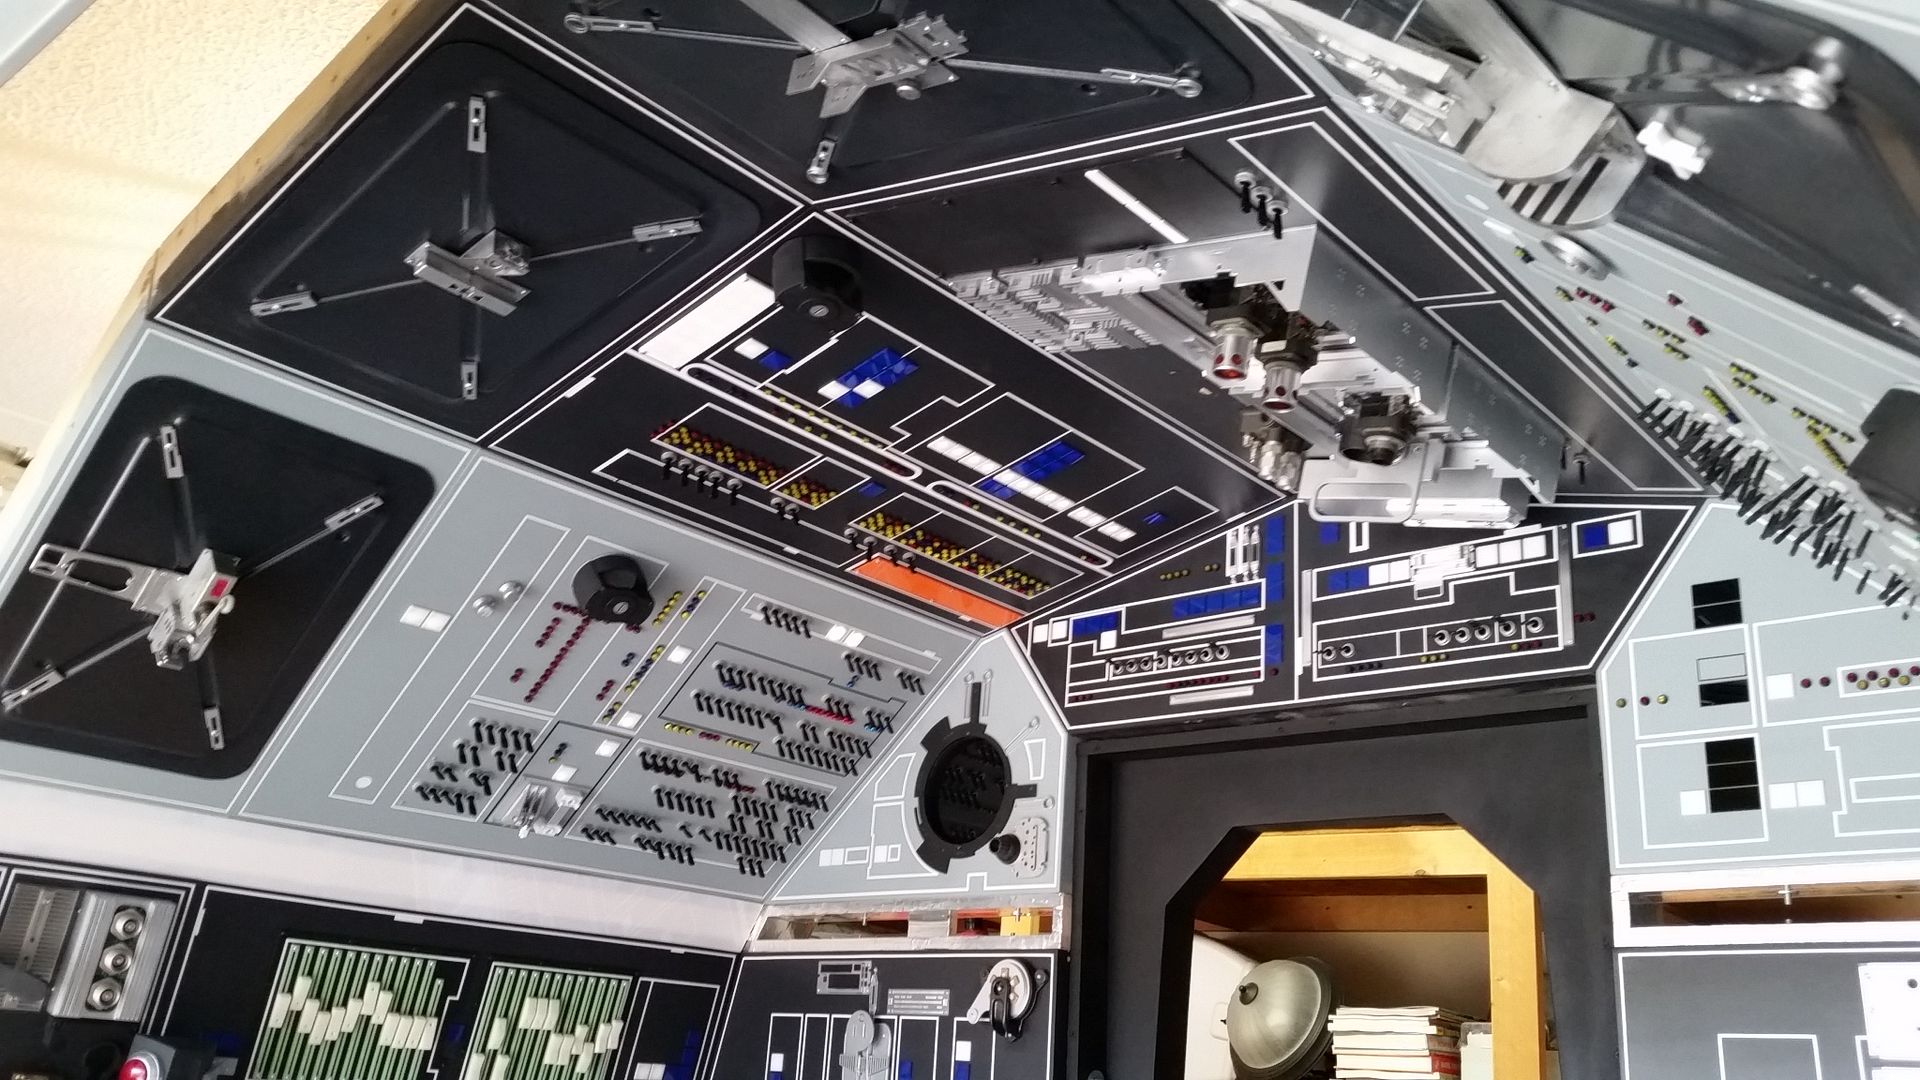
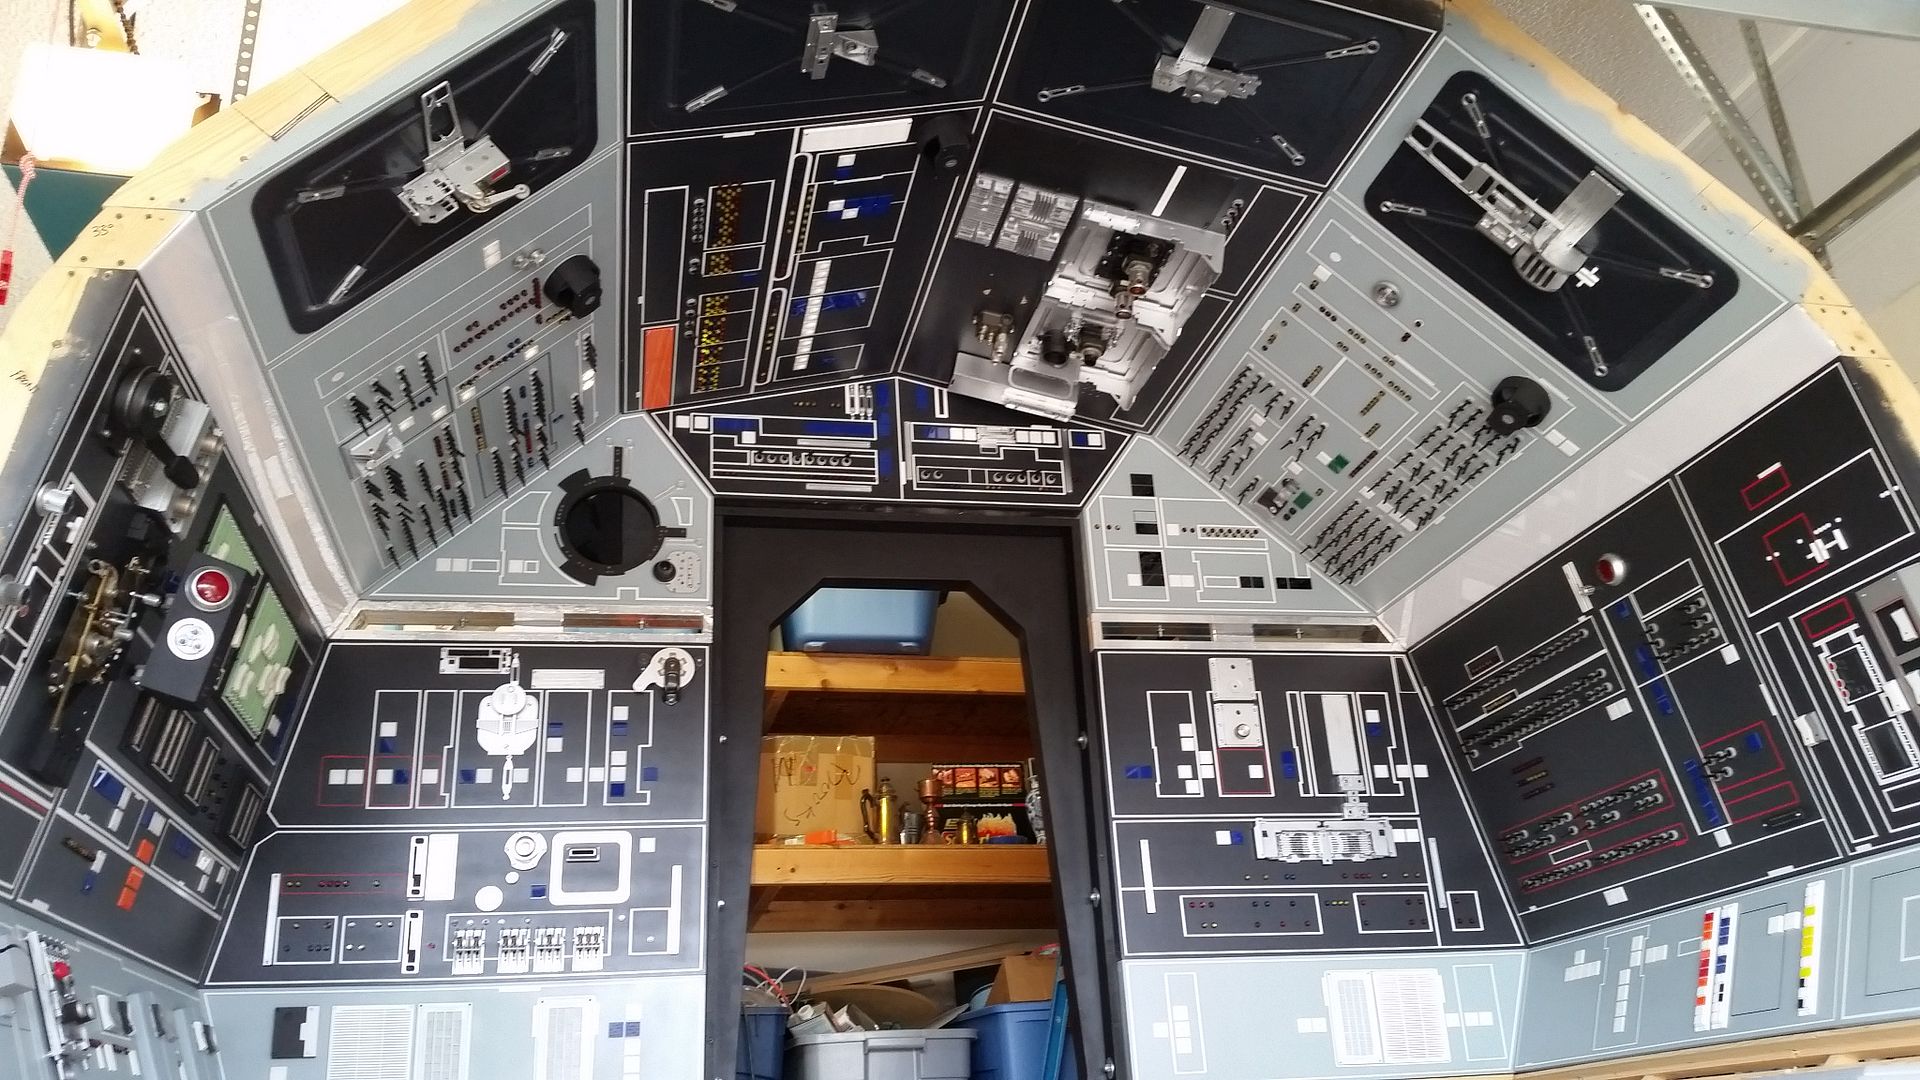
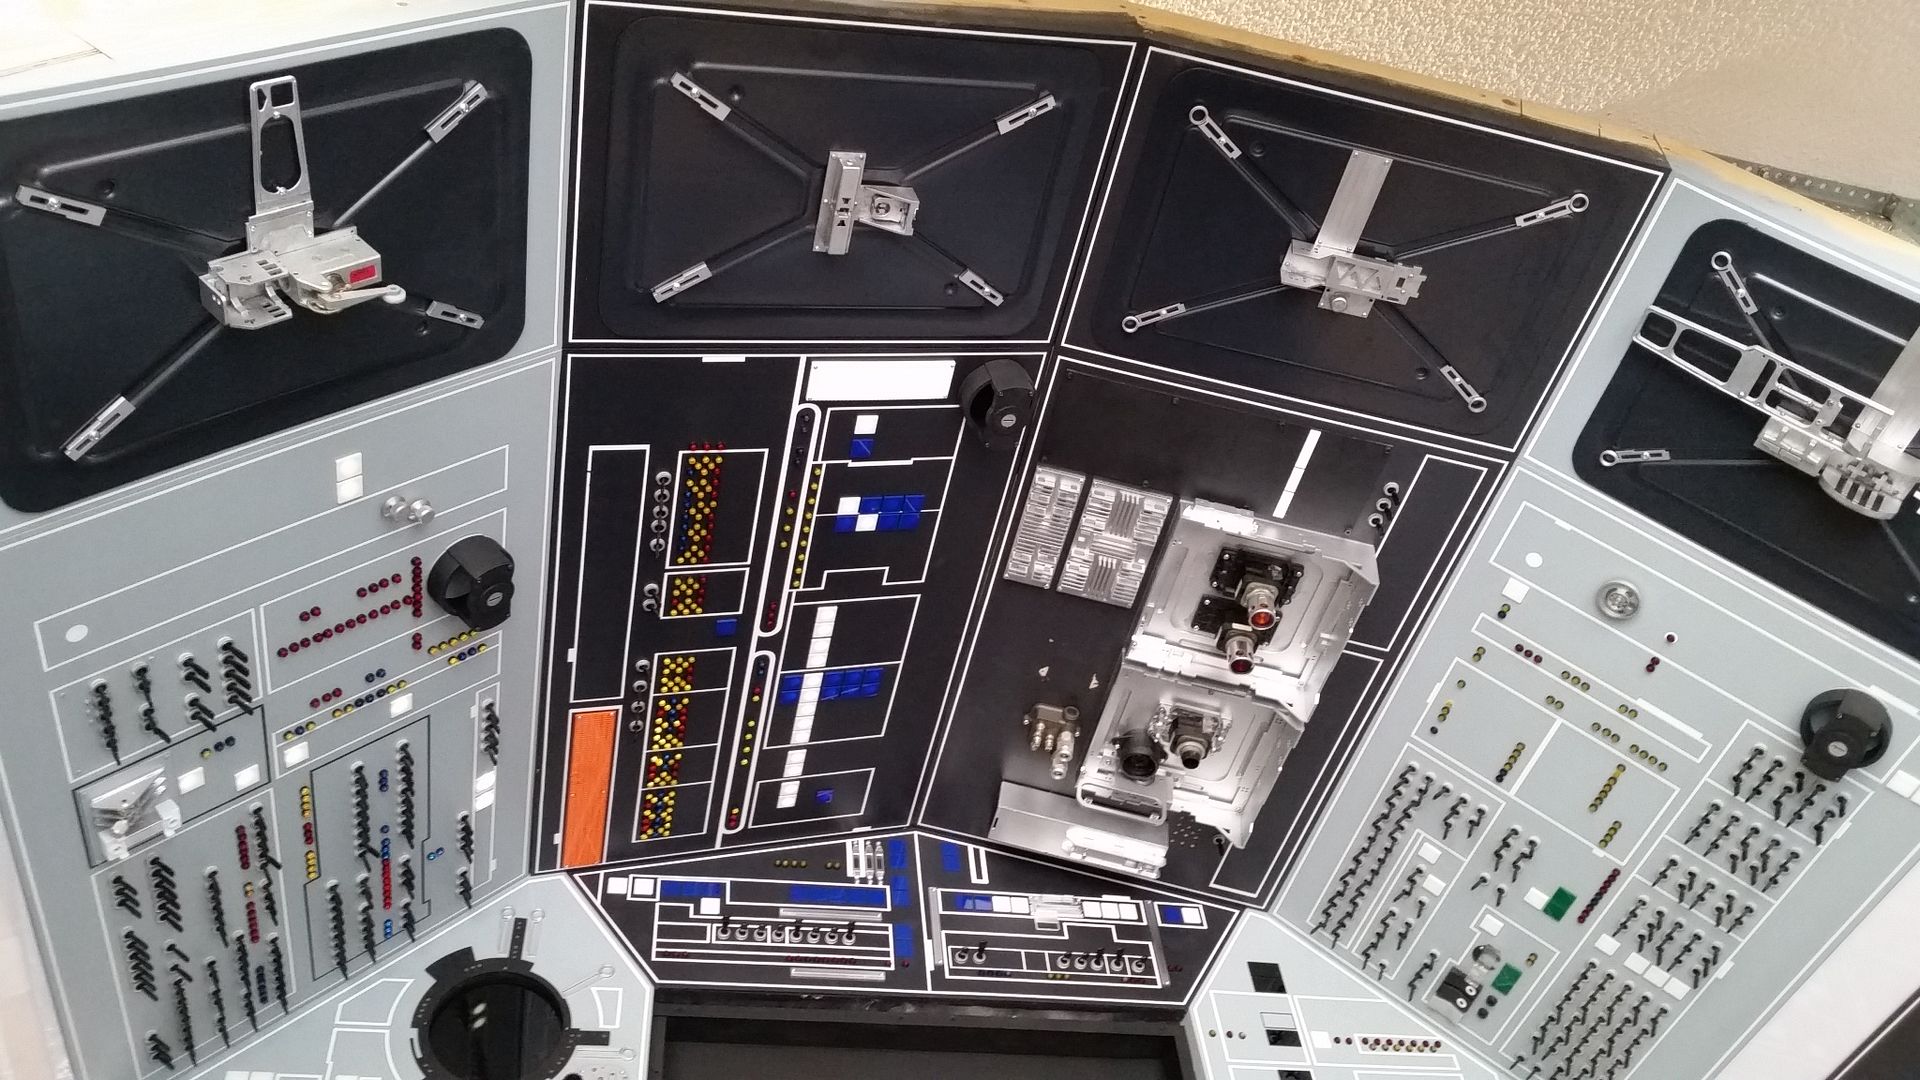
This is the 1st time in over a year the panels have been back in place
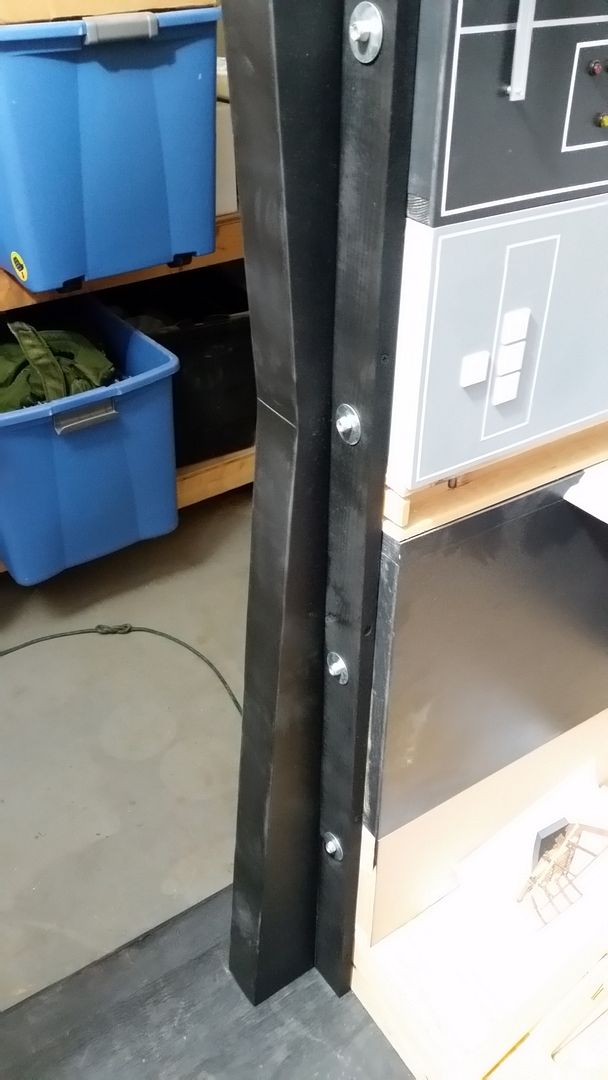
For fun... I installed this brace
Temp positioned the front window
Let the party begin!
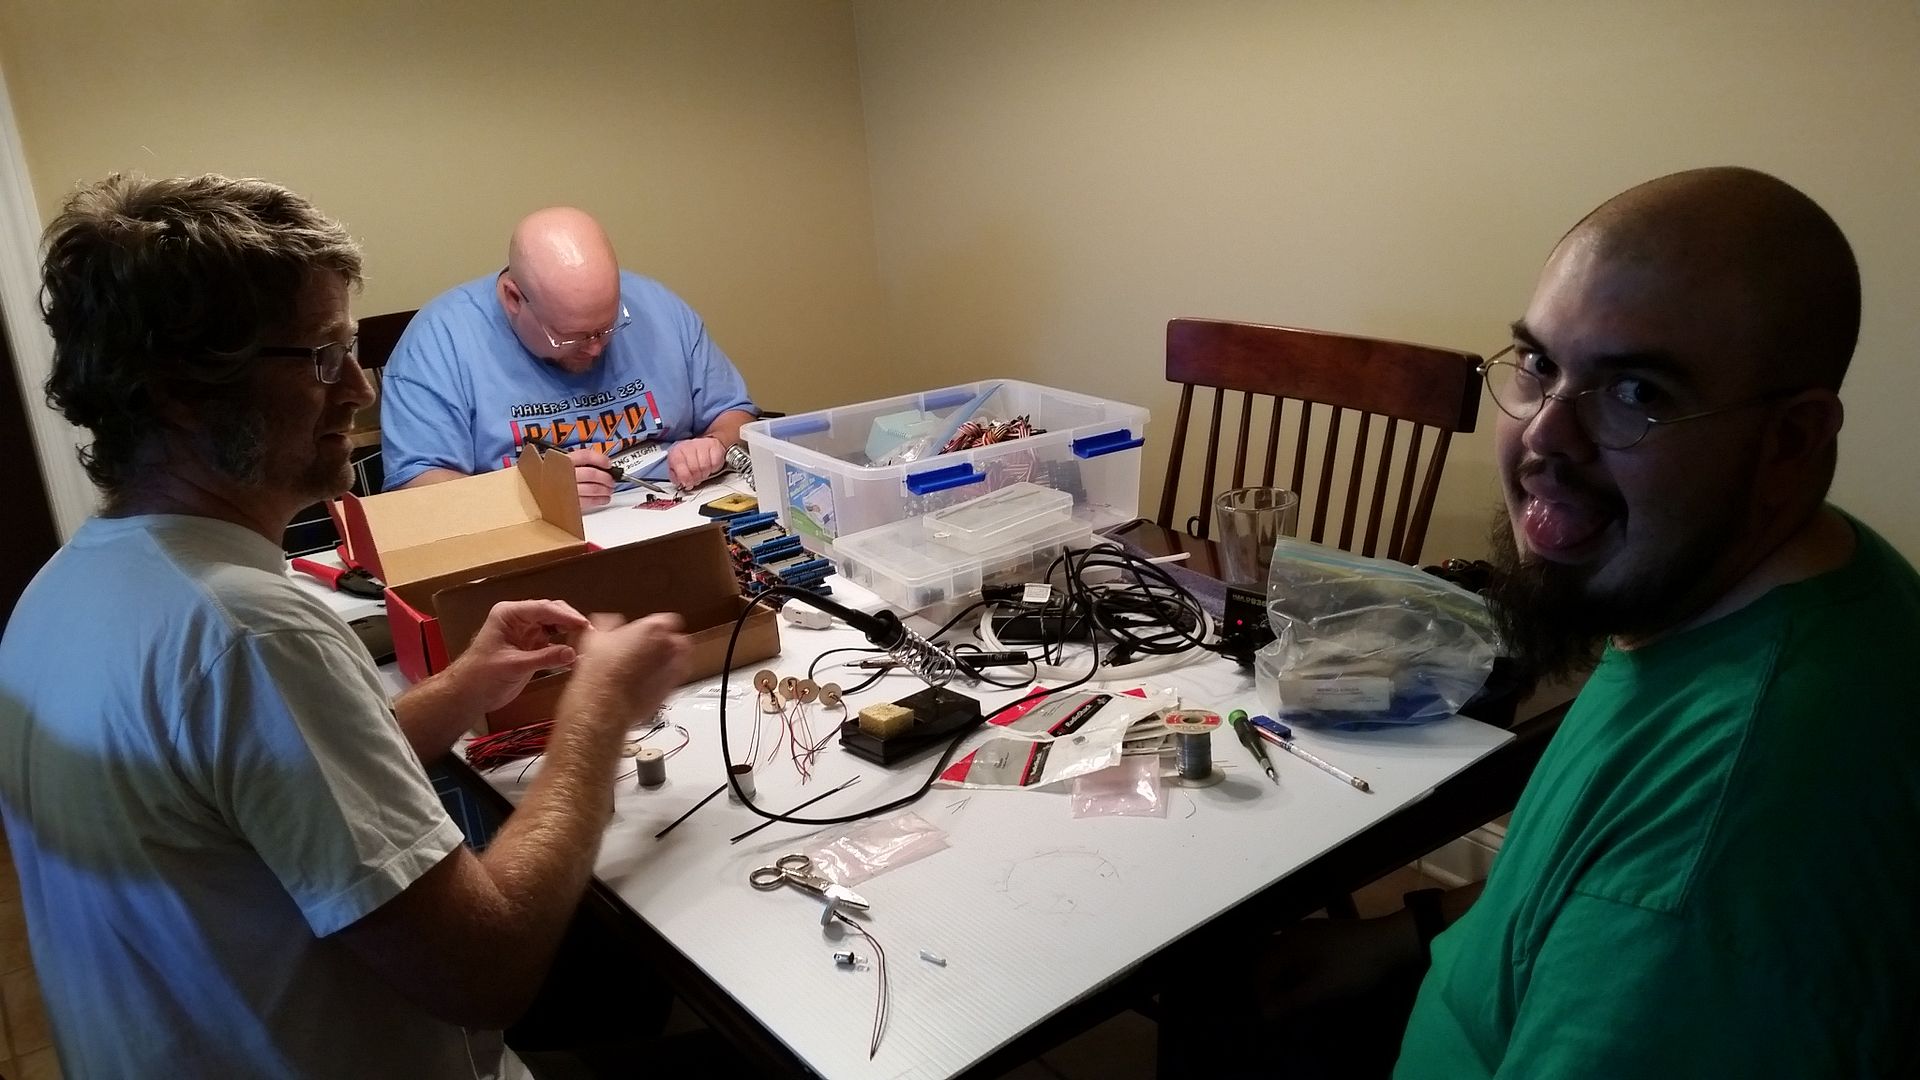
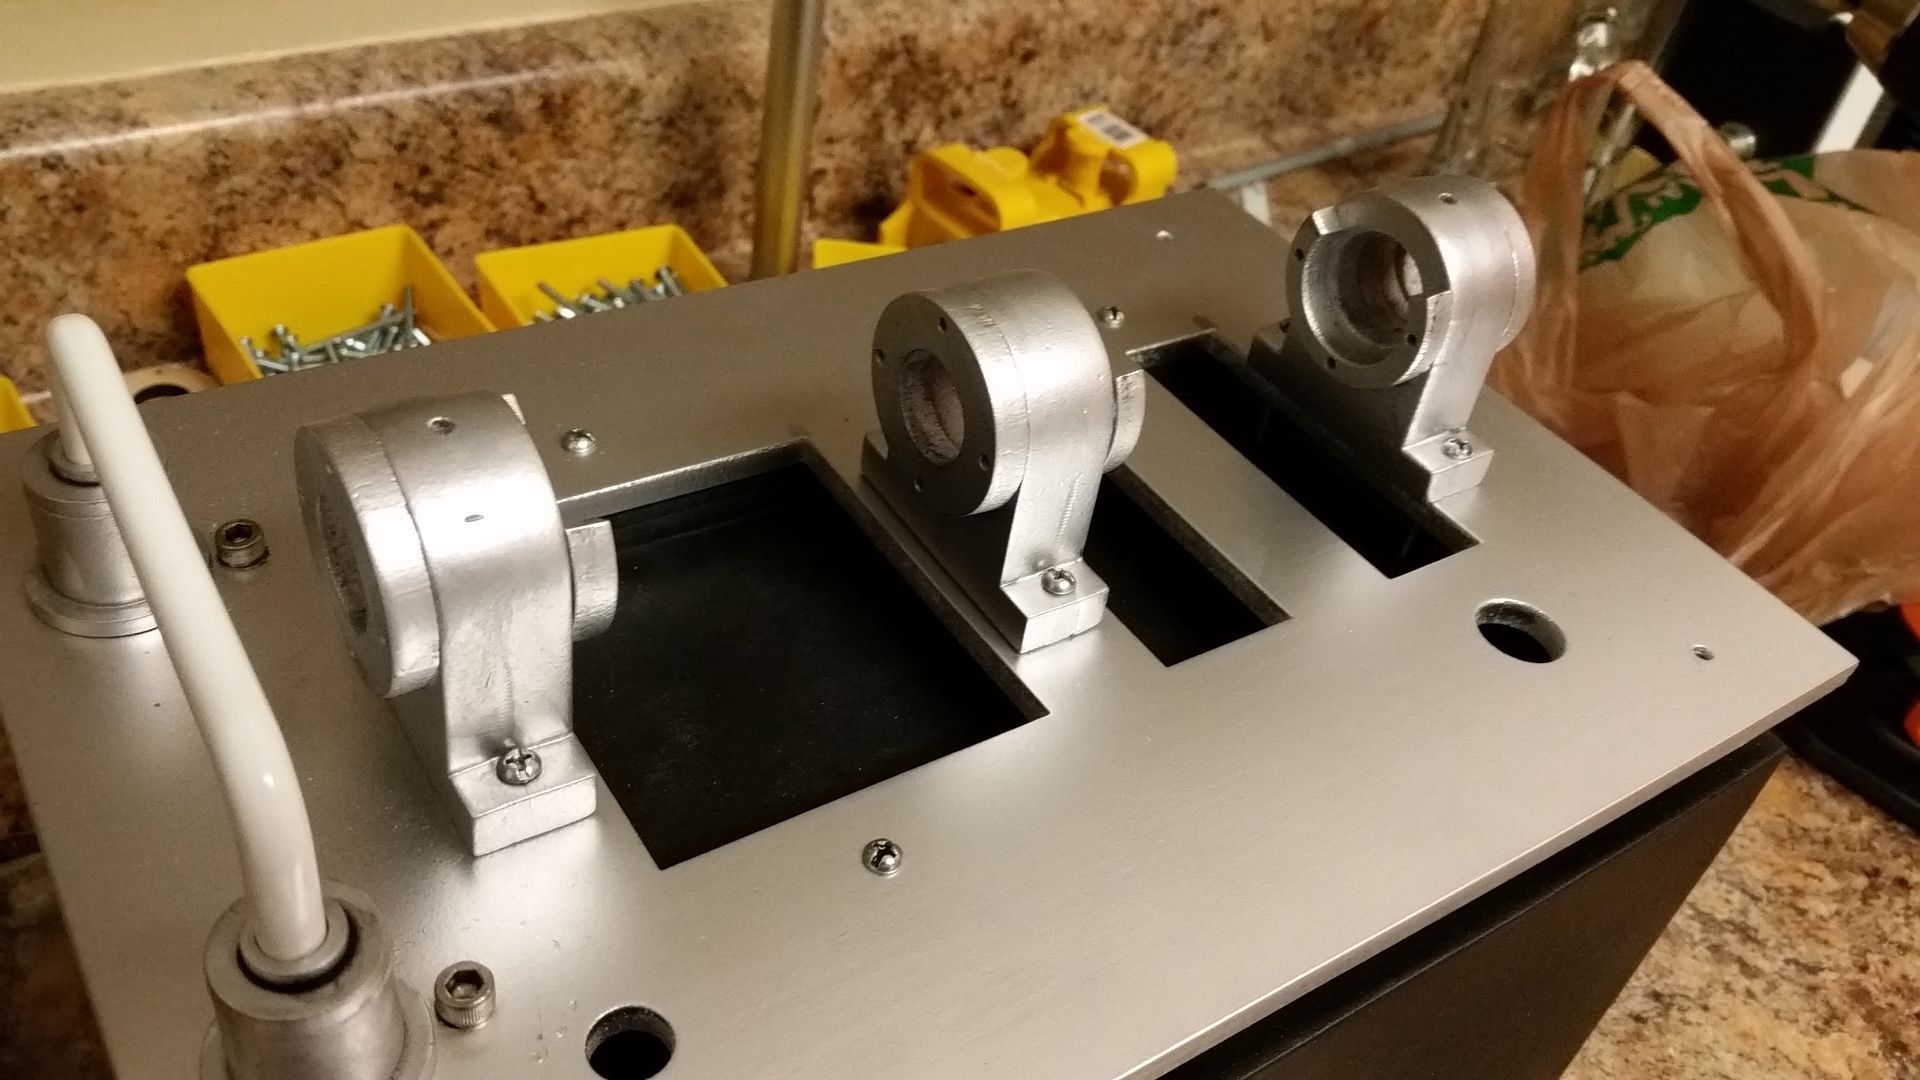
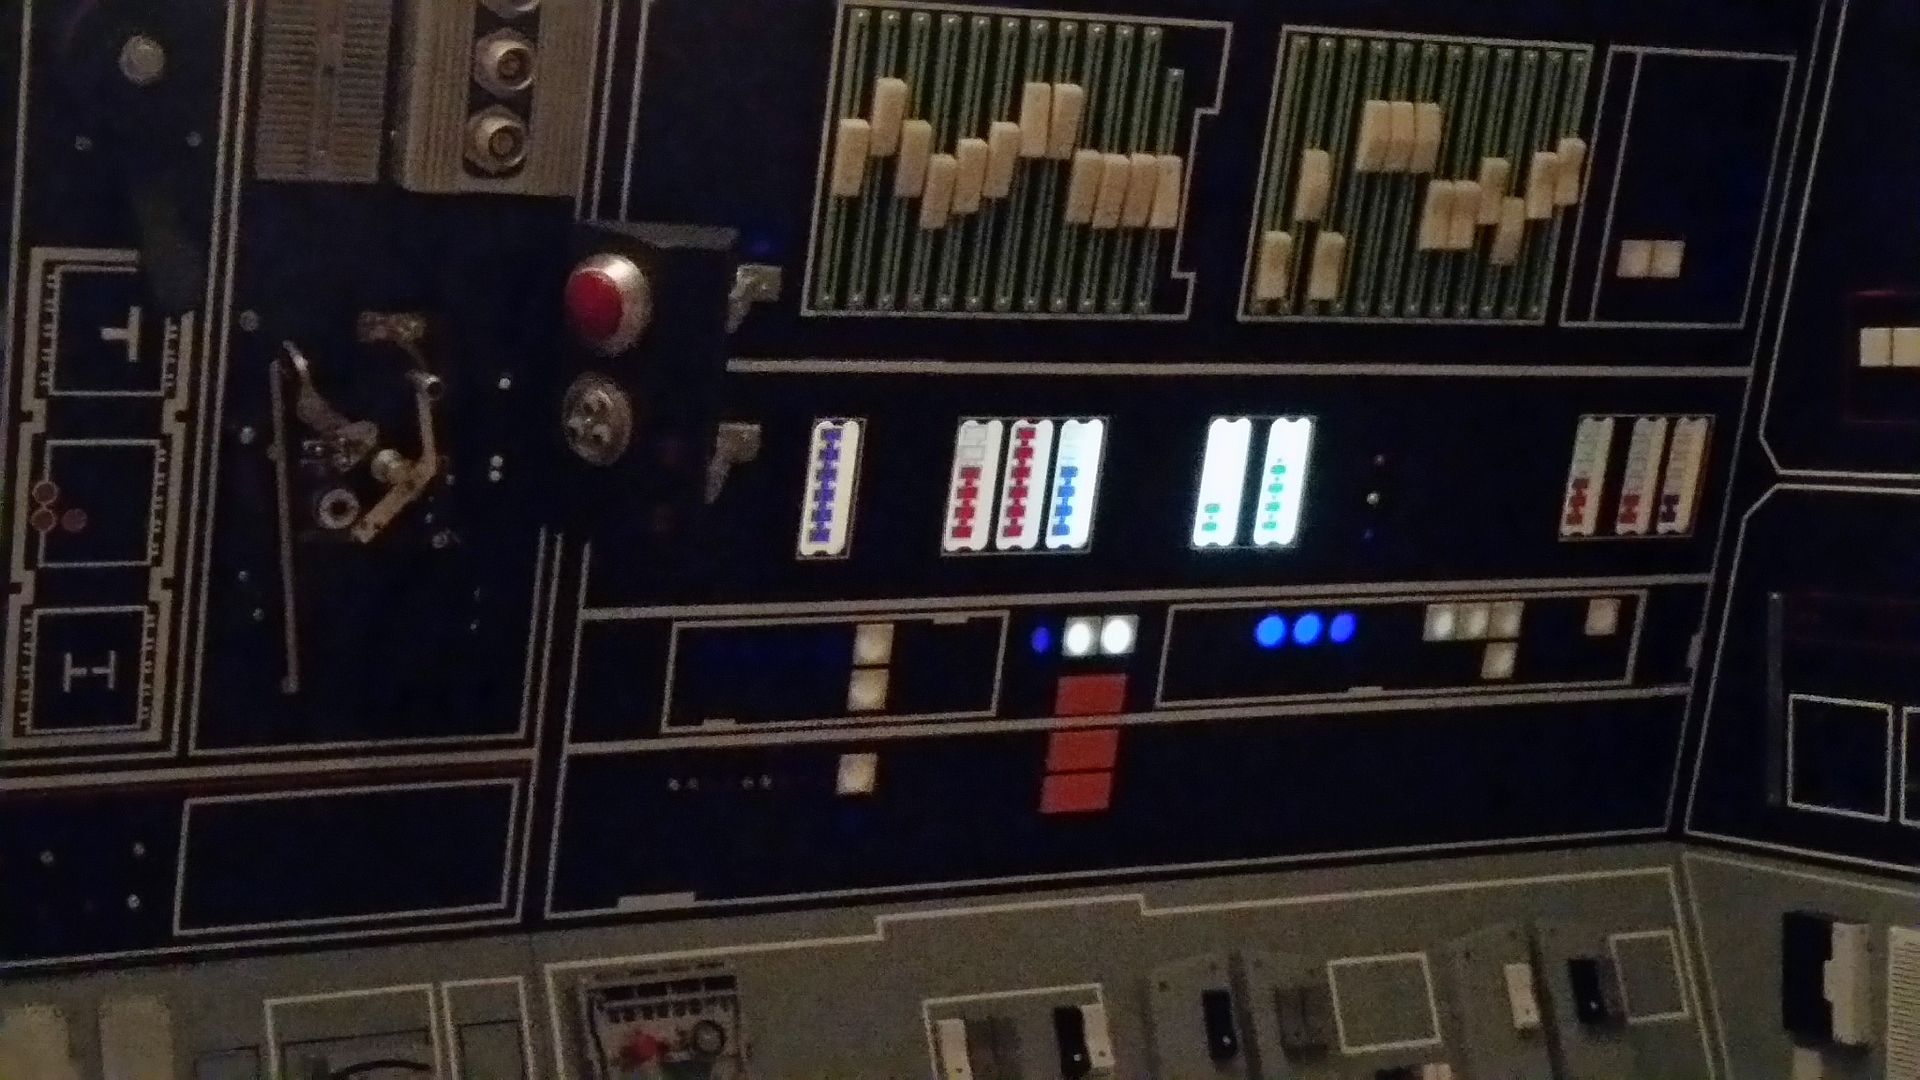
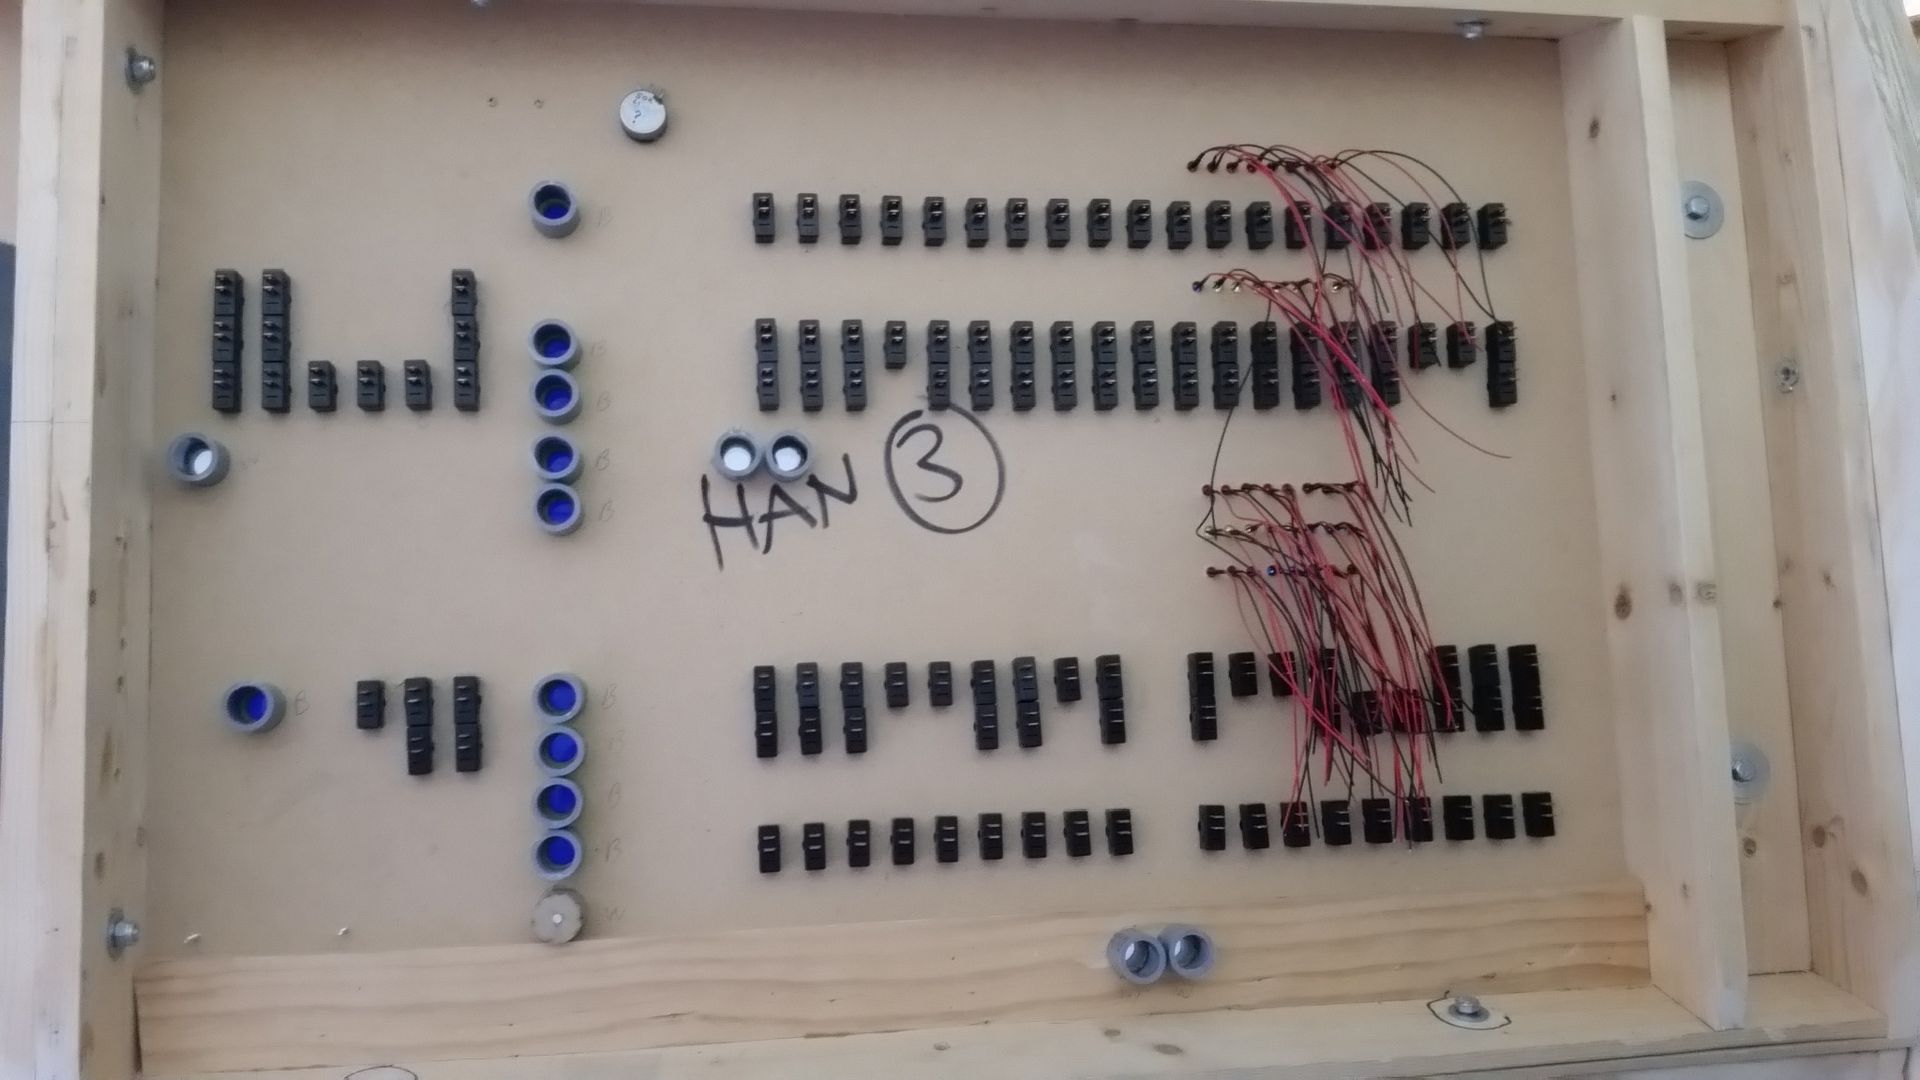
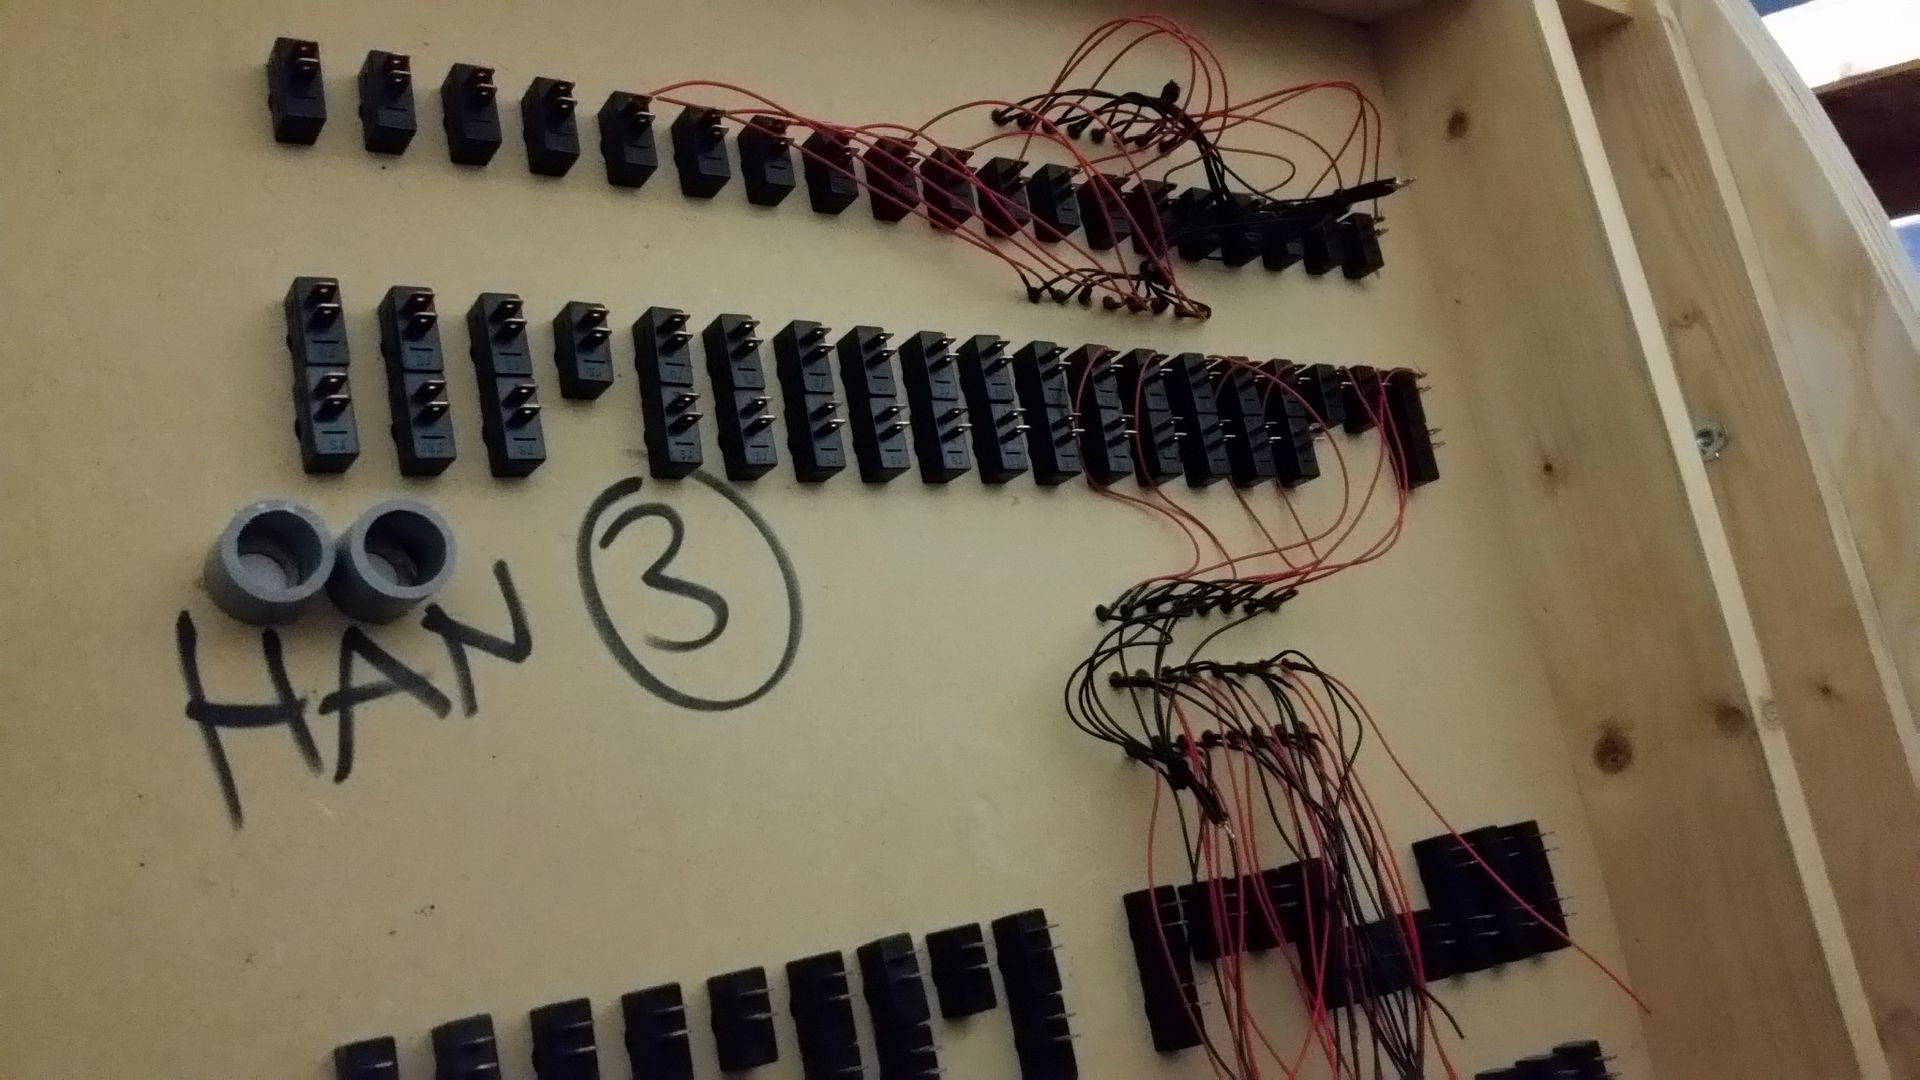
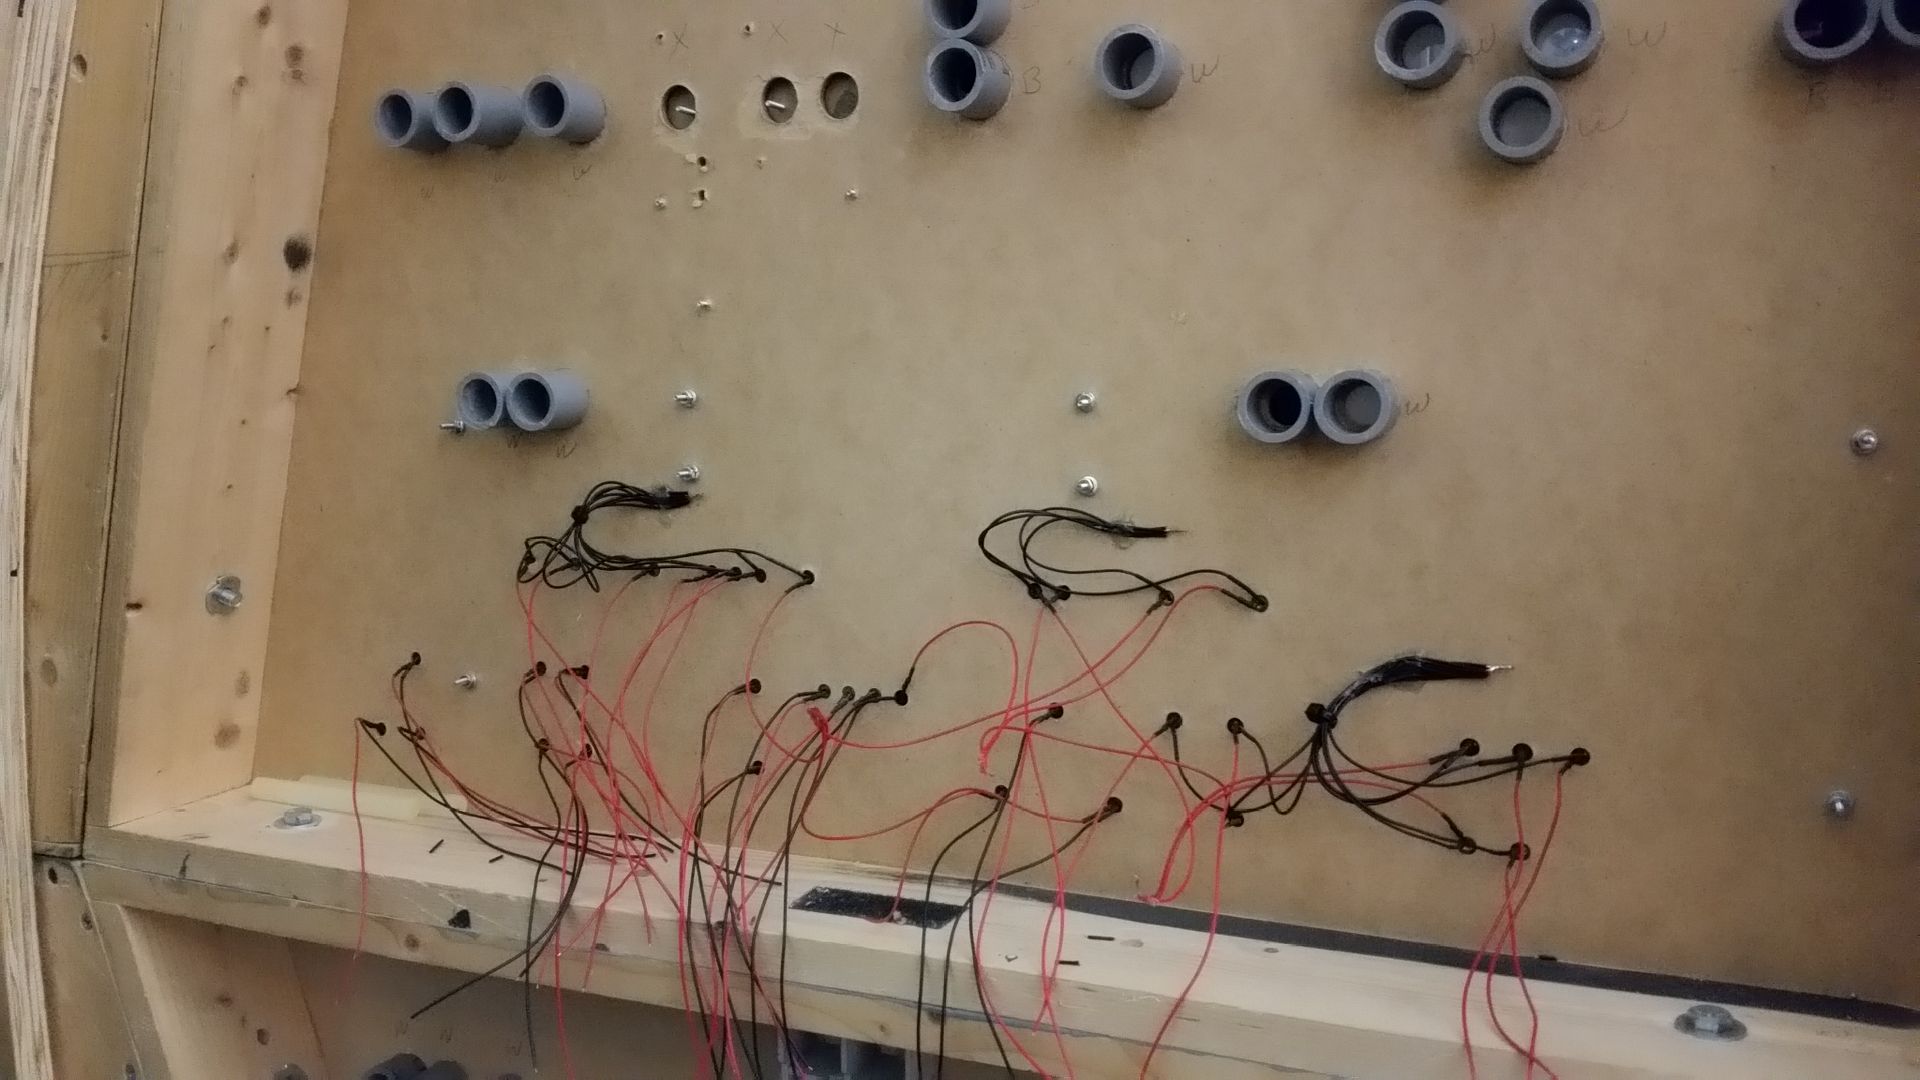
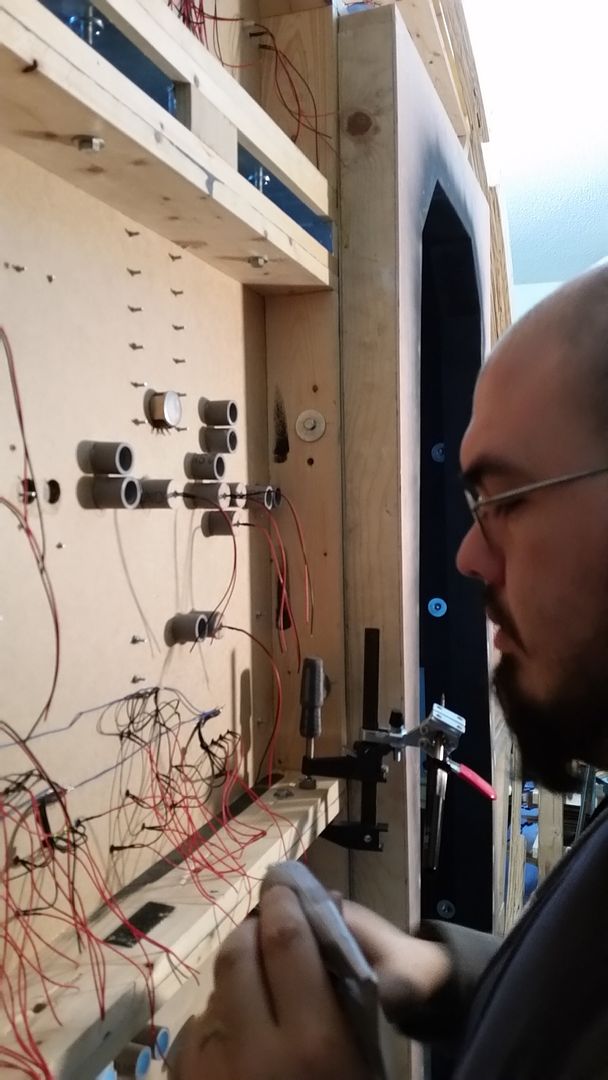
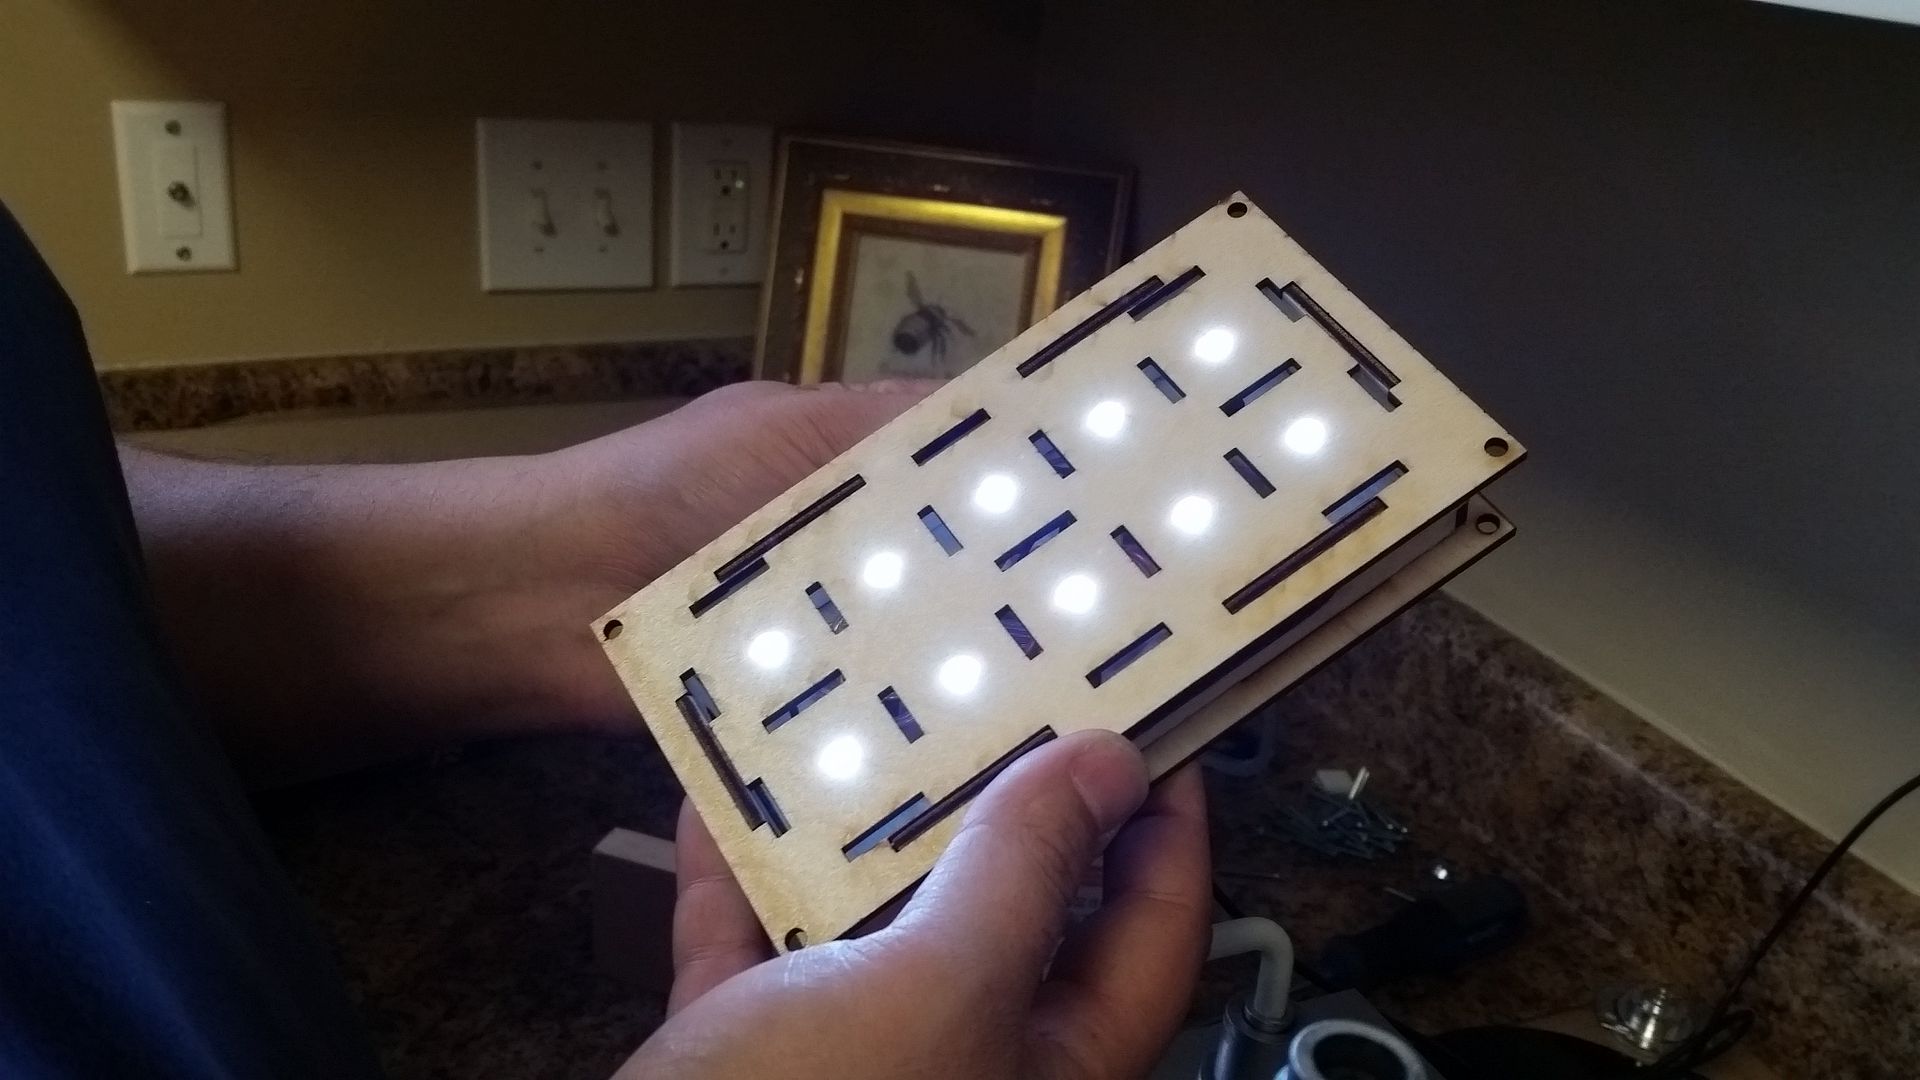
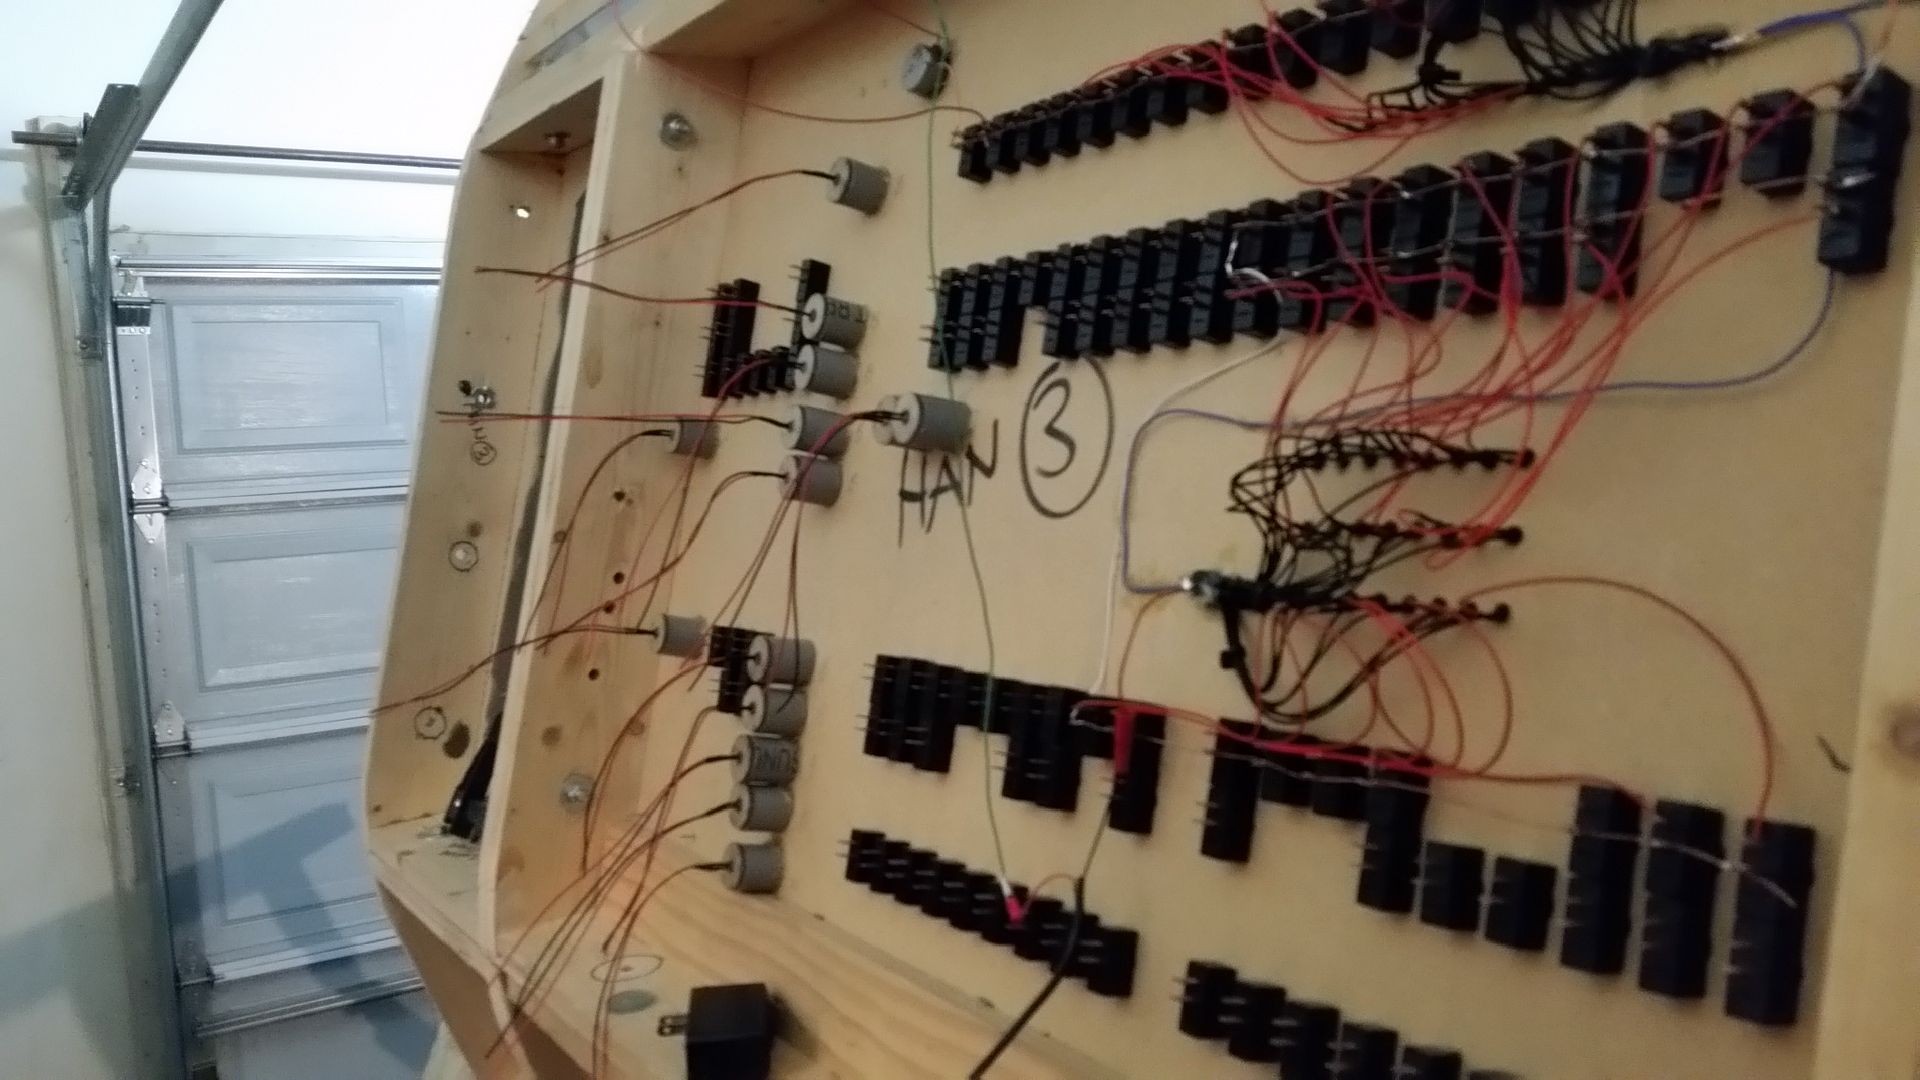
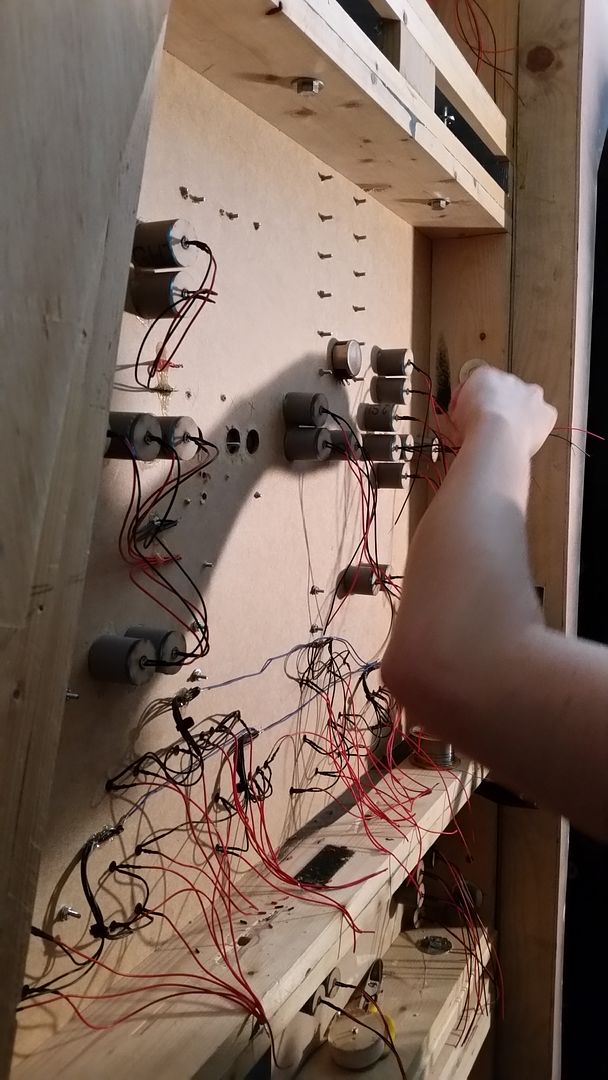
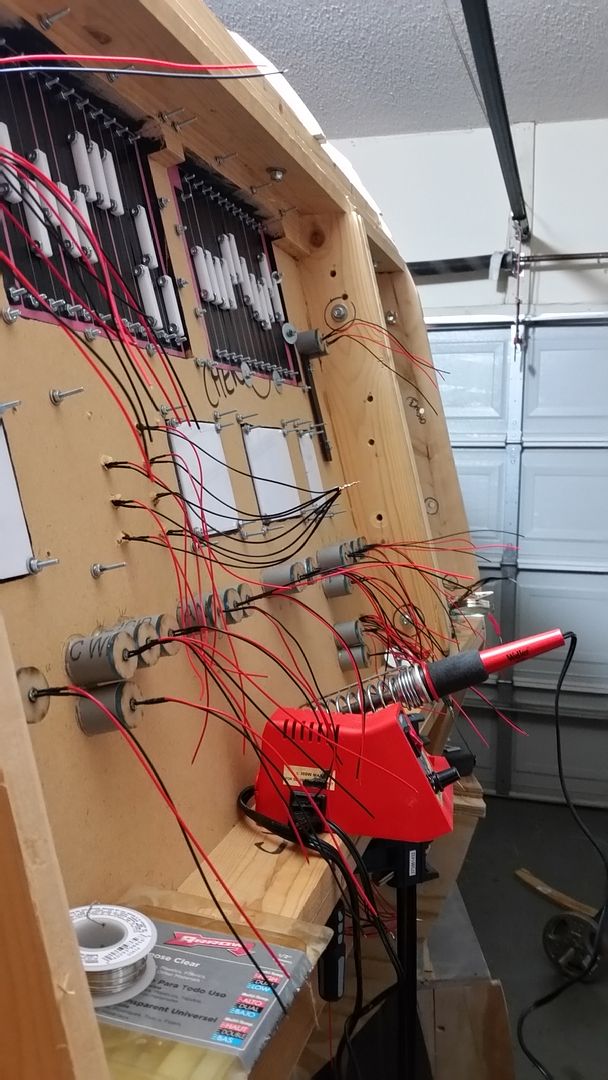
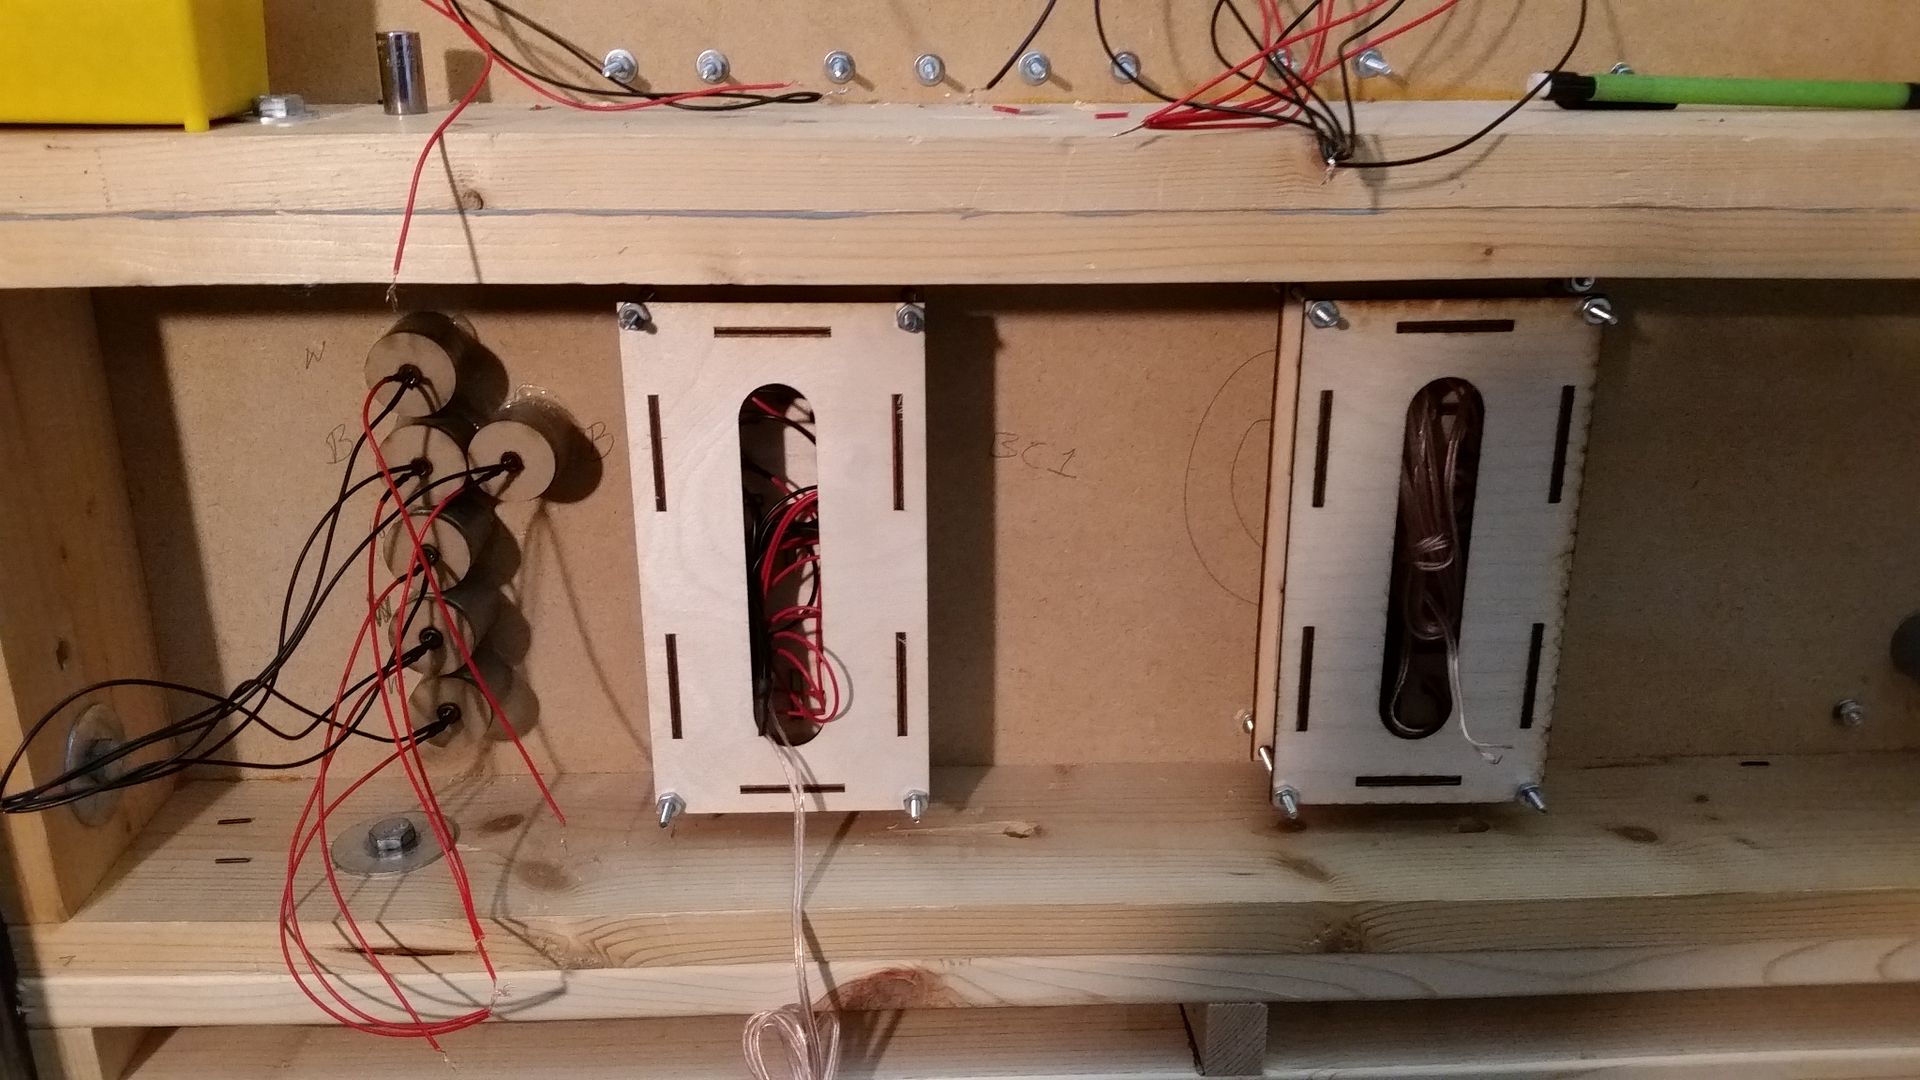
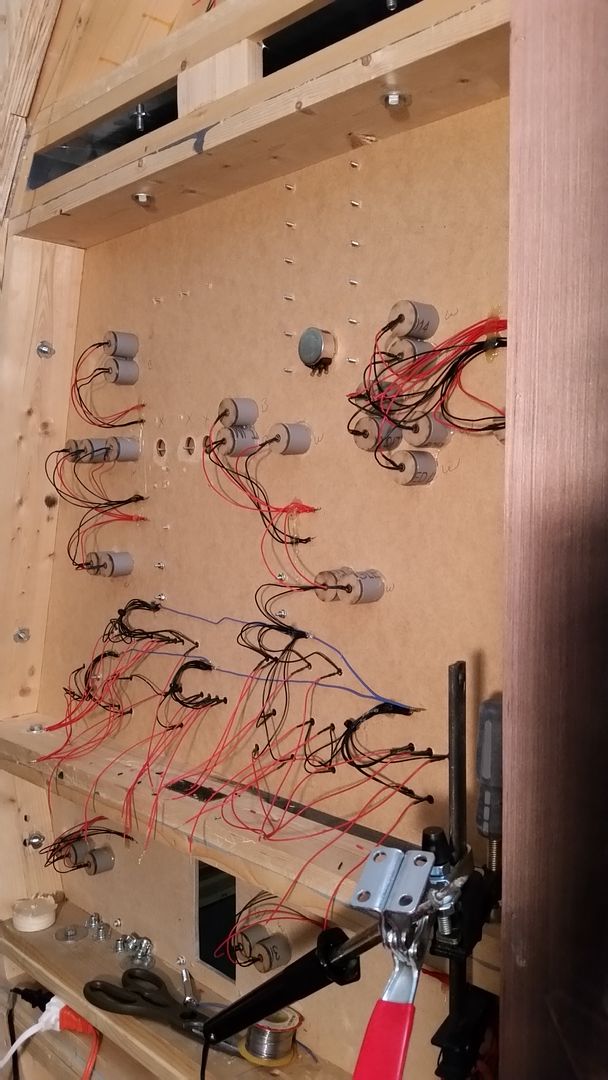
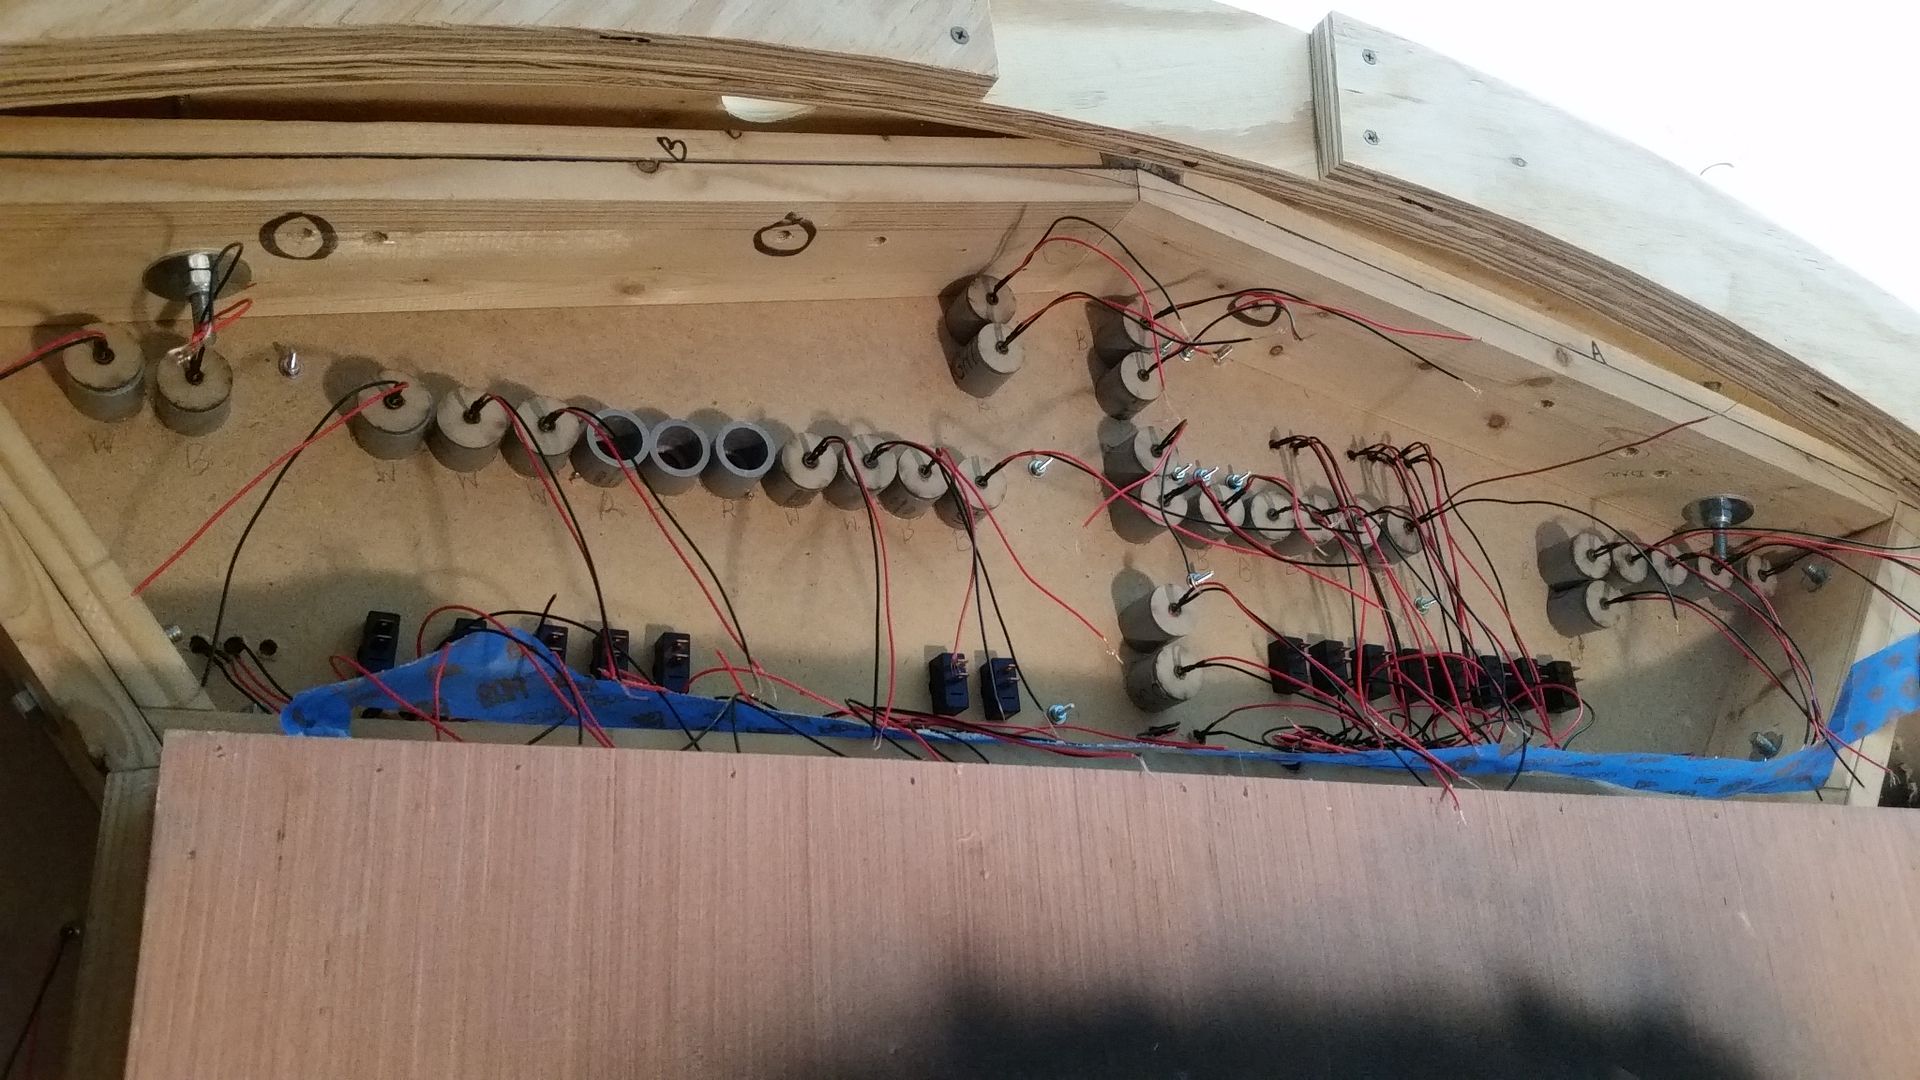
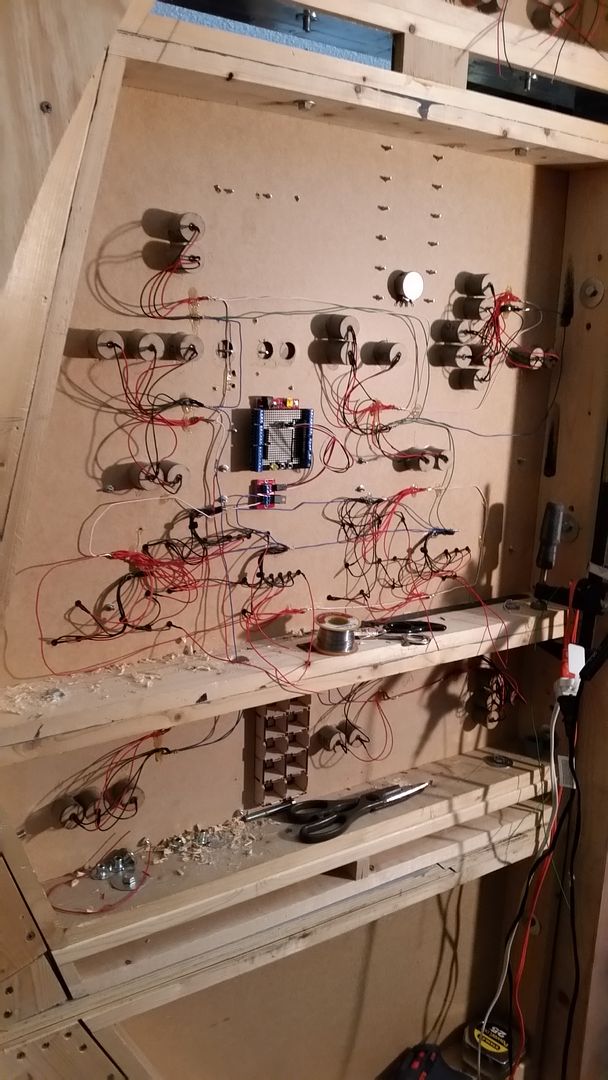
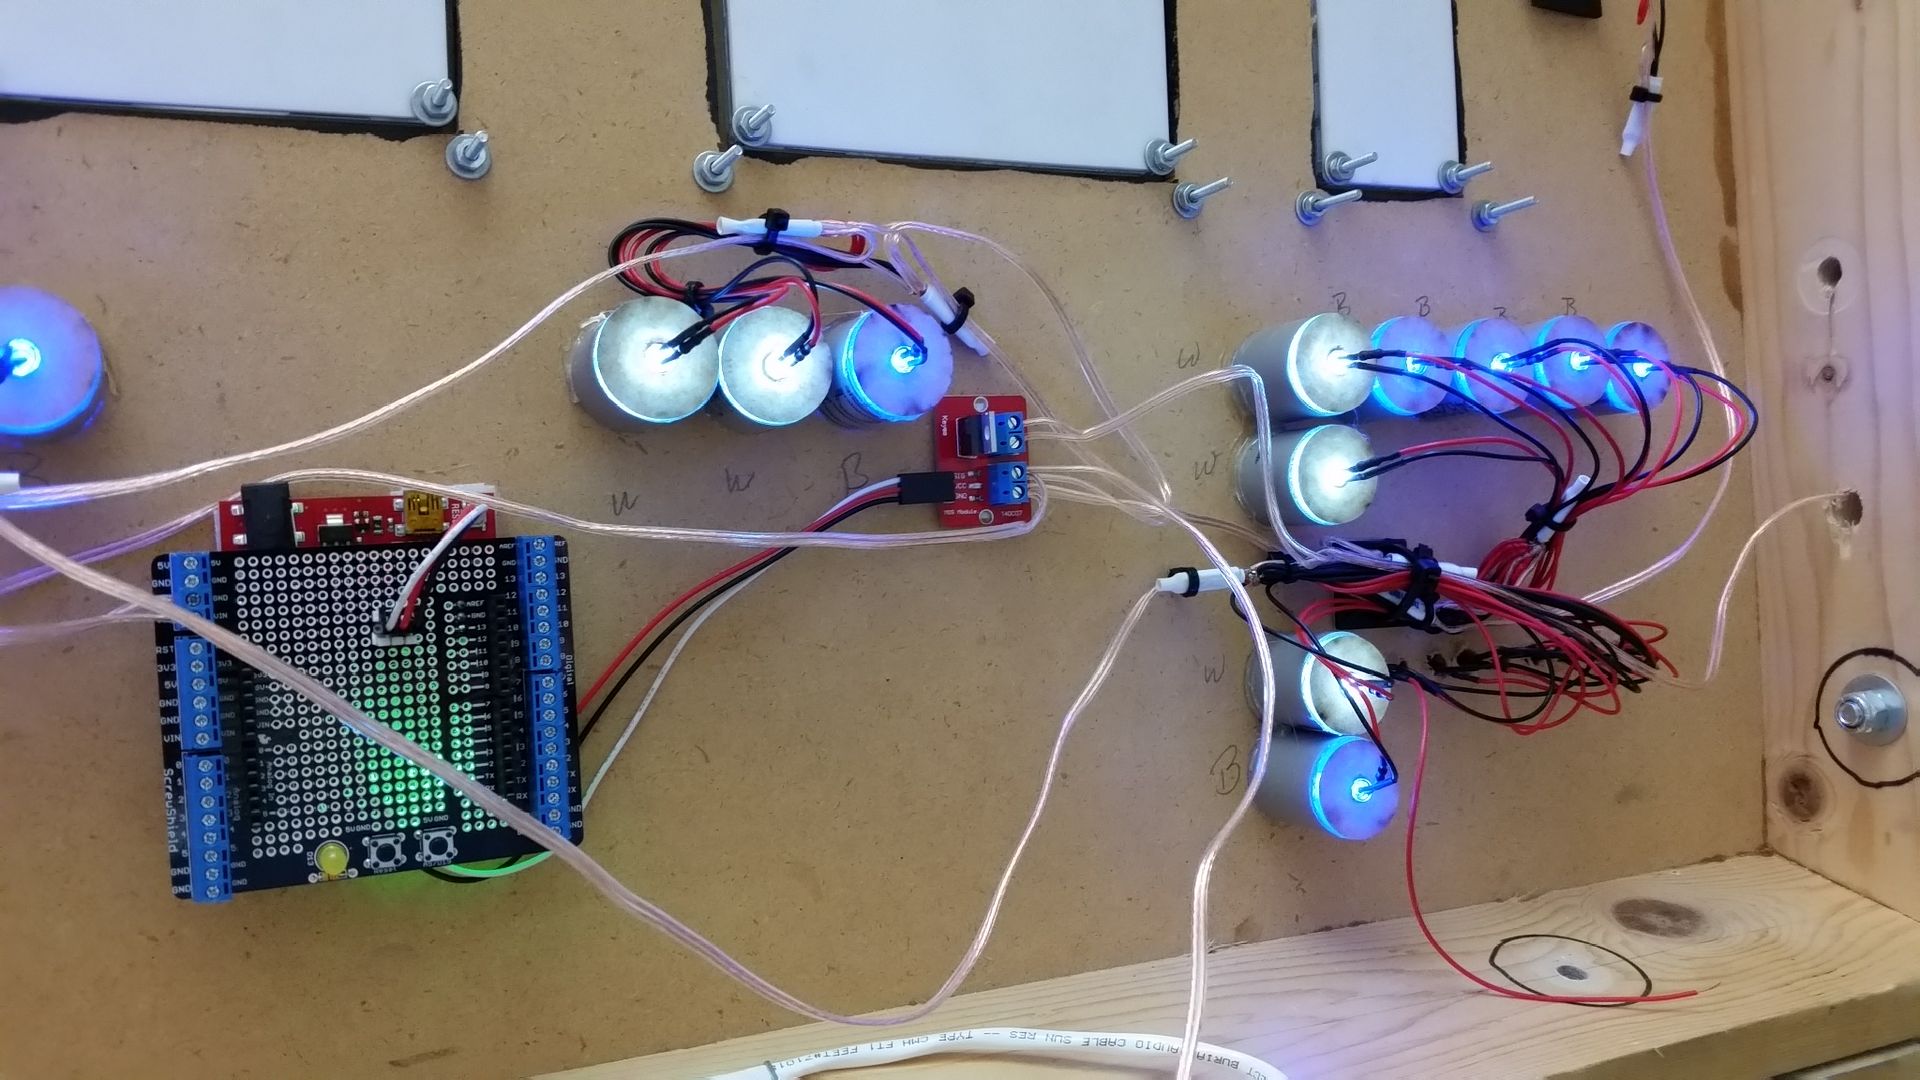
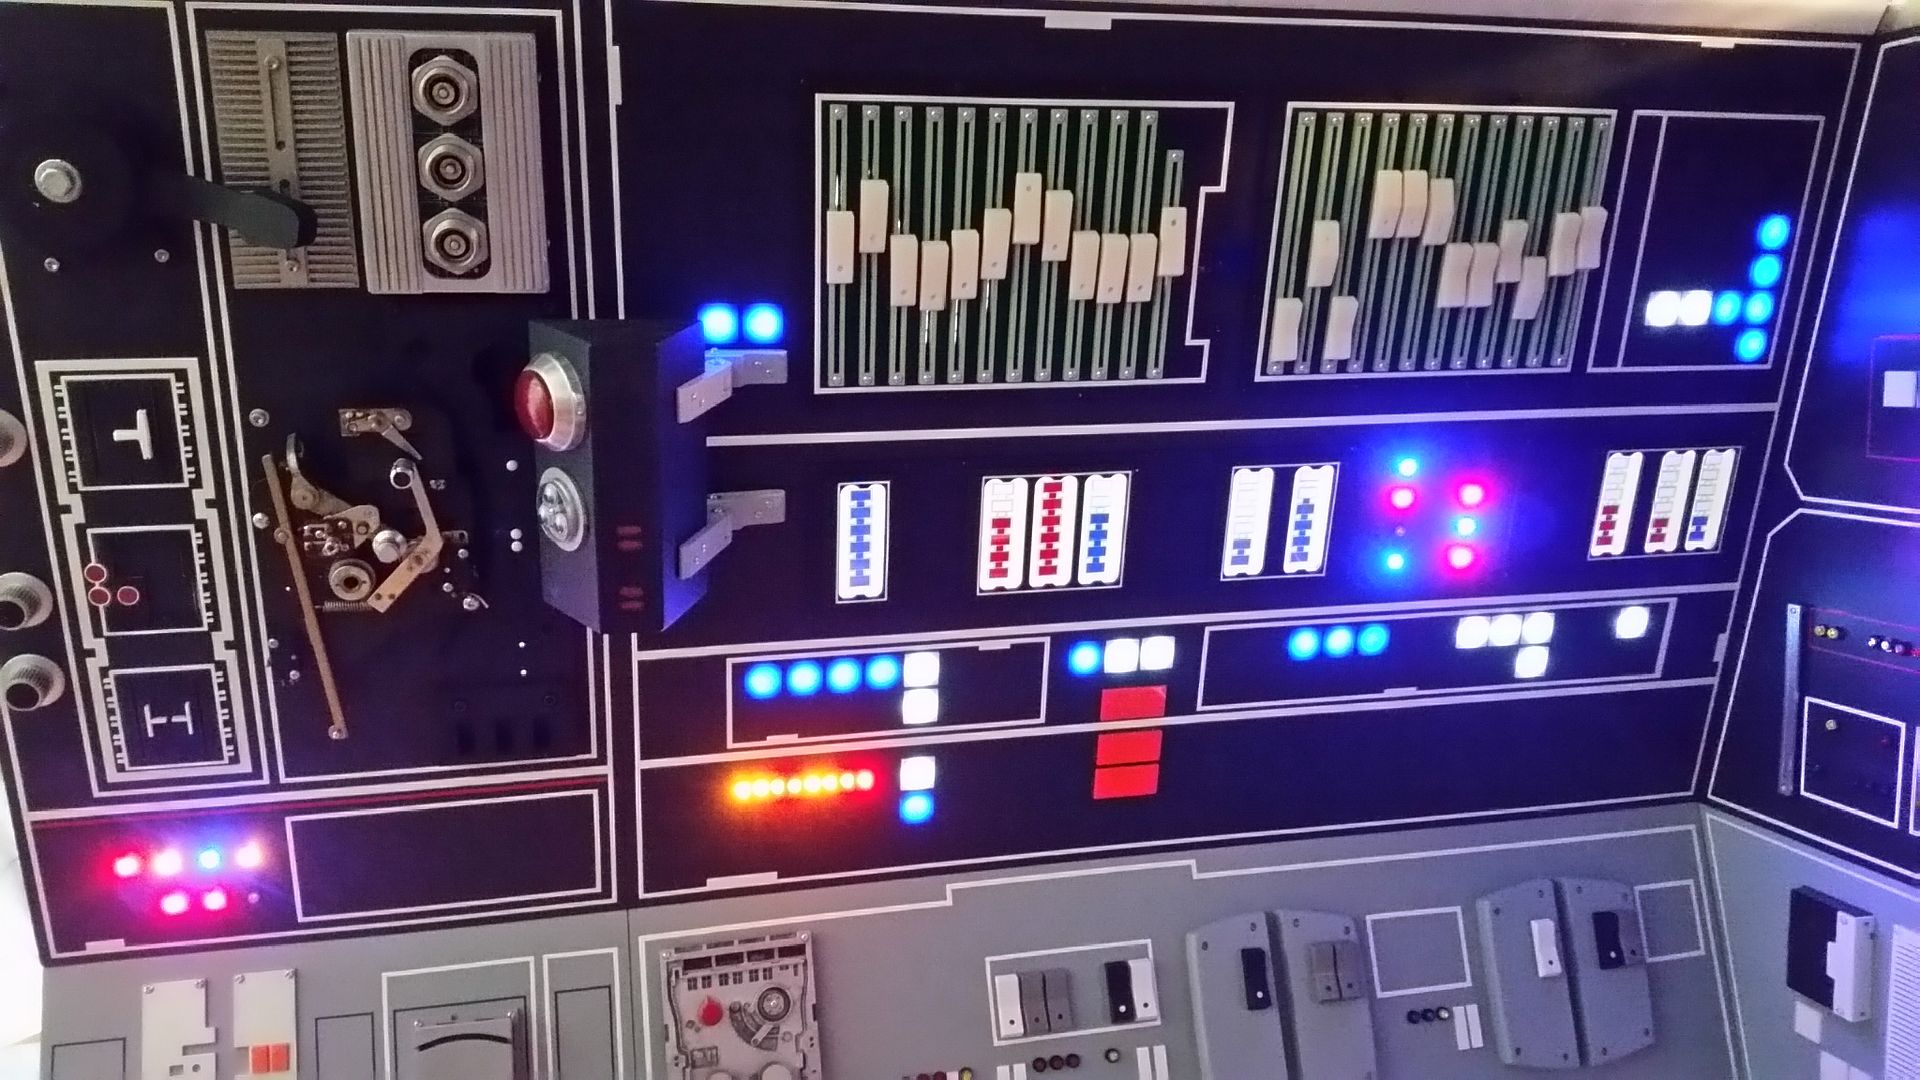
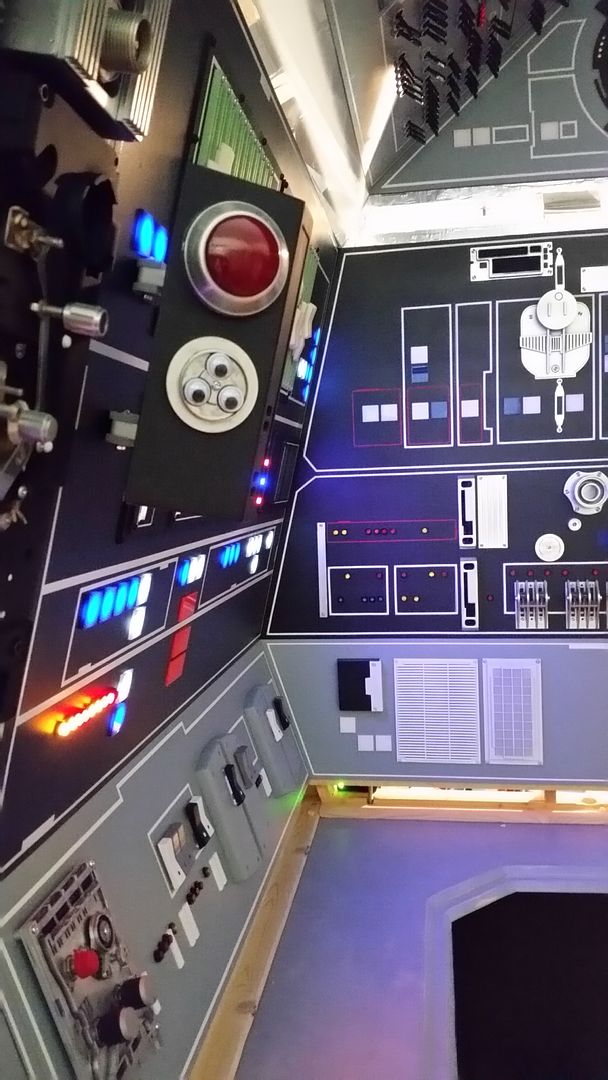
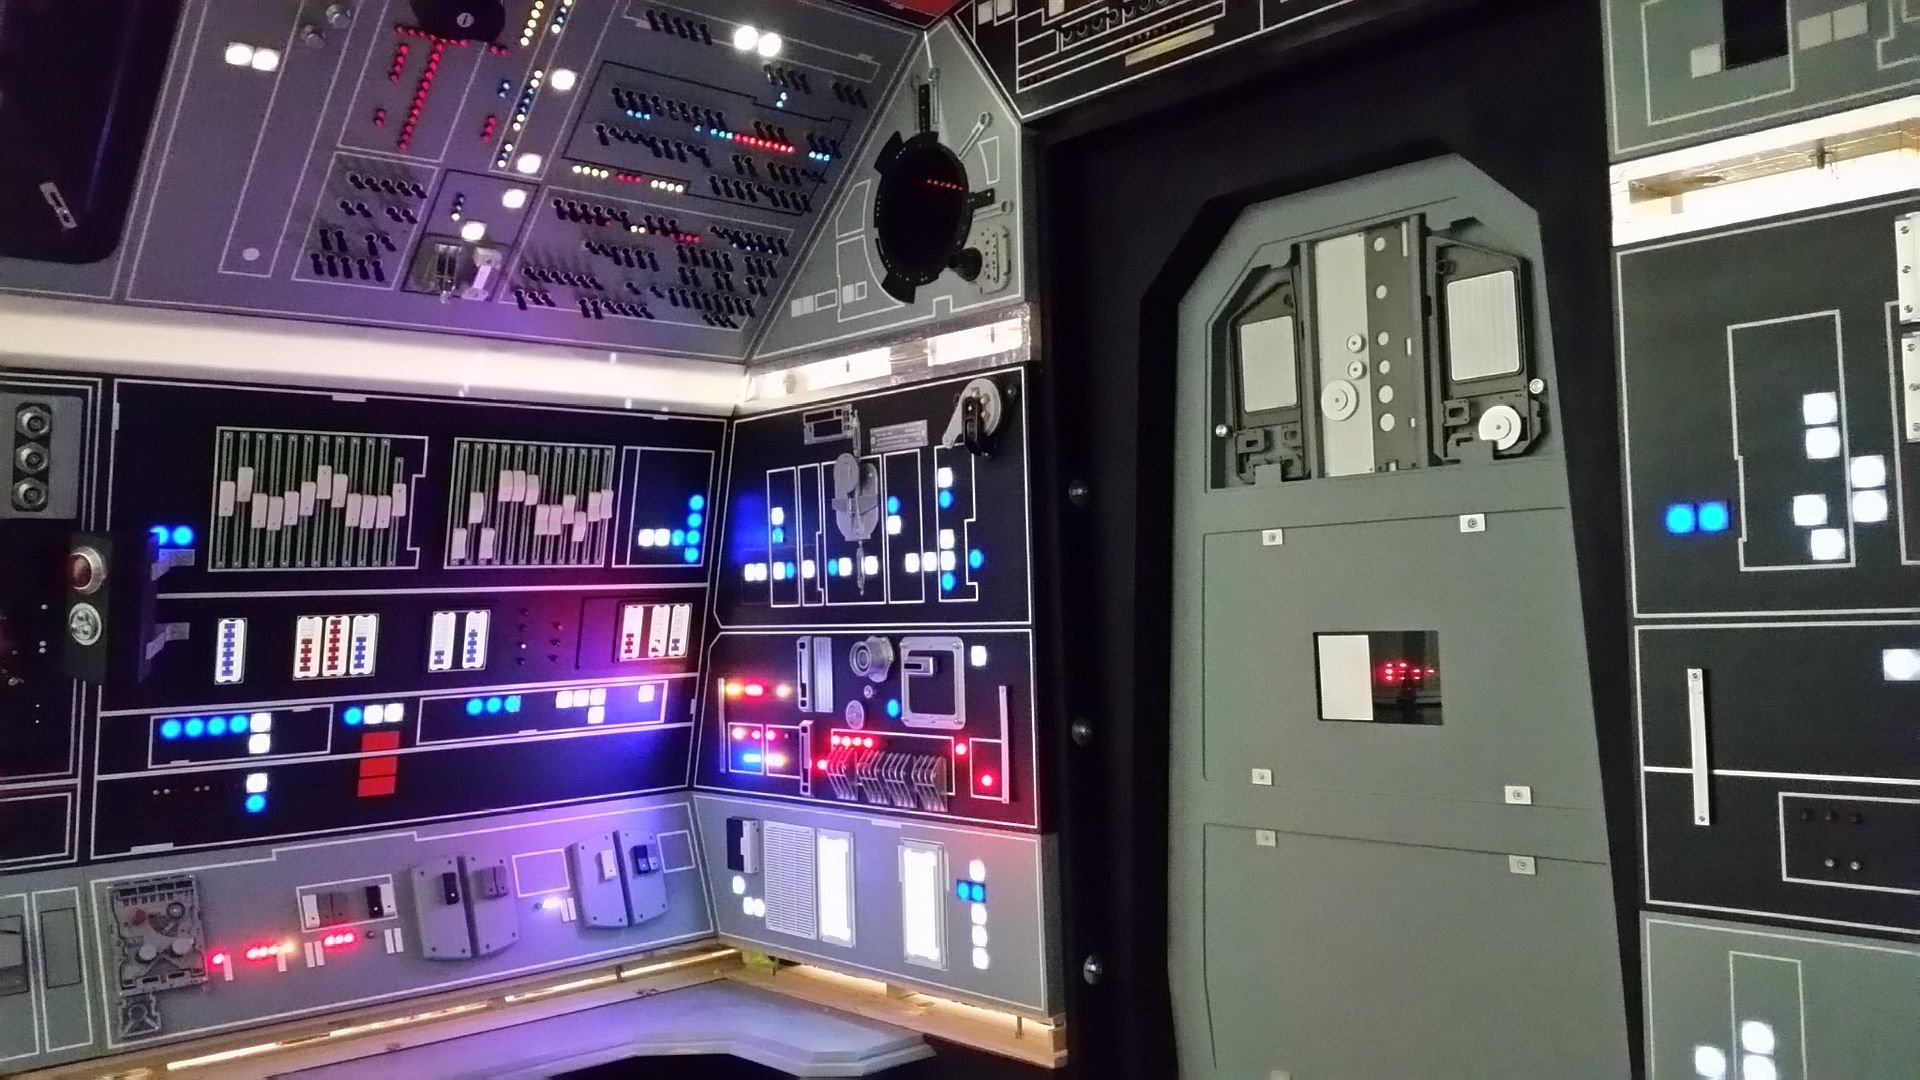
We've started wiring all the panels!
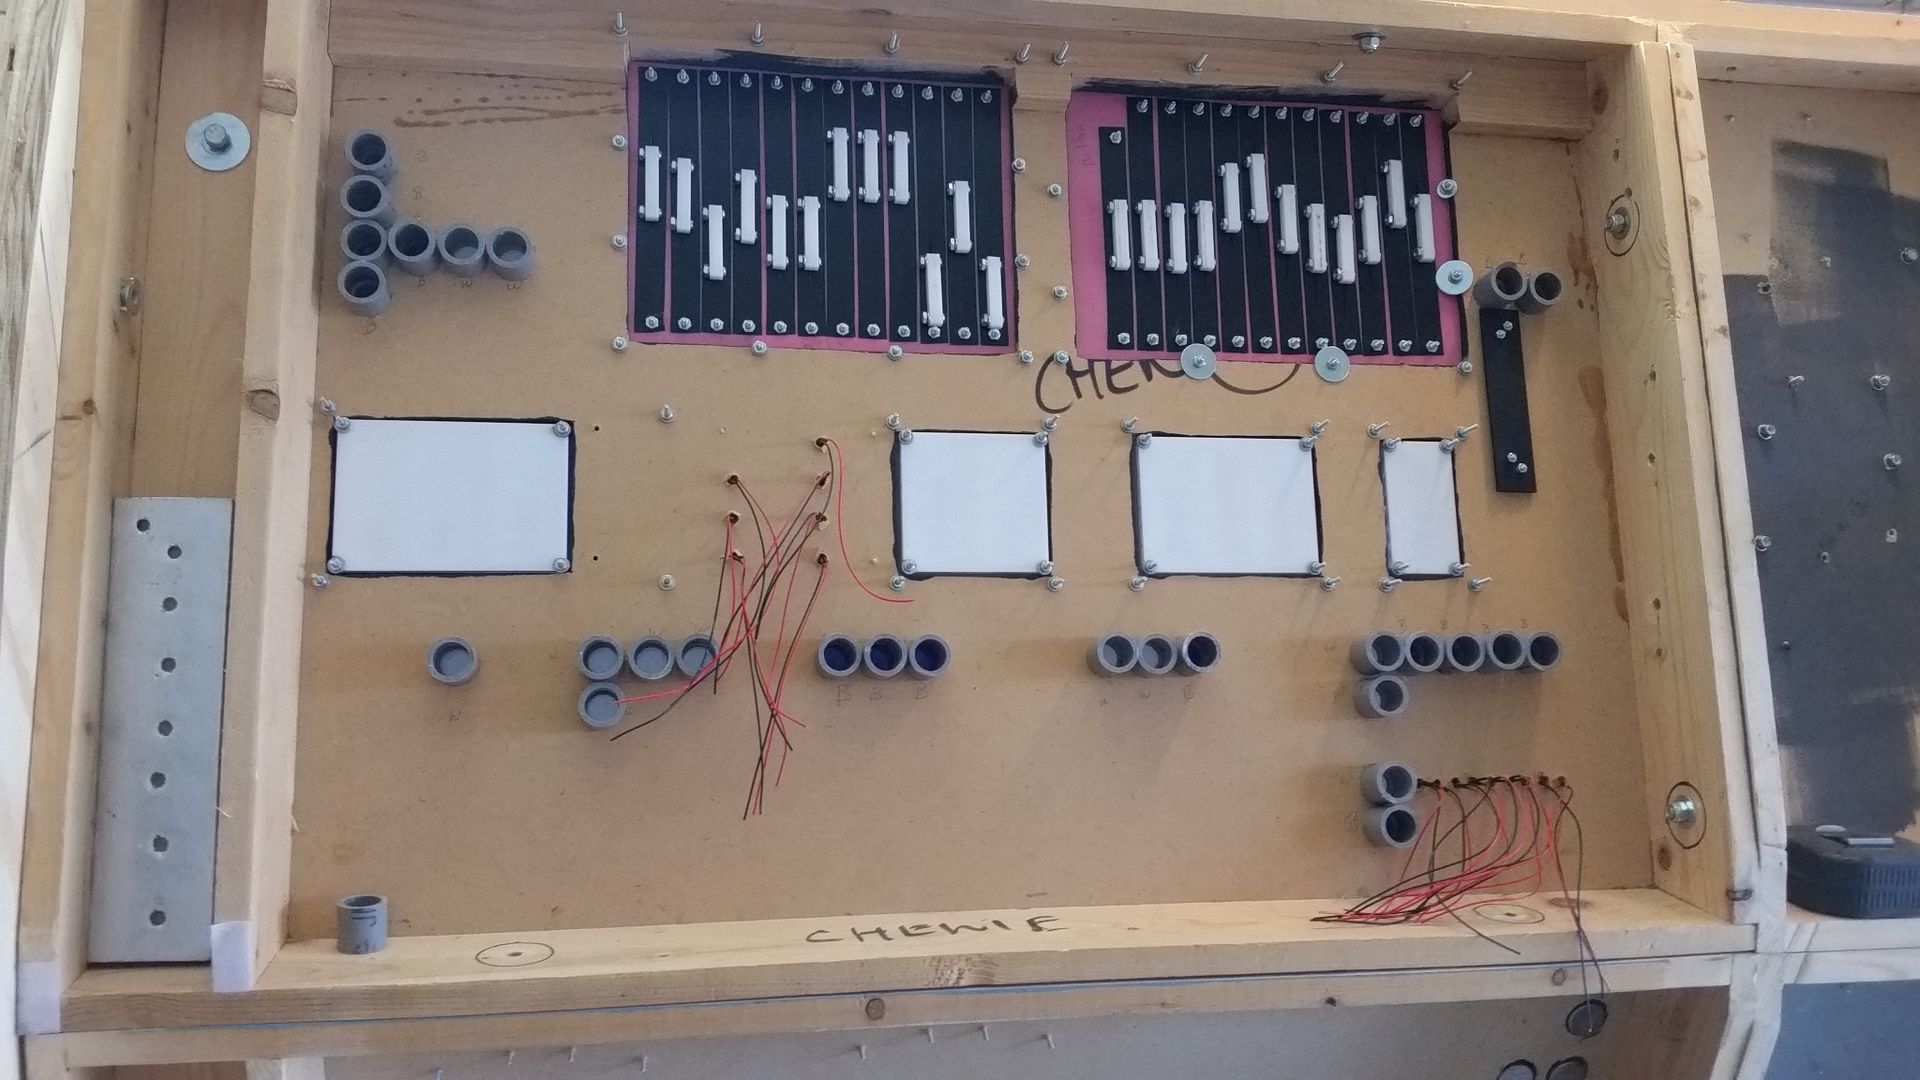
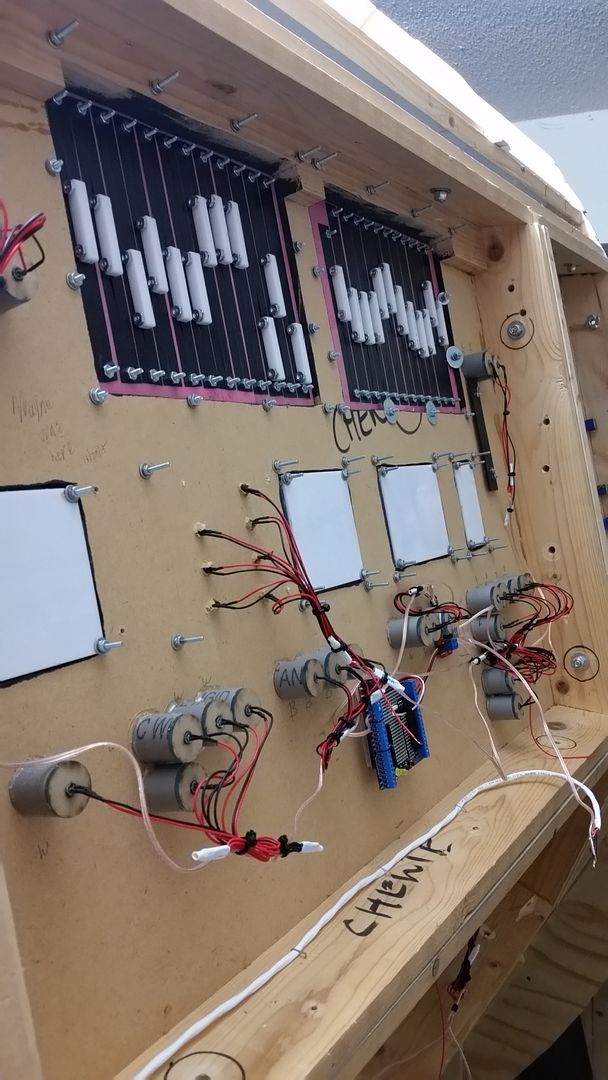
The 1" tiles get a small PVC cup surround that will hold a single LED and back light the tile
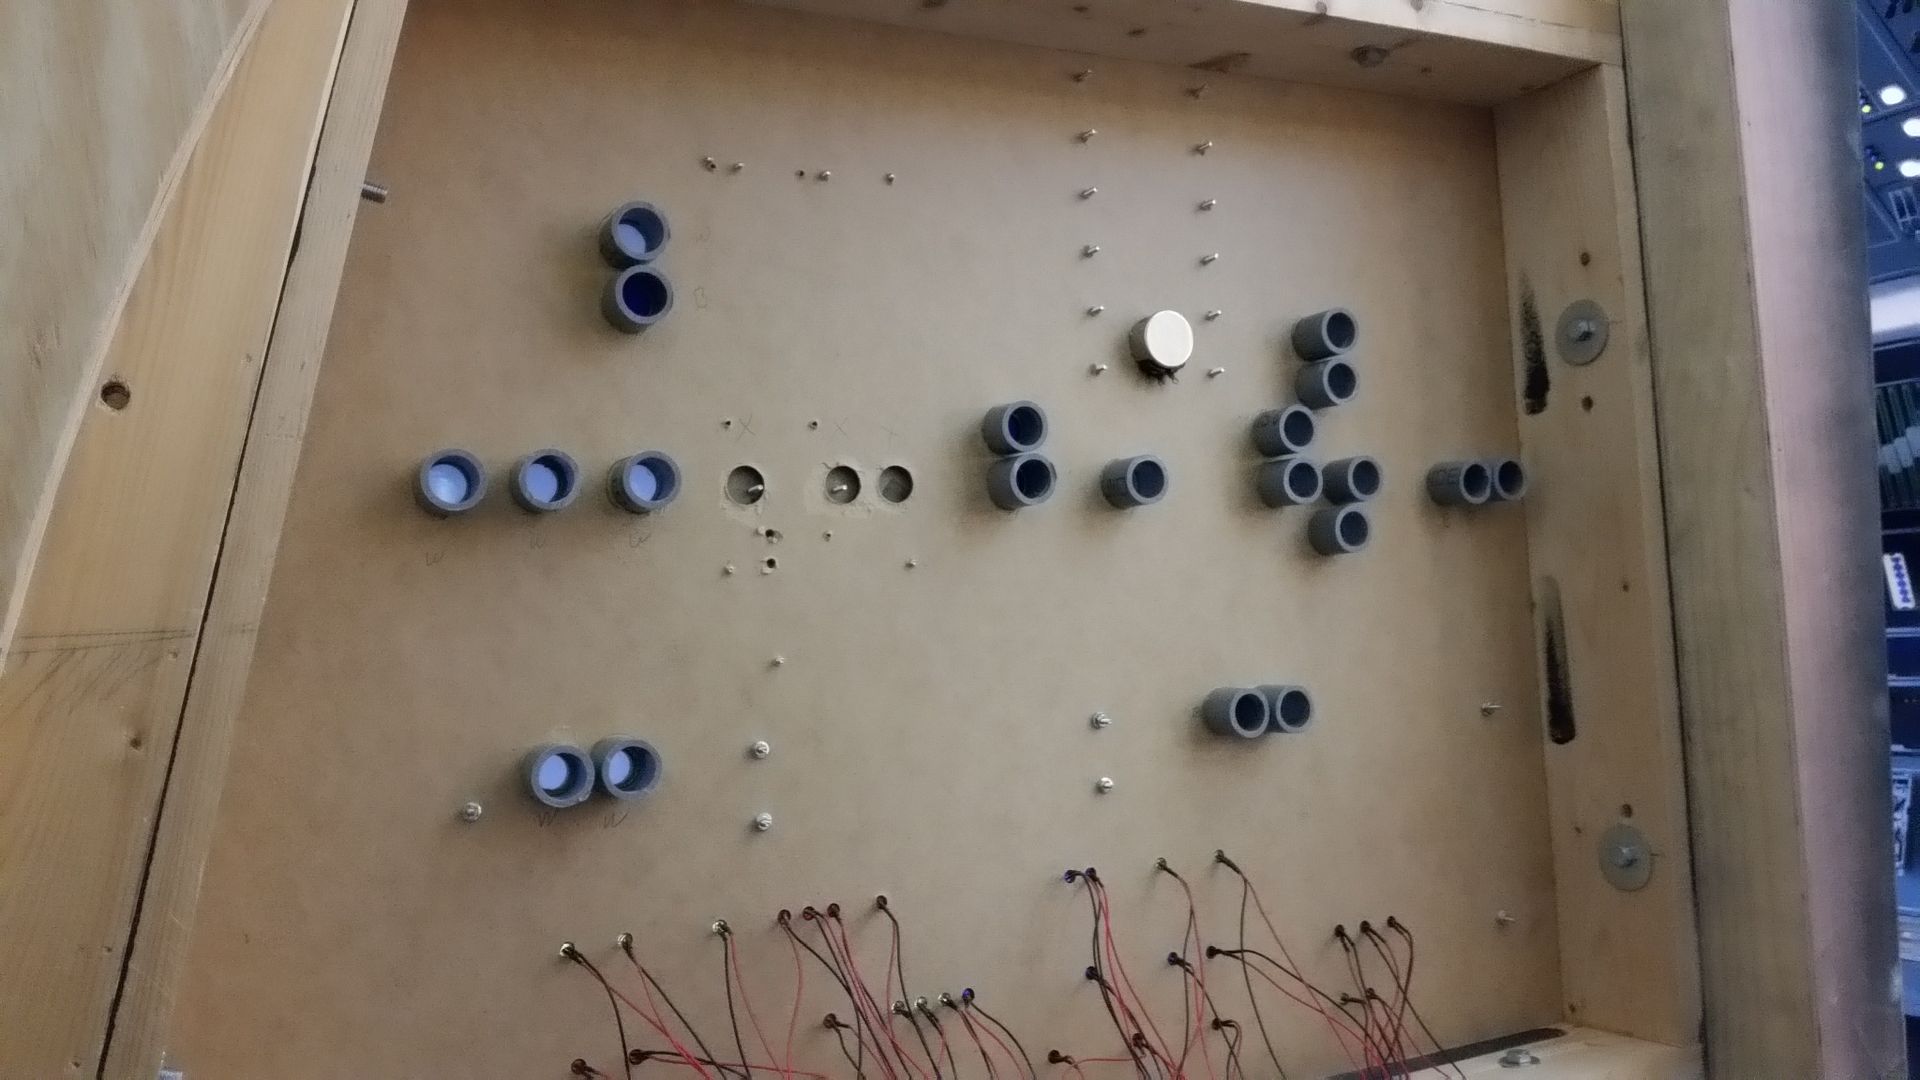
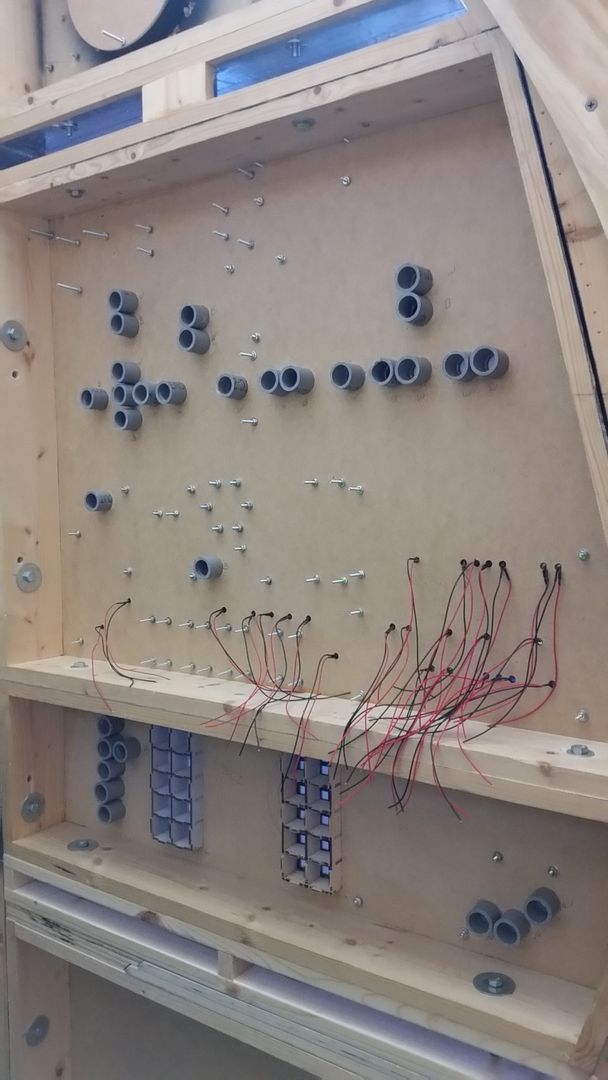
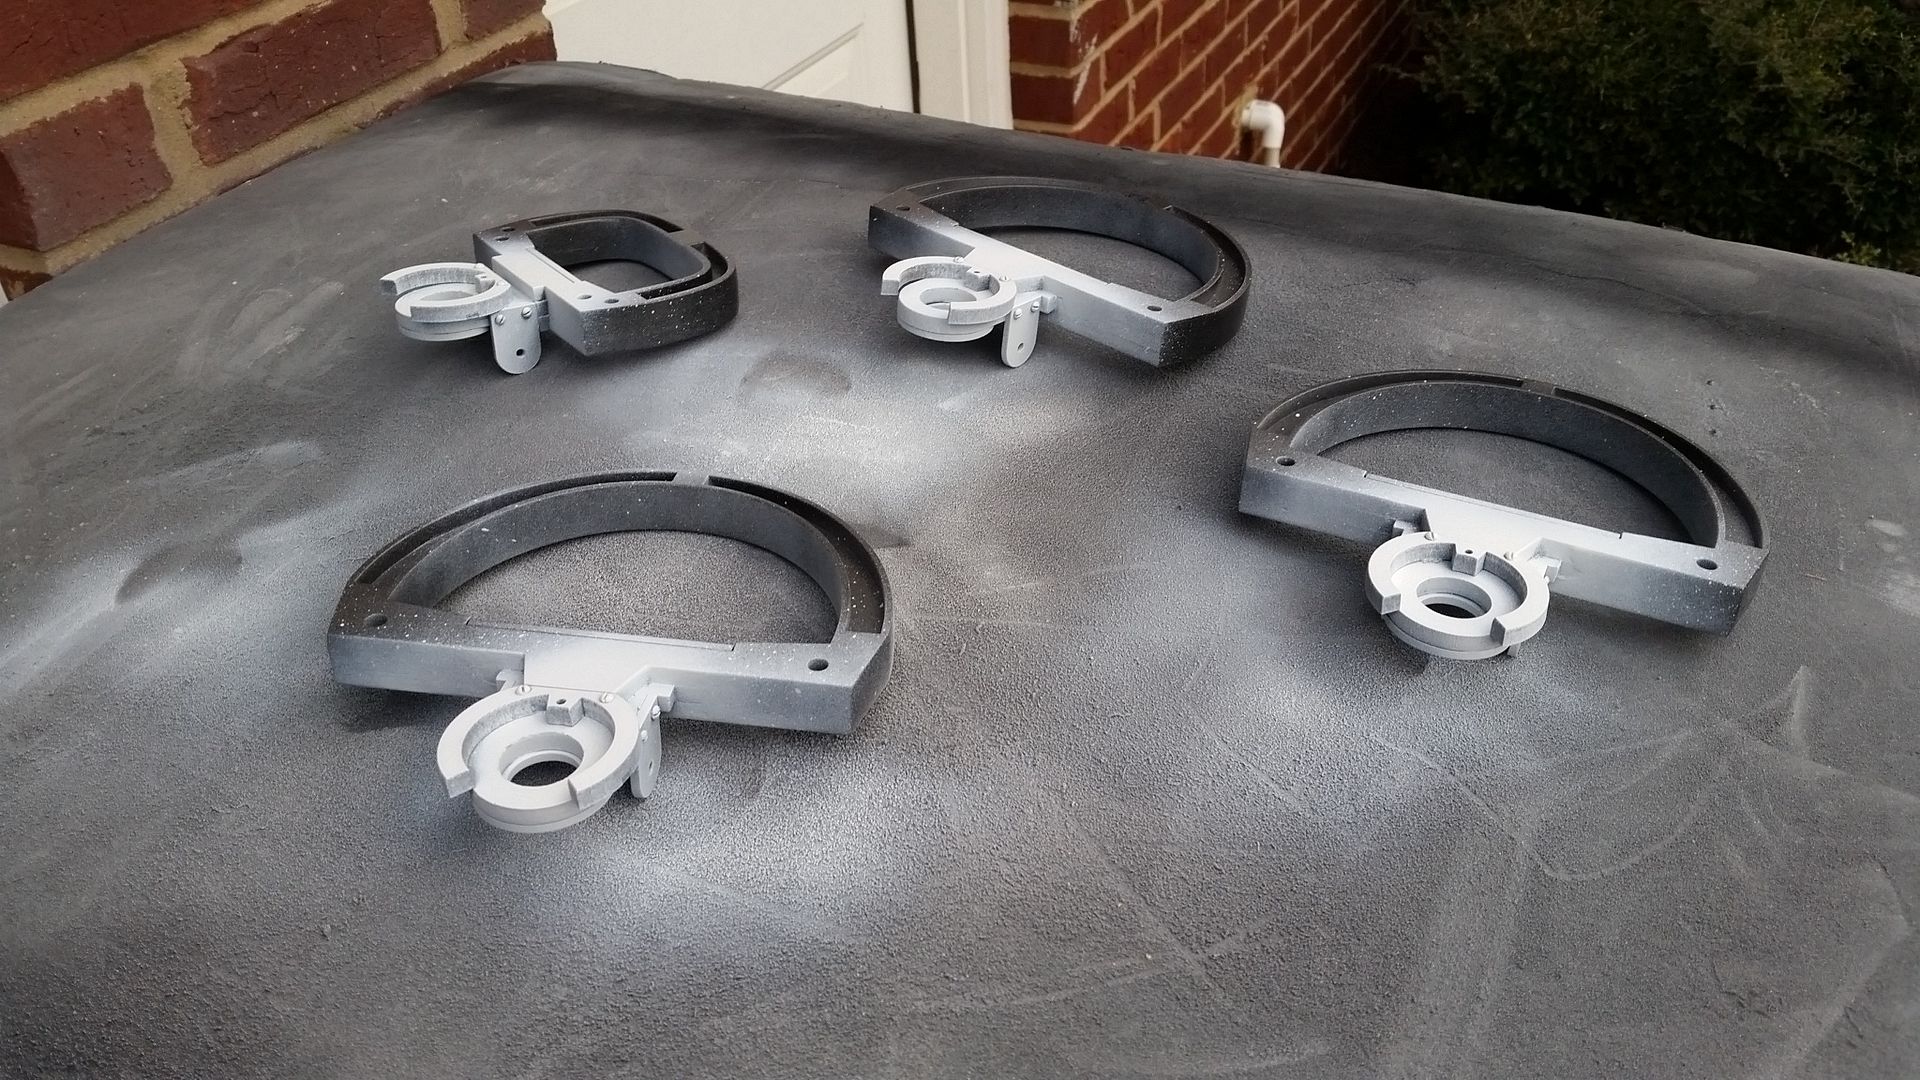
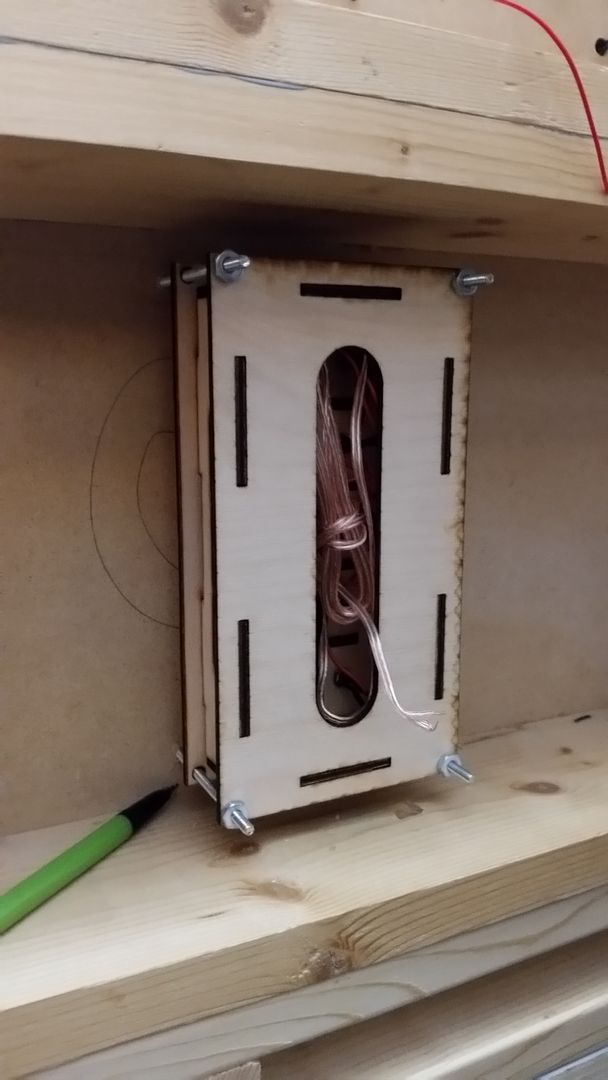
LED Donuts
The gang is all here!
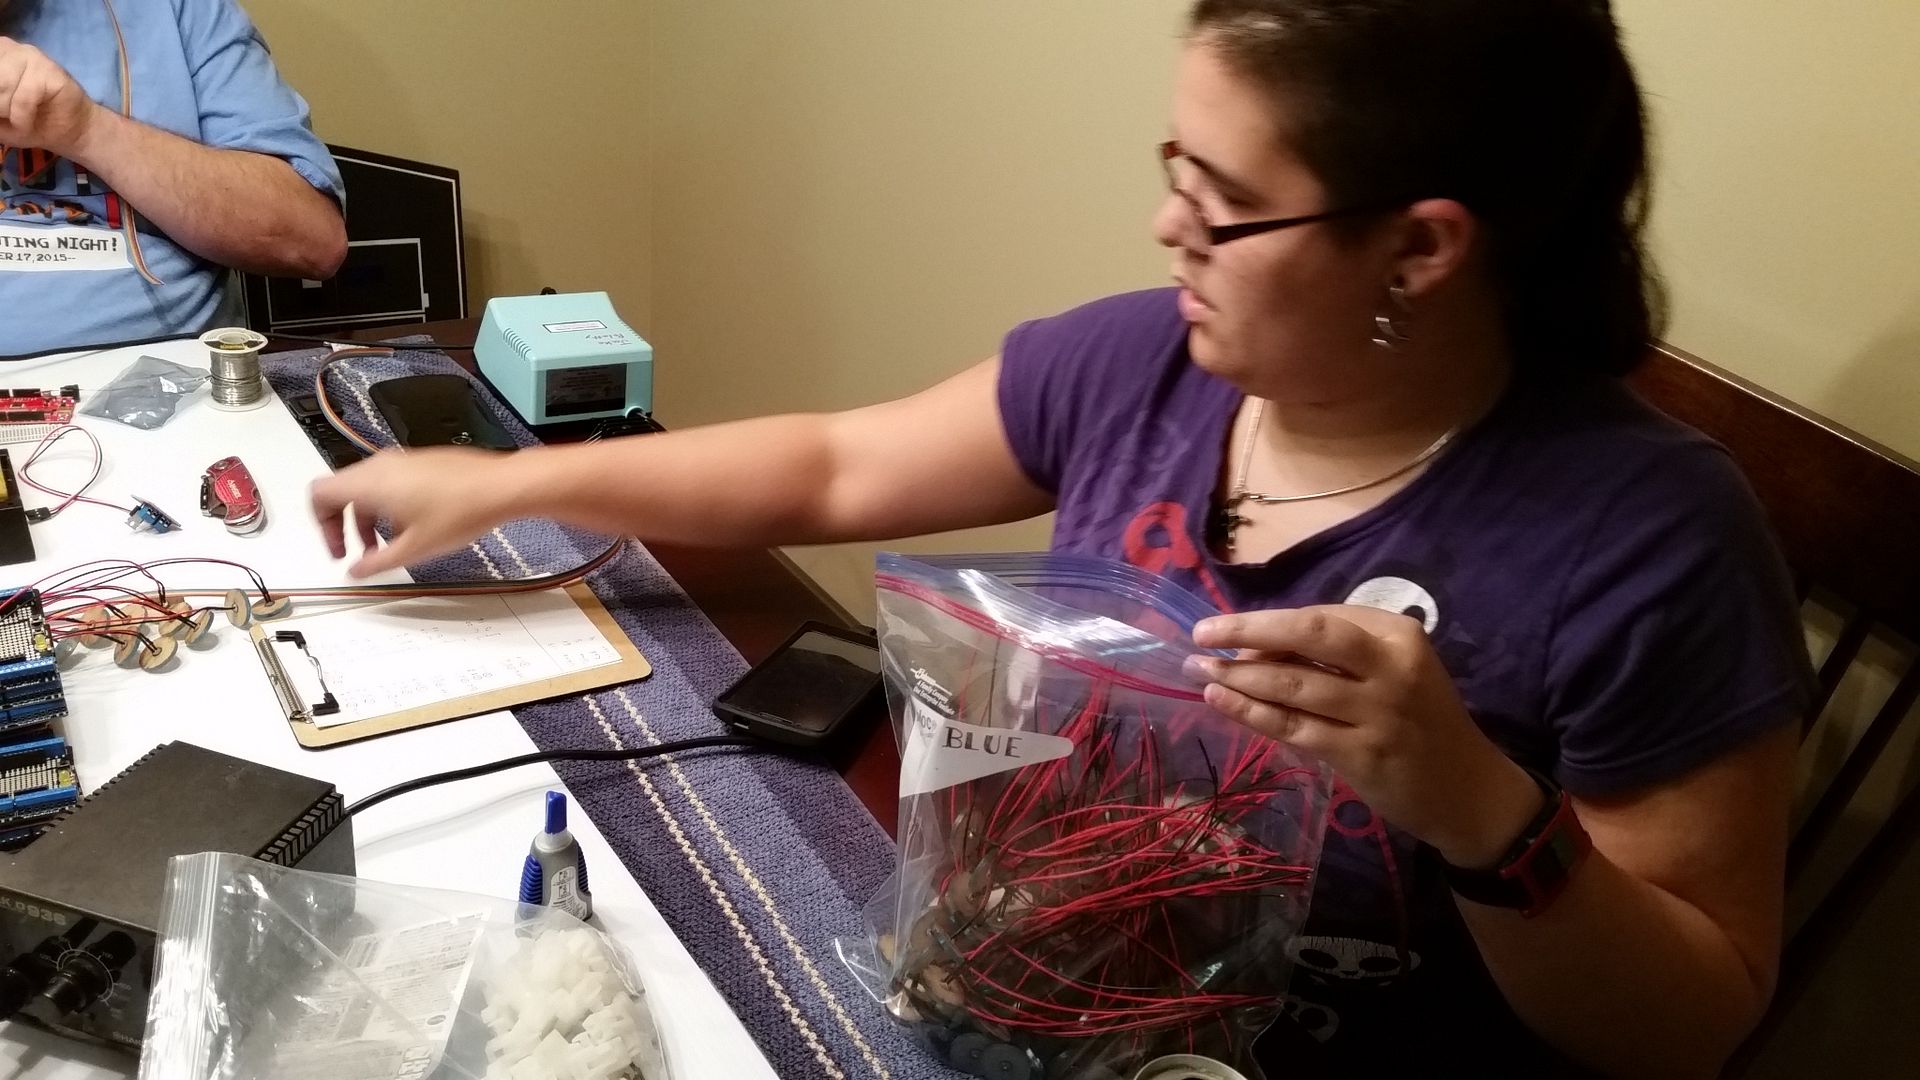
Wiring
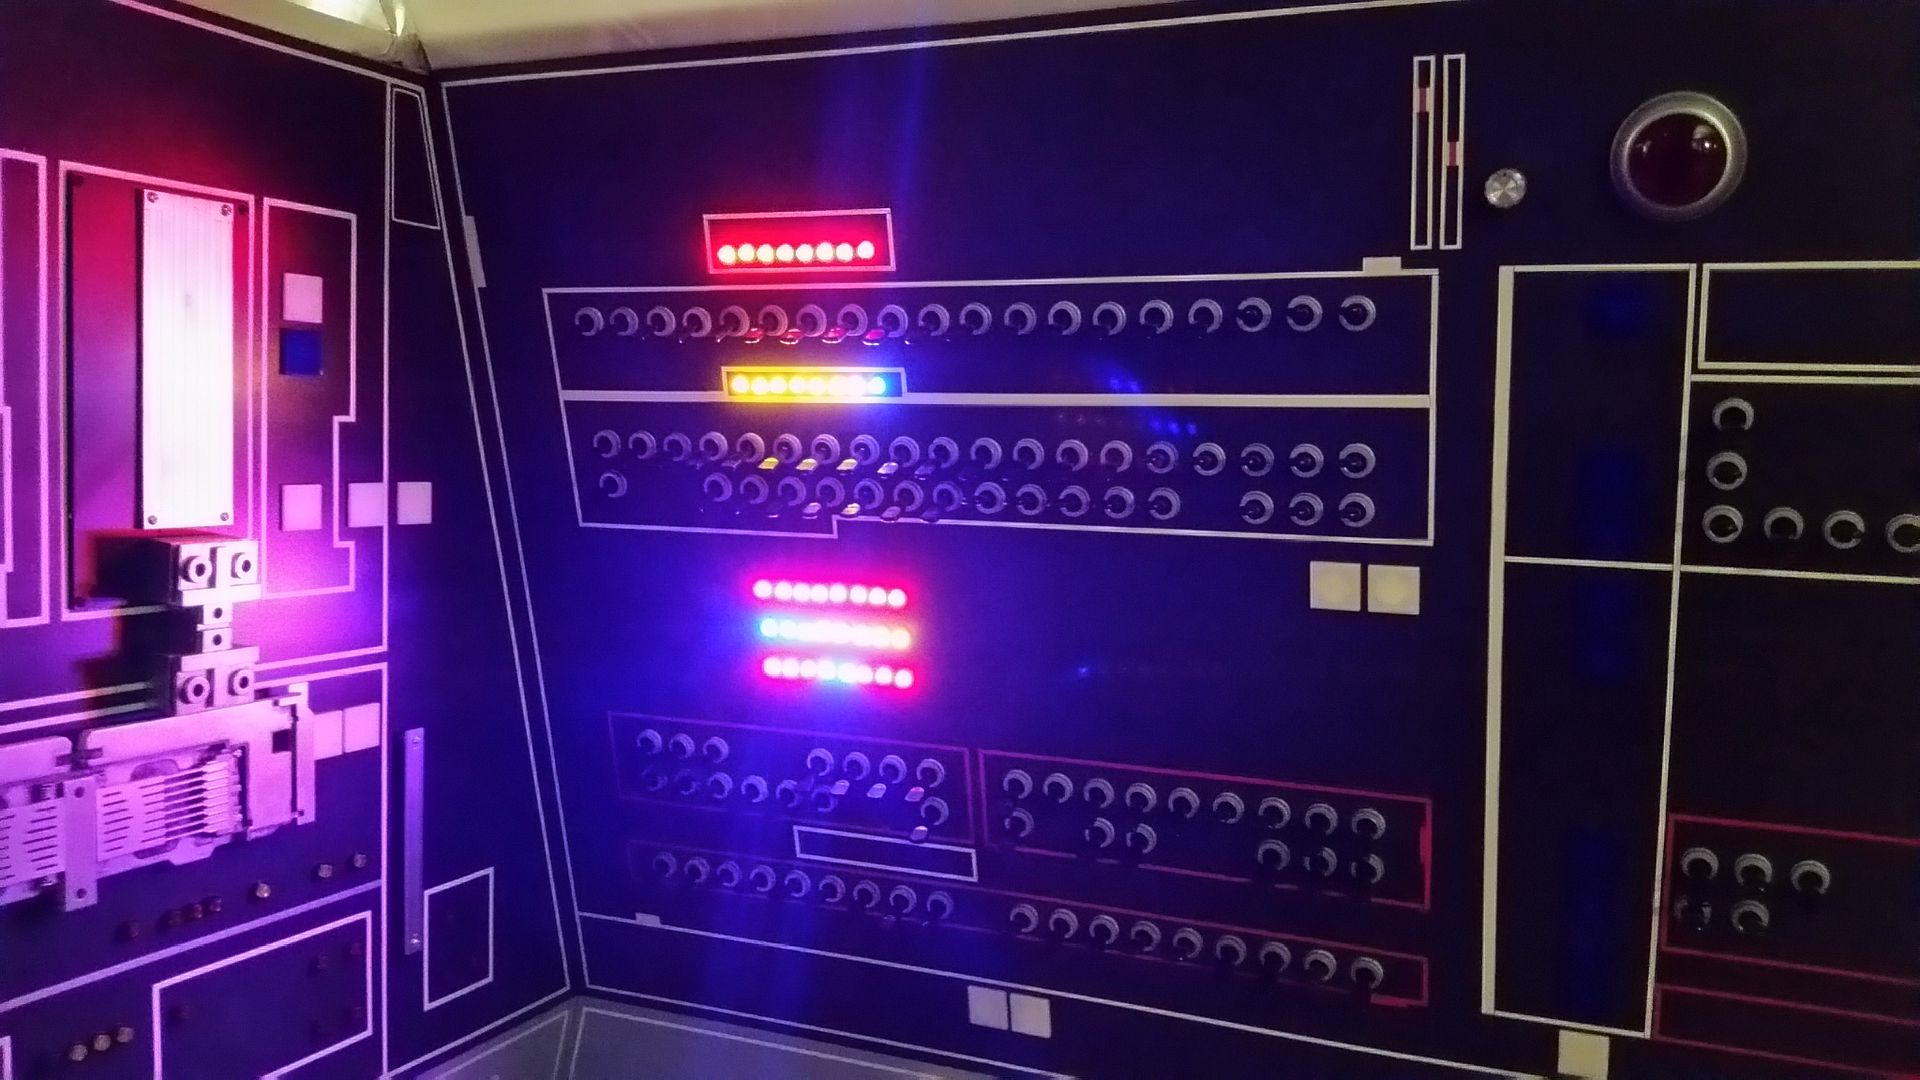
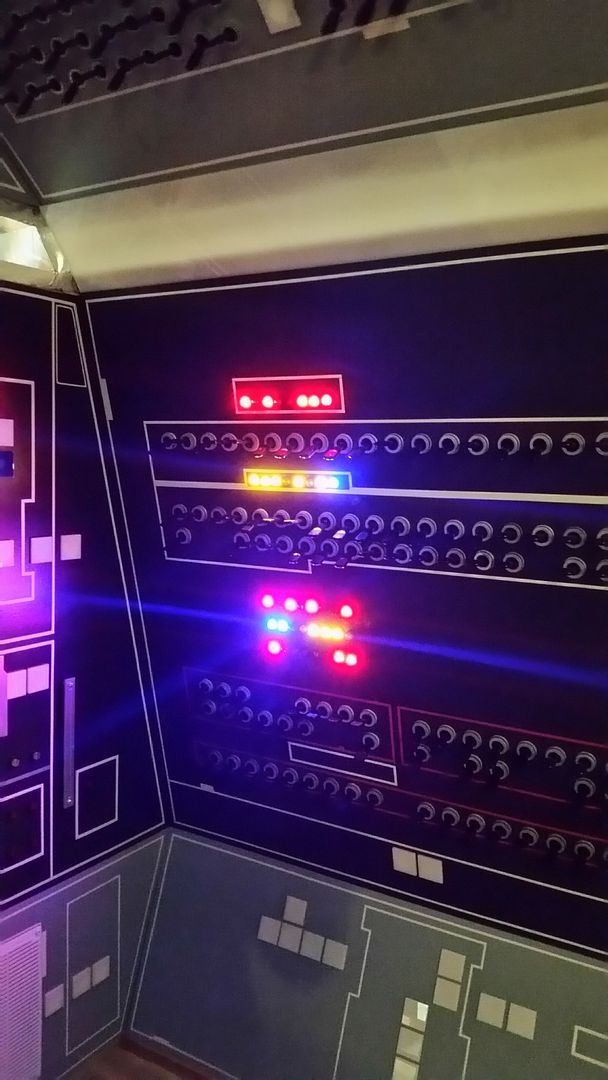
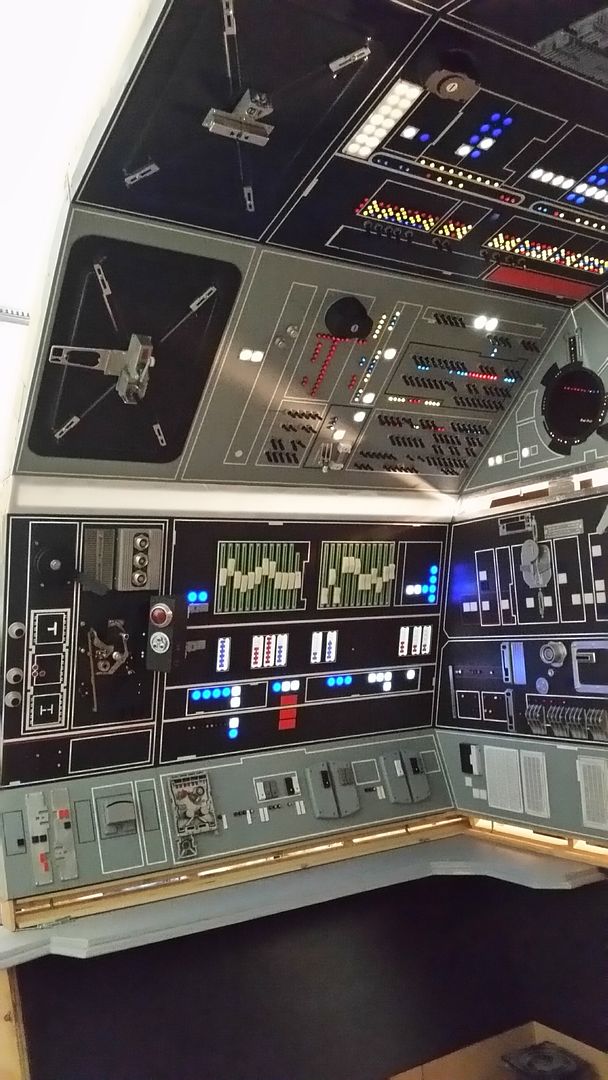
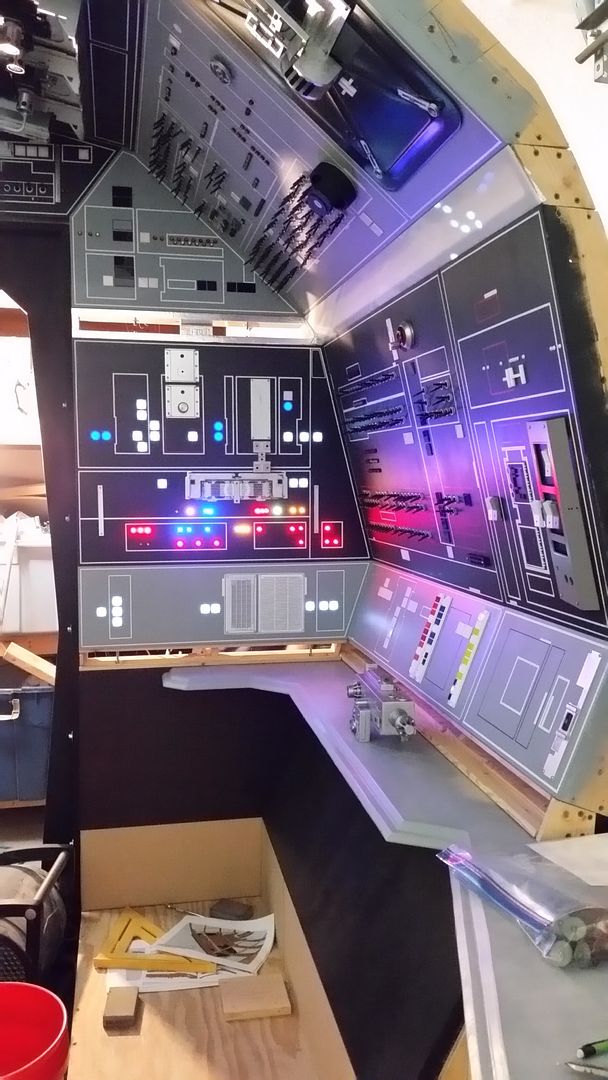
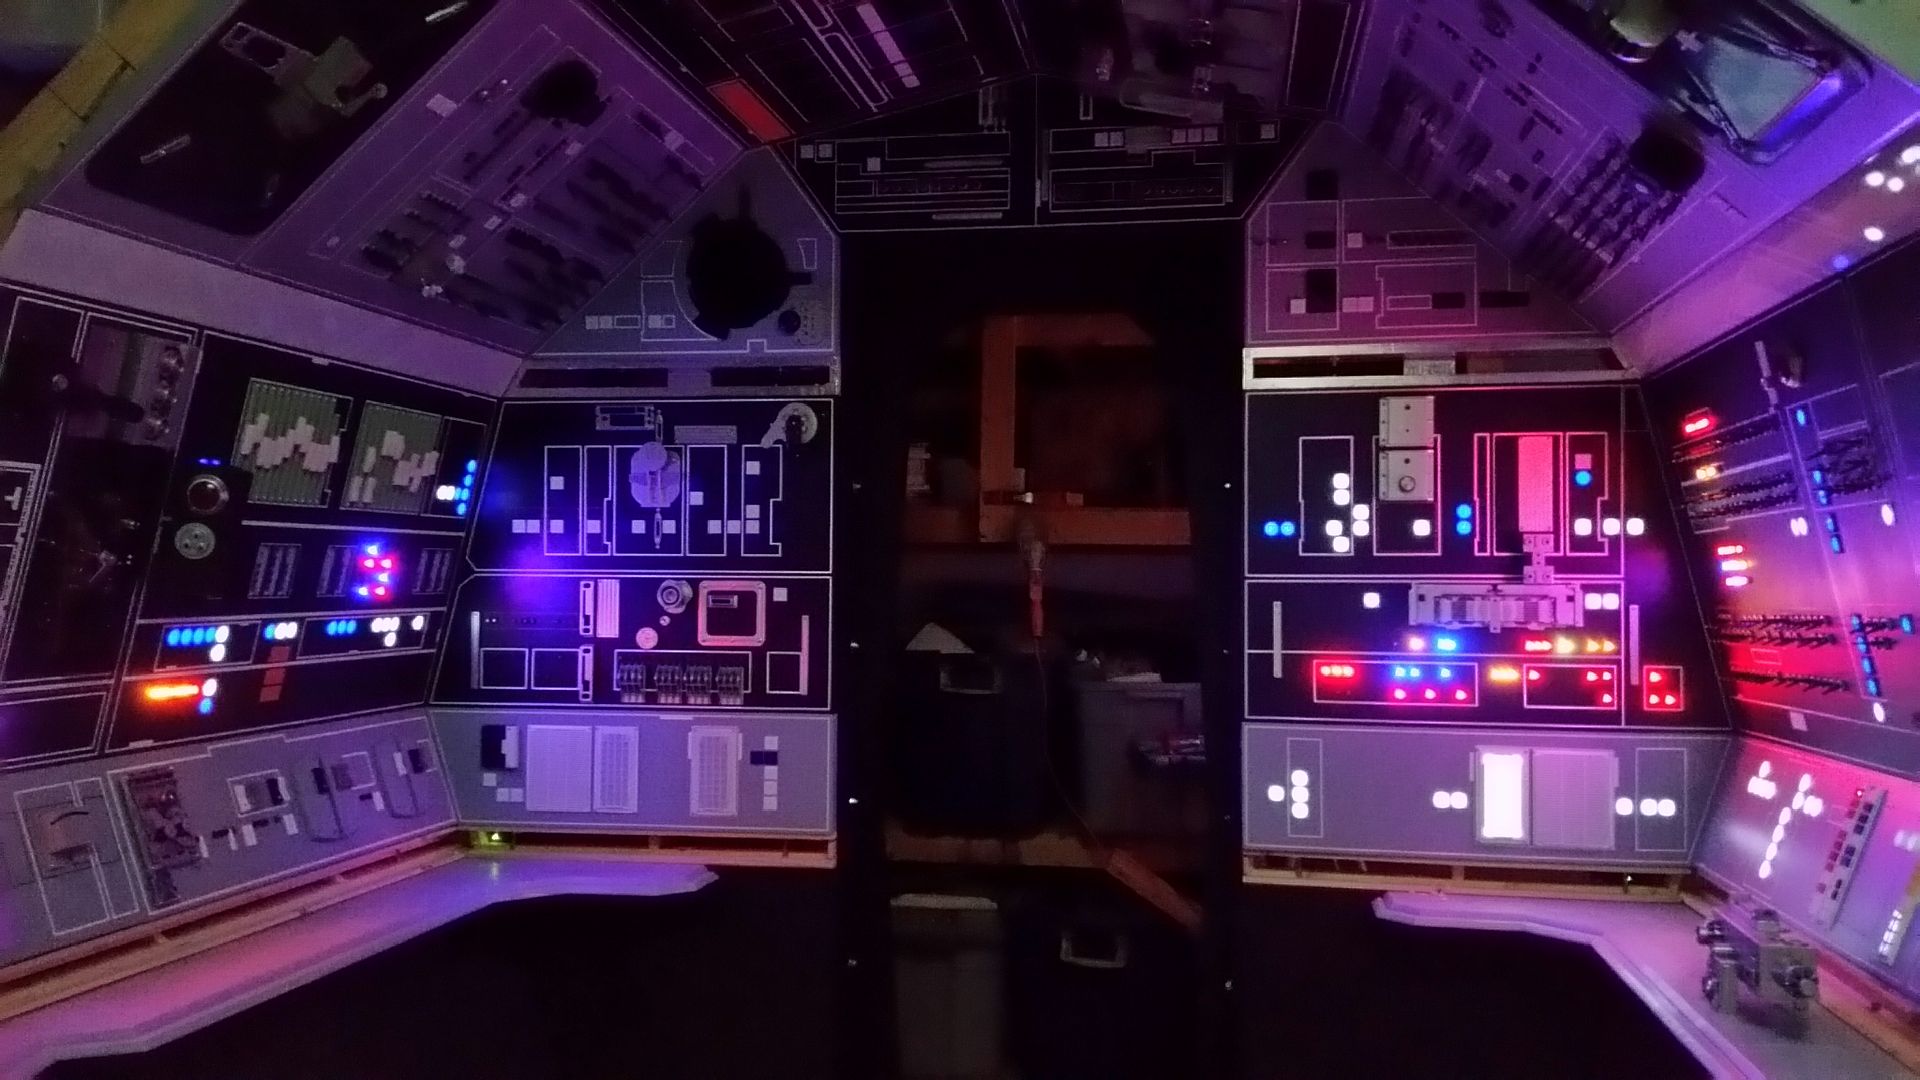
The garage light gave us this nice view...
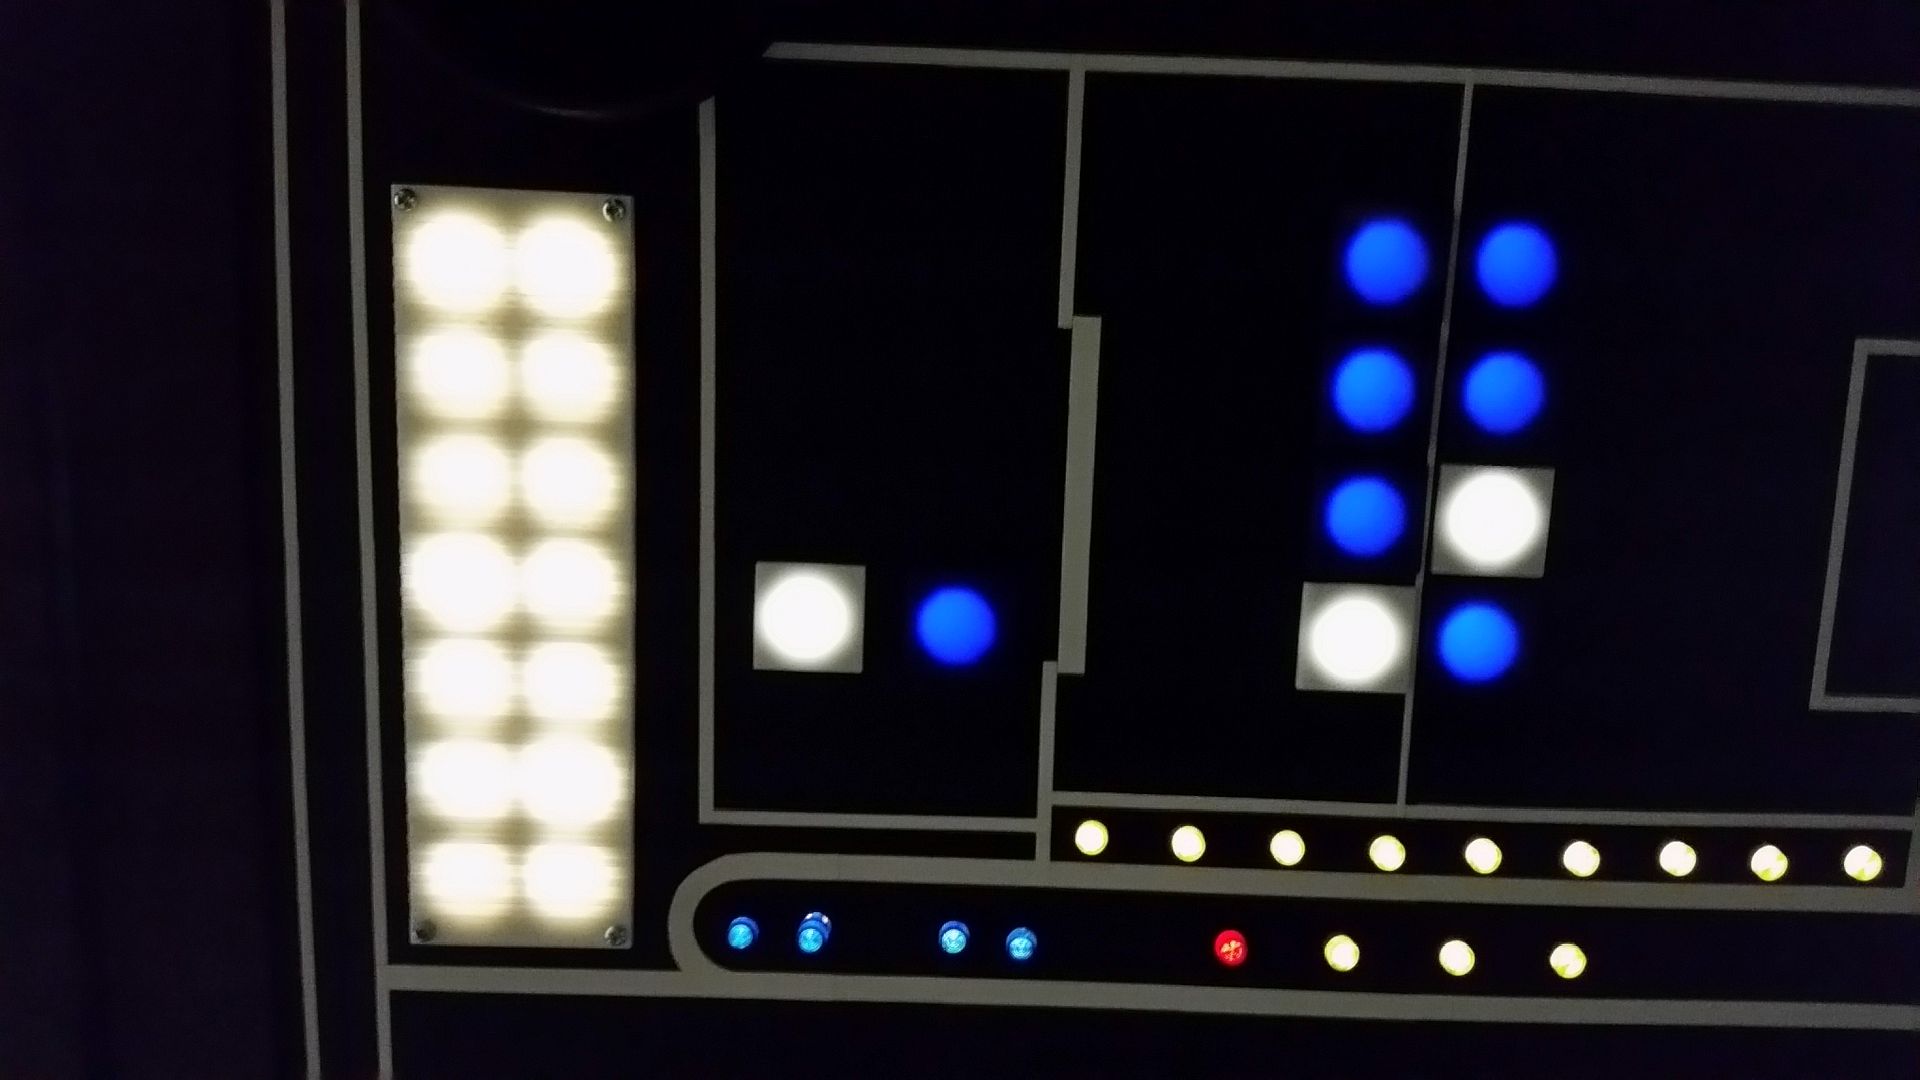
And the one shot I've been dying to see for a LONG time!
More wiring
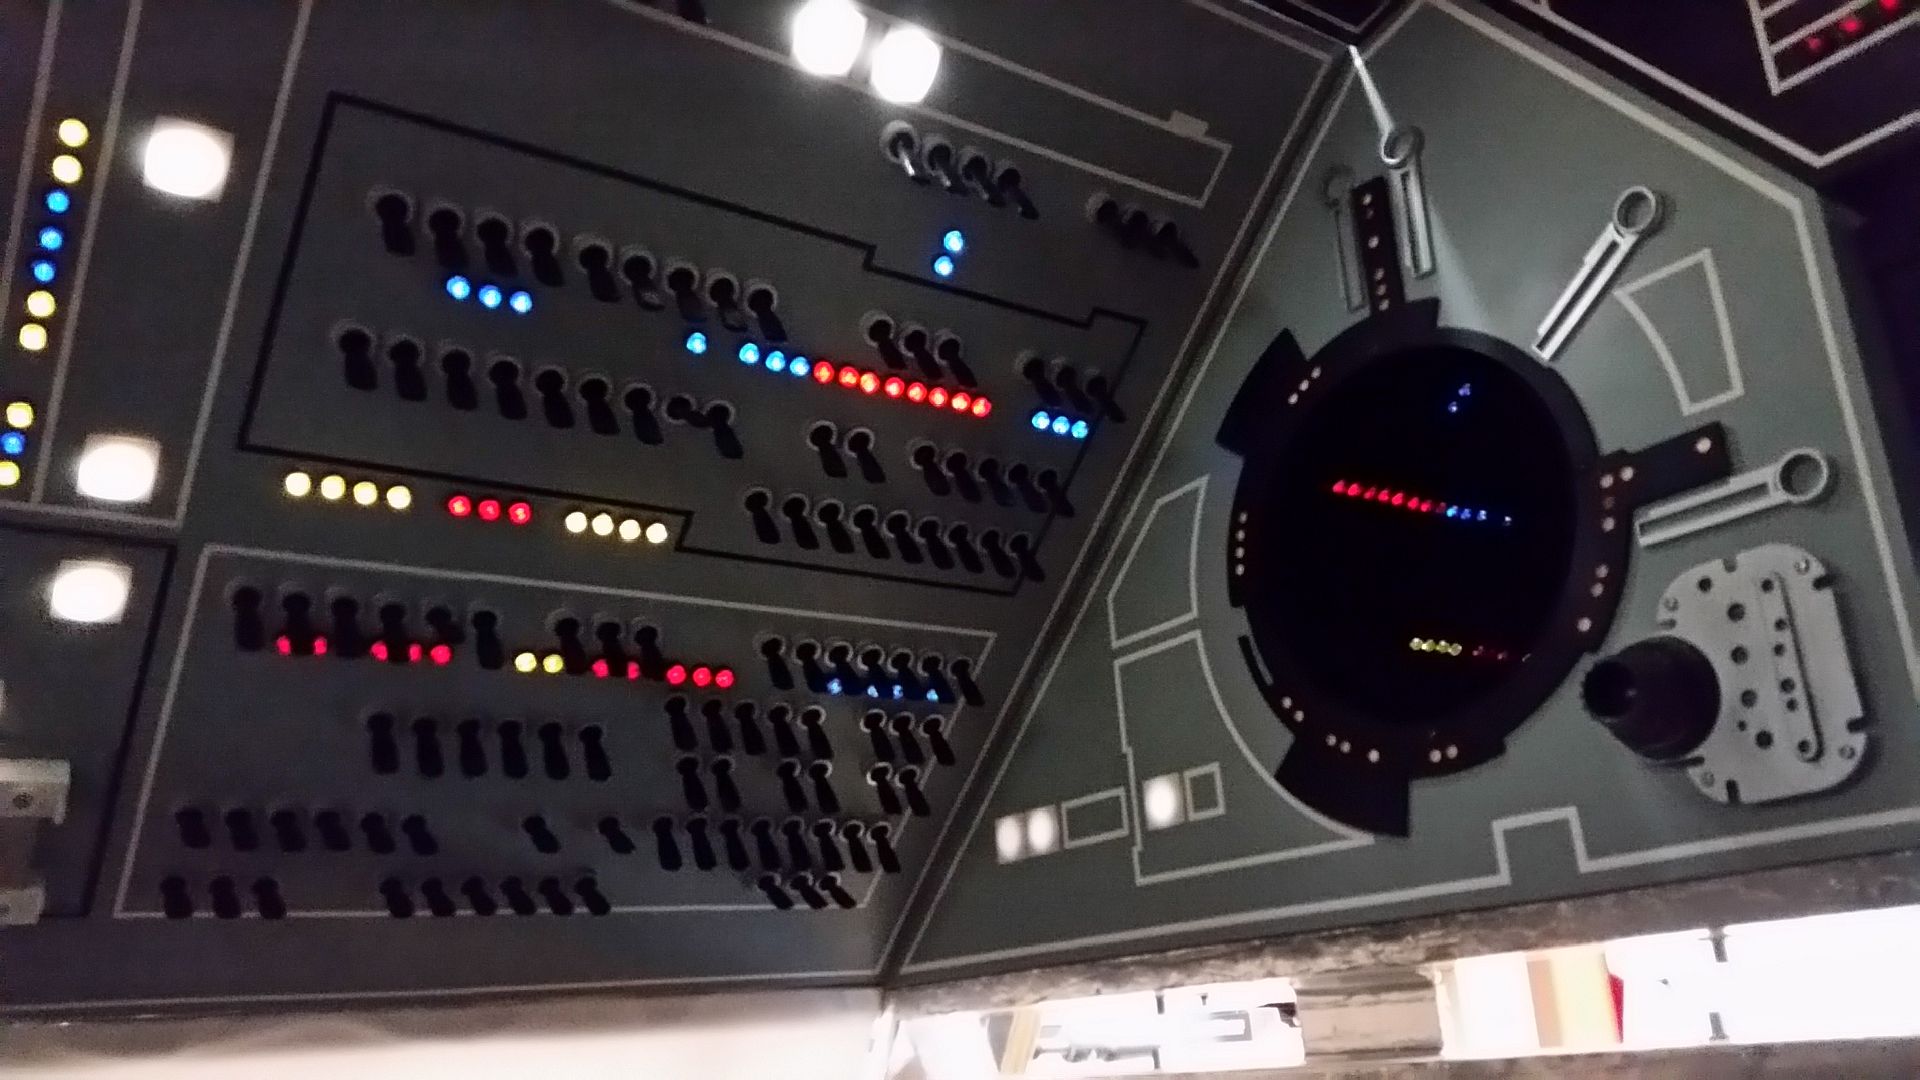
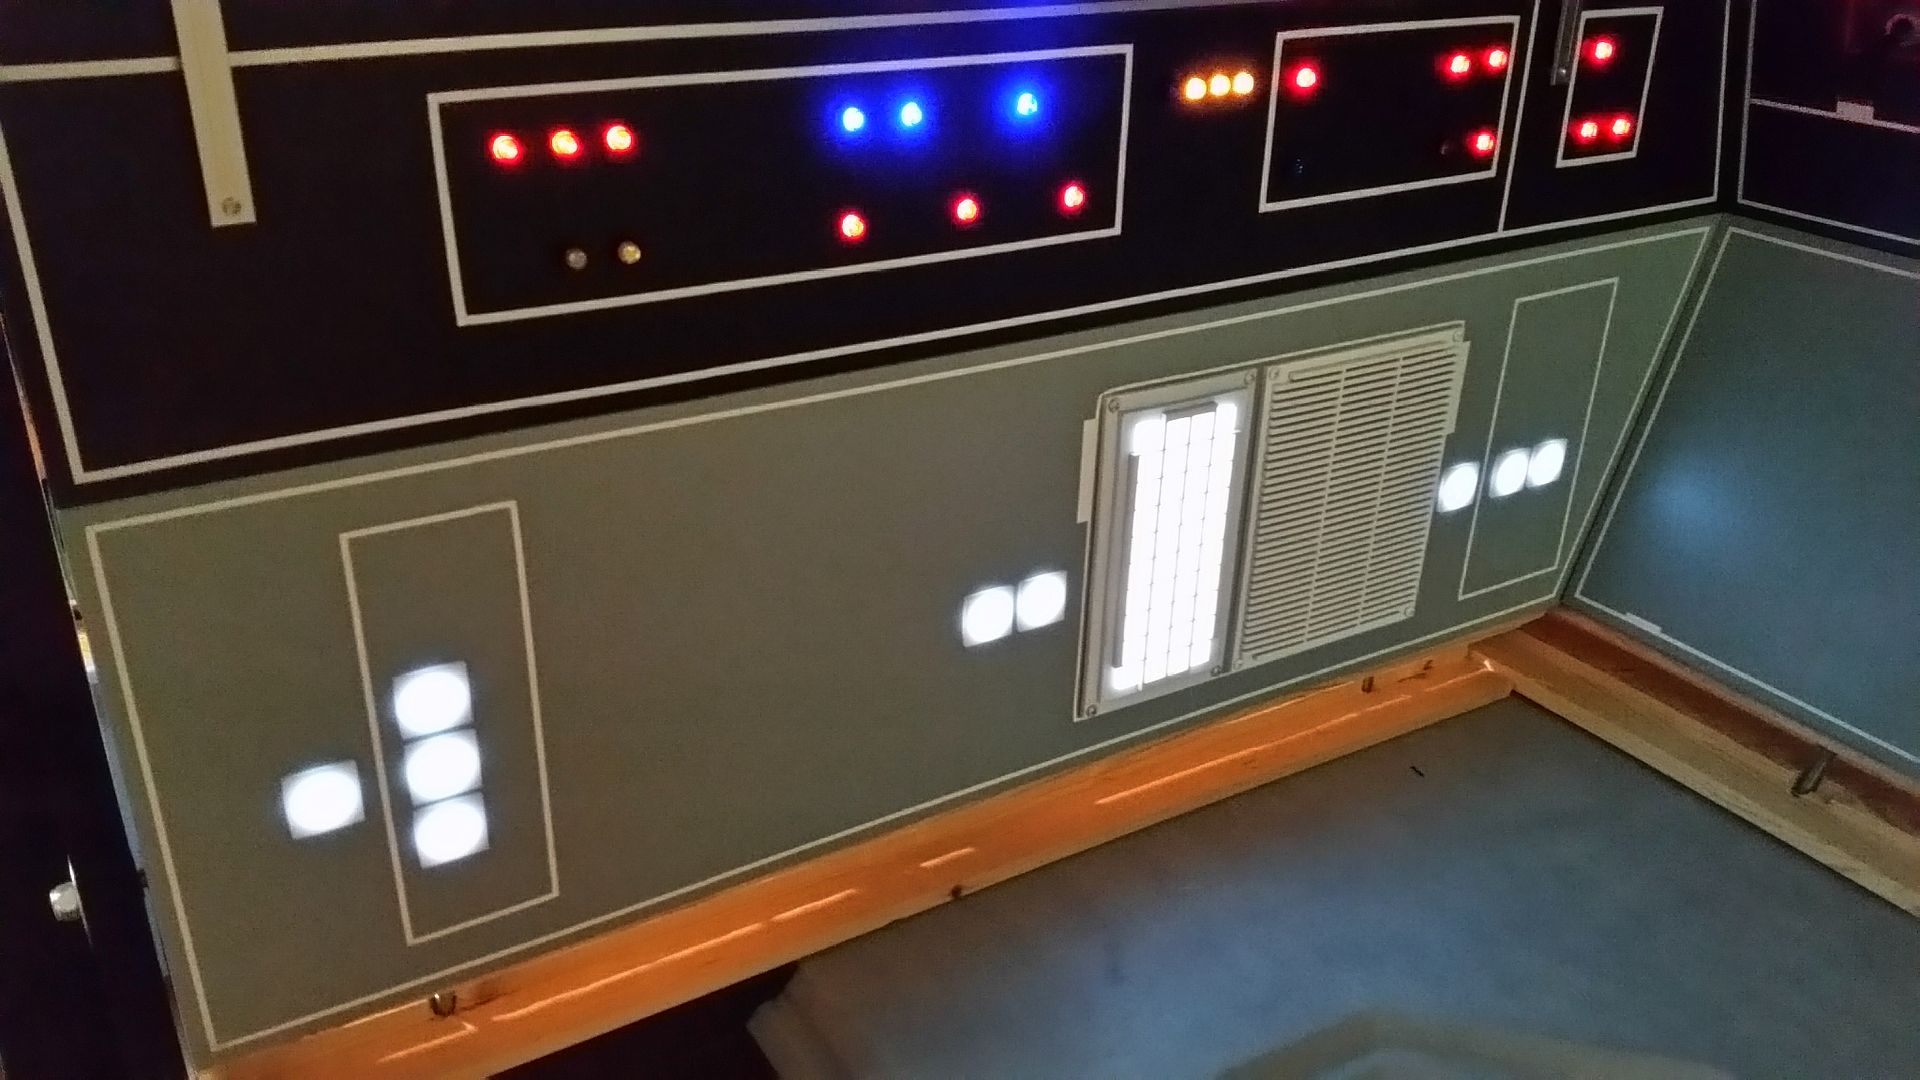
One panel... Done
Will install a dimmer to lessen the brightness
What a hectic and amazing couple of days - we're all exhausted! Thank you to everybody who showed up to help out - and to those returning today and tomorrow and the next and the next...
The weather is calling for rain rain rain ALL day so we'll see what happens. Also, I'll get to all your comments very soon but for thanks for the kind words and support from everybody!
Stay Tuned!
WHEW... It's been a mad house trying to get everything finished! Enjoy!
Installed the 2 lever greeblie
Working a new throttle lever mechanism
I'll be headed to the Makers to laser cut the remaining parts
Canopy Box lever dowel getting some attention
A new mounting plate was added to one of the pull handle greeblies
That's creepy....
Silver
More Primer
Mounted and in place and ready for weathering
We then laid out the pieces required for the new back wall
Door frame painted
And installed - the bolts will be covered by the 4" foam pads
Back main arch built and temp in place
Main and canopy arch in place
Calling it a night...
Early morning... Seeing how the door looks
Daniel and I then installed the rest of the panels - this took a while to get everything aligned
This is the 1st time in over a year the panels have been back in place
For fun... I installed this brace
Temp positioned the front window
Let the party begin!
We've started wiring all the panels!
The 1" tiles get a small PVC cup surround that will hold a single LED and back light the tile
LED Donuts
The gang is all here!
Wiring
The garage light gave us this nice view...
And the one shot I've been dying to see for a LONG time!
More wiring
One panel... Done
Will install a dimmer to lessen the brightness
What a hectic and amazing couple of days - we're all exhausted! Thank you to everybody who showed up to help out - and to those returning today and tomorrow and the next and the next...
The weather is calling for rain rain rain ALL day so we'll see what happens. Also, I'll get to all your comments very soon but for thanks for the kind words and support from everybody!
Stay Tuned!
BlobVanDam
Sr Member
That is one heck of a sight! Fantastic job as always.
spastromech
Sr Member
Incredible! In case I missed it, how are you getting it out of the garage?
IzzyMel
Sr Member
Incredible! In case I missed it, how are you getting it out of the garage?
I think he built a transporter.
Hi Gang,
What a weekend! The later part of this post are time progression photos so I wont bother you any commentary. Simply sit back and enjoy!
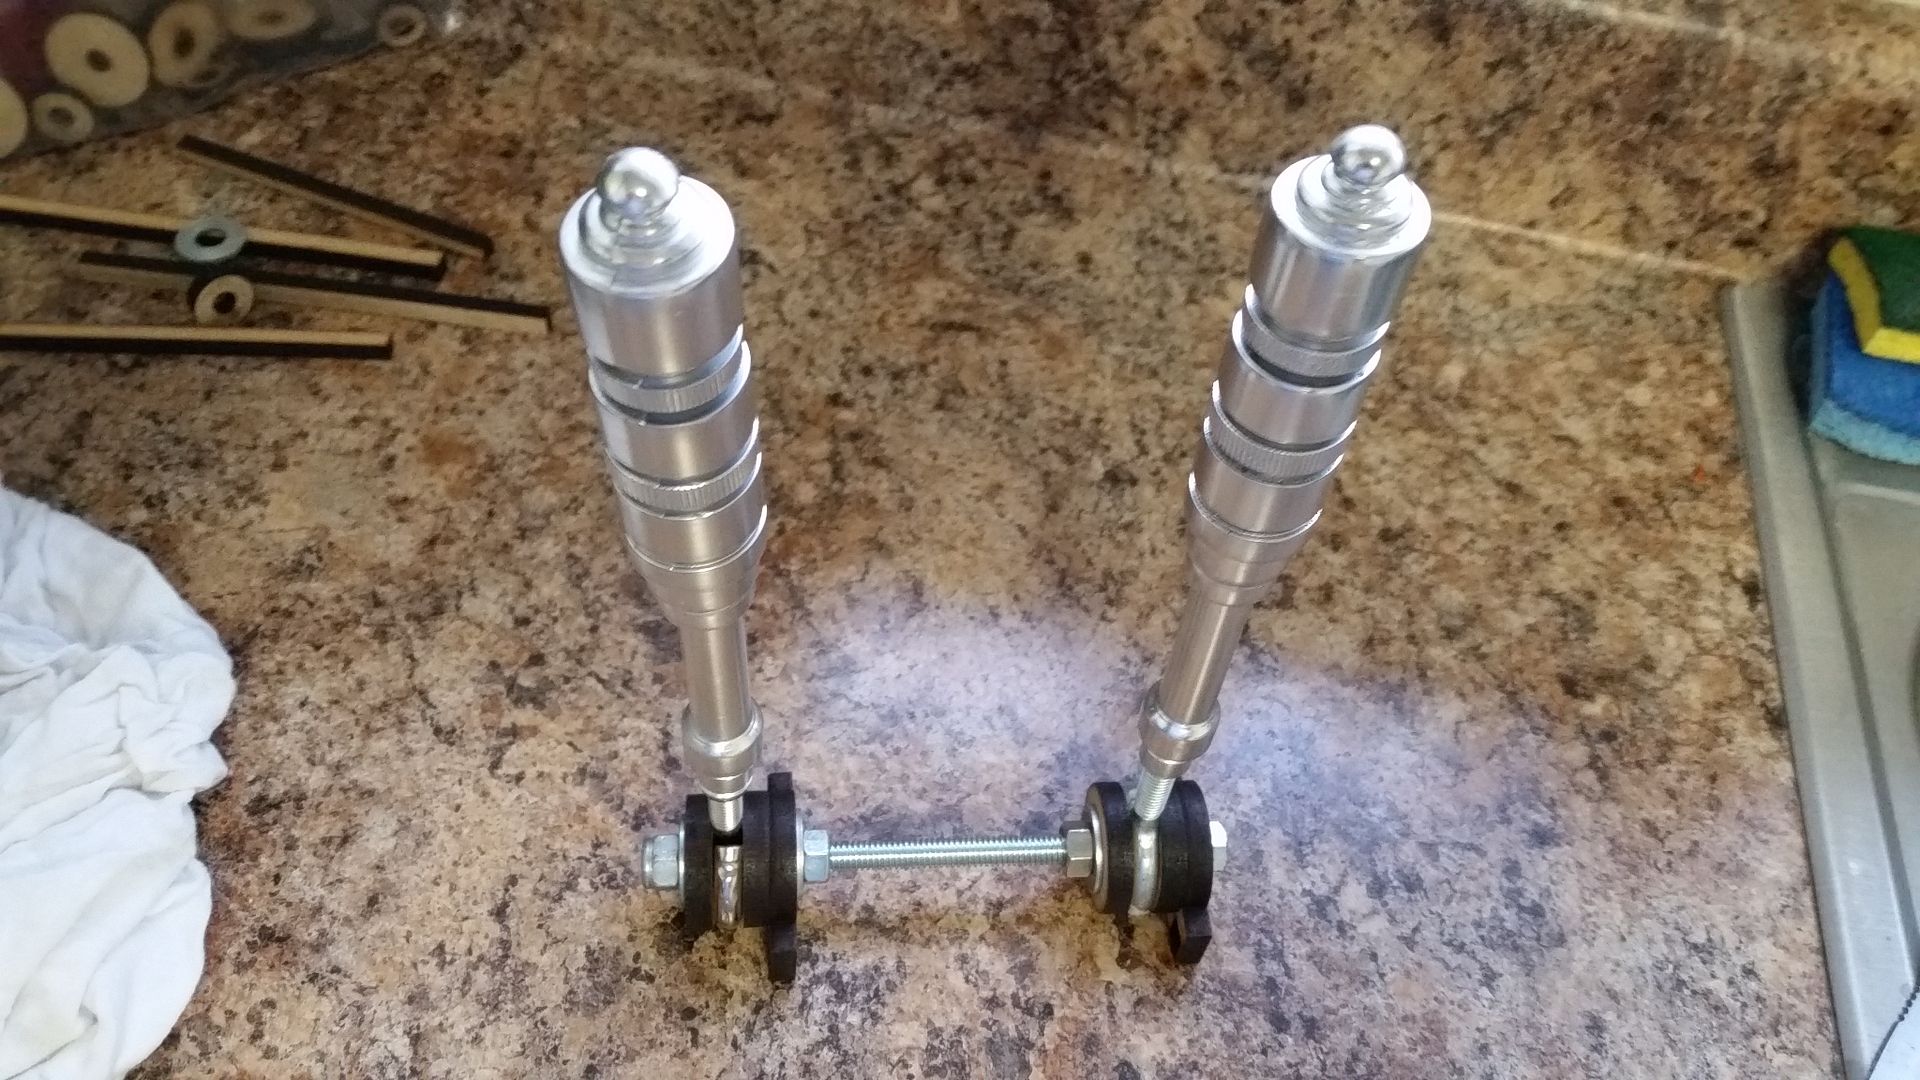
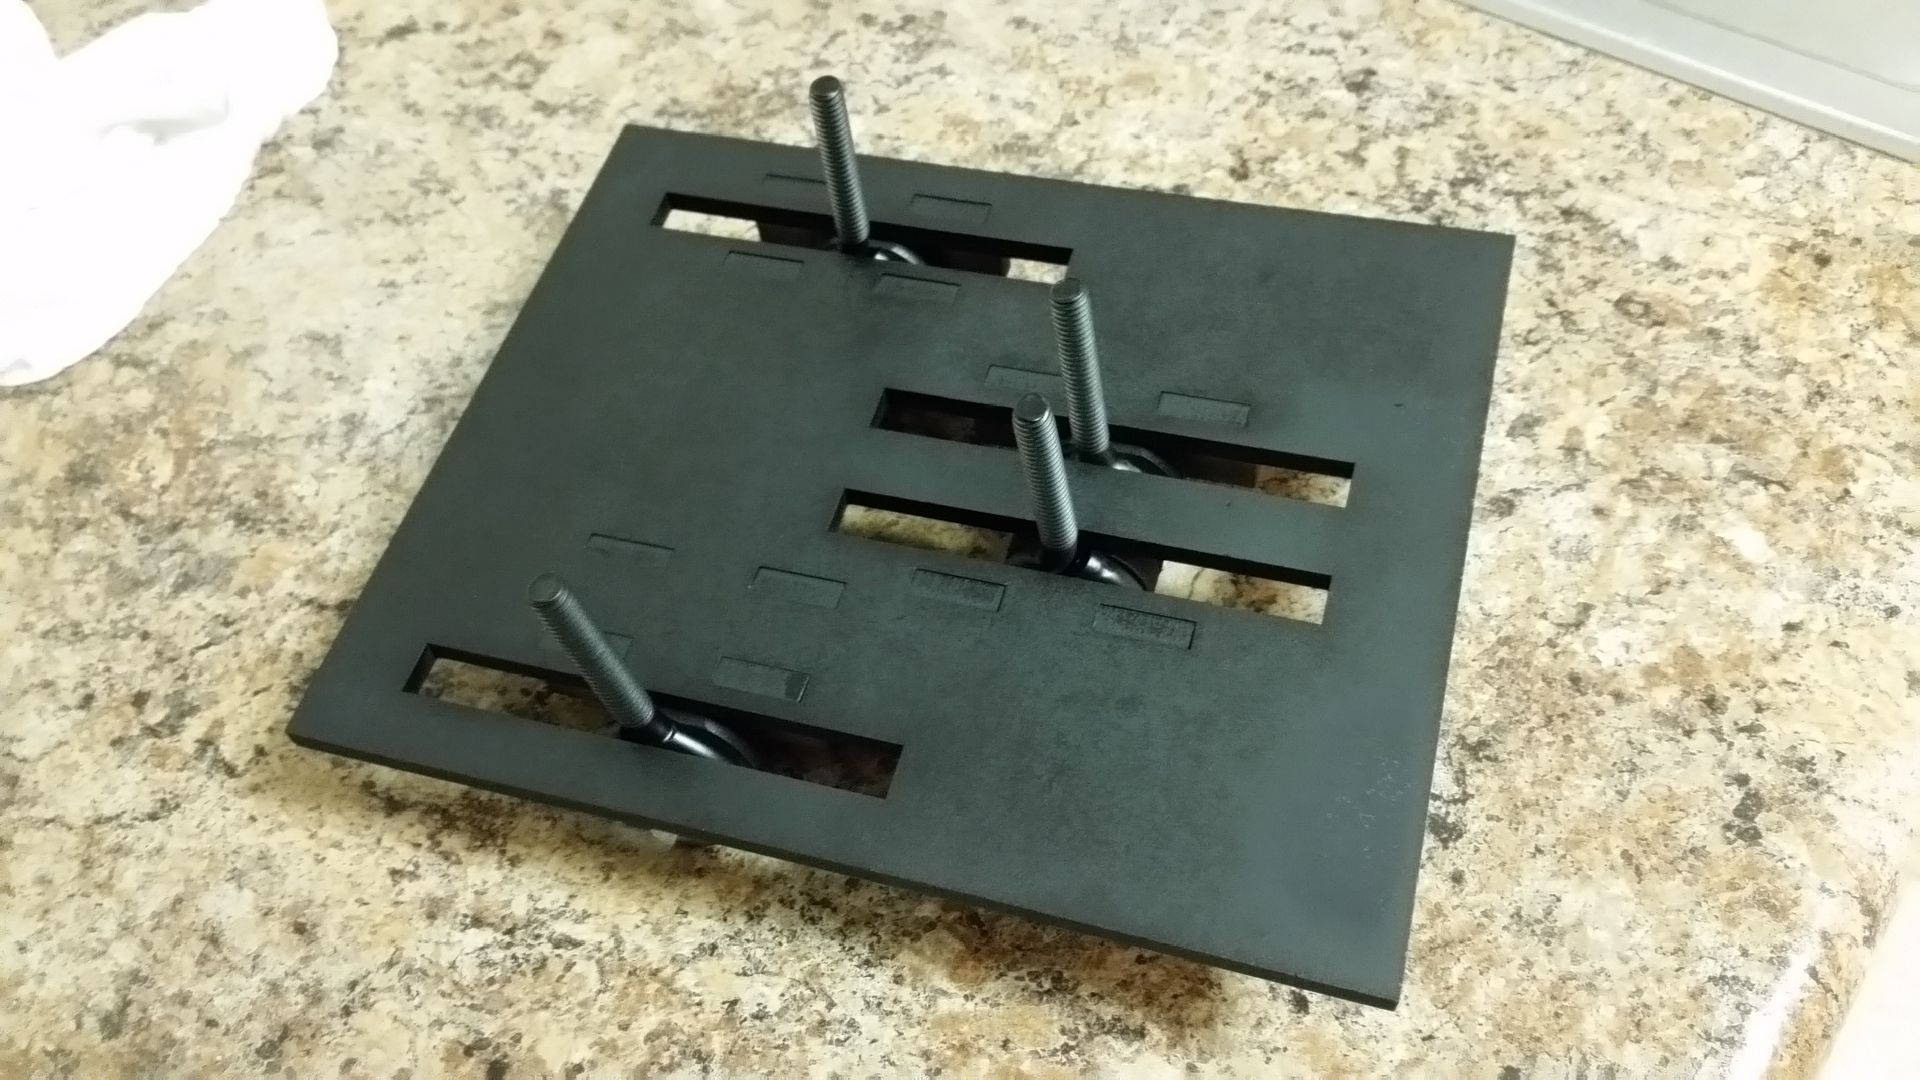
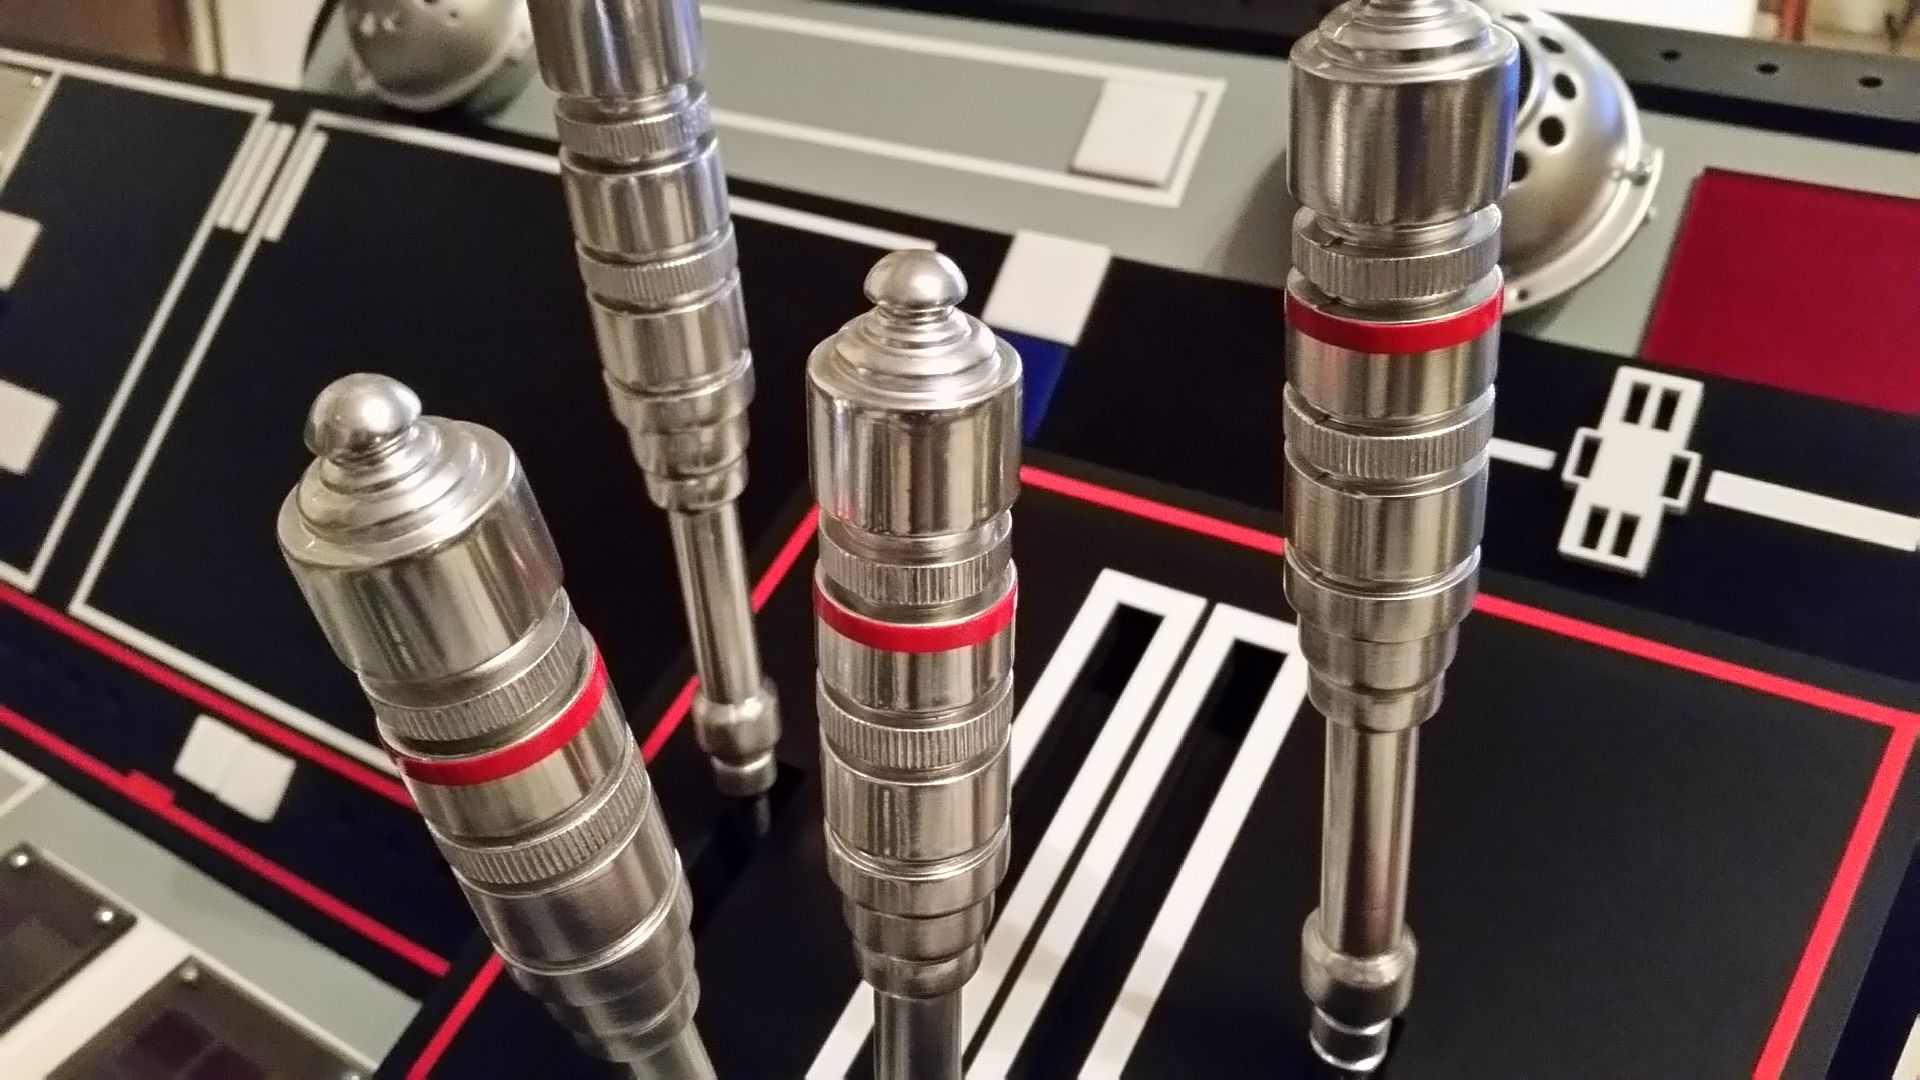
Weathered the pull lever greeblie
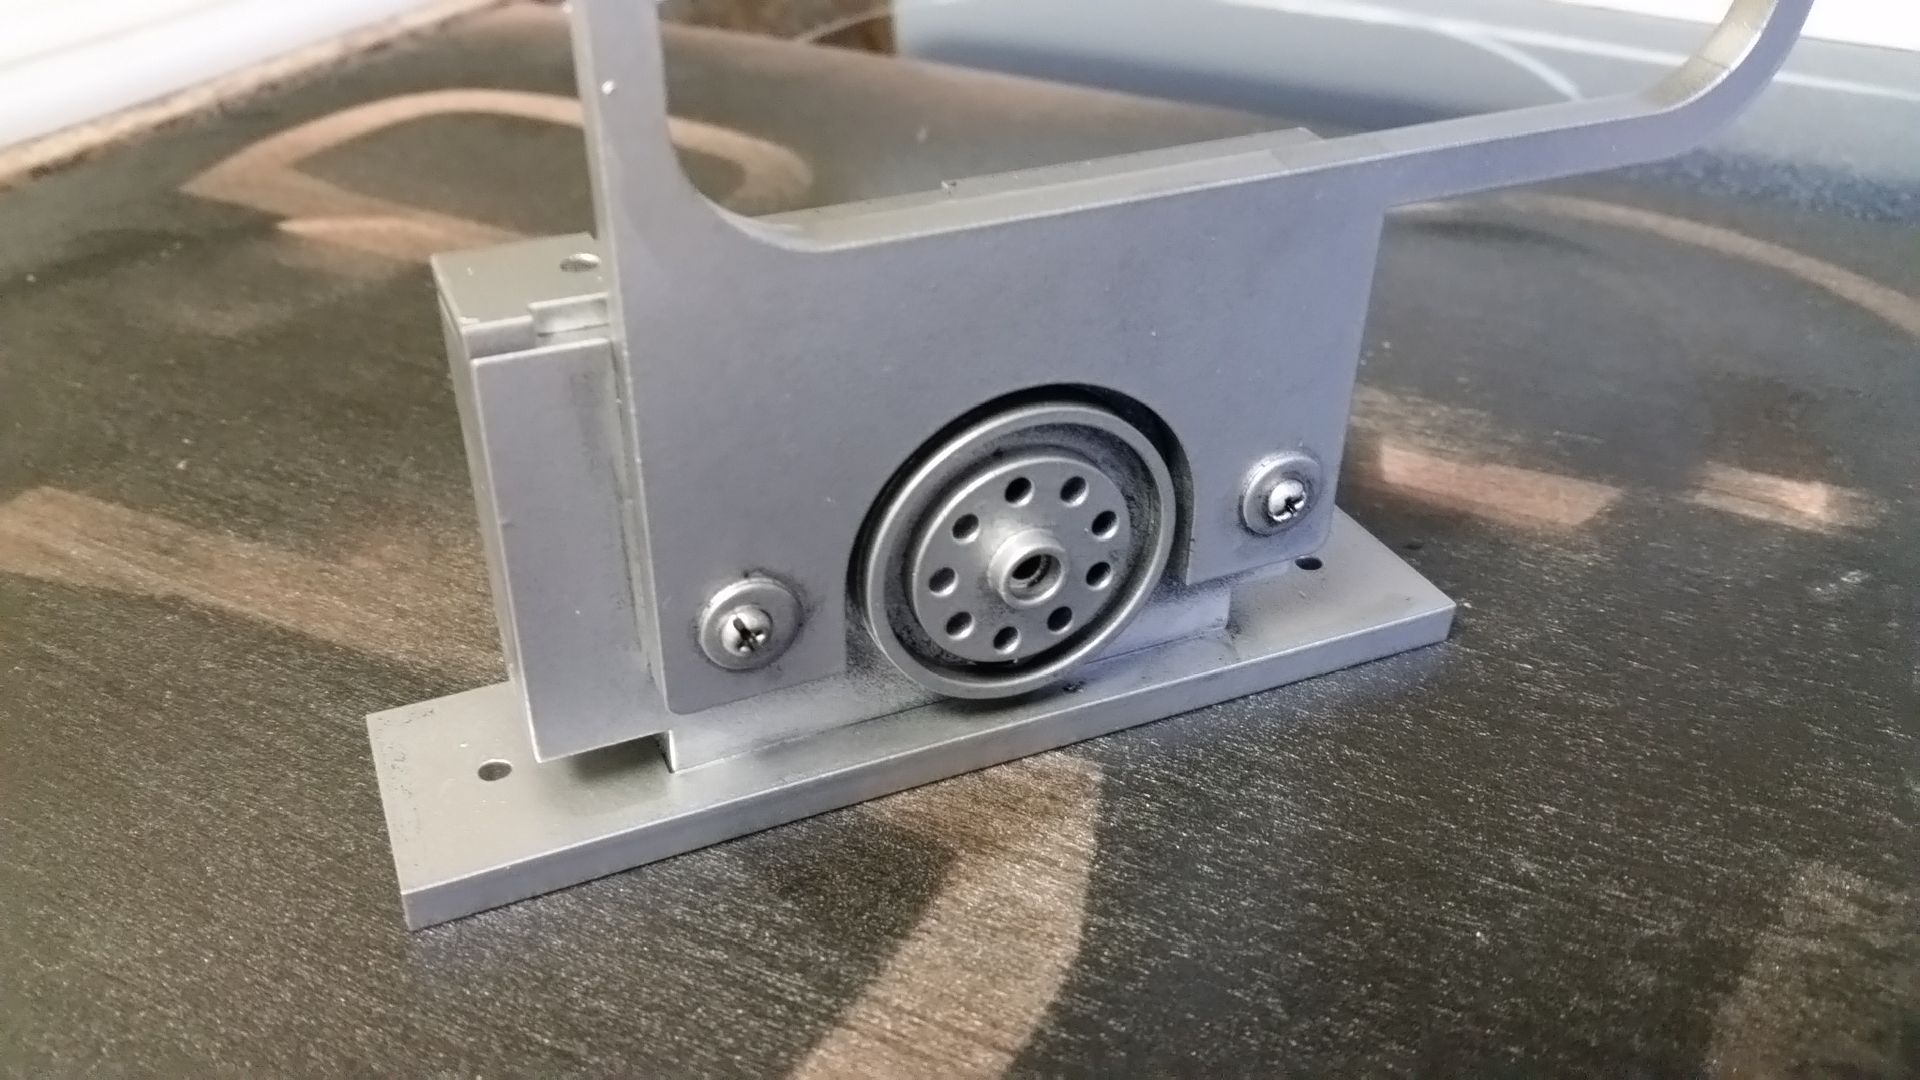
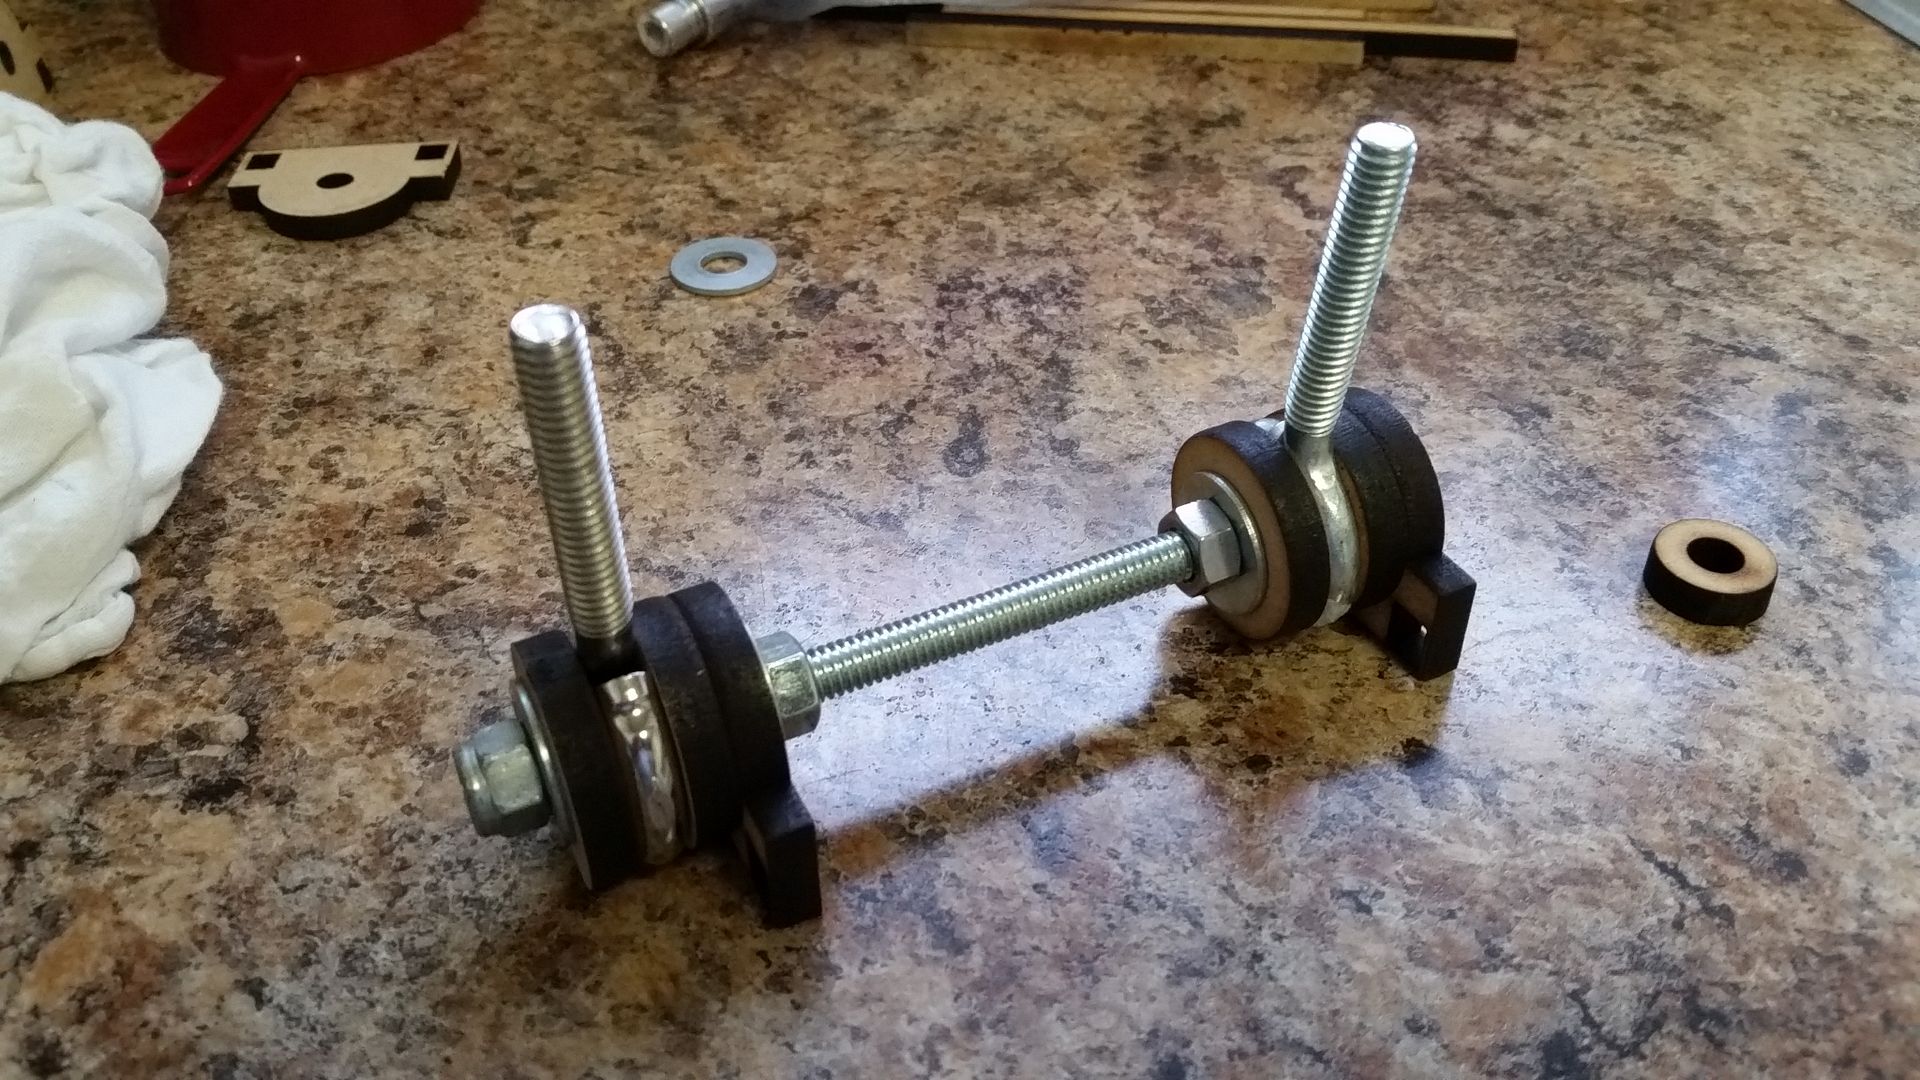
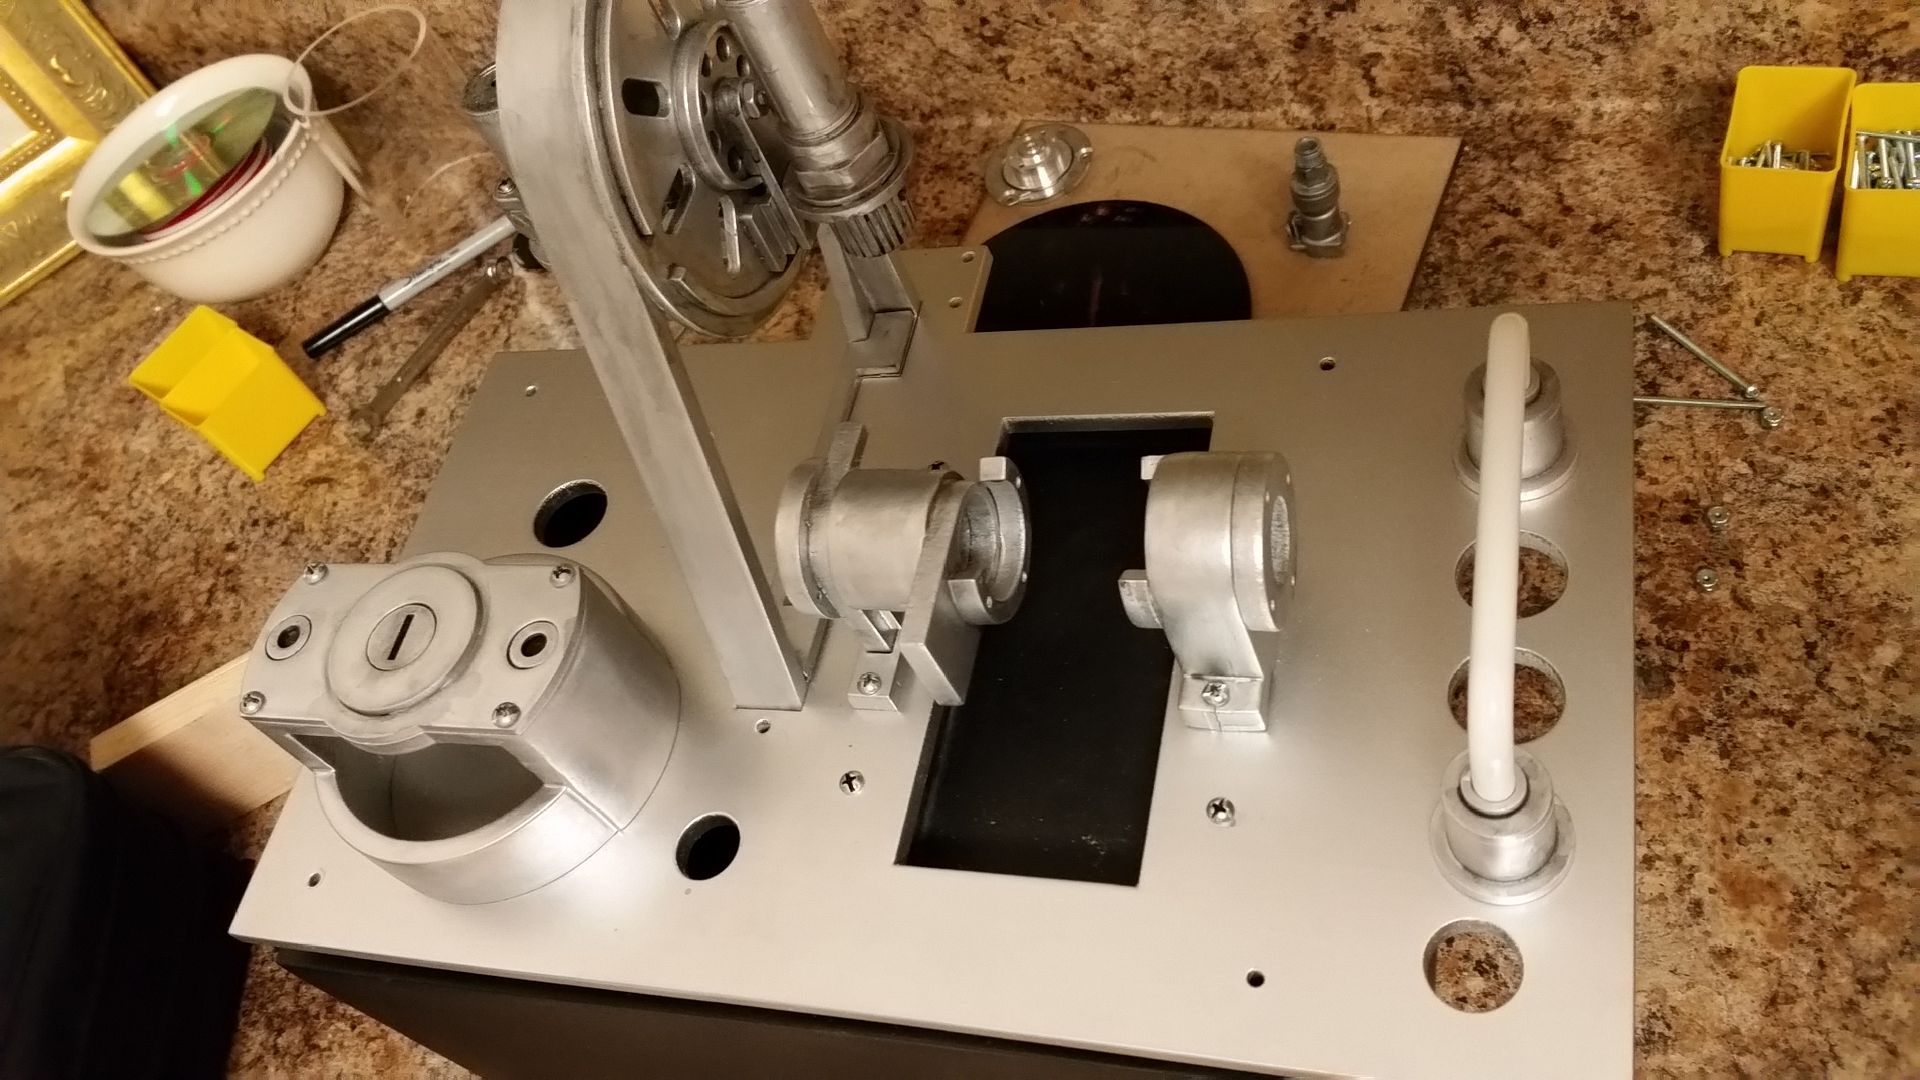
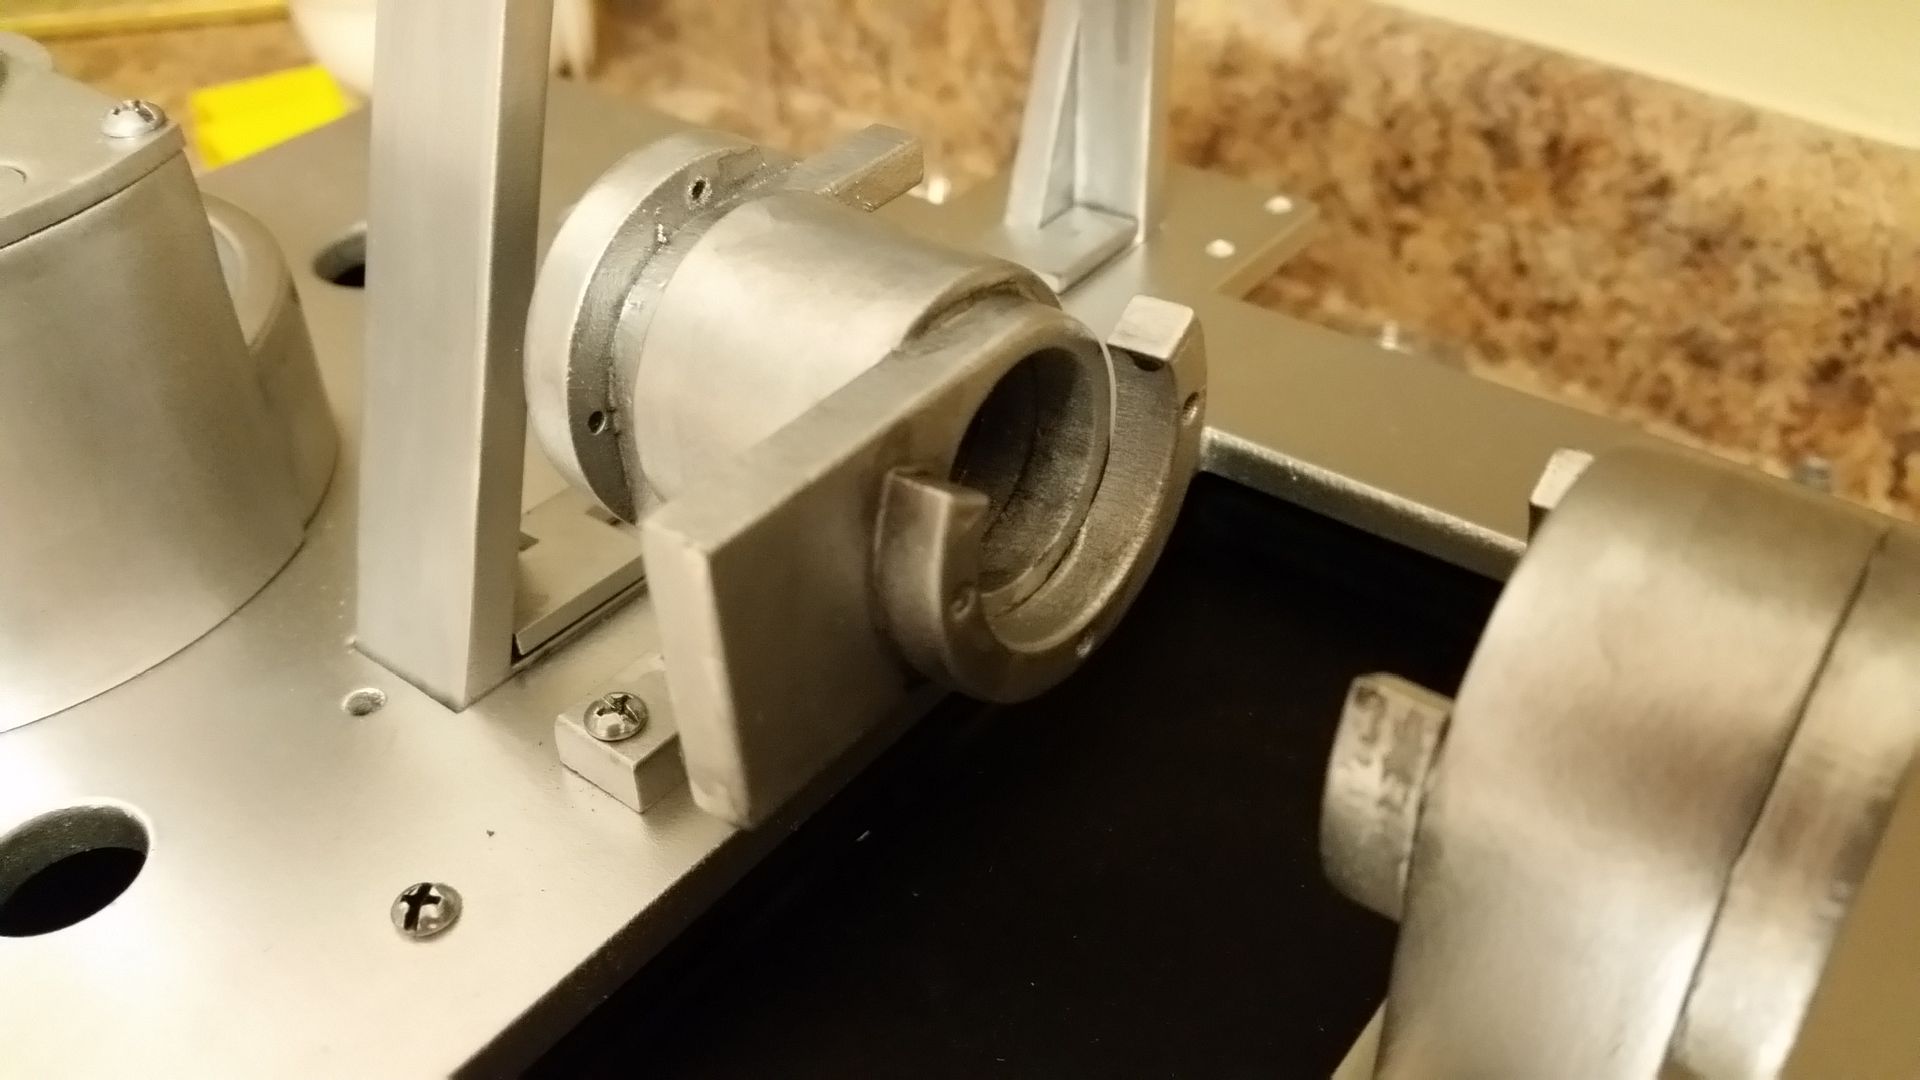
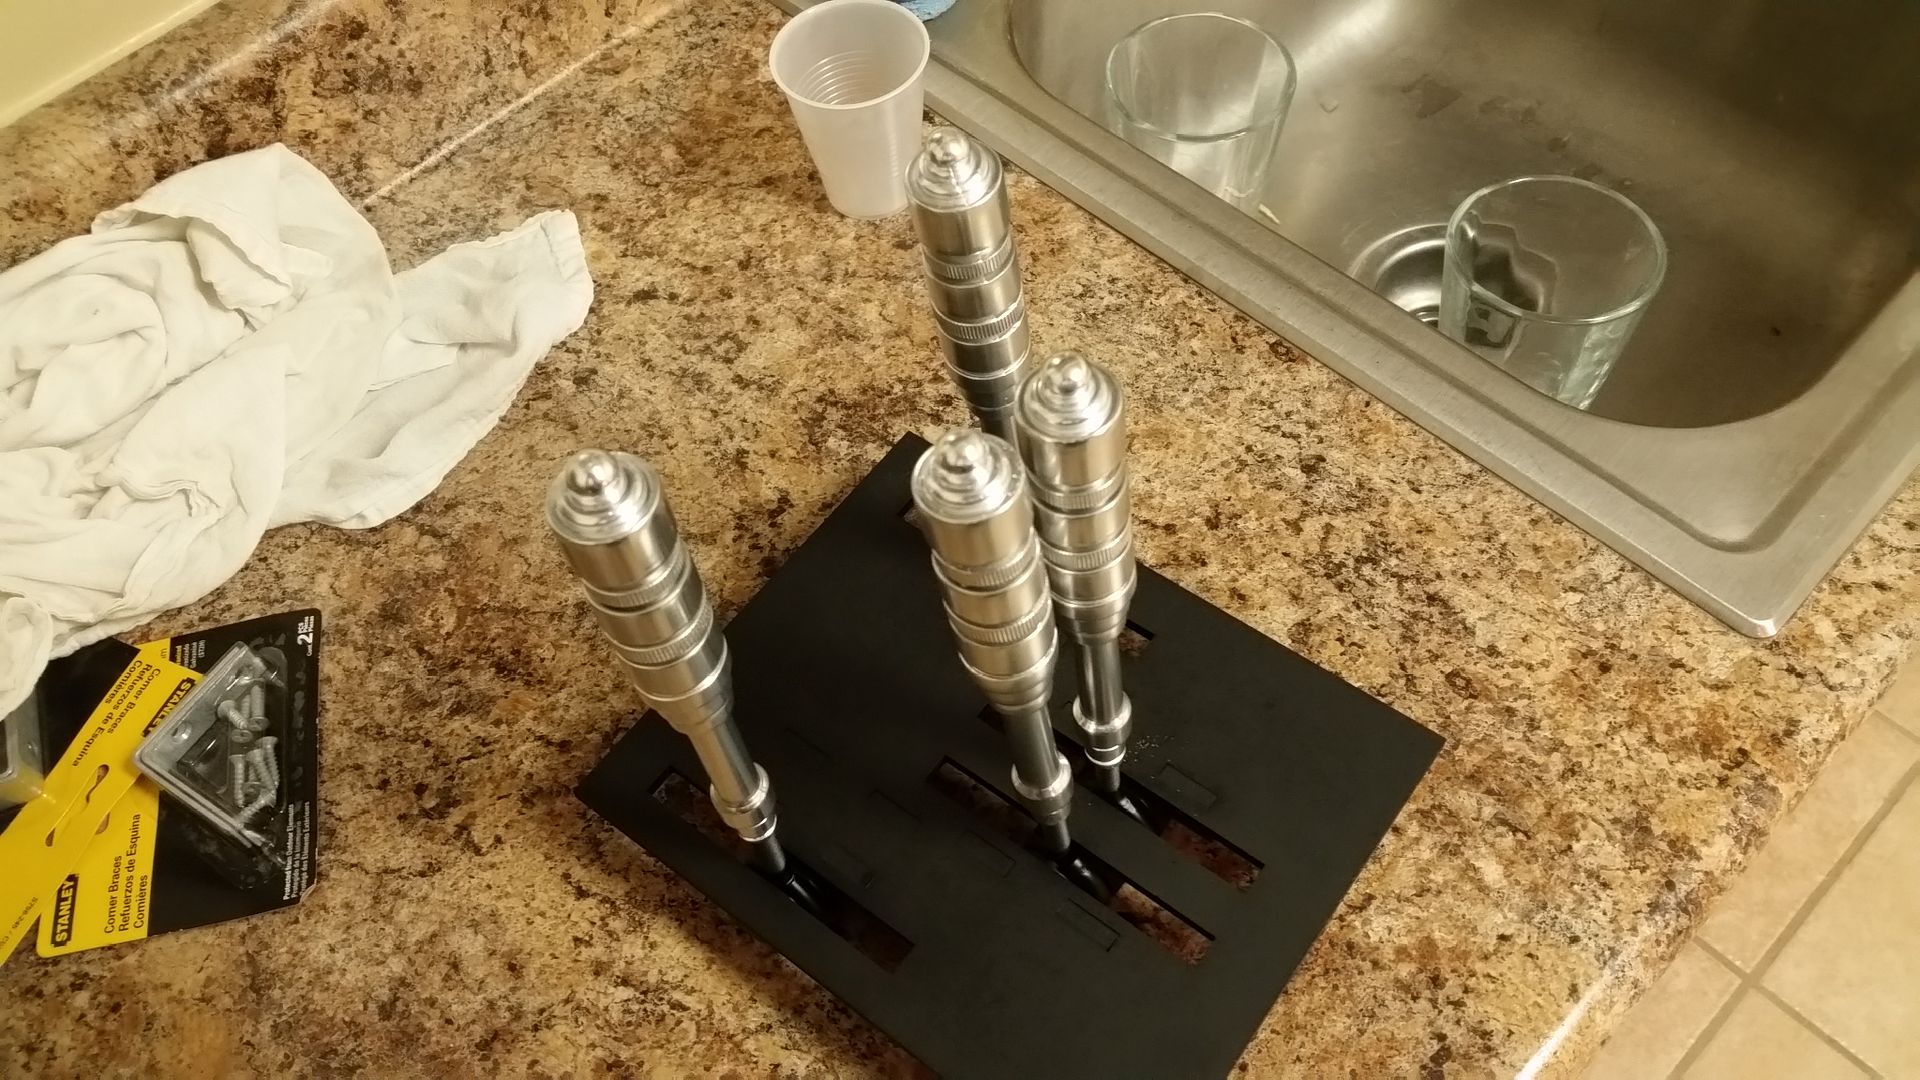
I designed and laser cut a new throttle lever mechanism
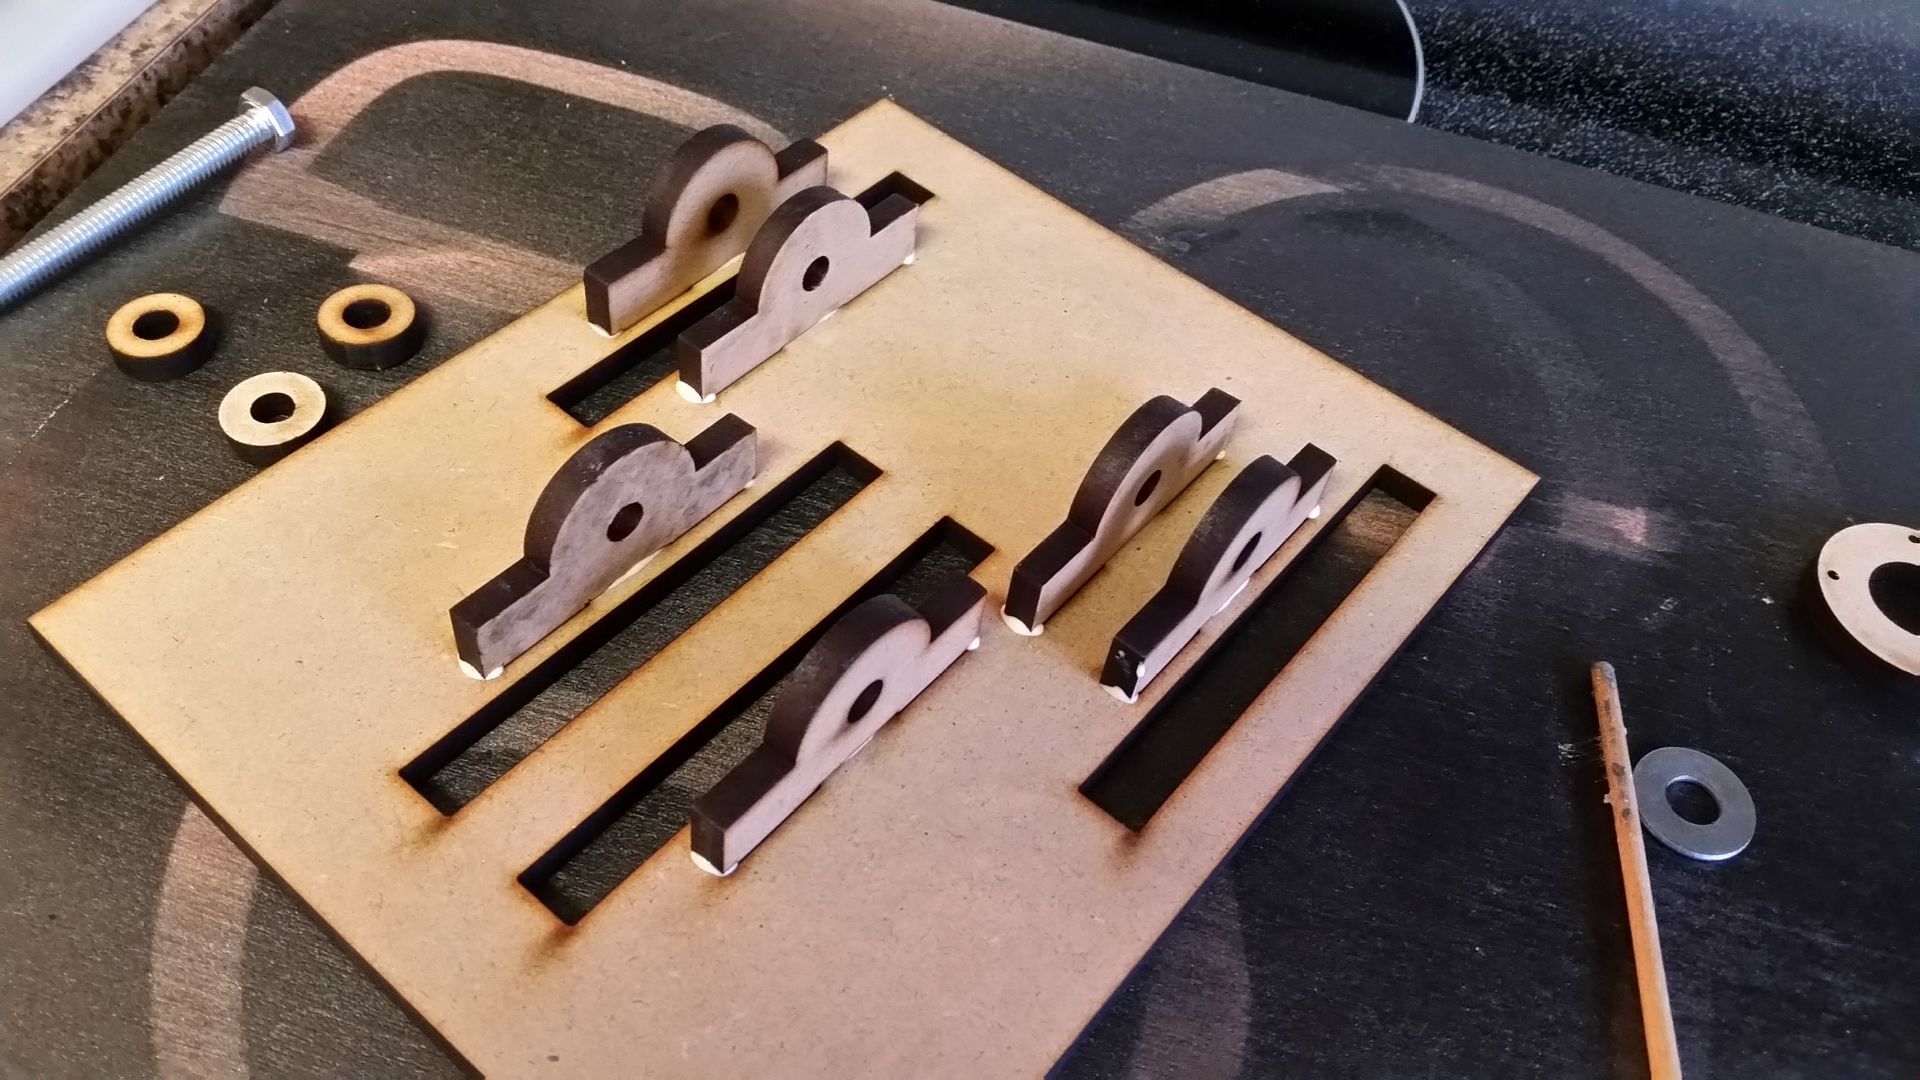

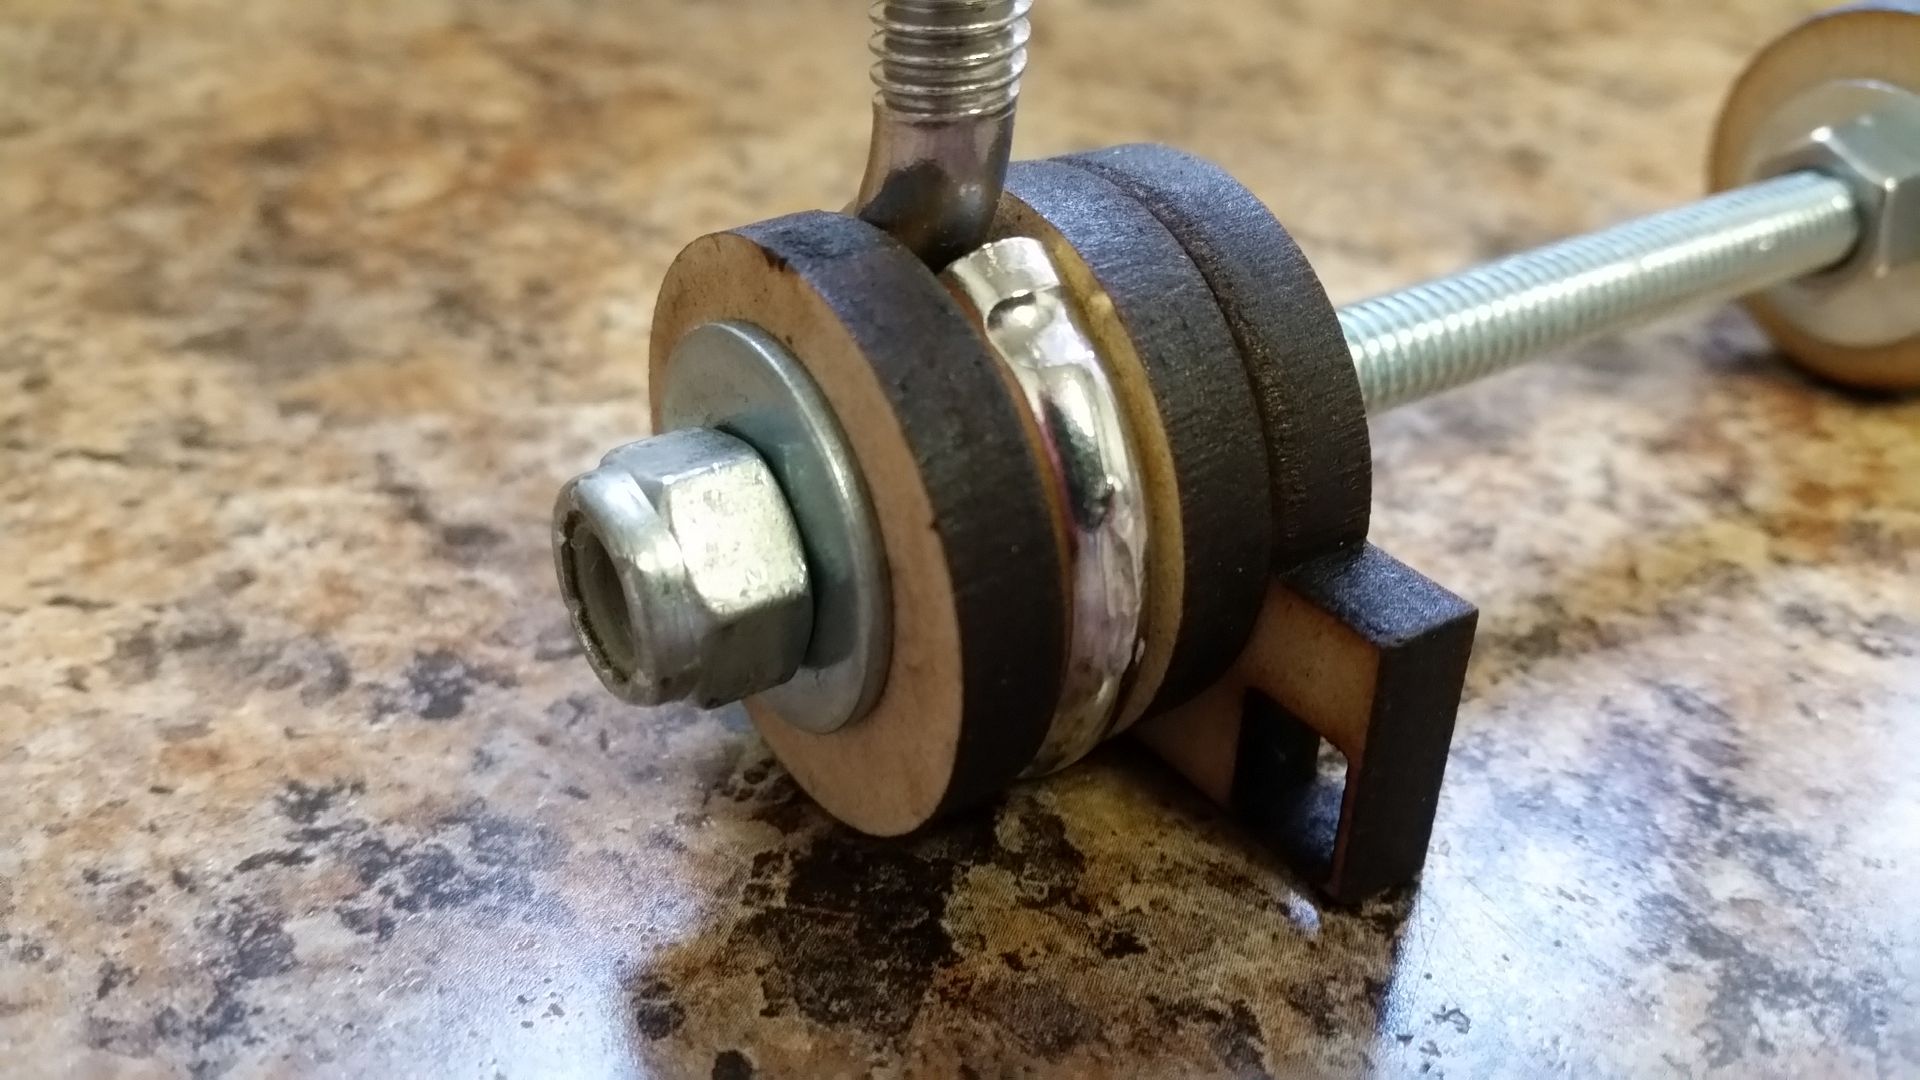
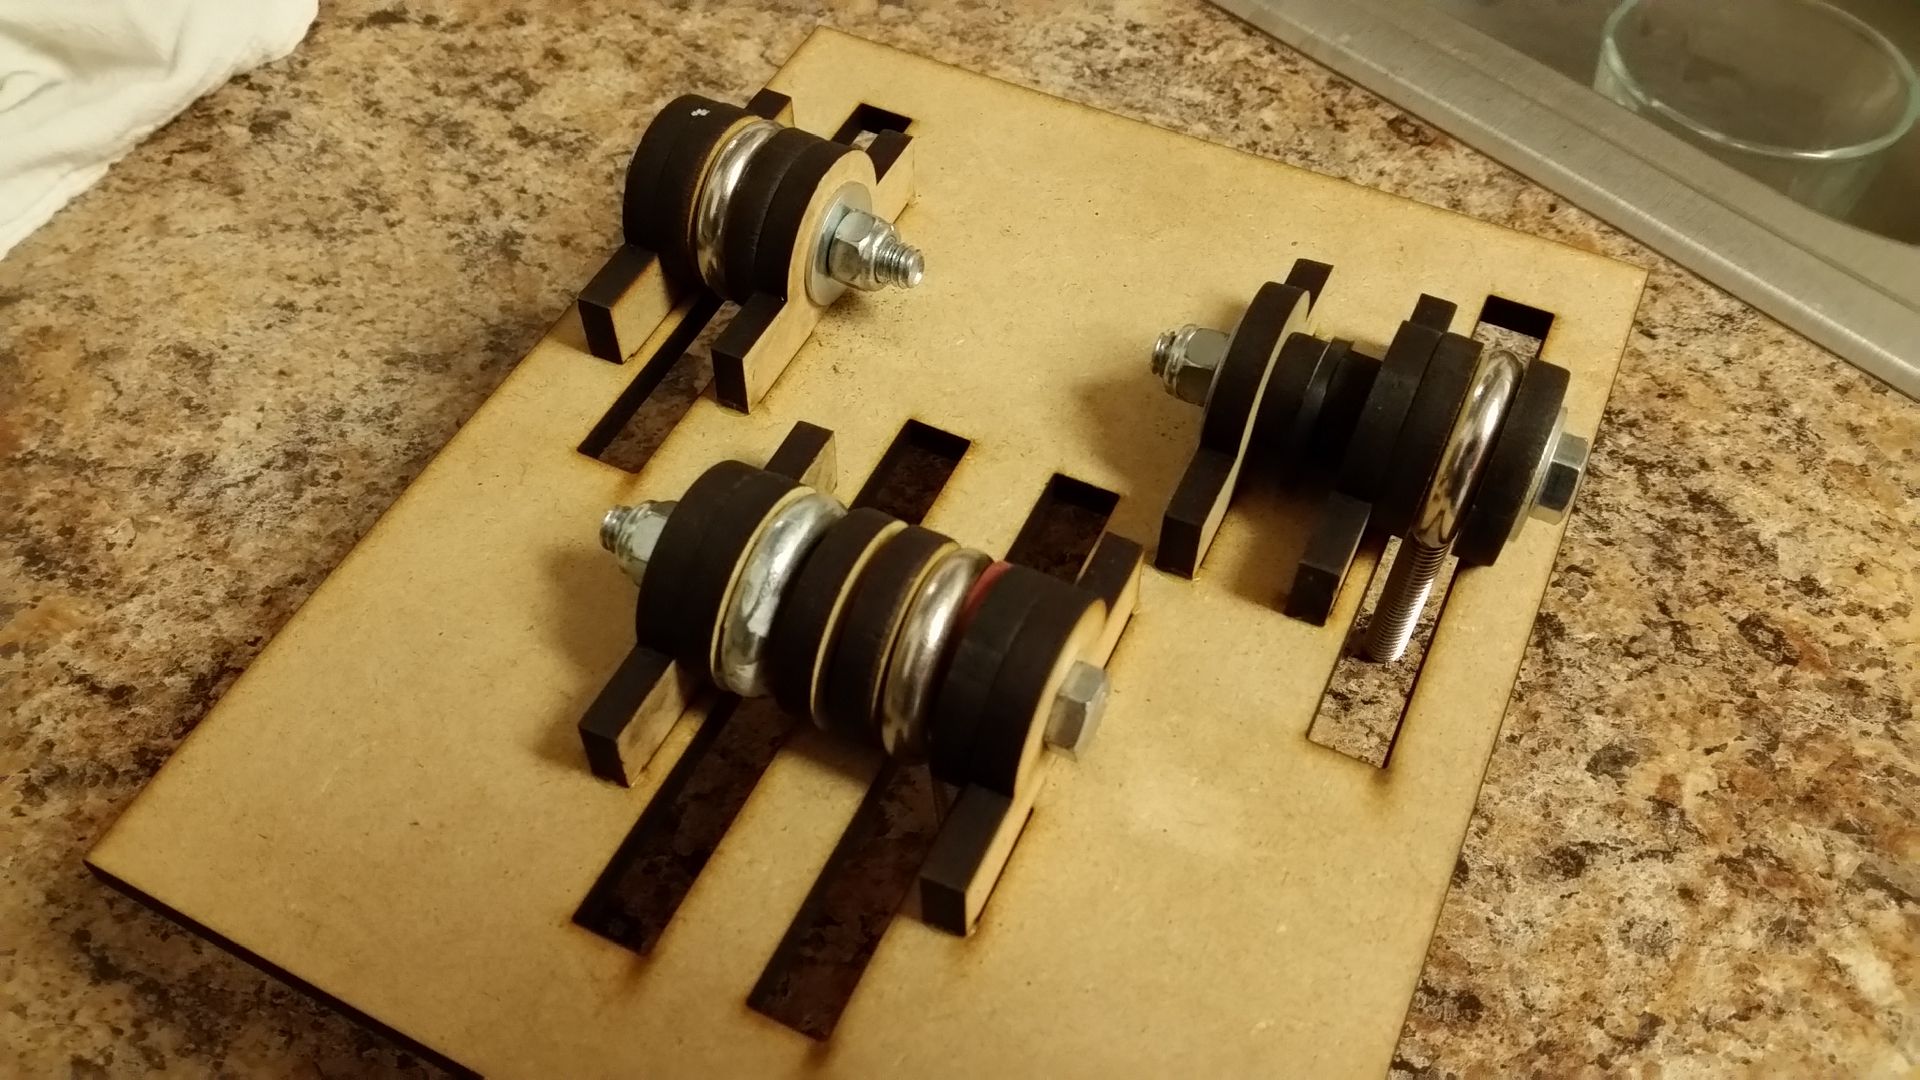
Donuts - with a bite out of them

Several donuts, washers and lots of luck later!
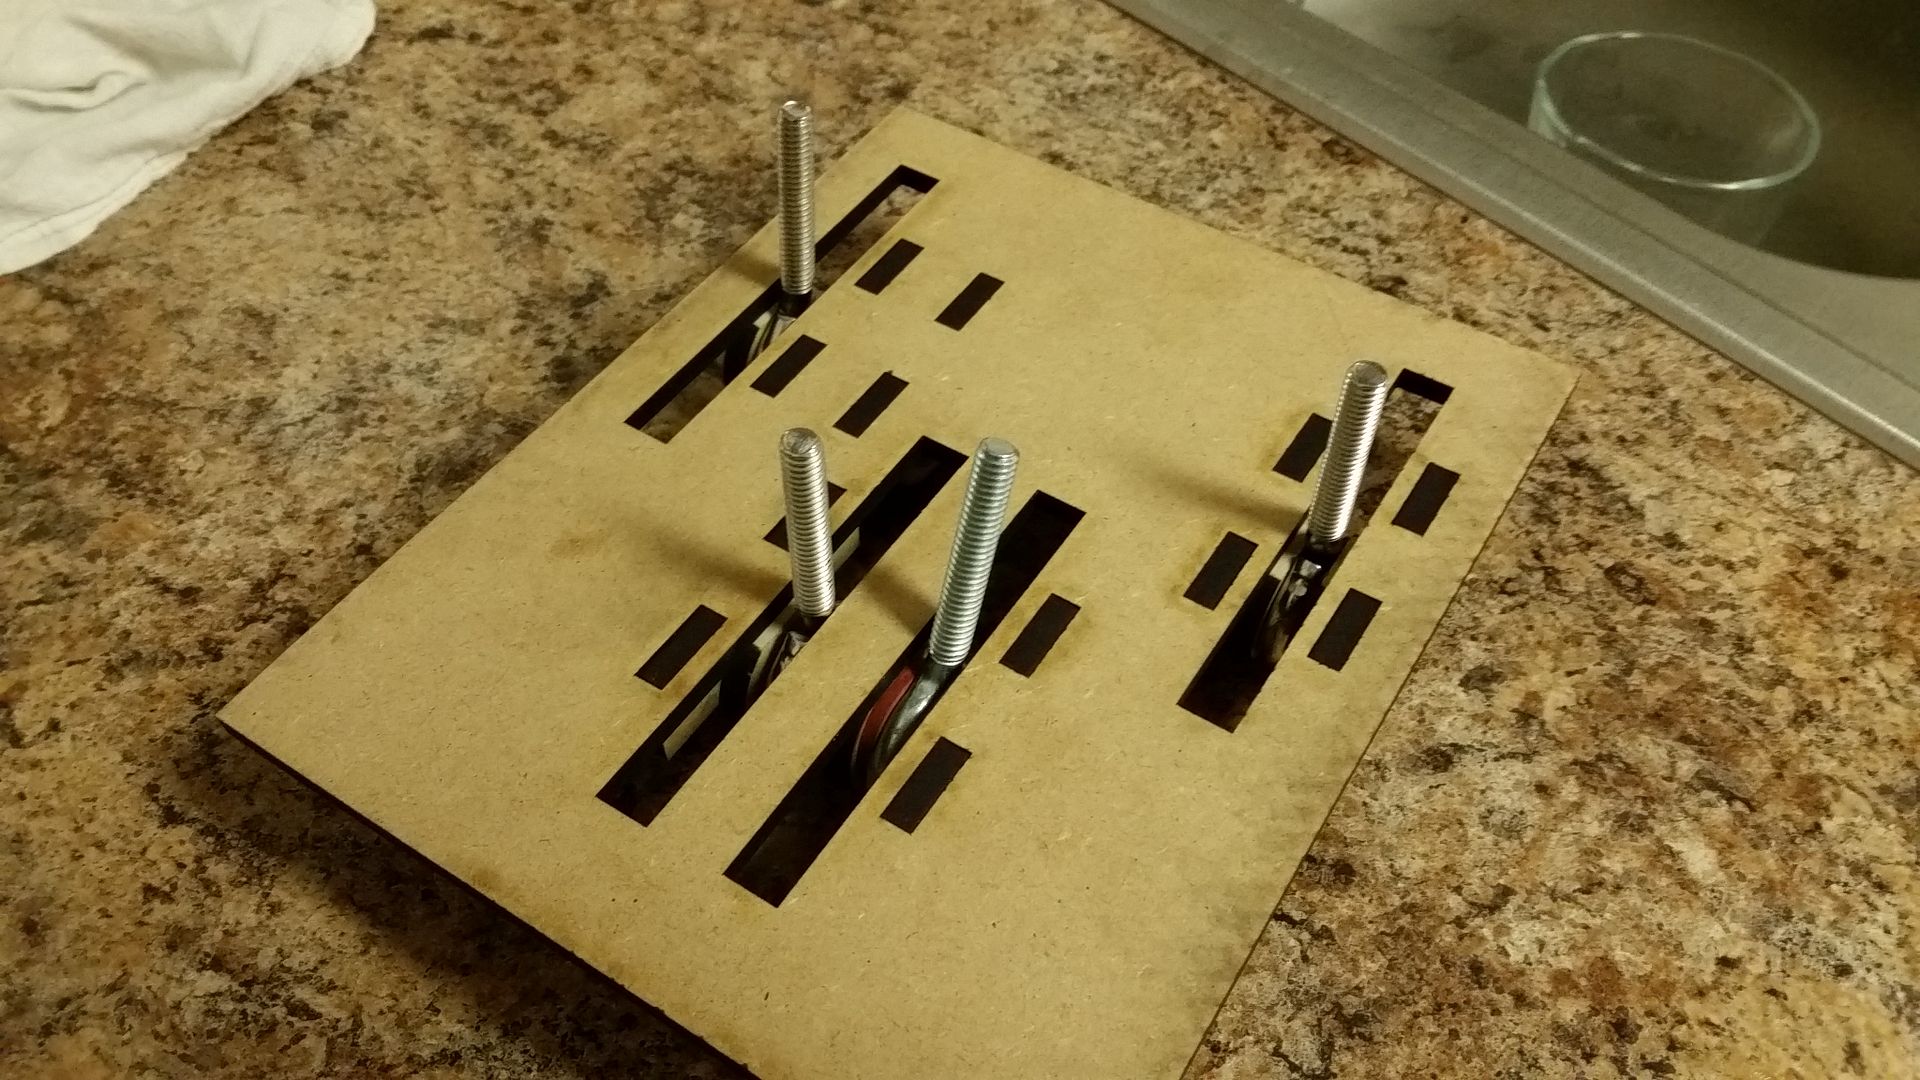
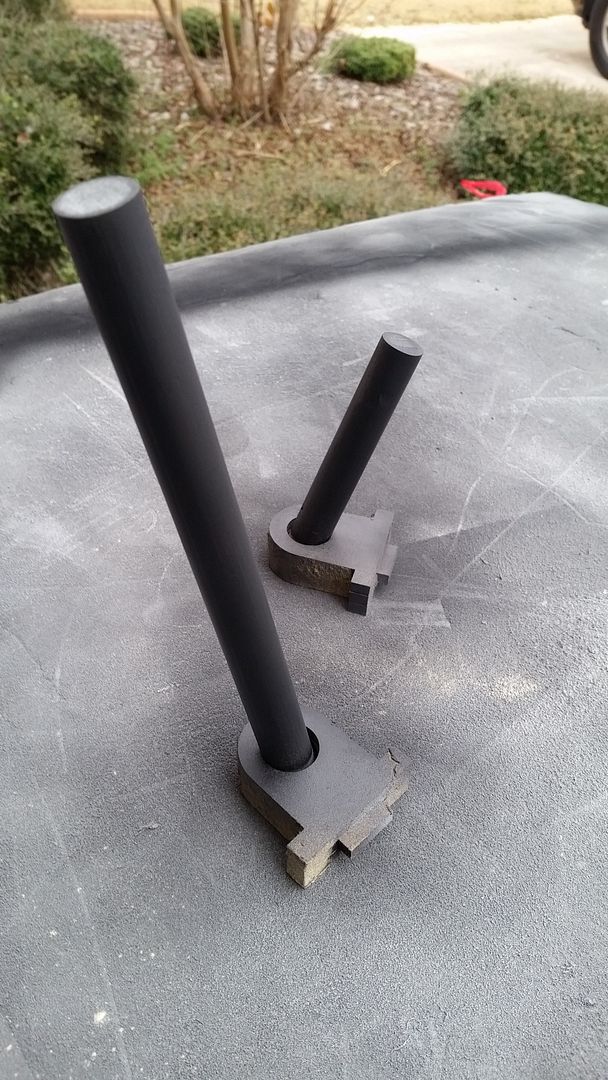
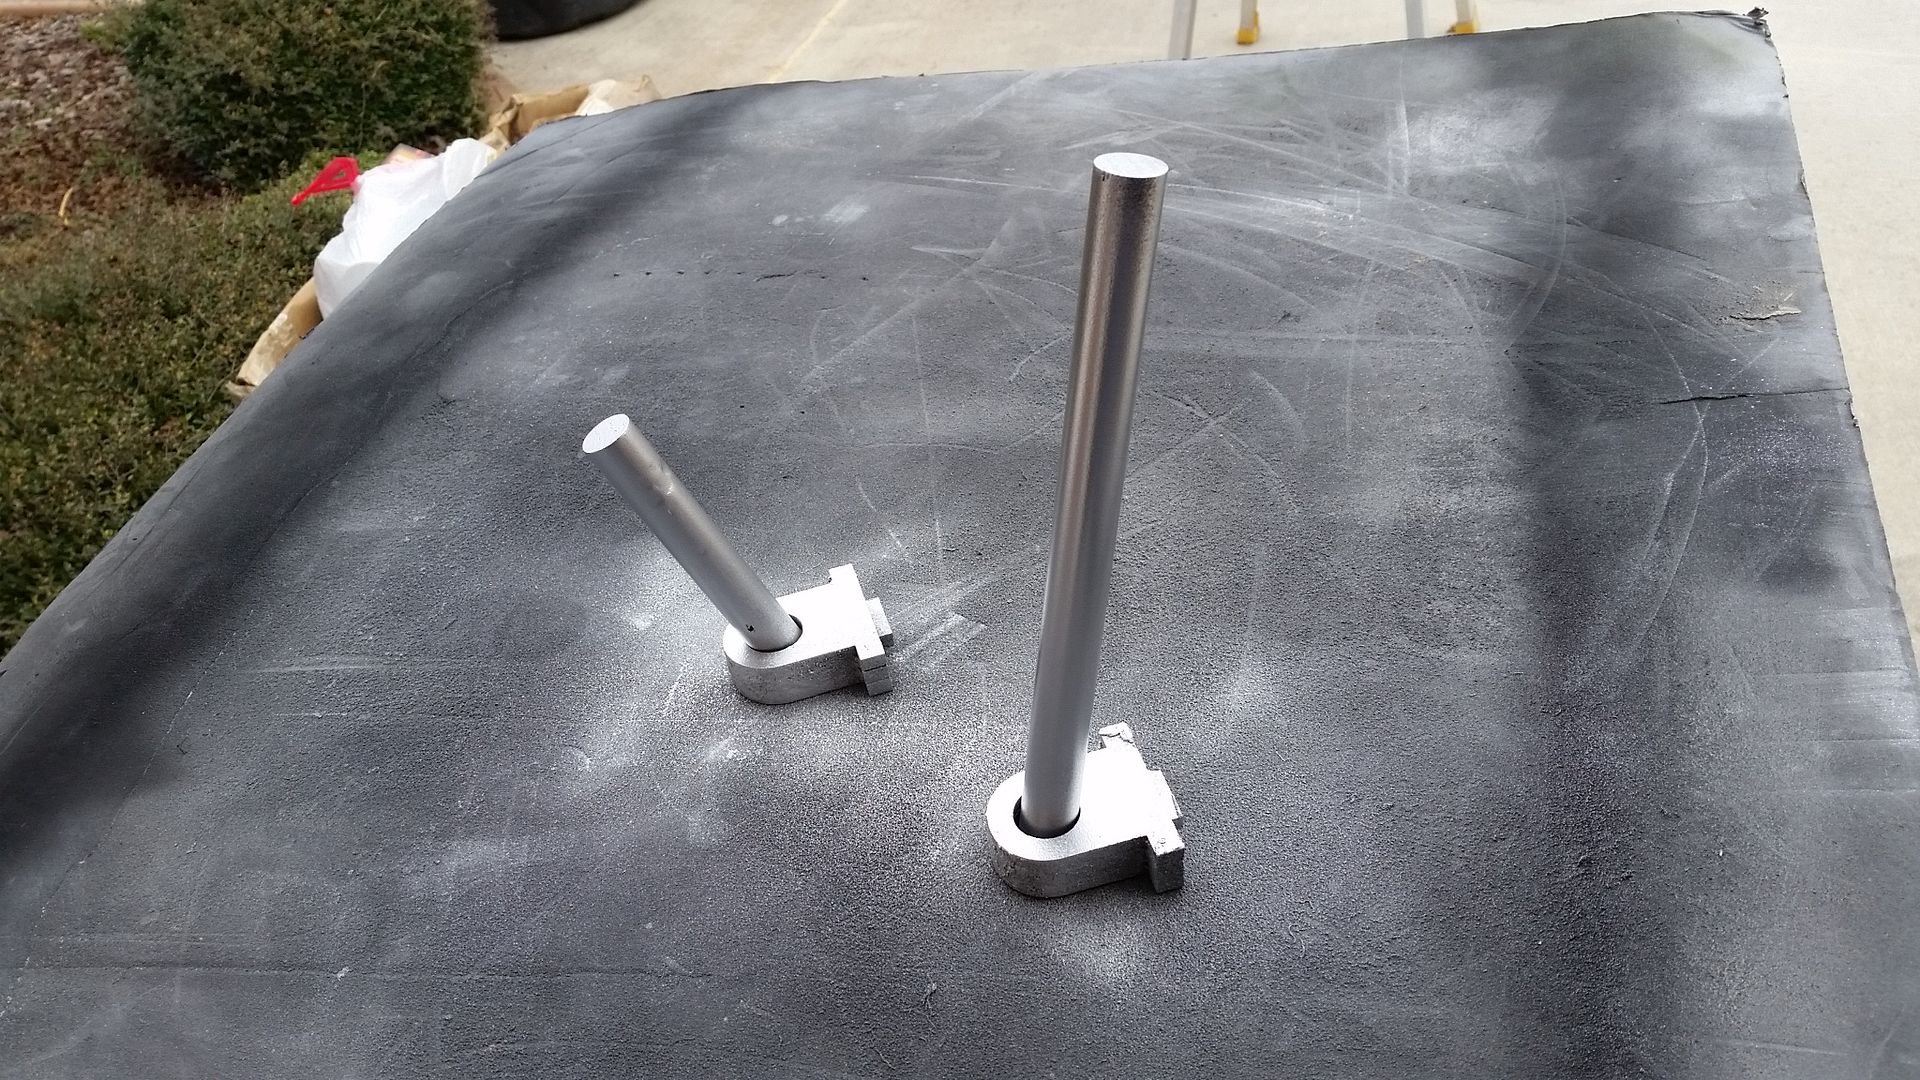
Paint
Checking alignment
Then placement within the housing
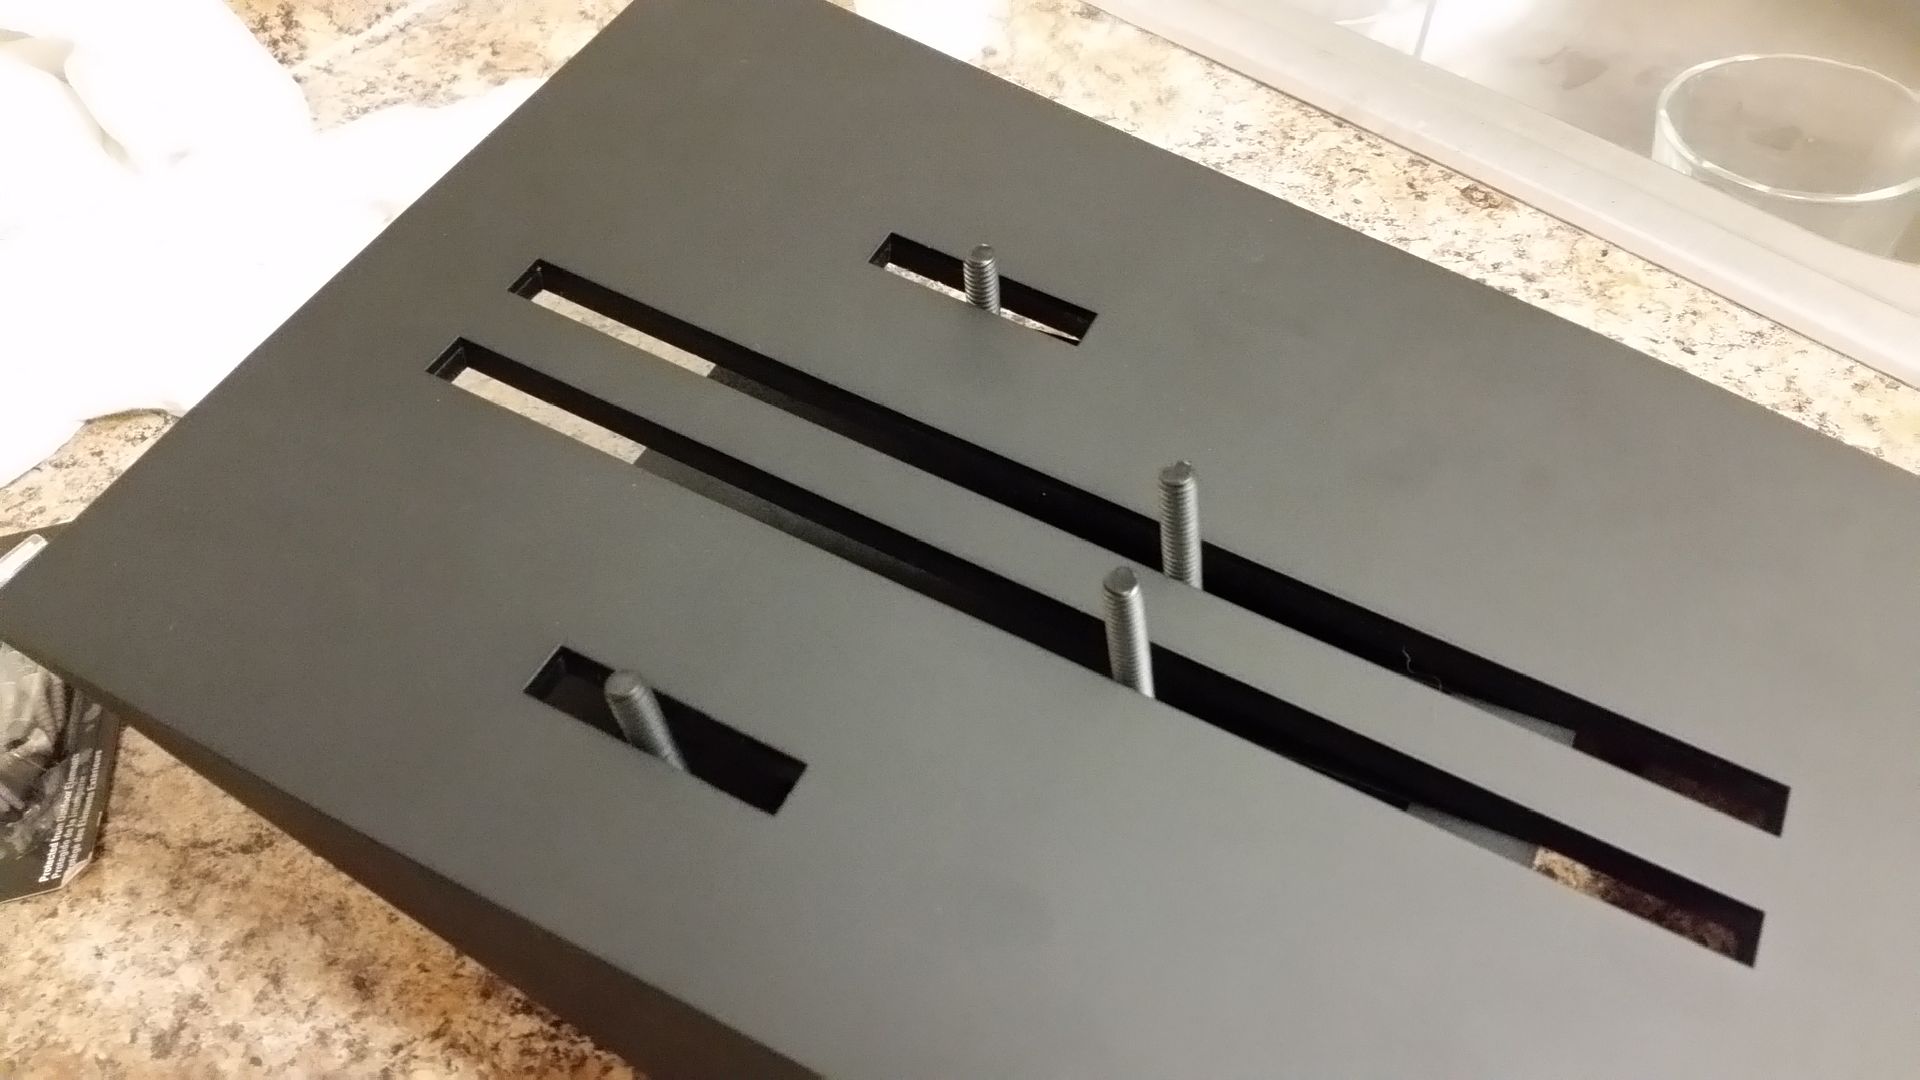
Adding glue
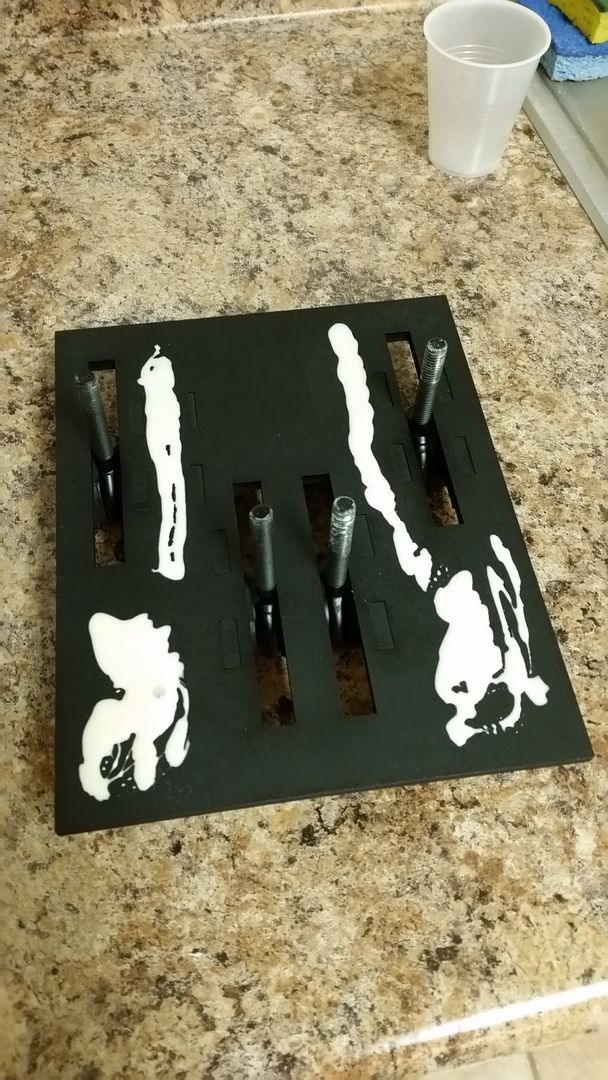
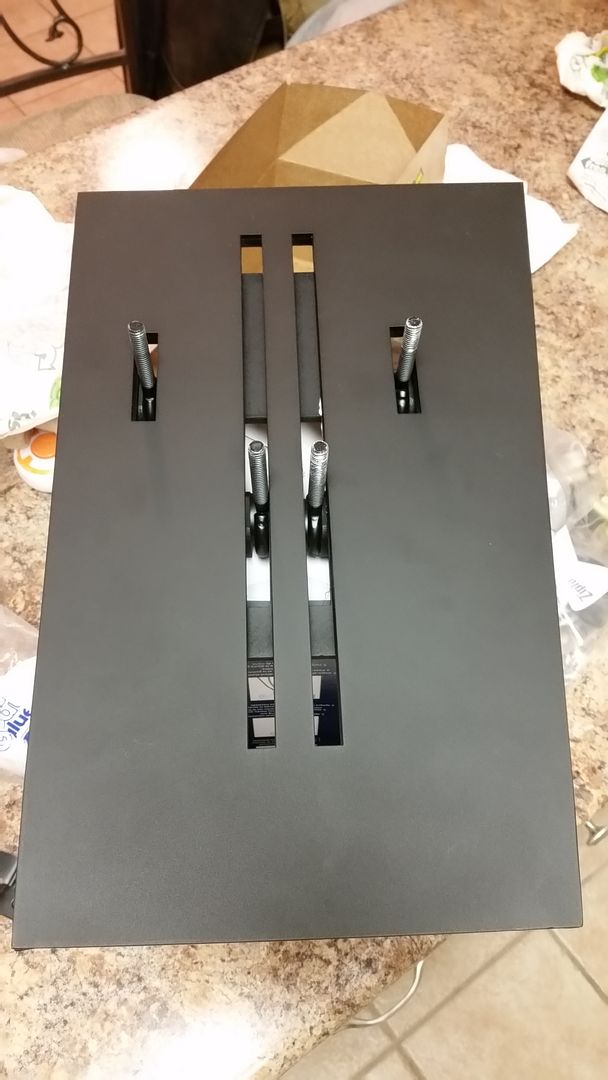
Basic fit
Adding pin stripes

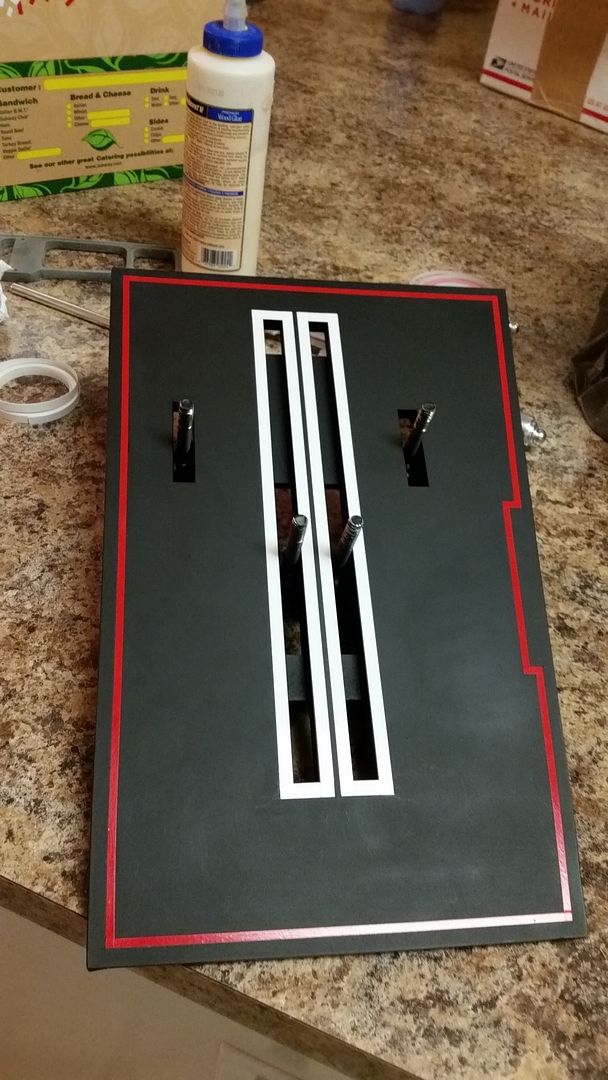
Satin Clear
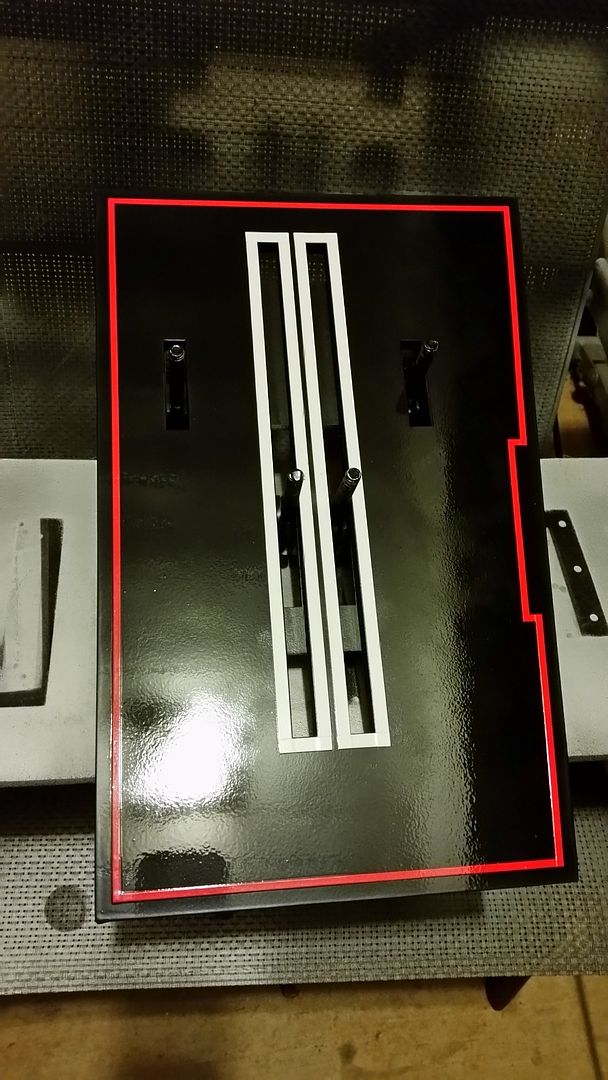
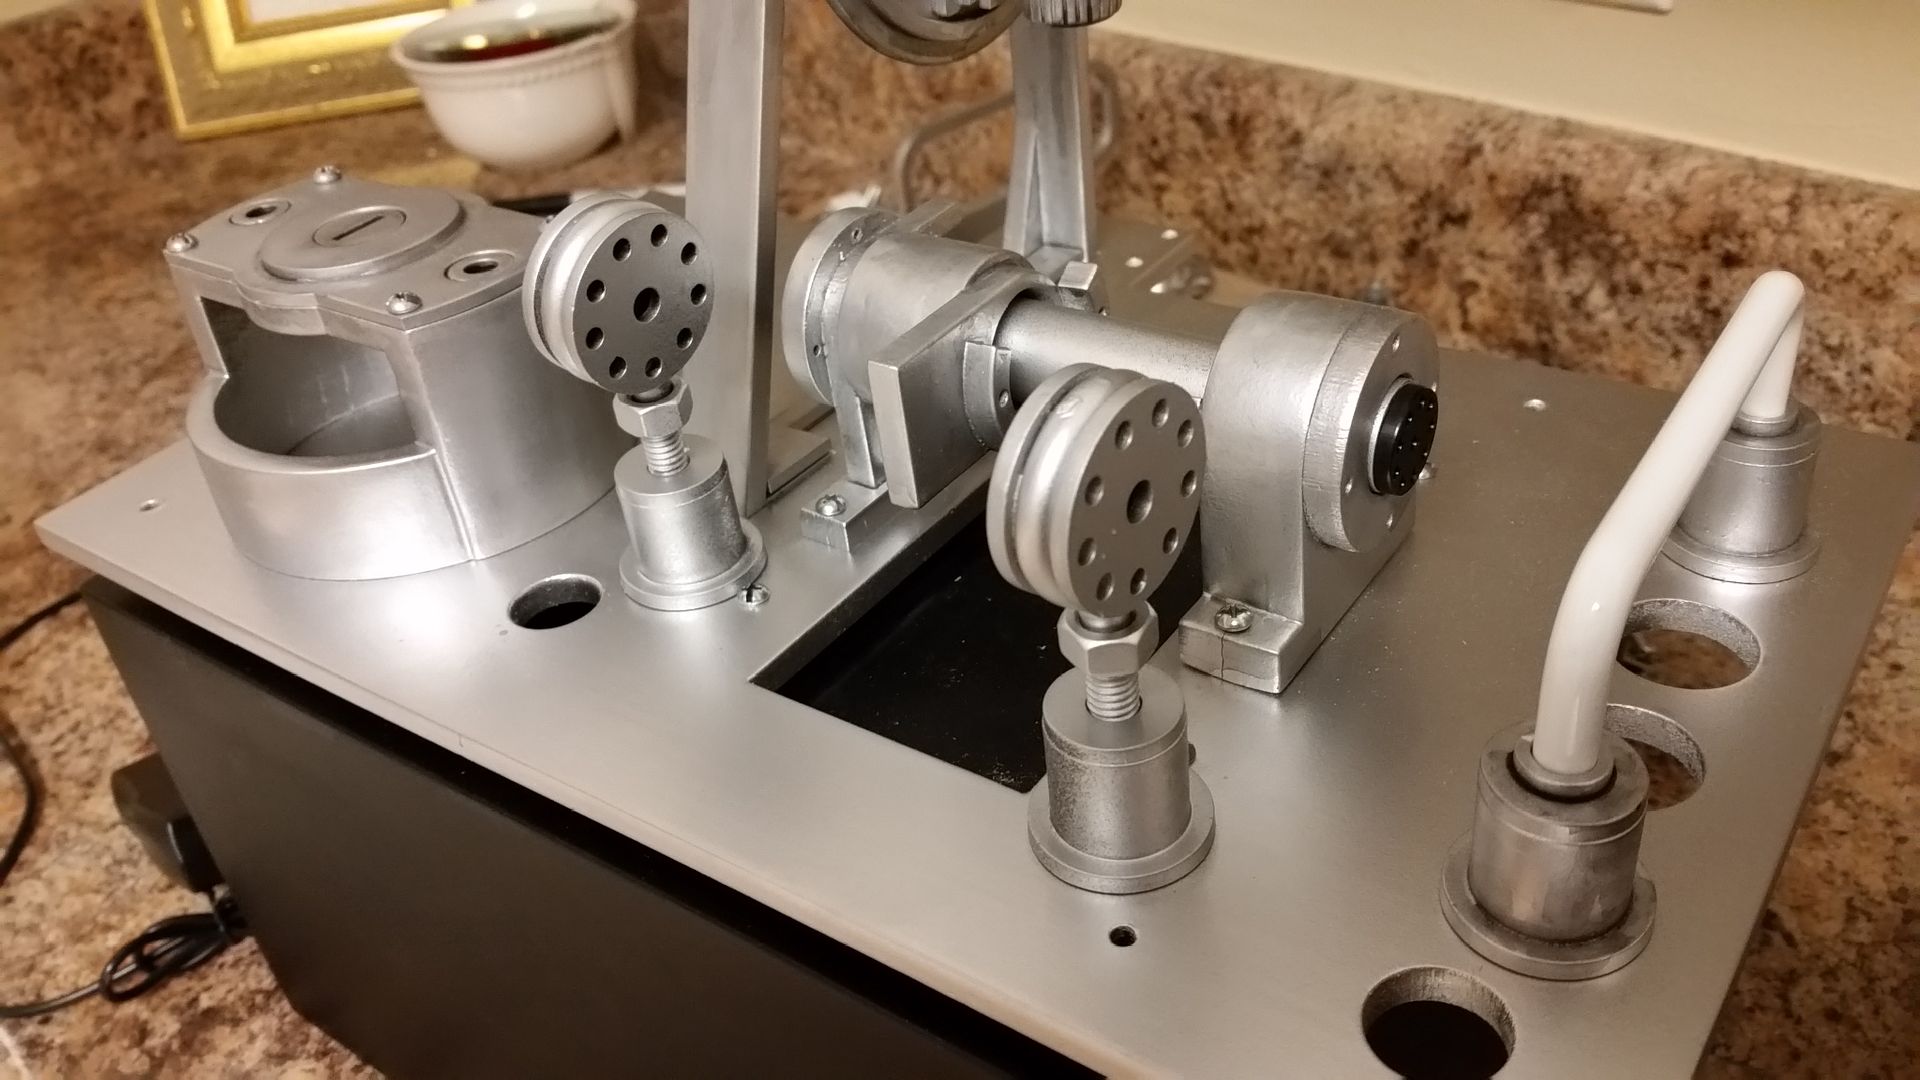
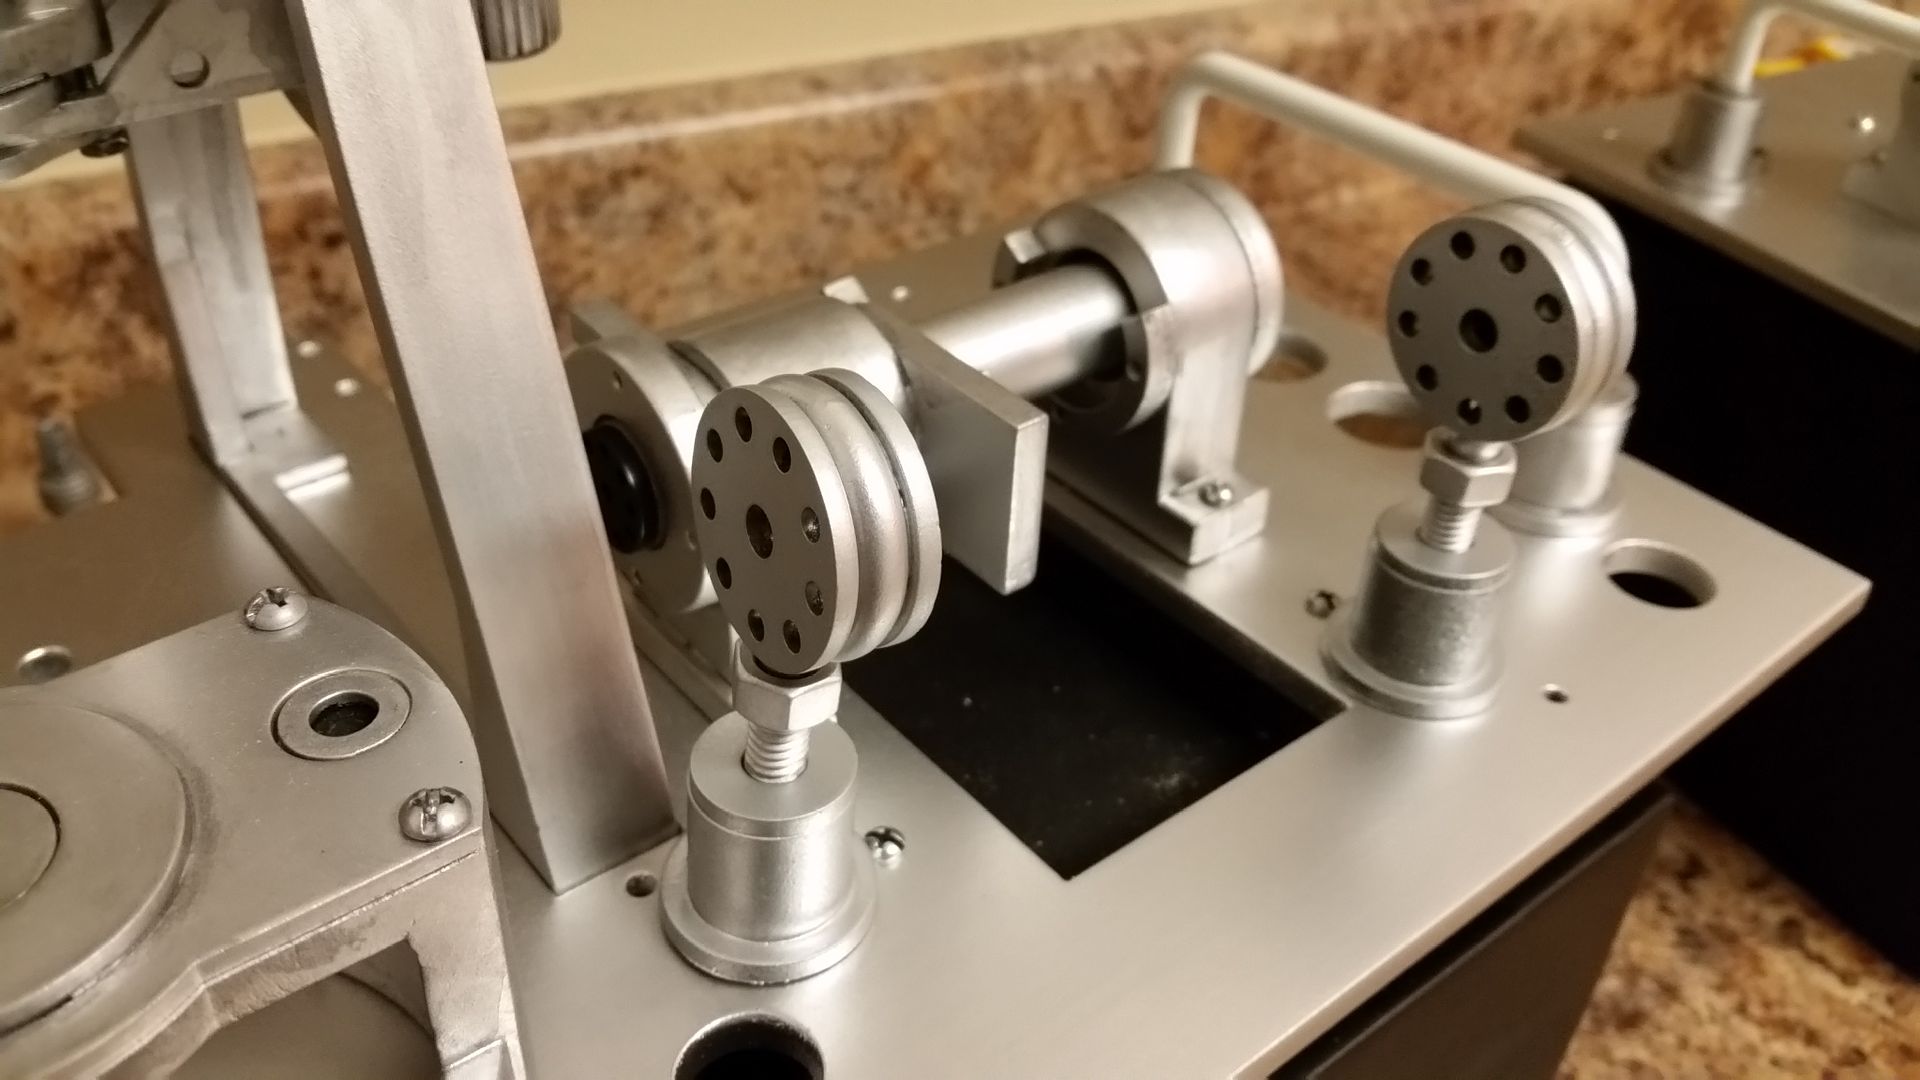
In place with pin stripes on throttle levers
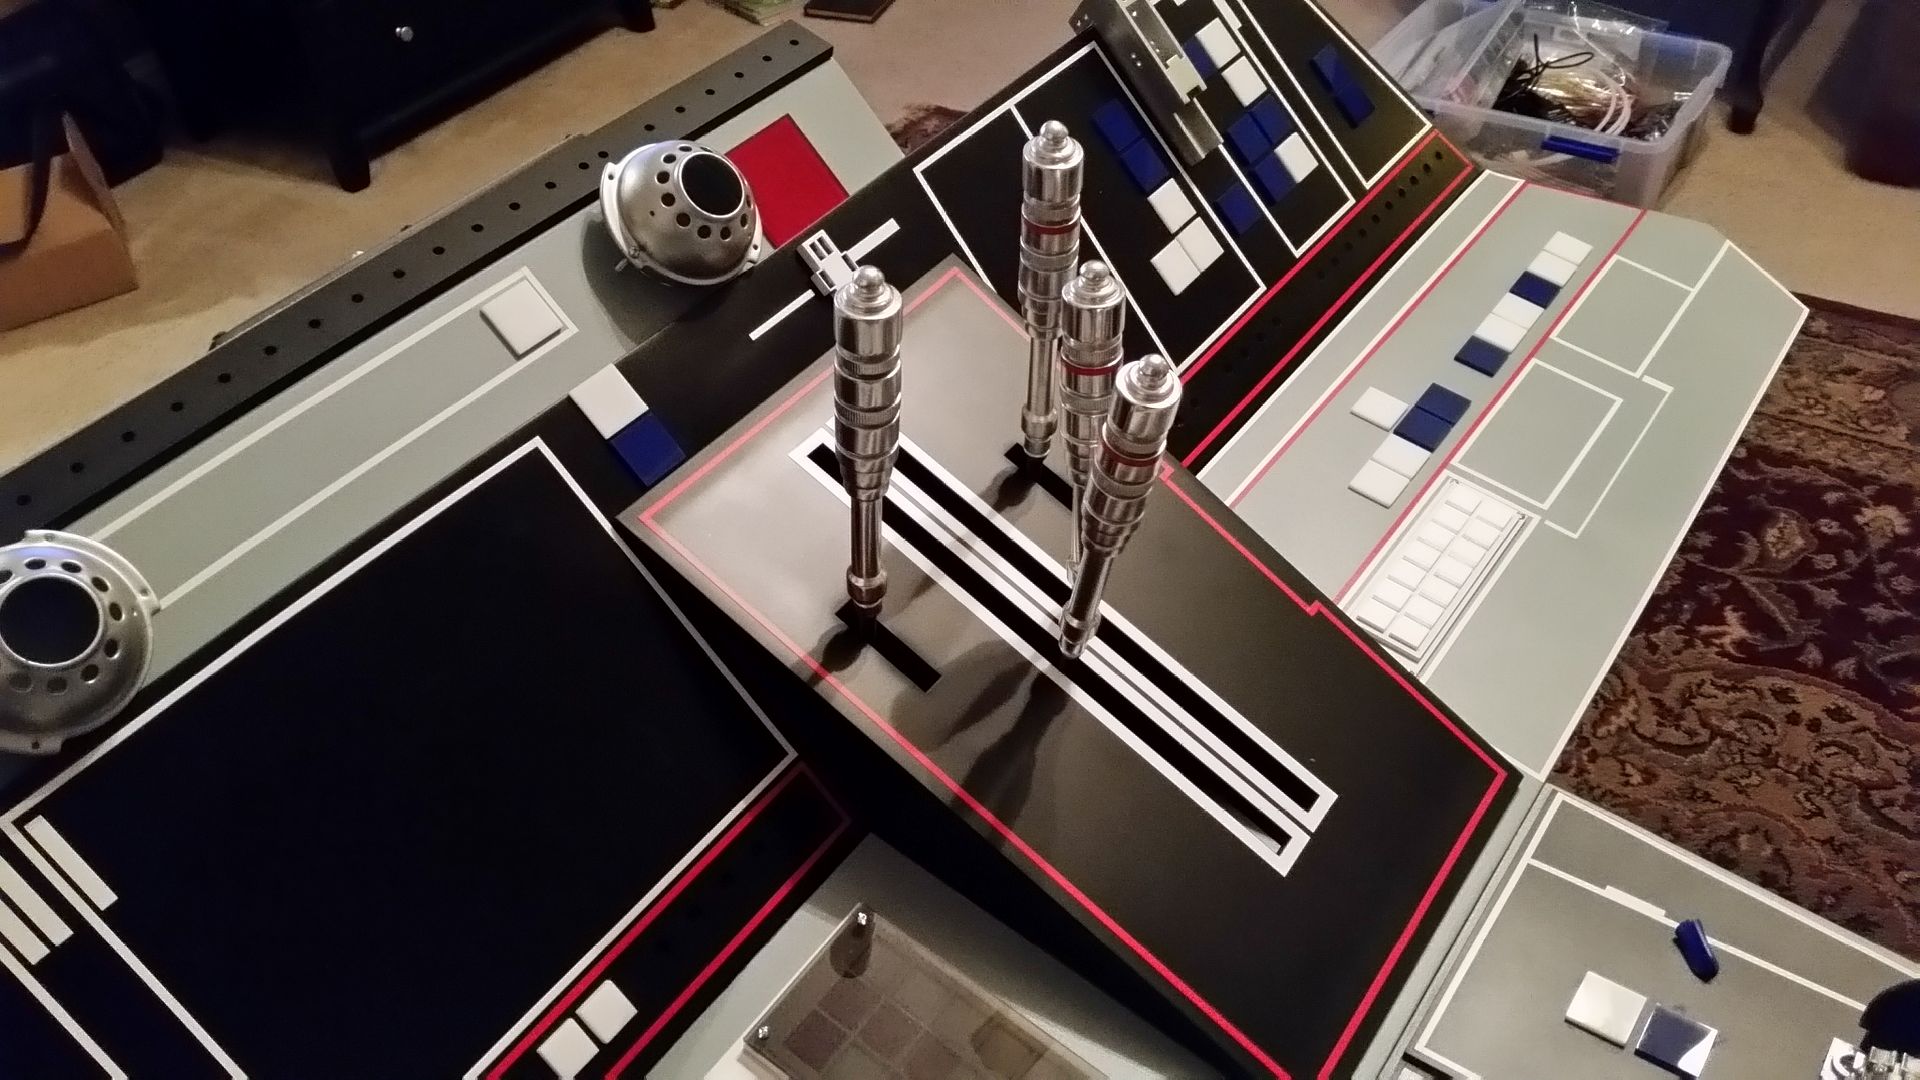

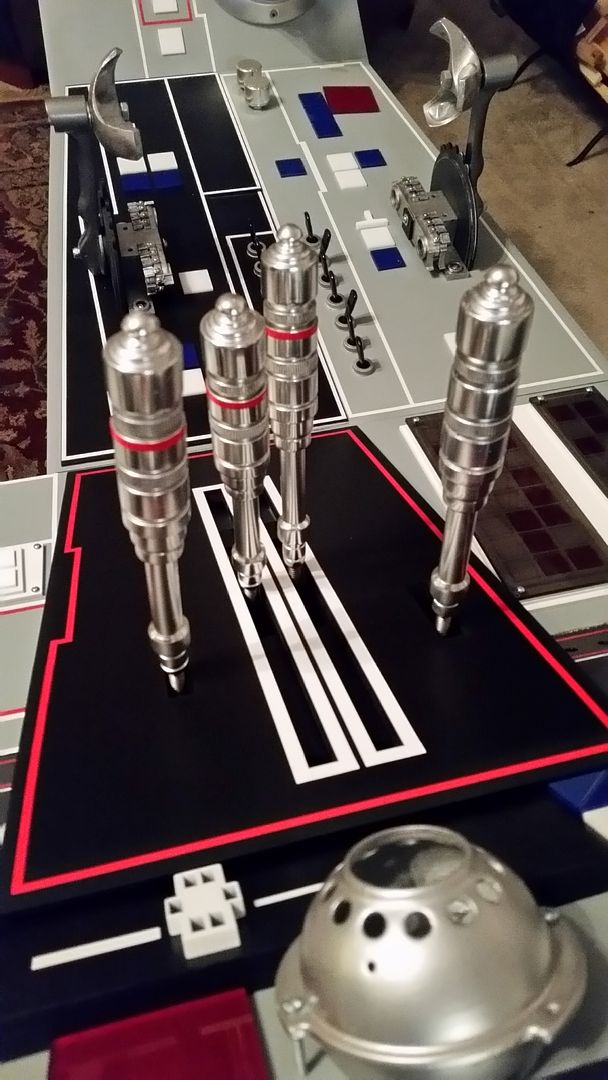
Canopy Box Greeblies
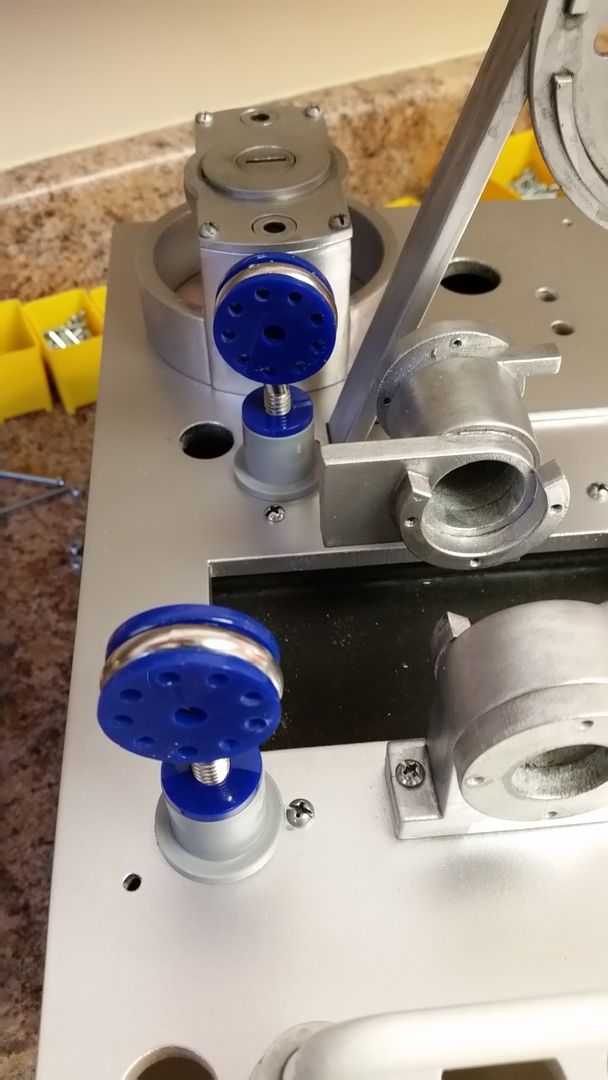
Painted and in place - needs weathering
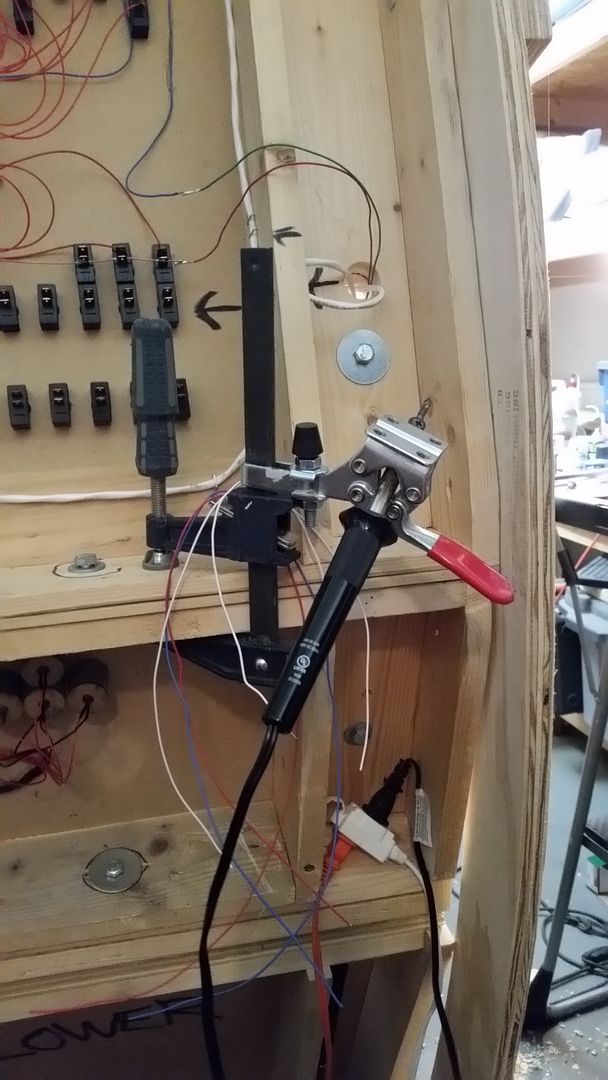
Wiring... (with minimal commentary) Enjoy!


And this is we are! The next few weeks will be even more insane!
As always my deepest and most sincere Thank You to Scot, Daniel, Jessie, Samantha, Jake, Brittany, Eric, Wayne, Barbara, and Pam (and many others) for their continued support/guidance/expertise and friendship throughout this crazy build!!! I love all you guys!
Hang On! This is where the fun begins...
What a weekend! The later part of this post are time progression photos so I wont bother you any commentary. Simply sit back and enjoy!
Weathered the pull lever greeblie
I designed and laser cut a new throttle lever mechanism
Donuts - with a bite out of them
Several donuts, washers and lots of luck later!
Paint
Checking alignment
Then placement within the housing
Adding glue
Basic fit
Adding pin stripes
Satin Clear
In place with pin stripes on throttle levers
Canopy Box Greeblies
Painted and in place - needs weathering
Wiring... (with minimal commentary) Enjoy!
And this is we are! The next few weeks will be even more insane!
As always my deepest and most sincere Thank You to Scot, Daniel, Jessie, Samantha, Jake, Brittany, Eric, Wayne, Barbara, and Pam (and many others) for their continued support/guidance/expertise and friendship throughout this crazy build!!! I love all you guys!
Hang On! This is where the fun begins...
Last edited:
Wow, Sofa - you've really gotten the hang of that weathering. As usual, it's all looking really good!
I had a really strange reaction to the front window assembly pics - I think because it's the outside AND the inside, and it's such an iconic piece of the cockpit, I got a little emotional. I hope to be able to see this bad boy in person some day.
Hey D,
Thanks so much! Seeing that window in place sent chills through me as well! I really hope we're able to pull it off!
- - - Updated - - -
...I wish I had the resources to come out and help with it right now. I so want to get my hands dirty with this. Clicking the mouse just is not the same as shooting staples.
No excuse!
You've been a tremendous help! This push would not have happened without you, my friend!W O W. What fantastic progress. Looking better and better
It does make for a cool gun though
Thanks much! We've been plugging away! I love the "laser gun" greeblie. It's very difficult not to say "Pew Pew" when holding it.
- - - Updated - - -
Unreal work as usual my friend. What ever kind of crack you are using to keep yourself working this hard for this long . . . I want some! :wacko
Thanks! LOL I think I've entered some kind of temporal rift where I can't stop working!
- - - Updated - - -
Take a good look people... this is what a passionate fan is all about. The love that is put into every detail is simply amazing. The time is astounding and the work is unbelieveable. Greg... You are an inspiration not only to me, but to everyone around you. I just wish I had a 10th of the passion and dedication you have! I can't speak for everyone else, but THANK YOU! You really are one of my icons!
Thank you, kind sir. Whether it's "passion" or "insanity"... I think the two are one in the same
- - - Updated - - -
So at some point, it looks like you will need to work on this with the garage door closed. Otherwise, maybe you can remove some of your storage shelves in the back and move them to a different wall so that you can shove the whole cockpit back further. Whether or not that will fix your height vs. garage door issue, I guess only you know.
The garage door will be closed at a certain point when the canopy starts. But everything fits as is. It'll make it tough for photos but we've got something big planned!
- - - Updated - - -
He says "constant." What he means is 3 calls over a 10 hour period, and one of them I dialed. Great job, C.E.C. Huntsville!
Thank you, my friend!
Similar threads
- Replies
- 2
- Views
- 873
- Replies
- 6
- Views
- 639
- Replies
- 8
- Views
- 564
- Replies
- 9
- Views
- 1,041
- Replies
- 4
- Views
- 2,345