Marvin3242
Member
I used to think that Huntsville was the smartest city in Alabama because of NASA's presence. Now I know its because people working on the Millennium Falcon are just so beyond everyone else that the average is so skewed.


Looking all very good Sofa, but for that hose on the side...didn't talk to me at all. Maybe getting 2 hoses going inside the innards of the tunnel (like the other pipes already in place)?
Just my 2 cents...I'm sure you'll come up with something for sure.
")
Oh yess!!! I love the droid sockets you've built!! the layers the designs... oh i just need a pic with an R2 unit plugged in...LOL
Pinstripping is soooo exciting!!
Good thing that you've discovered and fixed the Volvo panels.. now you could go and to those windows again.
I saw this today on FB
OOooooh can't Wait for the next update!!!
Popping in real quick for an update. The material for the skin has been ordered and is coming from Illinois and should be here Friday. It's a 3mm thick sheet of Alumilite or Alumiclad or ACM Alupanel depending on who makes it. It's a composite sheet of polyethylene core with an outer layer of aluminum bonded to the core. If you've never seen or crafted with it before it's a love/hate relationship. It bends by hand but has enough structure to be more rigid than wood and less rigid than plain aluminum. It truly feels like aircraft fuselage and can be drilled and riveted. I've sourced a company in Birmingham AL to roll the 10 foot by 5 foot sheets on the long edge with a diameter very very close to the diameter of the cockpit. The whole skin will take 4 and a half sheets. We ordered it in white due to cost but they make it in about any imaginable color. We chose 10 foot long sheets because the entire length is 9foot 8inches which is just awesome luck. Typical British material sizes is 5 foot by 5 foot and after measuring the outer radius of the fuselage we realized two sheets takes each side up almost all the way. This is probably the same size material the real empire cockpit used due to British available stock and completely explains the gap that's covered up by greebly panels at the top of the cockpit outer skin. Or I'm imagining correlations and jumping to conclusions hahaha.
Here's a quick preview of what it will look like.
https://uploads.tapatalk-cdn.com/20171002/3a7588357cb4a9f43575a5423ede75b6.jpg
Here's a few close ups of the material.
https://uploads.tapatalk-cdn.com/20171002/f9113742ae37c20ddf285125933bf04d.jpg
https://uploads.tapatalk-cdn.com/20171002/d871e85686509ee7e4e92e5364a56d26.jpg
- Daniel Valdez - Full Scale Falcon Team
Awesome progress! That last shot of the corridor is the bee's knees!
Could it be possible that a fully skinned, fully windowed and Volvo paneled cockpit might be a reality by the end of the year? Dare to dream.
I think the idea works, but the "outlet" of the bottom part looks really big to immediately step down to a tube of that diameter.Not found of the pipe connects but I think the idea works? Yes? No?
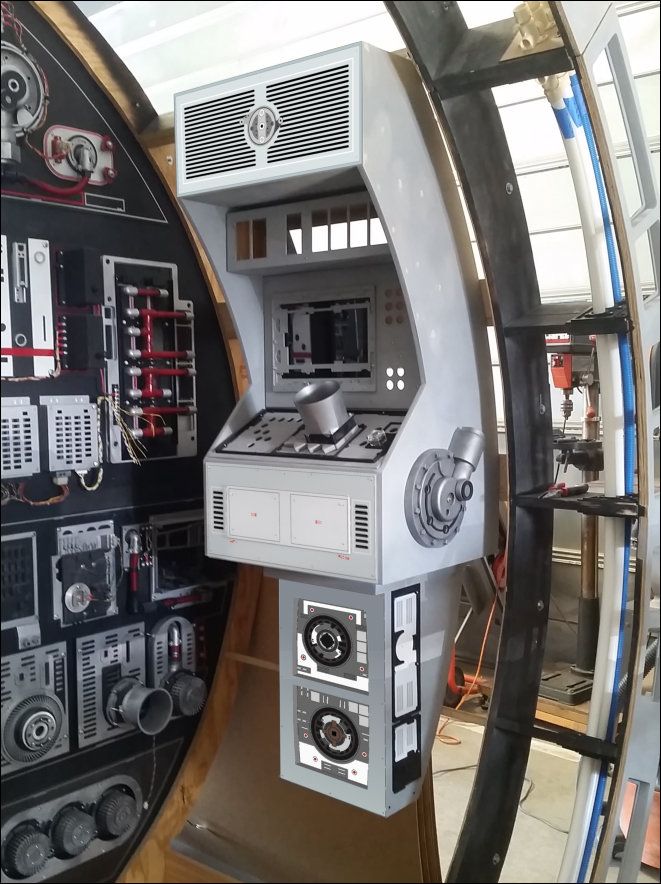
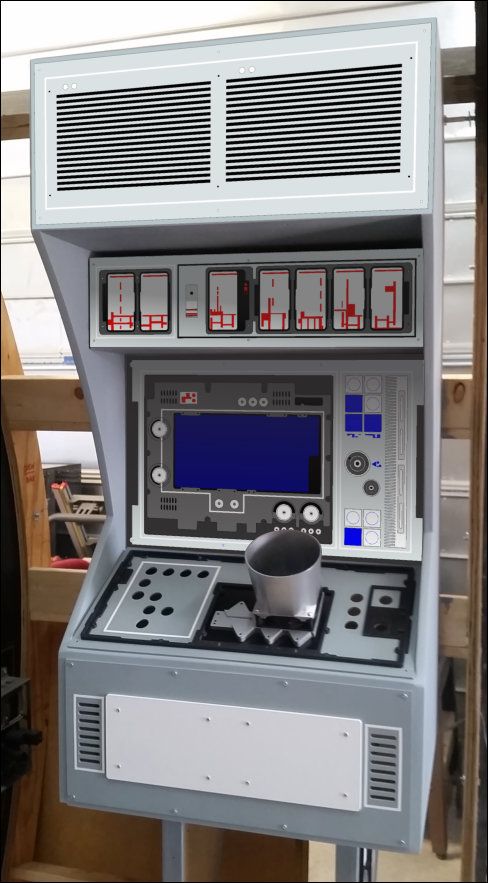
Aha! Now we know the Aurebesh on your computer is the culprit - every letter is backwards.Did some design work on the new monitor panel
Well, evidently I can't get a link to work, but the "CPU arm" is officially known as a "Scomp link." Based on the blueprints on the R2 Builders Club and making a few assumptions about where the Scomp Link pivots (it varies depending on an Astromech's position and which movie you're referencing, it seems), the center of the socket is between 24 and 29 inches above the floor. If you know someone with an R2 unit that has an animated Scomp link, I'd ask them where they put the pivot point.Not sure if I addressed this question... The lower panel sticks out far enough from the curve of the corridor wall that any Astromech "should" be able to roll up and extend the "arm" enough to make a connection with the socket. Unfortunately, I don't know the correct height of the panel.
I think the idea works, but the "outlet" of the bottom part looks really big to immediately step down to a tube of that diameter.
Aha! Now we know the Aurebesh on your computer is the culprit - every letter is backwards.
Well, evidently I can't get a link to work, but the "CPU arm" is officially known as a "Scomp link." Based on the blueprints on the R2 Builders Club and making a few assumptions about where the Scomp Link pivots (it varies depending on an Astromech's position and which movie you're referencing, it seems), the center of the socket is between 24 and 29 inches above the floor. If you know someone with an R2 unit that has an animated Scomp link, I'd ask them where they put the pivot point.
Wife: These are not the plans you're looking for (mysterious hand gesture)Wife: Man these guys are nuts!
Me to myself: Note: Hide Death Star two plans, and rent storage unit...
Wife: Man these guys are nuts!
Me to myself: Note: Hide Death Star two plans, and rent storage unit...
Seriously, this is the most impressive undertaking of all time for me. I'm more an empire fan myself, but c'mon... It's the FALCON! Very interested to follow this build. Hats off to everyone who has had a hand in this so far. Very nice work folks. I'm 6 hours out in Louisiana and would LOVE to come see this thing in person!
Wow. This is looking awesome.
Here's a thought, since the bottom console side greeblie and its fitting is so much larger than the upper, why not take two wire looms (or hoses) from the bottom greeblie and run one to the upper and the other into the ring? It'll give some credence to the mismatched fitting sizes plus its another "Falcon Quick Fix", running loose wires or hose into the ring.
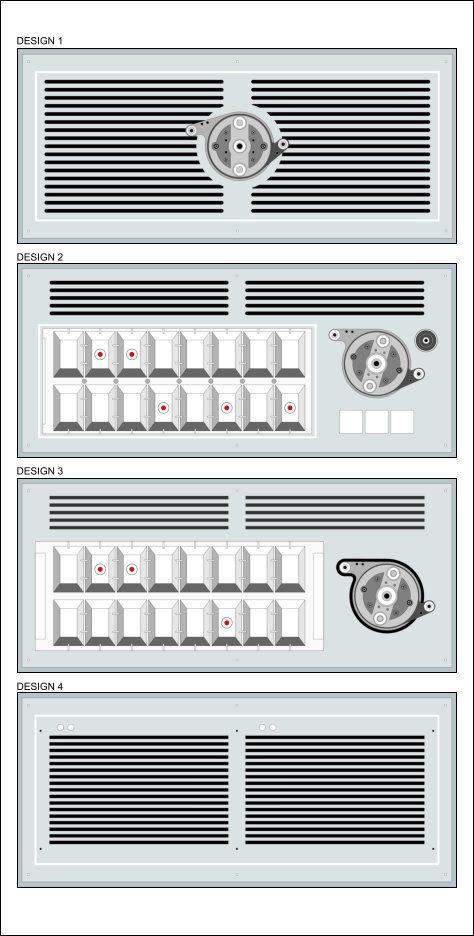
What are your plans for the top section of the console? I seem to remember there being what amounted to an A/C register there. Would be a good place to put a couple fans to blow into the corridor space for a bit of cooling.