My ROTJ V2 "Unibody" Luke Lightsaber

Filandrius

Sr Member
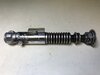
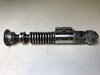
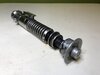
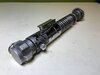
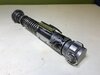
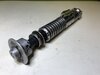
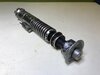
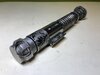
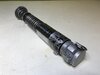
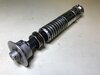
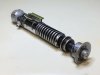
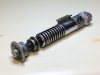
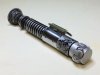
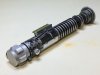
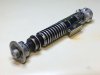
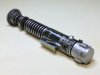
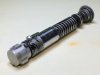
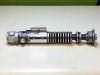
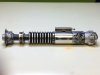
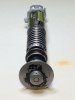
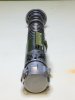
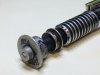
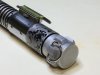
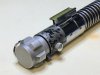
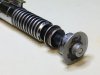
After being lucky enough to grab one of Anakin Starkiller's "unibody" kits at the last minute and finally completing my replica with the final details (installing the D-ring & plate nut, finishing up the weathering, etc...) I thought I'd show a few pics. I'm really satisfied of that one, so I had to share. ;) Here goes!
 

Attachments

  • IMG_1108.JPG
    IMG_1108.JPG
    970.6 KB · Views: 273
  • IMG_1109.JPG
    IMG_1109.JPG
    981.1 KB · Views: 243
  • IMG_1110.JPG
    IMG_1110.JPG
    1,013.2 KB · Views: 218
  • IMG_1111.JPG
    IMG_1111.JPG
    1,003.1 KB · Views: 207
  • IMG_1112.JPG
    IMG_1112.JPG
    990.1 KB · Views: 212
  • IMG_1113.JPG
    IMG_1113.JPG
    1,013.9 KB · Views: 204
  • IMG_1114.JPG
    IMG_1114.JPG
    990.5 KB · Views: 208
  • IMG_1124.JPG
    IMG_1124.JPG
    948 KB · Views: 215
  • IMG_1116.JPG
    IMG_1116.JPG
    973.5 KB · Views: 244
  • IMG_1117.JPG
    IMG_1117.JPG
    974 KB · Views: 217
  • IMG_1118.JPG
    IMG_1118.JPG
    883.8 KB · Views: 210
  • IMG_1119.JPG
    IMG_1119.JPG
    869.6 KB · Views: 181
  • IMG_1120.JPG
    IMG_1120.JPG
    930.6 KB · Views: 212
  • IMG_1121.JPG
    IMG_1121.JPG
    982.1 KB · Views: 208
  • IMG_1122.JPG
    IMG_1122.JPG
    965.3 KB · Views: 209
  • IMG_1123.JPG
    IMG_1123.JPG
    947.7 KB · Views: 222
You can rightclik to open in a separate tab. Its big resolution.. just a bit noisy because of the ISO
 
Very nice job you done there Filandrius....very nice indeed! Shame I can't enlarge the photos to see the details :(
That's weird, because when I click a picture it opens up to full screen, pretty much! Anyway, thanks for the nice words. :)
 
When I got the blank I started out by throwing it around on a concrete slab (mainly to dent the emitter face, but also to create random bends and scratches) Then I deburred it in my case tumbler, which removed machine marks, dulled the surface and softened the edges. Afterwards I darkened the metal with a bath of diluted Easy Off and applying Aluminum Black with a rag (focusing on the booster area)

For weathering the paint job I started out by using Trooper_trent's stencils. Then I removed some (freshly sprayed) paint randomly from the edges with a Q-tip dipped in paint thinner. When the paint was cured, I applied a wash of diluted acrylic copper paint on the windvane, then I buffed the whole thing extensively to emulate years regular handling. That's pretty much it!
 
Tremclad (Rustoleum) Professional Rust Enamel - Flat Black. A very thin coat after masking the emitter's nipple and the pommel. I didn't bother masking the rings, I wiped the paint off with a rag dipped in paint thinner while the paint was still wet.
 
Probably the best weathering of the windvane I've seen. Matches up perfectly with the newer photos we've seen IMO. Great job!
 
i am super impressed with the weathering!! i love the color you got the aluminum! is that aluminum black you used?!
 
Yep! I went over the whole saber with rag dipped in the stuff, focusing on the booster. Any unwanted blotches and spot I've got rid of with my case tumbler.

Thanks a lot for the nice words, it's really appreciated. :D
 
Small update: I upgraded the mystery chunk on my V2 with one of Solo Hold's, and used the occasion to modify its location (the old one wasn't in the accurate spot) I also revised the weathering a bit while I was at it. So here's a few pics.
 

Attachments

  • IMG_2980.JPG
    IMG_2980.JPG
    1.6 MB · Views: 129
  • IMG_2981.JPG
    IMG_2981.JPG
    1.6 MB · Views: 125
  • IMG_2972.JPG
    IMG_2972.JPG
    1.5 MB · Views: 121
  • IMG_2973.JPG
    IMG_2973.JPG
    1.5 MB · Views: 133
  • IMG_2974.JPG
    IMG_2974.JPG
    1.5 MB · Views: 118
  • IMG_2975.JPG
    IMG_2975.JPG
    1.4 MB · Views: 115
  • IMG_2976.JPG
    IMG_2976.JPG
    1.4 MB · Views: 123
  • IMG_2977.JPG
    IMG_2977.JPG
    1.5 MB · Views: 123
  • IMG_2978.JPG
    IMG_2978.JPG
    1.5 MB · Views: 107
  • IMG_2979.JPG
    IMG_2979.JPG
    1.4 MB · Views: 115
Back
Top