dcast
Active Member
So a while back I saw a picture on my social media feed of someone that made a zombie Ironman mask from Spiderman - Far From Home. The users name was Kylo on youtube, who posted a video of how he created this masterpiece. but it was frickin' COOOOOOL. This is my best attempt to do something similar. I love zombie movies and I love Ironman, so what a perfect mashup from the movie and the "what-if" series. Being new to 3d printing I looked every where I knew of that had stl's file to print for this kind of stuff....no luck. So I decided I would do one of my own. So this thread is my process, journey if you will, of making my take on the Zombie Ironman. Note, I have completed it and I did post it on the old rpf feed on FB, but never here. I'm gonna post a few pictures at a time so it's not a huge photo dump.
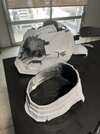
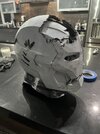
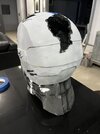
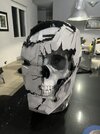
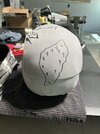
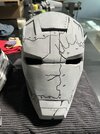
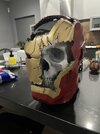
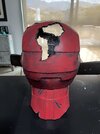
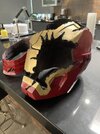
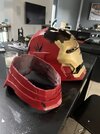
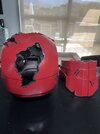
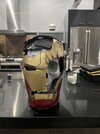
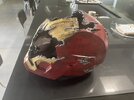
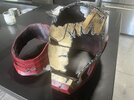
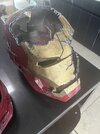
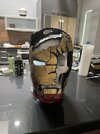
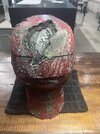
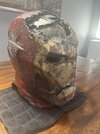
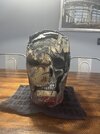
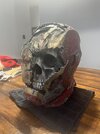
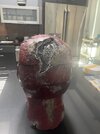
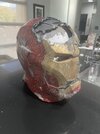
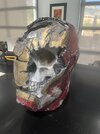
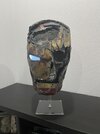
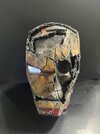
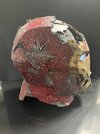
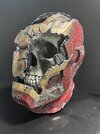
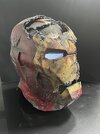
So the first thing I did was found a decent ironman helmet stl and skull stl and tried to match them up in size. On a side note...it's amazing how sizes for helmets fluctuate ...really kind of hard to nail that down. Anyways, I started to print these, and I didn't think to start taking photo's till I got the helmet printed and assembled. I think for the helmet is was roughly 12 individual pieces and the skull was printed into 3 different pieces. ( I don't have a big 3d printer). I then glued or melted the pieces together, on the back side, to form the final skull and helmet. Then after a bunch of sanding, I coated the both with automotive glazing putty,to help make the surfaces smoother. Then again with the sanding, to smooth that out. I hope you enjoy the photos, I did include photo of the zombie ironman from the movie....I'll post some more later...
So the first thing I did was found a decent ironman helmet stl and skull stl and tried to match them up in size. On a side note...it's amazing how sizes for helmets fluctuate ...really kind of hard to nail that down. Anyways, I started to print these, and I didn't think to start taking photo's till I got the helmet printed and assembled. I think for the helmet is was roughly 12 individual pieces and the skull was printed into 3 different pieces. ( I don't have a big 3d printer). I then glued or melted the pieces together, on the back side, to form the final skull and helmet. Then after a bunch of sanding, I coated the both with automotive glazing putty,to help make the surfaces smoother. Then again with the sanding, to smooth that out. I hope you enjoy the photos, I did include photo of the zombie ironman from the movie....I'll post some more later...
Attachments
-
 2024-07-19_12-40-16.jpg33.1 KB · Views: 210
 -
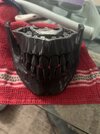 Image20240719123914.jpg162.6 KB · Views: 100
 -
 Image20240719123930.jpg193.5 KB · Views: 84
 -
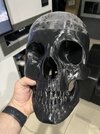 Image20240719123933.jpg189.7 KB · Views: 96
 -
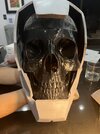 Image20240719123935.jpg201.9 KB · Views: 93
 -
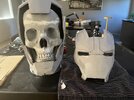 Image20240719123940.jpg227.3 KB · Views: 123
 -
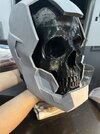 Image20240719123937.jpg209.6 KB · Views: 125
Last edited: