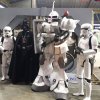
Zaku wolf 1/7 EVA Build

Nperez1986

New Member
Hello Everyone,

I'm new here. I wanted to introduce my MS-06 "R" Wolf Zaku build...I'll mention why it has a "R" later on

So last year for the San Antonio Alamo City Comic Con (2016) I built a white Proto Boba Fett in 3 weeks....SINCE I wanted to build a Zaku or Gouf and knew I didn't have the time to do that...so I started with about 2 months to finish this build for this past weekend (OCT Alamo City Comic Con Halloween Edition 2017)

So just as I stumbled on the internet discovering the "Prototype" Boba Fett...I found the white Wolf Zaku and loved it :D . I've seen people do Char, etc...but none yet of the Wolf Zaku,,,so I figured "why not!"

After scouring the internet for ANY Zaku Pepakura files, I found them to be inadequate with my project, so I purchased a 3d model online of a Zaku IIF, and ued it in Pepakura with a scale of 3.18 (I have the exact scale at my office), to be able to fit my head in adequately...BUT this required something different.

Not wanting to have a "big head" zaku as pretty much every other Zaku I've ever seen in Cosplay, I wanted a true scaled one...so according to my 3d model, I would be at about 8 feet tall...then I was like "so be it". I make a lot of models and I'm used to seeing "proper" scaling...and am plain one of those that just wants to do the best job I can on a project never done before

The 1st pepakura file I had for the helmet....just didn't work, so I made a custom head template and built it from there, using the Sintra foam board to the grill and the command fin
21552174_10213868147995964_515384143_n.jpg

21697963_10213899273734088_1213993209_n.jpg

For the side pipes I made a separate foam roll from 1/4", and cut each piece individually, gluing it together in the shape I wanted....I was not able to afford this sort of time when it came to the latter legs and torso portion, so I was forced to go with pipe insulation for the "inner" portion

Well, if I was going to build the helmet I guessed...I need to make the eye somehow. I stumbled across Adafruit which I essentially used for most of the electronics.

I used a Adafruit ProTrinket 5V/16Mhz and aa 12 bit RGB LED ring, and programmed the board to make the red I wanted (I kept testing later on)...in the end I add a 7 bit ring to the inside to make the whole light "whole" rather than just a "ring" . Links to rings and board below:
https://www.amazon.com/gp/product/B00Q9R8QUO/ref=oh_aui_detailpage_o02_s00?ie=UTF8&psc=1
https://www.amazon.com/gp/product/B00KAE3R1U/ref=oh_aui_search_detailpage?ie=UTF8&psc=1
https://www.amazon.com/gp/product/B0131VM9I0/ref=oh_aui_search_detailpage?ie=UTF8&psc=1


21844117_10213945493609556_922181397_o.jpg
21706026_10213945494209571_204714835_o.jpg
21706162_10213945494729584_1926195782_o.jpg

in the end for the visor I used this tinted plastic...work VERY well

https://www.amazon.com/gp/product/B002VECKRO/ref=oh_aui_detailpage_o03_s00?ie=UTF8&psc=1
 
So just waited for the post/forum to be approved to place the rest of my pics and updates.

So here is the building of the body. I used 3/8" EVA foam from mostly Harbor Freight....there are 4 different UPC codes on these...make sure you look and not use the slightly thinner and smaller light grey one...it has a lot of hole and sucks cutting, leading to more time to get it ready to prime/paint

I probably bought around 10-12 packs of EVA foam, lol.

I used pepakura with my 3d Model Zaku II F, at a scale of 3.465717
21640471_10213895767646438_1042976016_o.jpg

Helmet was measured at 267mm wide, 9.75" wide on the outside, inside diameter 9.25"

took me about 1 month to make the template, cut the EVA foam and contact cement together
21744956_10213909633633079_562087032_o.jpg

21908921_10213981063578783_1629518713_o.jpg
The legs were probably the most fun to make

21908696_10213964469283936_383670197_o.jpg
I used the white kitchen silicon to fill the gaps and smooth them by using water

22052641_10214004577126607_1636317980_n.jpg
After building the feet and legs, posing them together :D This is before I cut the holes for the jets. After putting them on my feet...there was NO way I could see placing the jet thrusters from the Zaku IIR version, thus I don't call this the "R" from the Zaku Wolf...maybe this could be a "Proto Wolf" lol

21942115_10213998309009908_1331078380_n.jpg
Getting an idea of how tall I would be :p
 
Last edited:
Well for the Jet Pack, I used the Zaku Wolf design to be able to mount the 4" speakers on the side. I used Rockford Fosgate Speakers 40w...kind of heavy :/...paid for it on my shoulders so I have to build a load bearing system that is better to be honest

21682374_10213933042778293_1810014230_o.jpg
Used EVA foam for the body and Sintra PVC Foam Board on the rear of the jet pack. The speakers were mounted in a 4" (if I remember right) PVC Pipes cut to length.

21684475_10213933048098426_190029585_o.jpg
My Adafruit 20W Amp testing the Speakers along with 16MB Soundboard

21706677_10213945543370800_1185930950_o.jpg
Testing the connection for my Zaku Eye, it's Pro Trinket..which I essentially connected to synch with the 16MB Soundboard to light up at certain signals :)
 
As for the weapons...I didn't opt for the bazooka since it was going to be WAY too large for me to carry it to be honest...so I went with the Panzerfuast and the Heat-hawk. I found the 3d model of the Zaku Heat Hawk online and used it at 3.01 scale in the program to measure 16.73" (425mm) in length and 19mm wide in the back portion. I bought another Pro Trinket and coded it with the amber orange on 5050 WS2812B LED Strip (60LED per m).

https://www.amazon.com/gp/product/B01LSF4QDM/ref=oh_aui_search_detailpage?ie=UTF8&psc=1

I only used about 27? or so for the heathawk. For the clear portion I bought some thin plexi glass at Hobby Lobby and cut it from the Heat Hawk Pepakure template, and clear epoxied together.
I then installed and wired the Adafruit 500C in conjuction to be able to power the 5v LEDs and Pro Trinket with 3.6v from 3 AAA NiMh batteries I placed inside the axe (see if you can tell where). I wired a switch on the main handle so the axe is only powered on when I want it to)

22901310_10214282811962304_873421481_n.jpg

Heat Hawk.jpg

23107570_10214282816642421_1366397134_o.jpg

For the Panzerfaust I found an online file from https://rocketmantan.deviantart.com/art/Full-size-Panzerfaust-papercraft-download-286043268, and used it to build mine out of EVA foam, PVC pipe (1.5" I believe) and Sintra Plastic for the flat portions

22522487_10214173219422559_1300678447_o.jpg
[/h]

- - - Updated - - -

test fitting before Paint work. From a previous testing I ordered some Hockey Gloves to make my hand look bigger to match the scale
22127536_10214048022732720_1149690213_n.jpg
22895018_10214282816802425_1869211228_n.jpg
23022179_10214282818562469_12619754_n.jpg
 
22662706_10214197487269240_121900614_o.jpg
For primer I used black plasti dip with 50% paint thinner on my HLVP setup. I then sprayed it with Rustoleum Semi Gloss White. I used about one pint of the paint mixed with paint thinner at about 5 parts paint, 2 parts thinner ratio to spray with the HLVP....using spray cans would have killed my hands... I did use Japan Drier on a small portion, but found that to make the paint too hard thus cracking even with the plasti dip primer. I then used acrylic black wash to later add the details on the whole cosutme

23030713_10214281590251762_1616245776_o.jpg
Built 22" stilts, and painted the jetpack and other portions with the grey. The black wash helped ALOT with the details. I also built all the wiring harnesses for my lights and sensors and covered them with PET hose...since I'm a perfectionist >-<...I don't like "rat nests"
22908430_10214282824402615_990058223_o.jpg
Setting up the Jet Packs..I made labels to make it easy to know what kind of AA batteries to use. I did have 18650's, but wanted to make it simple stupid.

22901269_10214282812242311_630972591_n.jpg
23023445_10214281588691723_1004028387_n.jpg
Programming the Pro Trinket for the "JetPack" lights using Adruino IDE. Synched the code with the soundtrack I wanted. As for the lights I used a combination of 3 or 4LED RGB I bought on eBay. The rear Jet Pack used 16 bit, and the rear of the legs used 12bit...

For the jet pack I used 3" Harly Davidson Clear turn signal lights to make the lights not only shine but more of the "thruster" feel. I was planning to do the same on the legs but ran out of time and I figured...they look good enough for now

(cuation: when you buy the 12 bit ones on eBay...they are made pretty bad...I had to resolder the Ground, 5v, and Data in on 3 out of the 4 lights...link is to a better build LED I ended up buying...
https://www.amazon.com/gp/product/B073R6P2FW/ref=oh_aui_search_detailpage?ie=UTF8&psc=1

22810450_10214246731300310_1918834473_o.jpg
eBay quality :/

To make the sounds activate and the lights as well...I made sound gloves I found from this idea from another cosplayer
https://www.youtube.com/watch?v=dxr5Myxsx8U

I wired up my setup to test everything and ensure the lights and sound were all synched up
https://www.youtube.com/watch?v=UkpdmwinmUk

Then it was off to fix all the wirings, solder, heat shrink, cover with PET, the whole 9 yds...
22906512_10214281589451742_909623623_o.jpg
I color matched the sensors to their boards, as well as the lights, so when the wife or assistant needed to connect it, it would be easy to find.
 
Last edited:
While I look for my "setup" pics...here is the final product...well at least for now since I have improvements to work on :p

23114639_10214283640223010_1488225500_n.jpg
The wife and me being interviewed upon arriving
 
Last edited:
So after this event LESSONS LEARNED:

1. Ensure assistant or anyone sees where your thigh meets the knee...mine went down about 1"...this must have happened when I fell

2. The FALL lol...so my left foot broke in half, thus I fell on my way to the entrance and didn't know what happened?!?! Until I was able to take my mask off, the wife did a duct tape repair that lasted all day...once I got home I made he permanent repair. This errors caused my foot sensors to not be aimed the right way, thus they never "engaged, so I was not able to play my "steps" in the audio. Also my right leg Jet lights were disconnected...found the harness was incorrectly connected post fall lol :p

Since the entire costume was EVA foam and not fiberglass, it took the fall like a champ :p I only had a tear in the foot where it had the failure...easy fix

3. Shield: Need to figure out a "ball joint" type of connection to allow the shield to "swivel" when I move my arm

4. Batteries: KISS...keep it simple stupid...I used Alkaline and NimH AA's mostly in the jet Pack..they worked GREAT and didn't have to change them. Due to the size limitations, the Axe was only able to take AAAs, thus I used the battery holder front he cheap $1 flashlights and wired it into my handle, using 3 1.2v NiMH with a total of 3300maH. I did have a 3.7v Lipo 4400Mah Battery BUT I wanted to keep it simple...if that battery went out...then I would need to connect the axe's USB port to recharge

5. JetPack weight: need to build a belt and also a back support for the jet pack can rest on my back appropriately

6. Cooling system: The two fans I had in my helmet, one in the front, one in the rear pulling hot air out, worked great. I need to add one to my torso.

7. Leg pipes: Need to build a semi-permanent design, they would come off once in a while

8. Zaku Eye: would love to make it move :p...I'll have to figure that out

9. Legs: figuring out a dolly/tow system where if I need to cover lots of ground, I can be "towed" easily...my legs died :p, but honestly it was mostly the shoulder that took most of it due to the weight of the torso, even with my back pack straps I built into it...time to get a used military Load Bearing Belt

10: Arms: Make sure the side exits are large enough so you don't have your arms fall asleep!
 
Last edited:
Looking pretty cool so far, I've seen a few Gundam builds before but I think that this is the first time I've seen a Zaku.

Btw, I get my foam from Harbor Freight as well, do you happen to recall what the UPC code is for the good foam? All I've seen there is the individual squares and the rolls, I didn't know there were more kinds.
 
As for the HFT foam I can't remember the SKU/UPC that was the good one. I just know if it's light gray to stay away, since it's made pretty badly. When I get home I have a pack left of the good one, so I can post on that one
 
Not sure why the previous post was not showing the attached pics, so I re-uploaded:


After my 2 hour "walk" from the parking lot to the Entrance...learned the hard way :/

22901442_10214282810082257_458631093_n.jpg

22908305_10214281594131859_441449396_o.jpg
Possibly my favorite shot, since the lighting contrasts the Mono Eye pretty well :p


23114639_10214283640223010_1488225500_n.jpg
Wife and me getting an interview at the entrance

23023748_10214281591811801_259211794_n.jpg
After 2 hours of walking from the parking lot...I learned the hard way

22885980_10214282746600670_2575764132046484488_n.jpg

Looking pretty cool so far, I've seen a few Gundam builds before but I think that this is the first time I've seen a Zaku.

Btw, I get my foam from Harbor Freight as well, do you happen to recall what the UPC code is for the good foam? All I've seen there is the individual squares and the rolls, I didn't know there were more kinds.

Thanks! Yeah I've seen plenty of elaborate Gundams, even some Zakus, but I have not seen any to "scale", so that was my motivation. I've seen a number of Red Zakus and Green ones...so I opted white :)

As for the UPS, I'll let you know the good one when I get home, I have a pack left
 
Last edited:
Great work, though as a Gundam fan, I'm not familiar with a "wolf"Zaku: did this start out as a build of Shin Matsunaga's (the White Wolf of Solomon) MS-06R-1A Zaku II, High Mobility Type?
 
Great work, though as a Gundam fan, I'm not familiar with a "wolf"Zaku: did this start out as a build of Shin Matsunaga's (the White Wolf of Solomon) MS-06R-1A Zaku II, High Mobility Type?
Thanks! Why yes...I thought honestly it was called the "Wolf Zaku"...that's how I would find it via google? But since when I built the legs...there was just no way I could properly walk having the high mobility jet thrusters on the legs :(...so I didn't call this a 06-1A High Mobility Type....I didn't finish the decals in time, but I hope to get it done...perhaps I could call this the 06R-P "Prototype" of some sort for the 06-1A? In the end I'm ok with whatever any body wants to call it officially since it was a challenge any how :)

- - - Updated - - -

This looks huge! Nice work!

Sent from my SM-N900T using Tapatalk
Thanks! Yes, I stand at 8ft tall (not counting the command fin) :D
 
Thanks! Why yes...I thought honestly it was called the "Wolf Zaku"...that's how I would find it via google? But since when I built the legs...there was just no way I could properly walk having the high mobility jet thrusters on the legs :(...so I didn't call this a 06-1A High Mobility Type....I didn't finish the decals in time, but I hope to get it done...perhaps I could call this the 06R-P "Prototype" of some sort for the 06-1A? In the end I'm ok with whatever any body wants to call it officially since it was a challenge any how :)

- - - Updated - - -


Thanks! Yes, I stand at 8ft tall (not counting the command fin) :D
Holy crap!
 
This thread is more than 6 years old.

Your message may be considered spam for the following reasons:

  1. This thread hasn't been active in some time. A new post in this thread might not contribute constructively to this discussion after so long.
If you wish to reply despite these issues, check the box below before replying.
Be aware that malicious compliance may result in more severe penalties.
Back
Top