JeepSoup
New Member
The XCOM Shotgun was my second weapon build from the game
Exported model. You can see the low poly model, many details in texture maps, etc that would need to be addressed before printing.

Here is the model before booleaning the new details. I used Wings 3D's smooth function to up the poly count on the pistol grip. I just find it easier to use than the tools in 3D Max.

This shows the cuts I made to fit the parts onto my Replicator 2X

This is the tactical light parts. I later added a reinforcement to the tabs on the cap locking mechanism. I also added an inset spot to fit the Radio Shack on/off switch.

I printed the grip first. That way I could verify sizing before wasting a lot of filament. I had based it's sizing off the XCOM pistol I made earlier, so it was right the first time. (yay!)


After I assembled it, I filled the shotgun with Smooth On's expanding foam. I used the slow version so it wouldn't generate so much heat.

This was followed by the usual bondo/sand/prime/repeat.
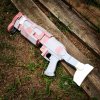
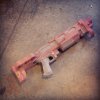
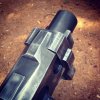
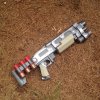
This is a shot of the Shotgun & Pistol after initial paint. The shotgun has silver spray paint as a base with Testors Buffable Gun Metal Metalizer paint on top. I buffed it with a soft cotton cloth to bring up the shine, then sanded it with 0000 sandpaper to add weathering. The two close ups are just of the Metalizer paint. There's no drybrushing there!
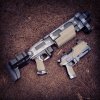
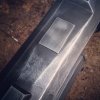
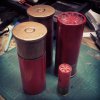
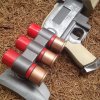
XCOM shotgun shells vs 12 gauge shotgun shell!
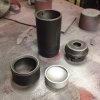
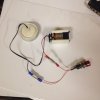
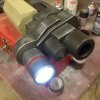
All the tactical light bits printed, cleaned up & painted. The wiring is pretty getto, but I had PLENTY of room in that huge tactical light. I figured I'd build it quick instead of fiddling with making it light/small. the LED is a pre-resisted LED from the auto parts store. On/off switch is from Radio Shack. I printed the 9 volt holder so it would fit the inside curve of the tactical light.
A few pics of the almost final paint job. I did add a wash to the shotgun, and drybrushed the stock/grip after these pics were taken. I'll try to take final pics later.
In-game image of the shotgun for comparison.

Exported model. You can see the low poly model, many details in texture maps, etc that would need to be addressed before printing.

Here is the model before booleaning the new details. I used Wings 3D's smooth function to up the poly count on the pistol grip. I just find it easier to use than the tools in 3D Max.

This shows the cuts I made to fit the parts onto my Replicator 2X
This is the tactical light parts. I later added a reinforcement to the tabs on the cap locking mechanism. I also added an inset spot to fit the Radio Shack on/off switch.
I printed the grip first. That way I could verify sizing before wasting a lot of filament. I had based it's sizing off the XCOM pistol I made earlier, so it was right the first time. (yay!)


After I assembled it, I filled the shotgun with Smooth On's expanding foam. I used the slow version so it wouldn't generate so much heat.

This was followed by the usual bondo/sand/prime/repeat.


This is a shot of the Shotgun & Pistol after initial paint. The shotgun has silver spray paint as a base with Testors Buffable Gun Metal Metalizer paint on top. I buffed it with a soft cotton cloth to bring up the shine, then sanded it with 0000 sandpaper to add weathering. The two close ups are just of the Metalizer paint. There's no drybrushing there!


XCOM shotgun shells vs 12 gauge shotgun shell!

All the tactical light bits printed, cleaned up & painted. The wiring is pretty getto, but I had PLENTY of room in that huge tactical light. I figured I'd build it quick instead of fiddling with making it light/small. the LED is a pre-resisted LED from the auto parts store. On/off switch is from Radio Shack. I printed the 9 volt holder so it would fit the inside curve of the tactical light.


A few pics of the almost final paint job. I did add a wash to the shotgun, and drybrushed the stock/grip after these pics were taken. I'll try to take final pics later.


In-game image of the shotgun for comparison.


