Wrath of Kahn studio modeling question

IndyFanChuck

Sr Member
Hey friends,

I had a question about how they did the model work in the actual Star Trek II Wrath of Kahn movie.

1.) Okay, the process of how they filmed the models and made it look like they were moving. I know its NOT "stop motion Animation" but what IS it called? I watched the making of disc on the special edition, but it talked more about the Nebula than the actual process of the modeling and filming the models and such.

2.) I want to know more about this type of model work, and specifically how it is FILMED to look like its moving. How can I learn more about this process? Since I dont know what its called, the process they used in Wrath of Kahn, I have no idea how to research it?

3.) Also, is there an way to accomplish that type of model film work today, with less expensive cameras?

4.) And, is there any where on the internet where this type of model special effects is talked about in detail?

The reason I ask is because a friend of mine owns a production company, and said I can use his high quality cameras and equipment. So, naturally I thought about getting a super duper high quality studio quality Enterprise made by a fellow member and shooting my own personal dog fight, just like they did for Wrath of Kahn.

I LOVE actual model work in films like 2001, Wrath of Kahn, and the Black Hole. I would love to be able to do some novice "at home" camera work and make short clips of my favorite models doing battle.

Is this possible and HOW? HELP! haha

Thanks for your help guys. Every single time I have a quesiton on the RPF - everyone is so nice and helpful! If you have any advice, internet links, or advice please feel free to post it here! Thanks again my friends.

---Chuck
 
The process is called "motion control". The model is held steady on a stand, and the camera is "flown" past the model, under computer control. The technique was pioneered by John Dykstra in Star Wars.

Often the camera will make several identical passes, while different exposures are made for overall key light, fill light, windows, and so forth. The different passes can then be composited together to make the image you see in the final film.

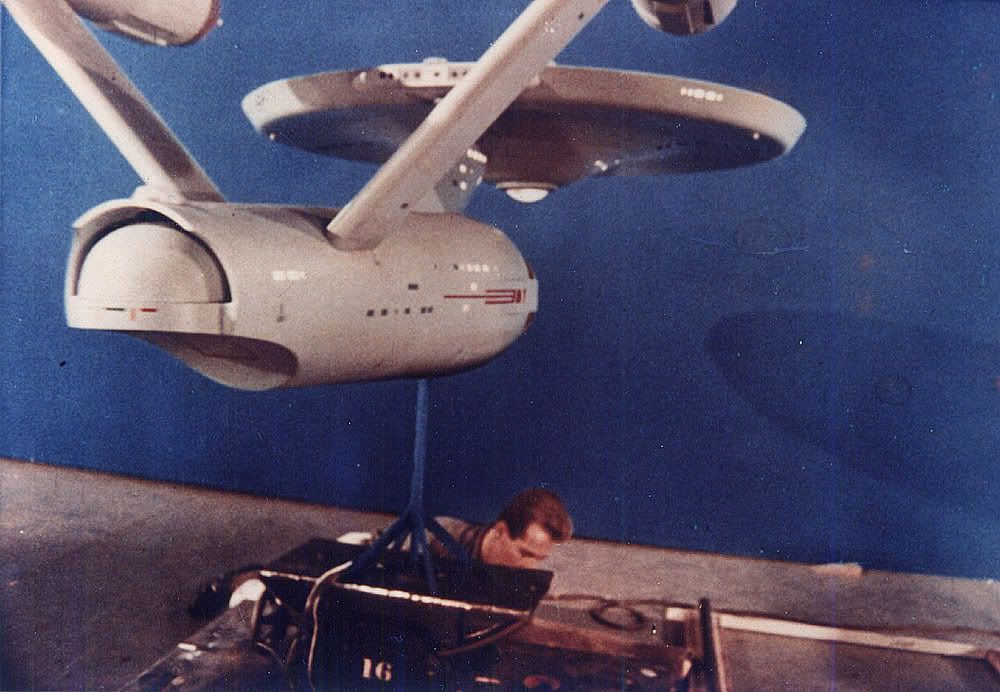
Here's the Enterprise miniature being suspended from the starboard side. There's a blue screen behind the model, so that later the background can easily be "keyed out" or removed. Then the star field can be put in its place.

st2bowqtp2.jpg


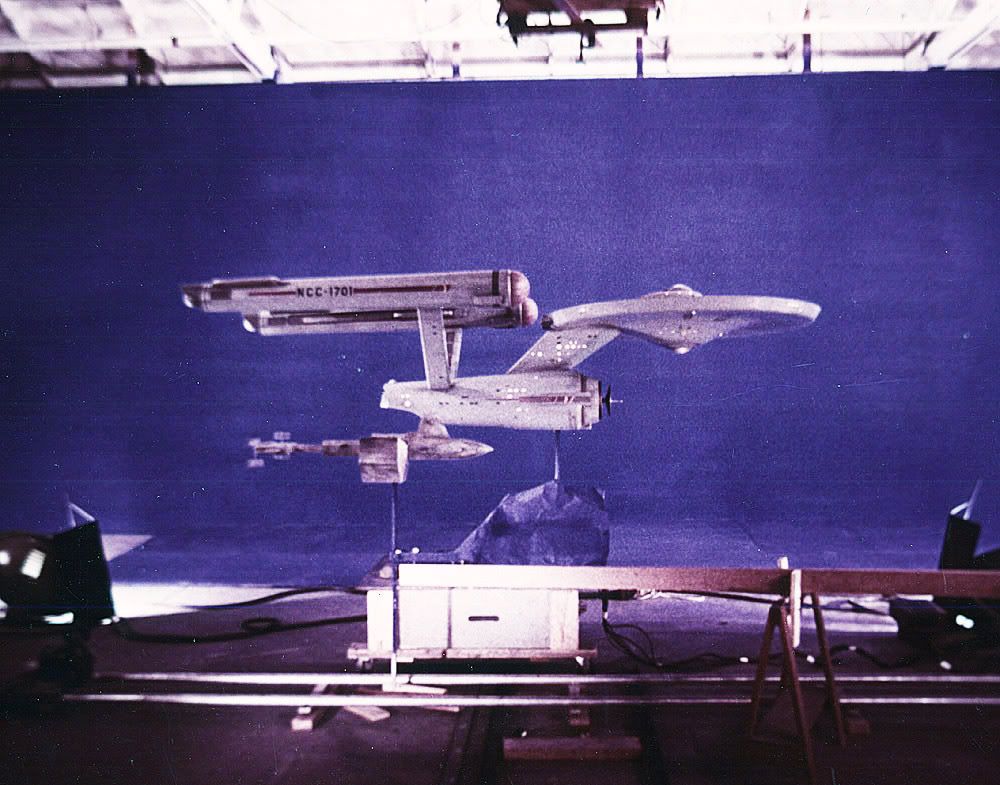
Filming the Drydock sequence for TMP. This footage was reused in Wrath of Khan.

tmpfilminguq1.jpg


Here's the six-foot Enterprise-D miniature being filmed for "Next Generation"

stgen1701dtopmount2mm5.jpg
 
Last edited:
Regarding how you can "do it at home", you would need at minimum

- a stand to hold the spaceship model

- a solid-colored wall or backdrop which could be removed digitally later (aka "green screen")

- a way to move the camera very smoothly past the model. This was done in the early days by laying down dolly track, and moving the camera by hand in tiny increments, exposing one frame at a time (that's how some of the effects in "2001 a space odyssey" were filmed).

Short of building a computer-control system with motorized dolly for moving the camera, you'll have to settle for some kind of manual means. Either a steadicam rig or some kind of dolly tracks I suppose.

I think KuhnGlobal here on the board has some hands on experience with this type of thing...


- k
 
I am pretty familar with the concepts of motion control. I assumed they used it in TOS and before as well, since it was first used in Star Wars, what did they use before this (ie in TOS)
 
TOS made use of manual camera moves.
LinwoodDunn.jpg


Though they did use blue screen.
ent26.jpg

ent45.jpg


The earliest use of what could be called motion control was in 2001.
The camera was moved by a large worm gear. The moves could be
repeated for multiple passes, but only with one axis of movement.
With this system, they would shoot a pass of the Discovery (a 54' model),
with the window blacked out. A second pass was made with the model
draped in black cloth, and film of the cockpit set projected onto a screen
in the window.

The term "motion control" came into being with STAR WARS. The moves
were made by the camera man using a remote control, with switches that
controlled the motors. Each axis of the move was made one at a time,
and was remembered by the computer. When all axis were done, the
computer would play them back together, allowing the camera to make
a complex move. These moves could be repeated, allowing multiple passes
to be made with great precision. The models internal lights were shot on
a separate pass, to allow a different exposure.

The camera moves were very slow, with an exposure of several seconds
per frame. The system moved the camera during exposure, to record a
"streaked" blur on film. This made the ships seem to fly at high speed. Stop
motion would not create this streak, since everything is stationary.

As for doing it at home, someone savvy with electronics and motors could
probably build a simple system. But the pro systems had an accuracy of
1/10,000 of an inch between passes, don't expect to do that at home.
Computer control is easy, but the precision gears needed for the dolly and
crane would be VERY EXPENSIVE. But a single pass system could be doable.

Rob
 
It might work, but you'd have to be precise with the beginning placement and that the robot can hold the weight of the camera
 
I would think that, with modern technology, you would not need to do a frame-by-frame exposure. Using a modern digital movie camera, all you really need is a way to move the model and/or camera in such a way that the shot looks good with your setup.

Because modern editing programs give you so much flexibility these days, you should be able to do a lot with the finished shot in terms of replacing the background, adjusting the frame rate, exposure, and adding effects. So, what you really need to do is concentrate on getting the camera to move past the model in a way that looks good on video.

Remember, you don't have to keep the model stationary. You can make the camera stationary and move the model (might be easier to maintain focus that way) or move both the model and the camera.

I'd suggest getting into robotics and learning how to build a camera or model mover that can sweep through a programmed move smoothly. Design it to minimize shaking. Build the mount in such a way that it won't flex during the move. This means it has to be very carefully designed.

For example, you don't want the arm to cantilever out. If this happens, the weight combined with inertia might cause the arm to flex and the end of the arm would then shake or move up and down. To solve this problem, you might look into some sort of gantry system like that used on a 3-axis milling machine. This could be more stable.

After the movement problem is solved, you then have to light the model and program the move at a speed where you can get good exposure throughout the shot. Keep in mind, getting close-ups could be very tricky because of depth of field problems.

On a still camera, you can use a high f-stop to maximize depth of field when photographing miniatures. (I don't know how this translates to a movie camera.) The higher the f-stop, the more light will be required to expose the shot. Being able to control this may require a more high-end camera, I don't know.

The alternative is to take a series of still images and then move the camera and/or model a very short distance between each shot. This is a frame-by-frame animation technique called stop motion. Doing this, however, requres that you be able to add some sort of motion blur in post production or you'll get that staccato effect with every movement.
 
Good points :)
Some pro rigs were gantry designs. Image G used a gantry rig for ST:TNG.
Boom arms, like ILM used had a counter weight on the other end to balance it.
Sometimes they even hung weights all over the arm to eliminate vibration.

Depth of field is a very important part of model photography. ILM used Nikon
lenses, some that were modified to stop down to f/45. That's why the
exposure times were so long. They also made use of tilting lens mounts.

The point about modern digital technology is interesting. If a home made rig
has a bumpy motion, that could be smoothed out digitally. If you can't get
the models' lights balanced right with a single pass, digital enhancement can
correct it.

Rob
 
I am working on some new videos and have the same problem moving the camera.
IMG_4693.JPG

IMG_4859.JPG


The best I came up with would be a section of smooth pipe propped up and aimed in the direction of the model and a Hot Wheels car rolling on it to set my camera on.
IMG_4950.JPG


The floating boom would create an arc in the shot, so I rejected that idea.
IMG_4695.JPG
 
Last edited:
For this to work properly it's equally important to get the camera's speed correct. It's the only real visual indicator of how we deal with approaching masses of various sizes and their speed relative to the camera's. Pay atention to some of the WoK approach shots (like arriving at Regula 1, or even the inital pod approach in TMP)
 
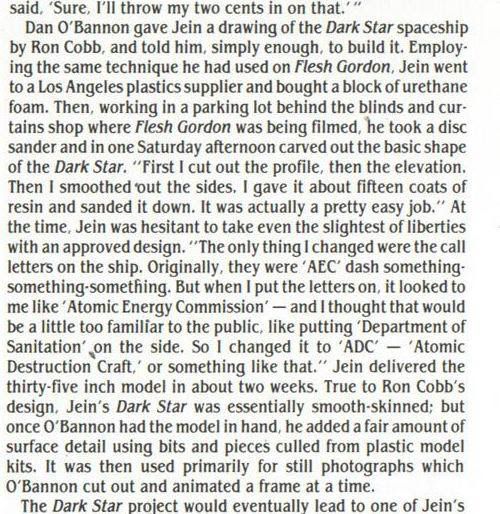
Or you could forego all the high tech mumbo jumbo and just do what Dan O'bannon did on Dark Star and just animate photo cutouts:

jein1bb.jpg

(From Cinefex 2)
The same Technique was used to shoot some of the ships on an animation stand in 2001(The Moonbus ,Pan-Am Shuttle and I think the Aries and Pod).
 
If I were going to do it in a no-budget film today I'd probably make one good pass with the camera, perhaps running at 60fps or more (even some "amateur" digital cameras nowadays can do that) and then add any lights or engine effects using the motion tracking features in a compositing application such as After Effects (which is relatively cheap). Final playback would (of course) be at a slower speed to add a sense of scale to the model.
 
Back
Top