Working time machine model from 1960 movie "The Time Machine" based on book from H.G. Wells

Snohoman

New Member
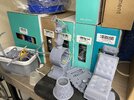
I decided to take a stock Time Machine 3D model from Etsy and add lights, sound and motion to it. I used three ESP32 microcontrollers for this project. One controls 5 LED's and the spinning disk in the back section and one controls 5 LED's in the control panel. The last microcontroller is an ESP32 Media Kit and plays 4 different sound snippets off of a MicroSD card that are from the original movie with Rod Taylor. The original 3d model was heavily modified to get the wires through various sections and to add a 30 RPM geared down motor. The entire unit runs on a 9VDC battery with two DC-DC circuits to provide 3.3VDC and 5VDC to the various controllers and motor. All software was written in Arduino C.

All 3d printing was from an FDM printer along with a vacuum former for some of the parts with transparent sections. Video of it operating is on YouTube at:


Time Machine Model1.jpeg
Time Machine Model 2.jpeg
 
Why am I only seeing this 12 months later, I would have loved to have seen a build log of how you put together the motors and lights, circuit and everything, I’ve had mine printed out for ages but need my large resin printer up and running for the back disc, phenomenal work
image.jpg
 
Why am I only seeing this 12 months later, I would have loved to have seen a build log of how you put together the motors and lights, circuit and everything, I’ve had mine printed out for ages but need my large resin printer up and running for the back disc, phenomenal work
View attachment 1848553
I retired after 40 years as a control system engineer so I had quite a bit of time on my hands to complete this. It took most of the spring of 2023 to get this completed. I have quite a bit of experience with microcontrollers so it wasn't much of an effort to get LED's to blink or play sound files from an SD card. My Rick and Morty Portal gun was much more complicated. I bought a 30rpm mini motor for the back disk but I had to modify the model extensively to get wires to it and to hold the motor. The part that holds the disk was completely redesigned. I used a 9V battery for power and two buck converters to get the 3.3V and 5V necessary. The 5V output was necessary for the motor.
 
Great project and it's always great to see a miniature with lights and movement.
 
Beautifully done!

Wish there was a version of the small model (with the less detail) available out there, so a prop replica of the prototype could be built!
 
I retired after 40 years as a control system engineer so I had quite a bit of time on my hands to complete this. It took most of the spring of 2023 to get this completed. I have quite a bit of experience with microcontrollers so it wasn't much of an effort to get LED's to blink or play sound files from an SD card. My Rick and Morty Portal gun was much more complicated. I bought a 30rpm mini motor for the back disk but I had to modify the model extensively to get wires to it and to hold the motor. The part that holds the disk was completely redesigned. I used a 9V battery for power and two buck converters to get the 3.3V and 5V necessary. The 5V output was necessary for the motor.
I’ve just resin printed the back disc so now I’m able to proceed with the build, I might have to reprint the rails as I’m not truly happy with them but we will see,
Did you use an Arduino mini and did you write your own code
Oooooh so so many questions
Again phenomenal work
 
Back
Top