My newest project is a build of AMT's ancient Darth Vader TIE Fighter kit, with as much scratch built detail as I can manage. This build will be my first attempt at scoring panel lines, lighting a kit, and making my own photo etch, so it should be a learning experience at least.
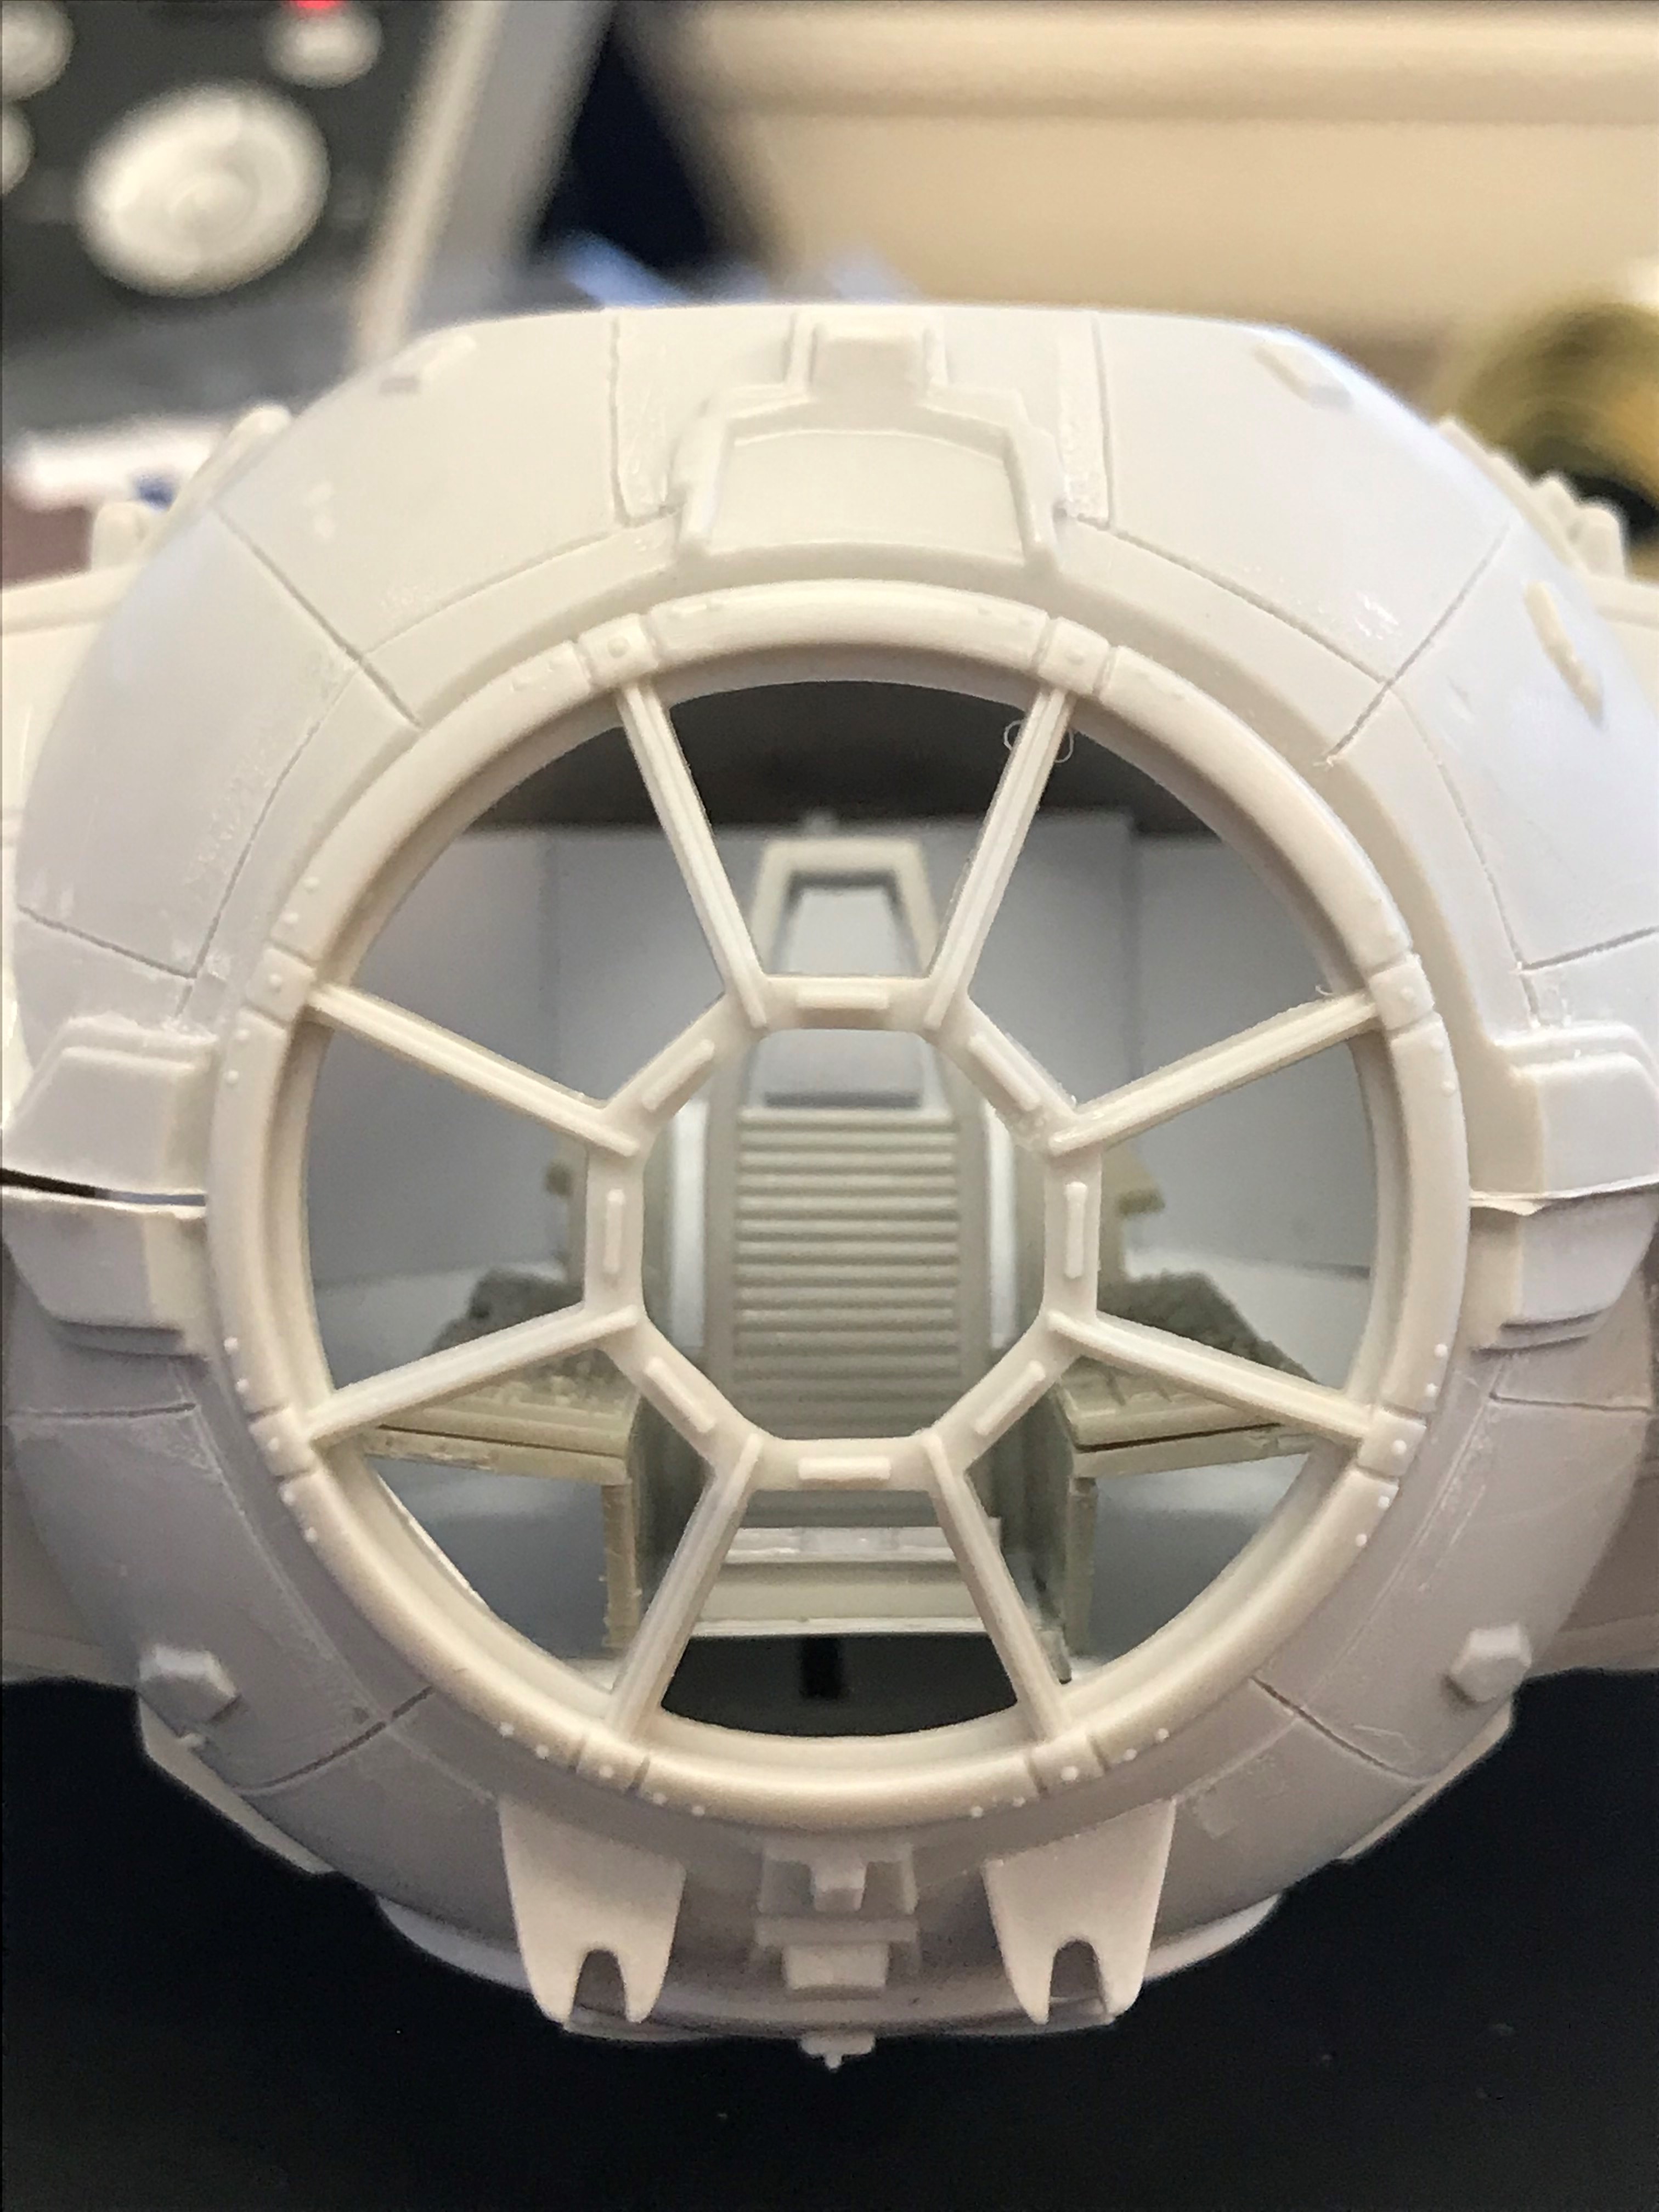
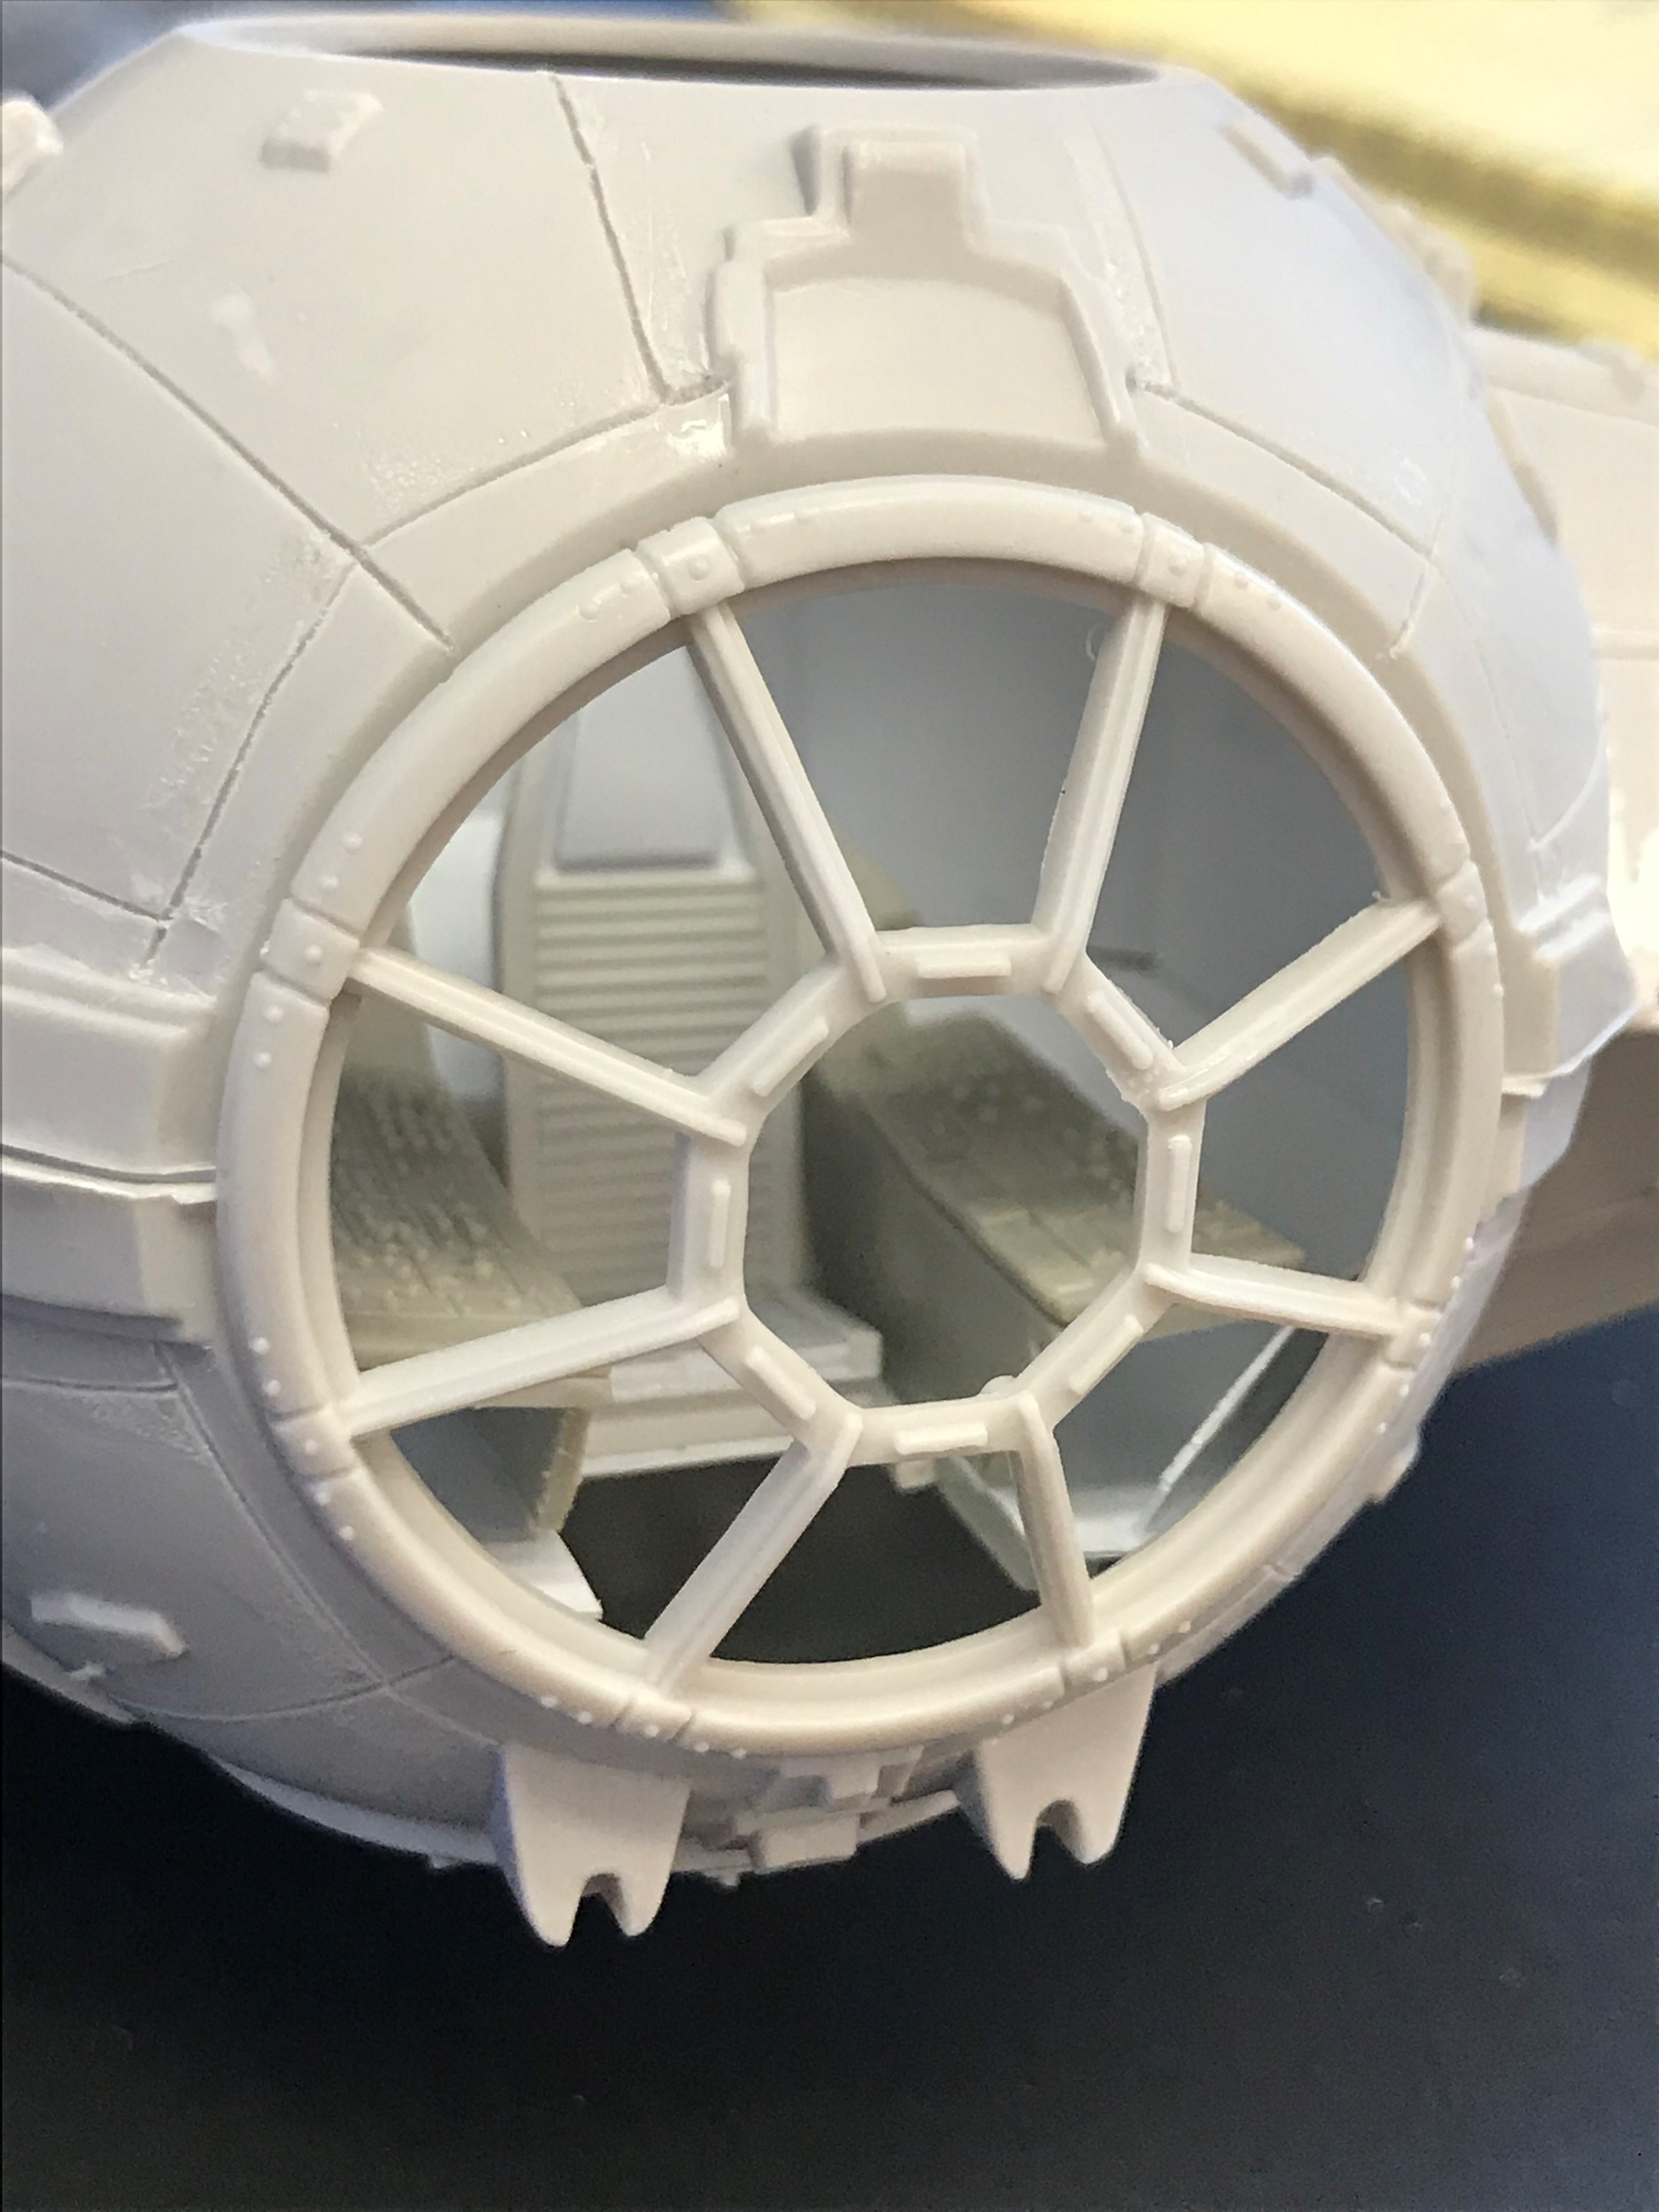
The first step was to add the missing panel lines. Recessed panel lines are present on most parts of the ship, but for some reason absent from the cockpit bubble. I screwed this up pretty much immediately, and ended up ordering a replacement kit for a second try. The hardest part was getting the scribe guides to sit properly on the compound curves. Ultimately, I found that lightly gluing styrene strips down as guides worked pretty well, and just removing them after. The panel lines aren't absolutely perfect, but I'm not going to buy a third kit.
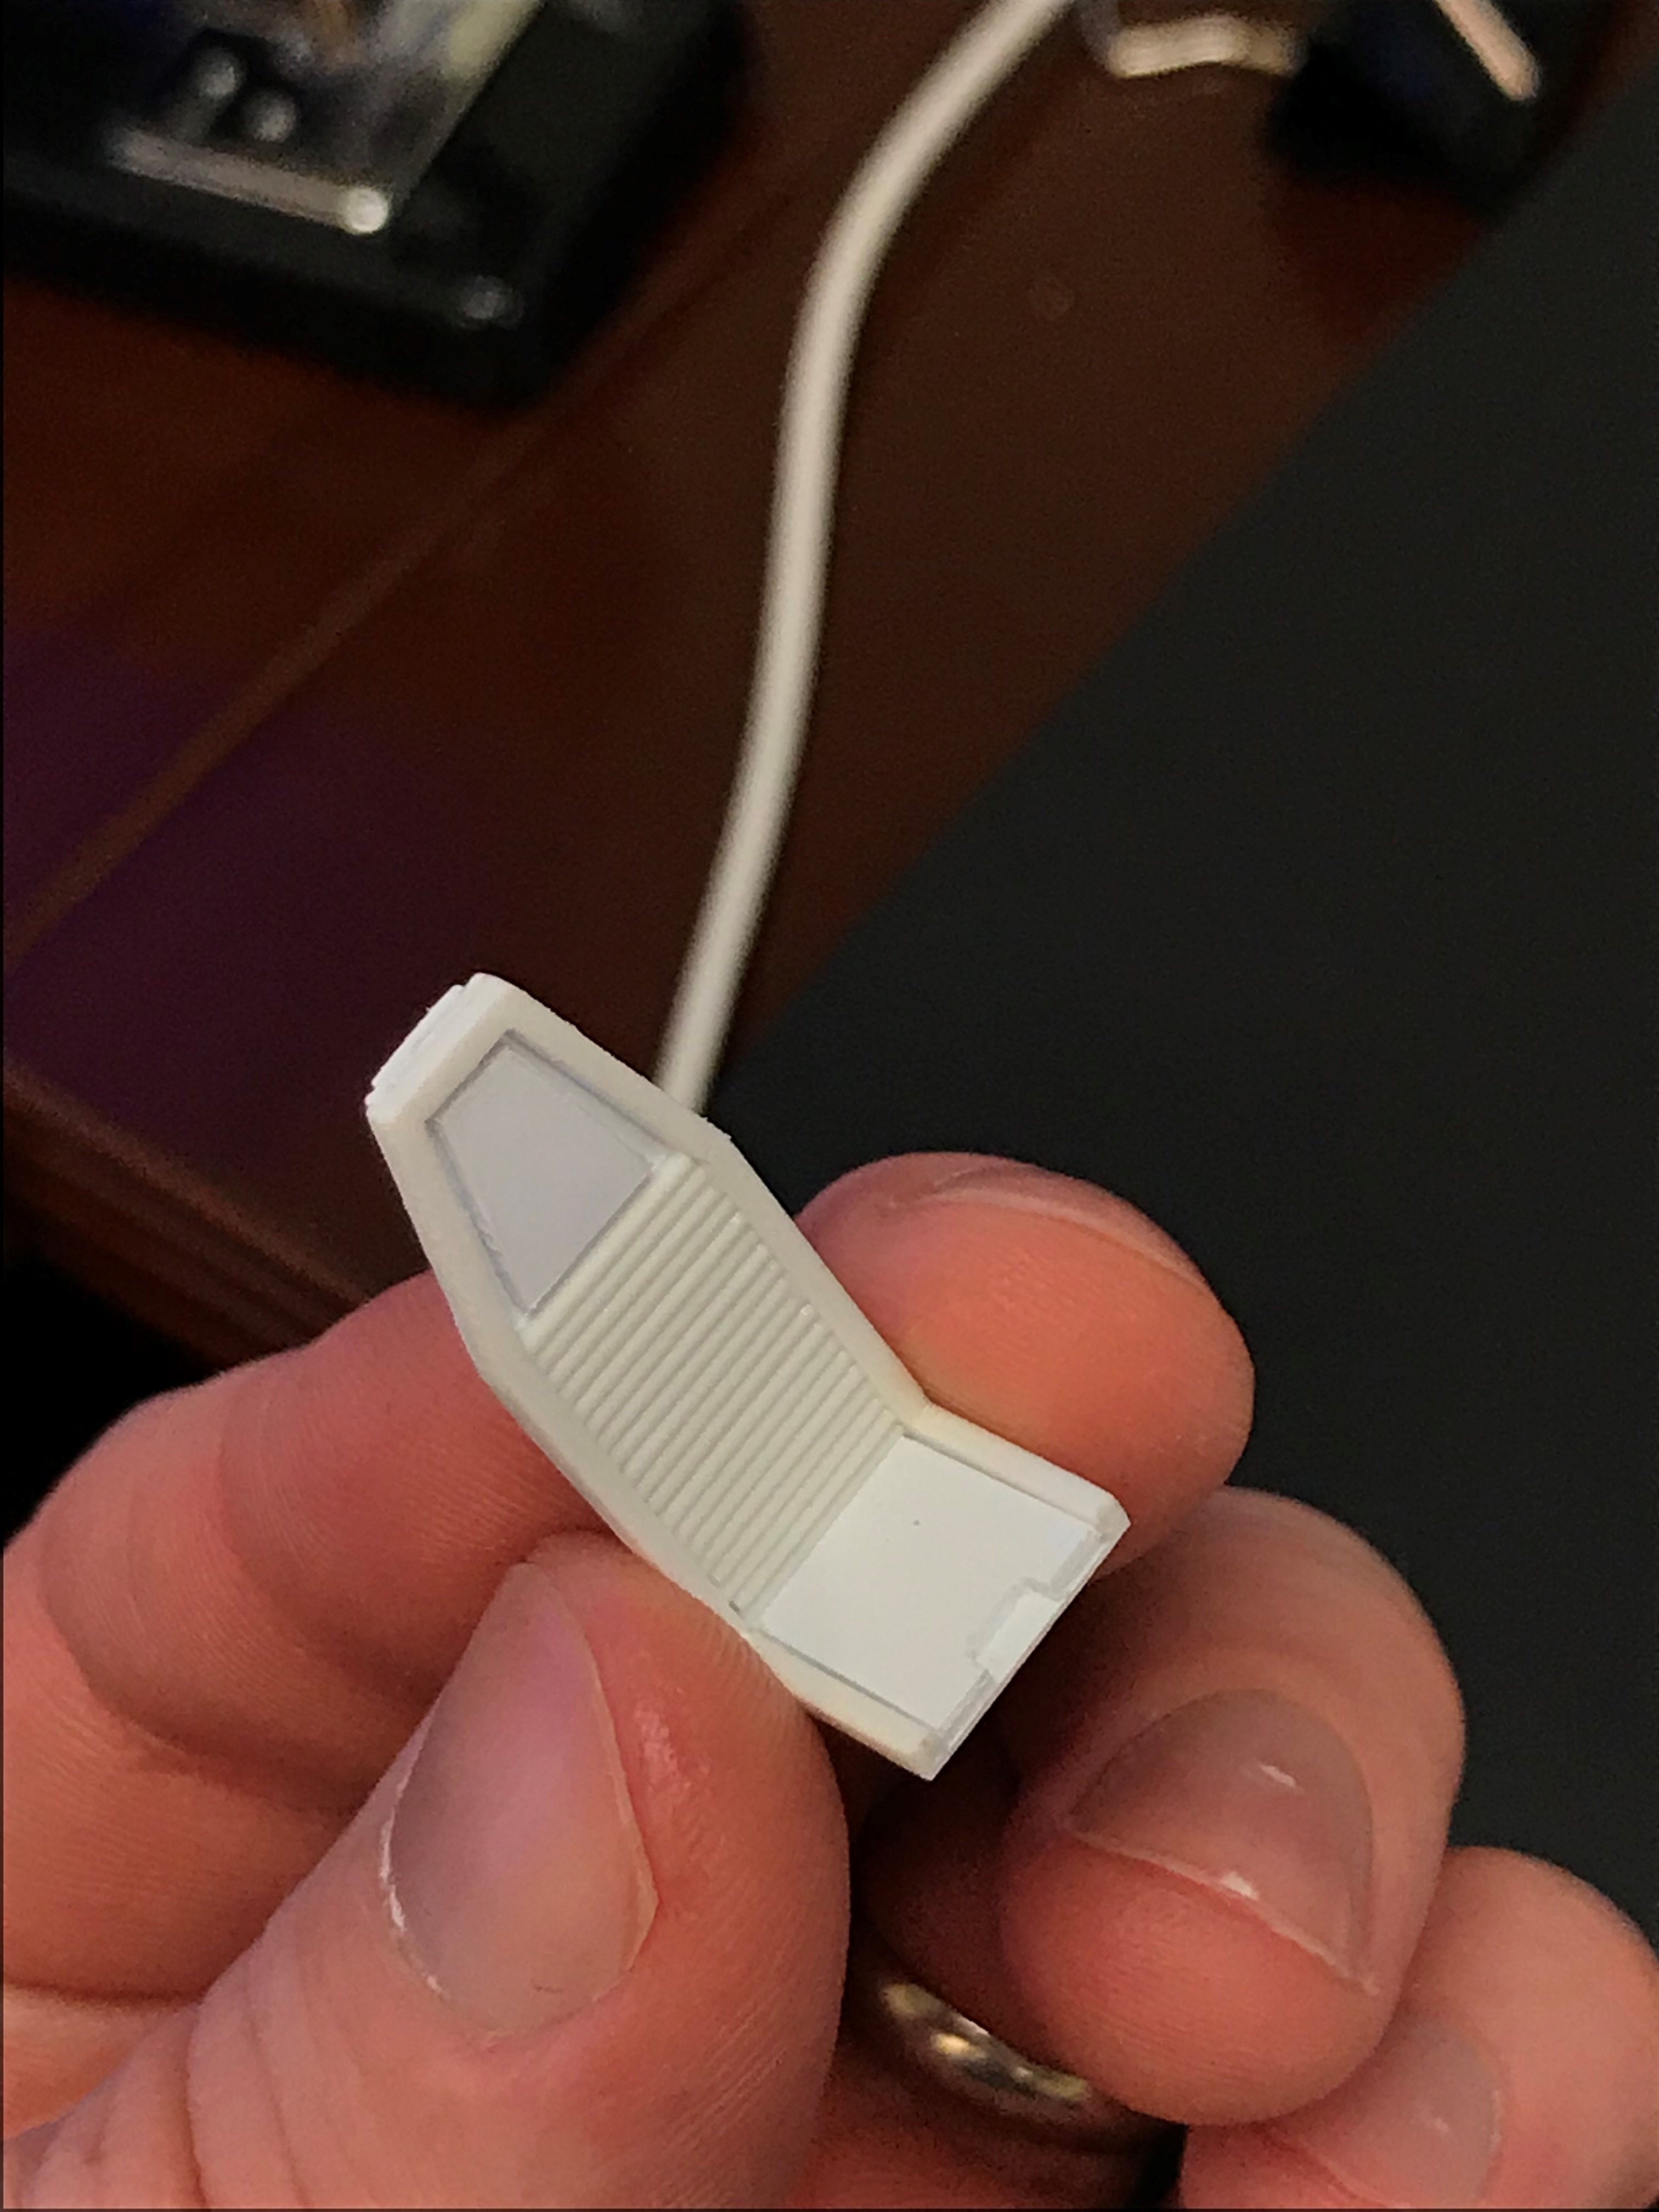
Next, the cockpit. After much fiddling, I decided to abandon the terrible kit cockpit entirely and build my own. I am modeling my cockpit build from the filming set, rather than the studio model. This will also involve quite a bit of imaginary work, as the filming set doesn't have much detail on the bottom half. I picked up the cockpit sprue from Tamiya's 1/32 F-16 for some donor parts. The sprue didn't come with a seat, however, so I built one from bits of styrene.
In my opinion, one of the best aspects of going with the filming set is the absence of the half-wall that obscures so much of the cockpit. With that gone, there is a much better view inside.
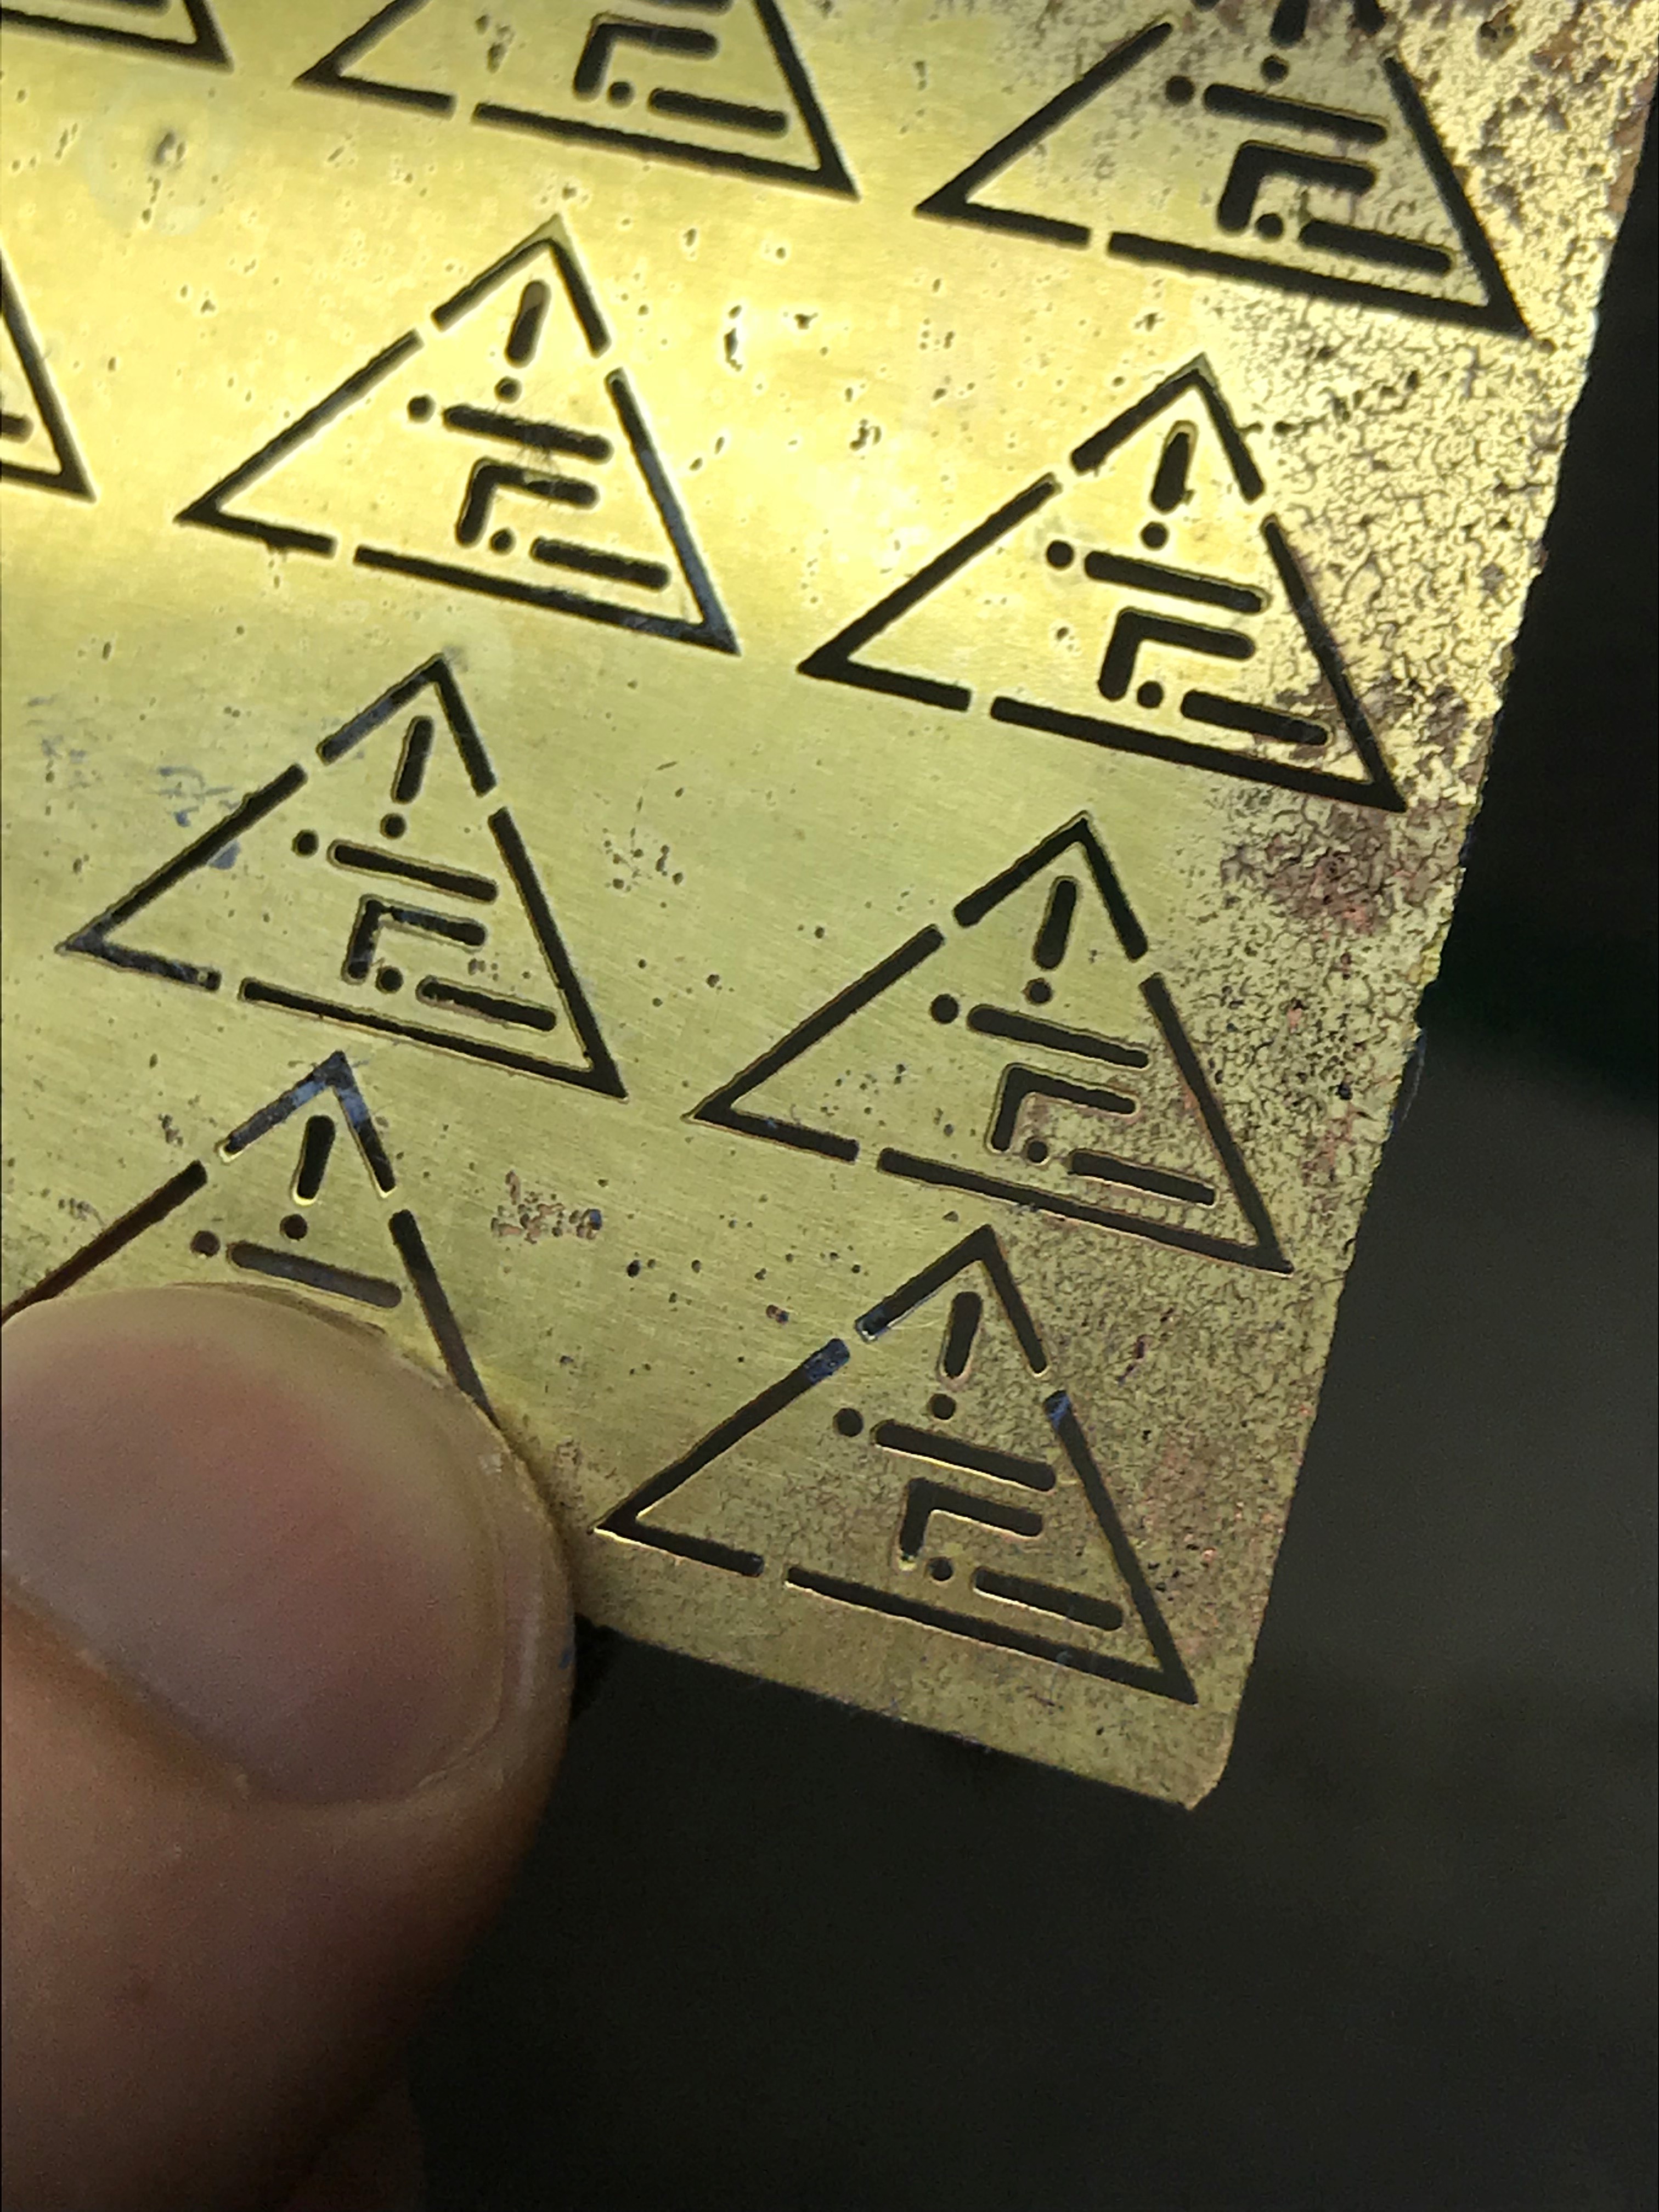
Simultaneously, I have been working on the photo etch for the cockpit triangle panels. I will also be using photo etch for various exterior bits. Happily, it turns out that photo etch isn't all that hard, and there are some great tutorials online. For this test panel, I designed a template in Vectr (a free vector graphics program), printed it on transfer paper with a laser printer, ironed it onto a brass sheet with a household iron, and soaked it for a few hours in a 1 to 1 mix of muriatic acid from Home Depot and hydrogen peroxide from the drug store.
I will add updates as I progress with the cockpit. Thoughts and suggestions welcome!
The first step was to add the missing panel lines. Recessed panel lines are present on most parts of the ship, but for some reason absent from the cockpit bubble. I screwed this up pretty much immediately, and ended up ordering a replacement kit for a second try. The hardest part was getting the scribe guides to sit properly on the compound curves. Ultimately, I found that lightly gluing styrene strips down as guides worked pretty well, and just removing them after. The panel lines aren't absolutely perfect, but I'm not going to buy a third kit.

Next, the cockpit. After much fiddling, I decided to abandon the terrible kit cockpit entirely and build my own. I am modeling my cockpit build from the filming set, rather than the studio model. This will also involve quite a bit of imaginary work, as the filming set doesn't have much detail on the bottom half. I picked up the cockpit sprue from Tamiya's 1/32 F-16 for some donor parts. The sprue didn't come with a seat, however, so I built one from bits of styrene.
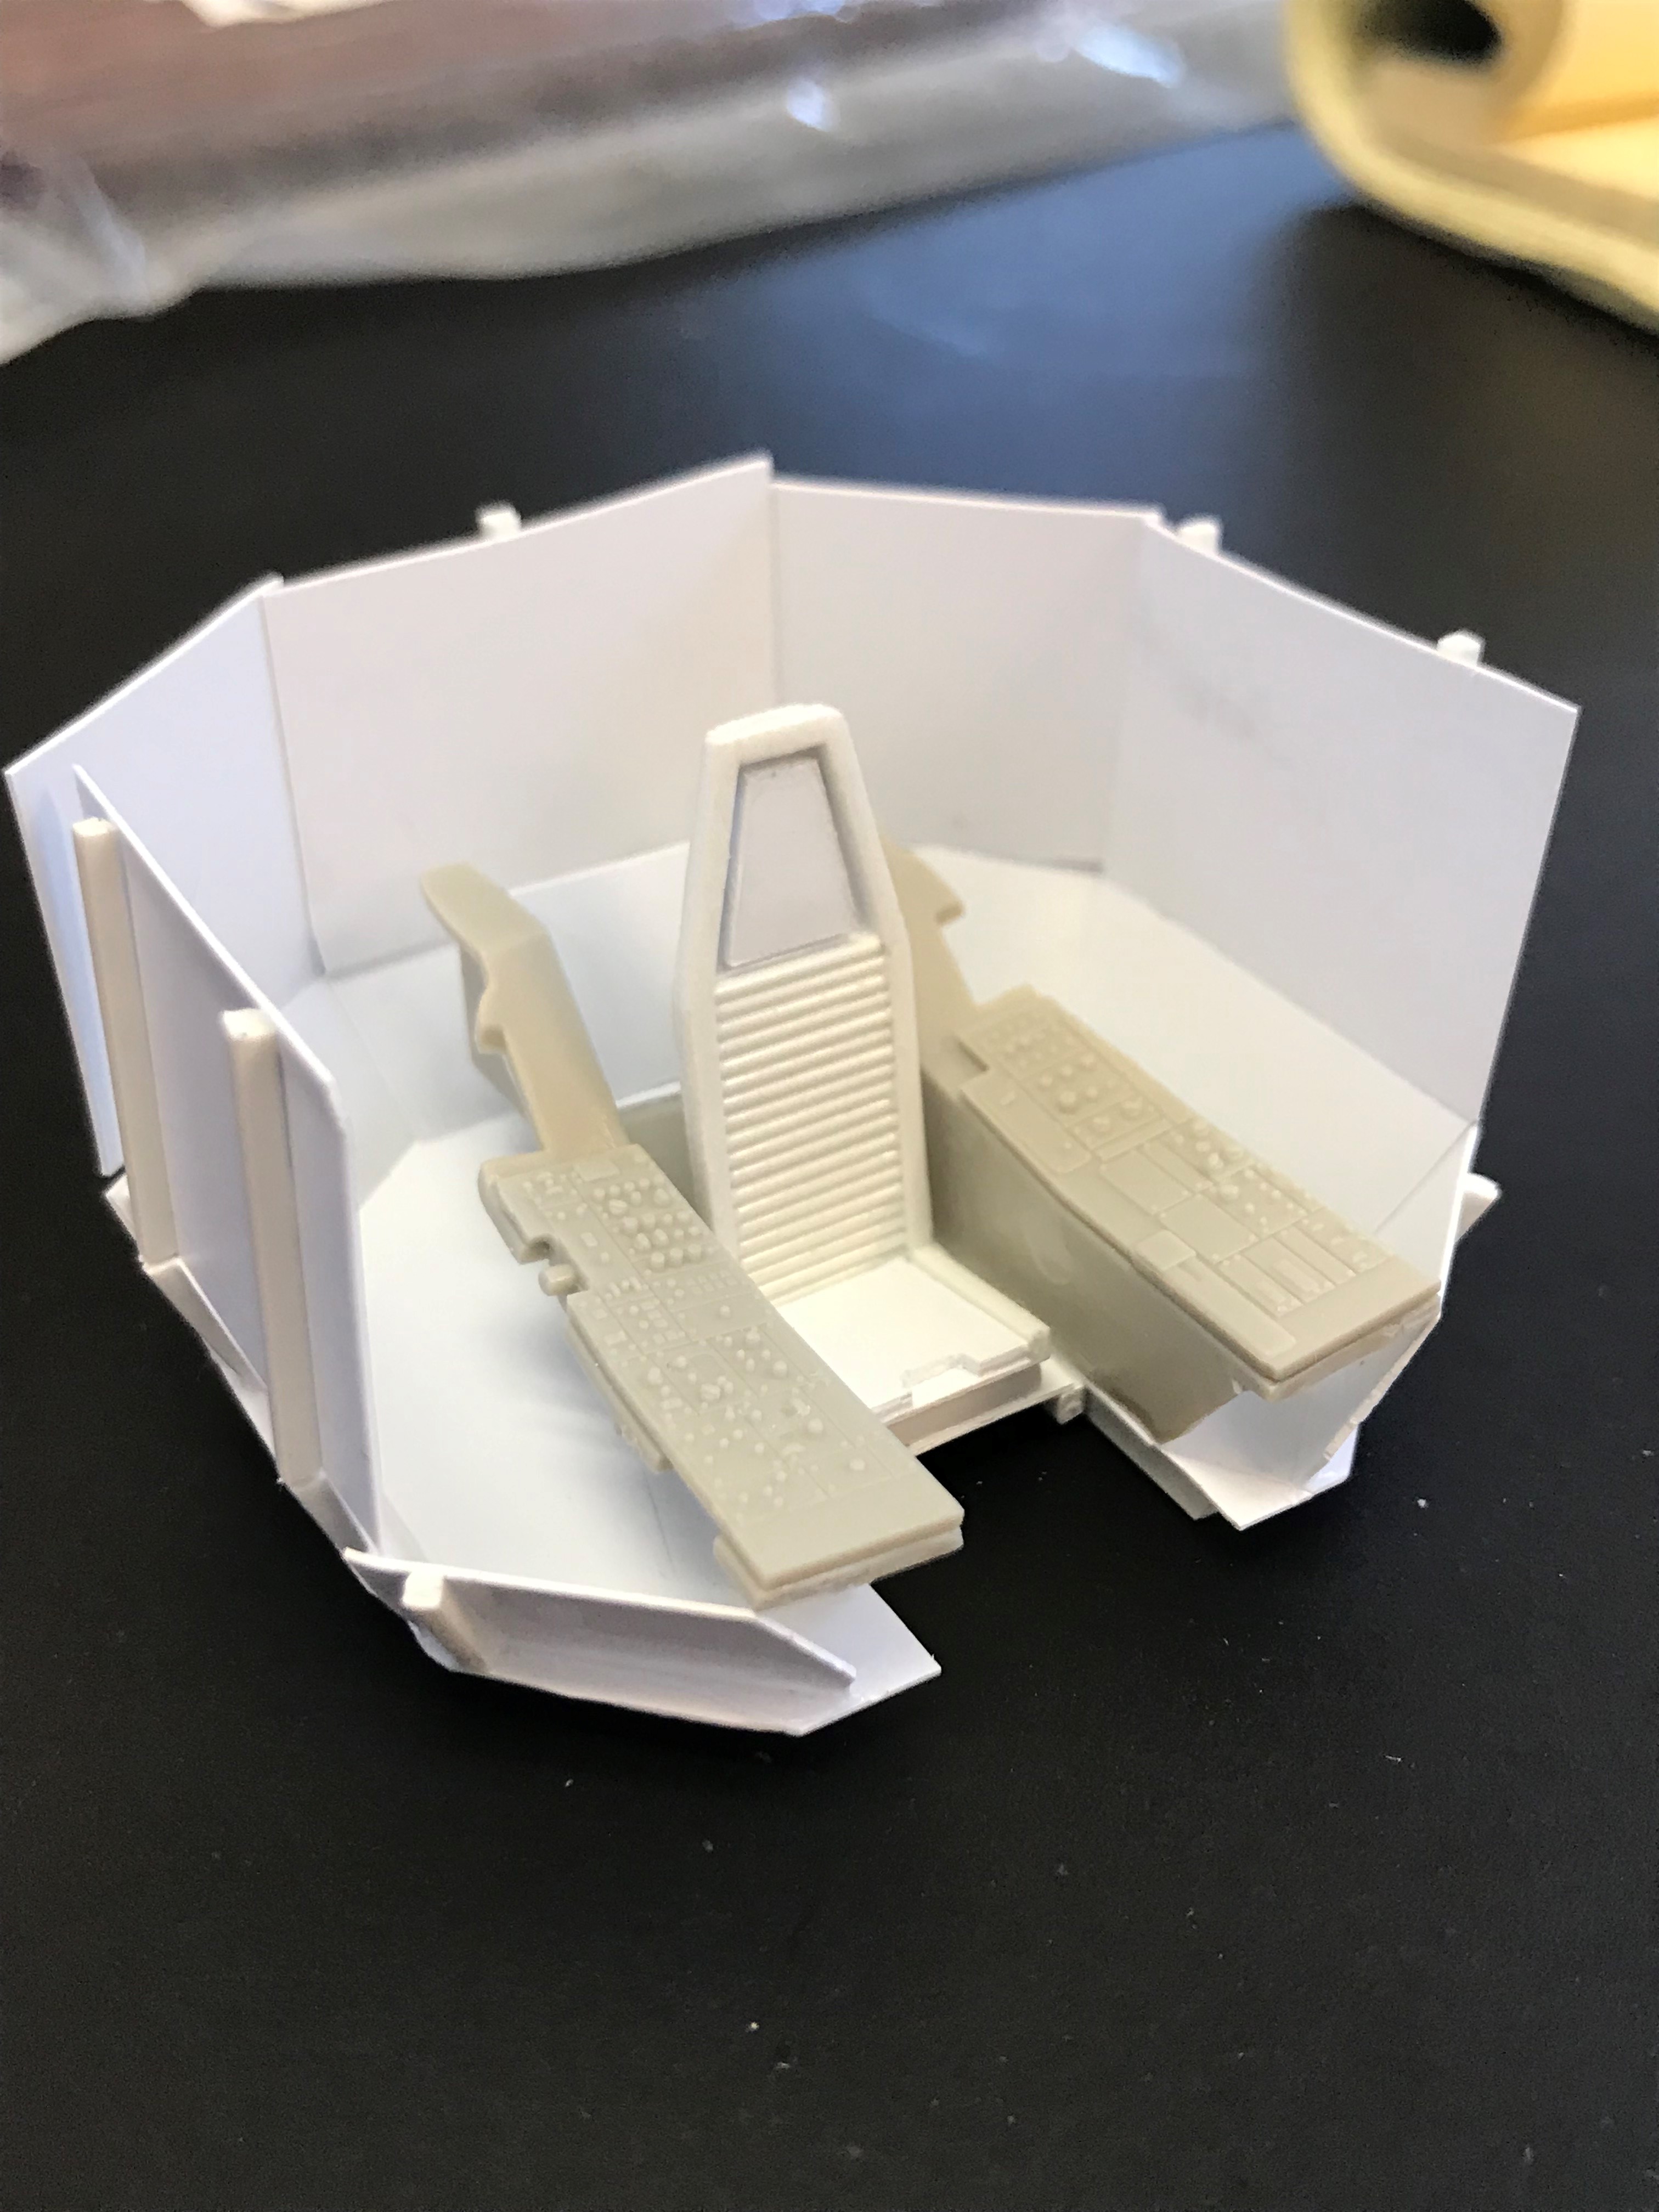
In my opinion, one of the best aspects of going with the filming set is the absence of the half-wall that obscures so much of the cockpit. With that gone, there is a much better view inside.
Simultaneously, I have been working on the photo etch for the cockpit triangle panels. I will also be using photo etch for various exterior bits. Happily, it turns out that photo etch isn't all that hard, and there are some great tutorials online. For this test panel, I designed a template in Vectr (a free vector graphics program), printed it on transfer paper with a laser printer, ironed it onto a brass sheet with a household iron, and soaked it for a few hours in a 1 to 1 mix of muriatic acid from Home Depot and hydrogen peroxide from the drug store.
I will add updates as I progress with the cockpit. Thoughts and suggestions welcome!