wii nunchuck 4 servo control

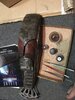
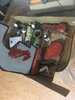
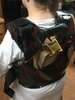
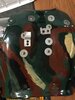
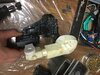
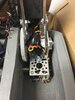
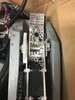
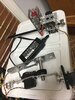
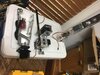
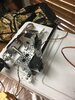
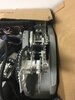
finally got sound to work. You have to pause the routine to allow enough time for any sounds to play. These products have not been used this way to my knowledge before now.

Code:
/***************************************************
  This is an example for our Adafruit 16-channel PWM & Servo driver
  Servo test - this will drive 8 servos, one after the other on the
  first 8 pins of the PCA9685

  Pick one up today in the adafruit shop!
  ------> http://www.adafruit.com/products/815
 
  These drivers use I2C to communicate, 2 pins are required to 
  interface.

  Adafruit invests time and resources providing this open source code,
  please support Adafruit and open-source hardware by purchasing
  products from Adafruit!

  Written by Limor Fried/Ladyada for Adafruit Industries. 
  BSD license, all text above must be included in any redistribution
 * Nunchuck control for four servos and two button inputs
 * Honus 2007
 * This allows the use of a Wii nunchuck as an input device and is modified/extended from the original code
 * by Tod E. Kurt and Windmeadow Labs
 *2007 Tod E. Kurt, http://todbot.com/blog/
 * Copyright 2011-2013 Gabriel Bianconi, http://www.gabrielbianconi.com/
 *
 * Project URL: http://www.gabrielbianconi.com/projects/arduinonunchuk/
 *
 * Based on the following resources:
 *   http://www.windmeadow.com/node/42
 *   http://todbot.com/blog/2008/02/18/wiichuck-wii-nunchuck-adapter-available/
 *   http://wiibrew.org/wiki/Wiimote/Extension_Controllers
 * Based on the following resources:
 *   http://www.gammon.com.au/blink
 *
 */
// www.facebook.com/ArduinoCenter
// https://blog.underc0de.org/arduino-wii-nunchuck-servo-motores/
// Original Code base credited to Undercode
// Code adapted from Sean Maio Crybabyfx setup
//https://github.com/outcry27/crybabyFX
// Updated by knoxvilles_joker 2017
// http://facebook.com/knoxvillesjoker
// more instructions documented at
// http://alienslegacy.com
 
#include "ArduinoNunchuk.h"
#include <Servo.h>
#include <Wire.h>
#include <Adafruit_PWMServoDriver.h>
#include <SPI.h>
#include <Adafruit_VS1053.h>
#include <SD.h>

// These are the pins used for the music maker shield
#define SHIELD_RESET  -1      // VS1053 reset pin (unused!)
#define SHIELD_CS     7      // VS1053 chip select pin (output)
#define SHIELD_DCS    6      // VS1053 Data/command select pin (output)
#define CARDCS 4     // Card chip select pin
#define DREQ 3       // VS1053 Data request, ideally an Interrupt pin
Adafruit_VS1053_FilePlayer musicPlayer = Adafruit_VS1053_FilePlayer(SHIELD_RESET, SHIELD_CS, SHIELD_DCS, DREQ, CARDCS);
//end servo shield declarations

// called this way, it uses the default address 0x40
Adafruit_PWMServoDriver pwm = Adafruit_PWMServoDriver();
//Creates the objects to control the servos
ArduinoNunchuk nunchuk = ArduinoNunchuk();

#define SERVOMIN  150 // this is the 'minimum' pulse length count (out of 4096)
#define SERVOMAX  550 // this is the 'maximum' pulse length count (out of 4096)
int pulseWidth1 = 0;    // Amount to pulse the servo 1
int pulseWidth2 = 0;    // Amount to pulse the servo 2
int pulseWidth3 = 0;    // Amount to pulse the servo 3
long lastPulse1;
long lastPulse2;
long lastPulse3;
int xjoystick;
int yjoystick;
int xtilt;
const int SoundPin1 = 14;
const int SoundPin2 = 150;
const int servoPin1 = 9;      // Control pin for servo motor
const int servoPin2 = 11;      // Control pin for servo motor
const int servoPin3 = 10;      // Control pin for servo motor
const int ledPin1 = 2;       // Control pin for LED 1
const byte ledPin2 = 12;       // Control pin for LED 2
const int servoPin4 = 5;      // Control pin for servo motor
int pulseWidth4 = 0;    // Amount to pulse the servo 4
long lastPulse4;
int minPulse = 150;   // minimum pulse width
int loop_cnt=0;
int ytilt;
int refreshTime = 20;  // the time in millisecs needed in between pulses

void setup() {
  Serial.begin(9600);
 Serial.println("PWM Begin"); pwm.begin(); pwm.setPWMFreq(60);
// This moves all servos to minimum positions at start.  Good if you do not want overloaded servos 
  pulseWidth1 = minPulse; pulseWidth2 = minPulse; pulseWidth3 = minPulse; pulseWidth4 = minPulse; nunchuk.init (); delay(1000);     
// This initializes the Serial interface functions 
  Serial.println("Adafruit VS1053 Library Test"); musicPlayer.begin();
  SD.begin(CARDCS); printDirectory(SD.open("/"), 0); musicPlayer.setVolume(20,20);
  musicPlayer.useInterrupt(VS1053_FILEPLAYER_TIMER0_INT);
  delay(500); musicPlayer.startPlayingFile("/t00next0.wav"); delay(1500); //PLAYS INIT SOUND
}

void loop() {
// This initializes the servo read and write functions 
    checkNunchuck1(); updateServo1(); checkNunchuck2(); updateServo2(); checkNunchuck3(); updateServo3(); checkNunchuck4(); updateServo4();   
// This checks if buttons are pressed and then turns on two separate LED elements
    if (nunchuk.zButton == 1) { musicPlayer.startPlayingFile("/T03NEXT2.WAV"); delay(1900); }
    checkzbutton(); checkcbutton();   
// This sets and reads the output from the nunchuck and stores them as floating variables 
  xjoystick = nunchuk.analogX; xjoystick = constrain(xjoystick, 26, 226); xjoystick = map(xjoystick, 26, 226, 0, 180);
  yjoystick = nunchuk.analogY; yjoystick = constrain(yjoystick, 26, 226); yjoystick = map(yjoystick, 26, 226, 180, 0);
  xtilt = nunchuk.accelX; xtilt = constrain(xtilt, 320, 720); xtilt = map(xtilt, 320, 720, 180, 0);
  ytilt = nunchuk.accelY; ytilt = constrain(ytilt, 320, 720); ytilt = map(ytilt, 320, 720, 0, 180);
// This prints the serial status of the nunchuck.
  Serial.print ("Joystick X: "); Serial.print (xjoystick, DEC); Serial.print ("\t");
  Serial.print ("Joystick Y: "); Serial.print (yjoystick, DEC); Serial.print ("\t");
  Serial.print ("X: "); Serial.print (xtilt, DEC); Serial.print ("\t");
  Serial.print ("Y: "); Serial.print (ytilt, DEC); Serial.print ("\t");
  nunchuk.update();
  if (nunchuk.cButton == 1) { Serial.print("--C--  ");  }
  if (nunchuk.zButton == 1) { Serial.print("--Z--  ");  }
  if (nunchuk.cButton == 1 && nunchuk.zButton == 1) { Serial.print("--Z-C--"); }
    Serial.print ("\r\n");
    }
// button
void checkzbutton() { if(nunchuk.zButton == 1)  { pwm.setPWM(ledPin1, 4096, 0); delay(300); pwm.setPWM(ledPin1, 0, 4096); delay(300);  delay(300); }}
void checkcbutton() { if(nunchuk.cButton == 1)  { pwm.setPWM(ledPin2, 4096, 0); delay(3000);}  else {pwm.setPWM(ledPin2, 0, 4096); delay(300);  }}
// File listing helper
void printDirectory(File dir, int numTabs) { while(true) { File entry =  dir.openNextFile(); if (! entry) { break; } for (uint8_t i=0; i<numTabs; i++) { Serial.print('\t'); } Serial.print(entry.name()); if (entry.isDirectory()) { Serial.println("/"); printDirectory(entry, numTabs+1); } else { Serial.print("\t\t"); Serial.println(entry.size(), DEC); } entry.close(); } }
// These are the functions to check and set the PWM settings for the servos   
void checkNunchuck1() { if( loop_cnt > 100 ) { float tilt = xjoystick; pulseWidth1 = map(xjoystick, 0, 180, SERVOMIN, SERVOMAX); loop_cnt = 0; } loop_cnt++; }
void updateServo1() { if (millis() - lastPulse1 >= refreshTime) { pwm.setPWM(servoPin1, 0, pulseWidth1); lastPulse1 = millis(); } }
void checkNunchuck2() { if( loop_cnt > 100 ) { float tilt = yjoystick; pulseWidth2 = map(yjoystick, 0, 180, SERVOMIN, SERVOMAX); loop_cnt = 0; } loop_cnt++; }
void updateServo2() { if (millis() - lastPulse2 >= refreshTime) { pwm.setPWM(servoPin2, 0, pulseWidth2); lastPulse2 = millis(); } }   
void checkNunchuck3() { if( loop_cnt > 100 ) { float tilt = xtilt; pulseWidth3 = map(xtilt, 0, 180, SERVOMIN, SERVOMAX); loop_cnt = 0; } loop_cnt++; }
void updateServo3() { if (millis() - lastPulse3 >= refreshTime) { pwm.setPWM(servoPin3, 0, pulseWidth3); lastPulse3 = millis(); } }
void checkNunchuck4() { if( loop_cnt > 100 ) { float tilt = ytilt; pulseWidth4 = map(ytilt, 0, 180, SERVOMIN, SERVOMAX); loop_cnt = 0; } loop_cnt++; }
void updateServo4() { if (millis() - lastPulse4 >= refreshTime) { pwm.setPWM(servoPin4, 0, pulseWidth4); lastPulse4 = millis(); } }
 
OK, I have been working on integrating this with my new cannon setup. for the hitch 785hb sail winch servo, I had to set the servo max to 230. 110 degrees of tilt rotation is the most I could dare squeeze with the new cannon setup with physical mechanical limitations. I am playing with the code to hash out responsiveness and timing. It is very close to the honus setup minus a few cosmetic issues. I have to get the facsimile look to mirror the ADI videos I found this weekend. I can get it close, but, there will be a few differences. With most of my builds I add in serious overkill so breakage does not happen that often and is easily repaired when it does the way I do my builds. I have ears on another more responsive code piece but am waiting to get hands on it.

As far as the build I try to slowly strive to get closer to a movie like look. I would note that I am cash flowing everything and there are substantial investments made in R&D part orders. Once I get everything working I will provide an exacting parts list of parts to order. Unfortunately I had to do some minor machinist work for mounting as I had to tap a few holes to make sure nothing moves.

The only boggle I have at this point is to make the rig move forward and ensure the hardware is sufficiently concealed. Now as I have no desire to sell items, I use off the shelf items with no or very little/minor modifications to ensure any average joe can do what I did. I try to take the guess work out of things and ensure that a struggle another would have would be minor at best.
 
OK, I did some more rehashing and it appears the 460 micro farad capacitor might not be beefy enough. I will upgrade to a 4700 micro farad capacitor. I think it has to do with the constant drag from the hs785hb and hs645mg servos in play being a constant draw. I also appear to be running into processing limits of the Arduino uno so I am switching to a metro m4. That is the beefiest Arduino compatible unit adafruit offers.

As far as research goes the movie units were all belt driven. This allowed the drive components to be more well hidden.

With the increased popularity of high torque servos options are opening up to do a more direct drive setup and not have to worry about torque multiplication as much.
 
Here is the latest code. It seems to be a fair bit more stable. I lowered response times down to 10ms on the loops. any lower than that and the code stops working. I will re-investigate once I get the metro m4 on hand.

C-like:
/***************************************************
  This is an example for our Adafruit 16-channel PWM & Servo driver
  Servo test - this will drive 8 servos, one after the other on the
  first 8 pins of the PCA9685

  Pick one up today in the adafruit shop!
  ------> http://www.adafruit.com/products/815
 
  These drivers use I2C to communicate, 2 pins are required to 
  interface.

  Adafruit invests time and resources providing this open source code,
  please support Adafruit and open-source hardware by purchasing
  products from Adafruit!

  Written by Limor Fried/Ladyada for Adafruit Industries. 
  BSD license, all text above must be included in any redistribution
 * Nunchuck control for four servos and two button inputs
 * Honus 2007
 * This allows the use of a Wii nunchuck as an input device and is modified/extended from the original code
 * by Tod E. Kurt and Windmeadow Labs
 *2007 Tod E. Kurt, http://todbot.com/blog/
 * Copyright 2011-2013 Gabriel Bianconi, http://www.gabrielbianconi.com/
 *
 * Project URL: http://www.gabrielbianconi.com/projects/arduinonunchuk/
 *
 * Based on the following resources:
 *   http://www.windmeadow.com/node/42
 *   http://todbot.com/blog/2008/02/18/wiichuck-wii-nunchuck-adapter-available/
 *   http://wiibrew.org/wiki/Wiimote/Extension_Controllers
 * Based on the following resources:
 *   http://www.gammon.com.au/blink
 *
 */
// www.facebook.com/ArduinoCenter
// https://blog.underc0de.org/arduino-wii-nunchuck-servo-motores/
// Original Code base credited to Undercode
// Code adapted from Sean Maio Crybabyfx setup
//https://github.com/outcry27/crybabyFX
// Updated by knoxvilles_joker 2017
// http://facebook.com/knoxvillesjoker
// more instructions documented at
// http://alienslegacy.com
 
#include "ArduinoNunchuk.h"
#include <Servo.h>
#include <Wire.h>
#include <Adafruit_PWMServoDriver.h>
#include <SPI.h>
#include <Adafruit_VS1053.h>
#include <SD.h>

// These are the pins used for the music maker shield
#define SHIELD_RESET  -1      // VS1053 reset pin (unused!)
#define SHIELD_CS     7      // VS1053 chip select pin (output)
#define SHIELD_DCS    6      // VS1053 Data/command select pin (output)
#define CARDCS 4     // Card chip select pin
#define DREQ 3       // VS1053 Data request, ideally an Interrupt pin
Adafruit_VS1053_FilePlayer musicPlayer = Adafruit_VS1053_FilePlayer(SHIELD_RESET, SHIELD_CS, SHIELD_DCS, DREQ, CARDCS);
//end servo shield declarations

// called this way, it uses the default address 0x40
Adafruit_PWMServoDriver pwm = Adafruit_PWMServoDriver();
//Creates the objects to control the servos
ArduinoNunchuk nunchuk = ArduinoNunchuk();

#define SERVOMIN  150 // this is the 'minimum' pulse length count (out of 4096)
#define SERVOMAX  530 // this is the 'maximum' pulse length count (out of 4096)
int pulseWidth1 = 0;    // Amount to pulse the servo 1
int pulseWidth2 = 0;    // Amount to pulse the servo 2
int pulseWidth3 = 0;    // Amount to pulse the servo 3
long lastPulse1;
long lastPulse2;
long lastPulse3;
int xjoystick;
int yjoystick;
int xtilt;
const int SoundPin1 = 14;
const int SoundPin2 = 150;
const int servoPin1 = 9;      // Control pin for servo motor
const int servoPin2 = 4;      // Control pin for servo motor
const int servoPin3 = 10;      // Control pin for servo motor
const int ledPin1 = 2;       // Control pin for LED 1
const byte ledPin2 = 12;       // Control pin for LED 2
const int servoPin4 = 5;      // Control pin for servo motor
int pulseWidth4 = 0;    // Amount to pulse the servo 4
long lastPulse4;
int minPulse = 150;   // minimum pulse width
int loop_cnt=0;
int ytilt;
int refreshTime = 3;  // the time in millisecs needed in between pulses

void setup() {
  Serial.begin(9600);
 Serial.println("PWM Begin"); pwm.begin(); pwm.setPWMFreq(60);
// This moves all servos to minimum positions at start.  Good if you do not want overloaded servos 
  pulseWidth1 = minPulse; pulseWidth2 = minPulse; pulseWidth3 = minPulse; pulseWidth4 = minPulse; nunchuk.init (); delay(1000);     
// This initializes the Serial interface functions 
  Serial.println("Adafruit VS1053 Library Test"); musicPlayer.begin();
  SD.begin(CARDCS);
//  printDirectory(SD.open("/"), 0);
  musicPlayer.setVolume(20,20);
  musicPlayer.useInterrupt(VS1053_FILEPLAYER_TIMER0_INT);
  delay(500); musicPlayer.startPlayingFile("/t00next0.wav"); delay(1500); //PLAYS INIT SOUND
}

void loop() {
// This initializes the servo read and write functions 
    checkNunchuck1(); updateServo1(); checkNunchuck2(); updateServo2();
    checkNunchuck3(); updateServo3();
    checkNunchuck4(); updateServo4();   
// This checks if buttons are pressed and then turns on two separate LED elements
    if (nunchuk.zButton == 1) { musicPlayer.startPlayingFile("/T03NEXT2.WAV"); delay(1900); }
    checkzbutton(); checkcbutton();   
// This sets and reads the output from the nunchuck and stores them as floating variables 
  xjoystick = nunchuk.analogX; xjoystick = constrain(xjoystick, 26, 226); xjoystick = map(xjoystick, 26, 226, 0, 180);
  yjoystick = nunchuk.analogY; yjoystick = constrain(yjoystick, 26, 226); yjoystick = map(yjoystick, 26, 226, 180, 0);
  xtilt = nunchuk.accelX; xtilt = constrain(xtilt, 320, 720); xtilt = map(xtilt, 320, 720, 180, 0);
  ytilt = nunchuk.accelY; ytilt = constrain(ytilt, 320, 720); ytilt = map(ytilt, 320, 720, 0, 180);
// This prints the serial status of the nunchuck.
  Serial.print ("Joystick X: "); Serial.print (xjoystick, DEC); Serial.print ("\t");
  Serial.print ("Joystick Y: "); Serial.print (yjoystick, DEC); Serial.print ("\t");
  Serial.print ("X: "); Serial.print (xtilt, DEC); Serial.print ("\t");
  Serial.print ("Y: "); Serial.print (ytilt, DEC); Serial.print ("\t");
  nunchuk.update();
  if (nunchuk.cButton == 1) { Serial.print("--C--  ");  }
  if (nunchuk.zButton == 1) { Serial.print("--Z--  ");  }
  if (nunchuk.cButton == 1 && nunchuk.zButton == 1) { Serial.print("--Z-C--"); }
    Serial.print ("\r\n");
    }
// button
void checkzbutton() { if(nunchuk.zButton == 1)  { pwm.setPWM(ledPin1, 4096, 0); delay(300); pwm.setPWM(ledPin1, 0, 4096); delay(300);  delay(300); }}
void checkcbutton() { if(nunchuk.cButton == 1)  { pwm.setPWM(ledPin2, 4096, 0); delay(3000);}  else {pwm.setPWM(ledPin2, 0, 4096); delay(300);  }}
// File listing helper
//void printDirectory(File dir, int numTabs) { while(true) { File entry =  dir.openNextFile(); if (! entry) { break; } for (uint8_t i=0; i<numTabs; i++) { Serial.print('\t'); } Serial.print(entry.name()); if (entry.isDirectory()) { Serial.println("/"); printDirectory(entry, numTabs+1); } else { Serial.print("\t\t"); Serial.println(entry.size(), DEC); } entry.close(); } }
// These are the functions to check and set the PWM settings for the servos   
void checkNunchuck1() { if( loop_cnt > 10 ) { float tilt = xjoystick; pulseWidth1 = map(xjoystick, 0, 180, SERVOMIN, 265); loop_cnt = 0; } loop_cnt++; }
void updateServo1() { if (millis() - lastPulse1 >= refreshTime) { pwm.setPWM(servoPin1, 0, pulseWidth1); lastPulse1 = millis(); }
//if (pulseWidth1 <= 170) {pwm.setPWM(14, 0, 130);}
if (pulseWidth1 >= 200) {pwm.setPWM(14, 0, 530);} else {pwm.setPWM(14, 0, 230);}
}

void checkNunchuck2() { if( loop_cnt > 10 ) { float tilt = yjoystick; pulseWidth2 = map(yjoystick, 0, 180, SERVOMIN, SERVOMAX); loop_cnt = 0; } loop_cnt++; }
void updateServo2() { if (millis() - lastPulse2 >= refreshTime) { pwm.setPWM(servoPin2, 0, pulseWidth2); lastPulse2 = millis(); } }   
void checkNunchuck3() { if( loop_cnt > 10 ) { float tilt = xtilt; pulseWidth3 = map(xtilt, 0, 180, SERVOMIN, SERVOMAX); loop_cnt = 0; } loop_cnt++; }
void updateServo3() { if (millis() - lastPulse3 >= refreshTime) { pwm.setPWM(servoPin3, 0, pulseWidth3); lastPulse3 = millis(); } }
void checkNunchuck4() { if( loop_cnt > 10 ) { float tilt = ytilt; pulseWidth4 = map(ytilt, 0, 180, SERVOMIN, SERVOMAX); loop_cnt = 0; } loop_cnt++; }
void updateServo4() { if (millis() - lastPulse4 >= refreshTime) { pwm.setPWM(servoPin4, 0, pulseWidth4); lastPulse4 = millis(); } }
 
OK, I did some more rehashing and it appears the 460 micro farad capacitor might not be beefy enough. I will upgrade to a 4700 micro farad capacitor. I think it has to do with the constant drag from the hs785hb and hs645mg servos in play being a constant draw. I also appear to be running into processing limits of the Arduino uno so I am switching to a metro m4. That is the beefiest Arduino compatible unit adafruit offers.

As far as research goes the movie units were all belt driven. This allowed the drive components to be more well hidden.

With the increased popularity of high torque servos options are opening up to do a more direct drive setup and not have to worry about torque multiplication as much. Coupled with more efficient 12 volt systems and compact batteries and opportunities are opened although at a higher cost.
 
OK the 4700 micro Farad capacitor really, really helps smooth things out. I am too close to fanboy at this point to do any substantial recoding or redesigns on things. The metro M0 is the newest Arduino unit that can be used with the code base. The M4 metro express is more for circuit python and is so new that half the libraries for traditional Arduino ide do not play nice with it and you have to do substantial steps to make it work with linux. I was looking at eventually switching the code over to python but that will take me a while to hash out.

I will have to do a resign on the pack to match the avp design better as it better hid the servo setup but I would have to figure out a linear actuator setup but the kicker is you have to trade off strength, travel and cost and the choices are very big depending on which way you want to go. The other is to look at possibly switching to digital servos and see how that impacts battery life in light of the cheaper cost/performance ratio offered by the gobilda 25-2 servos offered by servocity.com.
 
Latest code:

C-like:
/***************************************************
  This is an example for our Adafruit 16-channel PWM & Servo driver
  Servo test - this will drive 8 servos, one after the other on the
  first 8 pins of the PCA9685

  Pick one up today in the adafruit shop!
  ------> http://www.adafruit.com/products/815
 
  These drivers use I2C to communicate, 2 pins are required to 
  interface.

  Adafruit invests time and resources providing this open source code,
  please support Adafruit and open-source hardware by purchasing
  products from Adafruit!

  Written by Limor Fried/Ladyada for Adafruit Industries. 
  BSD license, all text above must be included in any redistribution
 * Nunchuck control for four servos and two button inputs
 * Honus 2007
 * This allows the use of a Wii nunchuck as an input device and is modified/extended from the original code
 * by Tod E. Kurt and Windmeadow Labs
 *2007 Tod E. Kurt, http://todbot.com/blog/
 * Copyright 2011-2013 Gabriel Bianconi, http://www.gabrielbianconi.com/
 *
 * Project URL: http://www.gabrielbianconi.com/projects/arduinonunchuk/
 *
 * Based on the following resources:
 *   http://www.windmeadow.com/node/42
 *   http://todbot.com/blog/2008/02/18/wiichuck-wii-nunchuck-adapter-available/
 *   http://wiibrew.org/wiki/Wiimote/Extension_Controllers
 * Based on the following resources:
 *   http://www.gammon.com.au/blink
 *
 */
// www.facebook.com/ArduinoCenter
// https://blog.underc0de.org/arduino-wii-nunchuck-servo-motores/
// Original Code base credited to Undercode
// Code adapted from Sean Maio Crybabyfx setup
//https://github.com/outcry27/crybabyFX
// Updated by knoxvilles_joker 2017
// http://facebook.com/knoxvillesjoker
// more instructions documented at
// http://alienslegacy.com
 
#include "ArduinoNunchuk.h"
#include <Servo.h>
#include <Wire.h>
#include <Adafruit_PWMServoDriver.h>
#include <SPI.h>
#include <Adafruit_VS1053.h>
#include <SD.h>

// These are the pins used for the music maker shield
#define SHIELD_RESET  -1      // VS1053 reset pin (unused!)
#define SHIELD_CS     7      // VS1053 chip select pin (output)
#define SHIELD_DCS    6      // VS1053 Data/command select pin (output)
#define CARDCS 4     // Card chip select pin
#define DREQ 3       // VS1053 Data request, ideally an Interrupt pin
Adafruit_VS1053_FilePlayer musicPlayer = Adafruit_VS1053_FilePlayer(SHIELD_RESET, SHIELD_CS, SHIELD_DCS, DREQ, CARDCS);
//end servo shield declarations

// called this way, it uses the default address 0x40
Adafruit_PWMServoDriver pwm = Adafruit_PWMServoDriver();
//Creates the objects to control the servos
ArduinoNunchuk nunchuk = ArduinoNunchuk();

#define SERVOMIN  150 // this is the 'minimum' pulse length count (out of 4096)
#define SERVOMAX  570 // this is the 'maximum' pulse length count (out of 4096)
int pulseWidth1 = 0;    // Amount to pulse the servo 1
int pulseWidth2 = 0;    // Amount to pulse the servo 2
int pulseWidth3 = 0;    // Amount to pulse the servo 3
long lastPulse1;
long lastPulse2;
long lastPulse3;
int xjoystick;
int yjoystick;
int xtilt;
//const int SoundPin1 = 14;
//const int SoundPin2 = 150;
const int servoPin1 = 9;      // Control pin for servo motor
const int servoPin2 = 5;      // Control pin for servo motor
const int servoPin3 = 4;      // Control pin for servo motor
const int ledPin1 = 2;       // Control pin for LED 1
const byte ledPin2 = 15;       // Control pin for LED 2
const int servoPin4 = 10;      // Control pin for servo motor
int pulseWidth4 = 0;    // Amount to pulse the servo 4
long lastPulse4;
int minPulse = 150;   // minimum pulse width
int loop_cnt=0;
int ytilt;
int refreshTime = 3;  // the time in millisecs needed in between pulses

void setup() {
  Serial.begin(9600);
// Serial.println("PWM Begin");
 pwm.begin(); pwm.setPWMFreq(60);
// This moves all servos to minimum positions at start.  Good if you do not want overloaded servos 
  pulseWidth1 = minPulse; pwm.setPWM(servoPin1, 0, 145);
  pulseWidth2 = minPulse; pwm.setPWM(servoPin2, 0, 530); // yjoy
  pwm.setPWM(14, 0, 530);  //second tilt servo
  pulseWidth3 = minPulse; pwm.setPWM(servoPin3, 0, pulseWidth3);
  pulseWidth4 = minPulse; pwm.setPWM(servoPin4, 0, pulseWidth4);
  delay(1000);
  nunchuk.init (); delay(1000);     
// This initializes the Serial interface functions 
//  Serial.println("Adafruit VS1053 Library Test");
  musicPlayer.begin();
  SD.begin(CARDCS);
//  printDirectory(SD.open("/"), 0);
  musicPlayer.setVolume(20,20);
  musicPlayer.useInterrupt(VS1053_FILEPLAYER_TIMER0_INT);
  delay(500); musicPlayer.startPlayingFile("/t00next0.wav"); delay(1500); //PLAYS INIT SOUND
}

void loop() {
// This initializes the servo read and write functions 
    checkNunchuck1(); updateServo1(); checkNunchuck2(); updateServo2();
    checkNunchuck3(); updateServo3();
    checkNunchuck4(); updateServo4();   
// This checks if buttons are pressed and then turns on two separate LED elements
    if (nunchuk.zButton == 1) { musicPlayer.startPlayingFile("/T03NEXT2.WAV"); delay(1900); }
    checkzbutton(); checkcbutton();   
// This sets and reads the output from the nunchuck and stores them as floating variables 
  xjoystick = nunchuk.analogX; xjoystick = constrain(xjoystick, 26, 226); xjoystick = map(xjoystick, 26, 226, 0, 180);
  yjoystick = nunchuk.analogY; yjoystick = constrain(yjoystick, 26, 226); yjoystick = map(yjoystick, 26, 226, 0, 180);
  xtilt = nunchuk.accelX; xtilt = constrain(xtilt, 320, 720); xtilt = map(xtilt, 320, 720, 180, 0);
  ytilt = nunchuk.accelY; ytilt = constrain(ytilt, 320, 720); ytilt = map(ytilt, 320, 720, 0, 180);
// This prints the serial status of the nunchuck.
//  Serial.print ("Joystick X: "); Serial.print (xjoystick, DEC); Serial.print ("\t");
//  Serial.print ("Joystick Y: "); Serial.print (yjoystick, DEC); Serial.print ("\t");
//  Serial.print ("X: "); Serial.print (xtilt, DEC); Serial.print ("\t");
//  Serial.print ("Y: "); Serial.print (ytilt, DEC); Serial.print ("\t");
  nunchuk.update();
  if (nunchuk.cButton == 1) { Serial.print("--C--  ");  }
  if (nunchuk.zButton == 1) { Serial.print("--Z--  ");  }
  if (nunchuk.cButton == 1 && nunchuk.zButton == 1) { Serial.print("--Z-C--"); }
    Serial.print ("\r\n");
    }
// button
// z is the cannon laser.  c is the head laser.
void checkzbutton() { if(nunchuk.zButton == 1)  { pwm.setPWM(ledPin2, 4096, 0); delay(2000); pwm.setPWM(ledPin1, 4096, 0); delay(300); pwm.setPWM(ledPin1, 0, 4096); pwm.setPWM(ledPin2, 0, 4096); delay(300);  delay(300); }}
void checkcbutton() { if(nunchuk.cButton == 1)  { pwm.setPWM(ledPin2, 4096, 0); delay(3000);}  else {pwm.setPWM(ledPin2, 0, 4096); delay(300);  }}
// File listing helper
//void printDirectory(File dir, int numTabs) { while(true) { File entry =  dir.openNextFile(); if (! entry) { break; } for (uint8_t i=0; i<numTabs; i++) { Serial.print('\t'); } Serial.print(entry.name()); if (entry.isDirectory()) { Serial.println("/"); printDirectory(entry, numTabs+1); } else { Serial.print("\t\t"); Serial.println(entry.size(), DEC); } entry.close(); } }
// These are the functions to check and set the PWM settings for the servos   
void checkNunchuck1() { if( loop_cnt > 8 ) { float tilt = xjoystick; pulseWidth1 = map(xjoystick, 0, 180, 145, 265); loop_cnt = 0; } loop_cnt++; }
void updateServo1() { if (millis() - lastPulse1 >= refreshTime) { pwm.setPWM(servoPin1, 0, pulseWidth1); lastPulse1 = millis(); }
//if (pulseWidth1 <= 170) {pwm.setPWM(14, 0, 130);}
if (pulseWidth1 >= 200) {pwm.setPWM(14, 0, 500);} else {pwm.setPWM(14, 0, 230);}
}

void checkNunchuck2() { if( loop_cnt > 8 ) { float tilt = yjoystick; pulseWidth2 = map(yjoystick, 0, 180, SERVOMIN, SERVOMAX); loop_cnt = 0; } loop_cnt++; }
void updateServo2() { if (millis() - lastPulse2 >= refreshTime) { pwm.setPWM(servoPin2, 0, pulseWidth2); lastPulse2 = millis(); } }   
void checkNunchuck3() { if( loop_cnt > 8 ) { float tilt = xtilt; pulseWidth3 = map(xtilt, 0, 180, SERVOMIN, SERVOMAX); loop_cnt = 0; } loop_cnt++; }
void updateServo3() { if (millis() - lastPulse3 >= refreshTime) { pwm.setPWM(servoPin3, 0, pulseWidth3); lastPulse3 = millis(); } }
void checkNunchuck4() { if( loop_cnt > 8 ) { float tilt = ytilt; pulseWidth4 = map(ytilt, 0, 180, SERVOMIN, SERVOMAX); loop_cnt = 0; } loop_cnt++; }
void updateServo4() { if (millis() - lastPulse4 >= refreshTime) { pwm.setPWM(servoPin4, 0, pulseWidth4); lastPulse4 = millis(); } }
 
The xlr8 board requires a recoding to function properly. Also note that when swapping boards out and putting stuff in split wire looms it helps to not reverse the wiring on the nunchuk. I will have to work with the manufacturer as I believe the libraries may be in conflict slightly with what I am trying to do. This is not the first time I ended up working with a developer to sort things out.
 
The build I had was a huge success and hit at fanboy. I will work on getting the gears miniaturized to some extent. I think an ABS shell will be a better option for the cannons to reduce weight on things. Guess I will be making a vacuum form table before I get a 3-d printer.

I am also going to start working on porting this code over into circuit python as there appears to be more performance benefits running things on that. The only problem with this is that that section of circuits and boards are going to deprecate or get phased out much more rapidly than on an Arduino IDE type hardware/code base. My initial searches do indicate that the boards are all supported so the simple stacking setup will be a doable option.

Once I am feeling a little more froggy if the tooth requiring a root canal in a couple weeks lets up I will do a video explaining the current setup in greater detail. I have found that folks that are great at modeling, may not be so strong in other areas. Folks that are great at electronics may not be strong in modeling or other areas. I will try to explain things as clearly as I can as the electronics setup with the code I am running is literally hookup the power, the servos, led's and away you go.
 
OK, here is a youtube video detailing a physical look and overview of things:
--note will have to redo. AI on youtube flagged something on the video.
 
Last edited:
Awesome
10406.jpg
you are brilliant! :)
 
Awesome View attachment 272936 you are brilliant! :)
Thanks. Thank Honus for the original code base that I used as a base. I merely updated using some of the latest products with minimal fabrication. I am looking at redoing part of the pack as it has some design issues regarding weight at about 60 pounds. The initial build was for absolute ruggedness and it has taken a spill or three.

And it does appear that youtube lifted the IP violation as my appeal went through. As that is all licensed stuff monetization was never my intent on those sort of videos.
 
OK, minor update. I worked with the alorium manufacturer and we identified a bug in their servo library that was completely unknown to them until now. The board currently only has options for controlling 4 servos. I need about 10 for the final end game setup I am shooting for.
I am also still looking at porting things over to circuit python.
The components are there and this would also enable a direct plug-in for a raspberry pi which has a fair bit more oomph to function. The pi can directly play the audio so that would remove the vs1053 board in that setup, but I would have to figure out a low power auto shutdown sequence trigger as well. (The raspberry pi sdcards have a chance of corruption if improperly being shut down.) The more I improve the more complications I run into.
 
Note to self when you commit a sketch to production and convention ready costumes, name it as such. I had to refresh my arduino after the battery drained and corrupted the EEPROM memory.
 
I have updated the setup and am switching over to a raspberry pi based control system. Three months of tinkering. no more delay on response that I am seeing.


Some reference pictures as i prototype the new build.
 

Attachments

  • 5CC8B1C0-7E61-4C54-8C0B-C3BD8E603558.jpeg
    5CC8B1C0-7E61-4C54-8C0B-C3BD8E603558.jpeg
    1.8 MB · Views: 166
  • 3C9641DB-4474-4116-8C79-8EAF722A6451.jpeg
    3C9641DB-4474-4116-8C79-8EAF722A6451.jpeg
    1.5 MB · Views: 169
  • 709C2B1A-24E4-4FAA-A2F7-06903336B618.jpeg
    709C2B1A-24E4-4FAA-A2F7-06903336B618.jpeg
    1,002.2 KB · Views: 177
  • E845BFA1-8ADA-40A9-9301-DE5607AF2908.jpeg
    E845BFA1-8ADA-40A9-9301-DE5607AF2908.jpeg
    1.6 MB · Views: 161
  • 25899787-06CA-4407-9FEB-E8E22C5C82A4.jpeg
    25899787-06CA-4407-9FEB-E8E22C5C82A4.jpeg
    2 MB · Views: 149
  • 18B5DFD6-0C46-4C93-AE96-EAC0868F76F9.jpeg
    18B5DFD6-0C46-4C93-AE96-EAC0868F76F9.jpeg
    1.9 MB · Views: 154
  • 1D0A718D-95B2-40D5-A2A8-340D70667A78.jpeg
    1D0A718D-95B2-40D5-A2A8-340D70667A78.jpeg
    592.4 KB · Views: 156
  • B62FA221-5346-40AF-8F67-18B3887E8A83.jpeg
    B62FA221-5346-40AF-8F67-18B3887E8A83.jpeg
    1.6 MB · Views: 162
  • 094EA32E-07B6-47C9-8D16-77610E9297D5.jpeg
    094EA32E-07B6-47C9-8D16-77610E9297D5.jpeg
    1.6 MB · Views: 156
  • 84F69ED1-3738-416E-865F-B67838ED7174.jpeg
    84F69ED1-3738-416E-865F-B67838ED7174.jpeg
    1.4 MB · Views: 153
  • 2AD581EA-8BF1-4B31-BA6A-D2A2EC946E4D.jpeg
    2AD581EA-8BF1-4B31-BA6A-D2A2EC946E4D.jpeg
    1.4 MB · Views: 161
  • 97BF2763-68E8-4EEE-B71D-7EC0D9258AA8.jpeg
    97BF2763-68E8-4EEE-B71D-7EC0D9258AA8.jpeg
    1.5 MB · Views: 152
  • B8F690FB-8F2D-41F1-8920-2CBA757CC2A9.jpeg
    B8F690FB-8F2D-41F1-8920-2CBA757CC2A9.jpeg
    1.4 MB · Views: 171
  • 9DA56658-FE3F-47BA-8A6D-526C199F8BF0.jpeg
    9DA56658-FE3F-47BA-8A6D-526C199F8BF0.jpeg
    1.4 MB · Views: 149
This thread is more than 3 years old.

Your message may be considered spam for the following reasons:

  1. This thread hasn't been active in some time. A new post in this thread might not contribute constructively to this discussion after so long.
If you wish to reply despite these issues, check the box below before replying.
Be aware that malicious compliance may result in more severe penalties.
Back
Top