Thank you, sir!Looks wicked!
You are using an out of date browser. It may not display this or other websites correctly.
You should upgrade or use an alternative browser.
You should upgrade or use an alternative browser.
What’s on Your Workbench? (Star Wars items only)
- Thread starter Jimbo890
- Start date
CAD work done. Now onto breathing some life into it. This is where the fun begins!

I finally finished my Jawa Blaster (I have no idea what the make / model is, in-universe):


Darthmagpie
Sr Member
I see that you did the discoloration on the lower tube of your DV6. I was going to do that on mine but couldn't find epoxy that dried amber, dam manufacturing improvements, lol. What was your method?Two builds,
one is all about making things as bad as you can
View attachment 1941335
The other one is a completely different story
View attachment 1941337
Benjo
Well-Known Member
Gently sanding the lower tube to partialy reveal the brass underneath the chromeI see that you did the discoloration on the lower tube of your DV6. I was going to do that on mine but couldn't find epoxy that dried amber, dam manufacturing improvements, lol. What was your method?
") .
.I don't subscribe to this yellowish dried epoxy theory. To me they likely sanded the lower tube at one point to get rid of glue residue or so, in order to glue back T tracks right after.
Darthmagpie
Sr Member
Well you maybe right about that. The results speak for themselves. Thank you for sharing.Gently sanding the lower tube to partialy reveal the brass underneath the chrome
I don't subscribe to this yellowish dried epoxy theory. To me they likely sanded the lower tube at one point to get rid of glue residue or so, in order to glue back T tracks right after.
I finished another X-Wing Dashboard Graflex in ANH colors…but cheated a bit on this one.
The base flash is one of the rarer, black military Graflex flashes (which may be what the original was).
It’s a very cool looking variant:


A quick plug for the decal sets sold by TatooineMachine …they are awesome!

 www.therpf.com
The base flash is one of the rarer, black military Graflex flashes (which may be what the original was).
It’s a very cool looking variant:
A quick plug for the decal sets sold by TatooineMachine …they are awesome!
Unlimited Run - Graflite X Wing Cockpit Decal Set
UNLIMITED RUN - Decal Kit for X Wing Cockpit Graflite prop With the help & nod of approval from Kurtyboy, these are available! Just add a three cell Graflite #2773 and satin black paint! $15.00 shipped USPS First Class Mail
www.therpf.com
Last edited:
Mara Jade's Father
Master Member
I finished another X-Wing Dashboard Graflex in ANH colors…but cheated a bit on this one.
The base flash is one of the rarer, black military Graflex flashes (which may be what the original was).
It’s a very cool looking variant:
View attachment 1942010View attachment 1942011View attachment 1942012View attachment 1942013
A quick plug for the decal sets sold by TatooineMachine …they are awesome!
Unlimited Run - Graflite X Wing Cockpit Decal Set
UNLIMITED RUN - Decal Kit for X Wing Cockpit Graflite prop With the help & nod of approval from Kurtyboy, these are available! Just add a three cell Graflite #2773 and satin black paint! $15.00 shipped USPS First Class Mail
I saw this hilt display on Etsy and thought it would be great for this item.
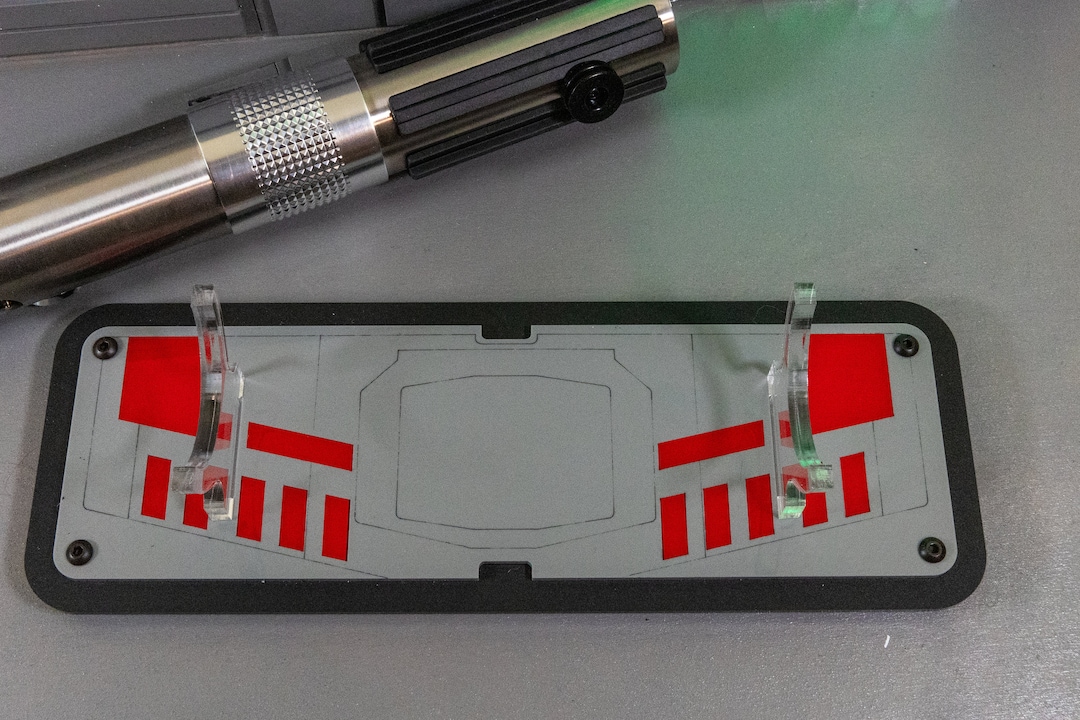
Hilt Lightsaber Display Stand Red 5 Saber Stand. Inspired by Our Favorite Ship From a Far Far Away Galaxy. - Etsy
This Displays item by TylerMakes has 9 favorites from Etsy shoppers. Ships from Sammamish, WA. Listed on Jun 3, 2025
 www.etsy.com
1/48 Red Jammer

I saw this hilt display on Etsy and thought it would be great for this item.
Hilt Lightsaber Display Stand Red 5 Saber Stand. Inspired by Our Favorite Ship From a Far Far Away Galaxy. - Etsy
This Displays item by TylerMakes has 9 favorites from Etsy shoppers. Ships from Sammamish, WA. Listed on Jun 3, 2025
Great idea!
Impressive!!
Working on the Studio scale ROTJ AT-ST.
but I realized it is too big, so I have to start over :/
View attachment 1942149
I just got a resin printer and saw a file for an AT-ST, but I was wondering how to do the legs. I would think that it would need a support under the body because resin usually sags under weight.
xeno
Sr Member
I just got a resin printer and saw a file for an AT-ST, but I was wondering how to do the legs. I would think that it would need a support under the body because resin usually sags under weight.
If you are going for the Studio scale likeness, then a rod up the backside is ok, as the ILM model also has it.
I will use a very sturdy resin type, and try to add a metal rod system inside the legs.
As XENO said inserting a metal rod, when you come to splicing your STL files is the perfect option and there should be a drop down option in your settings to add voids/spru holes which you can tinker with pre print.I just got a resin printer and saw a file for an AT-ST, but I was wondering how to do the legs. I would think that it would need a support under the body because resin usually sags under weight.
Similar threads
- Replies
- 0
- Views
- 117
- Replies
- 0
- Views
- 118
- Replies
- 1
- Views
- 572