What’s on Your Workbench? (Star Wars items only)

Waiting on the fasteners to arrive. I am not looking forward to this build. I foresee a lot of issues.

View attachment 1915048

I went ahead and finally assembled this.

Next step is to put on a layer of epoxy filler, then prime, then paint, detail, weather.

IMG_0787.jpeg
 
Seagull Knob Is Complete.
Just finished painting/weathering the knob itself. Assembled it together, time to put it on the Macros
 

Attachments

  • IMG_8962.jpeg
    IMG_8962.jpeg
    4 MB · Views: 40
  • IMG_8963.jpeg
    IMG_8963.jpeg
    4.4 MB · Views: 46
  • IMG_8965.jpeg
    IMG_8965.jpeg
    1.3 MB · Views: 39
Just finished a real Margolin-based DDC Defender Leia blaster, which is now displayed in my curio cabinet.

IMG_2177.jpg


IMG_2174.JPG


And my collection of parts for a ROTJ build. I'm still looking for an accurate rear flared Margolin slide for the ANH version. But with a screen accurate spare ROTJ barrel/sight assembly, I could easily swap the barrel, takedown block, and greeblies to configure two faithful Leia blasters.

IMG_2184.JPG
 
Last edited:
A bit of progress on the ANH helmet, its has a nice weight to it and seems pretty rigid.


Four pieces become one.

1000120912.jpg

(Goggles are a temporary puck to make the goggles when the perspex arrives)
I want to make goggles slide up into helmet but also look nice and tidy so working on a hidden channel guide.

I also printed the data pad for the Flightsuit sleeve and a Mike tip and All important hose connector.

1000120945.jpg
 
And Off The Workbench.

Luke Skywalkers Macrobinoculars From ANH

Utilizing Found Parts
 

Attachments

  • IMG_9071.jpeg
    IMG_9071.jpeg
    3.3 MB · Views: 36
  • IMG_9070.jpeg
    IMG_9070.jpeg
    1.9 MB · Views: 36
  • IMG_9064.jpeg
    IMG_9064.jpeg
    1.5 MB · Views: 38
  • IMG_9063.jpeg
    IMG_9063.jpeg
    1.5 MB · Views: 31
  • IMG_9062.jpeg
    IMG_9062.jpeg
    1.5 MB · Views: 33
  • IMG_9061.jpeg
    IMG_9061.jpeg
    1.7 MB · Views: 32
  • IMG_9058.jpeg
    IMG_9058.jpeg
    1.7 MB · Views: 33
And Some Roman Prop MPPs

Both ESB. Post/Current Day and Production/Clean Versions.
 

Attachments

  • IMG_9051.jpeg
    IMG_9051.jpeg
    1.7 MB · Views: 50
  • IMG_9050.jpeg
    IMG_9050.jpeg
    1.8 MB · Views: 52
  • IMG_9048.jpeg
    IMG_9048.jpeg
    2 MB · Views: 51
  • IMG_9047.jpeg
    IMG_9047.jpeg
    1.8 MB · Views: 51
  • IMG_9044.jpeg
    IMG_9044.jpeg
    1.7 MB · Views: 45
  • IMG_9041.jpeg
    IMG_9041.jpeg
    1.6 MB · Views: 39
  • IMG_9043.jpeg
    IMG_9043.jpeg
    1.7 MB · Views: 38
  • IMG_9053.jpeg
    IMG_9053.jpeg
    1.8 MB · Views: 44
  • IMG_9054.jpeg
    IMG_9054.jpeg
    2 MB · Views: 35
  • IMG_9056.jpeg
    IMG_9056.jpeg
    1.5 MB · Views: 55
Think this is done and coming of the workbench. First time doing anything like this, mostly stick to mechanical. Printed on my A1, removed the layer lines the best I could without overly spoiling the texture and sculpture. Went for how he was walking onto the tantive after going nuts with his saber. Eyes flowing with the darkside, loosing the pigment in his skin, eye sockets starting to darkening, and scars less than fresh. Did a base of a standard tone, added skin variation and reds, then went over the whole thing with a lighter skin tone and finally the reds, pinks and blacks. I'm not unhappy with it but wish I had the skill for more realism. Anyway, thanks for looking. Ben
1749681113513.jpeg
1749681159165.jpeg

1749681220360.jpeg
1749681259122.jpeg

1749681305090.jpeg
 
Think this is done and coming of the workbench. First time doing anything like this, mostly stick to mechanical. Printed on my A1, removed the layer lines the best I could without overly spoiling the texture and sculpture. Went for how he was walking onto the tantive after going nuts with his saber. Eyes flowing with the darkside, loosing the pigment in his skin, eye sockets starting to darkening, and scars less than fresh. Did a base of a standard tone, added skin variation and reds, then went over the whole thing with a lighter skin tone and finally the reds, pinks and blacks. I'm not unhappy with it but wish I had the skill for more realism. Anyway, thanks for looking. Ben
View attachment 1940641View attachment 1940642
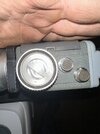
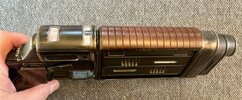
View attachment 1940643View attachment 1940644
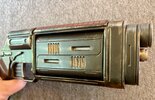
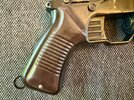
View attachment 1940645
Those eyes!!! Wicked!
 
Finished!

IMG_0172.jpeg


Well…sort of…

IMG_0177.png


I’ve got to create a lightbox for it.

I may be too lazy for that task and may pass this on to someone else, in the Junkyard. This was more trouble than my photos show with layers upon layers of caked on paint that I had to remove from the Cougthrie light part, in addition to the weathering applied.
 
Last edited:
Back
Top