Coz
Sr Member
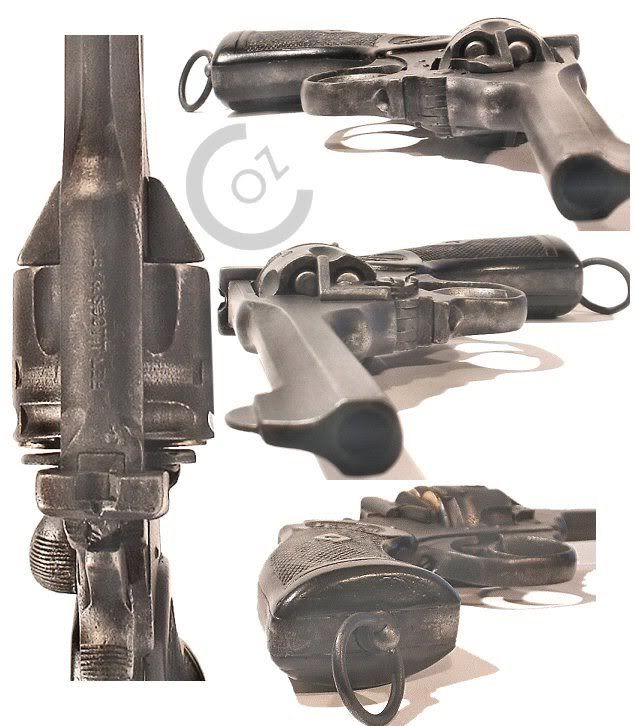
Snagged a resin cast of a Webley Mark IV pistol from KarlUK, a fellow Brit on the Blaster Builder Club forum.
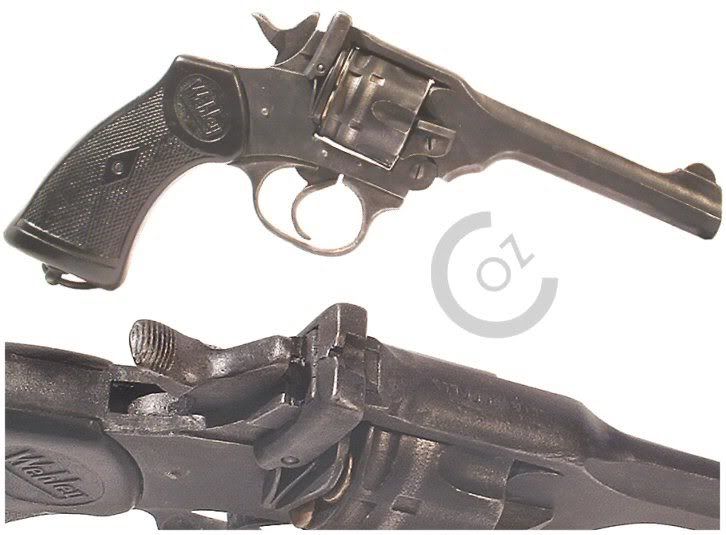
A really cool one-piece casting, in black with very few bubbles and minimal cleanup.
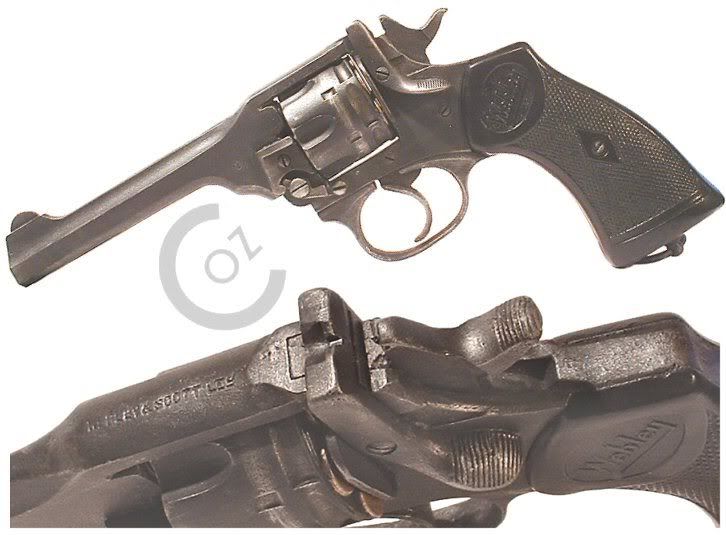
Well, being me, I couldn't help but want to see daylight around the cylinder and add visible bullets.
Also wanted a lanyard ring that would turn (comes molded solid).
After a lot of drilling and hacking (okay, not much drilling, but a heck of a lot of awkward sawing.), the cylinder was free and I could start adding the bullet details.
Rather than risk screwing up the cylinder completely by drilling all the way through it (a viable option to someone with a drillpress), I just drilled about 10mm deep, trying to keep the holes in the proper places.
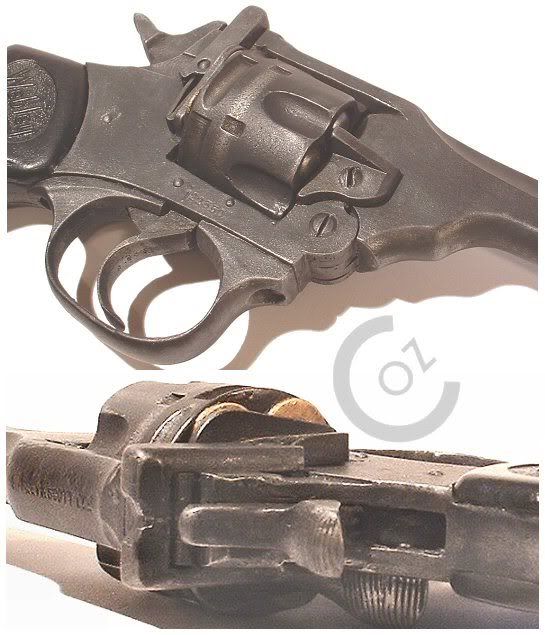
Once drilled, I pushed in six wood beads, flattened off where the beads were slightly proud, and filled the holes in them.
On the top, I used washers roughly equal in size to the casing of a .38.
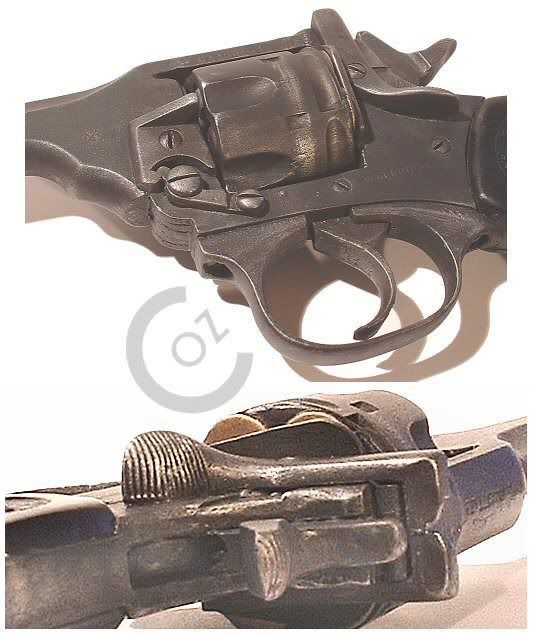
A little repair work, and the cylinder fitted nicely (added a couple of thin washers to take up the clearance).
I'd thought ahead, before removing the cylinder, to drill a hole through the bottom of the hammer into the centre of the cylinder, hoping it would be close enough to have the cylinder be able to spin - but that didn't pan out.
Instead, I tool a long, narrow bolt, cut off the head and ground in a screwdriver slot with my Dremel.
This screwed into place nice and tight, and easily hides away beneath the hammer (I left the hole unfilled, in case of any problems later).
I then worked on the Lanyard ring. A fabric shop yielded a curtain ring of appropriate size, and I visited a hardware shop, on the lookout for a sink chain bolt (or stay), which I knew was very similar to the Webley lanyard mount.
No luck, so I had to carve down a plastic bolt to the right shape.
Cordless drill + plastic bolt + needle files = low rent lathe.
To have the mount turn, I first shaved off the thread, cut a slot all around the shank of the bolt, about 10mm from the base of the round top.
I drilled a hole in the bottom of the grip section just slightly larger than the now thread-less bolt.
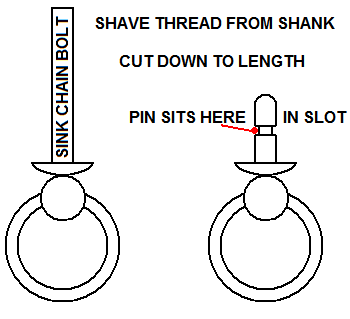
Now came the tricky part- using the slot in the bolt as a guide, I drilled a small hole 10mm from the base of the grip. I inserted a thin headless nail, and it lined up with the bolt and held it in place.
You can even hang the gun from it (tho maybe two nails rather than one).
The pistol was filled, cleaned and primered (I sprayed all three parts seperately), then I sprayed the grip section satin black.
Once the paint dried, I masked off the grips, then sprayed a coat of black barbacue paint. I like the finish this has, and it's quite resiliant.
The following day, I took a soft clothes brush, and buffed the surface to remove excess spray 'dust', and to add a little sheen to the paint.
I picked out the Bullet casing in gold acrylic, and the tips in gunmetal (Citadel paints).
I used more gunmetal with the dry-brushing method to weather the edges, and copied wear patterns from photos of real MkIVs.
A small amount of ink (both back and brown) was used to give a little difference in shade and finish to the top-break lever spring etc, and to add a little grime behind the trigger and hammer.
I re-assembled the parts, and I was quite surprised that I hadn't screwed up a perfectly good casting.
It was also a great trial run before painting the Bladerunner blaster.
Let me know what you think.
Coz.

A really cool one-piece casting, in black with very few bubbles and minimal cleanup.

Well, being me, I couldn't help but want to see daylight around the cylinder and add visible bullets.
Also wanted a lanyard ring that would turn (comes molded solid).
After a lot of drilling and hacking (okay, not much drilling, but a heck of a lot of awkward sawing.), the cylinder was free and I could start adding the bullet details.
Rather than risk screwing up the cylinder completely by drilling all the way through it (a viable option to someone with a drillpress), I just drilled about 10mm deep, trying to keep the holes in the proper places.

Once drilled, I pushed in six wood beads, flattened off where the beads were slightly proud, and filled the holes in them.
On the top, I used washers roughly equal in size to the casing of a .38.

A little repair work, and the cylinder fitted nicely (added a couple of thin washers to take up the clearance).
I'd thought ahead, before removing the cylinder, to drill a hole through the bottom of the hammer into the centre of the cylinder, hoping it would be close enough to have the cylinder be able to spin - but that didn't pan out.
Instead, I tool a long, narrow bolt, cut off the head and ground in a screwdriver slot with my Dremel.
This screwed into place nice and tight, and easily hides away beneath the hammer (I left the hole unfilled, in case of any problems later).
I then worked on the Lanyard ring. A fabric shop yielded a curtain ring of appropriate size, and I visited a hardware shop, on the lookout for a sink chain bolt (or stay), which I knew was very similar to the Webley lanyard mount.
No luck, so I had to carve down a plastic bolt to the right shape.
Cordless drill + plastic bolt + needle files = low rent lathe.

To have the mount turn, I first shaved off the thread, cut a slot all around the shank of the bolt, about 10mm from the base of the round top.
I drilled a hole in the bottom of the grip section just slightly larger than the now thread-less bolt.

Now came the tricky part- using the slot in the bolt as a guide, I drilled a small hole 10mm from the base of the grip. I inserted a thin headless nail, and it lined up with the bolt and held it in place.
You can even hang the gun from it (tho maybe two nails rather than one).
The pistol was filled, cleaned and primered (I sprayed all three parts seperately), then I sprayed the grip section satin black.
Once the paint dried, I masked off the grips, then sprayed a coat of black barbacue paint. I like the finish this has, and it's quite resiliant.
The following day, I took a soft clothes brush, and buffed the surface to remove excess spray 'dust', and to add a little sheen to the paint.
I picked out the Bullet casing in gold acrylic, and the tips in gunmetal (Citadel paints).
I used more gunmetal with the dry-brushing method to weather the edges, and copied wear patterns from photos of real MkIVs.
A small amount of ink (both back and brown) was used to give a little difference in shade and finish to the top-break lever spring etc, and to add a little grime behind the trigger and hammer.
I re-assembled the parts, and I was quite surprised that I hadn't screwed up a perfectly good casting.
It was also a great trial run before painting the Bladerunner blaster.
Let me know what you think.
Coz.
