You are using an out of date browser. It may not display this or other websites correctly.
You should upgrade or use an alternative browser.
You should upgrade or use an alternative browser.
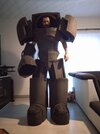
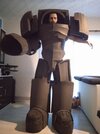
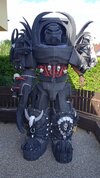
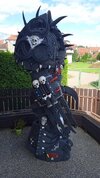
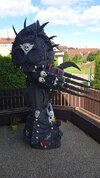
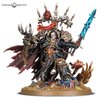
warhammer 40k Terminator possessed
- Thread starter honza1976
- Start date
honza1976
Active Member
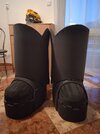
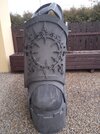
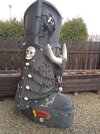
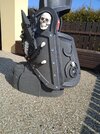
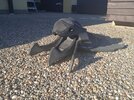
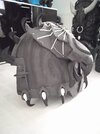
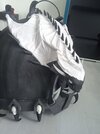
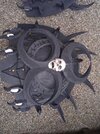
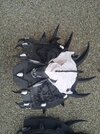
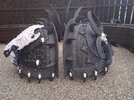
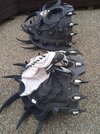
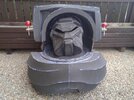
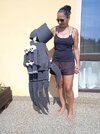
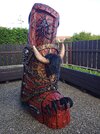
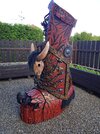
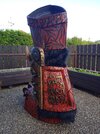
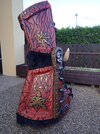
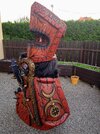
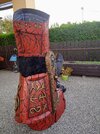
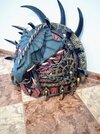
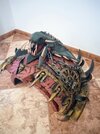
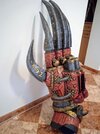
we start with boots
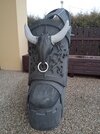
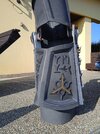
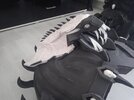
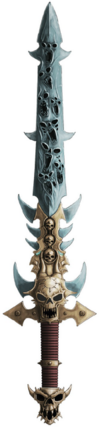
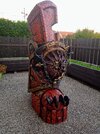
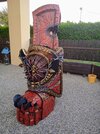
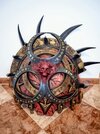
star of chaos with a bison skull
star of chaos with a bison skull
Attachments

AdeptMechanicus
Active Member
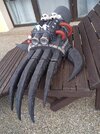
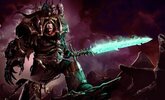
Looks great! If you have extra scrap foam to experiment with, I would try some translucent colors. What is the actual color of the blade in the lore? Try that color (looks to be like ice blue). Myself, I would stay near the edges with the paint and let the LED's do the talking. You can still make designs along the edge
honza1976
Active Member
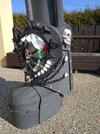
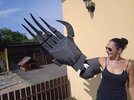
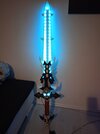
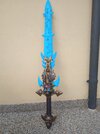
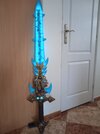
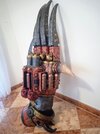
made of LED EVA FOAM.
color is turquoise blue.
I'll ask at our store if they can get her.
There are souls in the blade.to burn with solder?
color is turquoise blue.
I'll ask at our store if they can get her.
There are souls in the blade.to burn with solder?
Attachments
AdeptMechanicus
Active Member
I would try the paint on scrap, it might turn out better than you think. You'll get the glow through the skulls and it might show through with some cool effects. And I would burn the skulls in with the iron like you say but have a light touch as you may burn though the foam. Again, I would practice on the scrap. I also thought about another way . Get some single layer cardboard or card stock that's paintable and airbrush your designs on and glue to each side. You can leave the holes in the skulloiyhd and eyes open and even cut some whispy designs in to show more light through. That you don't have to worry about burning through the foam. Would add some stiffness to the blade also
Last edited:
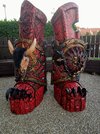
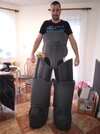
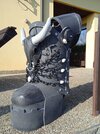
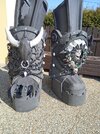
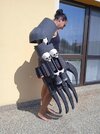
 Those boots are going on yourselfs?
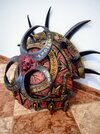

Similar threads
- Replies
- 2
- Views
- 1,095
- Replies
- 10
- Views
- 1,053
- Replies
- 3
- Views
- 446
- Replies
- 18
- Views
- 3,931