USS Columbia

Shaw

Well-Known Member
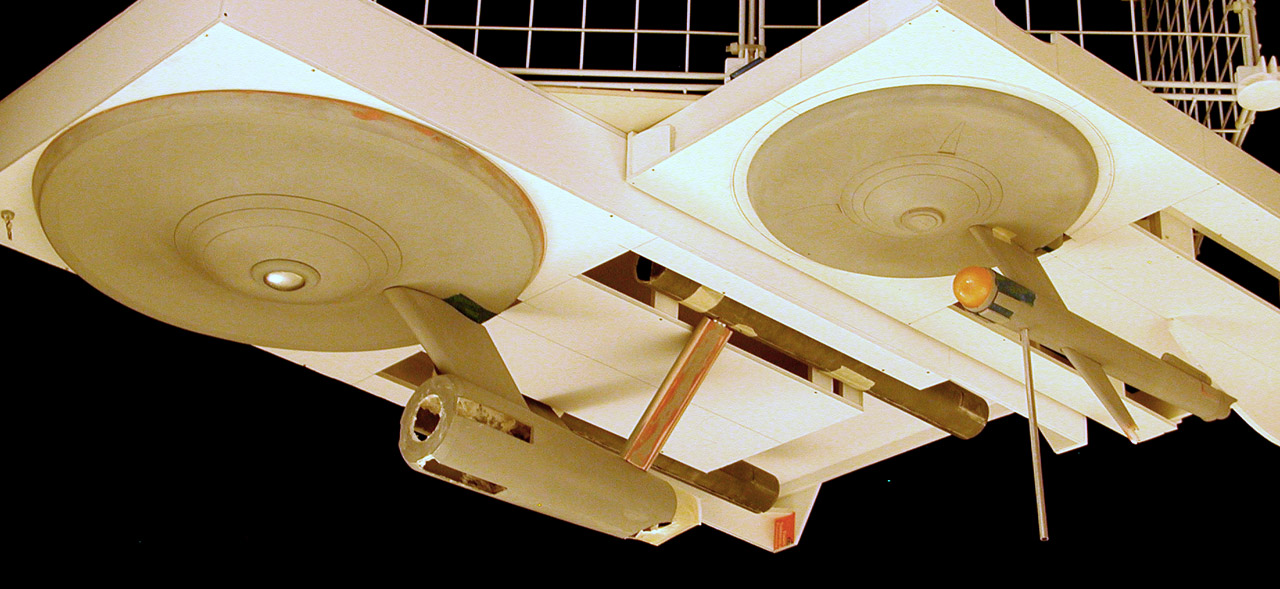
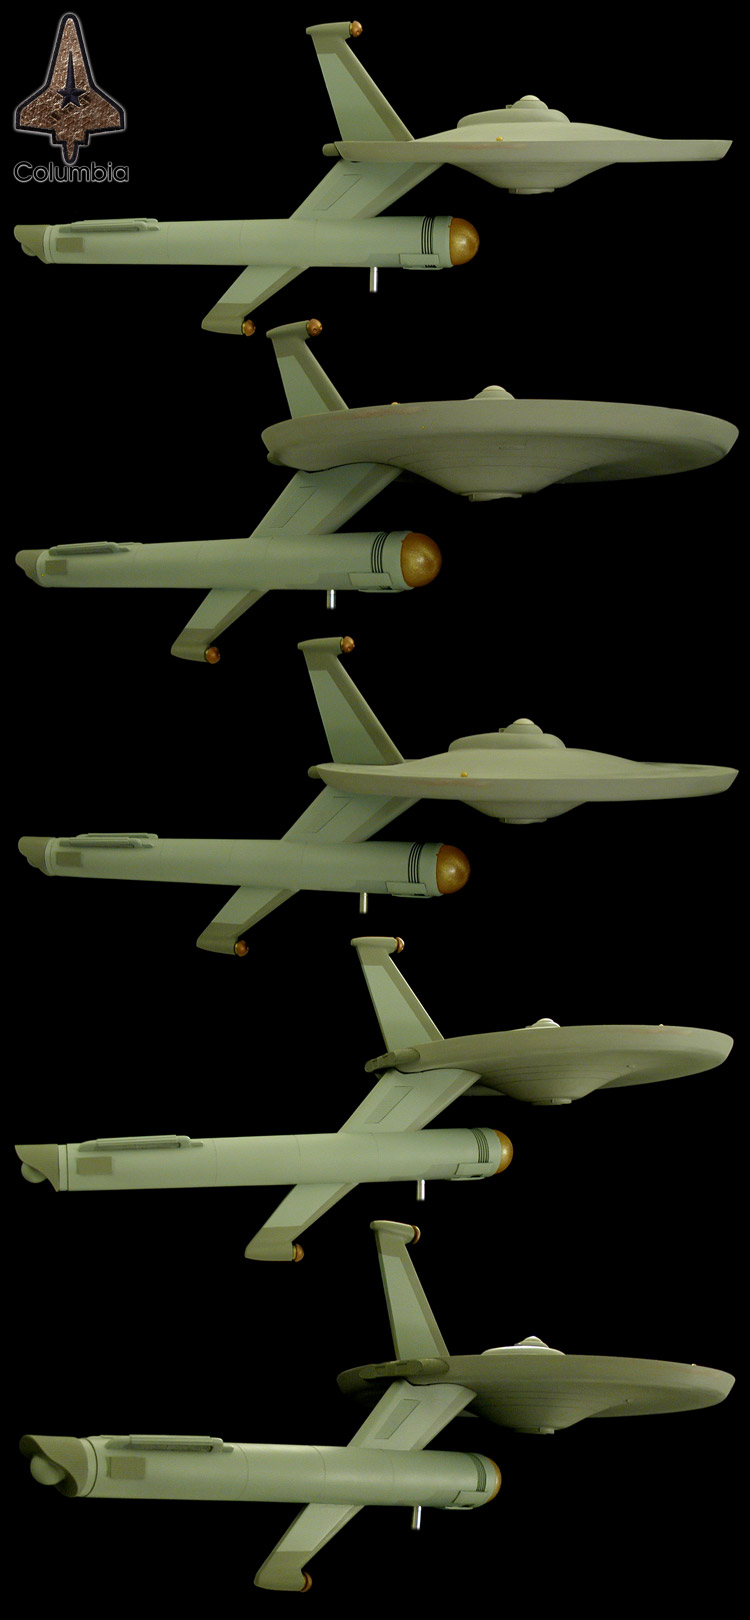
This is a small project inspired by a model by one of my favorite artists. This is a low pressure build based on an idea I'd been kicking around for quite some time.

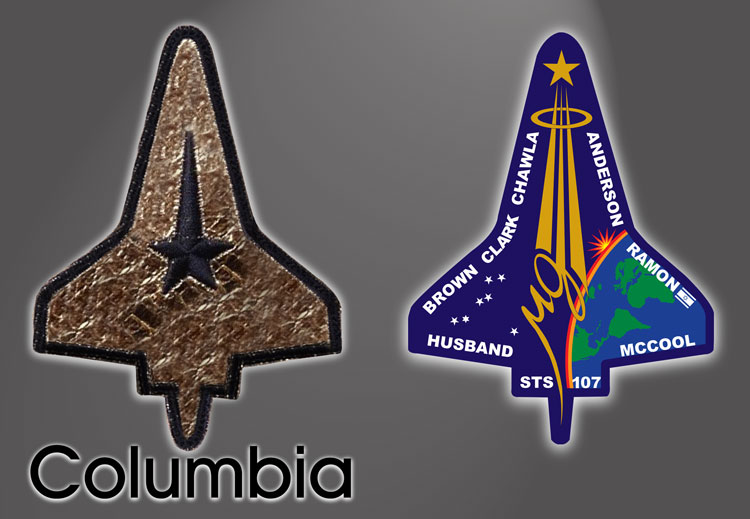
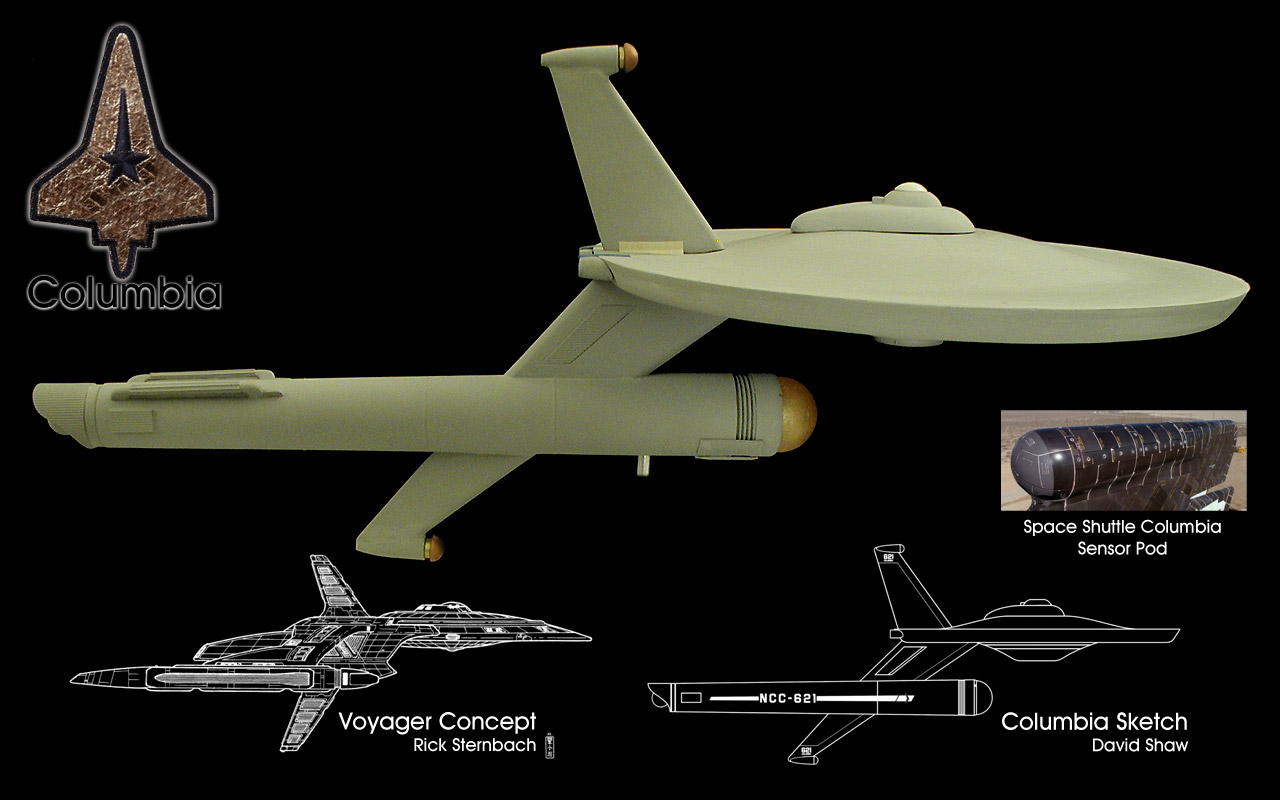
The design is a modified TOS era Starfleet scout. I've included sensor masts with sensor assembly pods which (when done) should feel a bit like the sensor pod on the tail fin of the space shuttle Columbia.

The model will be totally scratch... no third party or kit parts will be harmed in the making of this model. It is at 1/500th scale, the same scale as my Phase II Enterprise study model.

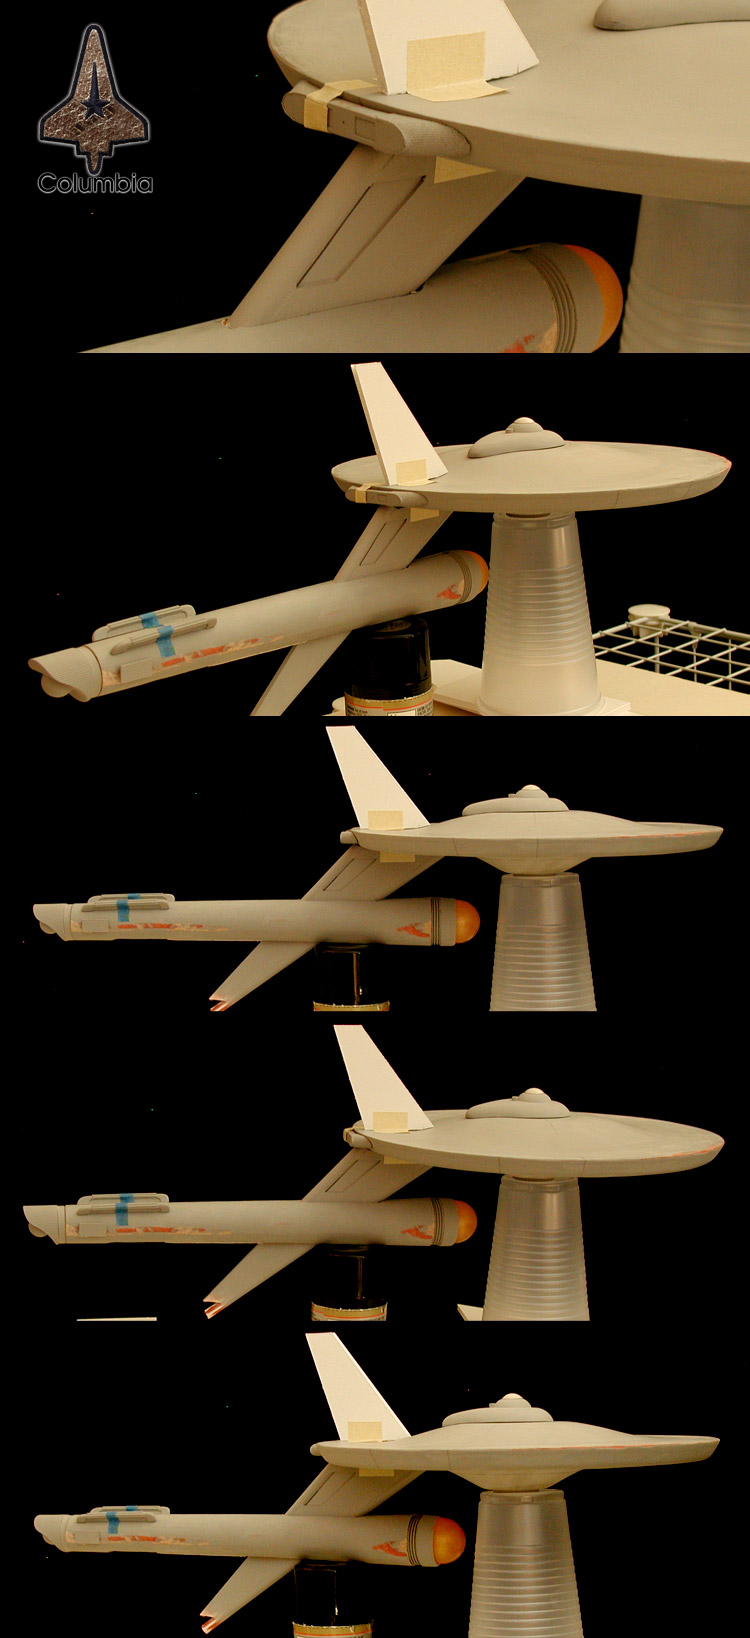
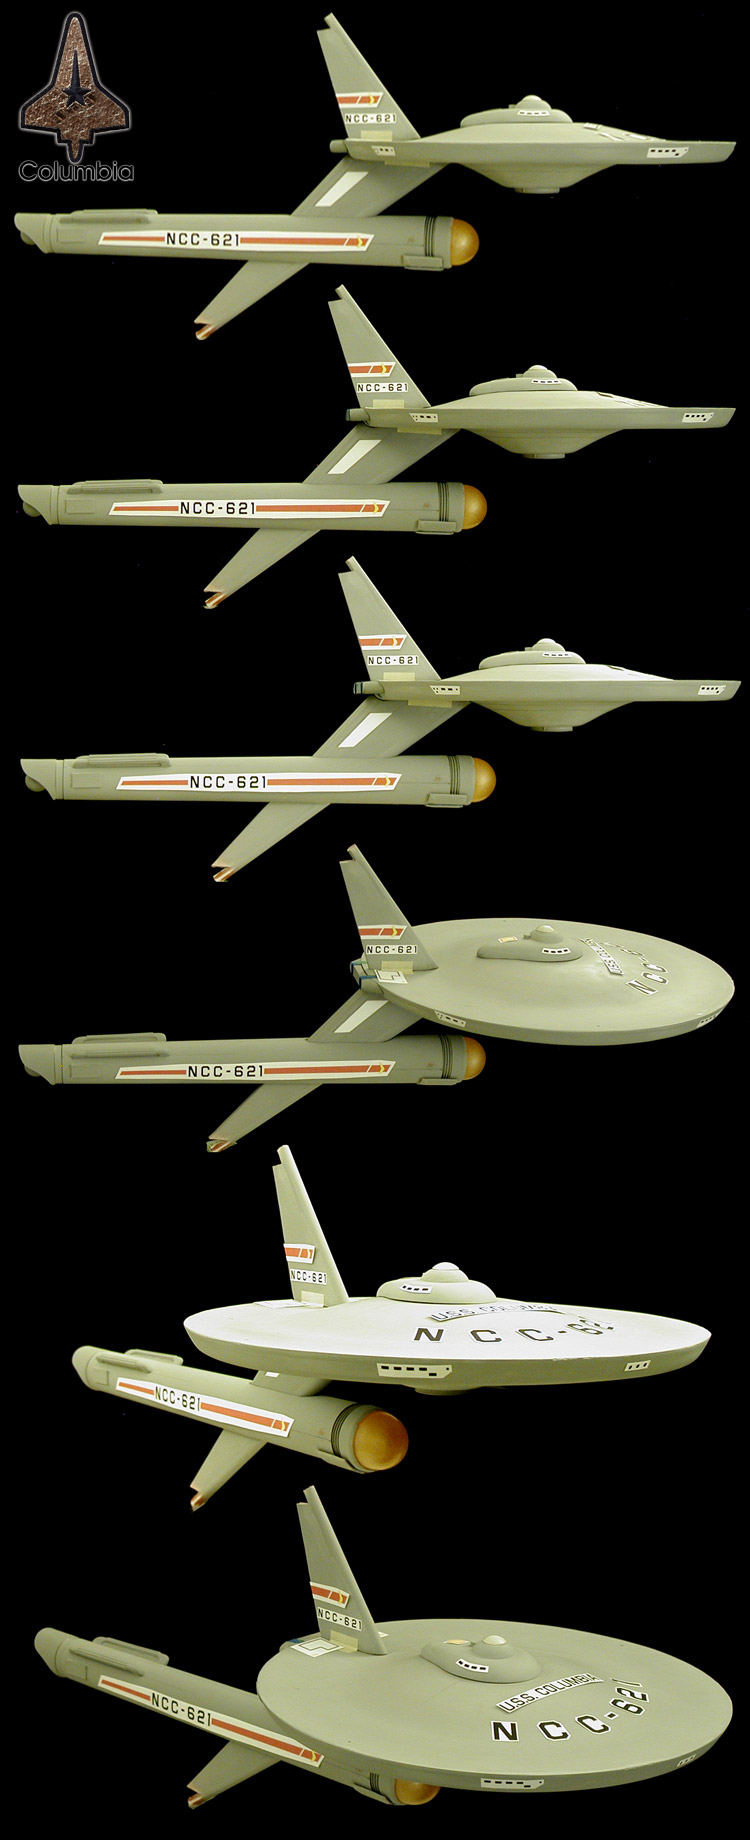
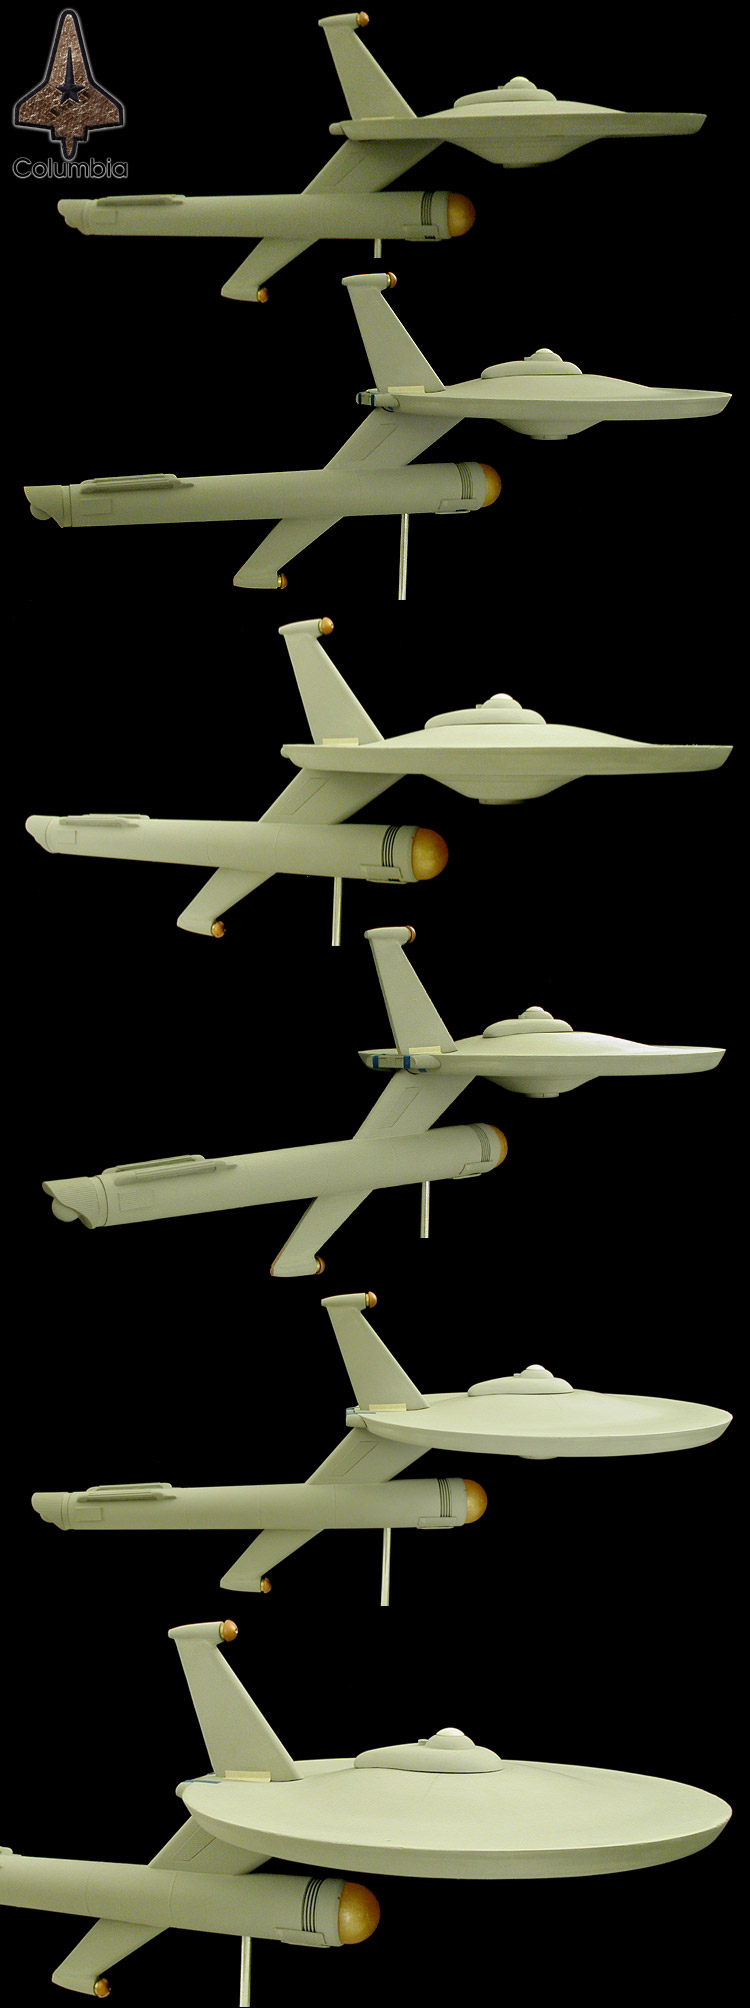
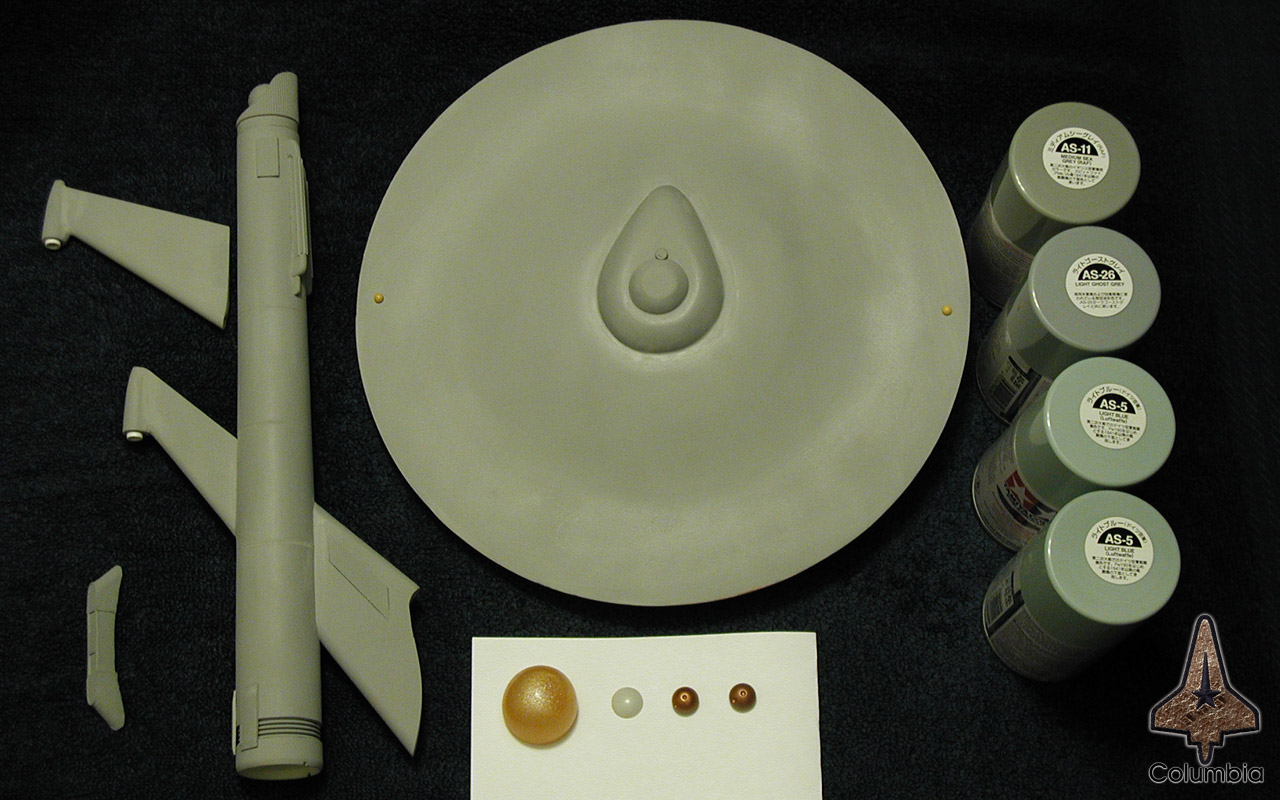
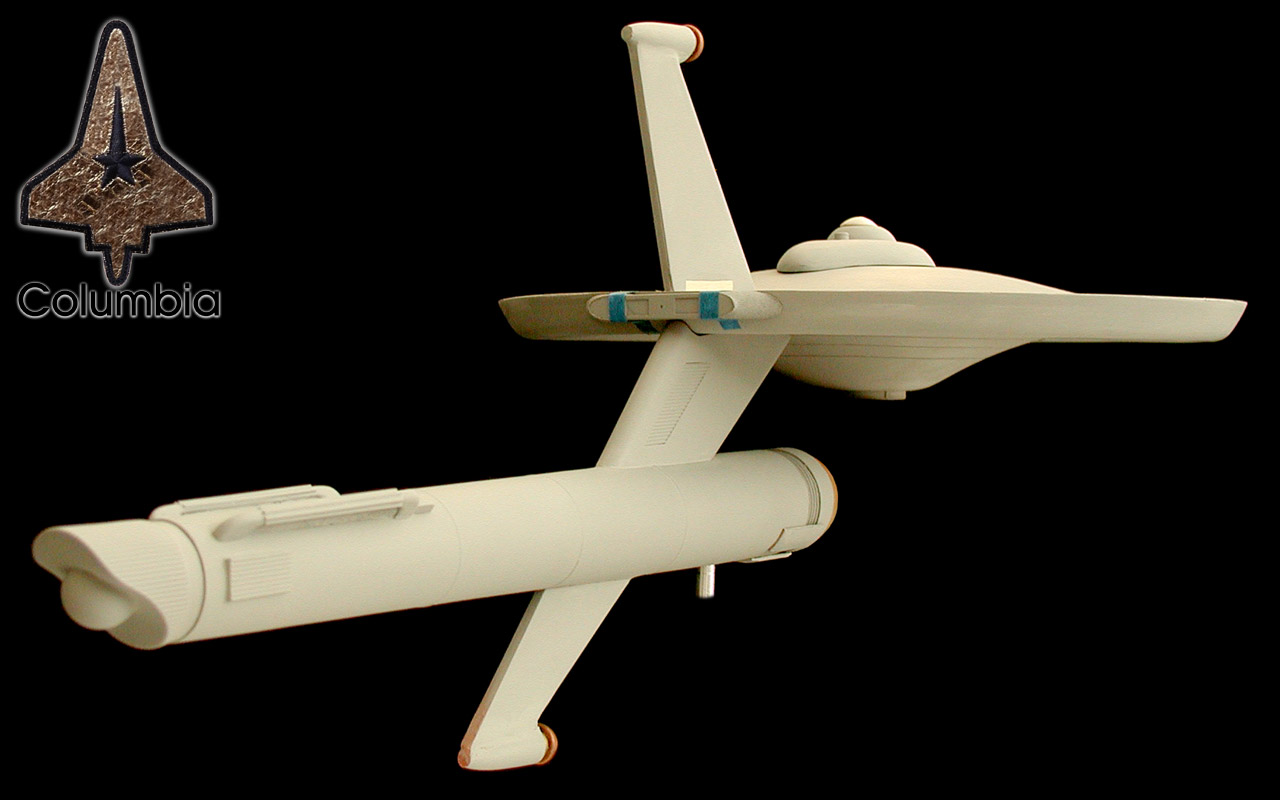
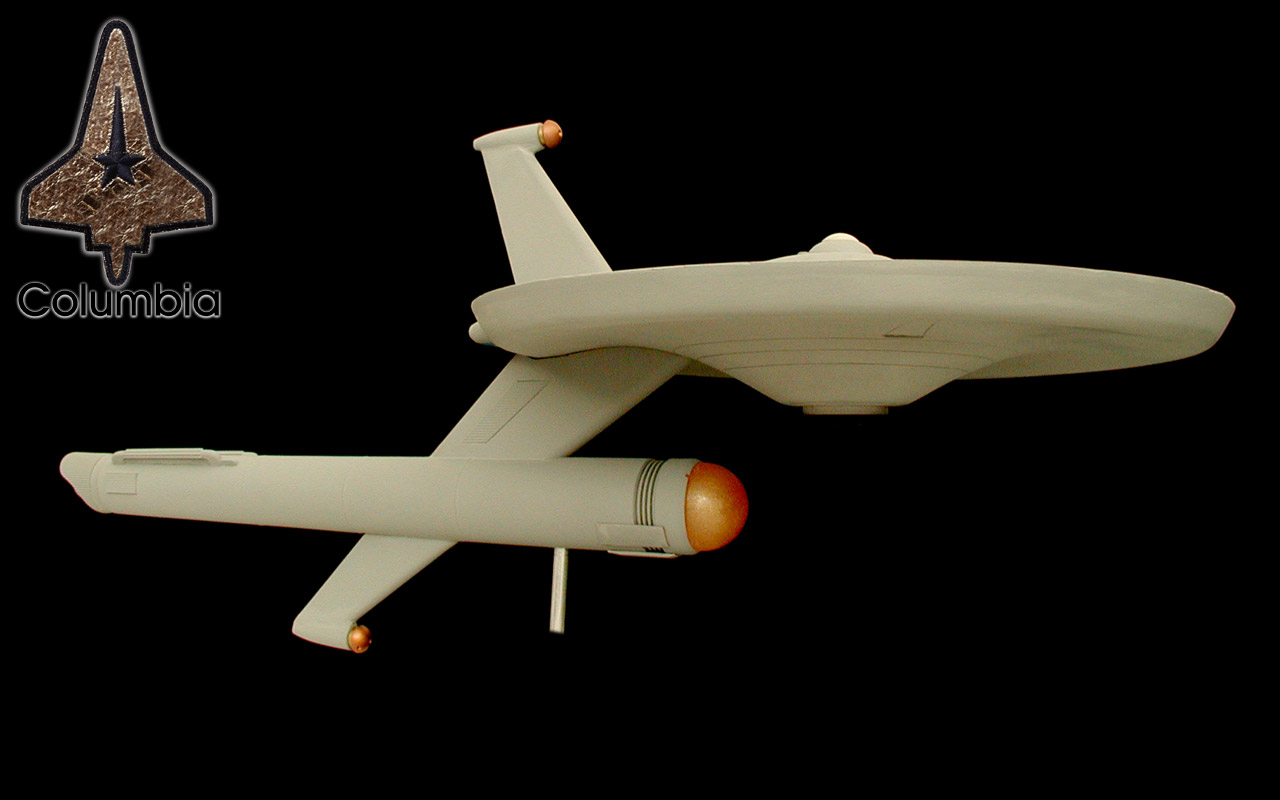
Here are some of the parts I've gotten together so far (with foam core board stand-ins for the dorsal and upper sensor mast)...

621-001.jpg

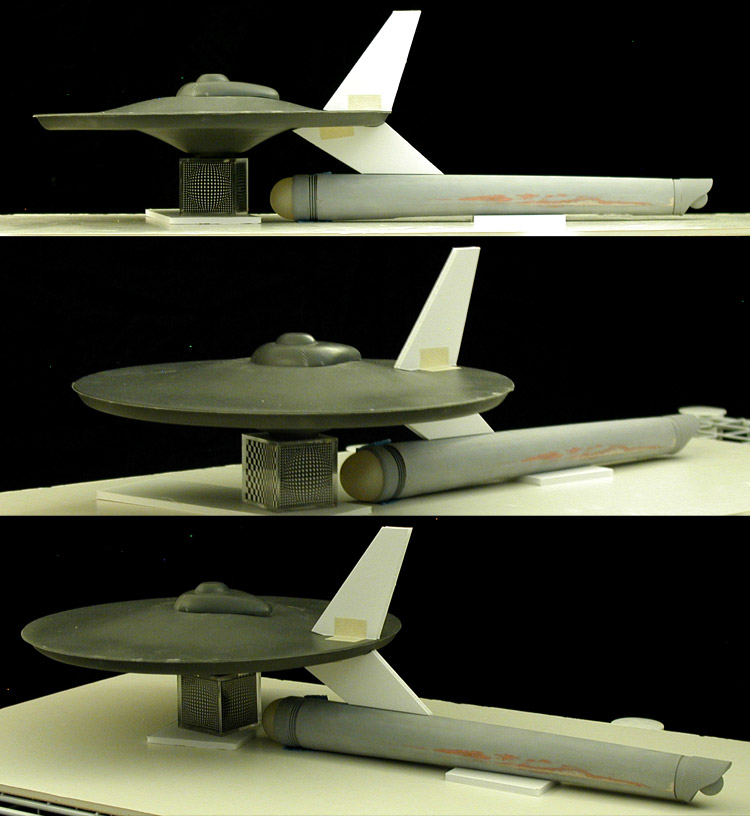
Anyways, nothing is glued together yet, everything is basically set (or taped) in place. Mostly I wanted to see how the mast idea would work and play with some ideas before starting in on the construction of the actual parts.

While the pod assembly was inspired by the space shuttle, the mast itself was inspired by one of the early Voyager concept designs. I liked the idea, but being a TOS era ship it won't be as busy as the Sternbach version.

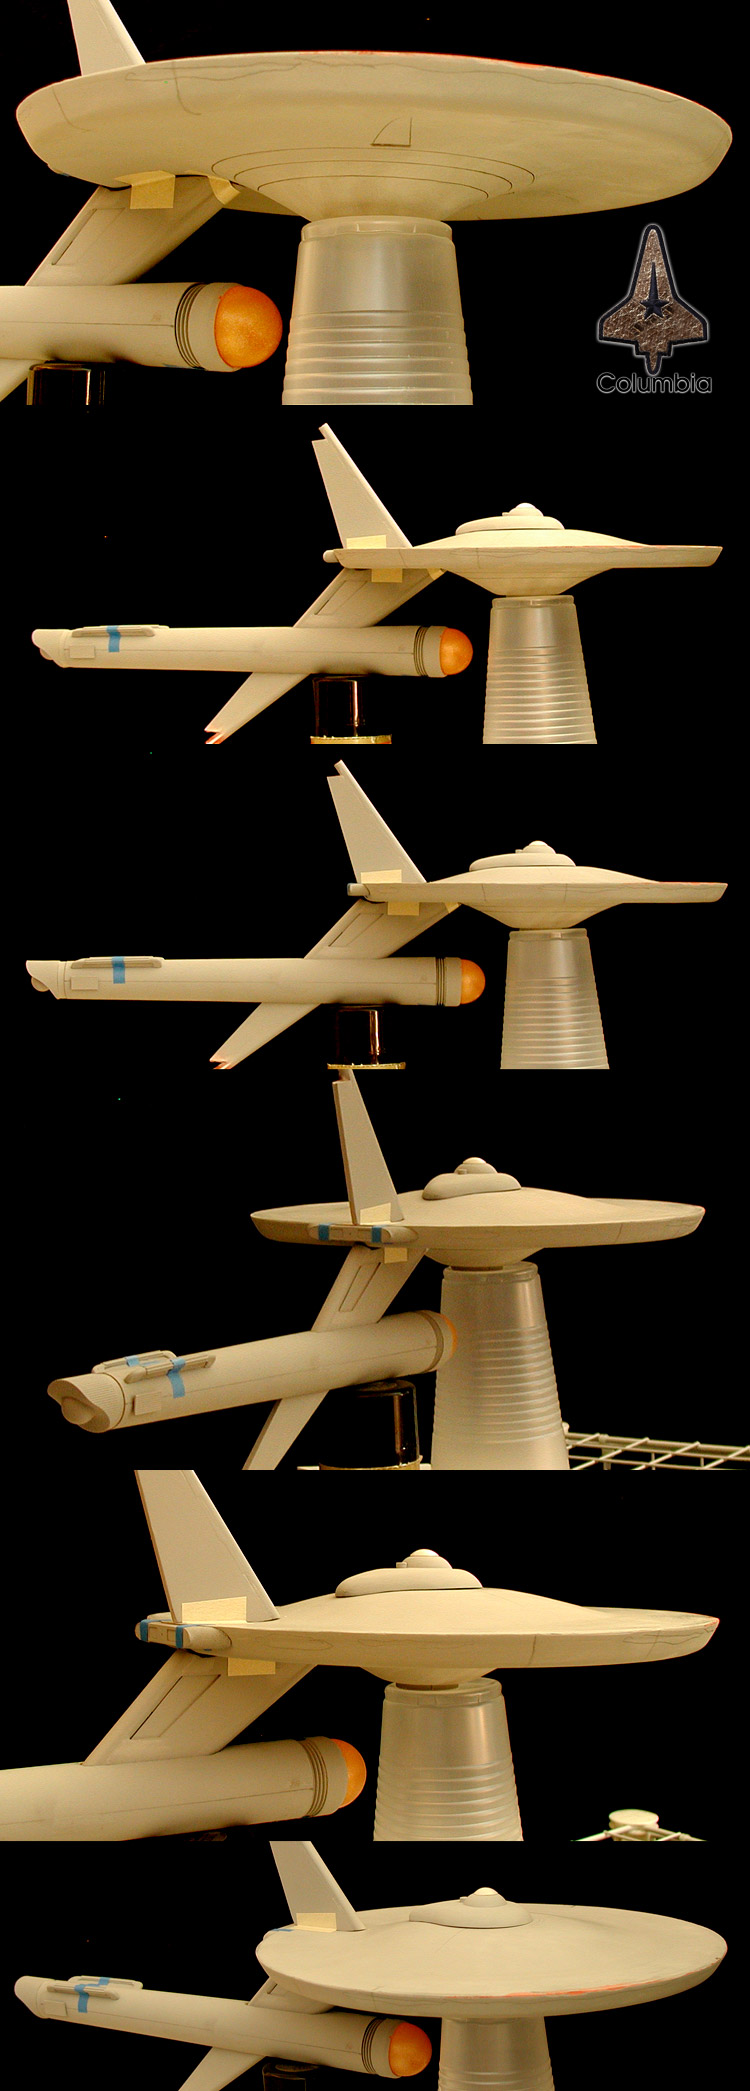
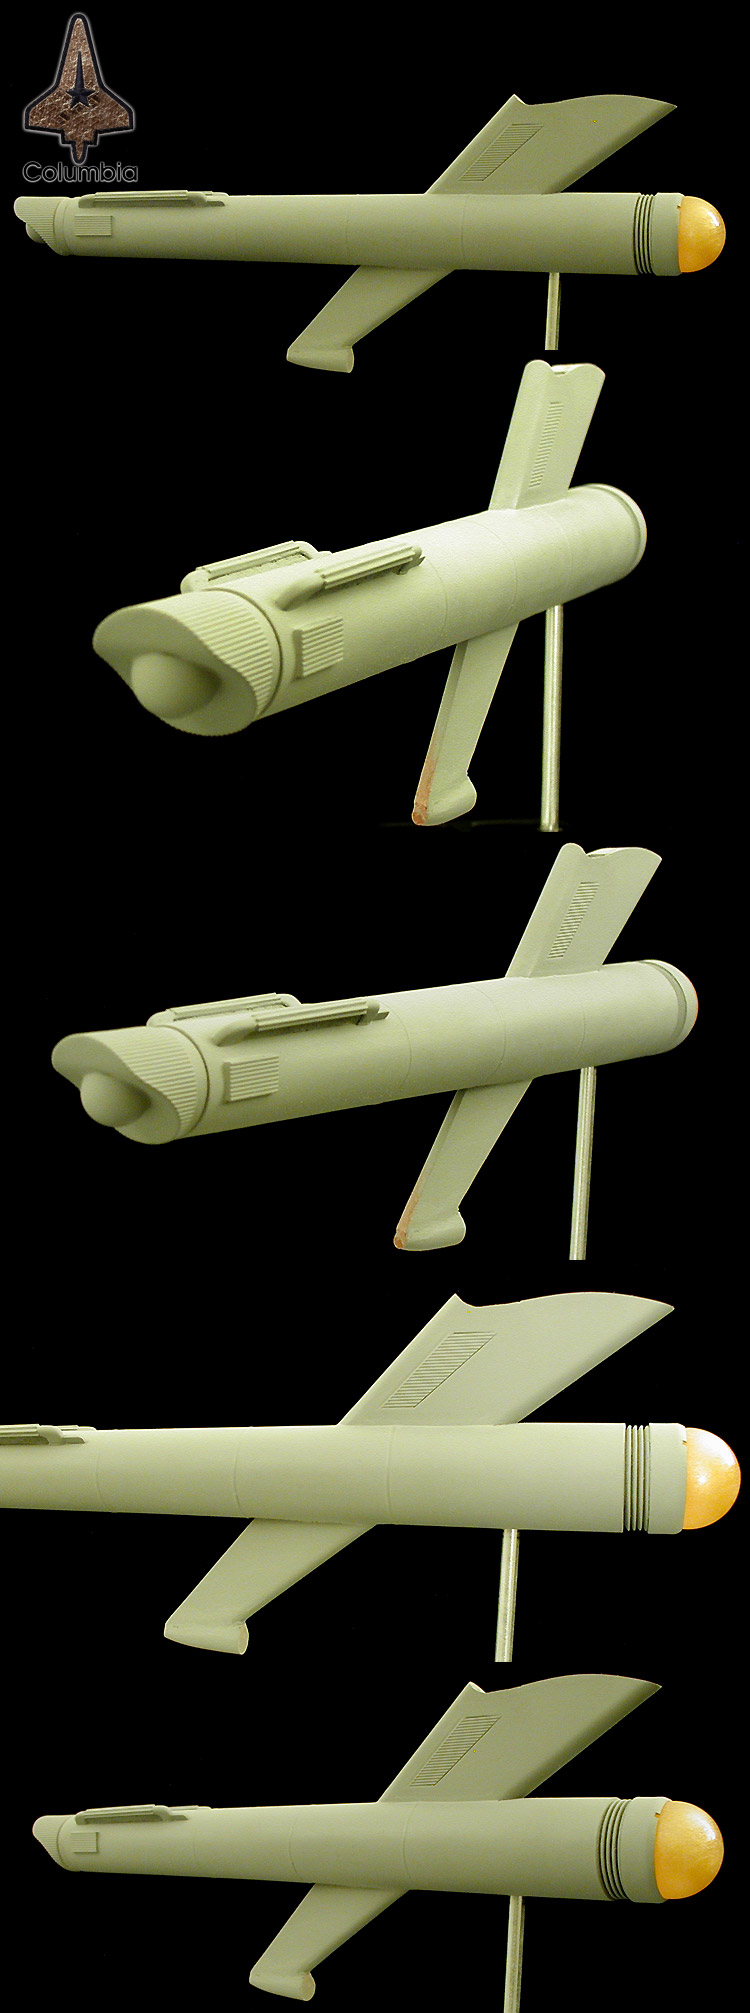
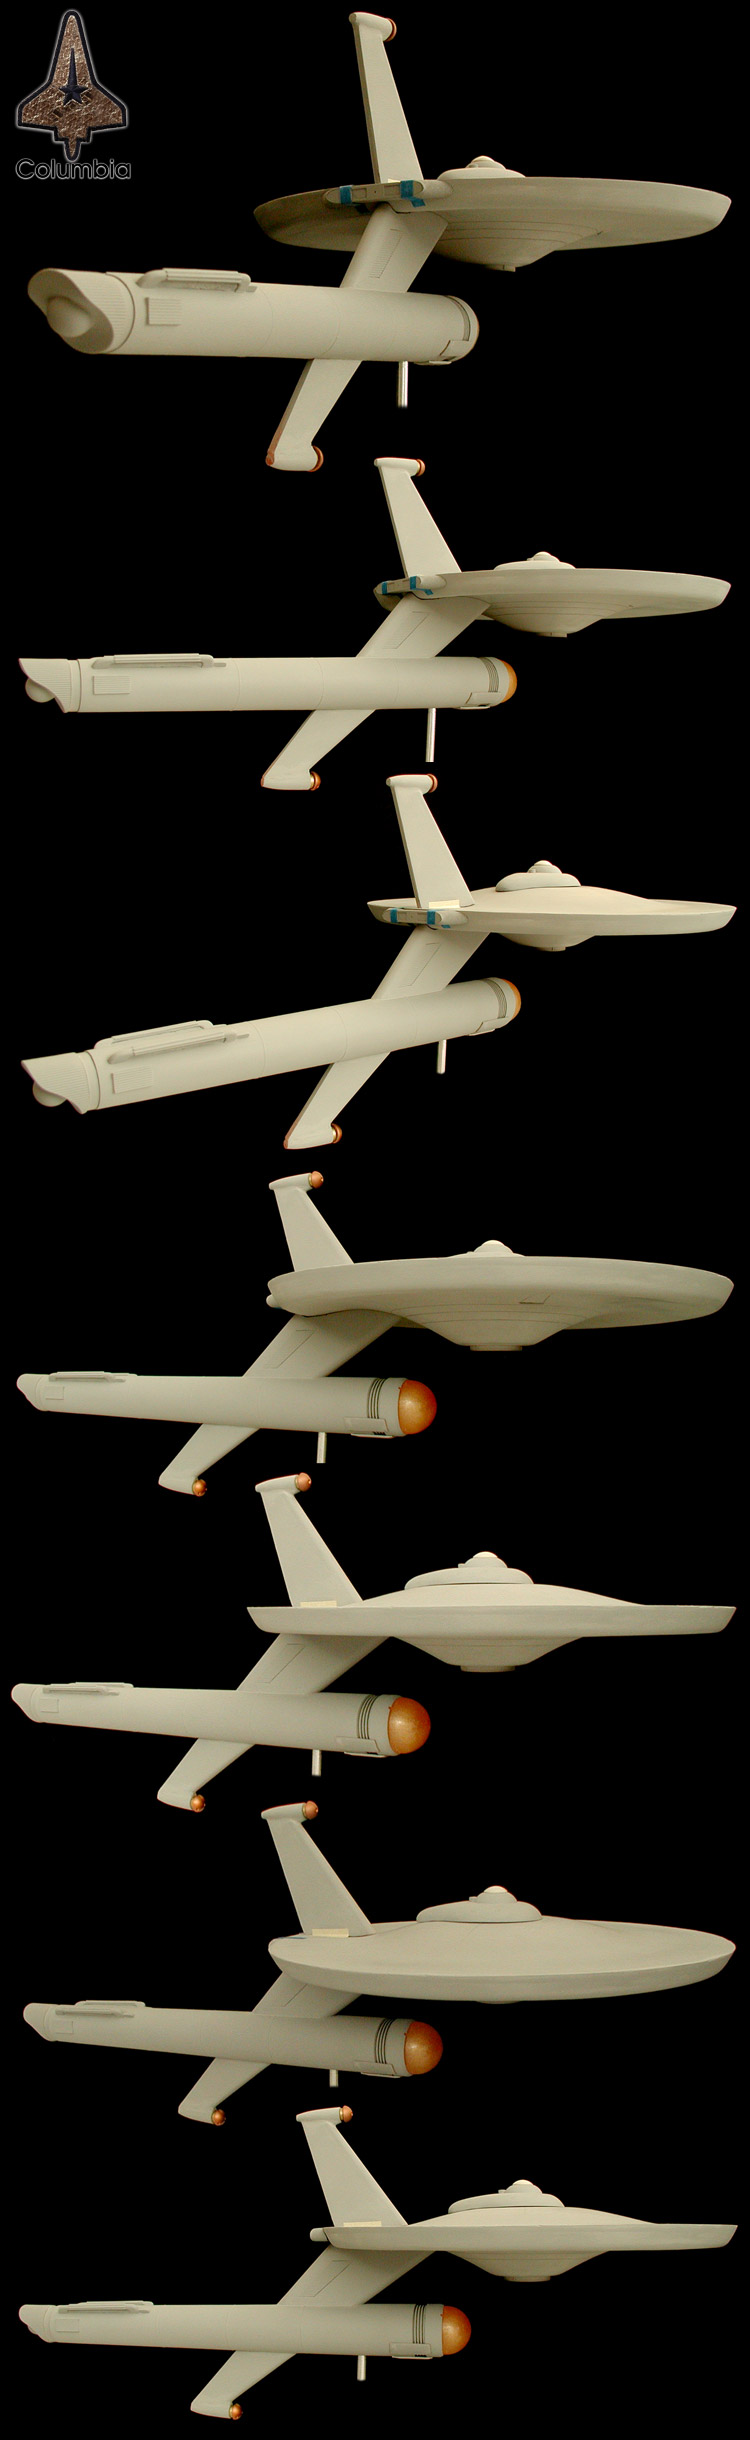
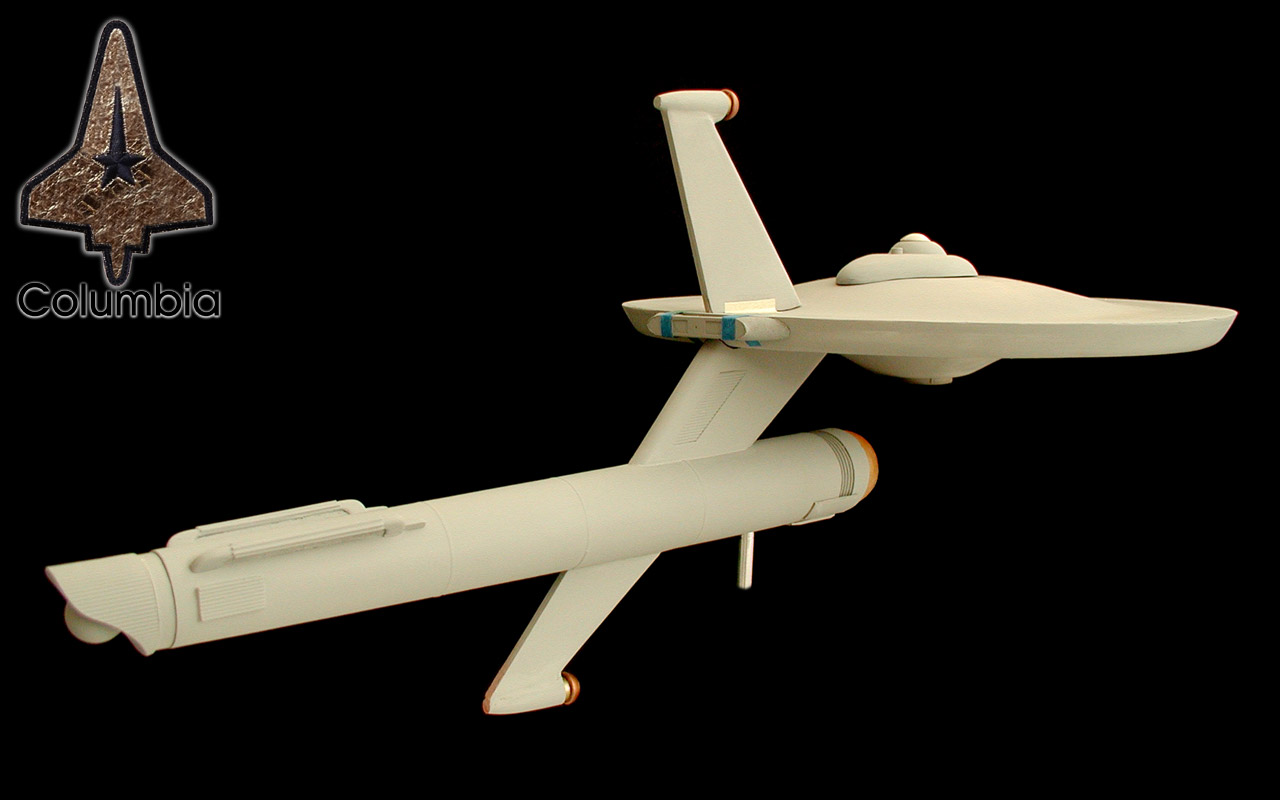
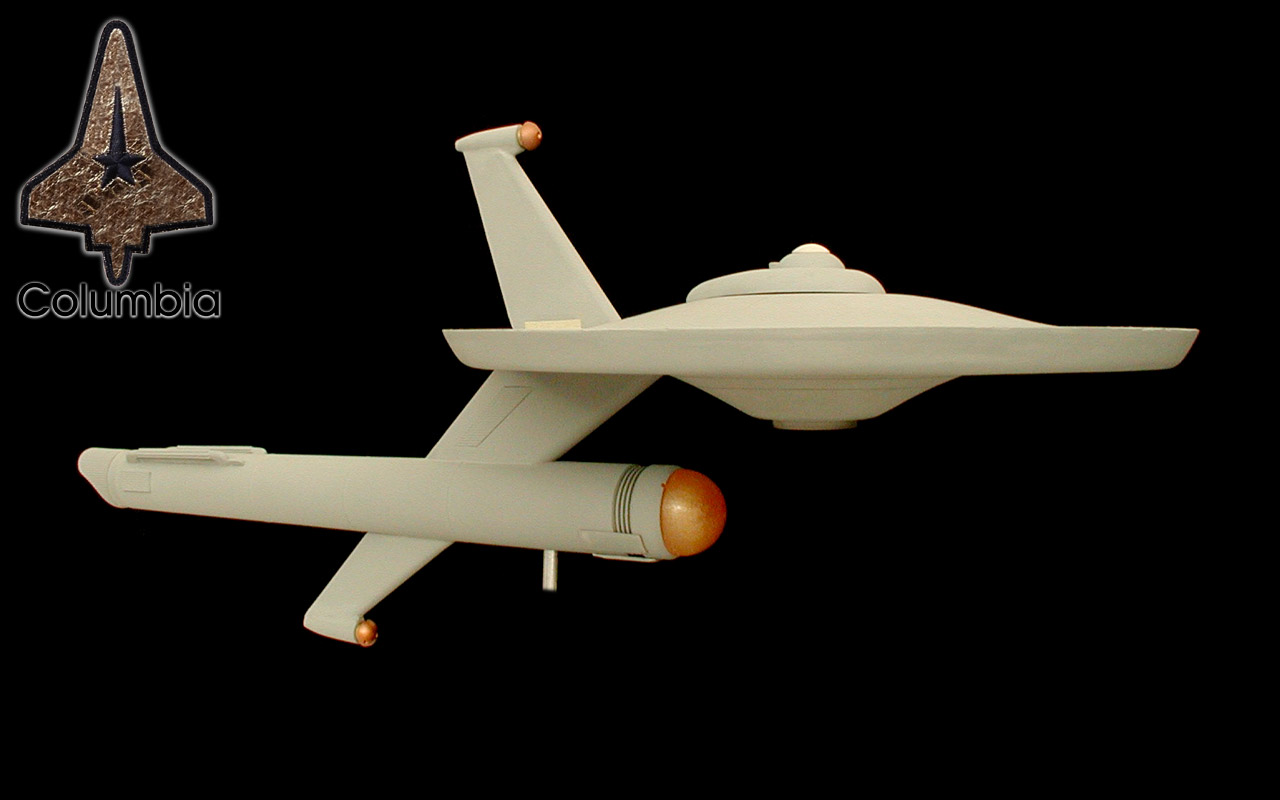
I got together a few more parts and worked a bit on the fit of the primary hull pieces. Because the top piece isn't perfectly even on the inner surface, it is easier to use a series of spacers to close the gap between the upper and lower pieces. Oddly, it wasn't nearly as uneven as I was expecting it to be.

More pics...

621-003.jpg

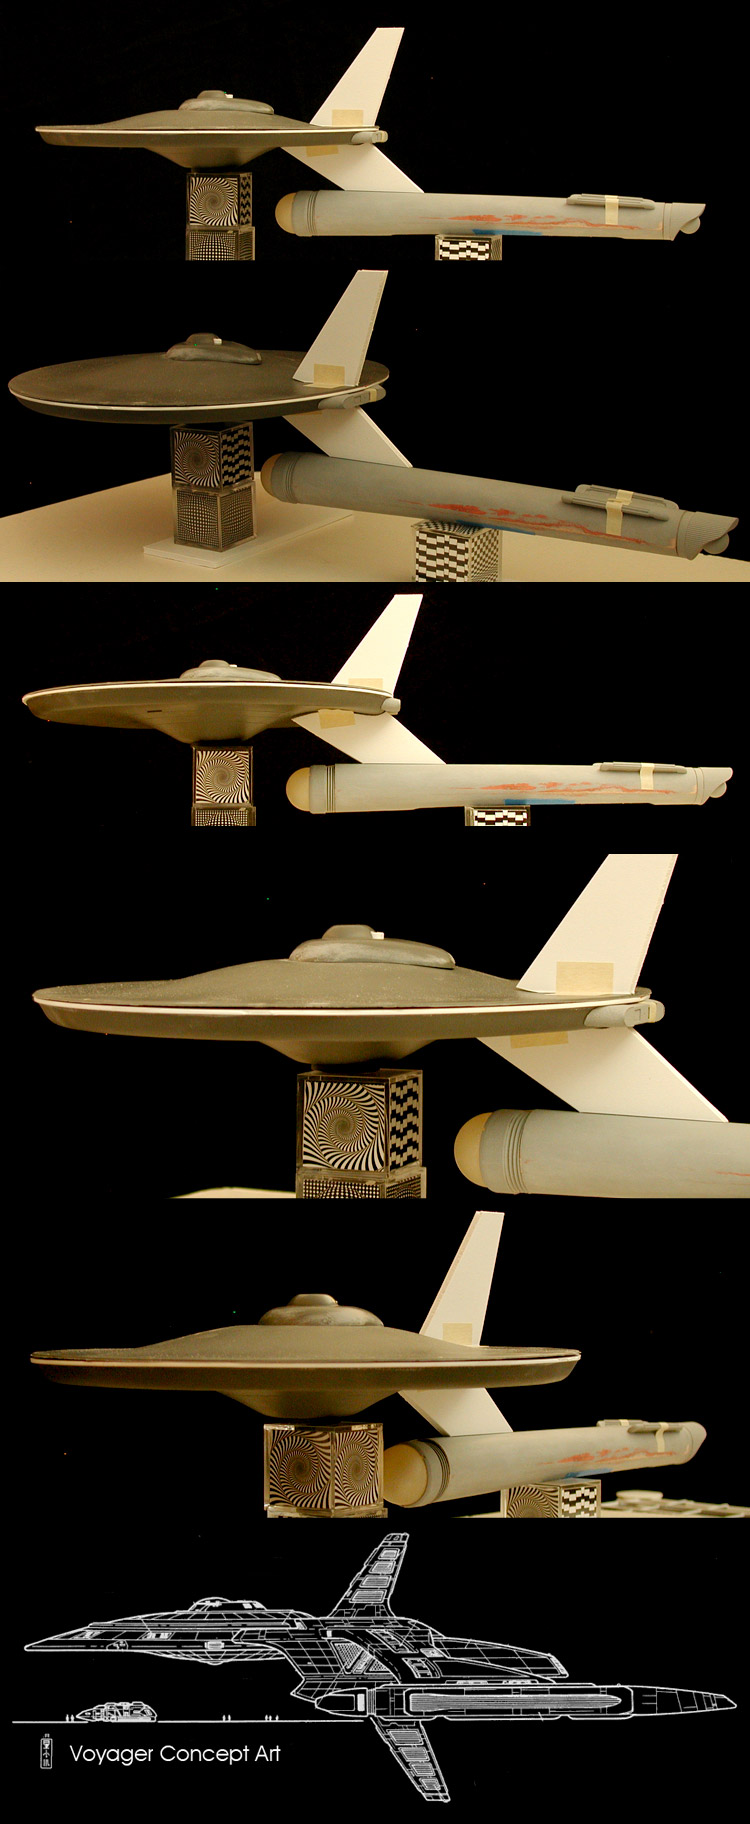
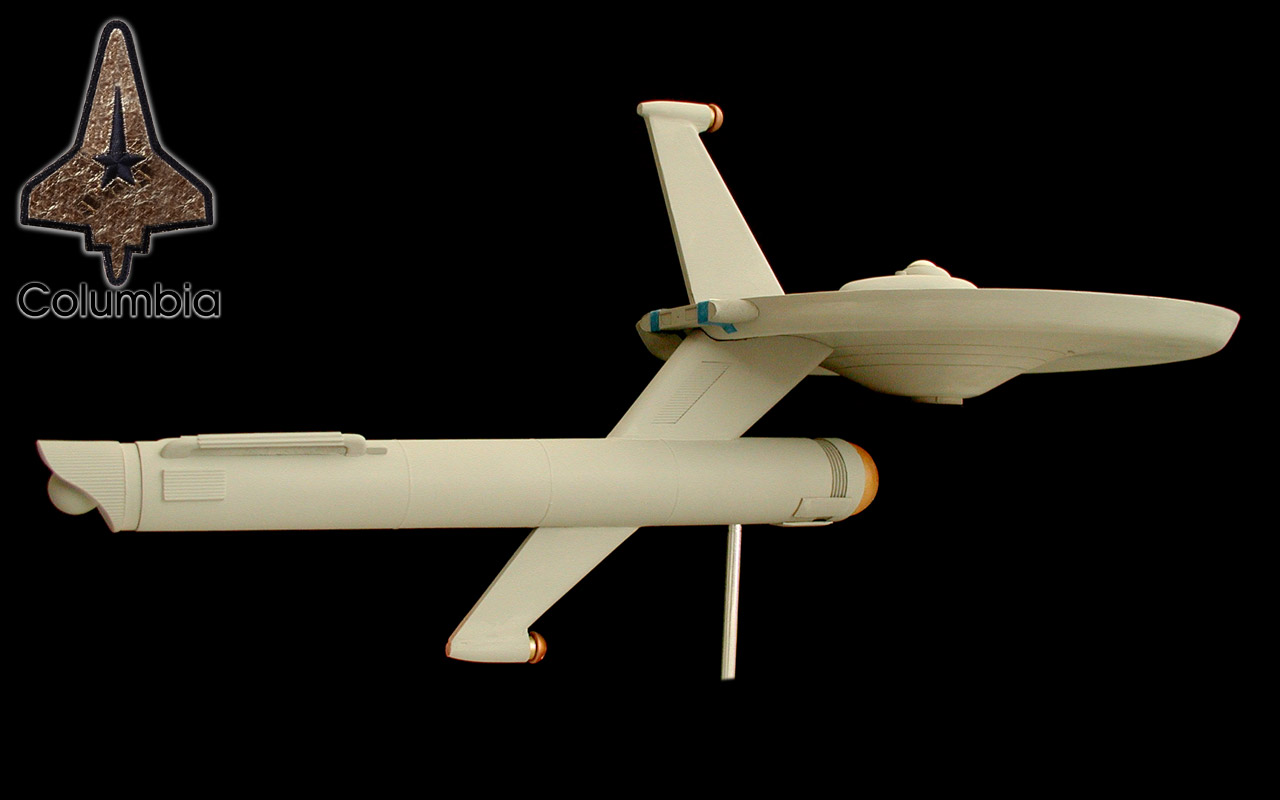
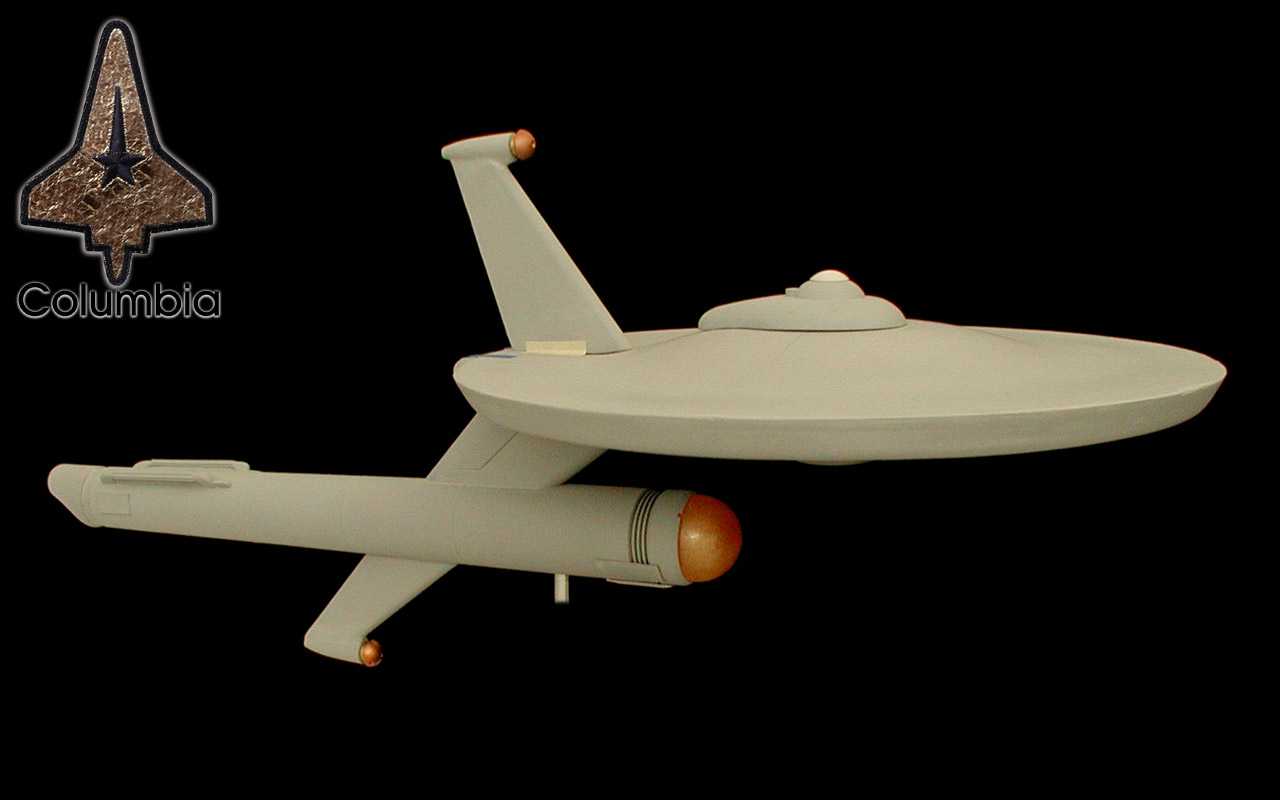
I also need to build an internal structure to support the nacelle (which is bending a bit with the large hole for the channel being wide open). I'm still working out how to build that structure as it will support both the nacelle, the primary hull and dorsal and the display mounting point.

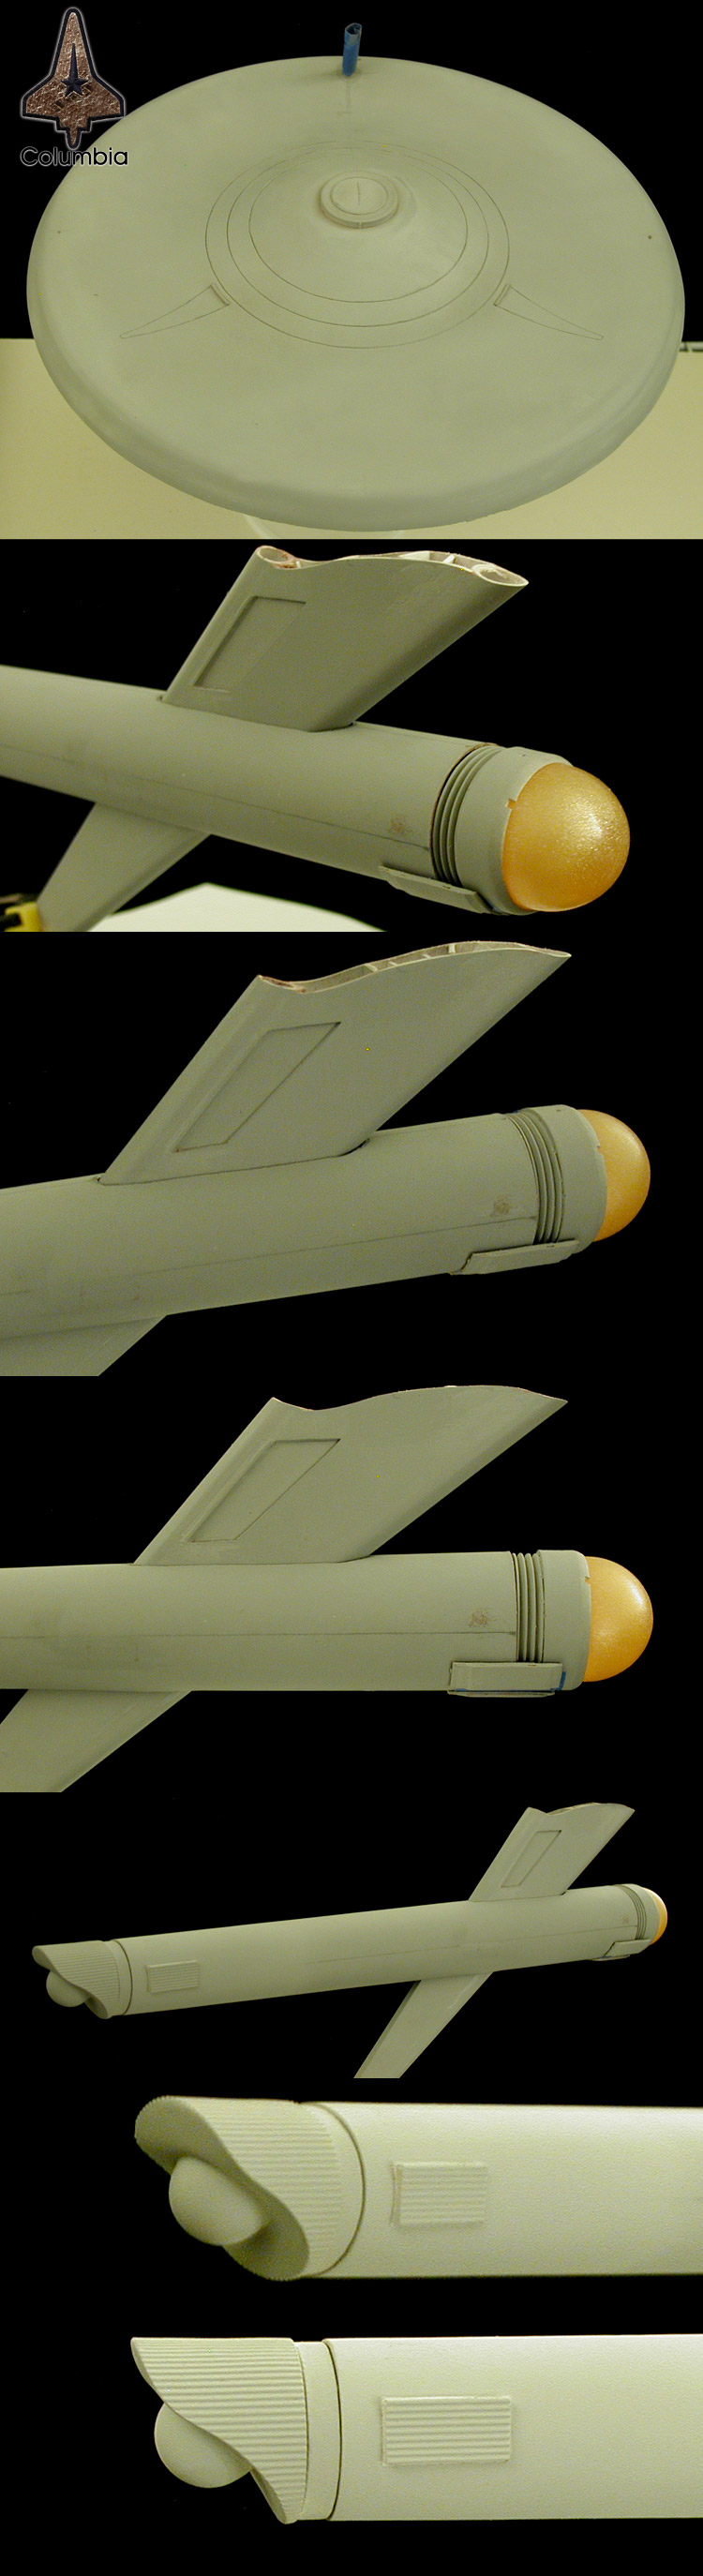
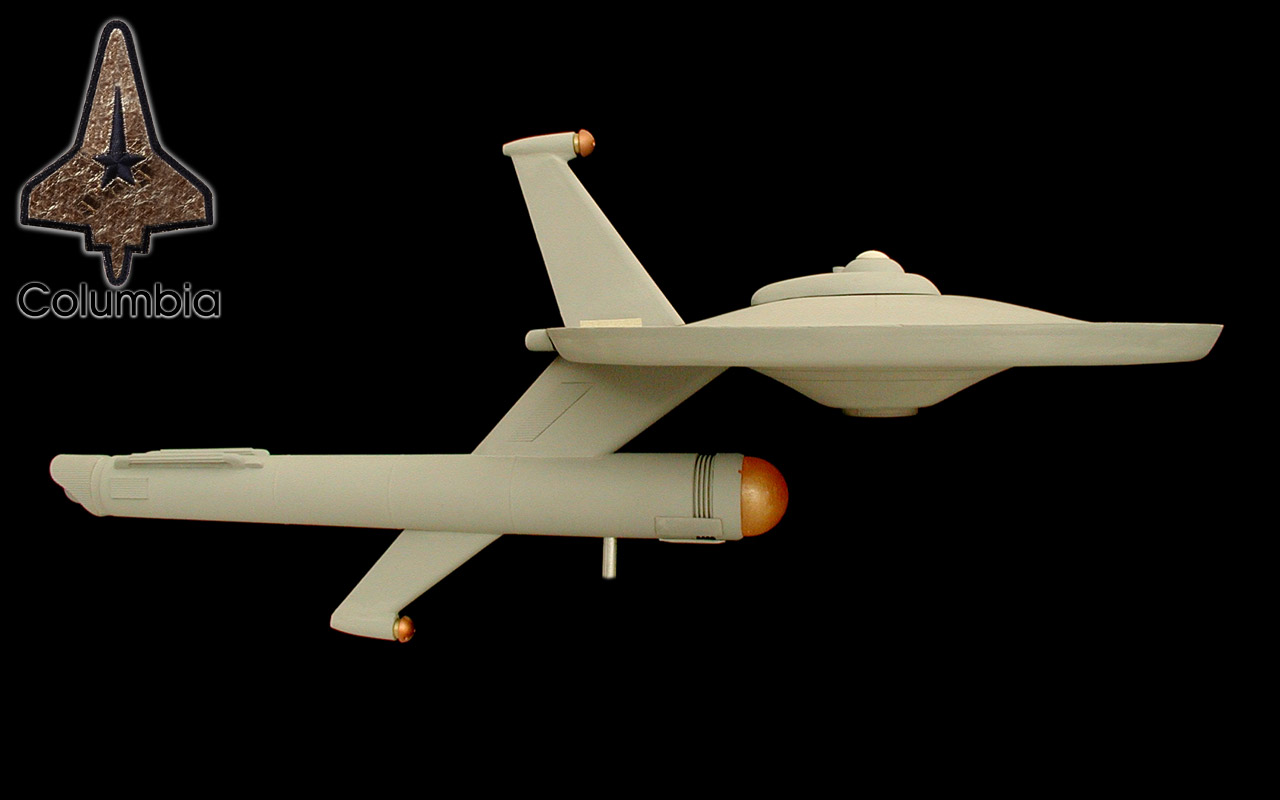
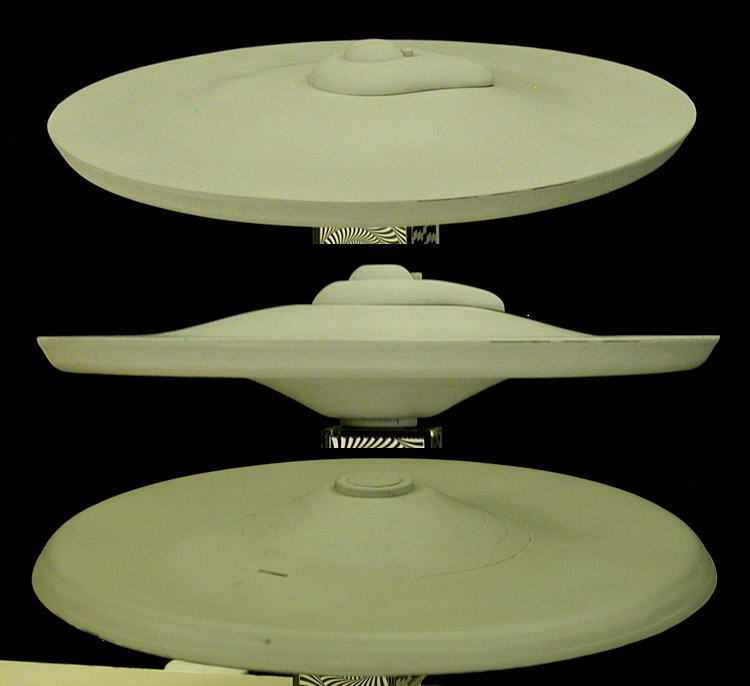
I glued the top and bottom halves of the primary hull together and started in on sanding out the seam. I haven't done any puttying yet, just hit it with a quick primer coat to see where I'm at.

621-005.jpg

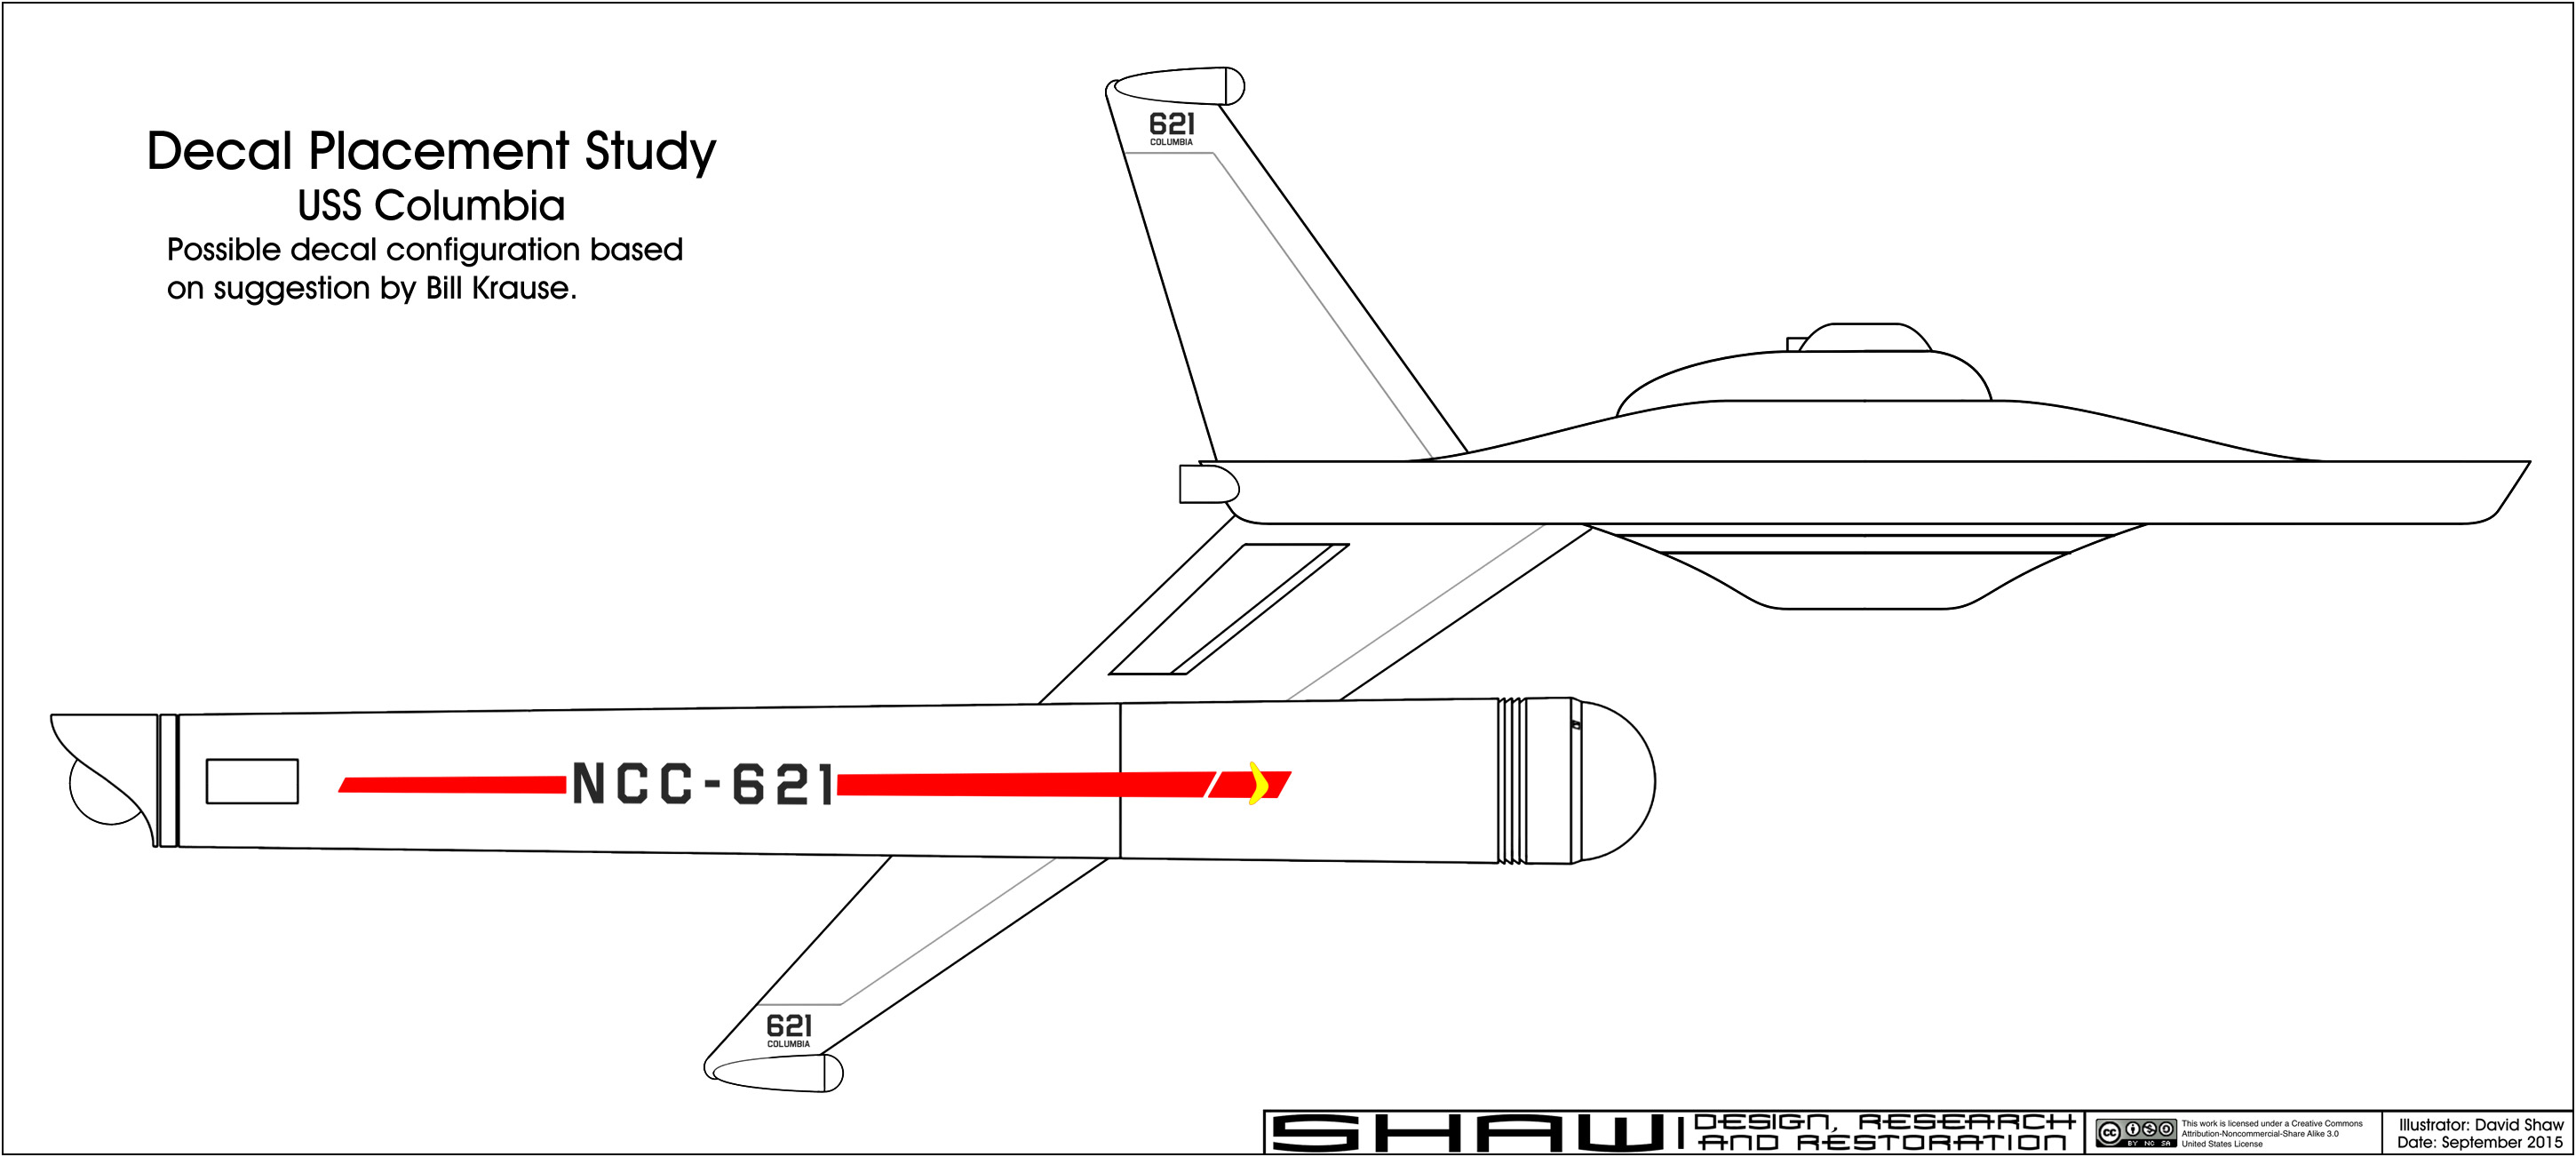
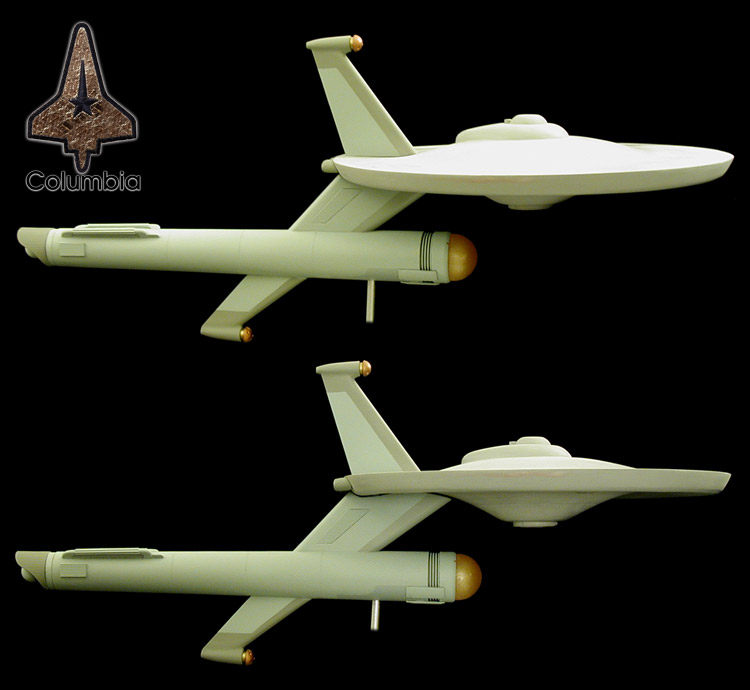
And this is a sketch of the approximate configuration of the Columbia that I'm aiming for...


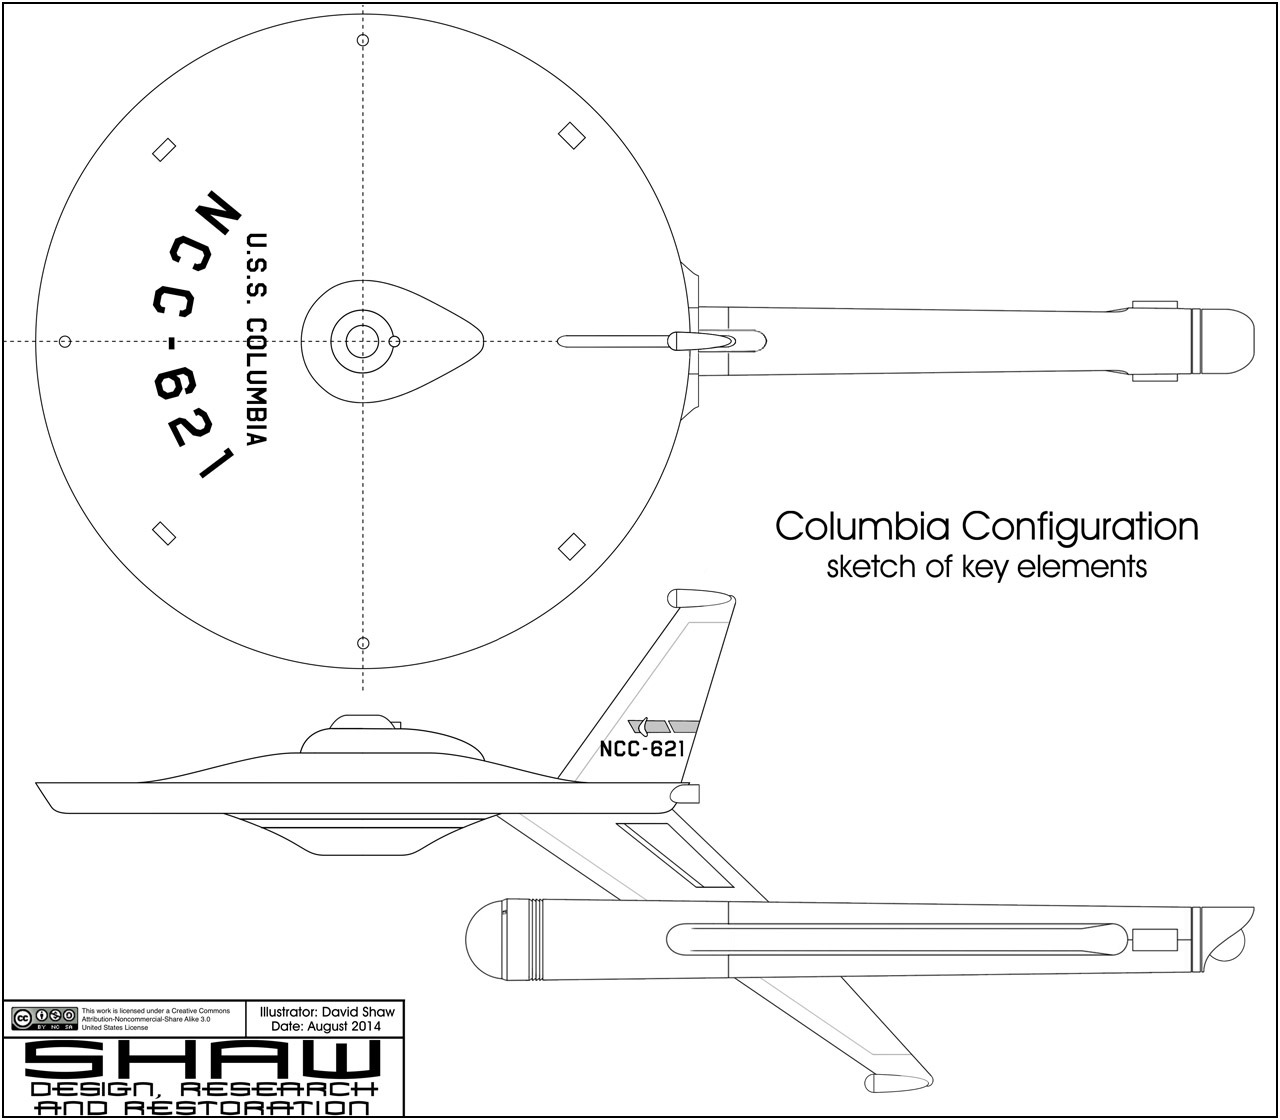
Even with the drawings missing a bunch of the details, I think it gives a good feel for how it'll look in the end.

This is meant mainly as a fun build that should move along pretty quickly. And unlike my 33 inch Enterprise replica, this should show some nice progress (I've made a lot of progress on the Enterprise, but not much that is very visually interesting at this point).
 
Looks great so far! (I'm partial to smaller ships like that.)

I'm glad that version of Voyager was passed over - the under slung engines are cool and all, but the fins make the design too complicated.
 
Thanks!

Yeah, when you consider that the outboard panels on the warp nacelle of the Voyager concept design swept outward during warp, it really just had way too much going on. I'm glad they ended up dialing it back quite a bit for the final design.


Small update...

This is another configuration test, again with some foamcore board stand-ins for parts I haven't started yet...

621-006.jpg

This is pretty much how I envisioned it and even in this rough state I like the overall feel. I'll most likely start in on the dorsal next (as I've done a bunch of those in the past) and I'm pretty close to attaching the bridge/B/C deck structure.
 
Looking good, as always! I'm curious what's your plan for a deflector dish? Hang it from a boom Franz Josef style? Leave it off altogether? Something else?

Can't wait to see more!

--Alex
 
Thanks!

I'll be leaving it off. Jefferies originally had all that equipment under a nose cone on the secondary hull, which was removed to make the ship more interesting looking. I figure that type of functionality would be part of the sensor pods.

And I like how it looks without the dish.

I've decided to forgo the nacelle channels. I realized that this is the same detail that I was getting hung up on with the Enterprise, and I was running into the same issue here... which is exactly the type of thing I wanted to avoid with the build (which is supposed to be a fun, low pressure project).

Here are a few more shots with the start of the dorsal and lower sensor mast. That is a spare nacelle body I am using to get a feel for how everything will be arranged in the end.

621-007.jpg

I'm about to make the molds for parts for the sensor pods. Once I have those in hand, I'll trim down the ends of the sensor masts to join them.
 
I made a little more progress, mostly on the upper sensor mast...

621-008.jpg

Even without the sensor pods in place, I think it is starting to come together. The upper and lower sensor masts are about half the thickness of the dorsal.
 
A bit more work done...

I spent some more time puttying/sanding the primary hull rim, sharpening up the upper edge and evening out some spots I noticed after my last close inspection of the surface.

I also put more time into the nacelle, adding the rear box features to the body and started in on sculpting the forward box features (they are just taped in place in the images below). I also cut the holes in the body for the dorsal/lower sensor mast to go through (I made that part as a single piece to make sure they aligned nicely).

Here are some closer views of the areas I was working on...

621-009.jpg

One of the other reasons for doing this build (besides the fun of it) is to get a chance to put some of these parts into action and see how they look while I still have the chance to make alteration on my Enterprise study model (based on the 11 foot filming model as a model). And it is nice to take a fresh look at these parts after putting the project on hold about a year ago.

I need to still make the molds for the sensor pods, but I've been putting it off because it tends to be a messy process.
 
I've made some more progress...

The nacelle dome I'm using is actually made from the same batch of resin I used to make the front end caps of my Phase II Enterprise when I realized I had extra.

This is a series of test assembly shots as the model stands right now...

621-010.jpg

I included a mockup shot of my Columbia insignia on a uniform just for the fun of it at the end of that series. Someone had asked about the insignia, I based the shape on the last mission patch of the space shuttle Columbia (though I had also considered basing it on the Columbia's first mission patch).

columbia_insignia.jpg

I thought you guys might like to see the Columbia next to my studio scale Enterprise. The Columbia is using the alignment box that was made for my Phase II Enterprise (because they are the same scale, 1/500) rather than building a new one for it. It shows how much bigger the Enterprise model is (at approximately 1/333 scale) and the contour differences between the primary hulls (the Columbia is based on the 11 foot model's contours).


I started in on adding the grills to the dorsal. And I wanted to test the graphics for my decals to get a feel for how they would look on the model (so I can make alterations before I print the final decal graphics on the decal sheet).

621-012.jpg

I've already started modifying the decals a bit based on some suggestions, and I'm debating other alterations mainly based on the limitations of my abilities to print decals (I'd need to have JT Graphics print them if I wanted to incorporate colors close to white in the graphics).


So... you guys haven't said much. Even though this is a side project, this is a full and completely scratch built model, using no third party or kit parts. And it is a live test of the one-sixth studio scale Enterprise parts to help find short comings while I can still fix them for that scratch built project. And the Enterprise parts are all based on my plans of the 11 foot model, so this is another opportunity to check my research as a physical model.

The only real difference between this model and the one-sixth studio scale Enterprise is the material I used to make the parts (I'm using TC-1630 for the Columbia where I had used Alumilite White for the Enterprise), but the parts shared between the two projects are from the same molds.

Any thought or comments?
 
Well, all I can say is that the work is lovely. As ever, your technique is clean and downright enviable. I like the markings too, very Trek traditional. If anything, and this is on a purely subjective--my own opinion level--I'm not sure how I feel about the red pennant on the upper sail. It's horizontal stubbiness seems at odds with the vertical nature of the structure. The large area could lend itself to a more graphical approach, as seen on many commercial and even military planes. But, again, just my opinion.

I look forward to seeing this unfold. It really is an interesting project. I'm perfectly happy to assume this is the ship the TMP comm chatter was talking about.

--Alex
 
Thanks!

After playing with a number of ideas and suggestions, I'm actually leaning toward a less is more approach (I don't want to move too far away from the look of the tail of the space shuttle Columbia). AdmiralBuck suggested the simple number/name on the masts (which I liked as it feels very naval), so I'll most likely limit the additional hull markings to just those.

Here is a quick sketch of what I'm planning on currently...


Did a bit more work on bringing aspects of the dorsal, nacelle and lower mast together. I've also made some pretty good progress on adding the lower sensor pod.

621-014.jpg

I've also started in on the upper sensor pod, I just didn't take any shots of it.

The sensor pods are going to be a bit larger than I had originally drawn them, I wanted to make sure I could include some detail on them.
 
Another series of test assembly shots, this time including the front of the sensor pods.

621-015.jpg

The reason for doing the sensor pod domes in copper is to maintain the visual language of the original series. The sensor pods are supposed to serve a similar role to the navigational sensor/deflector assembly on the Enterprise, so I wanted the colors to be similar.

There are a few spots on the upper and lower sensor masts that need a little more attention, then I'll return to work on the primary hull. I need to catch a few rough spots along the rim, and then I'll finally attach the bridge/B/C deck to the primary hull.
 
I love, love, love the fin on the underside of the nacelle. It really makes the FJ scout design pop. But, I have to say that I'm not sure about that upper fin. The ship just looks...unbalanced? Have you considered going with a much smaller fin up top? Lovely model overall, no doubt.
 
I had played with a few different sizes, specially as Jefferies had originally included a small fin in that spot in his original design, but for this model I wanted something that felt a bit like the space shuttle Columbia's tail fin, yet with a large enough sensor pod that you could make out some details (even at this small scale).

I think the other thing that I'm partial to is the fact that it feels a bit like a model of a sail boat.

I've also been playing with ideas on painting the model so these modifications are a slightly different hull color from the rest of the model... to make it look like these are unique additions to just this one ship and not a standard design for a sub-class. But there is still a ways to go before I get there.


Okay, so not too much progress, but here is a larger view of the model (still just set/taped together) with some of the design's inspirations included...


And I finally got a chance to shoot the model in day light (I'd been shooting at night in very low light recently), so hopefully more details are visible in this set...

621-017.jpg
 
A little more progress...

I've worked on a few additional elements of the model, the biggest being attaching the bridge/B/C deck structure to the primary hull. I've got to iron out a couple spots and then I'll start painting and assembling the model. I still need to make the lower sensor dome (which is on one of my Phase II molds) and finalize the decal graphics (I'm trying to decide if I want to just use the windows from one of my Phase II Enterprise decal sheets).

At any rate, here is a quick inventory shot of the parts and paints I have on hand for this build...


Also I figured I'd share some of closer views of the last series of test assembly shots with you guys. Hopefully it shows the level of detail I'm attempting to reach (even if it also shows some of the rough spots too). Anyways, here ya go...

Click images to enlarge


Got a little painting done. Haven't started on the primary hull yet, but even without that I hope this gives the model a bit more depth...

621-019.jpg
 
I got a little more done... a little more painting and I sanded/buffed the painted parts. Here is another round of baby pictures.

621-020.jpg
 
Thanks!

Yeah, I need to go back to work on the decal graphics. It really bugged me that I made the first test printing too big (about 105% of what they should have been), so I've been avoiding working on them since then. Because I don't build a lot of models I don't get as much practice in doing decals as I think I should have to do a reliable job each time. So I end up stressing a lot at about this stage of my builds.

Of course this is part of the reason for doing this model, to practice all these skills. But I tend to get attached to even practice models by the end.

As a dress rehearsal of many of these elements for my 1/500 scale Enterprise, I'm actually quite happy with how they are coming together. Even if the individual elements look good as masters, the real test is if they play nicely with each other when brought together.

Thanks again!
 
Weird. I had just been sketching a design similar to this, but with half-length nacelles on both upper and lower pylons. I was contemplating a scratch build, but watching your perfection is so discouraging. Lol.
 
This thread is more than 8 years old.

Your message may be considered spam for the following reasons:

  1. This thread hasn't been active in some time. A new post in this thread might not contribute constructively to this discussion after so long.
If you wish to reply despite these issues, check the box below before replying.
Be aware that malicious compliance may result in more severe penalties.
Back
Top