USS Columbia

I really like your design. Something that might be neat, that I just thought of, would be a vertical impulse engine design. Maybe one that went from pylon to pylon over the back of the saucer.
 
I'll have to give that a try sometime. In this case, I wanted to see how close to the 11 foot model's impulse housing I could get to cross check my plans. But yeah, this has started me thinking about a number of other variations I'd like to experiment with someday.


A bit more progress...

 
Thanks!

Here she is with a bit more done...


I've finished applying most of the decals. Once I've made sure that there isn't any silvering I'll apply a few coats of gloss and then a few coats of matte and she'll be done.

Here is how she looks right now...


For a 100% scratch built model, I think she turned out pretty nice. I think she could have been better if I hadn't rushed, but she was fun to build!
 
Could be better?!?! I suppose there must be little imperfections in person, but from where I sit, it's a pretty damned excellent model! I like the port-side docking hatch on the neck section. Is that just a decal or is it actually modeled as a recessed feature?

Also I'm glad you went conservative on the markings on the sail. Very convincing design. I'd be happy to load this version of Scout Columbia into my personal head-canon. And I still want to try my hand at building a 1:2500 replica if you don't object.

--Alex

--Alex
 
Thanks!

I'd love to see a 1/2500 version! I'll be putting together a more complete set of plans for her, but the main difference from the one I posted is that I made the sensor pods larger (which will also help at 1/2500 scale). The main thing to note is that the sensor masts are about half as thick as the dorsal.

I look forward to see what you come up with. I'm always impressed with how much detail I've seen people get out of their 1/2500 builds.

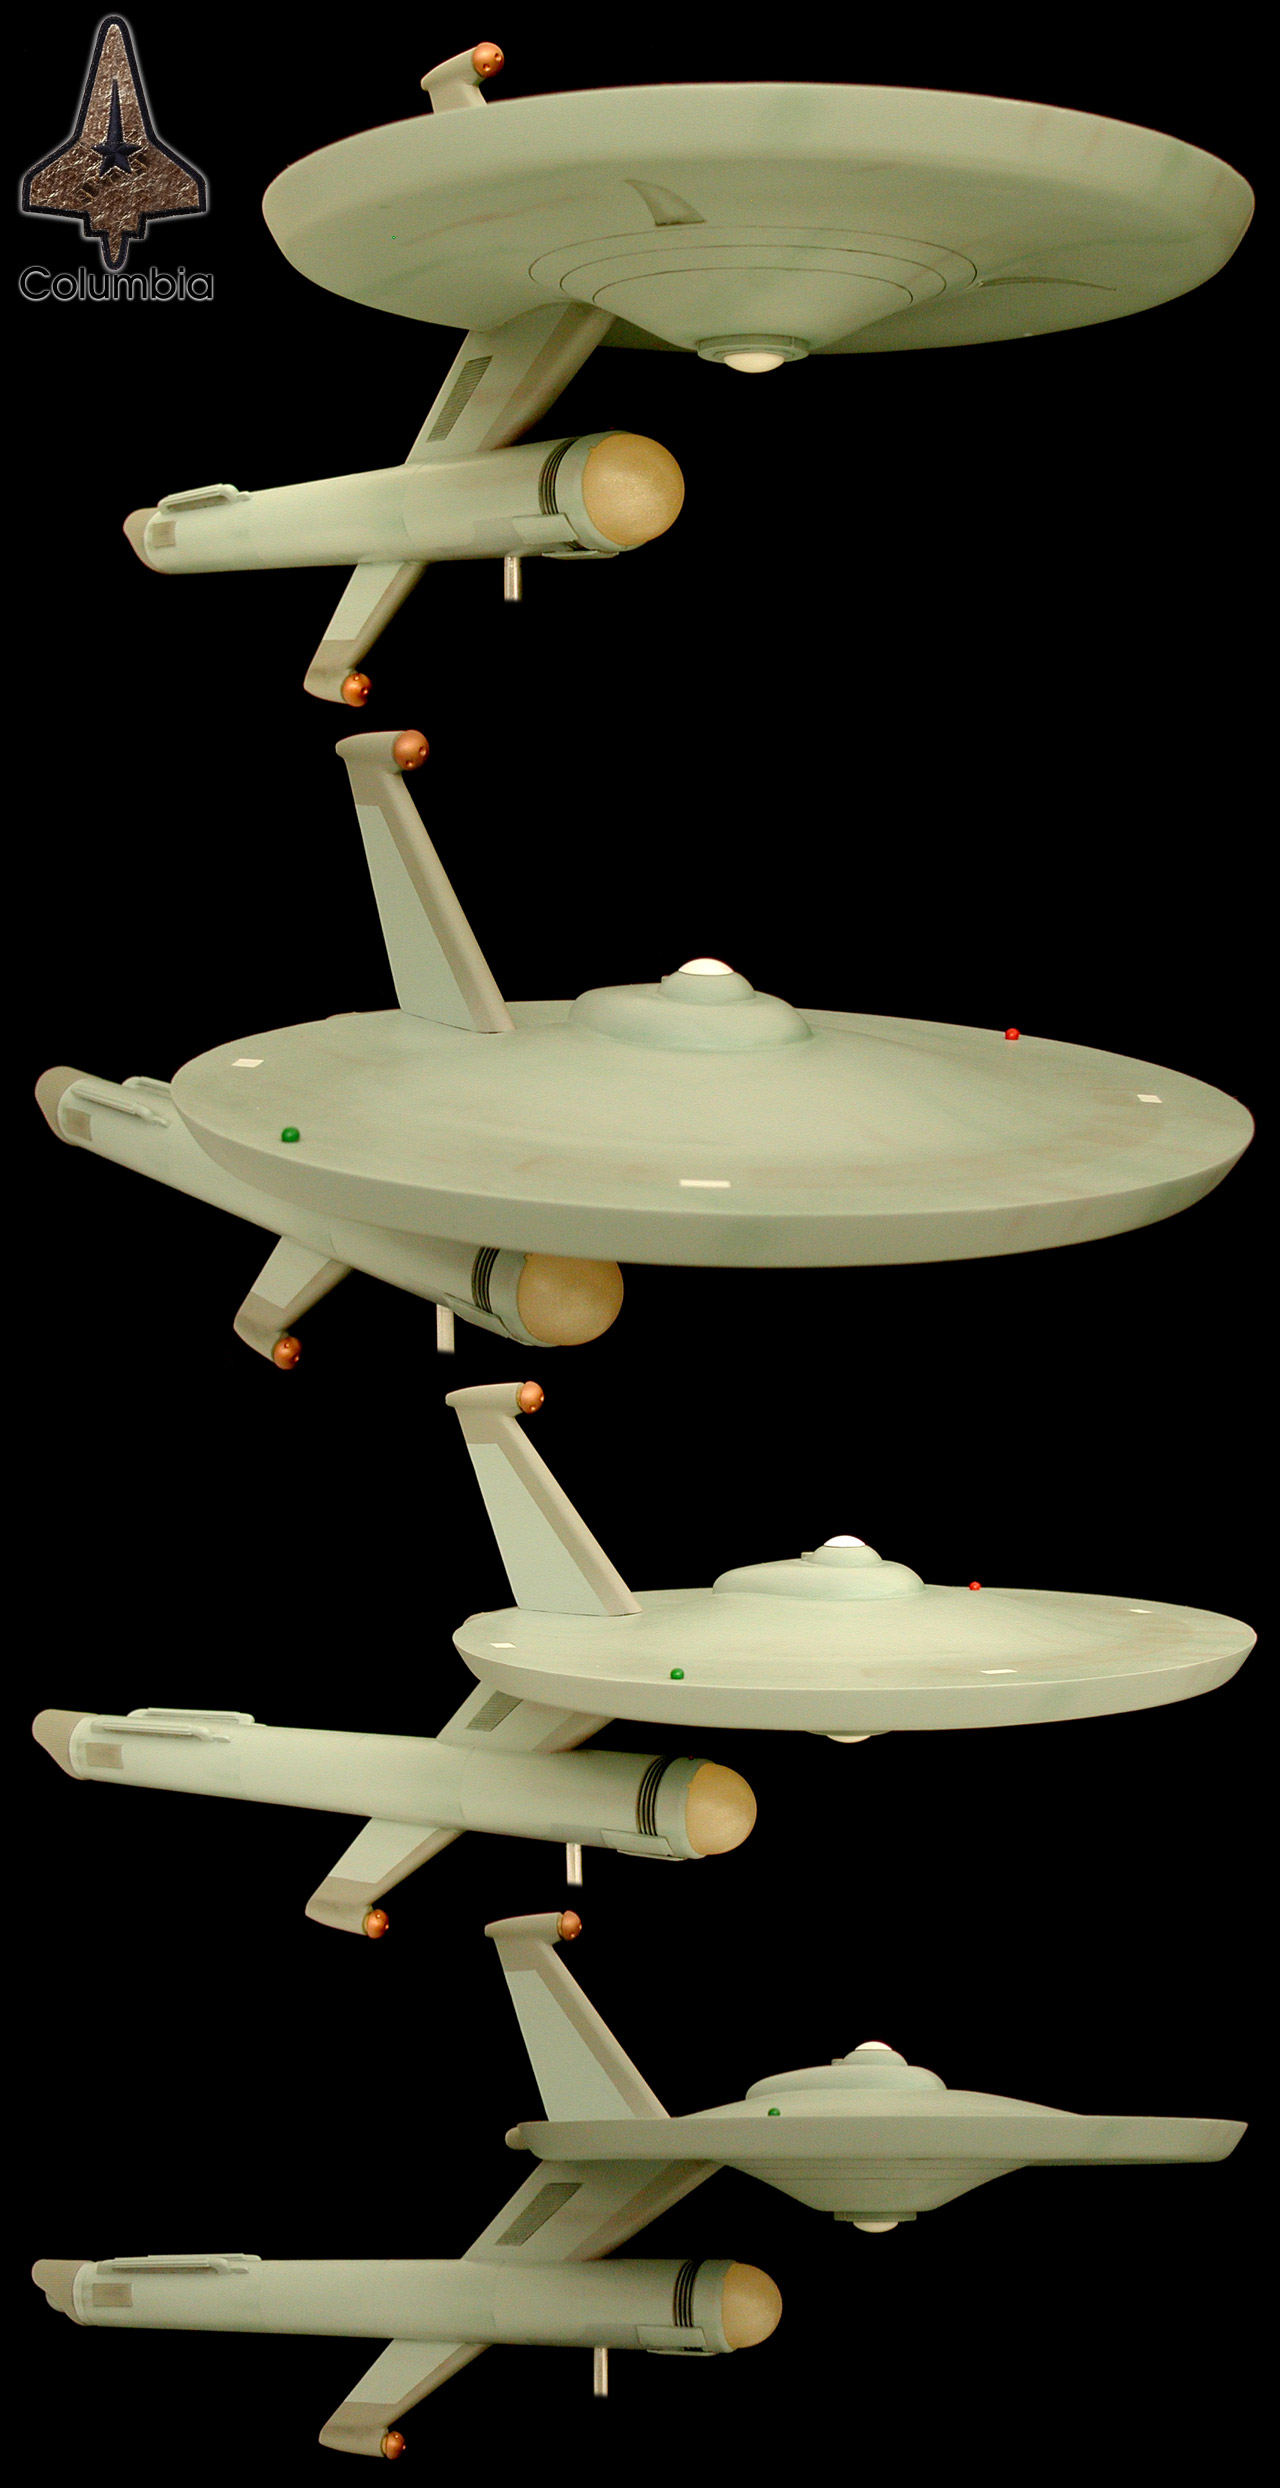
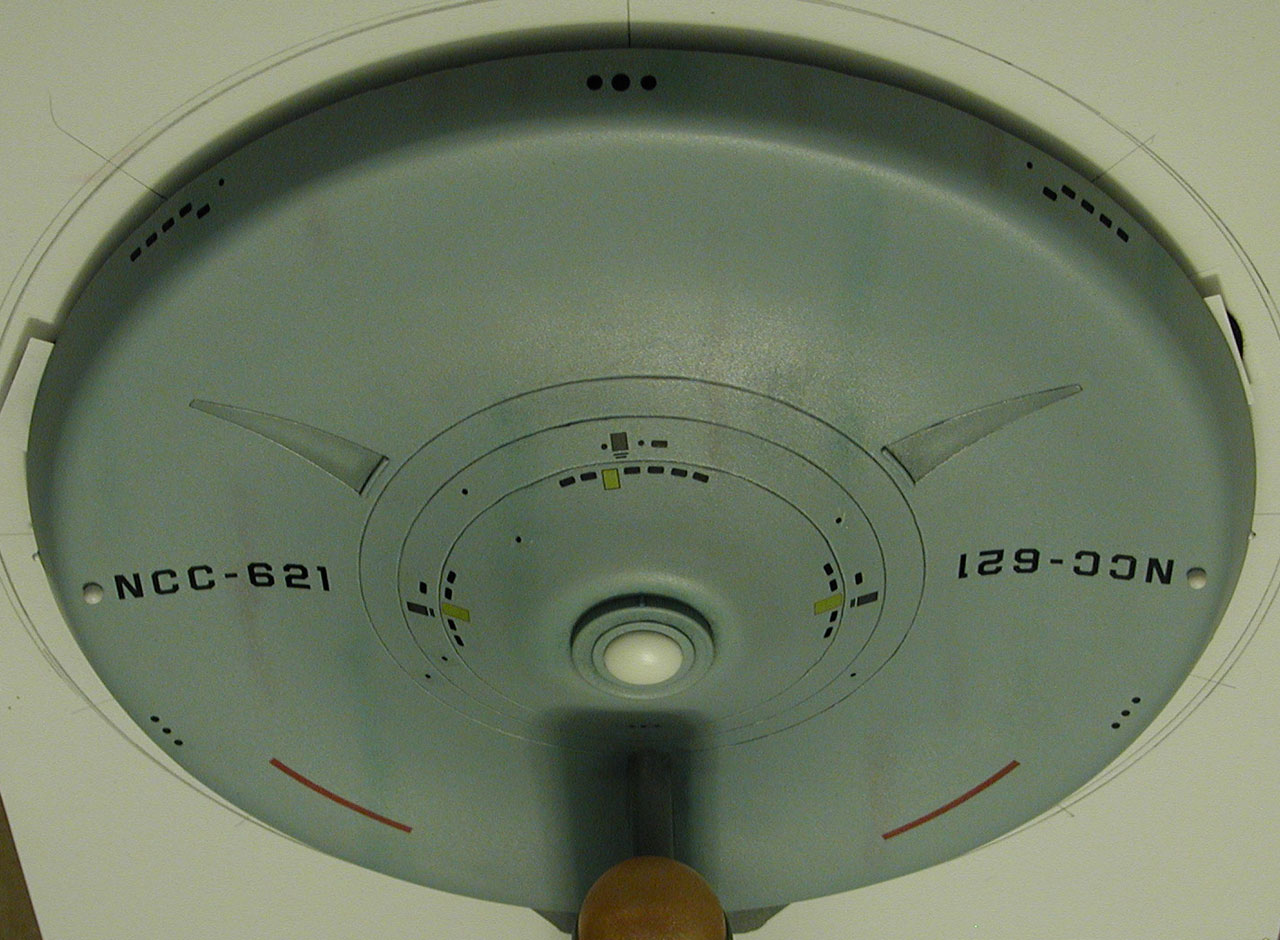
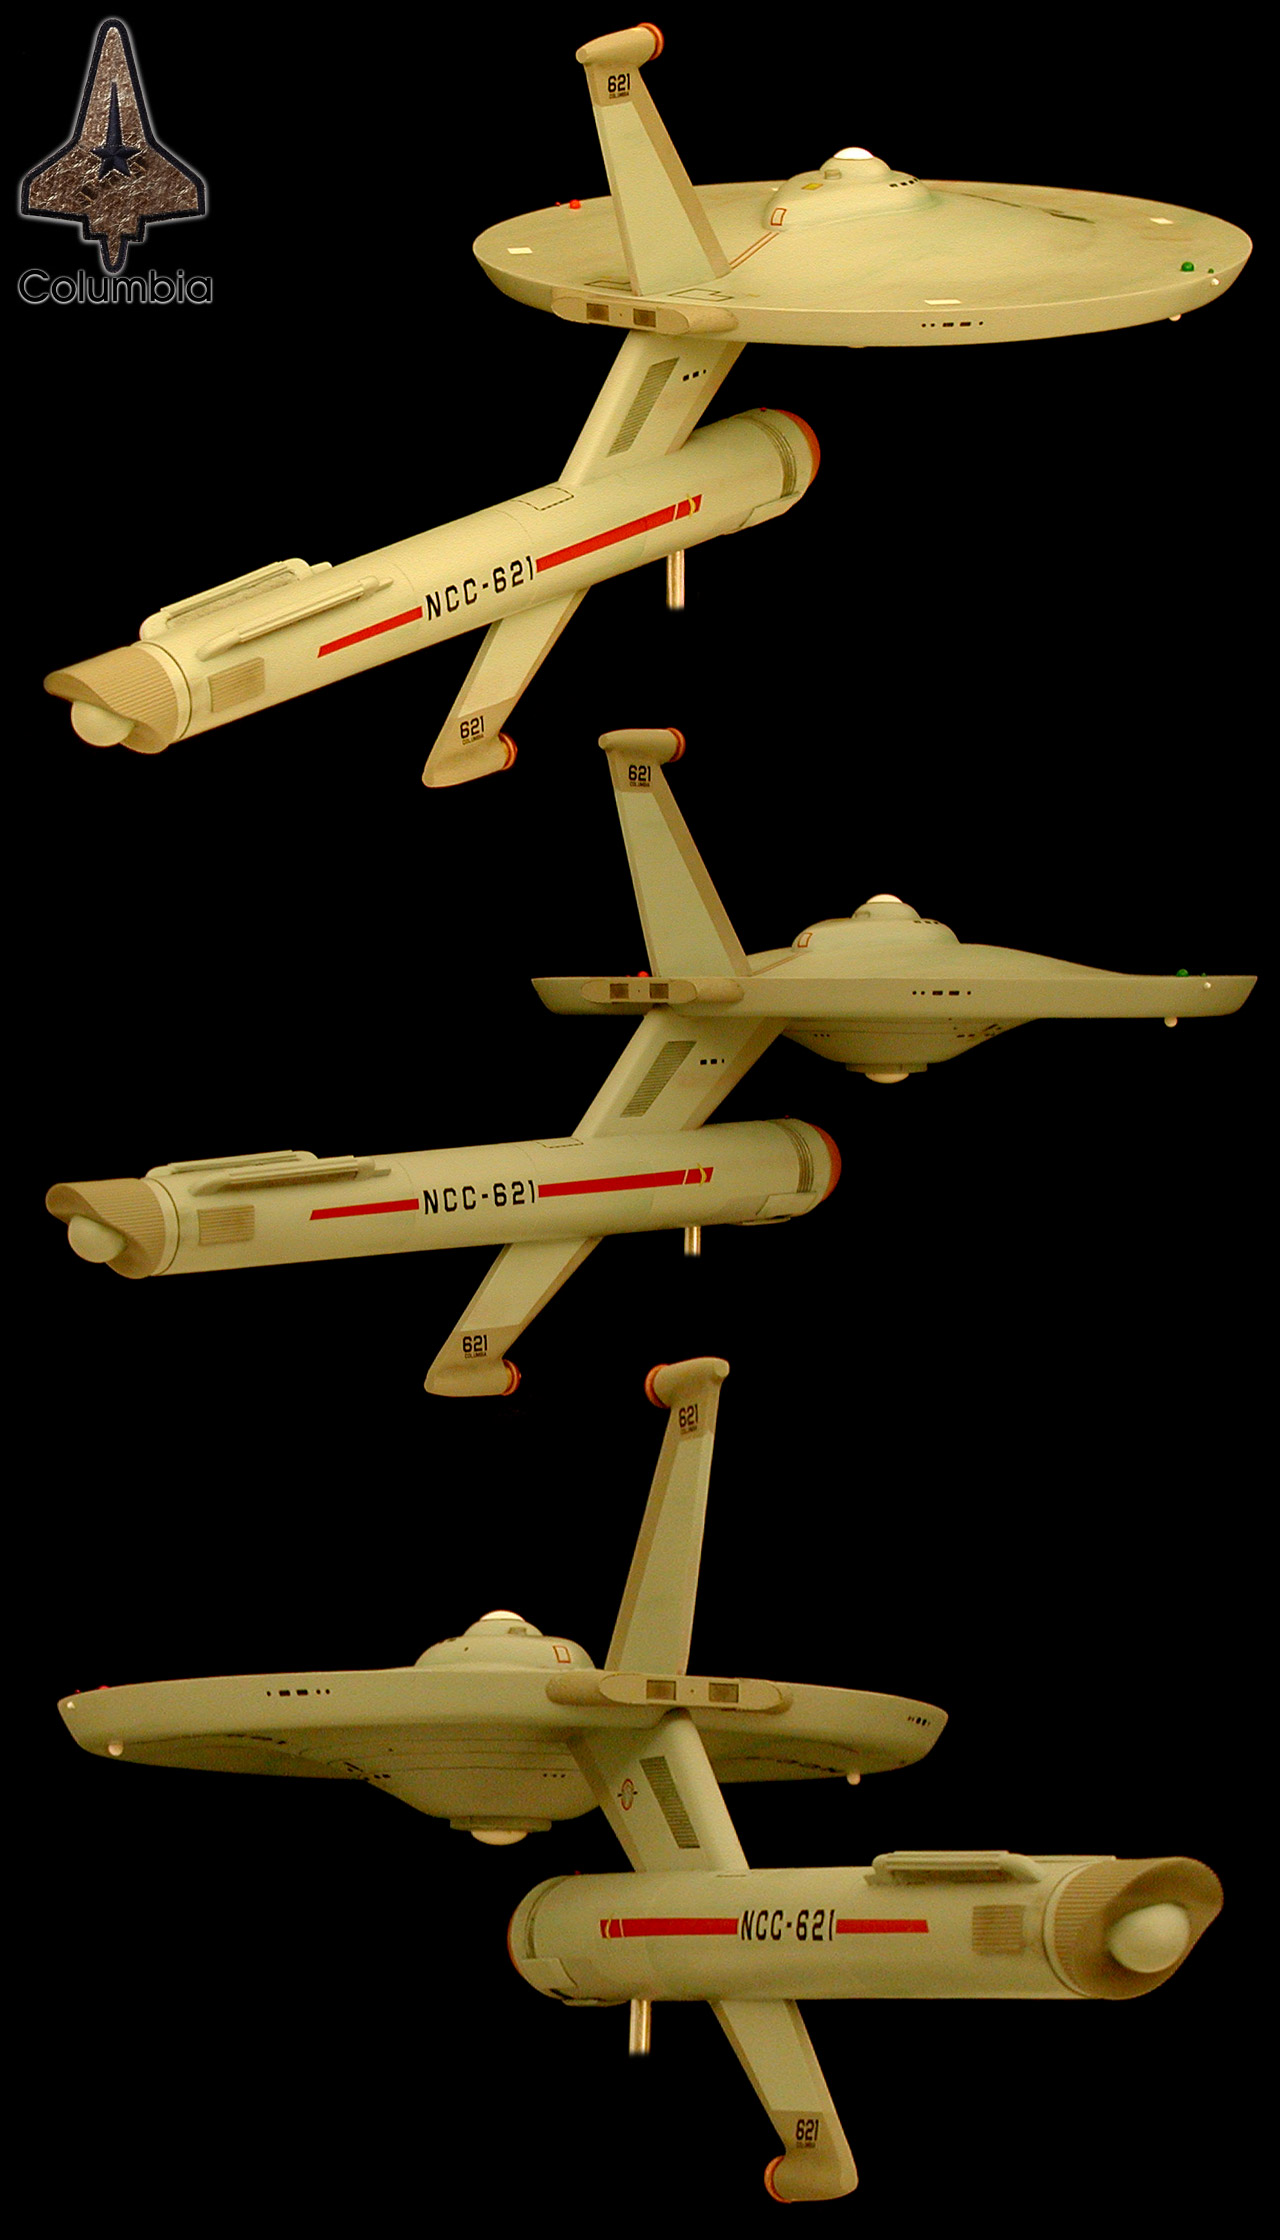
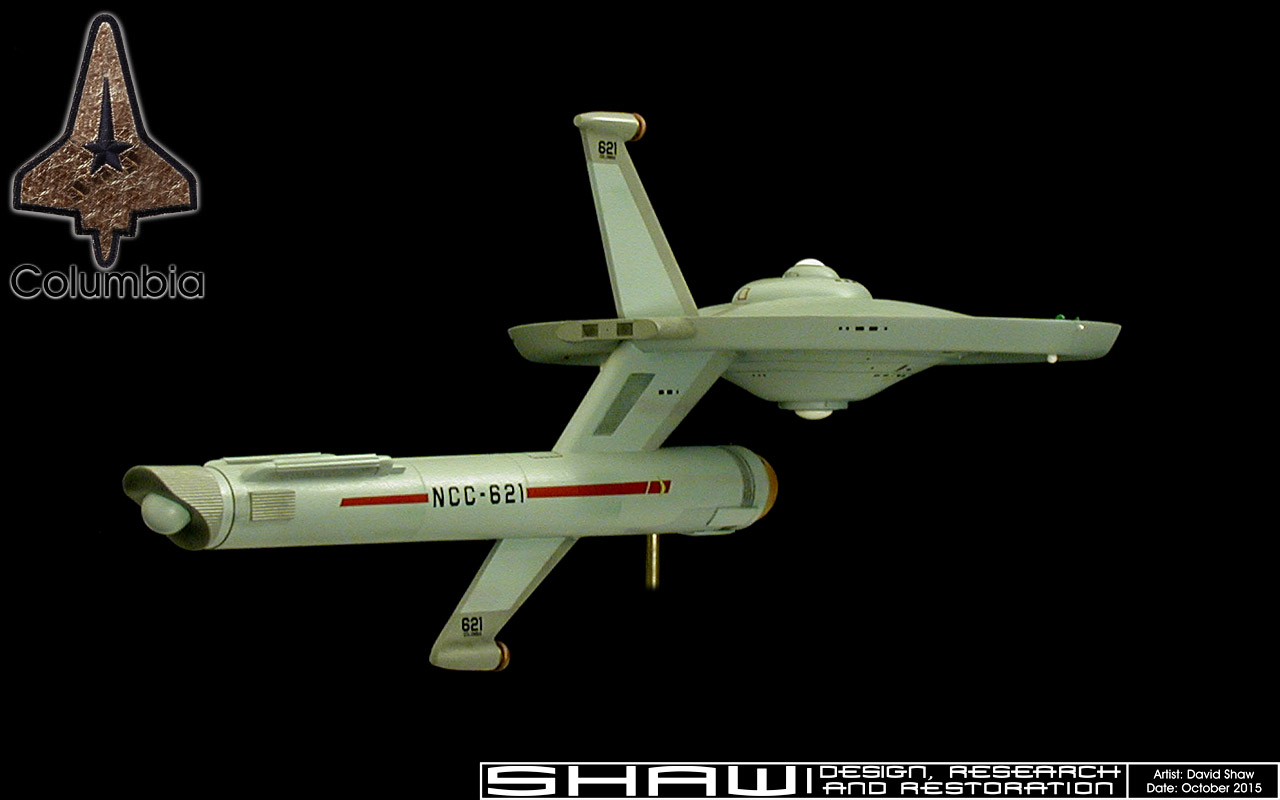
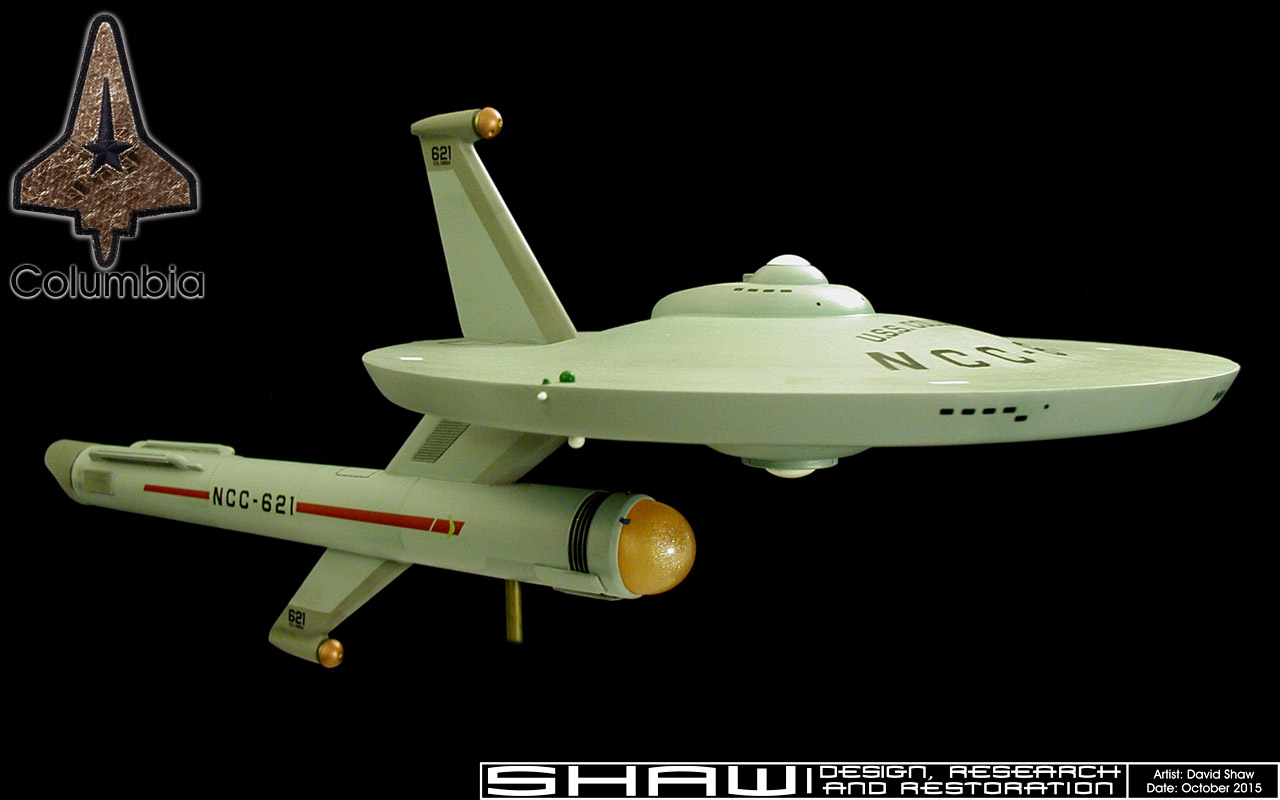
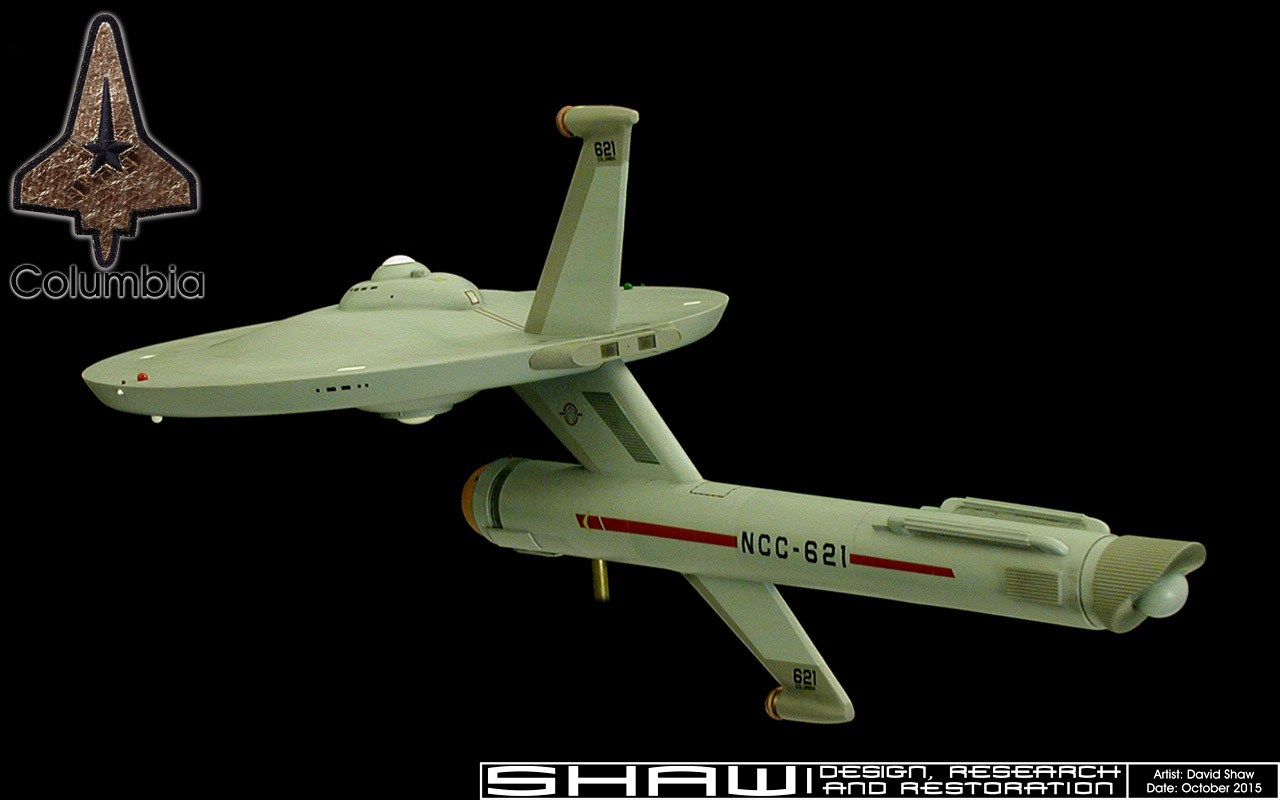
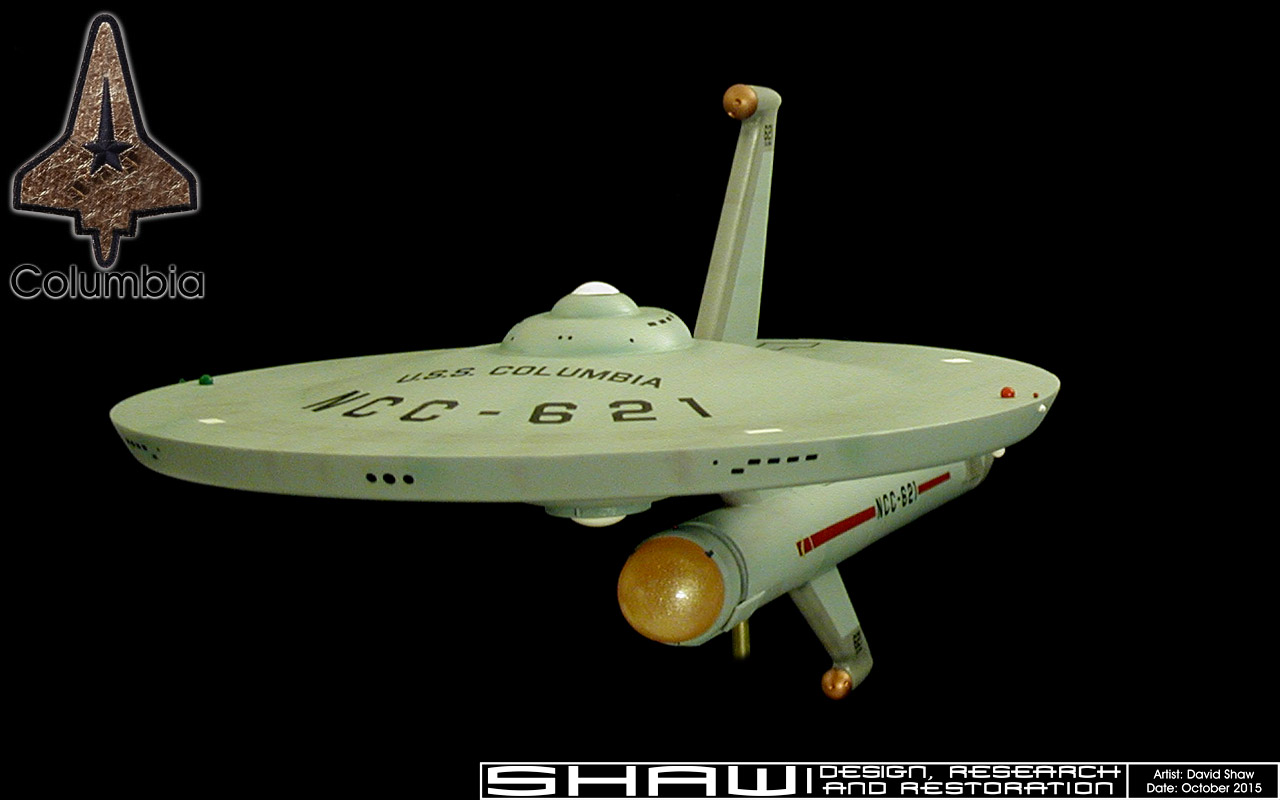
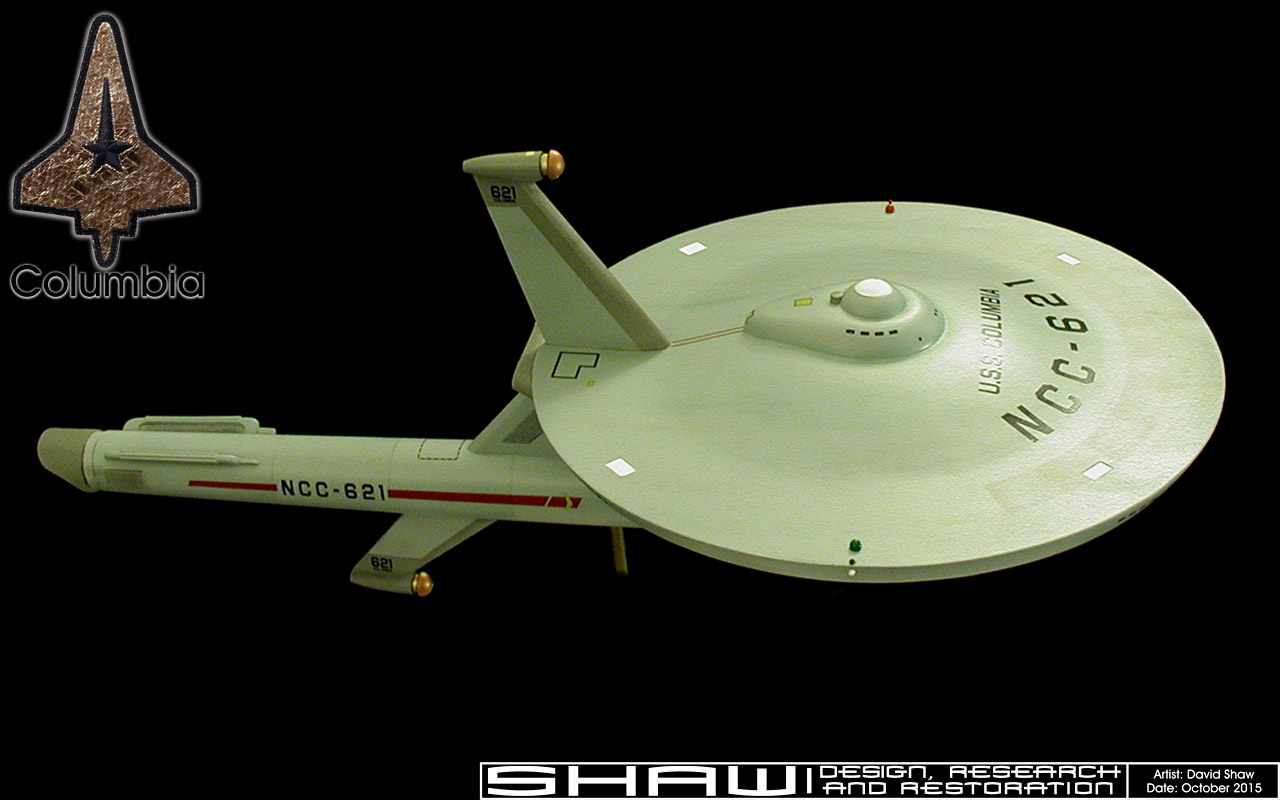
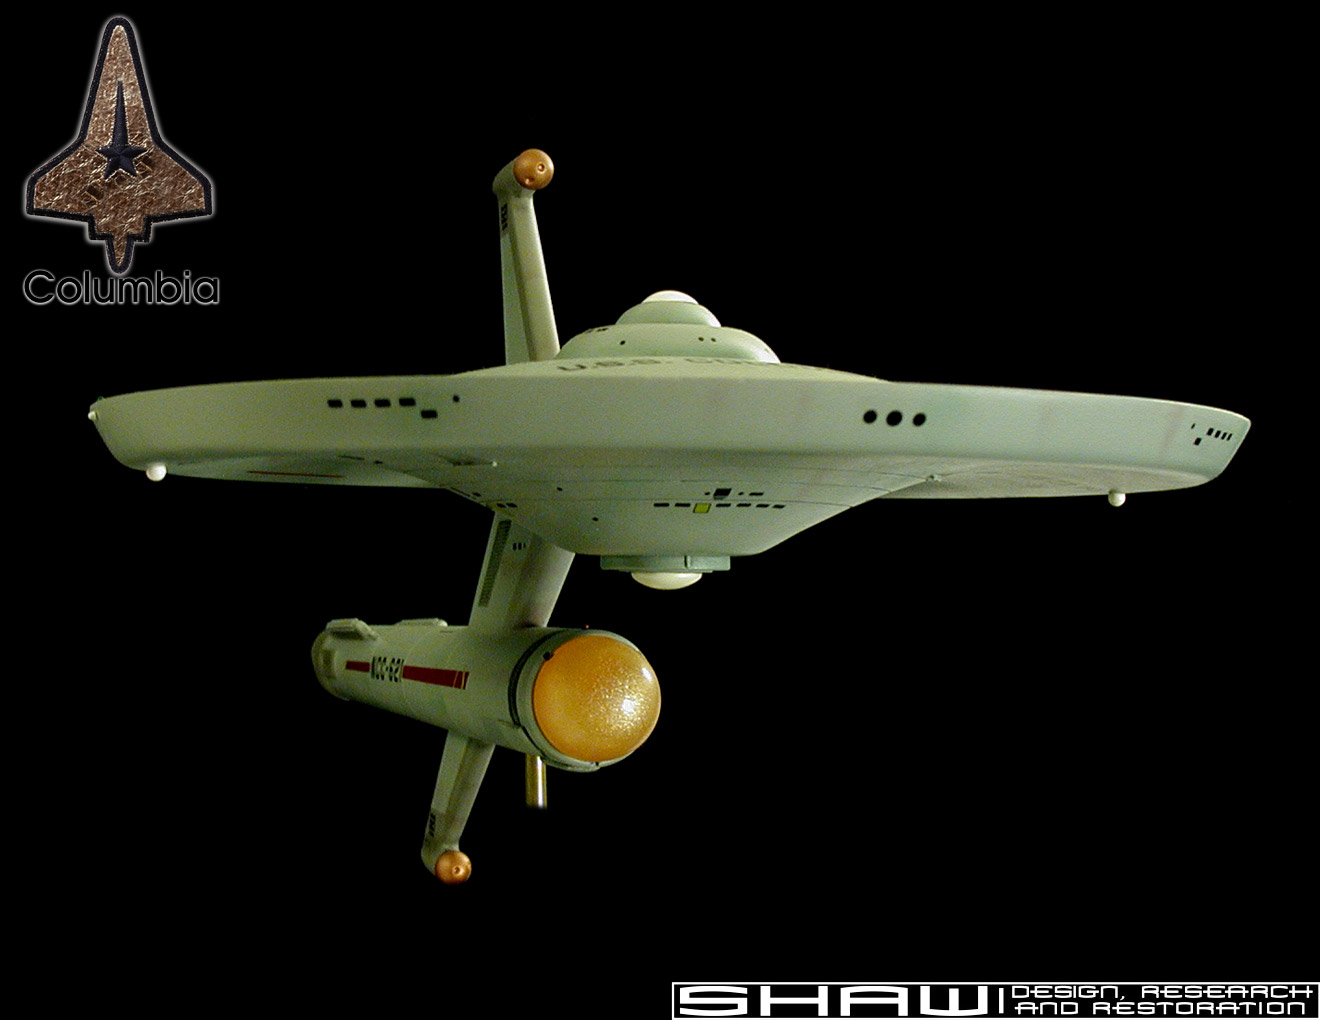
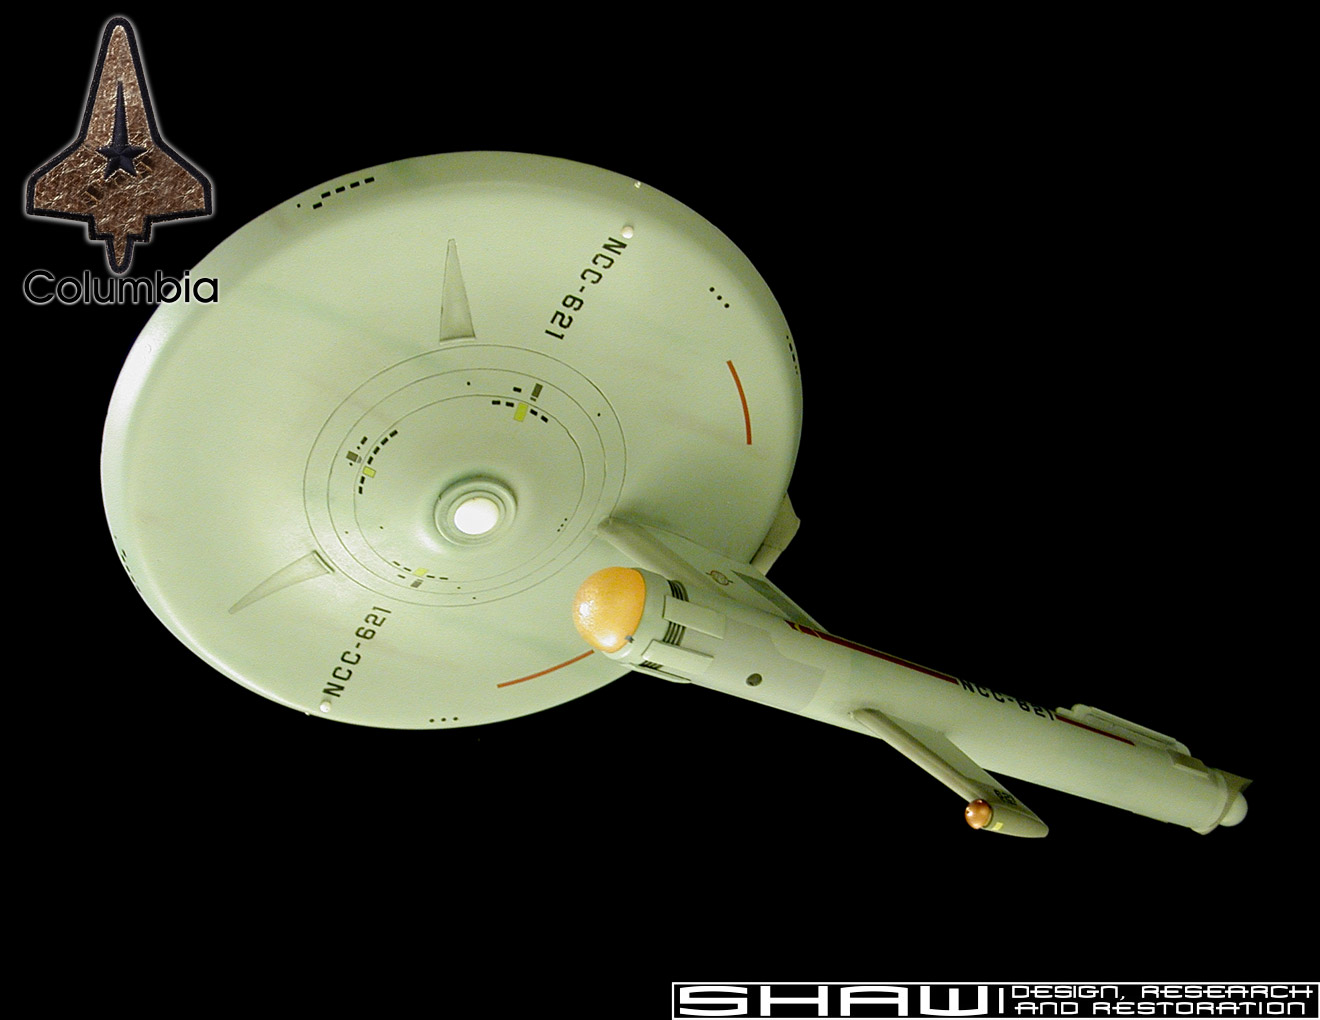
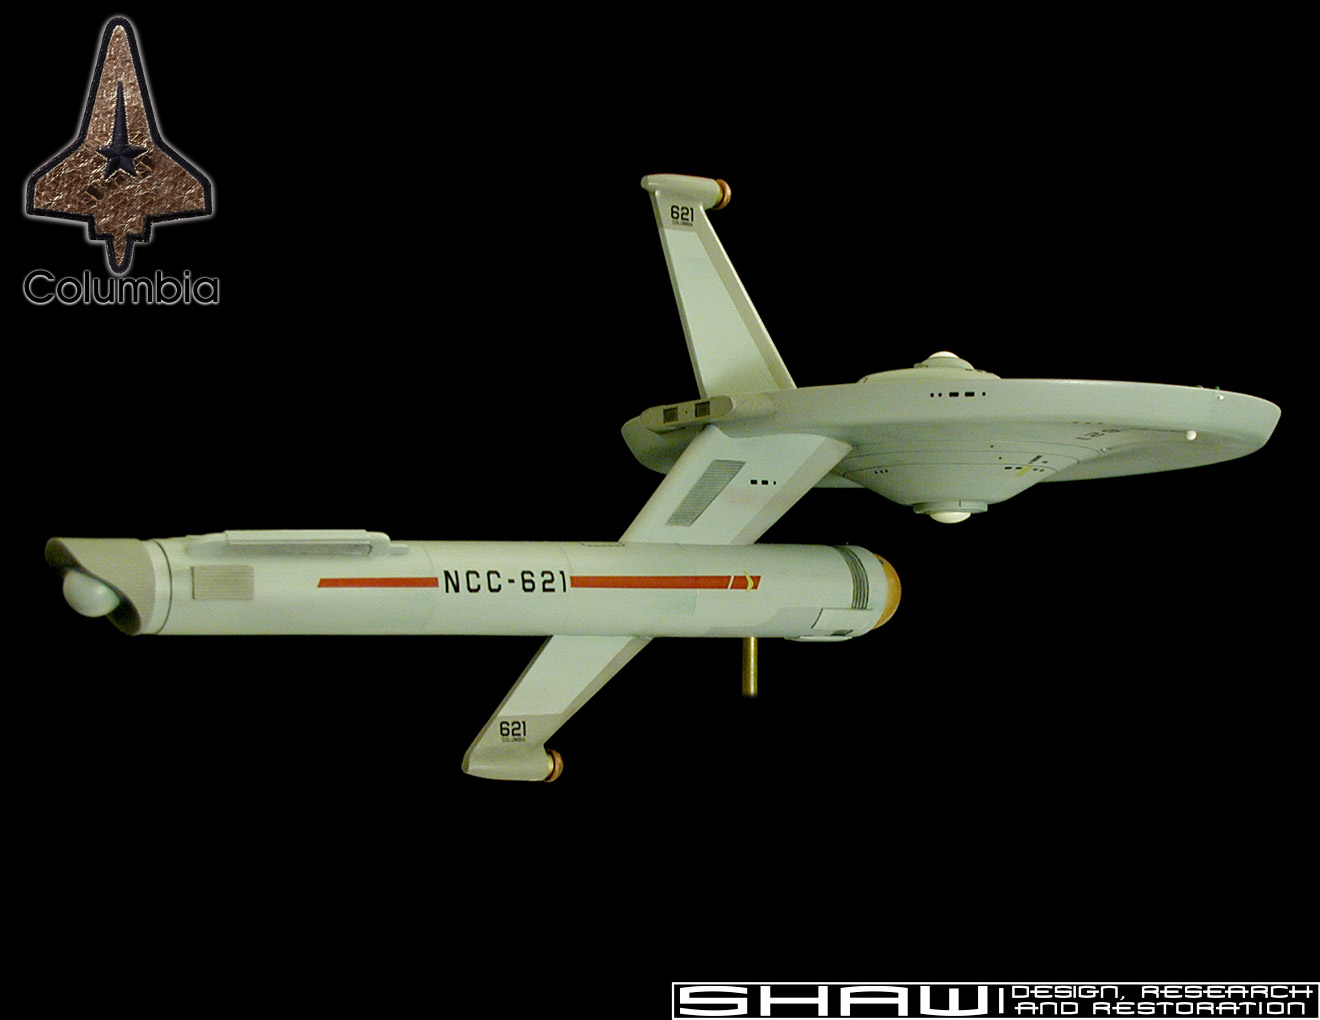
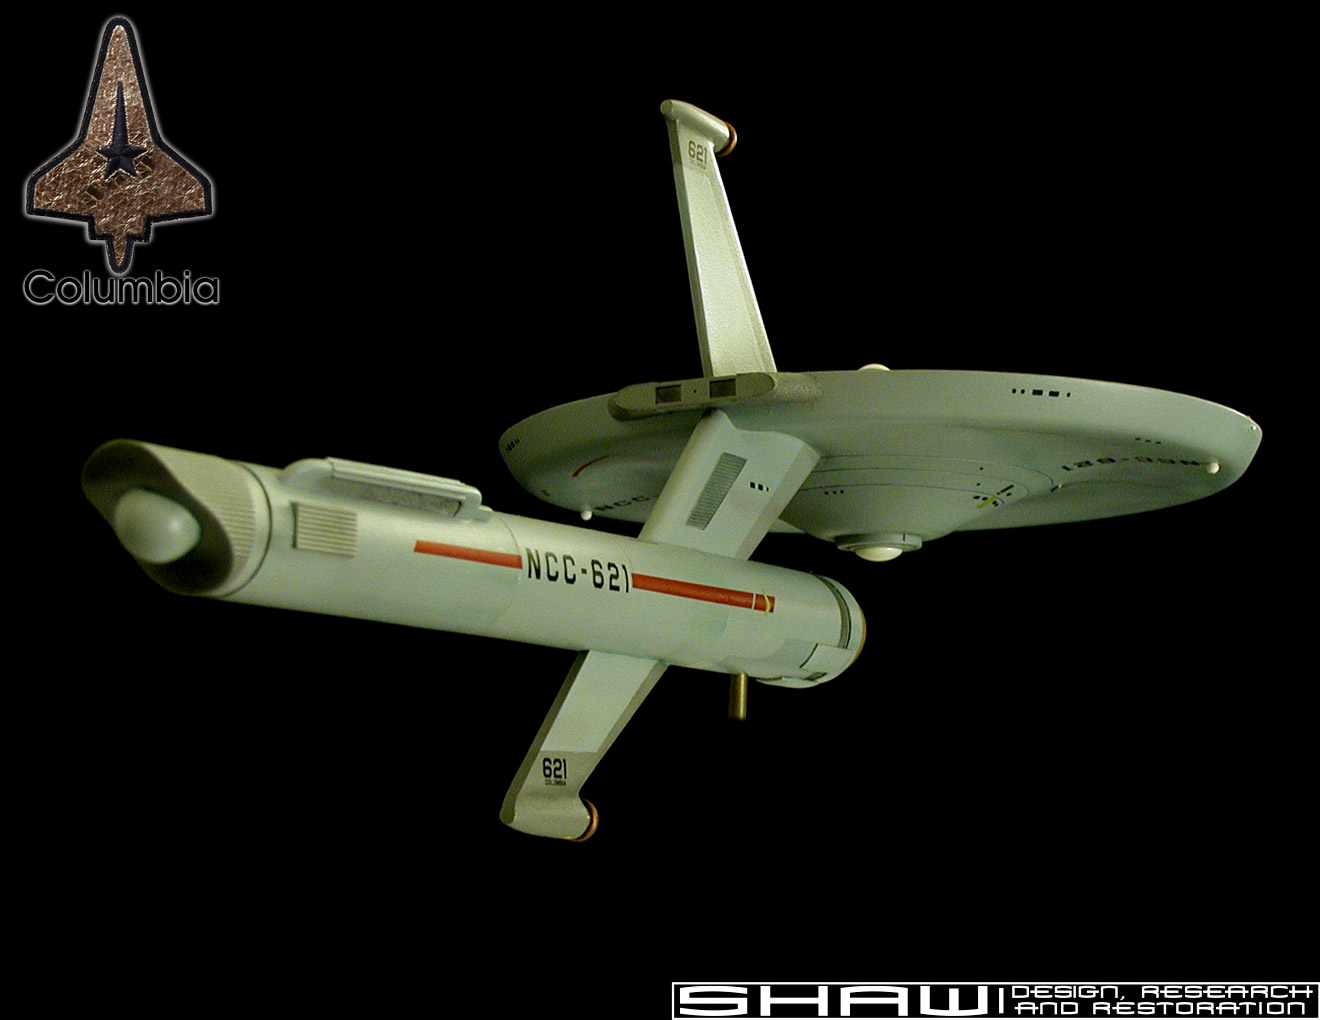
The docking hatch is recessed a small amount, so even if you can't see the decals because of a glare on the surface, the physical circle would still show. The decal for the door is from the Phase II Enterprise decal sheet, but the target ring decal was made for the Columbia. I figured this modification was during the Phase II era.

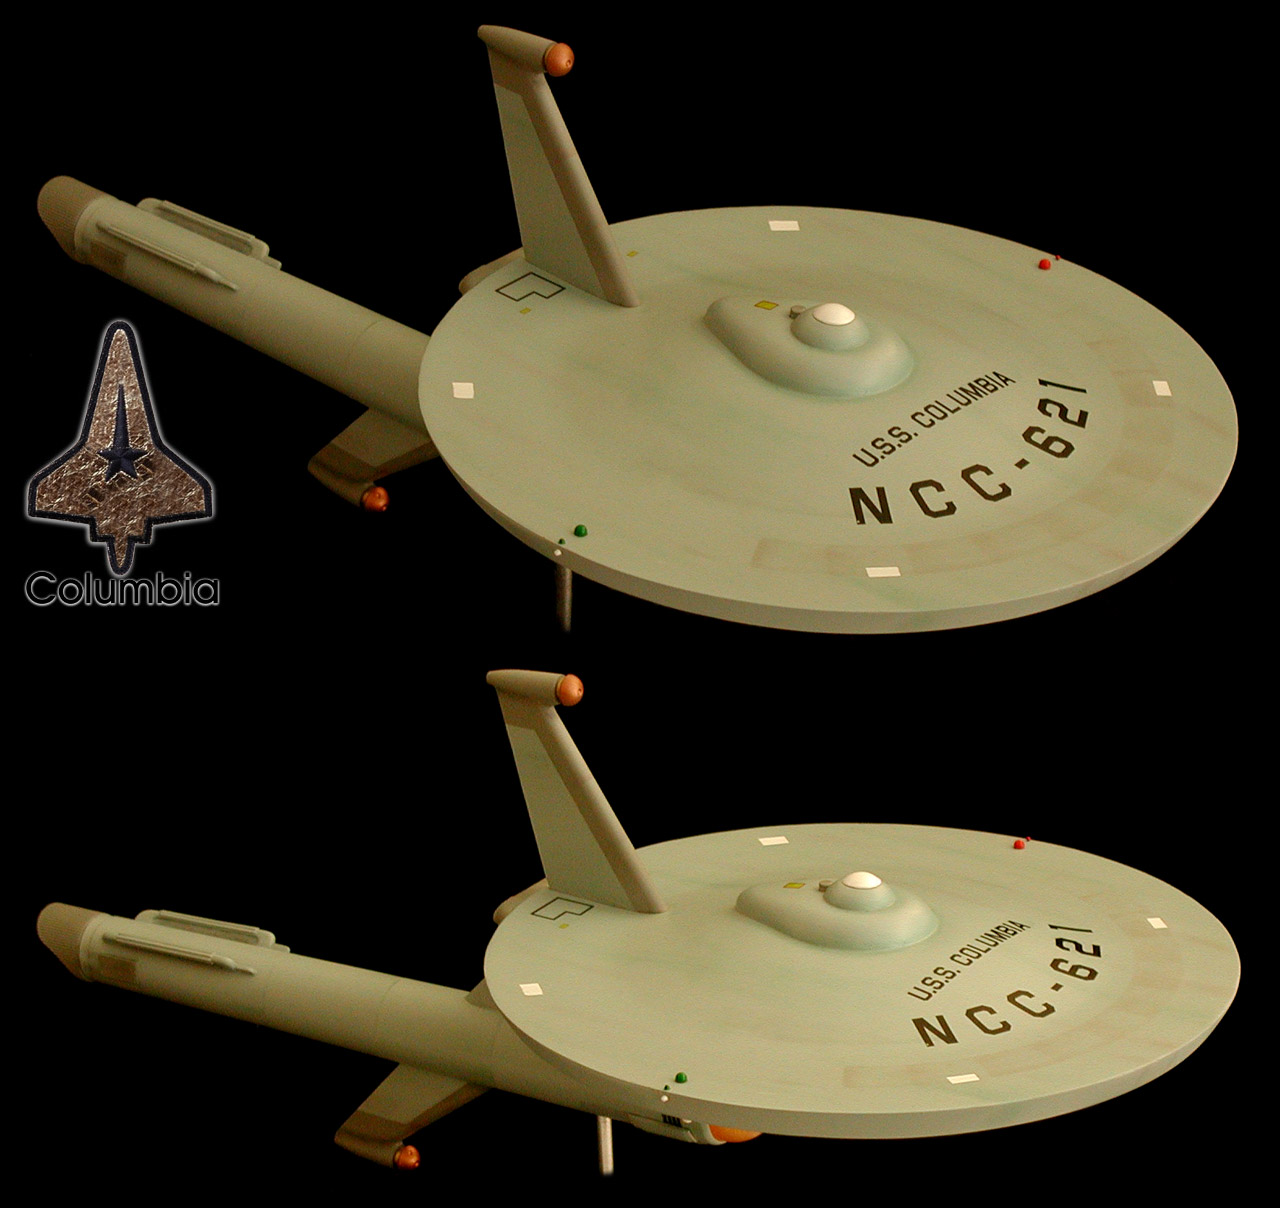
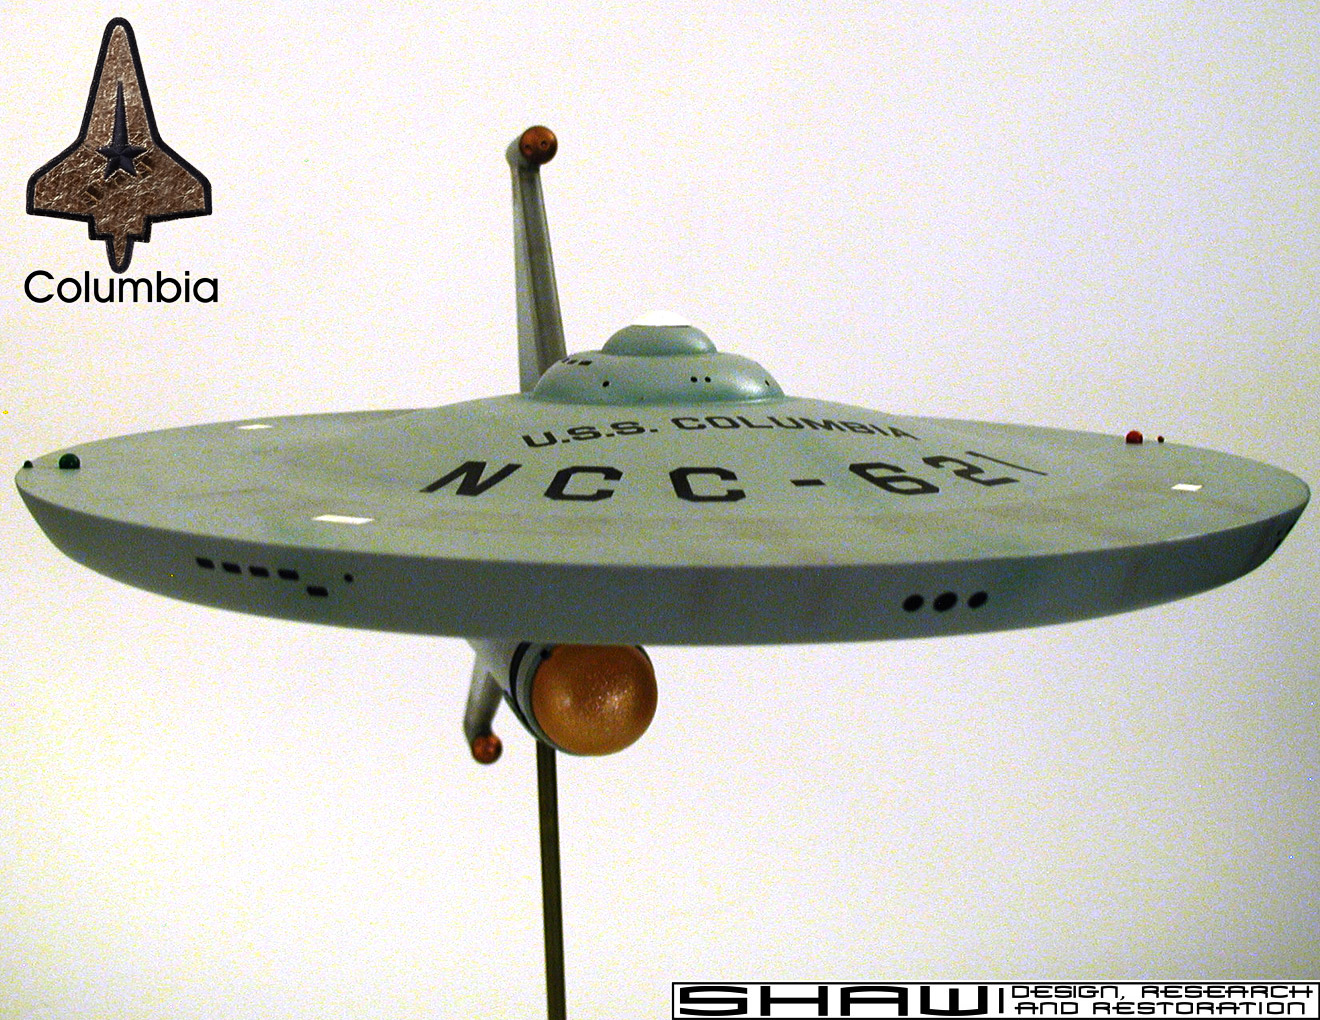
I always felt that with the scout/destroyer configuration the dorsal spaces would be mostly devoted to engineering, so the only windows I put on the dorsal were directly across from the docking hatch for the receiving area. Engineers don't need windows.

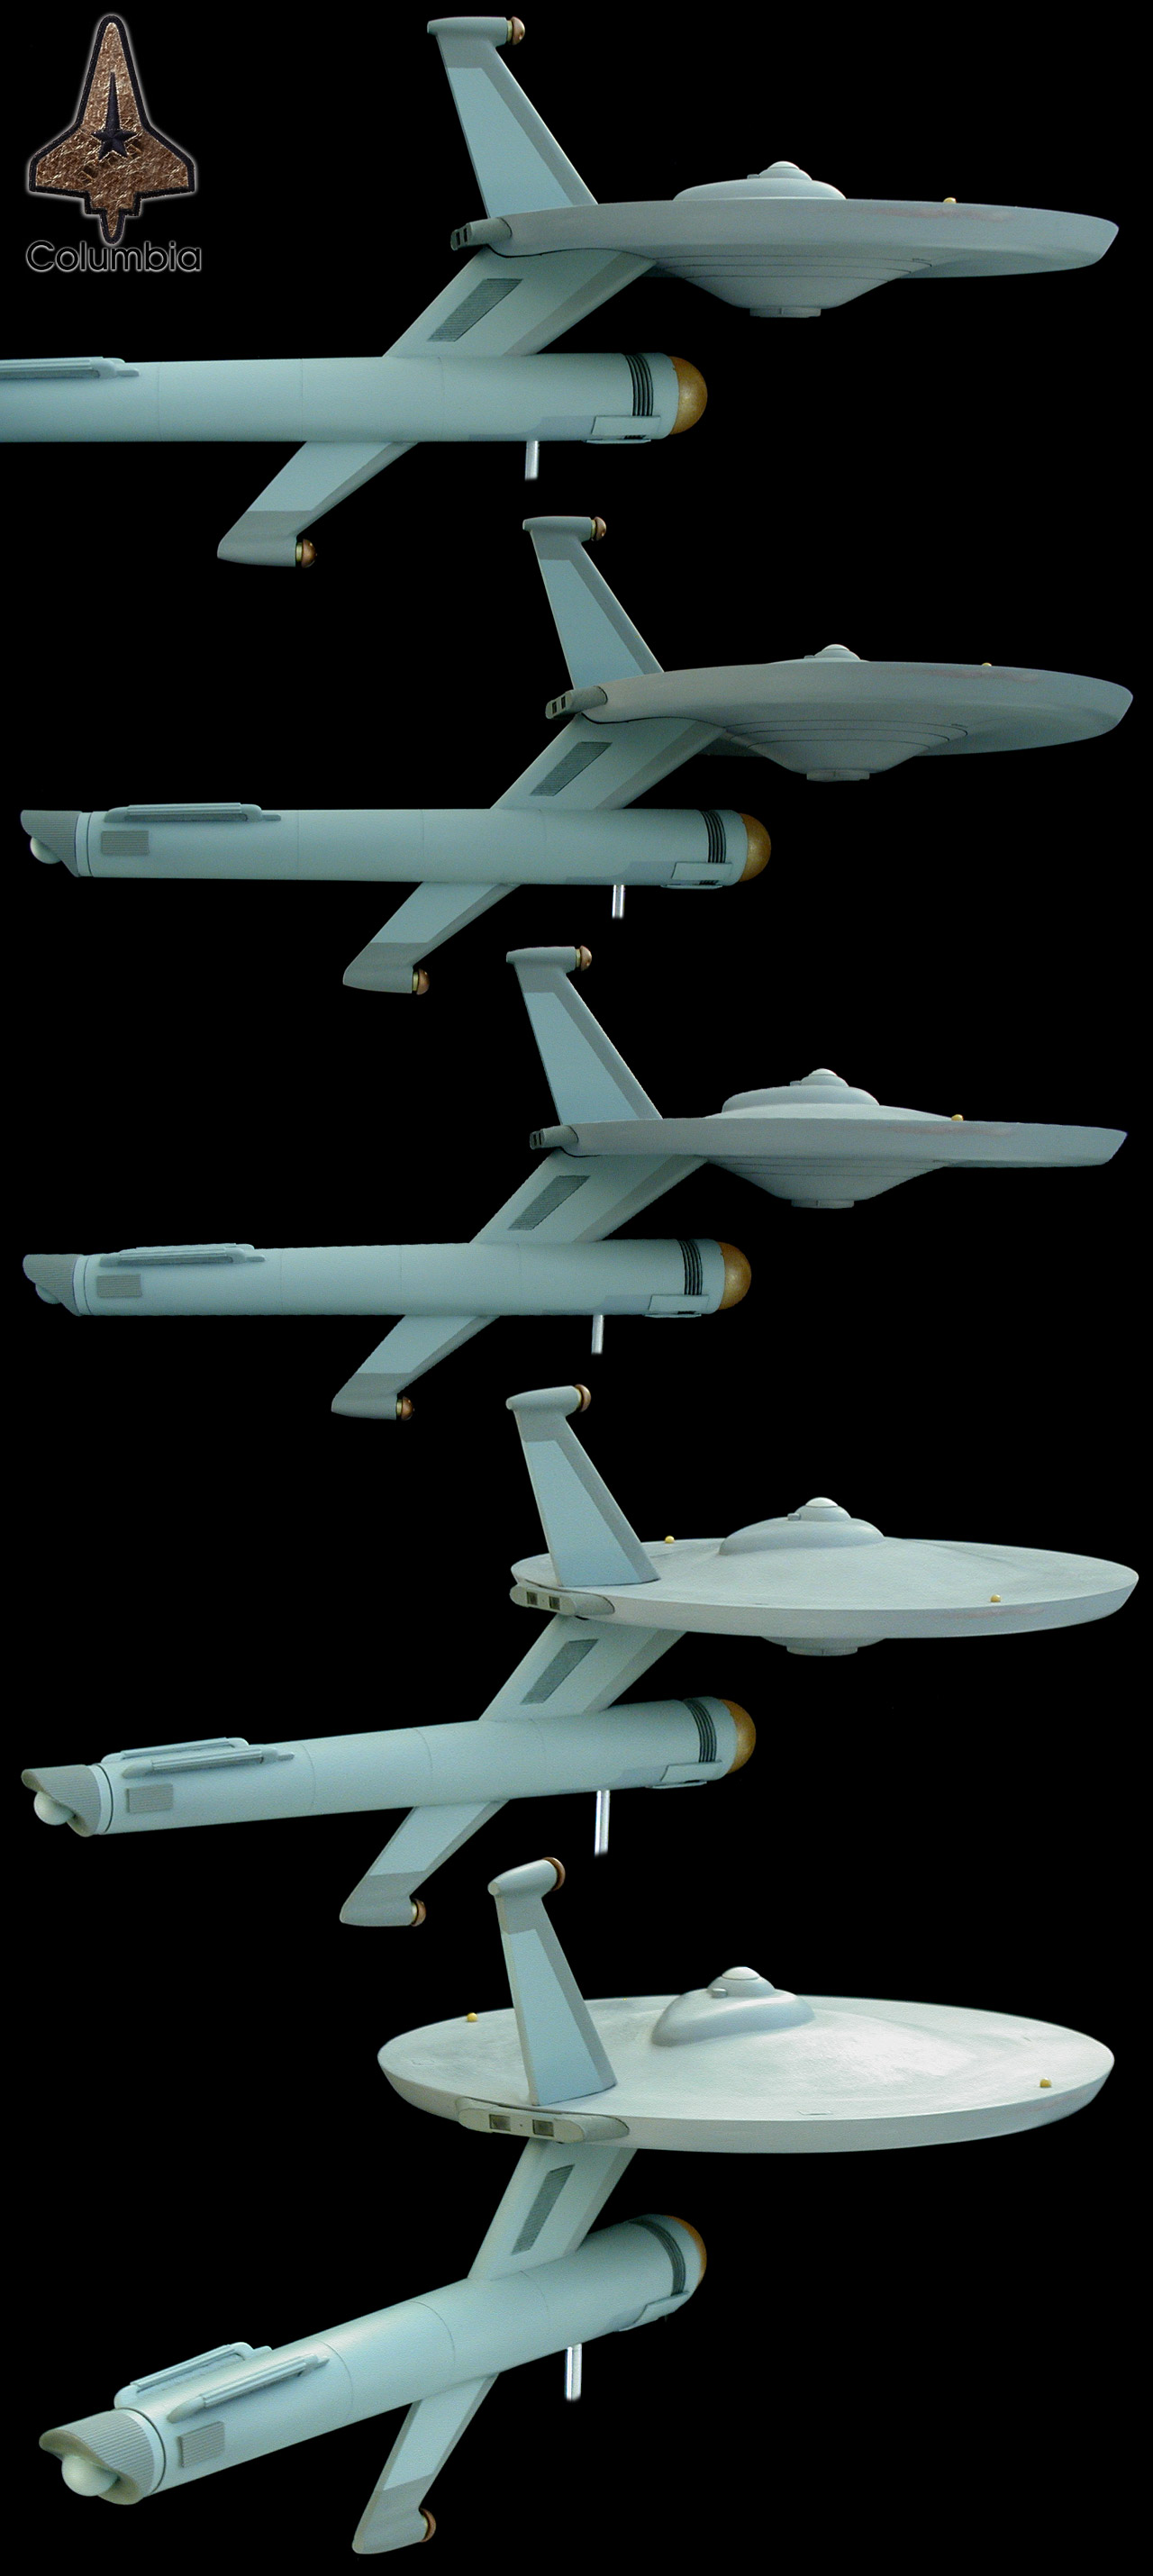
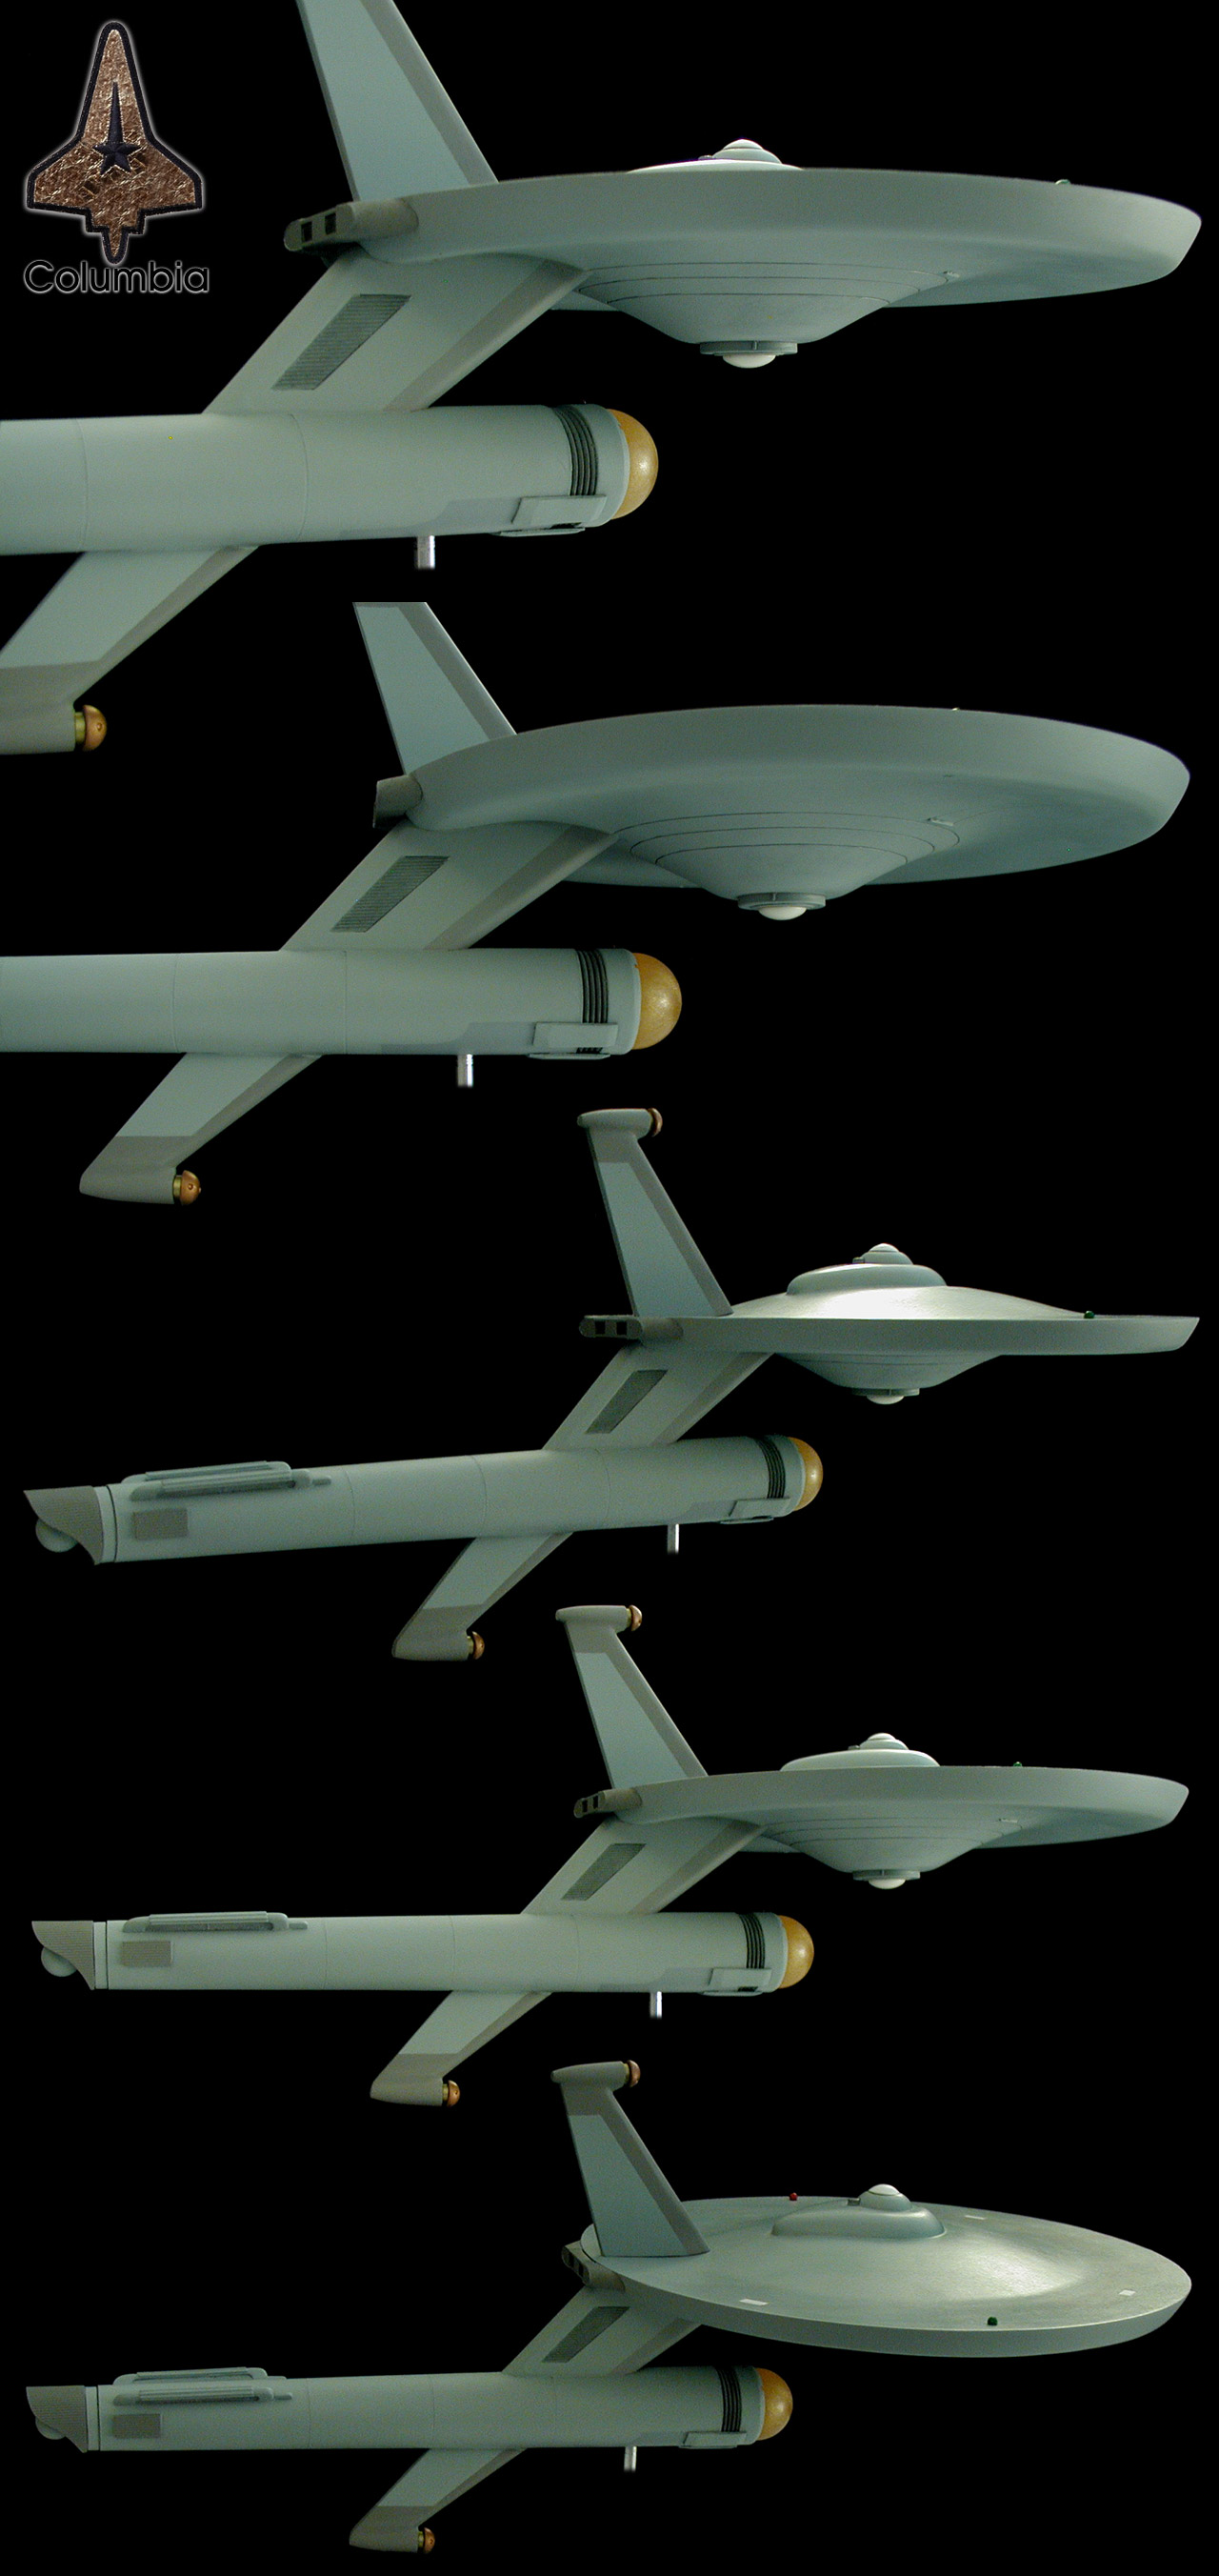
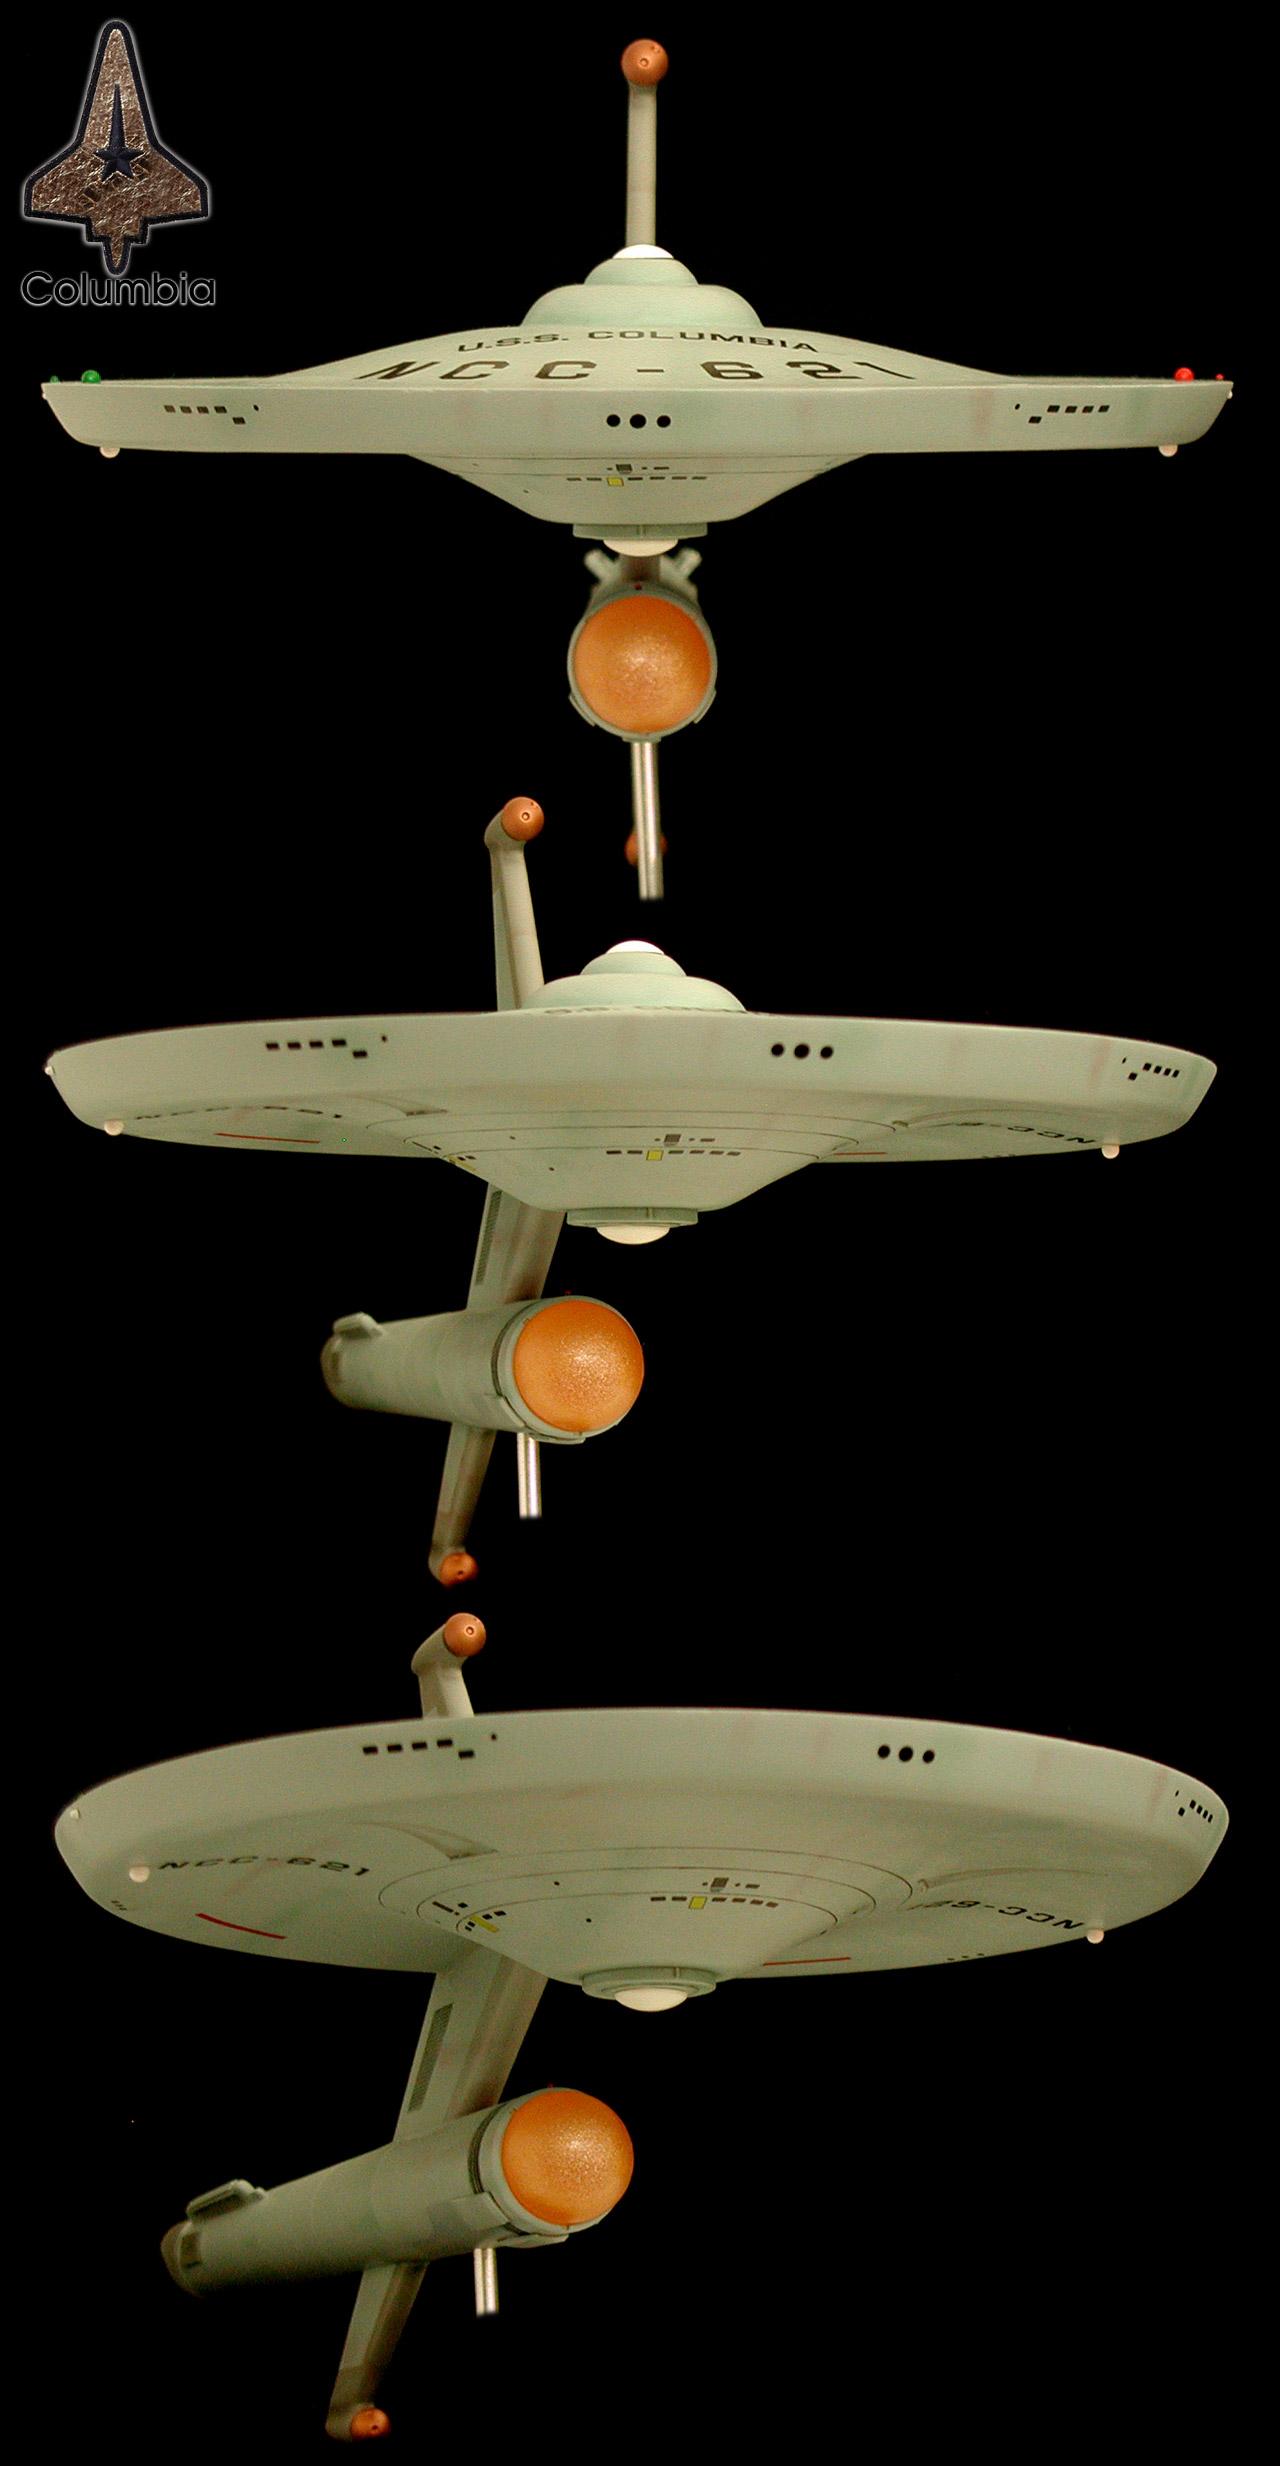
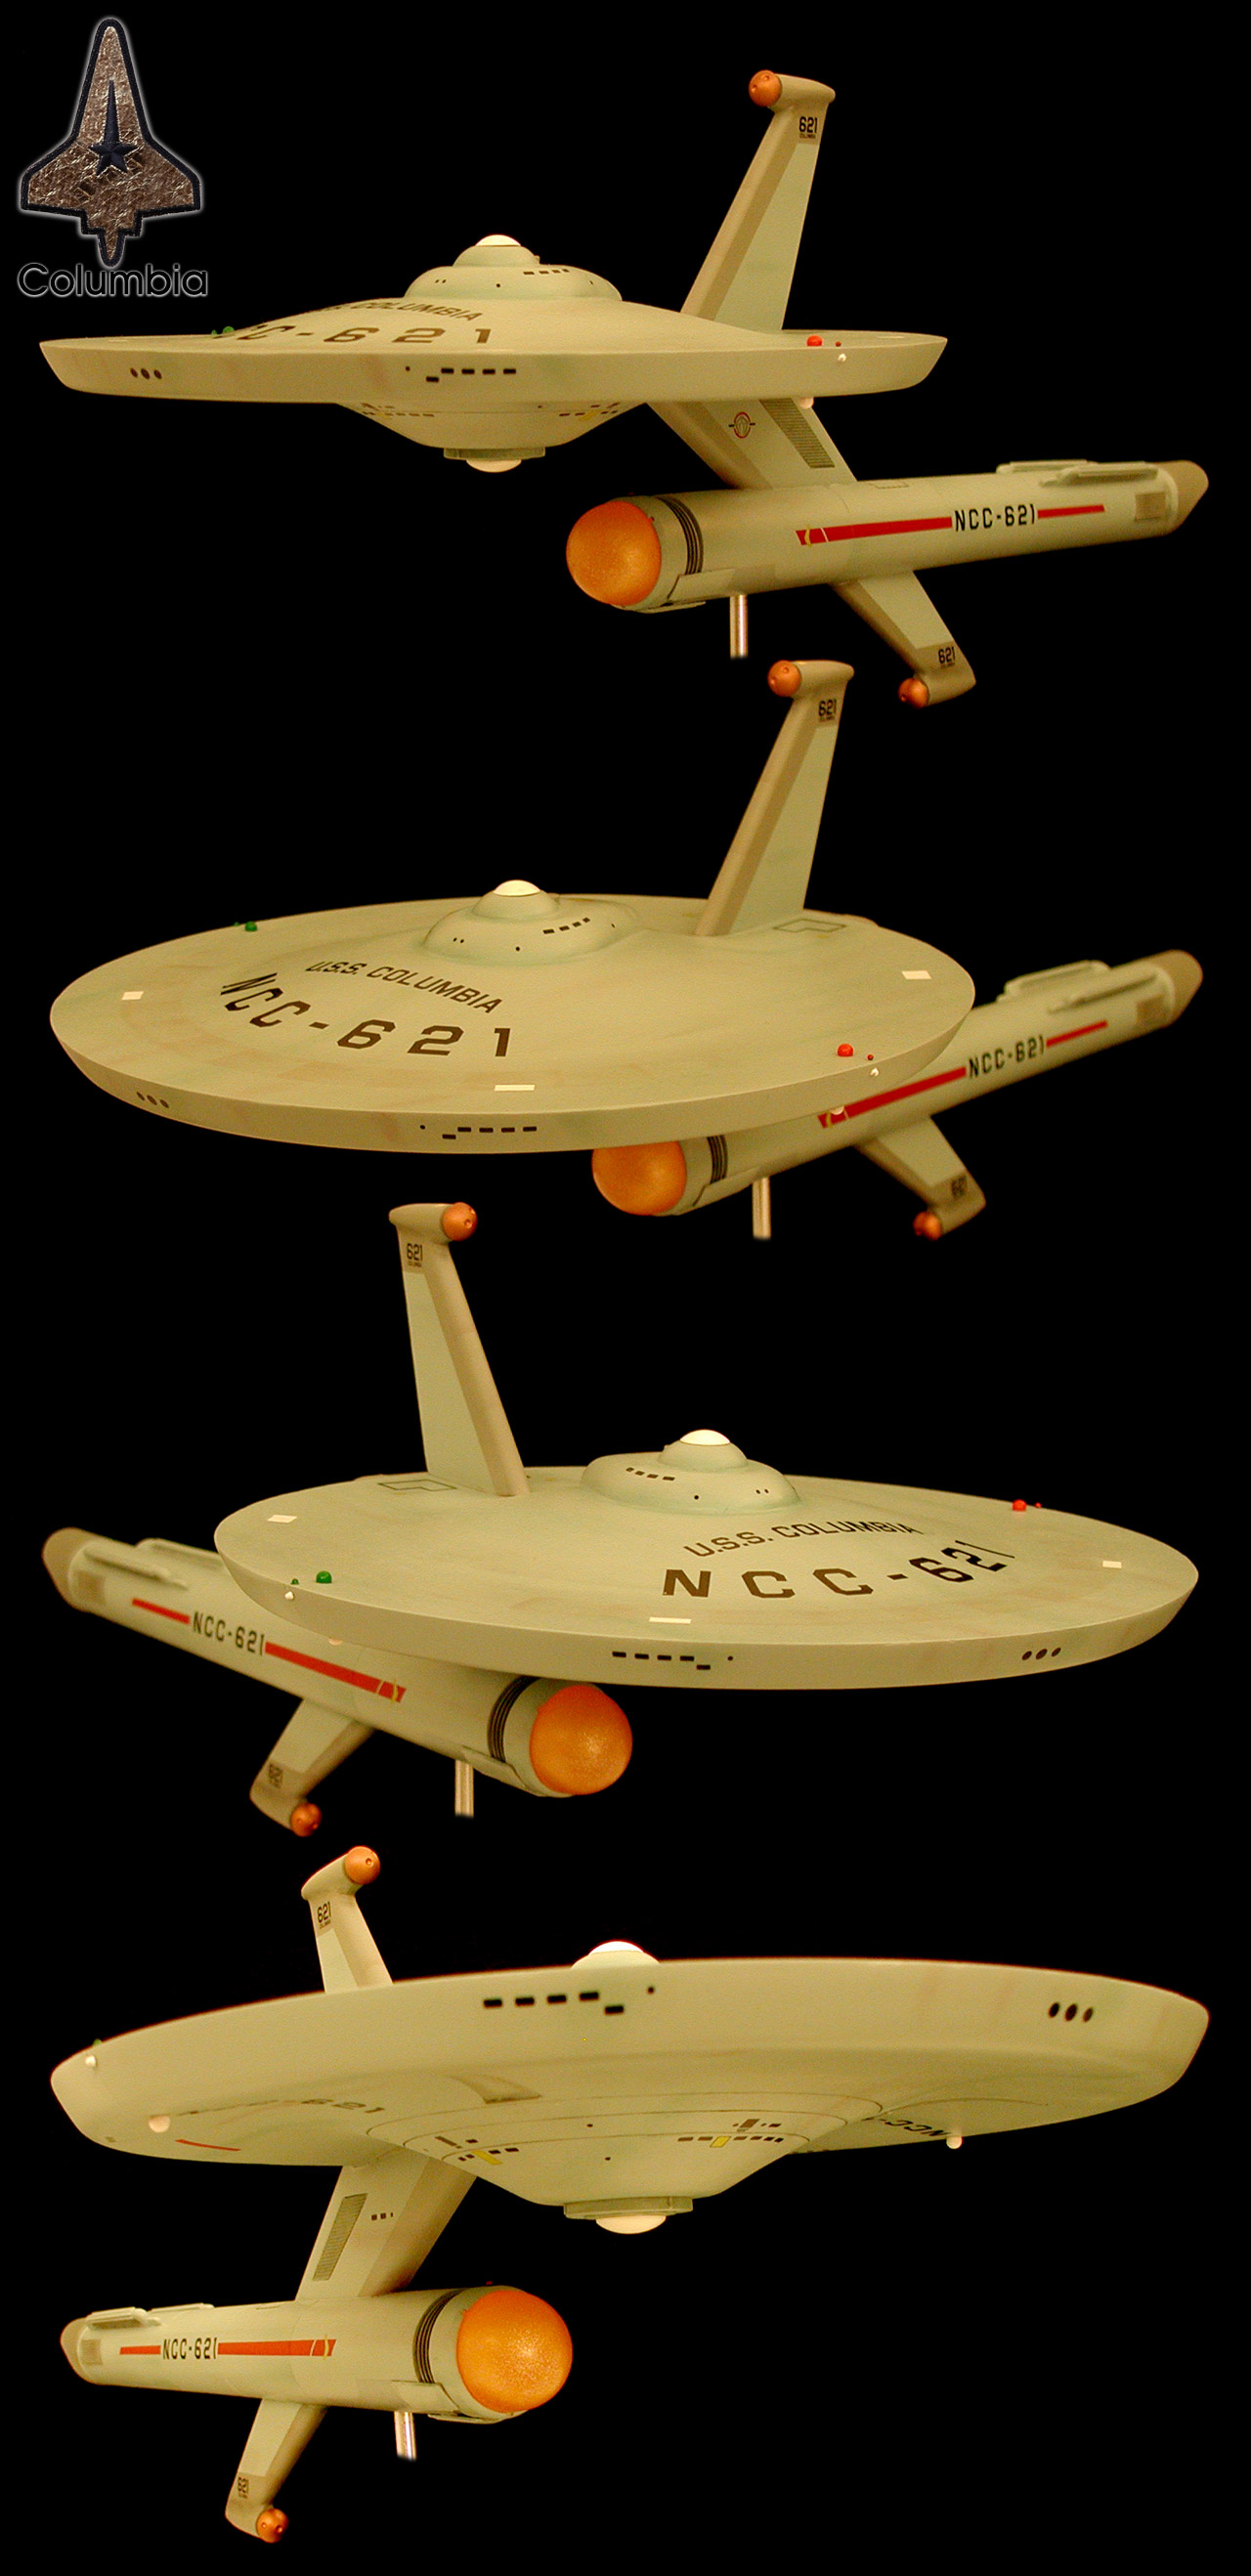
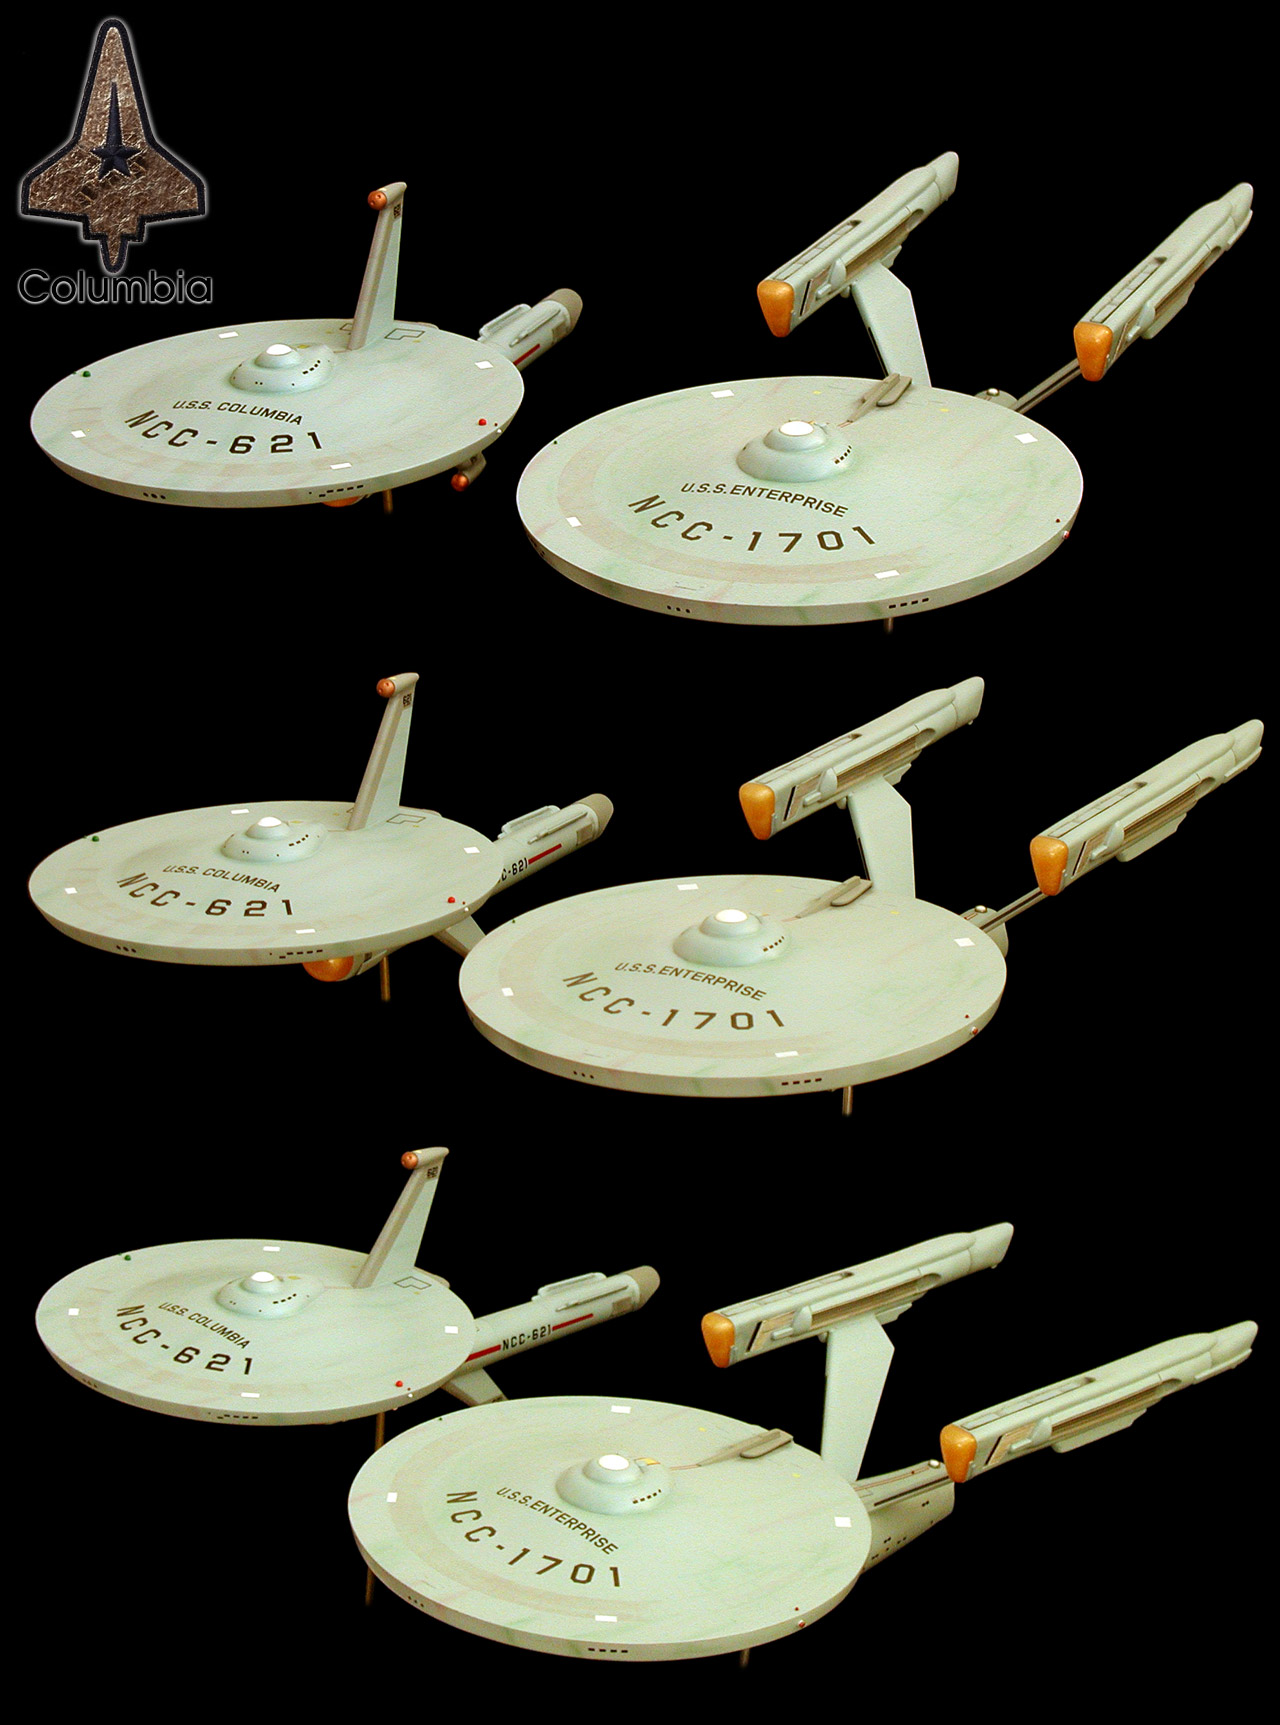
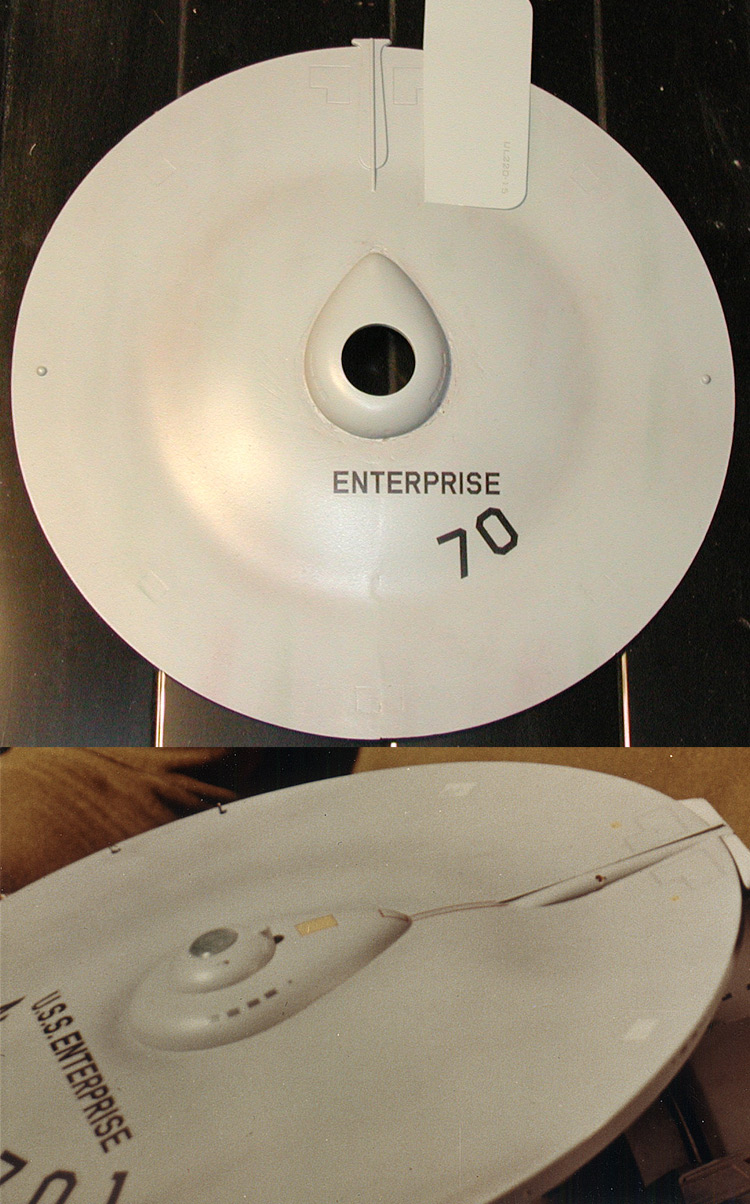
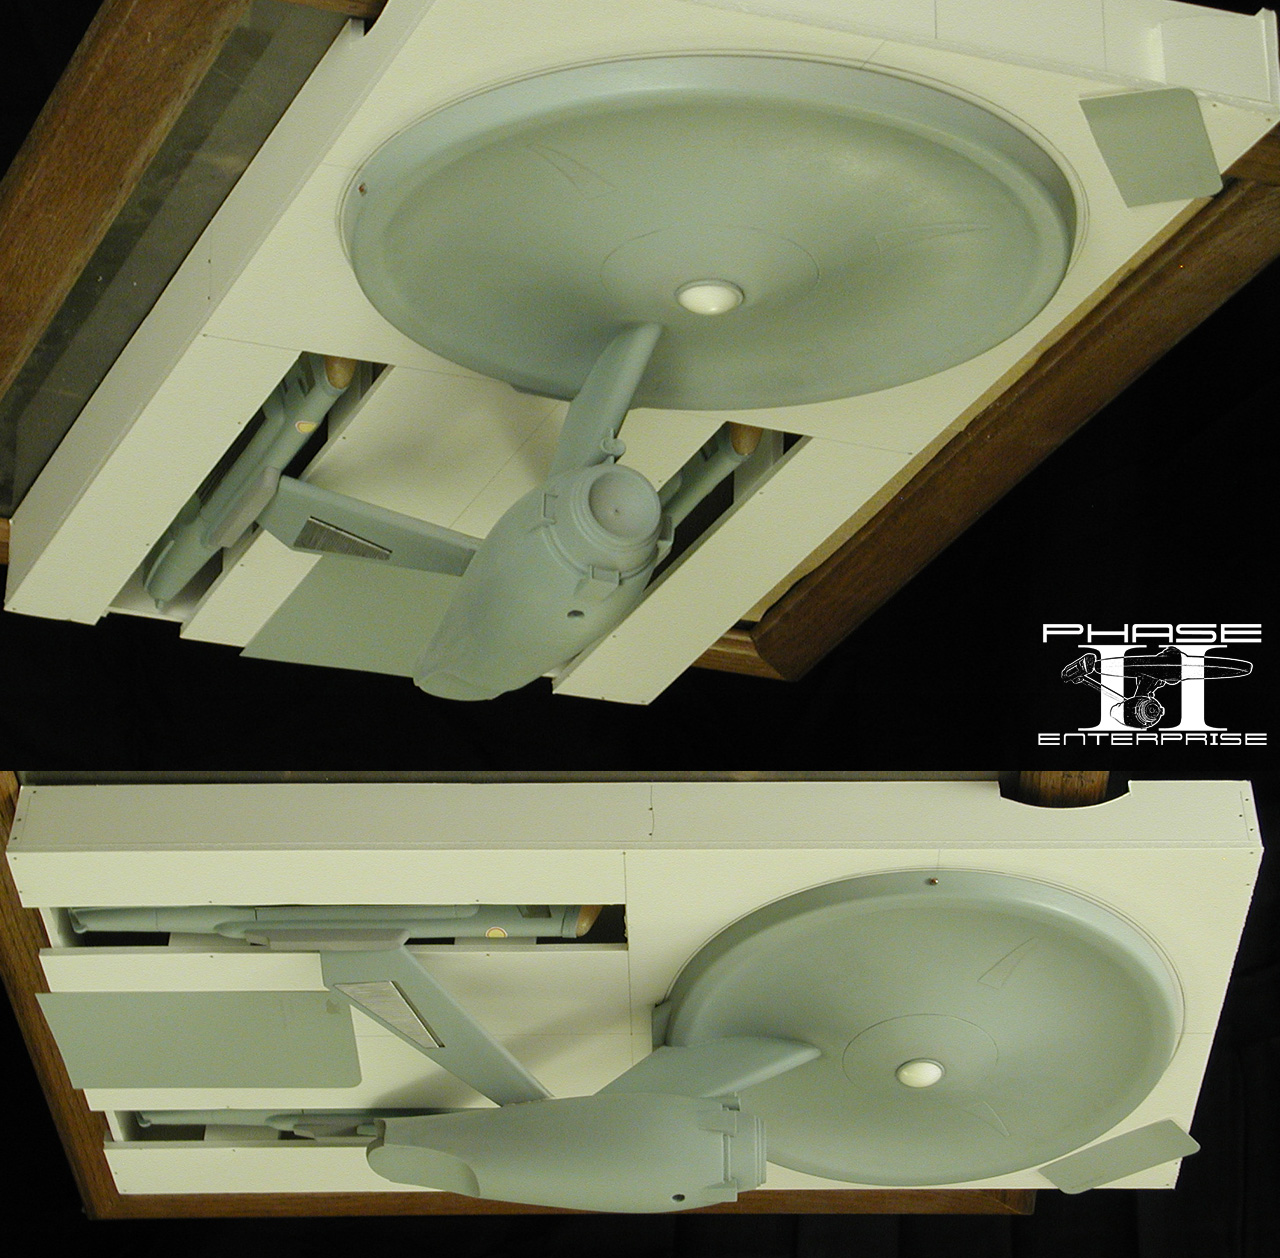
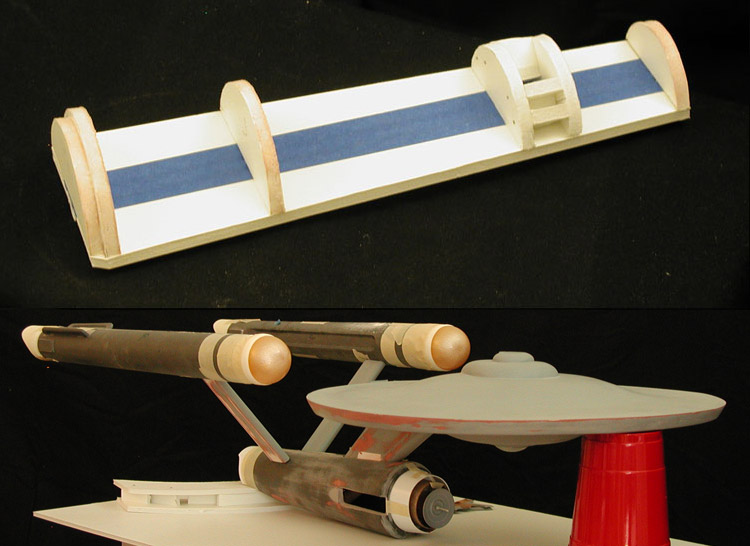
Speaking of the Phase II Enterprise, I thought I'd share a few shots of the Columbia with the Enterprise as both are at 1/500 scale...


I'll inspect the decals on the Columbia today and if they are all good I'll start in on the clear coats. After that, a few small details and I'll start taking beauty shots of her.
 
Some additional shots (I have a bit left to do, but she looks essentially finished at this point)...

Click images to enlarge


Gorgeous! I love the subtle weathering. Truly masterful work.

I love how green-grey it looks in these pictures verses how blue-gray it looked in the previous set. Would you mind telling us what paints you used?

--Alex
 
Thanks!

Yeah, the color pulls more blue when the main (or only, in the case of those test shots) light is ambient light from outside on a sunny day. In does the same thing, only towards yellow brown with some of my lamps at night (or shooting near sunset).

These are the colors I used...
  • Tamiya Luftwaffe Light Blue (AS5): Base hull color
  • Tamiya Light Ghost Gray (AS26): Accent under front of nacelle
  • Tamiya Medium Sea Gray (AS11): Impulse housing, rear nacelle accents, leading edges of masts and sensor pods
  • Tamiya Light Gray (AS18): Leading edge of dorsal

For the base color I was looking for the best color that closely matched the best sample color I had on hand... Behr Frozen Pond.

Luftwaffe Light Blue looked like it would work, but the fact that blue was part of the name made me run some test to be sure. Here are a few test shots of the paint with the Frozen Pond color sample.

First with normal lighting...
1701-11-color-test-1.jpg

And with the flash (compared to the 33 inch Enterprise under studio lighting)...
1701-11-color-test.jpg

And this is on my Phase II Enterprise right after painting her with the color sample resting next to the model...

I used all the same colors on the Phase II Enterprise, which meant I had all the paint on hand when I started painting the Columbia.
 
Another set of pictures... this time I took a few in front of a white background to see how it looked (I had set up the background for my wife's project). Even in low light it is easier to take shots against the white background... but I still like the black better ('cause it is more like space). I also included one quick-n-dirty composite image, hopefully I'll have some time to do more soon.

Click images to enlarge


I also put together this collection of shots showing how I made the lower primary hull as an example of how I make larger parts...


I figured this part was one of the better examples of the process I use.
 
I'm not sure if I missed it, but is there an internal armature supporting all the pieces together or are these just pinned together and glued?
 
I'm not sure if I missed it, but is there an internal armature supporting all the pieces together or are these just pinned together and glued?
Not really... there is a small piece of metal tubing coming down from the primary hull into the dorsal, but it is really more to help with alignment. The dorsal and primary hull parts are pretty rigid (and not very heavy), and I extended out a small structure forward from where the dorsal entered the nacelle that supports the mounting tube (because the body of the nacelle is cardboard).

If I had made the nacelle body of the same TC-1630 that I used to make the primary hull, this wouldn't have been an issue. Even when laid up pretty thin, the TC-1630 is quite strong and rigid. So I'll most likely be making masters and molds for the nacelle body parts for the Enterprise in the future.


Okay, a few more composite shots...

 
Really pretty. I think your less is more approach is entirely appropriate. After all, who is 'outside' to see the markings anyway? ;^)

Thanks for sharing your 'turning board' technique. I recall seeing David Merriman demo basically the same technique which he used for his TOS Enterprise build (he made a mold for vacuforming the saucer parts for his project...), longer ago than I care to consider. I've been considering using this method to fabricate some 1/48 scale Saturn V parts (you can use a 'scree' for linear as well as rotational scraping.) Good to see the old skills still in use...

Regards, Robert
 
Thanks!

I've been considering using this method to fabricate some 1/48 scale Saturn V parts (you can use a 'scree' for linear as well as rotational scraping.)
Yeah, I've used that technique to help build the masters of the secondary hulls of both my 33 inch TOS Enterprise replica and my 1/500 scale Phase II Enterprise...

1701_33in_002.jpg


1701_33in_051a.jpg

I had been putting some thought into using the same technique to build a Gemini spacecraft at some point. While slower than a laithe, I actually like the hands on sculpting aspect of this method.
 
This thread is more than 8 years old.

Your message may be considered spam for the following reasons:

  1. This thread hasn't been active in some time. A new post in this thread might not contribute constructively to this discussion after so long.
If you wish to reply despite these issues, check the box below before replying.
Be aware that malicious compliance may result in more severe penalties.
Back
Top