U.S.S Cygnus 1/700 scale… a study in insanity

Astonishing!

Also, good to see a Product Enterprise talking Dalek- I made prototypes for them for years, across several different names! ;)
 
View attachment 1863704View attachment 1863705View attachment 1863706View attachment 1863707View attachment 1863708Greetings FawltyFX, thank you for the info. I’m afraid that I’m an old school modeler/machinist and mainly purchase 3D products and have no files. As for my call for the missing items, I have made good progress on two of the three mentioned. I plan to turn and scratch build a Probe Ship. Considering that this Cygnus is a near representation of the shooting models, I have room for some creative liberties (the detail that Disney Imagineers created is still amazing). I found an excellent solution to the Command Tower/ Observation Domes spires. I purchased one 1/48 scale and two1/72scale aftermarket “Wind Piercers” for a B58 Hustler. The lengths and shapes are perfect and I can add the extra little details to them. As for the Palomino, I’m not going to be too broken up if I don’t get that piece. I’ll check out the info that you found, however, I’m okay with taking this model to the upcoming show without it. And now to step out of order for a posting…pictures of the bare spires and the Probe Ship that Szarchie’s Cygnus has. Ill pat myself on the back for that Spire workaround.
Well Sir, you have done an incredible job, and it would be nigh impossible to find fault with your replication! I may have to attempt to learn some 3d modelling myself, and use your build as reference for any parts I may be missing! Thank you for showing us how it's done!
 
Okay, I’m currently without power because of the damn hurricane…yes, I’m in Florida. First forty years of my life, no hurricanes. Buy a house in Mount Dora twenty three years ago and bring on the storms. I’m going off the board to address the DOCTOR. I gots a 12” Dalek that Product Enterprise didn’t make. Yes, I’m a stinker . The Special Weapons Dalek is a scratch build that is (or needs to be) on my Doctor Who Stuff thread. Once I get pat Modelpalooza in three weeks, I’ll try to update that thread.
IMG_2058.jpeg
IMG_2059.jpeg
IMG_2060.jpeg
IMG_2061.jpeg
 
Now back Cygnus. I had acquired a Lower Spine section about six years ago. The print was decent and sat flat on a table top. However, it had a lateral curve to it. I tried to get a new one a few weeks before Shapeways surprise folding but no lick. The Upper Spine had to be corrected by NWerke (Kremenn on Shapeways) and my print is a few months old. It has a vertical curve to it. Fortunately, Dave designed it to have a lattice work flange running down both sides. The two Power Centers are super rigid so, when in place, they hold down the center of the Spine. The other six boxes help, too. After figuring out the lights (I’m not really covering the wiring because I learn by doing, and my models light nicely. But getting there is not a pretty sight. I’m trying to improve), I closed up the bottom of the acrylic armature. I then slid on the end sections to capture the bottom Spine. I had to modify the mount holes in the armature because they didn’t quite line up with the printed holes in the spine. Fortunately, I’m still at what was my shop (my folks sold the place the same month that my wife died. However, the contract says if your last name is Sackett you come with the shop. That’s me, my sister, and Annabelle the office cat) and opened up the holes by setting the center section up on a milling machine. Acrylic is a funny animal and freehanding hole modifications can be problematic. No mill pictures…sorry. The other thing was that the Lower Spine has a 1/16”gap on the bottom. I had to make spacers for the mounting holes and the seam joints. Chip clip comes in handy for final glue up. Pictures are slightly out of order… and I’m lazy.
IMG_5208.jpeg
IMG_5207.jpeg
IMG_5206.jpeg
IMG_5204.jpeg
 
These are some shots of mount tube fitting. This was done during a lighting/ battery test. All of the interior lights started out as Warm White. I used Acrylic Tamiya Chrome Yellow to get my desired shade of yellow. So there were several light tests. Also, I prefer to have my model be battery powered. This is because the outlet locations in my house are in odd places and with batteries, I can put this anywhere. And I usually don’t run my models for more than an hour. More on batteries later.
IMG_5193.jpeg
IMG_5192.jpeg
IMG_5191.jpeg
 
I’ll be getting to the tricks I’ve used to help hide some seams in a few posts. It seems that my Upper Spine is a little short. I did have to sand the end faces of the light boxes due to tabs sticking out or laser cuts that were slightly askew. I had been pondering of how to do my stand. I wanted a stepped base but would have liked to have a spine like lattice between the mounting tubes. The ship needs to be a little high on the stand because the lowest part of the ship is the Center Spire on the Lower Observation Dome…3-1/2” below the bottom face of the Bow. I knew that there were parts out there for the bigger 1/350 scale Cygnus. I was looking for Antenna Boxes to be the bases for the mounts and have the spine run between the two. I had pictures of the early prints of the boxes from back when PrimitiveDave and NWerke were working out the bugs on both versions of the ship. I was disheartened to find that NWerkes Shapeways shop didn’t have any spines or antenna boxes for print. He did have the Observation Drums and the Upper Command Tower deck. I purchased two drums and the tower part and started drawing up new plans. At this time, I was still looking for the clear Antenna boxes, Observation Domes and, Command Tower dome for my ship. I had seen on another thread that 308Buds had these parts at Shapeways… and they were a bit pricey. I went looking and decided to go for it. I purchased the three domes and one antenna box. (The dimensions that were listed were rather large but it was titled 1/700 scale Cygnus). When they arrived,they were the size that was listed. I reached out to the artist and we figured out that these were the 1/350 scale parts, but the listing was incorrectly titled. I few back and forth sand he was set up to offer 1/700 scale parts. Now, I have a pair of 350 scale Observation Domes and Drums. These will be the bases for my mounting tubes.
IMG_4685.jpeg
IMG_5064.jpeg
IMG_5063.jpeg
IMG_5061.jpeg
IMG_5060.jpeg
 
Thanks Orvillian, this is like one of the garage resin kits of an odd subject. It really great to have but there are usually some issues when you look closer. I wrote a thread called Arvey 1/350 scale Space Battleship Yamato resin models where I go to extremes to correct issues with odd subject kits. This one has its issues too, which I have found as interesting one a couple of days ago. I’ll address that later.
 
IMG_5185.jpeg
IMG_3958.jpeg
IMG_5186.jpeg
IMG_3957.jpeg
The dome for the stand (and for the model) have rather deep grooves. This allowed me to take a different approach to making them stand out. Since I was going with my usual matte black base, I black primed the domes. Them I went to my sink and wet sanded them to remove the excess. I repeated the process to get good coverage in the grooves. I used Haze Grey for the Cygnus domes. For the stand domes, I made some plates and spacers (using brass and aluminum) to add interest.
 
IMG_3956.jpeg
IMG_5188.jpeg
IMG_5187.jpeg
IMG_5189.jpeg
IMG_5190.jpeg
To finish them out, I made some stunts using 5/32” square brass tubing. I see my milling to set up and (using a cutoff wheel) cut the eight pieces to the desired angle. I used a rat tail file to make the radius’s for the top ends. The battery/switch box mounts in the center.
 
View attachment 1863708I’m an old school modeler/machinist I plan to turn and scratch build a Probe Ship.
I purchased one 1/48 scale and two1/72scale aftermarket “Wind Piercers” for a B58 Hustler.
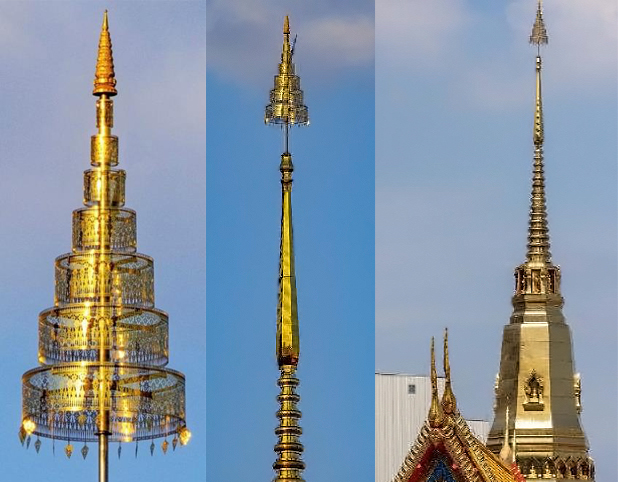
I wonder if that Probe was inspired by the structures similar to those below:

 
Funny you mention that Publiusr, as I’m getting down to the pesky antennas (not just the double cones mounted to the boxes) I decided to hand up one of the old Disney poster out in my garage/hobby store (I gots a lot of kits…and space to work). The last items that will get put on my model are the arrays around the Command Tower. The poster is a closeup of the Probe Ship landing. What you have mentioned is more like the design of those arrays. Basically, rings and rods. There is an elegance to them.
IMG_5244.jpeg
 
I’d like to see antennae and other fragile filigree on that model out of foam rubber, where a kid could pick it up and fly it around without damage or eye injury concerns.
 
Okay, looking real good for the model show next week (October 11-13). I got the three body segments (and the wiring) assembled. The idea is to get all of the body work done on the bottom side and then mount it on its stand and work the top side. I was stuck with the pesky issue of having to attach the Command Tower to the Stern. I fished out some old VHS tapes that I stacked to make a work stand for the model. Unfortunately, no pics of the early bodywork/ fitment sessions but other pictures will be shown to move the thread along. Got the model on its stand and got the wiring ran. More on that later.
IMG_5246.jpeg
IMG_5247.jpeg
IMG_5252.jpeg
IMG_5251.jpeg
 
IMG_5248.jpeg
IMG_5249.jpeg
IMG_5253.jpeg
IMG_5254.jpeg
I added the Observation Domes and Antenna arrays just to get a feel for the finished model. The lower Observation Dome was completed( except for the Spire) and glued into place. This was done before I mounted the model to the stand. The LDRS video case shown was the high point in my High Powered Rockerty career. That’s Project 463 on the front of the case and the first listing on the back of the case. I was also responsible for the construction of Stratospheric Dreams for my friend Mike Ward (in exchange, he cast the propellant for Project 463). Those were good times, but I find I’m enjoying the less stressful hobby that I’m sharing with you folks now.
 
IMG_5258.jpeg
IMG_5255.jpeg
IMG_5256.jpeg
IMG_5257.jpeg
The bodywork that the model mainly has is the segments in the center section, the multiple lengths of piping, and the Command Tower and its mounting base. I used UV resin the hide the seams in the Center Section and the hide the pipe joints after they were glues. For the Command Tower, I cut a circle in a piece of paper ( and a slit) and fit it around the tower base ring. Got to protect the clear stuff. I applied brush on primer to the joint then carefully ‘shoeshine’ sanded around the tower. I’ve also started working the variously arrays that mount to the tower. I’ve also started adding details to the Three spires ( more details on that shortly).
 
Back
Top