You are using an out of date browser. It may not display this or other websites correctly.
You should upgrade or use an alternative browser.
You should upgrade or use an alternative browser.
Tom's Skywalker Ranch Saber
- Thread starter thd9791
- Start date
Sym-Cha
Master Member
Just unscrew the bottom screws ... take the T-track off and then file out the remaining bottom holes just enough so you can move the T-track so that the top holes are covered again with T-track and some new glue . . . it's the only way I see that will work ... for the screwed up T-tracks perhaps some apoxy sculpt and black paint could do the trick? Now's the time to be really thinking like a propmaker . . . remember George wants these back a.s.a.p. on set ")
Chaim
Chaim
Can you elaborate? It's a good way to use the bad holes but In my head I picture just a larger hole shaped like "8"Just unscrew the bottom screws ... take the T-track off and then file out the remaining bottom holes just enough so you can move the T-track so that the top holes are covered again
and I would have to move everything over, even the good ones.
Last edited:
Sym-Cha
Master Member
No not an '8' ... just file away enough from one side to your right making the 'o' look more or less like '0' ... so the bottom hole itself will not quite 'hold' the x-screw as it is supposed to but it doesn't have to, since you'll glue the T-track down anyways. Copy that? Also I guess it would have been better to pre-drill all the needed holes in your T-track before you glued them onto the 3 Cell bottom and then drill all the holes further into your tube.
Chaim
Chaim
That I do. Now, this also means the "good" couple of tracks I'll have to do the same with the upper holes...
If I get my hands on new track, what if I take epoxy sculpt and fill the "bad holes and just make the right holes with new track? It will mean I'll have to alter less
Or make the "0" on the upper holes and use....mylar to cover any excess
If I get my hands on new track, what if I take epoxy sculpt and fill the "bad holes and just make the right holes with new track? It will mean I'll have to alter less
Or make the "0" on the upper holes and use....mylar to cover any excess

hahahaha I needed that laugh right now
If I move everything but the good ones a couple will be nearly right next to each other and I'll always be unhappy with it. I'm gonna try the epoxy in the holes and new track idea...maybe in a day or two this REALLY set me off. Very few things get me this riled up so I'm taking a ******* break.
and thanks Chaim! good pal, you are
Have you attached the kobold yet?
There's always a few milimeters that you can shift the bottom, so undo the tracks, get new ones from Roy, shift everything over enough to cover the bad holes. Then on the bottom holes,, do as Chaim says and file the holes wider, and epoxy the screws into place. Take another shot at the top scews.
You could pre drill the top track so at least one hole is done, or do as Teecrooz says and just use the heads.
Are you using a drill press, or doing it by hand. I tried by hand on a Tube once just to see if I could pull it off, and though successful, it was very clear I could mess it up pretty quickly so changed up. Now I only drill when I'm at my buddy in Seattles. He's got the equipment and is crazy precise.
On the upside, once you're done, you'll appreciate it more.:thumbsup
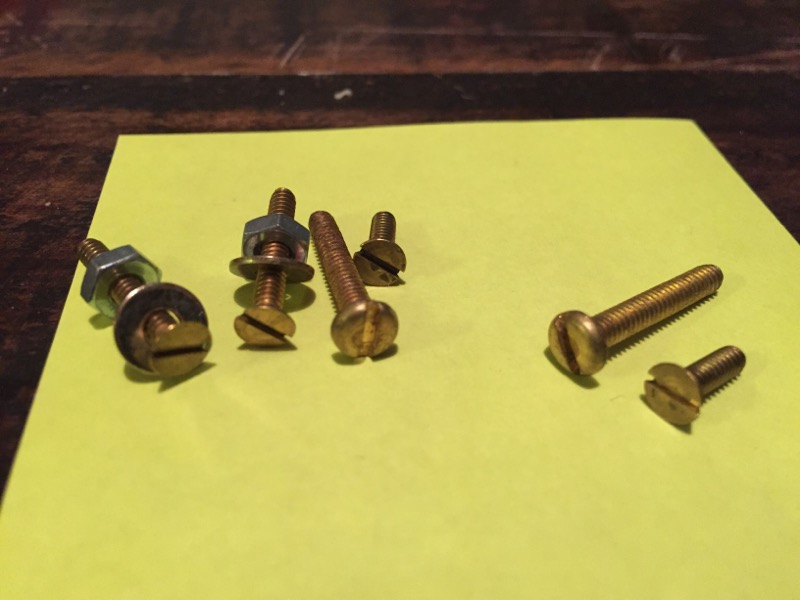
I finally found the leftover screws from my Ranch Saber run like 10 years ago. I don't have any of the grip screws but I have the brass ones.
I've got the slotted round head screw that replaces the clamp lever. It's a weird thread and hard to come by, I can send you two.
I was told by an 'insider' I trust the screw holding the lever on was a flathead slotted 4/40 screw, I can send you two.
For the d-ring I used the same 4/40 slotted brass screws just longer with washers/nuts on the inside of the Graflex. The head size is a little larger than the Kobold but if you've got a grinding wheel or a good file you can reduce the outer diameter easy and quick (brass melts like butter).
PM me your shipping address and I'll get them in a padded envelope headed your way.
Thanks James! will do..
I looked at it again - I am using a press, but something was misaligned and these went in at a slight angle, that's what did it.
if I were to take all these up, somehow clean all the superglue off the flash (I've done this to two sabers and had bad results), and move them over...I really think I have to move them far enough that the bottom hole might be showing too...Is there anything wrong with breaking out the putty for these tracks?
haha that's true
My only reservations are the amount of work it'll take to get everything up and make it look new again, including the two grips that are drilled and glued perfectly. If I start filing holes wider then nothing will really be screwed down, it'll all be glue...then what's the point of drilling?
- - - Updated - - -
So there IS a screw in the clamp as well as the lever. That's interesting to me, being that someone found the same threads as the lever system. This MAY make me go that route, seeing as I just broke one of Roman's clamps and have this bum lever dangling around...
I finally found the leftover screws from my Ranch Saber run like 10 years ago. I don't have any of the grip screws but I have the brass ones.
I've got the slotted round head screw that replaces the clamp lever. It's a weird thread and hard to come by, I can send you two.
I was told by an 'insider' I trust the screw holding the lever on was a flathead slotted 4/40 screw, I can send you two.
For the d-ring I used the same 4/40 slotted brass screws just longer with washers/nuts on the inside of the Graflex. The head size is a little larger than the Kobold but if you've got a grinding wheel or a good file you can reduce the outer diameter easy and quick (brass melts like butter).
PM me your shipping address and I'll get them in a padded envelope headed your way.
http://images20.fotki.com/v355/photos/9/976173/4001324/39446002119820-vi.jpg
Sym-Cha
Master Member
I know you'd like to have a prestine job done ... but once you see real props and the amount of residu glue or scratches or whatever ... they never look new at all ... especially after handling by Mark Hamill ... so either you can start all over again with new T-tracks and cover most of your mistakes ... or rescue what's left by means of by-pass procedures meaning use whatever holes are correct with some slight filing perhaps and then adjust the rest of the T-tracks and screws positions accordingly ... but before you do all that perhaps you should do a test fitting for your Kobold with the screws coming from James ... this will give you ample time to get your act together ... set aside your grievances and bad mood ... let your temper cool down some more and when ready ... start-a-fresh
I know how aggravating mishaps can be ... I've been in one right now ... struggling with a Darth Vader costume for over a year now and a customer who promised to lose some weight to be able to fit yet he didn't :wacko I tell you when working on anything Vader related ... the Dark Side is just lurking around the corner waiting it's turn to get to you
Chaim
i have a few of them, but they are much larger
Halliwax,
I got my miter box and miter saw (they came together) at Michael's (here in the midwest in the U.S.).
My miter box is about 2 inches tall if my memory serves correctly. That should be a good estimate until I get mine unpacked from storage.
Halliwax,
I got my miter box and miter saw (they came together) at Michael's (here in the midwest in the U.S.).
My miter box is about 2 inches tall if my memory serves correctly. That should be a good estimate until I get mine unpacked from storage.
thanks, we have a michaels as well, i am going to try and hit up that town this weekend, i need to run to the fabric store and michaels is right next door to it! thanks for the advice!!
- - - Updated - - -
struggling with a Darth Vader costume for over a year now and a customer who promised to lose some weight to be able to fit yet he didn't :wacko
Chaim
hey you stuck to your side of the bargain, your costumer needs more dedication! tell him to start hitting the treadmill now, double time!! lol
Hey everyone!
I want to thank everyone here for the kind support - I've had other things going on in my life and this petty thing added on was not a good mix. I'm still surprised this had such an effect on me.
Anyways my goal here is to repair with as little change as possible. Before i break the super-glue seal I'd like to try topical repair first. I've purchased Apoxie Sculpt and a flat-black paint pen from Amazon. The pen, in my eyes, would be better for detail work, as I'll be re-creating part of Gino's grips. I plan on stuffing putty from the inside and the outside, smearing it away for clean lines, and painting it back up. If you can see any putty through the tube, I'll cut some mylar tape (I have some left over from a Balst-Tech bubble strip) and stick it on. This worked to cover the switch hole on my Heiland Saber and the black emitter on the famous Shared Stunt saber.
Also, just got a Kobold clip from Roy - it's beautiful!
Edit: I also bit the bullet and bought a V-Block for my drill press! It will help center cylindrical things (like lightsabers) when using my drill press. Pics to come.
Attachments
Last edited:
Also, just got a Kobold clip from Roy - it's beautiful!
im hoping to place a order to roy in 2 weeks, we are so lucky to have him and his kobold's he makes!
Thanks for all the compliments guys!
Cool build. Good luck with the repairs.
Roy
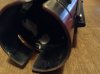
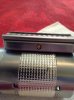
The past few days brought many packages! The screws, paint, apoxie sculpt and v block are here! I can't thank James enough, these screws are killer.
so we smeared some freshly mixed apoxie into the holes from both sides, used some water to clean it up and its setting as we speak. I think I'll start with a tiny drill bit and work my way up, if there's any play in my chuck, it will show less with minuscule pilot holes.
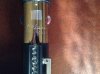
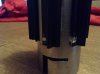
i also installed the clamp screw, using the square lever washer. The screw was a bit longer than the clamp so this fits ridiculously well. Next I'm going to find a way to drill through one of Romans levers and into this sidebar.
so we smeared some freshly mixed apoxie into the holes from both sides, used some water to clean it up and its setting as we speak. I think I'll start with a tiny drill bit and work my way up, if there's any play in my chuck, it will show less with minuscule pilot holes.
i also installed the clamp screw, using the square lever washer. The screw was a bit longer than the clamp so this fits ridiculously well. Next I'm going to find a way to drill through one of Romans levers and into this sidebar.
Attachments

Similar threads
- Replies
- 5
- Views
- 905
- Replies
- 24
- Views
- 1,735