Barnett College
Well-Known Member
TOHT COATHANGER TUTORIAL

CHOOSING QUALITY MATERIALS FOR MAKING THIS PROJECT WILL GIVE YOU BETTER RESULTS. IF YOU CHOOSE MORE STURDY MATERIALS, SUCH AS METAL, DURABILITY AND LONGEVITY OF THE HANGER WILL BE BETTER THAN PLASTIC OR WOOD.
MATERIALS NEEDED:
1. - 2 hollow tubes of 25cm long, inner diameter 10mm, outer diameter 12mm.
2. - 2 hollow tubes of 20cm long, inner diameter 10mm, outer diameter 12mm.
3. - 1 hollow tube of 10cm long, inner diameter 12mm, outer diameter 14 to 15mm.
4. - 1 spring 35cm long, outer diameter 9mm.
5. - 2 springs 12cm long, outer diameter 9mm.
6. - 6 pieces of chain 2-3cm long (2 links) and 9 mm outer diameter. LINKS CLOSED.
7. - 2 pieces of chain 9cm long and 12-14 mm outer diameters. LINKS OPENED.
8. - 2 single links of 12-14 mm outer diameters. LINKS OPENED.
9. - 2 opened metal rings, outer diameter 2cm.
10. - 1 hanger hook.

Tools:
1. - Two tongs or pliers to open and close the chain links.
2. - A special glue for the material we are working with. In this case we’ll use a long life special epoxy adhesive for metals.
3. - One string or small wire to tense springs through the tubes.
4. - One ruler.
WALKTHROUGH:
Because glue requires a drying time, the first step will be to attach the smaller 10cm tube to one end of one of the 25cm tubes. We will apply the special adhesive around the outer edge of one of the 25cm long tubes. We will then insert it into the 10cm tube until it reaches 5cm inside of it.

We have a few minutes to correct the position of this tube. To know if we have reached the correct depth of 5cm into the 10cm tube, we will introduce the other tube of 25cm at the other side until both tubes of 25cm touch inside the 10cm tube. Using a ruler, we will ensure that the 10cm tube is exactly in the middle of the longer ones. The overall length of all three tubes should be roughly 50cm.

Once reaching the correct length, we will set these pieces aside to let them dry. We should pay special attention that the smaller tube only must be attached to one of the 25cm sections, leaving the other one completely free.
Using this waiting time required for drying the glued pieces, the next step will be to assemble the chains and springs.
We will first take all the springs and will make a gap at its ends, isolating three or four coils from the rest of the spring. We’ll use the tongs and pliers for this matter.

Next we’ll attach all of the 2 link chains at 9mm in diameter at the ends of each spring. For this, we’ll follow the thread of the spring through one link, until we find the gap we previously created at the ends of the springs.
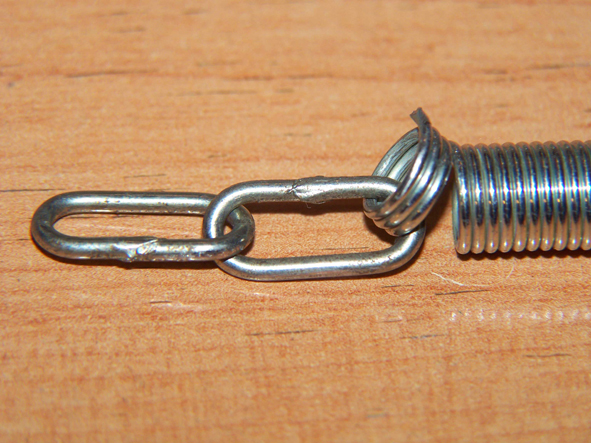
Now we’ll work on one of the 12cm springs with 2 links of chain at either ends. At one end of these chains we’ll attach a 12-14mm opened link and then close it. Next attach a 2cm open metal ring and also close it at this time.
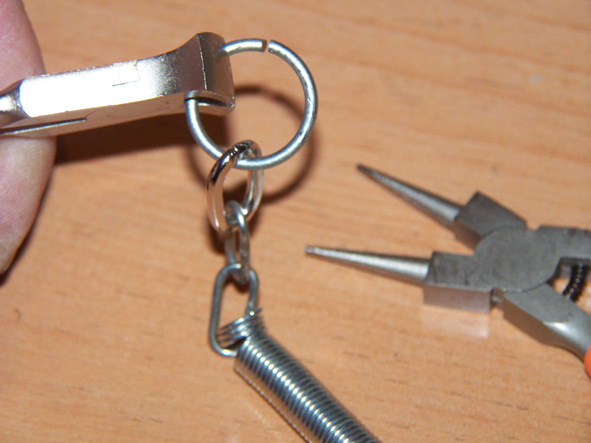
At the other end of the spring attach a string or wire to the end of the 2 links and thread it through one of the 20cm tubes until it appears out the other end.

Pull the string until the spring appears on the other side of the tube.
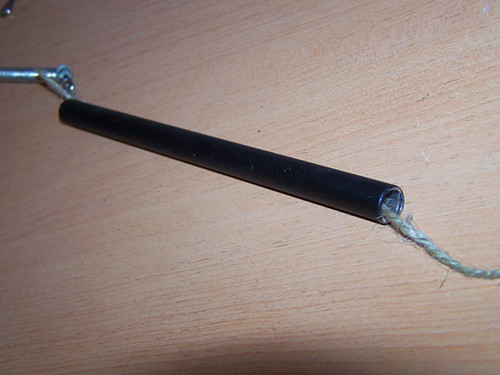
At the end of the spring section where we had attached the string, crimp one 9 cm chain piece, 12-14 mm in diameter, to the end of 2 link chain already attached. We close this chain link and have completed this first spring/tube section.
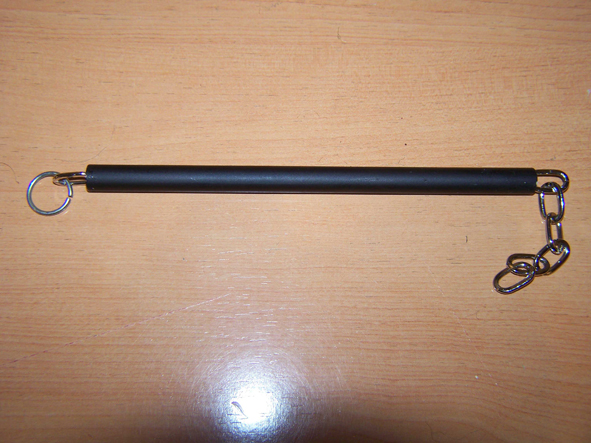
Let’s momentarily leave this spring/tube section and focus on the other spring of 12cm with 2 link chains attached at either ends.
At one end of this spring section, we’ll attach a 12-14mm opened link to the end of the 2 link chain and then close it. We’ll then attach a 2cm open metal ring to this, but before closing it, we’ll attach the hanger hook. Now close the 2cm metal ring.

As had been done before with the previous spring/tube section, at the other end of the spring opposite the hanger hook, attach a string or wire to the end of the 2 links and thread it through one of the 20cm tubes until it appears out the other end. Pull the string until the spring appears on the other side of the tube. At the end of the spring section where we had attached the string, crimp one 9cm chain piece, 12-14mm in diameter, to the end of 2 link chain already attached. We close this chain link and have completed this second spring/tube section.

Now, on our work table we have two spring/tube completed sections (20cm tubes). At either end of both sections, hangs a piece of chain of equal length and dimension. Now we’ll work on these chain sections.
From this point, be certain that the 10cm tube is permanently attached to the end of the 25cm tube. If there is any doubt this is not completely dry and secure at this time, please wait. It will make for easier handling while completing the project and a sturdier end product once finished.
Take the end of the chain of one of the 20cm sections, no matter which one, and attach it at the ending chain of the 35cms spring. Then close the link.
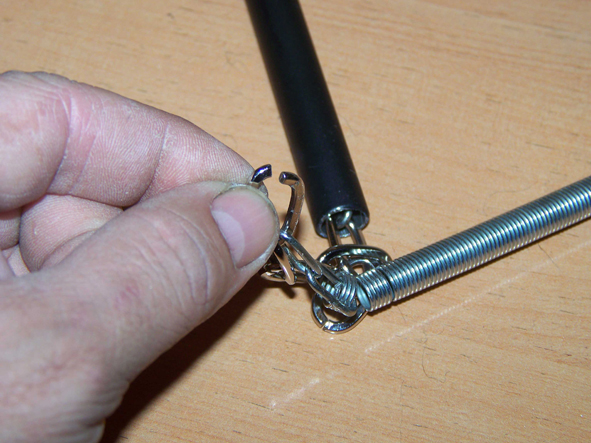
At the other end of the spring, attach a string or wire to the end of the 2 links and thread it through both of the 25cm tubes coupled by the center 10 cm tube until it appears out the other end.
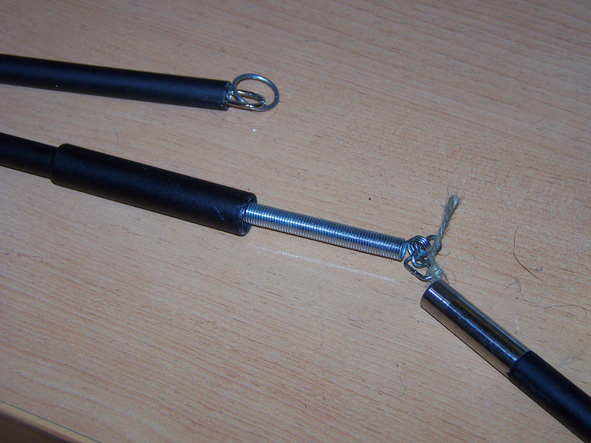
Pull the string until the spring appears on the other side of the tube. At the end of the spring section where we had attached the string, crimp the ending chain of the other already made 20cms spring/tube section. Now close this chain link.
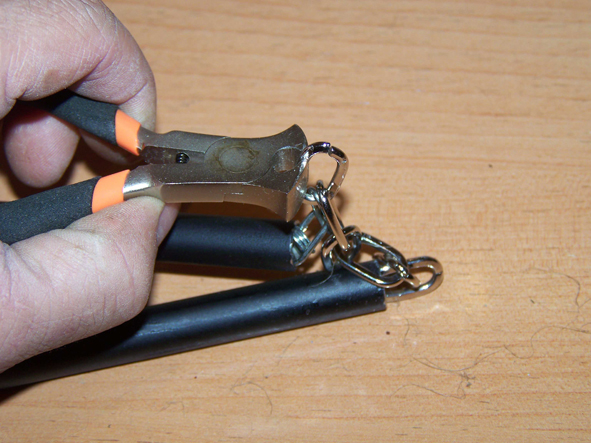
Check the mechanism.
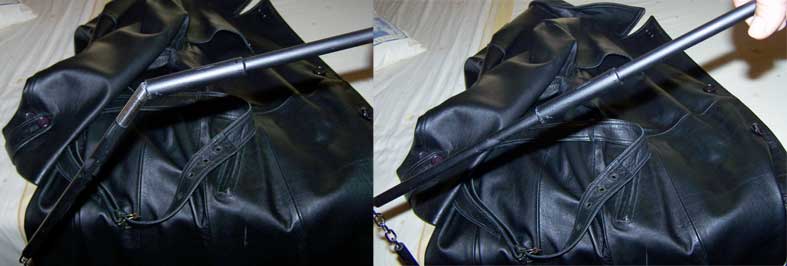
If all of the steps and directions have been followed correctly, at this time you should have a beautiful and fully functional reproduction of Toht’s coathanger from Raiders of the Lost Ark. It should be foldable and very durable.
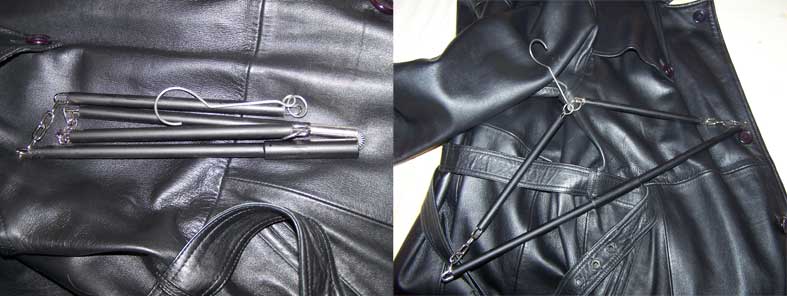
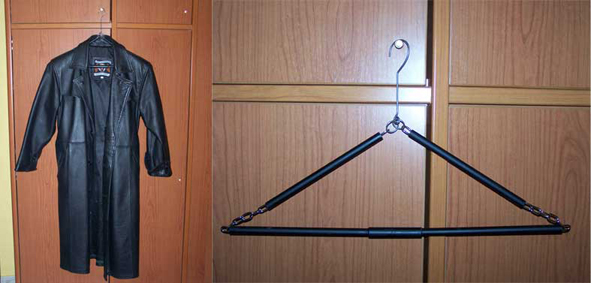
I uploaded a video to show my very result following this tutorial. Check it here
For the castillian-spanish version of this tutorial, check here
You can read this tutorial translated into Italian HERE
Hope you enjoyed it.
Bests
Barnett

CHOOSING QUALITY MATERIALS FOR MAKING THIS PROJECT WILL GIVE YOU BETTER RESULTS. IF YOU CHOOSE MORE STURDY MATERIALS, SUCH AS METAL, DURABILITY AND LONGEVITY OF THE HANGER WILL BE BETTER THAN PLASTIC OR WOOD.
MATERIALS NEEDED:
1. - 2 hollow tubes of 25cm long, inner diameter 10mm, outer diameter 12mm.
2. - 2 hollow tubes of 20cm long, inner diameter 10mm, outer diameter 12mm.
3. - 1 hollow tube of 10cm long, inner diameter 12mm, outer diameter 14 to 15mm.
4. - 1 spring 35cm long, outer diameter 9mm.
5. - 2 springs 12cm long, outer diameter 9mm.
6. - 6 pieces of chain 2-3cm long (2 links) and 9 mm outer diameter. LINKS CLOSED.
7. - 2 pieces of chain 9cm long and 12-14 mm outer diameters. LINKS OPENED.
8. - 2 single links of 12-14 mm outer diameters. LINKS OPENED.
9. - 2 opened metal rings, outer diameter 2cm.
10. - 1 hanger hook.

Tools:
1. - Two tongs or pliers to open and close the chain links.
2. - A special glue for the material we are working with. In this case we’ll use a long life special epoxy adhesive for metals.
3. - One string or small wire to tense springs through the tubes.
4. - One ruler.
WALKTHROUGH:
Because glue requires a drying time, the first step will be to attach the smaller 10cm tube to one end of one of the 25cm tubes. We will apply the special adhesive around the outer edge of one of the 25cm long tubes. We will then insert it into the 10cm tube until it reaches 5cm inside of it.

We have a few minutes to correct the position of this tube. To know if we have reached the correct depth of 5cm into the 10cm tube, we will introduce the other tube of 25cm at the other side until both tubes of 25cm touch inside the 10cm tube. Using a ruler, we will ensure that the 10cm tube is exactly in the middle of the longer ones. The overall length of all three tubes should be roughly 50cm.

Once reaching the correct length, we will set these pieces aside to let them dry. We should pay special attention that the smaller tube only must be attached to one of the 25cm sections, leaving the other one completely free.
Using this waiting time required for drying the glued pieces, the next step will be to assemble the chains and springs.
We will first take all the springs and will make a gap at its ends, isolating three or four coils from the rest of the spring. We’ll use the tongs and pliers for this matter.

Next we’ll attach all of the 2 link chains at 9mm in diameter at the ends of each spring. For this, we’ll follow the thread of the spring through one link, until we find the gap we previously created at the ends of the springs.

Now we’ll work on one of the 12cm springs with 2 links of chain at either ends. At one end of these chains we’ll attach a 12-14mm opened link and then close it. Next attach a 2cm open metal ring and also close it at this time.

At the other end of the spring attach a string or wire to the end of the 2 links and thread it through one of the 20cm tubes until it appears out the other end.

Pull the string until the spring appears on the other side of the tube.

At the end of the spring section where we had attached the string, crimp one 9 cm chain piece, 12-14 mm in diameter, to the end of 2 link chain already attached. We close this chain link and have completed this first spring/tube section.

Let’s momentarily leave this spring/tube section and focus on the other spring of 12cm with 2 link chains attached at either ends.
At one end of this spring section, we’ll attach a 12-14mm opened link to the end of the 2 link chain and then close it. We’ll then attach a 2cm open metal ring to this, but before closing it, we’ll attach the hanger hook. Now close the 2cm metal ring.

As had been done before with the previous spring/tube section, at the other end of the spring opposite the hanger hook, attach a string or wire to the end of the 2 links and thread it through one of the 20cm tubes until it appears out the other end. Pull the string until the spring appears on the other side of the tube. At the end of the spring section where we had attached the string, crimp one 9cm chain piece, 12-14mm in diameter, to the end of 2 link chain already attached. We close this chain link and have completed this second spring/tube section.

Now, on our work table we have two spring/tube completed sections (20cm tubes). At either end of both sections, hangs a piece of chain of equal length and dimension. Now we’ll work on these chain sections.
From this point, be certain that the 10cm tube is permanently attached to the end of the 25cm tube. If there is any doubt this is not completely dry and secure at this time, please wait. It will make for easier handling while completing the project and a sturdier end product once finished.
Take the end of the chain of one of the 20cm sections, no matter which one, and attach it at the ending chain of the 35cms spring. Then close the link.

At the other end of the spring, attach a string or wire to the end of the 2 links and thread it through both of the 25cm tubes coupled by the center 10 cm tube until it appears out the other end.

Pull the string until the spring appears on the other side of the tube. At the end of the spring section where we had attached the string, crimp the ending chain of the other already made 20cms spring/tube section. Now close this chain link.

Check the mechanism.

If all of the steps and directions have been followed correctly, at this time you should have a beautiful and fully functional reproduction of Toht’s coathanger from Raiders of the Lost Ark. It should be foldable and very durable.


I uploaded a video to show my very result following this tutorial. Check it here
For the castillian-spanish version of this tutorial, check here
You can read this tutorial translated into Italian HERE
Hope you enjoyed it.
Bests
Barnett

