Tie Interceptor kit Build Questions

Darth_Nickel

Sr Member
RPF PREMIUM MEMBER
I got my interceptor kit (thank you Steve).

I've got just a couple of questions. Some of the delicate detail on the wings was slightly damaged in shipping. I figured I could easily fix most of it. The majority of the parts were found in the shipping material, except for a few. I remember the post about t
he T4 T-TRACKS, so I'll add those to the list as well for my order.
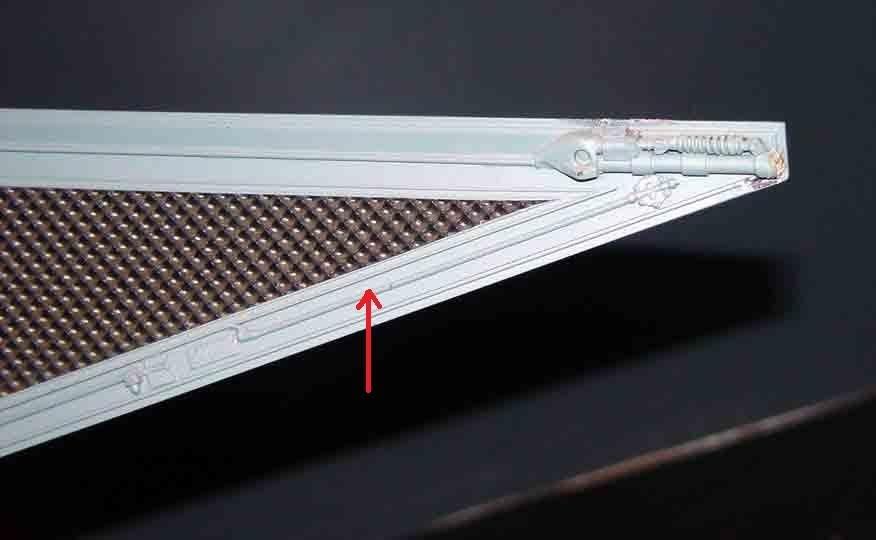
One item that I need to fix is some of the tiny tubing along the outer wing edges. It looks like pipe? I figured I could just get some replacement plastic tube from the hobby shop, but I am struggling with the size. Does anyone know?

I also can see the exposed wire structure inside the wing right at the tip on the outside/flat part of the wing. (it looks like perhaps it was a little light in the resin poor before the wire was placed or the wire sunk a little too far in the wet resin. Anyway... should I be concerned and try to fill or when painted will it just "go away".

Sorry for the noob questions. Just get'in my build on.
 
Thanks Michel. I saw that post (I think that's where I got the T4 reference) Any ideas on the little pipe.
 
if you want further informations ,contact guy cowen ,
it's him who sold me the T square profils for my interceptor

Michel
 
Here is the part that I'm looking at.

InterceptorWING-1.jpg


it just looks like it's little plastic tube that could be easily replaced. I asked Guy (because I'm too thick) about the T strips. I can't figure where to put them correctly. It's like the tree vs the forest for me...

I tried to make the arrow point to the part a little better.
 
Last edited:
Hey Brad, got the PM. The T strip is from plastruct & comes in 2 shapes, a straight symmetrical type & a tapered version, to be honest I never quite got to the bottom of which was to be used but I went with the symmetrical type I'll try & dig out the code for it.
You can see the t strip highlighted here in pink, it follows the hole outside edge of each wing. You will need at least 8 strips to do both wings but it is a bit tricky so I got 10 to allow for mess ups, and there where a few.

Tstrip.jpg
 
Awesome. thank you Guy!!! So that goes all the way around? Wow... that's going to be "fun" :) that's exactly the type of picture this moron needed :) I could not figure it out. I kept looking at the flat part of the wing, NOT the leading edge. oopppssss.

Any idea on the size of the little pipes? I'm thinking it's got to be super small... like .010 round rod (Plastruct MR-10). Maybe .020 round rod (Plastruct MR-20). These are the pipes that riun along the flat part of the outside of the wind (just below where the t-track would be)
 
I made it to the hobby shop today. It looks like 0.30 looks like it's a good match for the little pipes that broke off.
 
If you all don't mind, I can use this thread as my build thread as well. I’m a rookie SS builder, so I'm open to ANY help... sorry in advance if I butcher names of parts...
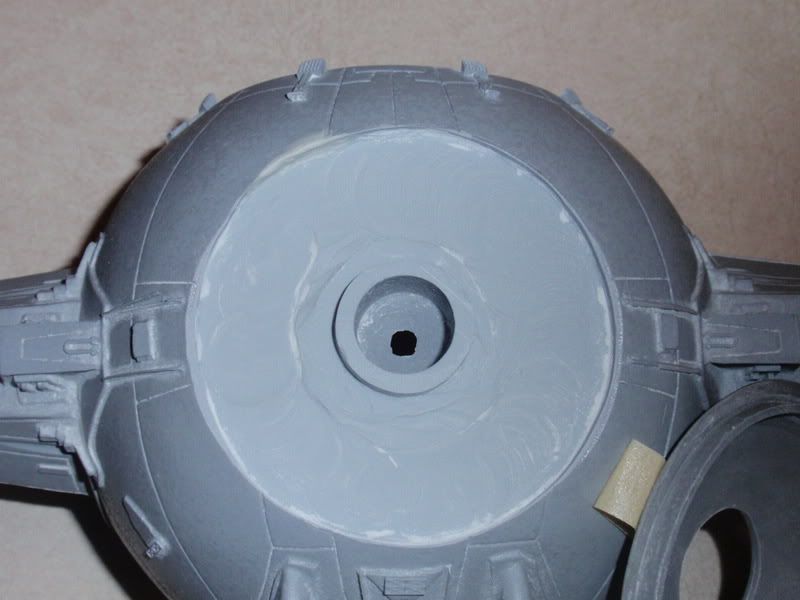
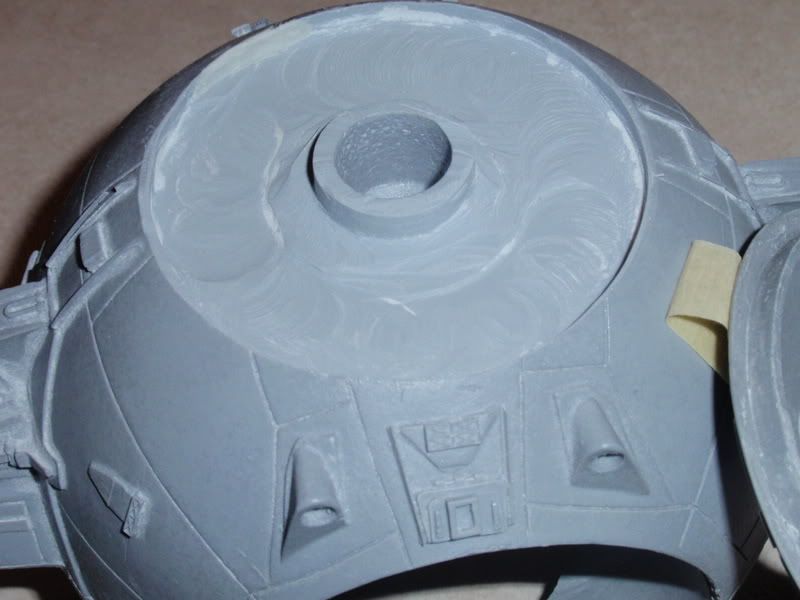
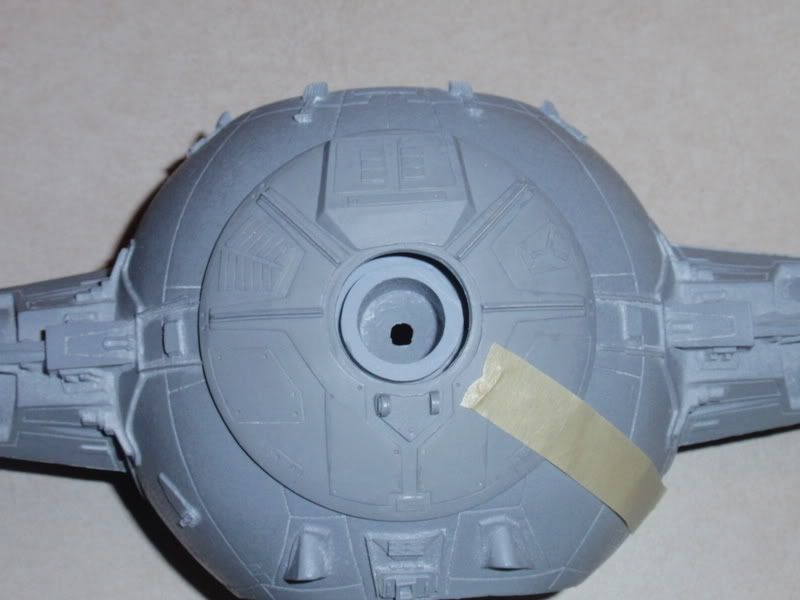
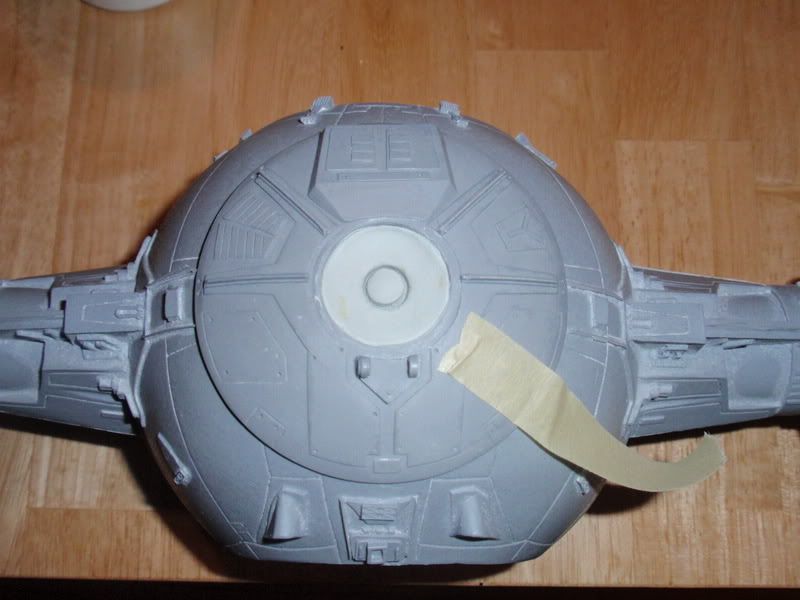
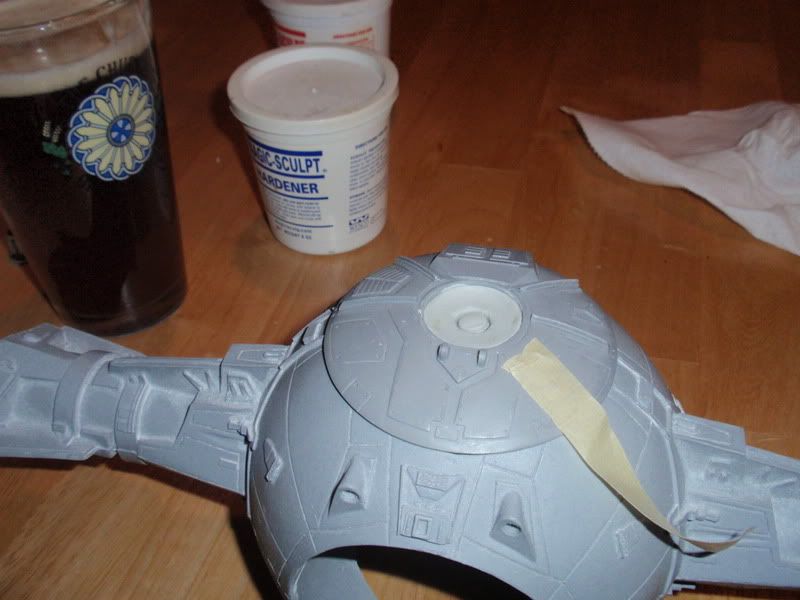
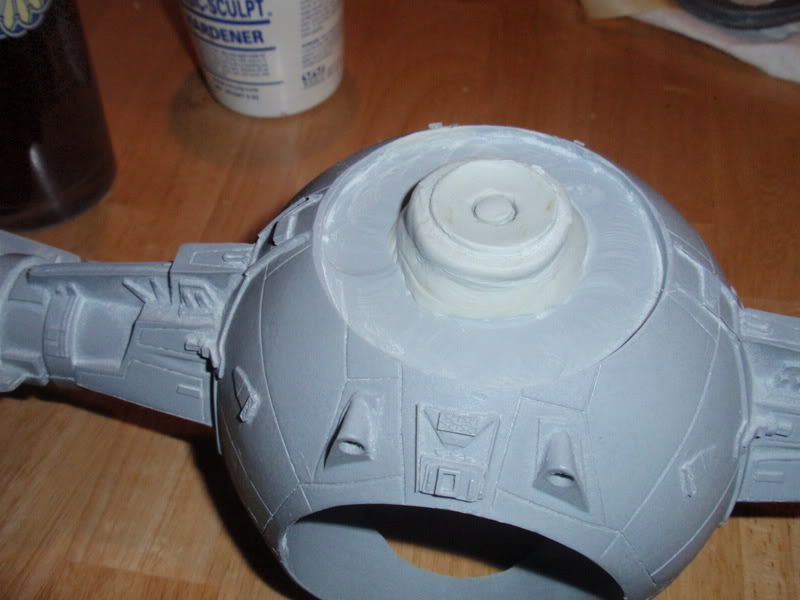
Thanks to Zombie Killer (thank you Glen), I was able to sand the molded bottom hatch off to fit the new hatch. Let's just say I'm glad it's cold out, the wife "may" not think twice about the "snow" in the garage...

I got the hatch to fit, then I had to figure out how I wanted to mount this bad boy. I really liked the mount I used for my xwing (as found here). It's a screw that fits a Panavise mount. I "think" a panavise would be cool, but being a rookie, I honestly have no idea IF it will work... but that's what I'm heading toward.

The hole in the hatch is bigger than the insert I’m using, so I just filled the gap with MagicSculp and set the insert location. I love this stuff, so I hope it works out.

I've been slowly cleaning the wings as well. I'm pretty slow at this stuff, but it's fun. I already found a mistake in sanding something off that I shouldn't have (thought it was a mold line...), so I'll have to get some plastic to replace the detail. I think it will be ok.

anyway, here are the pics of the bottom hatch process.


P2190198.jpg


P2190199.jpg


P2190197.jpg


P2190200.jpg


P2190201.jpg


P2190201.jpg


P2190204.jpg
 
Back
Top