Thorssoli's Ironman MkIII Build - Finished Suit Pics Page 26!!

Re: Just What This Forum Needs: Another Ironman Build

I go away for a little while and when I come back there is loads more to see!! Excellent!!

I like where you are going with the rubber joints, I'm not a big fan of the Spandex undersuit showing through, I'm hoping to do a similar thing with the joints on my Space Marine build, as you did

The pipes you're sculpting onto look to be about 4" and 6" at a guess or am I a bit off
 
Re: Just What This Forum Needs: Another Ironman Build

The pigments I used were urethane colorants from Epoxy Resin, Urethane Foam, Silicone Mold Making Rubber-AeroMarine Products. I wouldn't expect them to work with latex.

I've tinted latex for other projects though and I used latex pigments from The Monster Makers - 866-521-(SPFX)7739 - Halloween Latex Mask Making Kits, Fang Kits, Special Effects Supplies and more. They gave me no problems at all.
Thank you SO very much!

Can't wait to see the rest of this brilliant build.
 
Re: Just What This Forum Needs: Another Ironman Build

Can't wait to see the rest of this brilliant build.

And so the build continues...

Today I pulled the first copy of the neck out of the mold:


So far so good:


It definitely looks best from the front:


After cutting out the top of the neck, I slid my head through and dusted off one of my helmet casts:


It's good, but not great. Being a bit oversized, the back of the neck bulges out a bit:

It's not the end of the world though. I'll either set the whole thing further forward for a better fit with the helmet or add in a thin layer of upholstery foam in order to keep everything stuffed full

Here's a shot with the faceplate added on.


I go away for a little while and when I come back there is loads more to see!! Excellent!!

I like where you are going with the rubber joints, I'm not a big fan of the Spandex undersuit showing through, I'm hoping to do a similar thing with the joints on my Space Marine build, as you did

The pipes you're sculpting onto look to be about 4" and 6" at a guess or am I a bit off

I'm using a scrap of 3" and 4" pipe I had laying around. The latex will shrink a bit as it cures, but it will stretch a bit when it's pulled into place. In effect it'll be like wearing a light duty neoprene knee brace.

On that note, I've finished the knee and elbow sculpts:


I've also finished the first half of the molds for the new thighs:


Tomorrow I'll roll them over and start on the rubber for the other side. I'll also be starting on the stone mold for the knee and elbow parts.

As usual, stay tuned...
 
Last edited:
Re: Just What This Forum Needs: Another Ironman Build

Looking good keep up the great work....:thumbsup
 
Re: Just What This Forum Needs: Another Ironman Build

Loving those knee and elbow inserts, great work! I think the neck came out great too, with a little rear padding like you say, I reckon it'll be fine.
 
Re: Just What This Forum Needs: Another Ironman Build

That is insane work! I'm still a go for the thing I pm'd you about. Just waiting for something.
 
Re: Just What This Forum Needs: Another Ironman Build

the color came out good on the neck too

I really lucked out in that department. Since this was my first time working with this material I had no idea how it would take the pigments. This was a tiny bit of black and about eight times as much red. It seems to work.
 
Re: Just What This Forum Needs: Another Ironman Build

I really lucked out in that department. Since this was my first time working with this material I had no idea how it would take the pigments. This was a tiny bit of black and about eight times as much red. It seems to work.

and no problems with the stretching?
 
Re: Just What This Forum Needs: Another Ironman Build

This suit of yours is really quite amazing. There's so much information packed into this thread, it's super helpful to anyone looking to learn more about this kind of stuff.

Keep up the good work, good sir!
 
Re: Just What This Forum Needs: Another Ironman Build

and no problems with the stretching?

I haven't messed around with it enough to know if that'll be a problem. So far so good, but the scrap pieces are pretty easy to tear. I'm hoping that'll solve itself with a bit more curing time. Worst case, I'll just have to lay the pieces up thicker and use less pigment in the future.

There's so much information packed into this thread, it's super helpful to anyone looking to learn more about this kind of stuff.

That's the deal, right? We're here to share ideas and processes. Otherwise it's just a question of everyone posting about how cool their toys are. That's no fun at all.

On that note, I poured the print coat on the second half of the new molds last night:


This morning, I laid up more silicone for thickness:


Tomorrow I'll build the second half of the mothermold, so I should have a rough draft pair of thighs cast on Sunday. Then I'll see if I can get my fiberglass guy to lay up a pair for me.

I also laid up a set of the little plates that overlap in the hip joints, but I neglected to photograph them. That'll give me something interesting to post tomorrow...
 
Re: Just What This Forum Needs: Another Ironman Build

That's the deal, right? We're here to share ideas and processes. Otherwise it's just a question of everyone posting about how cool their toys are. That's no fun at all.

This would make a great sig! Any more progress on the joint covers?
 
Re: Just What This Forum Needs: Another Ironman Build

This would make a great sig! Any more progress on the joint covers?

Feel free to use it.

All I've done with the joint covers is clearcoat them. That'll be the last bit of polishing them up before molding. I'll admit I've been having a bit of trouble staying motivated on this project now that the summer heat is setting in in the workshop, but I should have a working mold for those parts in the next few days.
 
Re: Just What This Forum Needs: Another Ironman Build

Feel free to use it.

All I've done with the joint covers is clearcoat them. That'll be the last bit of polishing them up before molding. I'll admit I've been having a bit of trouble staying motivated on this project now that the summer heat is setting in in the workshop, but I should have a working mold for those parts in the next few days.

Looking forward to seeing how those come out, top class as usual I supsect :D
 
Re: Just What This Forum Needs: Another Ironman Build

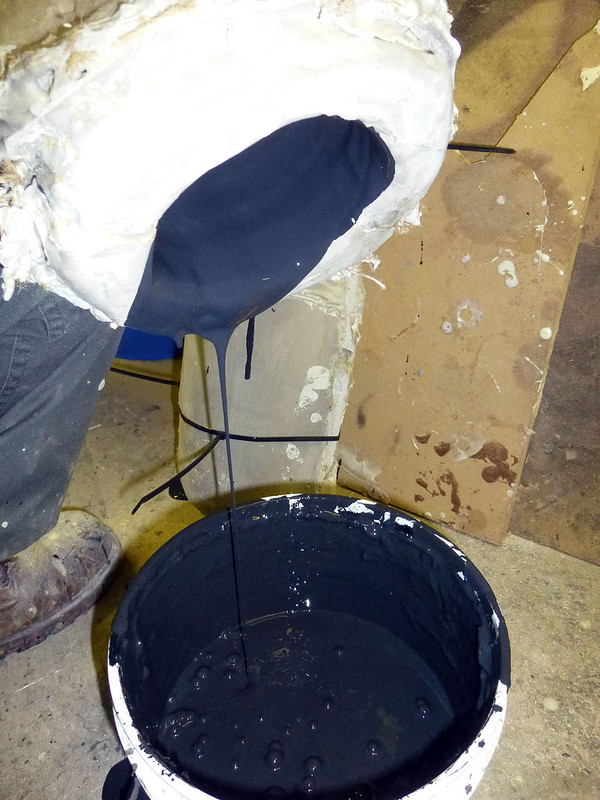
Today I finished the stone molds so I can slipcast the inner knee and elbow pieces. For those of you unfamiliar with the process, the mold is made using Ultracal 30, a gypsum product similar to Plaster of Paris (but much much better for this application). When the mold has cured, the sculpt is removed, the mold is reassembled, and liquid latex is poured into the mold. Since the Ultracal has a very porous surface, it wicks moisture out of the latex. Then the excess is poured back into the bucket and the mold is set up to air dry overnight. This process is repeated a couple of times to build up thickness for the latex parts. Then they're pulled out of the mold.

Here's a picture of both sculpts prepped for molding:


Because I'll need a two-part mold, I used water-based clay to make a parting wall. Since the sculpt is done in oil-based clay, there's no risk of the parting wall bonding to the clay itself. When the first half of the mold cures, the parting wall can be peeled off and any remaining residue can be removed with a soft brush and clean water. Here's what the molds look like with the parting wall built up:

The groove that's sculpted into the water-based clay will provide registration later to ensure that the two halves of the molds are properly aligned.

Once the parting wall is set up, it's time to layer on the Ultracal:

I start by layering on a couple of batches of mixed Ultracal to build a bit of thickness and capture all of the surface details on the sculpt. Because the Ultracal is a bit brittle by itself, once the first layer has firmed up it's a good idea to cut some strips of burlap, soak them in your next batch of Ultracal, and use them like bandages to build up a bit of composite strength. Think of it much like laying up fiberglass, but instead of glass and resin you're using burlap and plaster.

I didn't get any pictures of me actually laying up the burlap layers (my camera doesn't like being filled with gunk) but here's a shot of the first half laid up and peeking past parting wall:


Once the first half of the mold is cured, it's time to remove the parting wall:


Before laying up the second half, it's imperative to coat the mating surface with a release agent. In this case I'm using petroleum jelly:

The clay tabs that are sticking out the sides will leave holes along the parting line so I can pry the molds apart with a pair of screwdrivers later. You'll notice that they don't reach all the way to the inside of the mold. If they did, the latex would leak out during the slipcasting process.

The second half of the mold is laid up just like the first half:


Once the second half has cured, it's time to split the mold open and remove the sculpt:


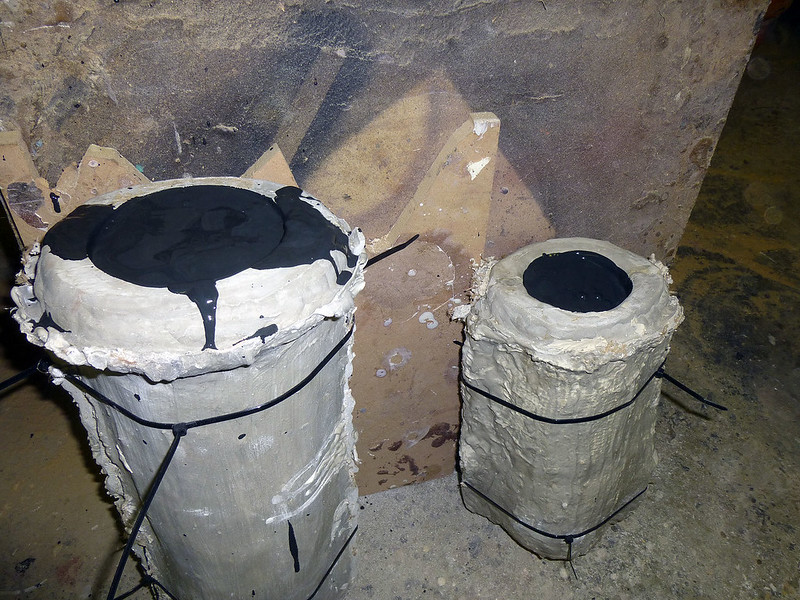
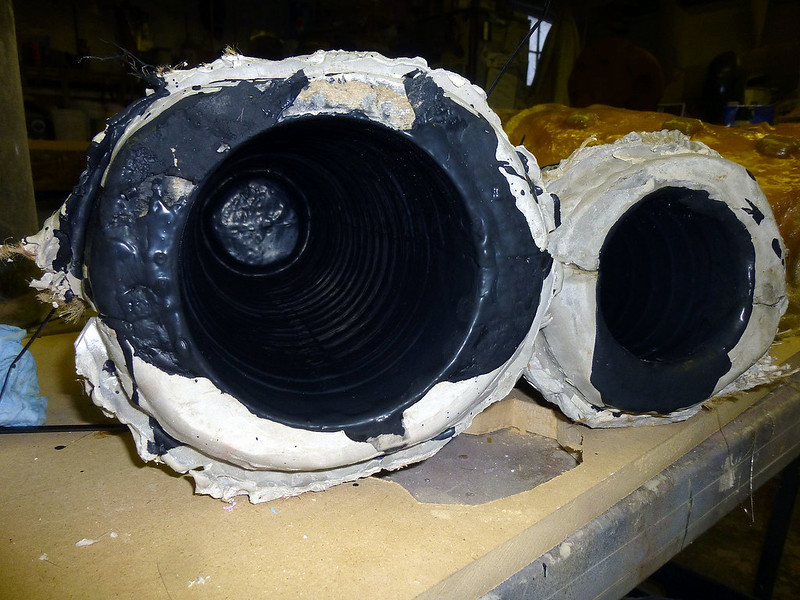
Here's both molds out in the sun so they can dry out a bit more:


So that's where they sit right now. I will probably hold off until tomorrow morning before I decide to pour in the rubber. That way the molds will be nice and dry before I begin slipcasting.

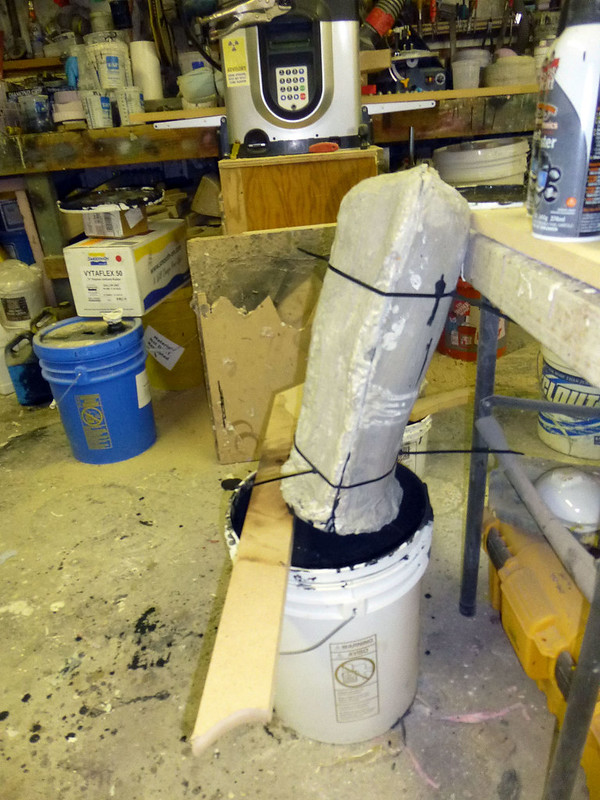
In other news, I laid up the second half of the mothermolds for the thighs:


So I should have a pair of them pulled by this time tomorrow.

Stay tuned...
 
Re: Just What This Forum Needs: Another Ironman Build

Here's the molds strapped shut and filled with the liquid latex:


After shaking out the air bubbles, the excess is poured back into the bucket:


It's pretty viscous stuff, so it's a good idea to let it set over the bucket and drain for a while:


After all day setting out in the sun, the first layer is fairly dry:


Today I'll be pouring the second layer to add a bit more strength. Tomorrow I'll have a set of inner knees and elbows in black. When I pull this set, I'll be dying my next bucket of latex a nice, rich, dark red and start on the next set.

Stay tuned...
 
This thread is more than 9 years old.

Your message may be considered spam for the following reasons:

  1. This thread hasn't been active in some time. A new post in this thread might not contribute constructively to this discussion after so long.
If you wish to reply despite these issues, check the box below before replying.
Be aware that malicious compliance may result in more severe penalties.
Back
Top