You are using an out of date browser. It may not display this or other websites correctly.
You should upgrade or use an alternative browser.
You should upgrade or use an alternative browser.
Thorssoli's Ironman MkIII Build - Finished Suit Pics Page 26!!
- Thread starter thorssoli
- Start date

Lunaman
Sr Member
Re: Just What This Forum Needs: Another Ironman Build
")
Astounding.Costume finished.
Re: Just What This Forum Needs: Another Ironman Build
Wow! That's so accurate, but your colors aren't even close. You're a terrible human being and should feel terrible that your colors are so wrong.
...we were getting a bit too positive here, I had to bring a little "Internet forum" back to the proceedings. :lol
Seriously though, I've been watching this whole thing in awe. What a fantastic build. Can't wait to see it all done.
-Nick
Costume finished.
[url]http://farm8.staticflickr.com/7311/8734661869_e25521ca0b_c.jpg[/url]
Wow! That's so accurate, but your colors aren't even close. You're a terrible human being and should feel terrible that your colors are so wrong.
...we were getting a bit too positive here, I had to bring a little "Internet forum" back to the proceedings. :lol
Seriously though, I've been watching this whole thing in awe. What a fantastic build. Can't wait to see it all done.
-Nick
drknotter
Active Member
Re: Just What This Forum Needs: Another Ironman Build
Heh, it's funny, I can't see the images in the email I get, so all I saw was "costume finished." I was all: "That was fast, last time I checked everything was still being molded and cast." Then I clicked on the link and I was like: "Oh, that's right, I forgot he's a big goof." Totally digging your work so far. You are one of the few on here who document almost every step of the process, I really enjoy it.
P.S. All things being equal, that IS a pretty cool stencil. I'm imagining an Andy Warhol Iron Man ala Marilyn Monroe piece with different colors in a grid. It'd look pretty cool, I think.
Heh, it's funny, I can't see the images in the email I get, so all I saw was "costume finished." I was all: "That was fast, last time I checked everything was still being molded and cast." Then I clicked on the link and I was like: "Oh, that's right, I forgot he's a big goof."
Totally digging your work so far. You are one of the few on here who document almost every step of the process, I really enjoy it.P.S. All things being equal, that IS a pretty cool stencil. I'm imagining an Andy Warhol Iron Man ala Marilyn Monroe piece with different colors in a grid. It'd look pretty cool, I think.
Re: Just What This Forum Needs: Another Ironman Build
Thanks for the comments guys. Sorry about that last post. It was a long and hard day and at the end I was looking at all of the pics and thought, "I'm really too tired to explain all of these..."
So here's the shots I didn't post:
First up, the finished boot prototype:

And the toe:

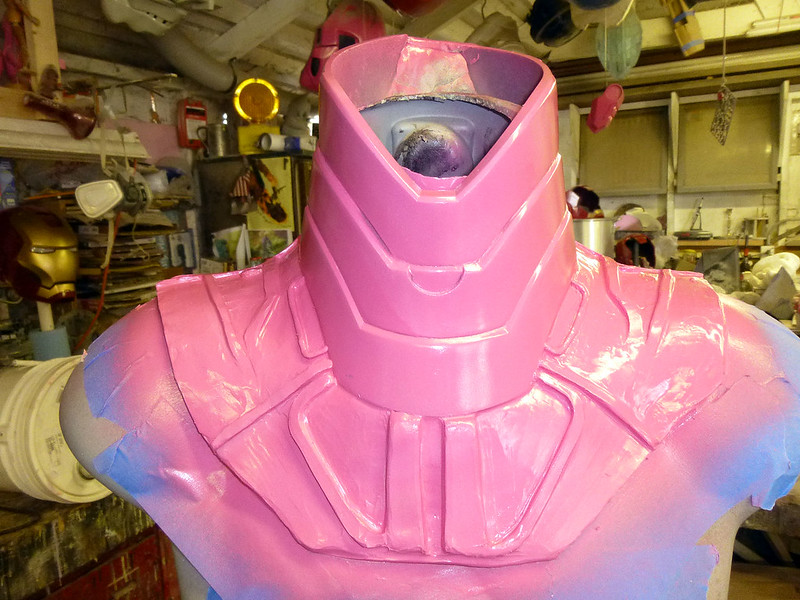
And the neck:
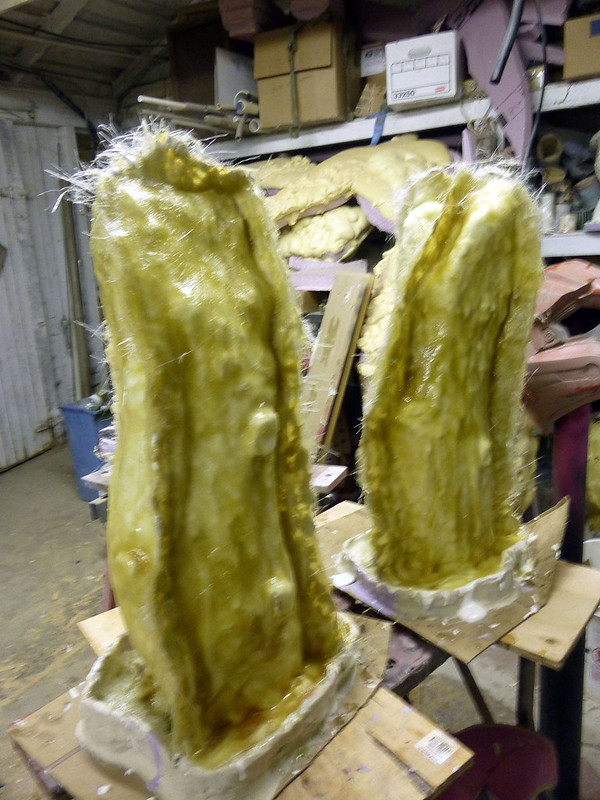
Here's Trevor laying up the mothermold for one of the thighs:

These are the boot parts blocked up for molding:

I started by building up thickness under the undercuts:

Same for the collar:

Here's the hip pod boxed for molding:

Here's the bigger flaps for the back:

Using the same basic design for open-faced mold, I set up all sorts of small pieces and started pouring rubber. Lots of it:


I also laid up a 3-part fiberglass mothermold for each of the shins:
I printed out kenlandrum's new and improved unibeam model:

It fits okay, but I need to re-print the center piece:
Still a few other molds to make. I'm not sure why, but I keep neglecting to mold the inner shin pieces:

The last thing I did before leaving the workshop was to set Lopez the Robot Whittler to work carving out the little plates that go in the hip joint.
The next morning (yesterday) I pulled the hip plate parts out of Lopez, assembled, prepped, and painted them in my standard prototype color:

Then I started pulling apart all of the molds I'd made the day before:


I spent a few minutes fooling around with some of the pieces:

Then it was time to start rotocasting and pulling copies:

After the tiniest bit of prep work on the belt sander and flapwheel grinder, I was able to do some test fitting:

The parts are a bit snug, but that's probably got something to do with the fact that I rotocast them a bit on the thick side and I was wearing heavy coveralls instead of my spandex tights.
Meanwhile, Lopez carved out the butt plates:

Which prompted more screwing around:
Here they are assembled:

I primed them last night, but they'll still need a bit more smoothing and shaping before they're ready for molding.
While that's going on, I've got a lot more parts to prep before I can get started on painting them:

I also need to overhaul the workshop and get set up for finish work:

Fortunately, these two pieces are all but ready for primer:

Much to do in the next couple of days. Stay tuned...
Thanks for the comments guys. Sorry about that last post. It was a long and hard day and at the end I was looking at all of the pics and thought, "I'm really too tired to explain all of these..."
So here's the shots I didn't post:
First up, the finished boot prototype:
And the toe:
And the neck:
Here's Trevor laying up the mothermold for one of the thighs:
These are the boot parts blocked up for molding:
I started by building up thickness under the undercuts:
Same for the collar:
Here's the hip pod boxed for molding:
Here's the bigger flaps for the back:
Using the same basic design for open-faced mold, I set up all sorts of small pieces and started pouring rubber. Lots of it:
I also laid up a 3-part fiberglass mothermold for each of the shins:
I printed out kenlandrum's new and improved unibeam model:
It fits okay, but I need to re-print the center piece:
Still a few other molds to make. I'm not sure why, but I keep neglecting to mold the inner shin pieces:
The last thing I did before leaving the workshop was to set Lopez the Robot Whittler to work carving out the little plates that go in the hip joint.
The next morning (yesterday) I pulled the hip plate parts out of Lopez, assembled, prepped, and painted them in my standard prototype color:
Then I started pulling apart all of the molds I'd made the day before:
I spent a few minutes fooling around with some of the pieces:
Then it was time to start rotocasting and pulling copies:
After the tiniest bit of prep work on the belt sander and flapwheel grinder, I was able to do some test fitting:
The parts are a bit snug, but that's probably got something to do with the fact that I rotocast them a bit on the thick side and I was wearing heavy coveralls instead of my spandex tights.
Meanwhile, Lopez carved out the butt plates:
Which prompted more screwing around:
Here they are assembled:
I primed them last night, but they'll still need a bit more smoothing and shaping before they're ready for molding.
While that's going on, I've got a lot more parts to prep before I can get started on painting them:
I also need to overhaul the workshop and get set up for finish work:
Fortunately, these two pieces are all but ready for primer:
Much to do in the next couple of days. Stay tuned...
Re: Just What This Forum Needs: Another Ironman Build
Love your continued candidness on the build... This is going to have a great payoff when finished!
Love your continued candidness on the build... This is going to have a great payoff when finished!
Junaid Ahmed
New Member
Re: Just What This Forum Needs: Another Ironman Build
This is definitely the most elaborative and professional build I've seen so far! Great work and looking forward to the final build and where you end up using the servos and control boards.
Awesome work!!
This is definitely the most elaborative and professional build I've seen so far! Great work and looking forward to the final build and where you end up using the servos and control boards.
Awesome work!!
Crow62
New Member
Re: Just What This Forum Needs: Another Ironman Build
CarveWright
Just curious what model is your MDF cutter and how much did it set you back?
CarveWright
msleeper
Sr Member
Re: Just What This Forum Needs: Another Ironman Build
Check Craigslist. I found someone selling one in my area for like $800 with only a few hundred hours on the machine. I really regret not snatching that up when I found it!
yeah seems a bit outta my price range =/ ah welll thanks man =)
Check Craigslist. I found someone selling one in my area for like $800 with only a few hundred hours on the machine. I really regret not snatching that up when I found it!
Ciano930
Well-Known Member
Re: Just What This Forum Needs: Another Ironman Build
I'm from Ireland =P sadly we arent as lucky for large populace barter
Check Craigslist. I found someone selling one in my area for like $800 with only a few hundred hours on the machine. I really regret not snatching that up when I found it!
I'm from Ireland =P sadly we arent as lucky for large populace barter
Lew Majestic 28
Member
Re: Just What This Forum Needs: Another Ironman Build
This suit looks incredible! i cant wait to see the final thing !! and your workshop is like the greatest man cave i have ever seen D:
This suit looks incredible! i cant wait to see the final thing !! and your workshop is like the greatest man cave i have ever seen D:
Re: Just What This Forum Needs: Another Ironman Build
I apologize for not updating sooner, it's been a pretty frantic past couple of weeks getting ready for the Bay Area Maker Faire. I was desperately hoping to be able to show off a rough draft of the suit at the event, but it didn't come together in time.
What I did get was a coat of paint on everything from the knees up (except the shoulders and hands):

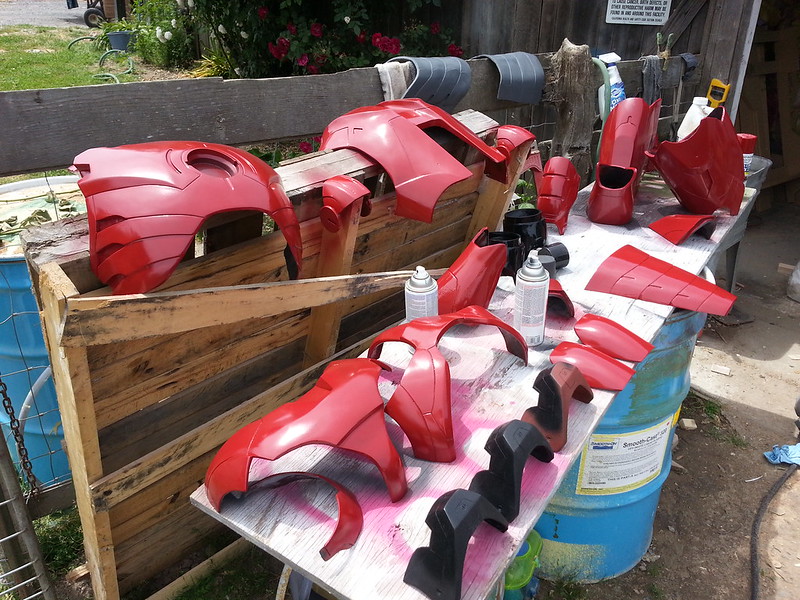
Airbrushed details with Alclad "Pale gold" paint:


Getting the perfect finish with metallic paints is really a question of having a nice, clean painting area:

While that was going on, I was also laying up the inner shin parts in fiberglass:

Somewhere in the middle of all of this, my friend Monica made the mistake of visiting and I strapped all of the key pieces onto her:

She didn't seem to mind:

This is about the same time that I decided my neckseal isn't going to work out until I get some more stretchable rubber:

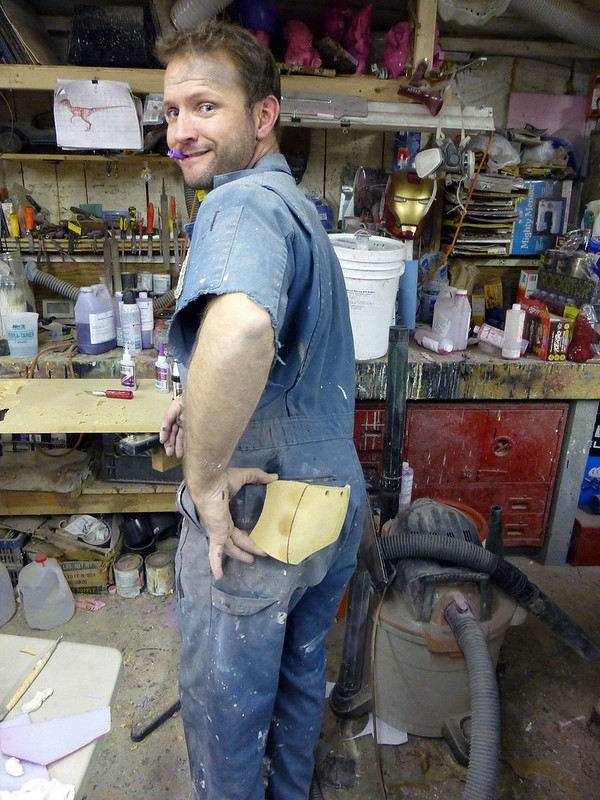
With some long days leading up to the Maker Faire, there was the inevitable goofiness brought on by exhaustion:

Still, the occasional test fitting did a good job to help maintain motivation:

And the parts are slowly shaping up:

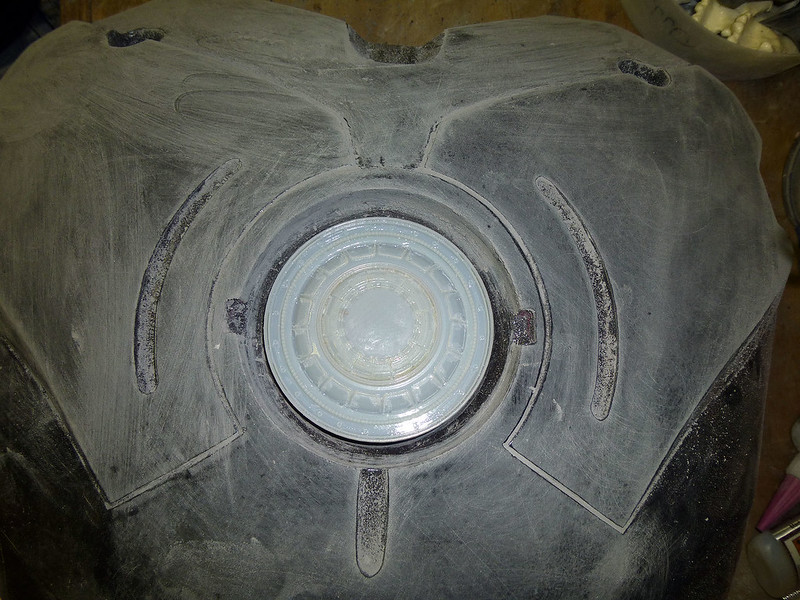
Since my sister is dating a guy who has a fabrication and machine shop down at the local raceway, I talked him into turning out a couple of aluminum bezels for the hole in the chest. I think he did a good job:

The piece inside is a clear resin cast copy of Kenlandrum's excellent unibeam model.
I'm still having problems getting the center part to print on my machine. It keeps filling in the grill:

Once I get the printing problem sorted out, I'll be installing LEDs to light it up.
Sometime on Wednesday night I had to call the game and recognize the fact that there was no way I'd be able to have this thing wearable for the weekend. I still packed all of the parts into a bin and brought them along so I could have them at my display. At that point, the suit looked like this:

Here's the display I put together for the weekend:

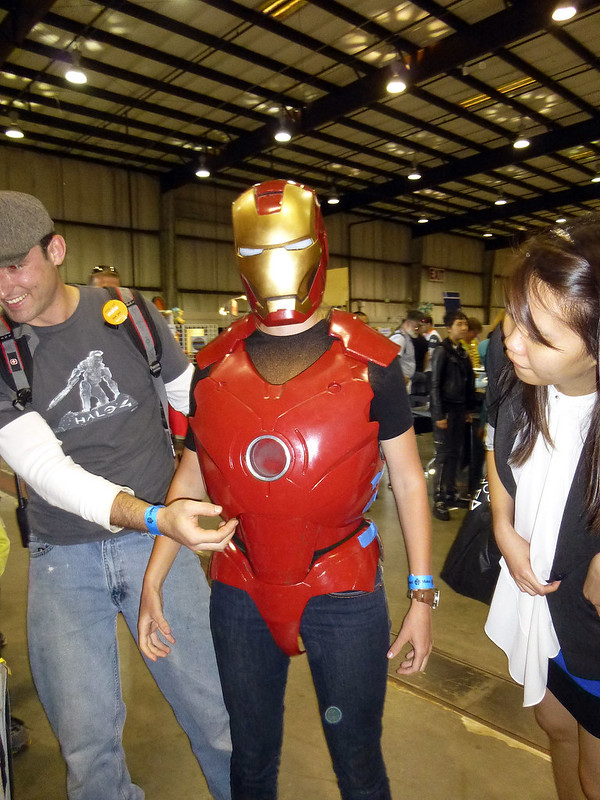
I even had the occasional hapless bystander try the parts on if they looked to be about the right size:
I haven't quite gotten everything put away from the weekend, but I'm still making progress on the suit. Here's one of the buttplate molds:

And the front plates for the hips:

I had Jarvis make the collarbones:

The printed parts are just going to be used as a template though. I've handed them off to Ryan the fabricator so he can crank out a few copies in aluminum for me.
Today I'll be thickening up the molds for the hip and butt plates, tinkering with the boots a bit more, and making a pair of wearable shins.
Stay tuned...
I apologize for not updating sooner, it's been a pretty frantic past couple of weeks getting ready for the Bay Area Maker Faire. I was desperately hoping to be able to show off a rough draft of the suit at the event, but it didn't come together in time.
What I did get was a coat of paint on everything from the knees up (except the shoulders and hands):
Airbrushed details with Alclad "Pale gold" paint:
Getting the perfect finish with metallic paints is really a question of having a nice, clean painting area:
While that was going on, I was also laying up the inner shin parts in fiberglass:
Somewhere in the middle of all of this, my friend Monica made the mistake of visiting and I strapped all of the key pieces onto her:
She didn't seem to mind:
This is about the same time that I decided my neckseal isn't going to work out until I get some more stretchable rubber:
With some long days leading up to the Maker Faire, there was the inevitable goofiness brought on by exhaustion:
Still, the occasional test fitting did a good job to help maintain motivation:
And the parts are slowly shaping up:
Since my sister is dating a guy who has a fabrication and machine shop down at the local raceway, I talked him into turning out a couple of aluminum bezels for the hole in the chest. I think he did a good job:
The piece inside is a clear resin cast copy of Kenlandrum's excellent unibeam model.
I'm still having problems getting the center part to print on my machine. It keeps filling in the grill:
Once I get the printing problem sorted out, I'll be installing LEDs to light it up.
Sometime on Wednesday night I had to call the game and recognize the fact that there was no way I'd be able to have this thing wearable for the weekend. I still packed all of the parts into a bin and brought them along so I could have them at my display. At that point, the suit looked like this:
Here's the display I put together for the weekend:
I even had the occasional hapless bystander try the parts on if they looked to be about the right size:
I haven't quite gotten everything put away from the weekend, but I'm still making progress on the suit. Here's one of the buttplate molds:
And the front plates for the hips:
I had Jarvis make the collarbones:
The printed parts are just going to be used as a template though. I've handed them off to Ryan the fabricator so he can crank out a few copies in aluminum for me.
Today I'll be thickening up the molds for the hip and butt plates, tinkering with the boots a bit more, and making a pair of wearable shins.
Stay tuned...
ROBOSTEVE 0671
Sr Member
Re: Just What This Forum Needs: Another Ironman Build
A great update Sean! love the results from that Alclad Gold! that's got a real metal zing to it's reflection and how it catches pure white highlights.
Loving the pieces. Are you thinking of doing the gaps with any fillers like Rubber details in the joints at all?
A great update Sean! love the results from that Alclad Gold! that's got a real metal zing to it's reflection and how it catches pure white highlights.
Loving the pieces. Are you thinking of doing the gaps with any fillers like Rubber details in the joints at all?
Similar threads
- Replies
- 1
- Views
- 573
- Replies
- 0
- Views
- 380
- Replies
- 22
- Views
- 742