The Spinner - My Fujimi Blade Runner Build.

If nothing else, I'm learning a truckload of things about the priming and painting process that I've *never* known before - and I am very glad that I took everyone's advice here and started again.

I should have said from the outset that I am a rank amateur.

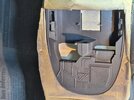
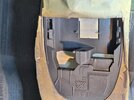
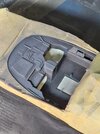
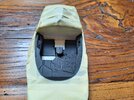
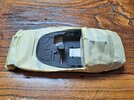
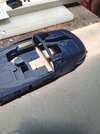
I had a look at the body this morning and while I am happy with it, I reckon wayouteast was correct in his concern about mottling. If I'm brutally honest, the body towards the rear of the spinner is right on the edge. It is smooth to the touch...largely. If I leave my finger on it for too long I can feel some texture but it is clear to me that this second effort is far better than my first. I'm satisfied that the rest of the priming is smooth and there's no crackling anywhere - especially where it appeared previously. I plan to do one more coat today to ensure the cockpit and underside is complete.

This is the second time I've used Vallejo primer on a kit. I like undercoating in black. It seems to make the surface colours punchier. I partially immersed the can in hot water yesterday for a bit before spraying to warm it up and I shook the can for a full three minutes each time before I sprayed.

Quite a useful long-term investment might be a set of abrasive Micro Mesh pads in various grades like these.

f you end up with a pre-paint surface that's not quite smooth enough for the final layers, but which isn't bad enough to merit a full strip and re-prime, you can use these to fix the issue. They're colour coded to signify the 'harshness' of the grit, and are designed to be used for 'wet sanding' where you use water to wet the surface to be smoothed. You start with the lower numbers to remove the texture and level the surface and then work your way up to the highest numbers (12000 - or as high as you feel you need to go). Each pass smooths the surface more and more and removes the fine scratches from the previous pass. At the highest grits it's actually more like polishing than sanding.

I've brought quite a few paint jobs back from the brink with these, and use them as a final stage before the final paint layers even where the primer layer seems perfect.
 
Glad to see it’s working out. You will be glad you went through the trouble. I see people using Vallejo all the time and getting good result,I have found them to be a real crapshoot.
Vallejo primer can be difficult, I know. I've not used the spray cans, to be honest, only the 'surface primer' through my airbrush, and it constantly dried on the needle tip and caused spattering and even complete clogging after a few seconds of painting, even when new and properly thinned. Their acrylic paints, on the other hand, I've found to be a joy to work with, with an airbrush or a brush. For the airbrush I use the 'Model Air' range with minimal or no thinning or the standard 'Model' range thinned about 50/50 with their airbrush thinner. For a standard brush I use them straight out of the bottle. I've rarely if ever had a problem with them. The primer, though... :cautious:

My goto primers now are Tamiya Fine Surface for small or very detailed items, and Hycote (an automotive acrylic primer) for larger or plainer items where fine detail isn't so much of an issue - though it dries pretty fine anyway. Of all the various brands and types I've used, I've found those to be the most consistent and reliable so far.
 
Here's where I'm at today...

A few areas of white showing through. I'm going to do a little rubbing on the body this morning.
 

Attachments

  • 20211123_092912.jpg
    20211123_092912.jpg
    1.7 MB · Views: 154
  • 20211123_092842.jpg
    20211123_092842.jpg
    4.8 MB · Views: 141
  • 20211123_092856.jpg
    20211123_092856.jpg
    1.7 MB · Views: 137
  • 20211123_092937.jpg
    20211123_092937.jpg
    1.5 MB · Views: 140
Hey there wayouteast! Yep still here - just had a busy week and took a break from the project. Prepped and sprayed the interior last night and this morning. I'm happy with it. I'm not concerned with the floor well around where the seating will go because it won't be seen.

I've taped the white panel forward of the driver and the dashboard where the driver's display will sit. I plan on blocking that portion out with al-foil and doing some drilling (similar to yours actually) I can run the lighting for the display.

I ordered and received my lighting this week. Got a great Black Friday deal on what I needed and it only ended up costing my $180AUD instead of $260AUD. I was well pleased with that.

I'm going to choose the body colours tomorrow. I'm leaning toward a couple of Tamiya products, a mid-to-dark range blue and an indigo or similar to overspray later. Haven't decided yet.
 

Attachments

  • 20211128_101423.jpg
    20211128_101423.jpg
    2.7 MB · Views: 109
  • 20211128_101421.jpg
    20211128_101421.jpg
    2.7 MB · Views: 108
  • 20211128_101400.jpg
    20211128_101400.jpg
    1.4 MB · Views: 118
  • 20211128_093735.jpg
    20211128_093735.jpg
    4 MB · Views: 104
  • 20211128_093723.jpg
    20211128_093723.jpg
    4.2 MB · Views: 109
It's been a couple of weeks. I've had a lot on and I haven't been able to do much work on the Spinner. I did get the final coat onto the body and I'm happy with how it looks. I wanted to go with a darker shade than the movie prop. I've always seen the Spinner as a darker blue compared to the lighter blue that it *should*. The Tamiya TS-51 Racing Blue has this metallic speckling throughout it which I really like. So I may not overspray with the lighter blue that I was considering after all. I had to take a backwards step with the front wheel covers as I wasn't happy with the coat I gave them. Fortunately, with the Dettol trick I picked up on here, I stripped them back and started again. They look much better the second time around. One thing I'm a little concerned with are the holes I cut for the Paragrafix overlays in the driver's side and passenger side doors. I did make them a little too big and I'm trying to work out a way of addressing that with some sort of greeblie. So far, I'm not having much luck.

I'm onto the prep work for the lighting. Taking a cue from wayouteast once again, I'm blocking the interior with aluminium foil using some spray glue to fix the foil strips I've cut. For some reason, I'm nervous about the lighting. I know it's going to be fiddly and I keep hesitating with it but I know I'm just going to have to dive in eventually.

Anyway, not much of an update but I'll continue working on it bit by bit.
 

Attachments

  • 20211213_150217.jpg
    20211213_150217.jpg
    2 MB · Views: 104
  • 20211213_142928.jpg
    20211213_142928.jpg
    1.5 MB · Views: 102
  • 20211214_130247.jpg
    20211214_130247.jpg
    1.6 MB · Views: 114
  • 20211214_130233.jpg
    20211214_130233.jpg
    1.6 MB · Views: 107
  • 20211214_130228.jpg
    20211214_130228.jpg
    1.6 MB · Views: 106
  • 20211214_130222.jpg
    20211214_130222.jpg
    1.7 MB · Views: 115
It's been a couple of weeks. I've had a lot on and I haven't been able to do much work on the Spinner. I did get the final coat onto the body and I'm happy with how it looks. I wanted to go with a darker shade than the movie prop. I've always seen the Spinner as a darker blue compared to the lighter blue that it *should*. The Tamiya TS-51 Racing Blue has this metallic speckling throughout it which I really like. So I may not overspray with the lighter blue that I was considering after all. I had to take a backwards step with the front wheel covers as I wasn't happy with the coat I gave them. Fortunately, with the Dettol trick I picked up on here, I stripped them back and started again. They look much better the second time around. One thing I'm a little concerned with are the holes I cut for the Paragrafix overlays in the driver's side and passenger side doors. I did make them a little too big and I'm trying to work out a way of addressing that with some sort of greeblie. So far, I'm not having much luck.

I'm onto the prep work for the lighting. Taking a cue from wayouteast once again, I'm blocking the interior with aluminium foil using some spray glue to fix the foil strips I've cut. For some reason, I'm nervous about the lighting. I know it's going to be fiddly and I keep hesitating with it but I know I'm just going to have to dive in eventually.

Anyway, not much of an update but I'll continue working on it bit by bit.

banistersmind,

I don't know what you ave planned for the final look of your Spinner but I thought I'd mention these figure are now available for you to jazz up your kit.
 
banistersmind,

I don't know what you ave planned for the final look of your Spinner but I thought I'd mention these figure are now available for you to jazz up your kit.
Oh WOW!!! You know, I was toying with trying to track down some figures but I couldn't find anyone who was making them. These look brilliant!
 
wayouteast - I'm struggling with how to diffuse the lighting through the wheel cover arcs. I've tried back covering with baking paper and attempting to glue paper onto the backs of the transparent plastic arcs to actually painting the backs of the transparent plastic arcs. None of these look good.

How did you achieve your look?

I actually made replacement insert pieces for most of the lit areas from 3mm opal acrylic LED light diffusion sheet like this, which you can buy cut to size (you don't need much - I think I ordered 150mm x 150mm):

Opal 35% Spectrum LED Light Diffusing Acrylic Sheet - Cut Plastic Sheeting

This not only diffuses the LED lighting brilliantly, but also gives a uniform look to those areas when unlit.

So I didn't use the kit's separate clear pieces for the wheel covers (the 'arcs' and the centre piece) at all, but carefully cut pieces the same shape from the diffusion sheet. The sheet does diffuse the light enough to avoid obvious hotspots, even at the small distances within the wheel cover. Those areas were lit with the same nano-SMDs you seem to be using, and in pretty much the same location (though I only used a single SMD for each 'arc'. You can see my setup from the inside here, unlit...

1640092821411.png


And lit...
1640092924045.png


I also removed 'strips' of plastic from either side of the fuselage and the 'fin' on the top, where the lit areas are (yellow/red on the sides and white on the top). These were again replaced with heat-curved strips of the same diffusion sheet cut to fit. Those were lit from the interior with lengths of LED strip. You can see the translucence here, with the body held up against the light from a window...

1640093058505.png


The only clear piece I retained from the kit (other than the cockpit glass, windows and various domes and other beacon lights) was the main front 'headlight' at the front between the wheel 'arms', since when I looked at photos of the original prop you could make out individual lights in that area, which were replicated nicely by the LEDs on the LED strip I used there. There was just a thin curved sheet of tracing paper inside the clear piece to very slightly diffuse the light.

Hope this helps!
 
I actually made replacement insert pieces for most of the lit areas from 3mm opal acrylic LED light diffusion sheet like this, which you can buy cut to size (you don't need much - I think I ordered 150mm x 150mm):

Opal 35% Spectrum LED Light Diffusing Acrylic Sheet - Cut Plastic Sheeting

This not only diffuses the LED lighting brilliantly, but also gives a uniform look to those areas when unlit.

So I didn't use the kit's separate clear pieces for the wheel covers (the 'arcs' and the centre piece) at all, but carefully cut pieces the same shape from the diffusion sheet. The sheet does diffuse the light enough to avoid obvious hotspots, even at the small distances within the wheel cover. Those areas were lit with the same nano-SMDs you seem to be using, and in pretty much the same location (though I only used a single SMD for each 'arc'. You can see my setup from the inside here, unlit...

View attachment 1522729

And lit...
View attachment 1522730

I also removed 'strips' of plastic from either side of the fuselage and the 'fin' on the top, where the lit areas are (yellow/red on the sides and white on the top). These were again replaced with heat-curved strips of the same diffusion sheet cut to fit. Those were lit from the interior with lengths of LED strip. You can see the translucence here, with the body held up against the light from a window...

View attachment 1522734

The only clear piece I retained from the kit (other than the cockpit glass, windows and various domes and other beacon lights) was the main front 'headlight' at the front between the wheel 'arms', since when I looked at photos of the original prop you could make out individual lights in that area, which were replicated nicely by the LEDs on the LED strip I used there. There was just a thin curved sheet of tracing paper inside the clear piece to very slightly diffuse the light.

Hope this helps!

Brilliant work from your end wayouteast - I fear I don't have the skill or the patience to try something similar to yours. That said, it looks as though I can get the product here in Australia so I might reconsider this...

For now, I tried cutting some standard A4 copy paper and I managed to fashion some serviceable inserts that sit flush over the arcs. They block out light bleed from the LEDs and diffuse the light. I've sat the clear covers over the top of them. The diffusion is okay. I've gone with three LEDs per arc to try and minimize the dead areas between each one.

I'll sit with them for a bit and see if I still like them in a week or two. As I type this, I'm beginning to wonder...

Cool. I've used white paper as diffuser in the past too, quite successfully. After all, the best solution to anything is 'whatever works'! :cry:
 
I got the coloured gel sheets for the cockpit panels - as recommended by wayouteast. They were a great option - if a little fiddly.
The only thing I'd say from my experience is that the paper thin diffusion gel sheets (the same thickness as the colour gels) don't really diffuse the SMDs at close quarters. They have much the same effect as baking (or tracing) paper, and, like those cheaper options, need the SMD to be a little way away from the surface to work. The thicker acrylic diffusion sheet I used diffuses the light even when the SMD is resting on the surface. It's certainly more difficult to work with, but more effective.
 

Your message may be considered spam for the following reasons:

If you wish to reply despite these issues, check the box below before replying.
Be aware that malicious compliance may result in more severe penalties.
Back
Top