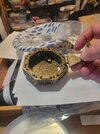
First, paint if you're going to paint. Lay the flaps in the CORRECT order around the outside of the top of the key.

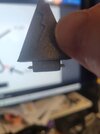
There are 8 brass rods. Put one rod through a flap, and the spring goes around the rod and into the flap. The other end of the spring will be sticking out. The side of the flap with the hole for the spring is the LEFT side when looking at the top of the flap. (as shown)

Turn the flap over, so the bottom is facing up. The brass rod will rest on two posts that are attached to the top of the key. The dangling end of the spring will now fit in the hole next to the post that the brass rod is resting on.

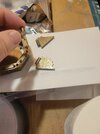
There are 8 printed hinges. Each hinge holds ONE brass rod end from each flap. This means you need to install 2 flaps at a time, and the hinge holds parts of the two sequential flaps. You go around the perimeter installing flaps and hinges until all eight flaps and eight hinges are in place. MAKE SURE ALL YOUR FLAPS ARE IN THE RIGHT ORDER BEFORE GLUING ANYTHING IN PLACE !

There are 8 brass rods. Put one rod through a flap, and the spring goes around the rod and into the flap. The other end of the spring will be sticking out. The side of the flap with the hole for the spring is the LEFT side when looking at the top of the flap. (as shown)

Turn the flap over, so the bottom is facing up. The brass rod will rest on two posts that are attached to the top of the key. The dangling end of the spring will now fit in the hole next to the post that the brass rod is resting on.

There are 8 printed hinges. Each hinge holds ONE brass rod end from each flap. This means you need to install 2 flaps at a time, and the hinge holds parts of the two sequential flaps. You go around the perimeter installing flaps and hinges until all eight flaps and eight hinges are in place. MAKE SURE ALL YOUR FLAPS ARE IN THE RIGHT ORDER BEFORE GLUING ANYTHING IN PLACE !
Last edited:
