You are using an out of date browser. It may not display this or other websites correctly.
You should upgrade or use an alternative browser.
You should upgrade or use an alternative browser.
The Martian helmet buildthread[CAD & 3D-print] - [FINISHED]
- Thread starter Kiwimaddog
- Start date
")
Looks beautiful, really cool to see a close to finished helmet like that. Great work zackw!
Wow! A remarkable project! I'm sure you know where all the discrepancies are, but no one else will!
....And great job cleaning up all the build-lines.
Really nice finish!
No doubt about lots of sanding - that just goes hand-in-hand with 3D printing.
But so does scratch building other ways too.
No doubt about lots of sanding - that just goes hand-in-hand with 3D printing.
But so does scratch building other ways too.
Topgun1984
New Member
Nice build and finishing i want to build one but i havent found any company that is makeing visors on comission
Looking real good there thepoynt!
I did finally get word this week that my visor guy started work on converting my printed bucks into the final form needed. Sadly things got a little more involved than I was first told. Basically (for the big dome) I want them to be at least 3 mm thick, and that thickness they will likely be very hard to remove from the buck once formed due to there being some negative draft around the u-shaped areas, or "ear-areas". What he will do is to make a silicon cape onto a removable inner core. I'm confident that this, albeit expensive method, will work. I'm really looking forward to him to start forming the parts.
I did finally get word this week that my visor guy started work on converting my printed bucks into the final form needed. Sadly things got a little more involved than I was first told. Basically (for the big dome) I want them to be at least 3 mm thick, and that thickness they will likely be very hard to remove from the buck once formed due to there being some negative draft around the u-shaped areas, or "ear-areas". What he will do is to make a silicon cape onto a removable inner core. I'm confident that this, albeit expensive method, will work. I'm really looking forward to him to start forming the parts.
That looks awesome, I love it. Great work buddy!
My wife bought these designs for my birthday in January! I've been a member on The RPF for a while but have never had anything to post until now. I have a couple more things to print, the left light and the bucks for the domes. I can't wait to post some of my own wip pics.
I had so much fun on this project - you'll love it!
One tip that would have saved me some money - I first ordered the decals from a place online, done on clear vinyl. I thought due to the size of the bigger ones that would be better than doing them as decals. Turns out the thickness of the vinyl made the edges very obvious. I ended up printing them myself on decal paper and that worked really well, and there's really no thickness to speak of; it looks like the details are printed directly on the helmet. So I'd recommend that, or if you can get clear stickers. Just not vinyl.
mattr85
New Member
I had so much fun on this project - you'll love it!
One tip that would have saved me some money - I first ordered the decals from a place online, done on clear vinyl. I thought due to the size of the bigger ones that would be better than doing them as decals. Turns out the thickness of the vinyl made the edges very obvious. I ended up printing them myself on decal paper and that worked really well, and there's really no thickness to speak of; it looks like the details are printed directly on the helmet. So I'd recommend that, or if you can get clear stickers. Just not vinyl.
This is the only part of the build I'm not worried about. I make custom football helmets and other sports promotional products for a living. We have clear and white convex material that's specifically formulated for helmets and curved surfaces. If I'm happy with what I can produce, I'll post some images of them on here and can probably make some for other people working on this project. I have a foil printing method that really makes bright colors pop. Speaking of colors, what color did you use for the orange and blue?
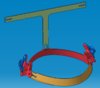
So, attached is a zipped catalog of the .stls I made for the head harness. These are designed to fit the helmet without any modifications to the existing helmet. All that is needed is some appropriate screws to lock the parts in place(M3s). Assembly should be self explanatory. I thought I should share these for all people who bought my design on Etsy.
Attachments

So, attached is a zipped catalog of the .stls I made for the head harness. These are designed to fit the helmet without any modifications to the existing helmet. All that is needed is some appropriate screws to lock the parts in place(M3s). Assembly should be self explanatory. I thought I should share these for all people who bought my design on Etsy.
Thanks! Something isn't right with the zip file though, it's either empty or corrupted or something.
Weird, I have no issues unpacking it. I can recommend downloading 7-zip, that is the most hassle free compression software I've used.Thanks! Something isn't right with the zip file though, it's either empty or corrupted or something.
Similar threads
- Replies
- 3
- Views
- 1,325
- Replies
- 0
- Views
- 243