The Mando Project (S.A. Blaster, Metal Beskar Ingot and I guess maybe the whole darn suit...!)

Really nice work, your results are incredible! An alternative (and somewhat easier) approach to achieve the bluing effect is to use black rear light-spray, even though it gives somewhat of a more browned effect. I'm going to follow your progress with great interest ;)
 

Attachments

  • IMG_20181021_140909.jpg
    IMG_20181021_140909.jpg
    1.7 MB · Views: 378
Your updates are the highlights of my days, and perhaps for many others too. Phenomenal work.
Thats... quite the compliment, thank you kindly! I hope I can keep living up to the bar it sets. If I manage to give just a fraction back, of the inspiration I got from all the true build-masters back when I joined, one of my goals will have been reached!
 
Really nice work, your results are incredible! An alternative (and somewhat easier) approach to achieve the bluing effect is to use black rear light-spray, even though it gives somewhat of a more browned effect. I'm going to follow your progress with great interest ;)
That rear-light spray is almost exactly the same as the Tamiya Smoke I use! That Brylar pistol looks great btw. So for those without an airbrush it's a great alternative to the smoke. The brown/blue tends to shift a lot. (Feels like blueing goes brown with age?) Adding the different layers of clear blue and orange, before adding the smoke just makes the effect a little "deeper", if that makes any sense. (And it's hard to beat the metallic sheen of graphite. It's just amazing when used right. Look at what some folks are doing with Mando buckets, for example!)
 
Thats... quite the compliment, thank you kindly! I hope I can keep living up to the bar it sets. If I manage to give just a fraction back, of the inspiration I got from all the true build-masters back when I joined, one of my goals will have been reached!
I agree with Detreut - thanks Joatrash and everyone on techniques and tips on metal effects - its like a master class in finishing props. I learned more that i can try out on the next set of things in the prop bin!
 
No photos for a couple days. Haven't had to do anything meaningful with the blaster to show.

I DID get the Poe GLIE 44 Nerfs in the mail. The electronics will fit in the grip with PLENTY of room to spare, but a solution needs to be found for the battery. The Nerf takes, oddly enough, ONE AA 1.5V battery and there's no way to fit that size battery AND battery holder in the Mando- there's simply nowhere to put it. I tried with LR44 buttoncell batteries but they are simply too weak to power the Nerf. However, with some modding, I think it's possible to get a triple-A battery in there. The upper part of the receiver needs to have a hole cut, and the barrel does too... and with the thickness of the barrel it takes a bit of cutting with a dremel. (Some dremeling might be needed inside the barrel too. Another option might be to use a rechargable battery of some kind and stick it in the grip, which was what I was thinking might work with a Blaster Core. I imagine that a 3.7v lipo can be brought down to 1.5. Anyway... the kit wasn't designed around the Nerf electronics, but it's a budget option. I'll see what cutting up a barrel does and let y'all know.
 
Small update today. Finishing up the first build, just gluing everything together using clear 2-part epoxy.

Thoughts on glue.
It might be different depending on brand, but I find that clear epoxy glues are less prone to snapping and shock-forces, because they are slightly less rigid than the "metal epoxy" types. (Note: superglue/cyanoacrylate is pretty worthless for a hand prop. It's much too brittle and will snap easily. I know lots of folks use it on 3d prints and love it, but it simply doesn't handle certain forces well. It's great for fast fixes in the field when you just need to get something together for a little while, or for resin scale models (printed and cast) as well as things like lead miniatures, or for attaching rubber parts to fabric, but for anything that has to withstand some handling, use epoxy. And if you need it REALLY strong, us "JB Weld Plastic Bonder" (NOT regular JB weld or their "plastic welder"... you want the one called BONDER, becuse it cures super strong but stays just a tiiiiiiiiiiny bit "gummy" or flexible- not enough to create any flex in the part, but enough to withstand snapping or shock forces. Trust me on this: I did extensive testing with different glues when assembling a resin-printed Star Lord helmet and the JB bonder was just superior. (The only downside is that it takes a few hours to cure fully.) Now, it's possible that some printed resins might not work as well with JB bonder, but for my prints in particular, it can't be beat.

(You can also "weld" printed pieces by curing liquid resin with a laser, which will create a "perfect" bond with no seam, BUT it's a long process because a laser can only penetrate 1-2mm into cured resin, so it has to be done in layers. But I digress...)


These parts have a little bit of flex to them since they are hollow, so I opted to use some clamps while the epoxy set.
1579609094321.png


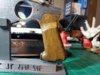
More stuff attached. Since this will not have electronics, I cut away part of the speaker grille in the side cover so that the disc would sit flush to the body. I glued the grip frame into the receiver, then added the grip sides later.
1579609167236.png

Attaching the safety lever...
1579609186362.png


Once the blaster i complete, I'll do a final round of weathering.

Now, I've started a second build. This one will have electronics taken from the Poe Nerf Glie 44. It will also have a similar paint job, but I'm going to try a different way of getting there.

Here you can see what I had to cut away to fit the AAA battery holder. My poor dremel did not like cutting the thick aluminum tube, but it got through... just had to pace it so as not to overload the motor. (1mm is easy, 2mm not so much. Plus I suspect that this is extra-hard stuff.) The battery holder fits very snug.
1579609223228.png


1579609238520.png

Luckily, the outer bar and slide will hide the cuts, and it shouldn't be weakened too much. I carefully cut a little material from the battery holder as well.

1579609248360.png


1579609277850.png
 
I take it one would not have to go to such heroics if using an Adafruit AudioFX board and a 3.7v battery?
 
I take it one would not have to go to such heroics if using an Adafruit AudioFX board and a 3.7v battery?
I think we had one of those in the Orville pistol and they are pretty small. A "safe" volume is about 28mmX65mmX8mm. You also have a little room in the grips in case it's wider.
 
OK, I'm calling the first buildup DONE. (I know many of you will have seen these photos in the facebook groups, but here they are anyway.)

I'll be continuing with the next buildup here, and trying different paint methods, but this first one turned out pretty well, I think.

After all the parts were glued together, I wanted to add a couple more subtle layers of weathering.

"AMMO OILBRUSHERS" [sic] by Spanish company Mig Jimenez, are thinned oil paints in tube-jars that look like mascara packages, complete with brush. They are great for small-spot weathering. I used brown and black shades to rub into metallic areas and add some "light grime". You can see it most clearly on the side disc and the muzzle. I also used a q-tip to rub some graphite on the painted-brass surfaces, to pale them a little.

1579882110836.png


1579882187491.png


1579882208253.png


1579882217106.png


1579882226935.png


1579882244678.png


1579882261412.png

Well... that's it. Enjoy the photos. More to come on the second buildup!
 
really nice, I like the bluing effect, and the brass and wood finishes. I may try to correct all those mistakes i made 'weathering' a rogue one rifle 3d print. if I can do a tenth of what you did I will be happy with myself :)
 
really nice, I like the bluing effect, and the brass and wood finishes. I may try to correct all those mistakes i made 'weathering' a rogue one rifle 3d print. if I can do a tenth of what you did I will be happy with myself :)
I'm going to see if the method can be done a little simpler and still get good results with the current electronics build. Have just been swamped with other stuff the last few days!
 
Ok, it's been tumbleweeds for a couple weeks since I've been prioritizing finishing ingots and things over working on my own stuff, but here's something neat. RPFer justinrowan just sent me a photo of his prototype wood grips that will fit my blaster. He got these done within a day of me sending him the specs. Awesome! (He's still working on trying to hollow out the inside to make more room for electronics.)

1581410150894.png


Hopefully, it won't be too long until I can get back to building my second piece, with electronics... and some other neat parts I've been waiting for...
 
Ok, it's been tumbleweeds for a couple weeks since I've been prioritizing finishing ingots and things over working on my own stuff, but here's something neat. RPFer justinrowan just sent me a photo of his prototype wood grips that will fit my blaster. He got these done within a day of me sending him the specs. Awesome! (He's still working on trying to hollow out the inside to make more room for electronics.)

View attachment 1256113


Hopefully, it won't be too long until I can get back to building my second piece, with electronics... and some other neat parts I've been waiting for...

They look great! Wish they were an option. Nevertheless, I'll see if anyone can do it locally where I am.
 
They look great! Wish they were an option. Nevertheless, I'll see if anyone can do it locally where I am.
Where are you? I don't mind shipping international, I've send a few sets for different models overseas ready. I'll be starting a thread soon, but feel free to PM me.
 
Where are you? I don't mind shipping international, I've send a few sets for different models overseas ready. I'll be starting a thread soon, but feel free to PM me.
I'm in Singapore. Your grips look amazing and I'll look out for your thread man. Don't want to swamp your Inbox as it should be by now after Jo's update above!
 
Back
Top