The Fiberglass Rubies Vader Helmet Recast Modification Project

kalkamel

Master Member
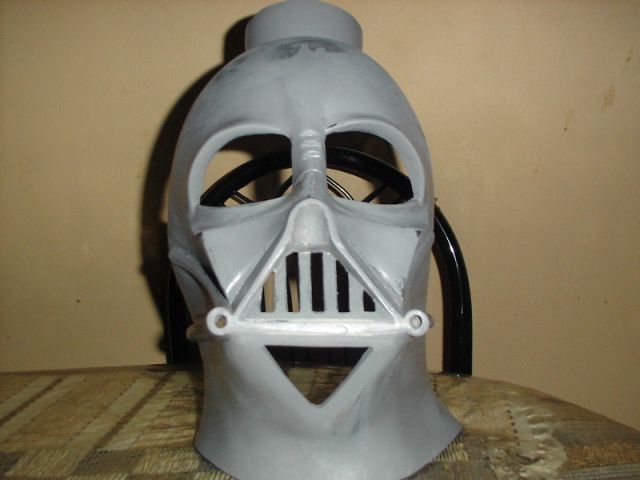
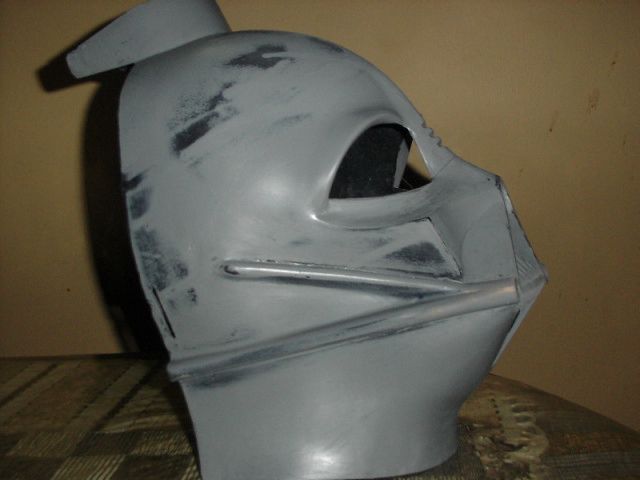
A few months ago, I received a fiberglass Vader bucket as part of a trade with another member of the RPF. He had sent me pics of it before that so I knew that the lid was a recast of the Rubies Supreme plastic helmet, which I already have. According to him, he bought it off Ebay and wasnÂ’t too happy with it. I thought, what the hell, itÂ’s fiberglass so I agreed to the exchange (it was for a Grail Diary prop replica I made).

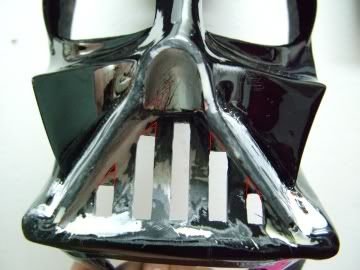
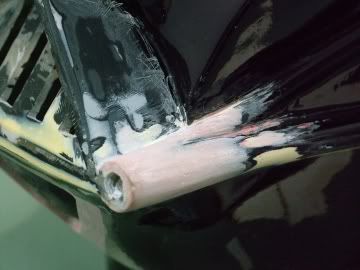
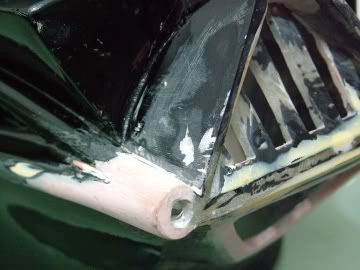
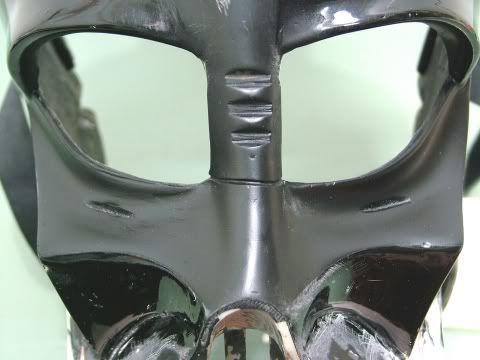
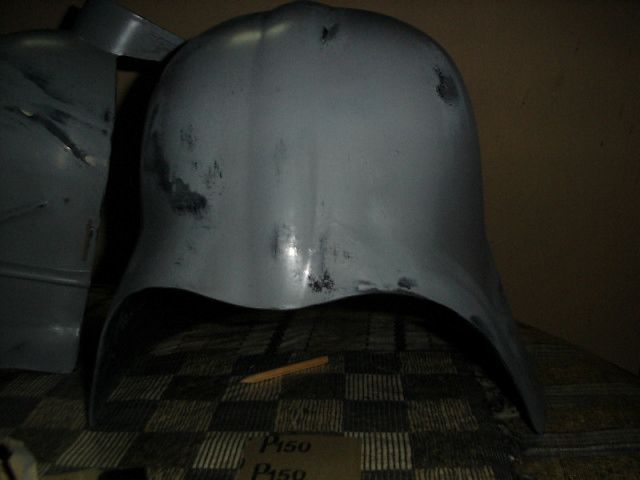
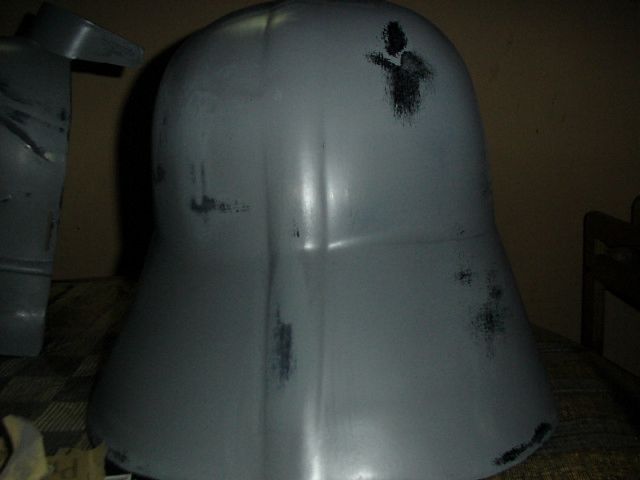
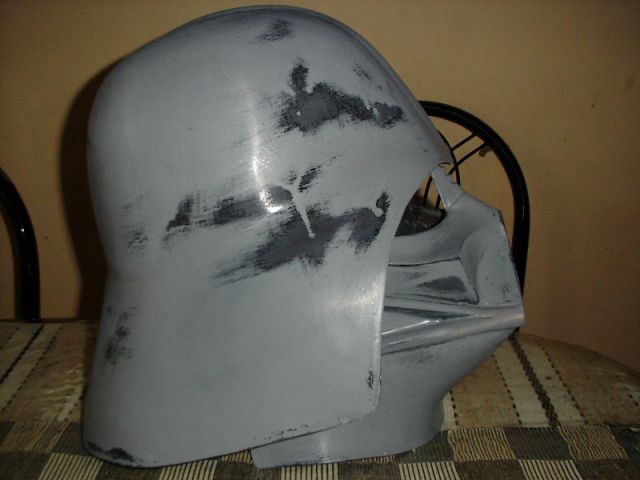
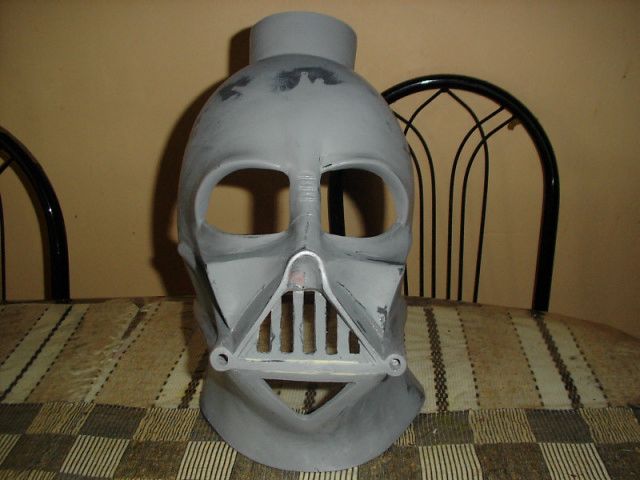
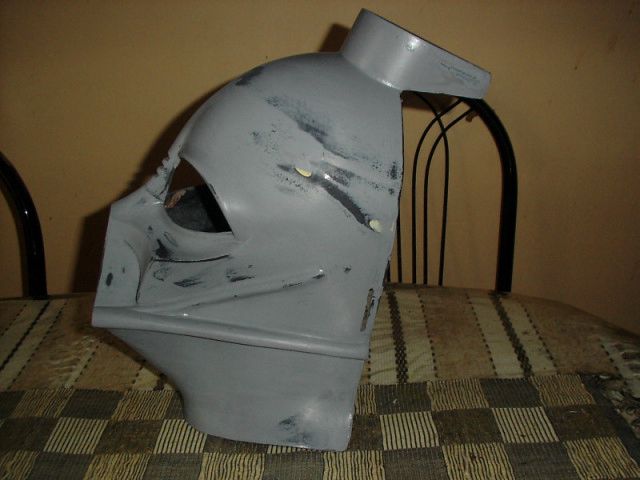
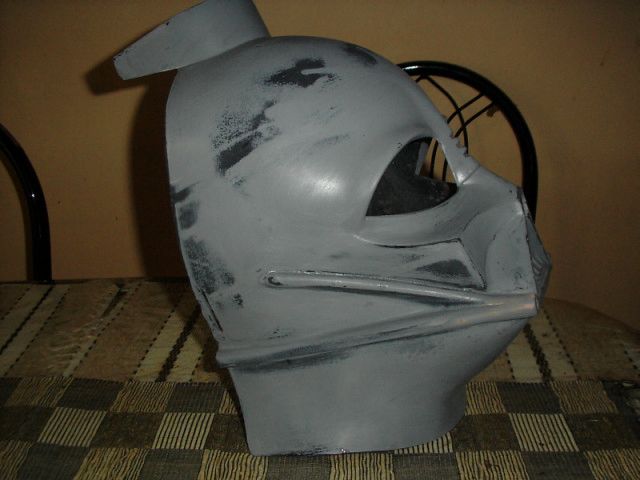
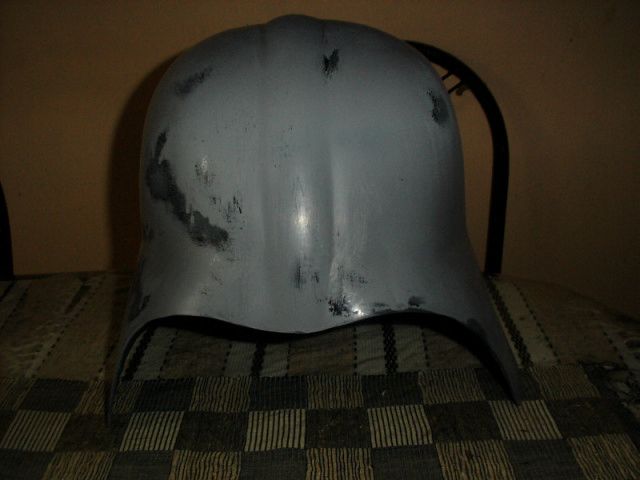
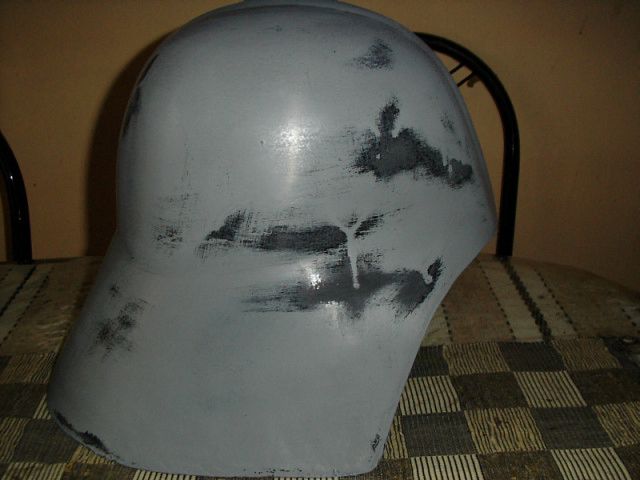
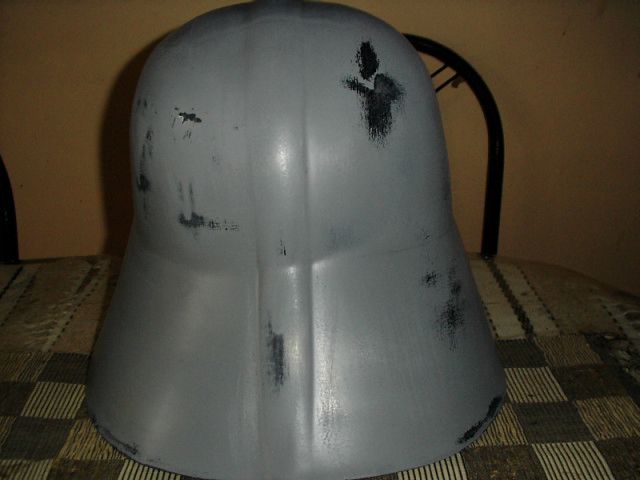
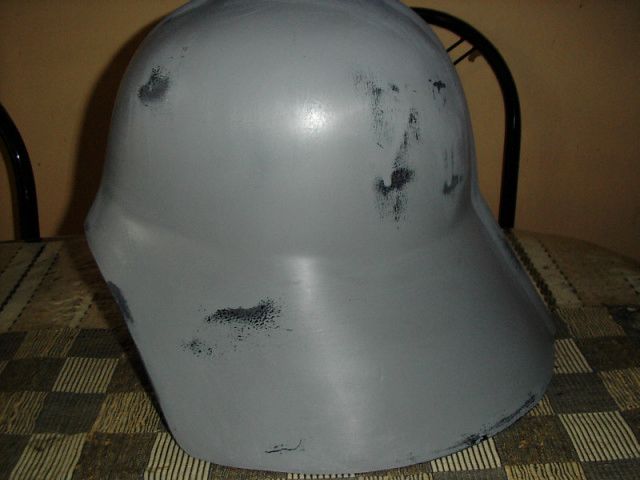
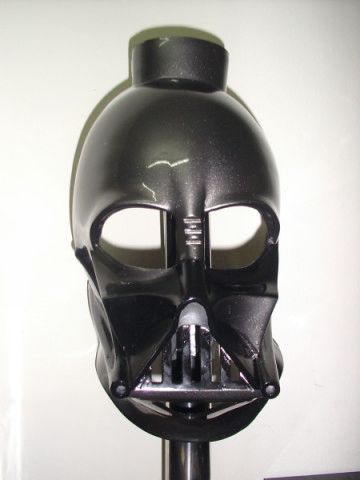
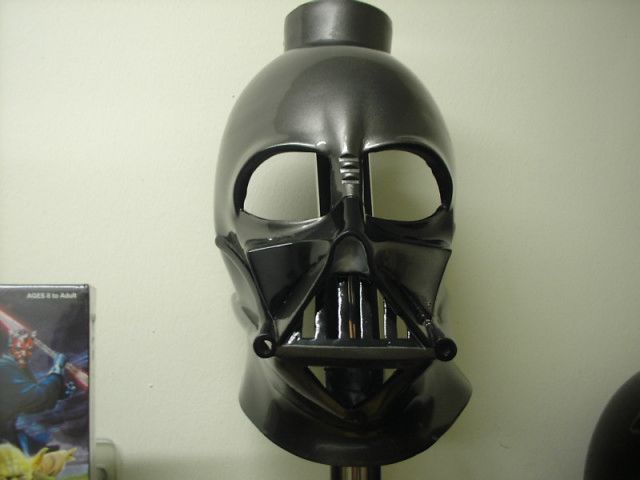
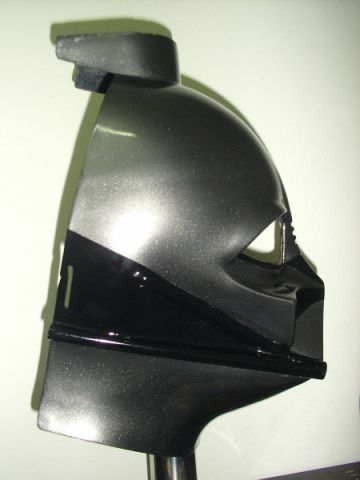
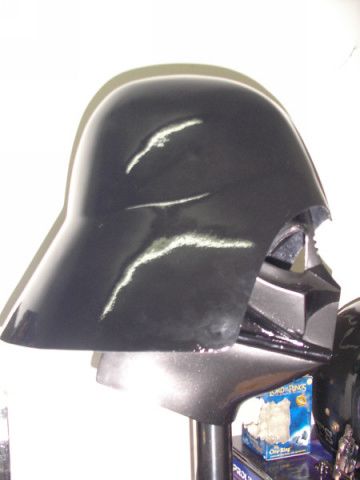
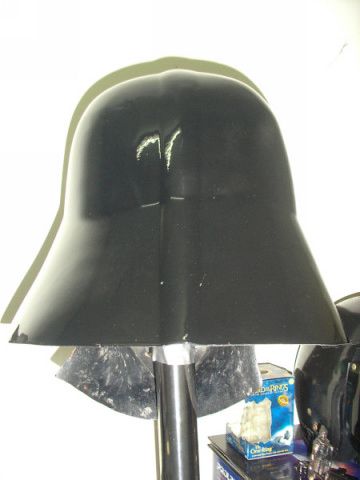
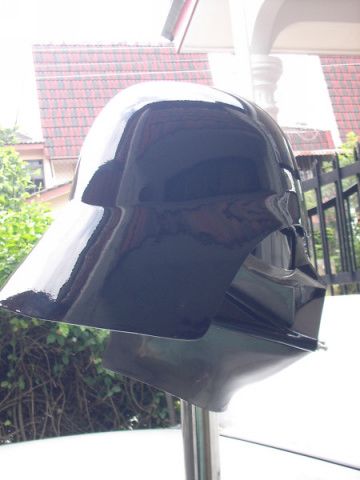
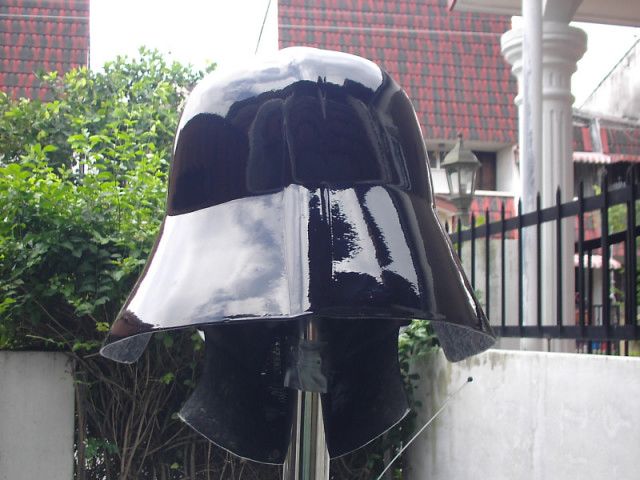
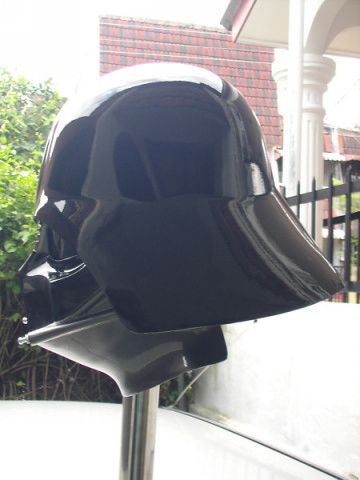
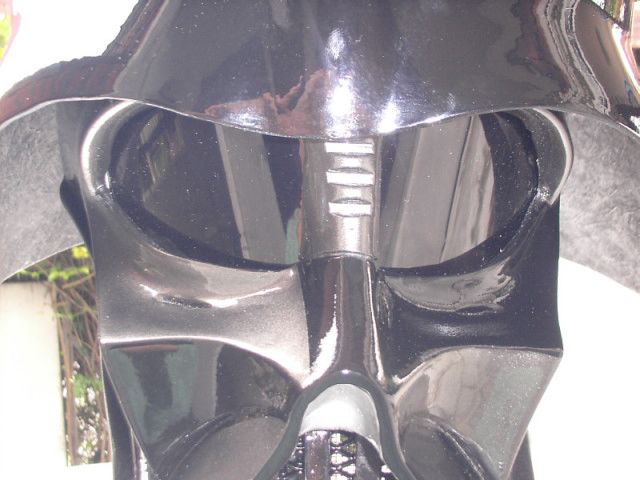
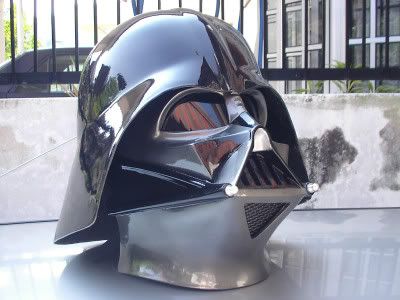
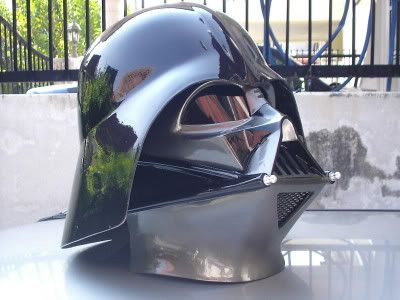
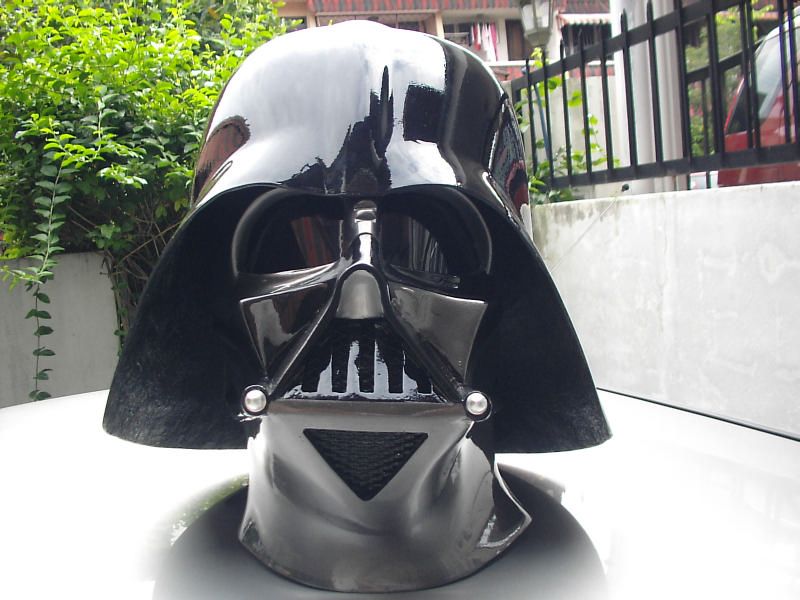
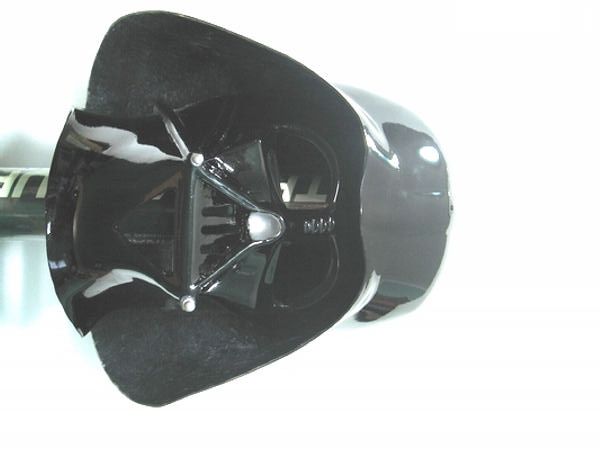
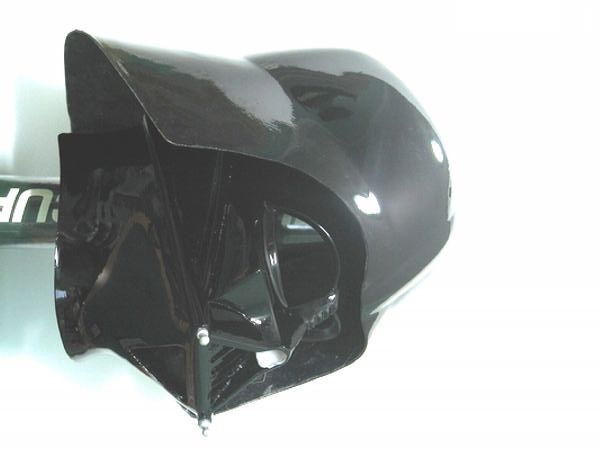
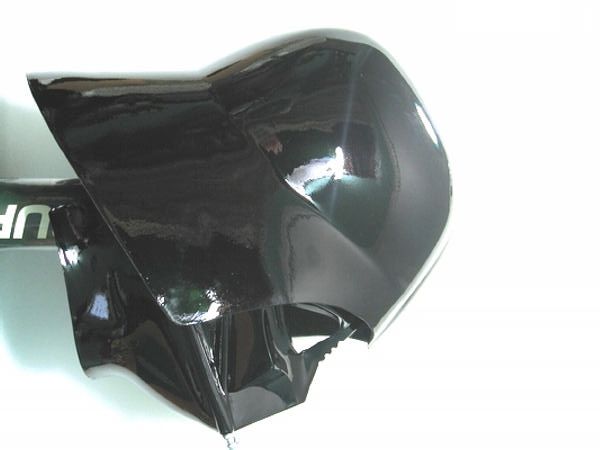
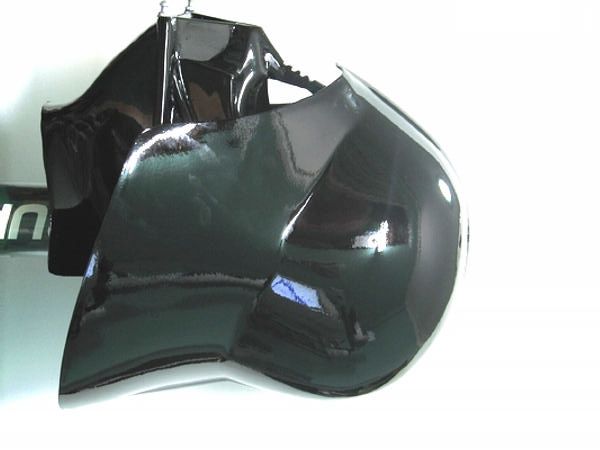
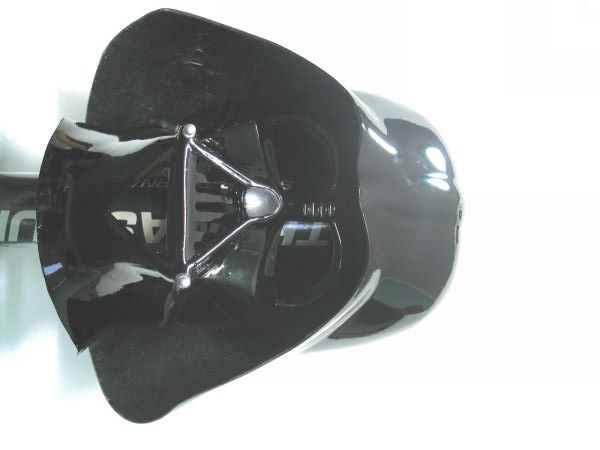
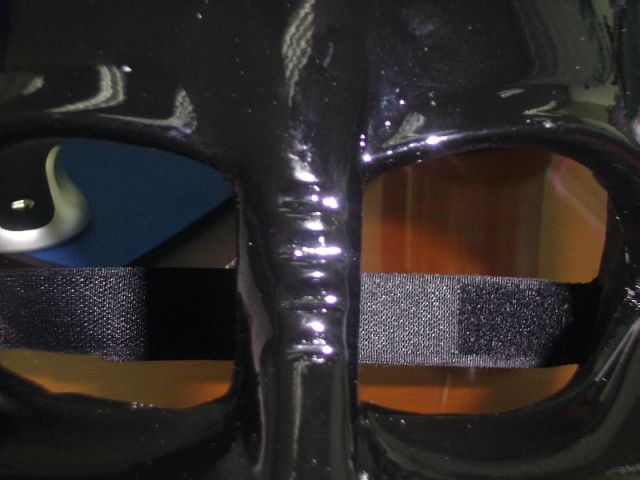
When I received it, I was surprised at the way the helmet was put together. It was really sloppily assembled. It was obvious to me that the recaster didnÂ’t even bother to clean his cast before painting it. So there were a number of areas where the burrs were painted over. Here are some pics of the helmet out of the box:

Pictures_002.jpg


Pictures_003.jpg


Pictures_004.jpg


Pictures_005.jpg


Pictures_006.jpg


Pictures_007.jpg


Pictures_008.jpg


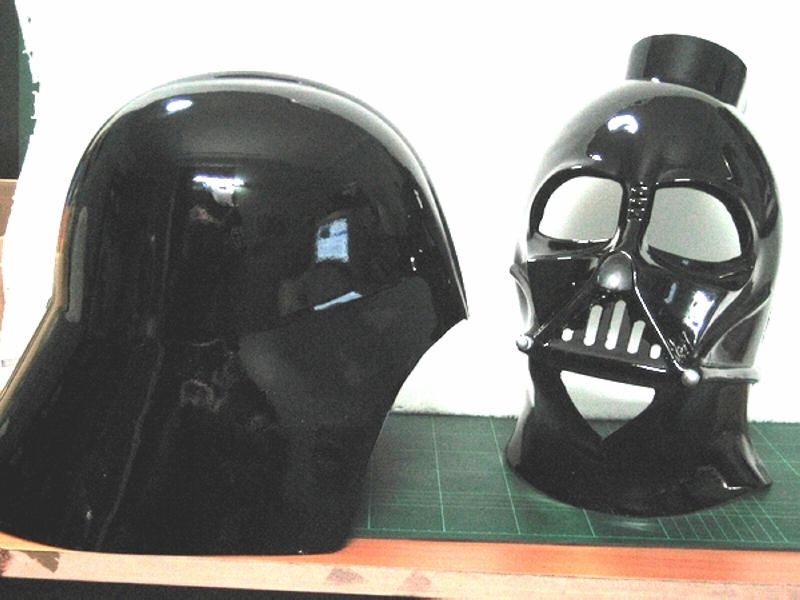
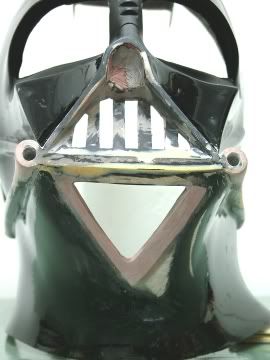
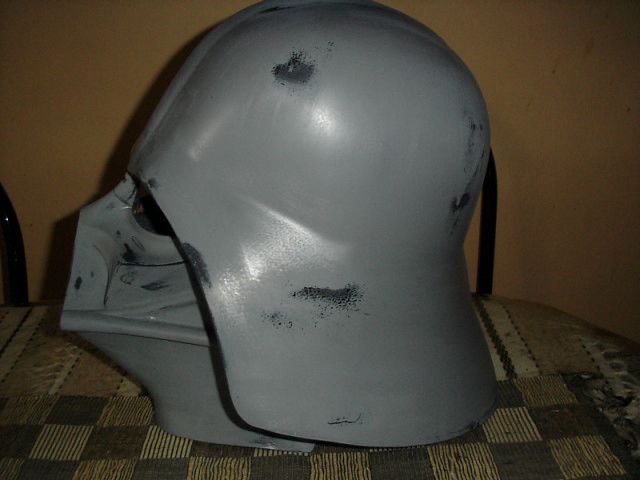
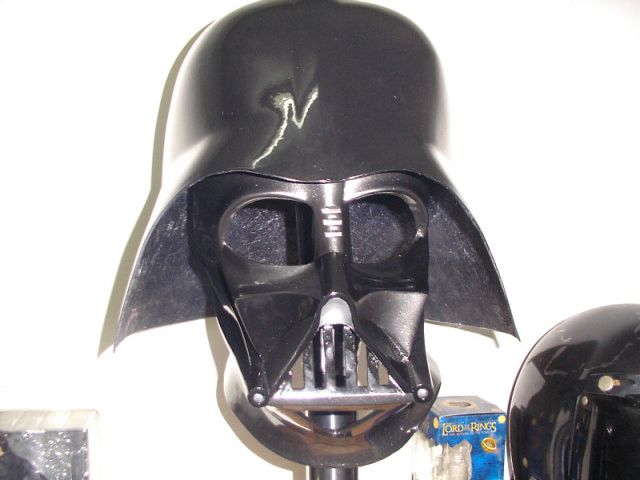
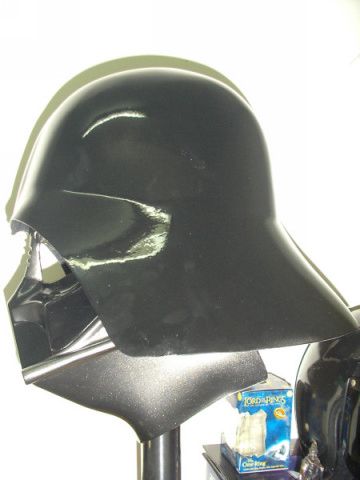
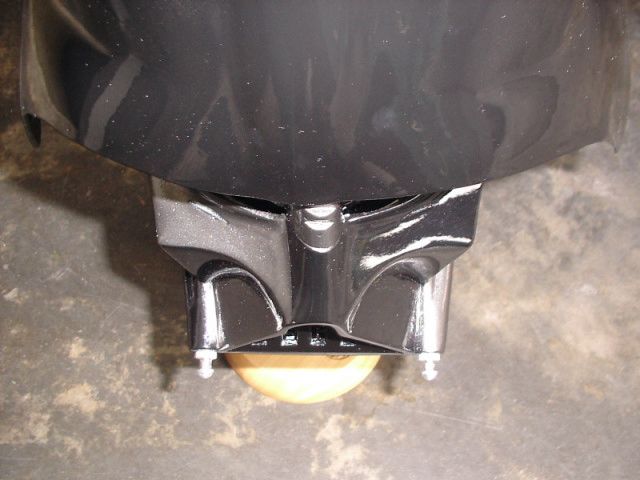
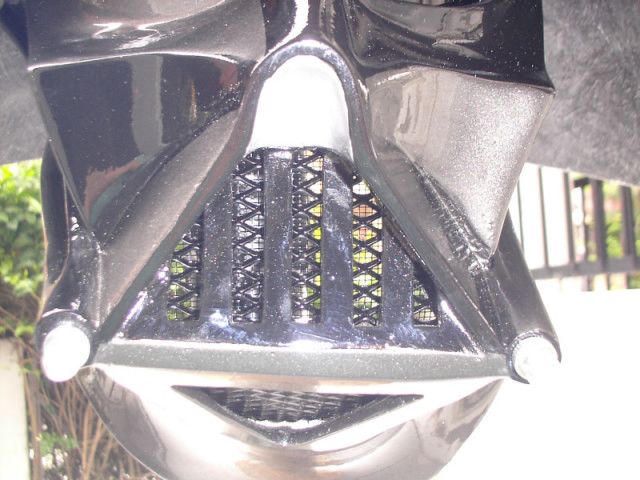
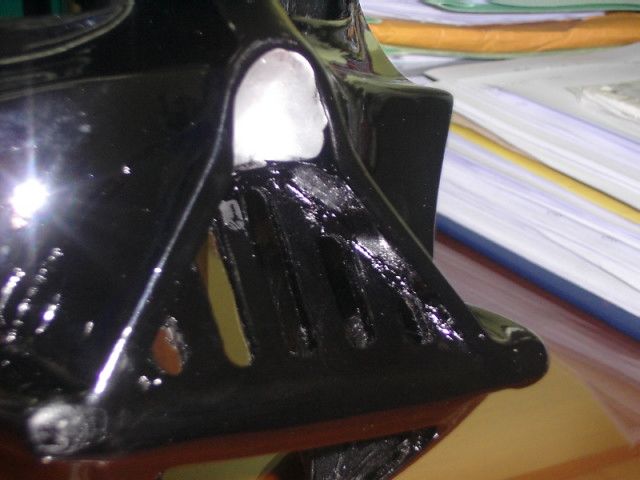
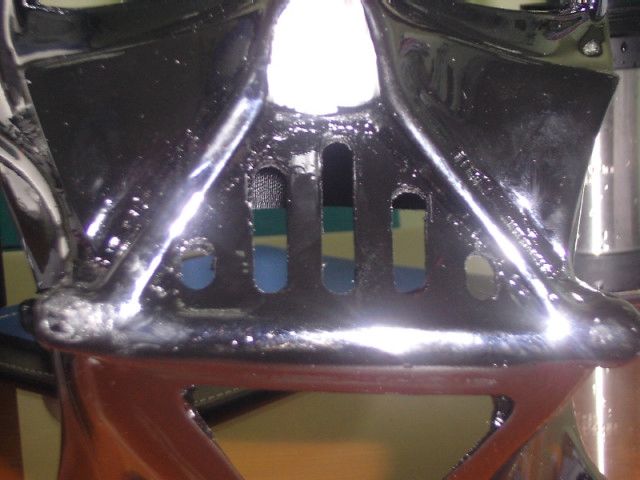
From a distance it looked acceptable, but in close-ups it was absolutely atrocious. HereÂ’s an example where the burr was painted over:

v-ii.jpg


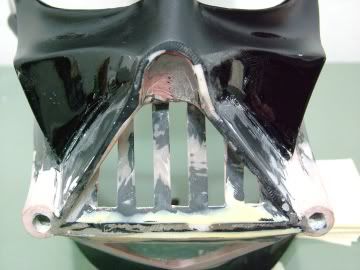
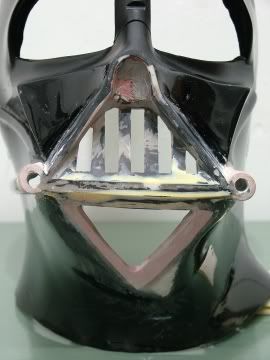
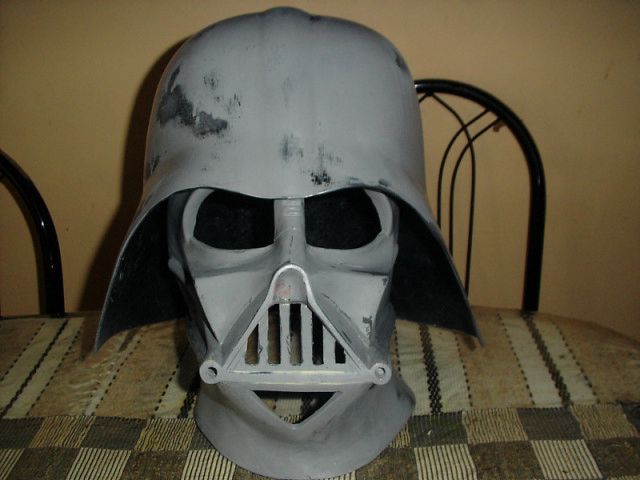
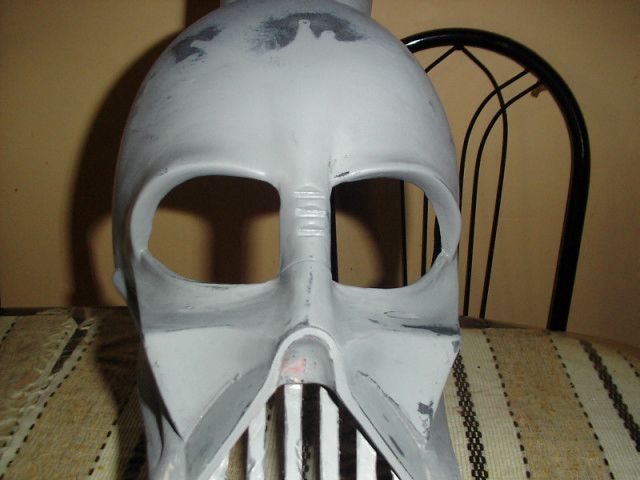
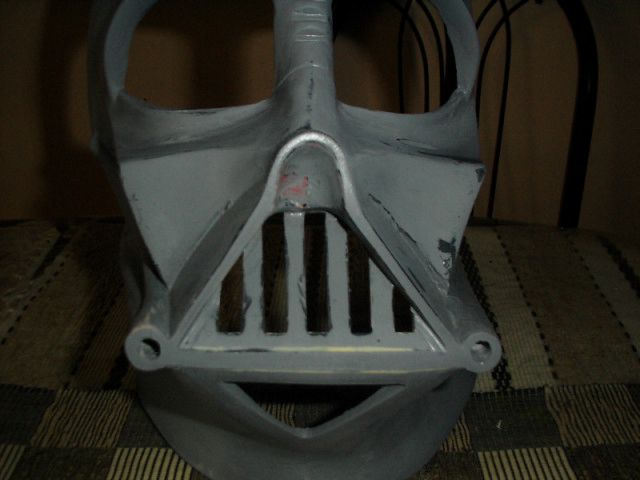
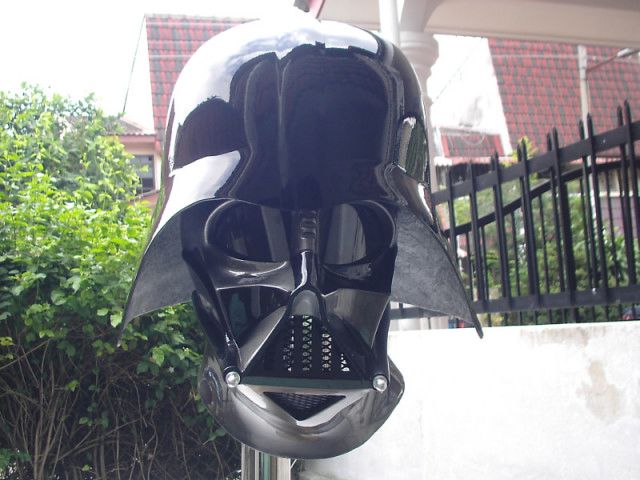
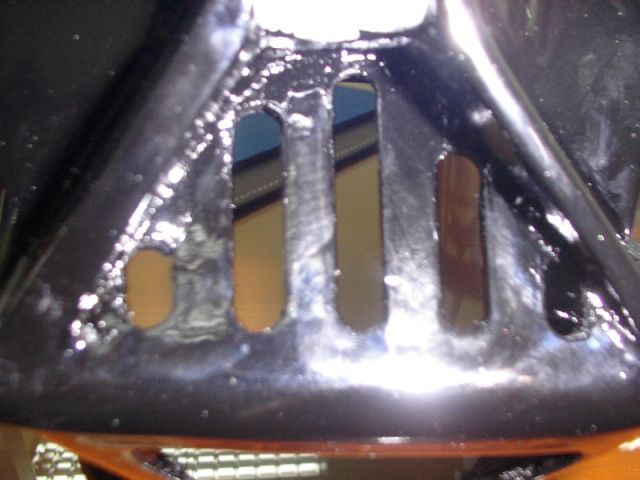
The recaster also didnÂ’t bother to change his mold. Basically what he did was make a mold out of the Rubies helmet as is, save and except for the eye slots, which he filled to enable the lenses to be slotted in from the inside instead of outside. So the flaws of the Rubies remain with this recast as well, e.g.

(1) Fourth slit on the nose ridge

v-iii.jpg


(2) Rounded vents

v-iv.jpg


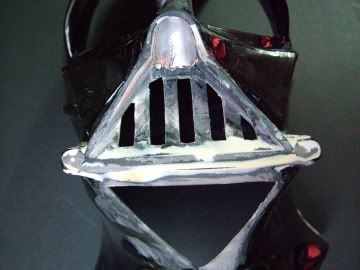
Also, the chin area appears very uneven; it was thicker on one side. I mean, itÂ’s a given that the OT Vader lid was assymmetrical, but this is taking it too far.

v-i.jpg


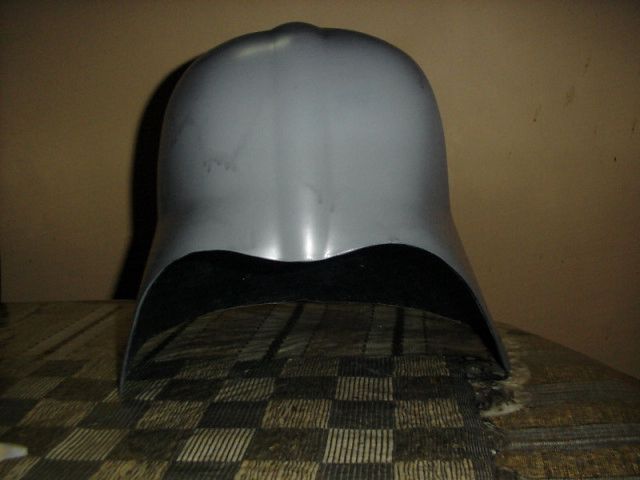
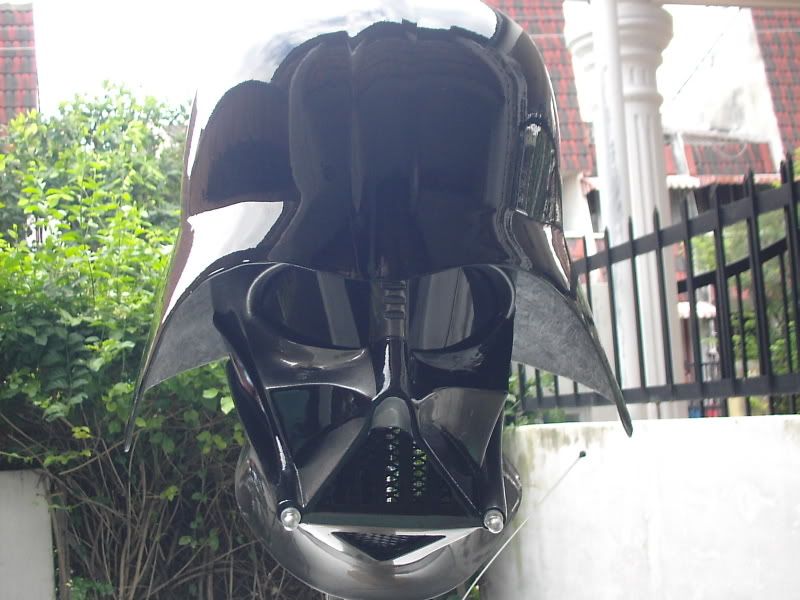
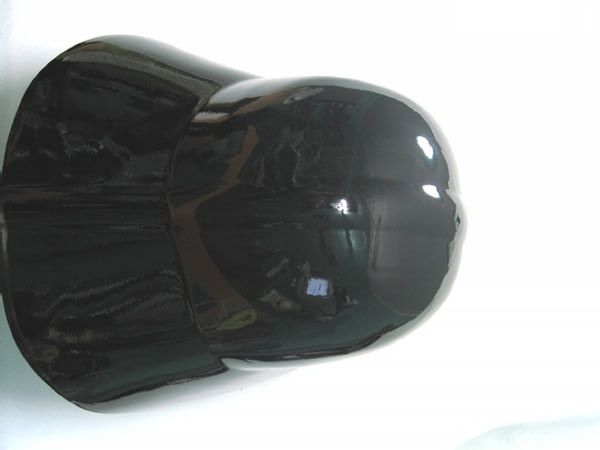
And donÂ’t get me started on that neck flare.

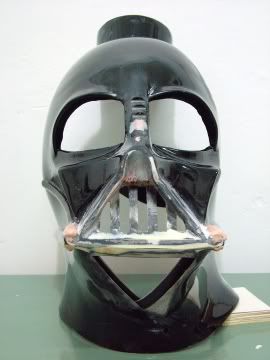
On a final note, it was painted (unevenly) thoroughly in gloss black, ROTS style, which was not the way I liked it. IÂ’m an ESB Vader guy.

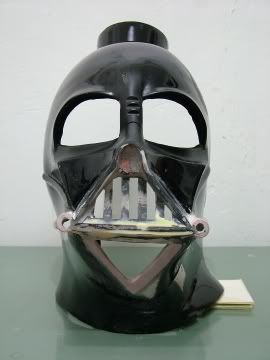
So, I had a dilemma. In my hands was a very poor recast fiberglass helmet. I want to modify it to be better, but I didnÂ’t have the tools and the necessary fiberglass modding expertise. So I turned to someone I knew had the ability. I sent the faceplate to my pal, Saberfreak while I worked on fixing the dome.

Â… to be continued
 
When I received Kal's fiberglass Vader faceplate, I couldn't believe how bad it was made. Due to the 'couldn't-care-less' attitude of the recaster, an already inaccurate Rubies Vader faceplate became even more inaccurate, and distorted. With Kal's instructions and reference photos he supplied, I began the arduous task of rectifying this abomination.

First thing I did was to reduce the thickness on the left side of the mouth triangular vent, which is way thicker then the right side. This took quite a bit of elbow grease to accomplish due to its awkward location and I had to be careful not to damage the rather thin grills on the mouth vent.

Next I needed to square off the vents on the mouth grill, which had rounded edges on top and bottom. With constant communication with Kal, I finally got the grill to a satisfactory state.

001.jpg


The chin vent on the FG faceplate was also grossly distorted and off centered, so I had to really open up the hole and grind down the bulge on the chin to get it ready for modification.

Then I started in earnest to modify the faceplate. I couldn't find any milliput or sculpy in the outer-outer rim planet where I'm located, so instead I used 2-part epoxy as a substitude. It goes on really sticky, and hard to handle, but leave it for 30 minutes and it becomes almost putty like, and can be shaped much easier.

I covered up the 4th slit on the nose ridge, started building up the task area, which were flat instead of rounded. I also had to add a bit of the thickness back to the left side of the mouth triangular vent, which I took a bit too much off.
002.jpg

004.jpg


Then I cut out some mounting board and put them on the inside of the chin vent, so that both me and Kal can have an idea of how big/small the vent need to be, before I start doing any real work on it. Note how bad the flare on the right side of the neck is. I had to prop it up to make the faceplate level.
003.jpg


After days of filling, sanding, filling again and sanding again, I finally got the tusk area to a stage where I'm happy with it. During the process I had to almost totally remove the epoxy several times and build it up again because the faceplate is so asymmetrical that I couldn't get the two sides to look the same visually. Its still not identical, but with a few tricks I've learnt over the years, at least now they look rather balanced visually.
005.jpg


Close up of the tusks:
006.jpg

007.jpg


Frontal view of the tusk area
008.jpg


0010.jpg


Close up of the nose ridge with the correct 3 slits, freshly added 'nail mark', and the line across the nose ridge which wasn't there before.

009.jpg


And here's a clearer view of the chin vent which I resized using epoxy.

0011.jpg


To support the epoxy, and to give the chin vent a straight edge which won't chip easily, I installed two strips of aluminum sheets on the inside of the chin vent.

I also reinforced the inside of the nose ridge so that the line I cut across it won't cause the ridge to break later. I also reinforced areas under the eye socket where fiberglass did not fill the mold properly, leaving structural-weakening cavities in the cast.

0012.jpg


Then I tried my best to identify any areas which may need to be levelled or require minor filling up, but without being able to buy grey spray primer where I am, I had to literally 'work in the dark', depending on my sense of touch to find any area I think need improving. After doing all that I could under the circumstances, I shipped the facemask back to Kal for him to prime and paint it.

This has been a great exercise, and have given me renewed confidence to take on bigger, more complicated projects.

Now back to you Kal.
 
When I got the faceplate back from Saberfreak, I couldnÂ’t believe my eyes. It was hard to believe that it was the same faceplate I shipped to Saberfreak a month before. Kudos to you, my friendÂ… you are indeed a gifted artistan.

That night I started sanding the faceplate. I started with 600 grit sandpaper and finished it off with 800 grit sandpaper. I did the same to the dome. Then I primed them both with grey primer spray.

v2.jpg

v3.jpg


The primer helped me identify uneven areas on the surface of the lid. So I sanded both the faceplate and the dome again, with 600 and 800 grit sandpapers.

v6.jpg

v8.jpg

v9.jpg

v10.jpg

v11.jpg

v12.jpg


Test fitting the dome and faceplate:

v13.jpg

v14.jpg

v15.jpg


As a final step, I sanded the helmet with 1000 and 1200 grit sandpapers to ensure a super smooth surface for painting.

v17.jpg

v16.jpg

v20.jpg


Close ups of the faceplate after final sanding:

v18.jpg

v19.jpg


Close ups of the dome after final sanding:

v21.jpg

v22.jpg

v23.jpg

v24.jpg


With priming and sanding out of the way, I was ready to paint the helmet. I was going for the OT Vader two-tone black and gunmetal paint job so I started out spraying the faceplate gunmetal (Duplicolor autopaint bought at Eneos in 1Utama), masked the relevant areas and sprayed it with Krylon Fusion Gloss Black. Three coats of each. I also sprayed the dome with three coats of Krylon Fusion Gloss Black, and left them a whole week to cure.

Once I was satisfied that the paint had fully cured, I had both the dome and the faceplate clear coated to add the shine. HereÂ’re pics of the faceplate after clear coating:

v25.jpg

v28.jpg

v26.jpg

v27.jpg


Test fitting with dome (before lenses, tusks and grills):

v29.jpg

v30.jpg

v31.jpg

v32.jpg


I had ordered screen accurate grills (backed by aluminium screen) and tusks on Ebay and installed them. I also added lenses which I cut out of smoked plexiglass and then bent into shape. I also added tinting film (as per PolÂ’s suggestion) to the lenses to make them darker.

HereÂ’re pics of the finished helmet:

v33.jpg

v35.jpg

v36.jpg

v37.jpg

v41.jpg


Close-up of the modified nose ridge:

v38.jpg


Close-up of the modified vents and chin:

v39.jpg


And here are the ones IÂ’m particularly proud of, the money shots:

Vader033.jpg

complete2.jpg

complete3.jpg

Vader005.jpg

Vader008.jpg


HereÂ’s a shot of it with the my Rubies armor, which I repainted, clearcoated and added screen accurate chain.

Vader010.jpg

Vader012.jpg


Again, thanks to Saberfreak for all the help with this bucket. You are the MAN.
 
This thread is more than 17 years old.

Your message may be considered spam for the following reasons:

  1. This thread hasn't been active in some time. A new post in this thread might not contribute constructively to this discussion after so long.
If you wish to reply despite these issues, check the box below before replying.
Be aware that malicious compliance may result in more severe penalties.
Back
Top