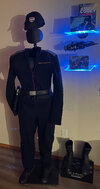
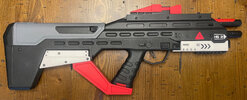
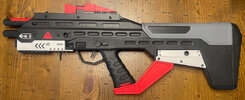
Keeping its shape enough that I was able to finish! Images attached, including 'as installed' in my display along with the Roci flight suit I won from PropStore and other show used items from Ebay. So, many items to document here for others:
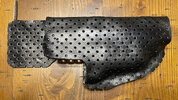
1. The Aquaplast material is fairly easy to work with. I actually reheated it (hot water bath) three different times to make it just as wanted and each time was able to lay flat, re-form, etc. I made a few teaks with a heat gun.
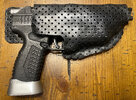
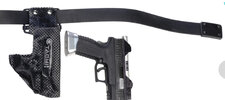
2. The Aquaplast basically cools hard within 15 minutes after forming so you need to work pretty fast. That said, it continues to cool and shrink, just a little, over the next 12 hours. So, leave whatever form you're using in the material for that long. Fortunately I had a prior, but not great, build of the same 3D pistol print as my second build. I wrapped that first build in gaff tape to have the holster form just a little larger to allow for easy pull from the hoster and reinserting.
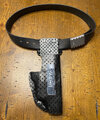
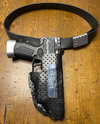
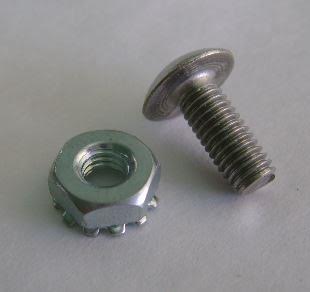
3. It was interestingly difficult to find the three bolts to attach the holster to the belt clip. Carriage bolts were my first thought, but those have a square shoulder under the curved top. Everything else I found had either a standard, Phillips or hex top. In the end I purchased bolts that had a Phillips top, filled the top with solder, sanded and then painted. Not perfect, but plenty close for me.
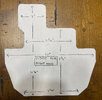
4. Image of the template I used, with some basic dimensions attached here as well. Note, as in my prior post, I wanted a holster to accommodate the gray accessory (my pistol fits with or without the accessory of course). If you don't care about that and want something closer to the show, you'll need to modify the template. Also, I don't know how closely the 3D print I purchased is to the actual XD prop pistol. So, as always, your mileage may vary.
5. Speaking of show reference, I was able to track down the Holden holster on PropStore and it's different than the others. First, it has the Tachi label in the center, which is how I went. Was just easier. Second, the Holden holster used the 5.11 Apex Gunners belt where others use the T-Rail belt. So, looks like either belt, as used by the Roci crew, is canon.
6. RandomMaker, I have enough AquaPlast material left to make two holsters (one sheet really only nets three, not the four I was thinking originally) and it's yours. I made an extra paper template I can include too. If you're still interested, all yours and great that you could cover shipping. I assume there's a PM option here where you can give me your address and then we can figure out payment method (Venmo, PayPal, etc.). All I ask is that you cut as carefully as possible so if you end up only needing material for one holster, let us know here and you could then send the last piece to someone else for their build.
Wow, never having done a build like this before it honestly feels a little odd to be done. Time for something new. Thinking of picking up the print from 3DREPLICAS of the MCRN assault rifle. Sanding on that alone will take a couple of months!
Let me know if there are any more questions or if anyone needs additional photos, etc. Thanks!
") And if you create a pattern to cut the sheet to its basic form, I'd be interested in that too...
And if you create a pattern to cut the sheet to its basic form, I'd be interested in that too...