The Delmonte Endor bunker charge

thd9791

Master Member
RPF PREMIUM MEMBER
Hi folks,

So, I’m going to start this thread because we managed to grab a Kango from a friend on Facebook who had two. Ours is the white version, fine by me it gets painted anyway.

Disassembling this was so much work, that I recorded it. redbutton and I managed to make it work. We have very limited shop space so we’re amongst a bunch of old stuff and we have workstations in different places in the house, add that to limited tools and this was quite the roller coaster!


If you watch that all the way through, you’re awesome. Currently nursing my neck and my thumb. There was SO MUCH GREASE!!

Btw it worked. Before this I plugged it into an outlet and sure enough… I was able to pull the trigger and it responded with a WAKKAWAKKAWAKKA
 
Thank you so much for the drill!!! I marvel at whoever designed all the parts to this thing.
 
Dude!! Redbutton makes a cameo!!!
IMG_4556.jpeg


Tom I love the father son team work! This is great!!!
 
Dude!! Redbutton makes a cameo!!!
View attachment 1799138

Tom I love the father son team work! This is great!!!
Thank you sir!!! It was an on the spot buy, and I’m in the middle of remodeling some of the basement so **** is everywhere

We’re sure none of the innards were left in there guys? Right now just the outer wire wrap part of the motor is in there, I was going to remove it when I clean the thing… and when my thumb heals a little more :D
 
Just for the sake of the project, here are some great reference photos of the prop sold via PropStore
EndorCharge1.jpeg
EndorCharge2.jpeg
EndorCharge3.jpeg
EndorCharge4.jpeg
EndorCharge5.jpeg
EndorCharge6.jpeg
EndorCharge7.jpeg
EndorChargeSS.jpeg


I know multiple people have already made their own and Wannawanga.com even has a replica kit! our community is amazing. I at least have my own molds of the real boot studs
 
I might - keep an eye on your inbox, more importantly to me I think I want to make sure I map out the internals first. The rotary switch, the LEDs and the metal plate up top...
 
From gus and lonepigeon there looks to be aluminum plate beneath the top, not sure if theres an aluminum hollow box or the electronics are just loose in there
IMG_2001.jpeg

PartsofSWBunkerBomb.jpeg


Oh, and here's the "other" one we commonly see
OtherBunkerBomb1.jpeg
OtherBunkerBomb2.jpeg
OtherBunkerBomb3.jpeg


Also, does anyone know what we're looking at here? Next to the fader knob theres like... a wire? I can't even 3D picture this
Screenshot 2024-03-15 at 11.19.43 AM.png
 
Last edited:
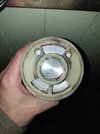
I washed this with Dawn this afternoon and the rest of the inside slipped out.

I really want to use the plastic frame to support the electronics area - has anyone seen inside underneath? (Beyond the “foot”) I’m wondering if they used a plastruct oil tank with foil tape on the end for the guts
 
three things I've noticed.
1) it's aluminum tape. You can even see their FINGERNAILS smoothing the tape down

2) They traced the cavities onto the tape with a scribe. I'm assuming to take the innards out and do something to them before putting them back in

3) Something gray with a seam line was used to cap off the bottom of the motor housing with screws. What is this? I can't find a plastruct disc that has a line across it?!

Screenshot 2024-03-16 at 11.41.14 AM.png
Screenshot 2024-03-16 at 11.41.25 AM.png
Screenshot 2024-03-16 at 11.42.12 AM.png
Screenshot 2024-03-16 at 11.42.21 AM.png
 
Got it. I thought you were talking about the silver disc on the left.
That… we have been told that’s old double stick tape lol and the current theory is that’s part of the cone used for the skirt, a smaller section higher up maybe
 
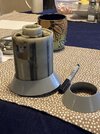
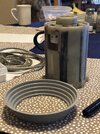
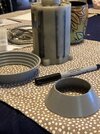
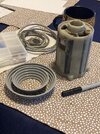
We made the start of the skirt!
IMG_2068.jpegIMG_2067.jpegIMG_2066.jpegIMG_2065.jpeg

Used a dremel wood cutting disc to slice around the groove from the inside. Files and a belt sander to finish them. Thinking about length of the housing, looks to be almost where it sits before you cut?

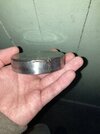
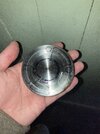
ALSO, I took the stainless bottom from a water bottle... it was a few points of a mm wider than the housing so I sliced it and glued it together to reduce the diameter. Tried to solder it but it just wouldnt stick...

IMG_2020.jpegIMG_2021.jpeg
IMG_2025.jpeg

A little cleaner look than the foil tape :D
 
Last edited:

Your message may be considered spam for the following reasons:

If you wish to reply despite these issues, check the box below before replying.
Be aware that malicious compliance may result in more severe penalties.
Back
Top