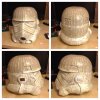
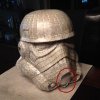
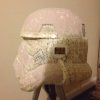
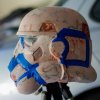
Stormtrooper helmet (photographers build)

Solar

New Member
Hey Everyone!

First post but I'm excited to finally join the community and share my progress on a personal project I've been working on for almost half a year.
I'm just about towards the end of this project so here we go from the beginning!

Step One (May 2014):
IMG_2282.JPGIMG_2328.JPG

I chose to use Fierfek's file, mostly due to it being the first file I found when I searched but also because it had the most detail (most of you know might already why this is going to bite me in the butt later lol). As I started looking up other builds I began noticed the majority of other builders opted to use SpaceCowboys file and I had no clue why. I now know that when bondo gets involved the less detail the better. With that said, I still would like to thank Fierfek for giving me an amazing base, the modeling imo was truly amazing.

IMG_4690.JPGIMG_4298.JPG

I just about finished the pep sometime early May 2014 as evidenced by my annual National Star Wars Day photo :D (I try to pep as smoothly as possible because i've had enough trouble on past projects where I'm sanding the bondo and that one paper edge just keeps on popping out to give me a hard time.)

Here is the first finished helmet in case you can't wait (finished and sold to a friend January 22):
FullSizeRender.jpg
More photos to come!
 
Last edited:
Step Two (June 2014):

IMG_4774.JPG
Resin & Fiberglassing ... yuck.
This was my third time fiberglassing a helmet so by then I was pretty accustomed to the process however no matter how clean I tried to be it was still a major PITA. I never mind the smell because I wear a respirator however I always seem to manage to get this stuff where it doesn't belong (skin, clothes, etc.). Thankfully it's only a 1-2 day process so it was over quickly.
IMG_4781crop.jpg
It was at this point that I realized trying to pep and resin the vocoder wasn't going to work and that it'd be best to just improvise it myself later. To keep the lower end of the helmet's shape I just hot-glued a spare sheet of cardstock and fiberglassed under it. This would be the first original file detail I end up having to remove for the sake of an easier bondo workflow. (Also important to mention that I chose before hand not to pep the ear pieces (the bumps) for the very same reason)

[I didn't actually starting the good quality photos with my camera until later in the bondo stage so they're up next!]
 
cool another stormtrooper helmet Pepakura, very good start, good luck for the future and post lots of photos we love it
 
Step Three (August 2014):

After an awesome 2 month summer vacation I was refreshed and ready to get back to work.
Now came the longest and most challenging step: using bondo, bondo, bondo, and more bondo.
FullSizeRender (1).jpgFullSizeRender (2).jpg
(This are the only early bondo shots I had and a rather bad quality ones but anything to show progress)
It was at this point that I angrily snapped out both pep mic tips which actually ended up being a great decision!

IMG_7142.JPGIMG_7163.JPG
Finally the groundwork for the rest of the bondo work was done. I smoothed out the dome and it no longer looked polygonal! Make no mistake though, I was still far from being done with the bondo ... oh so far.
 
Step Four (October 2014):

*If anyone is wondering why I didn't post about this in real time as I actually made it take a look at the months of each progress update ... lol yeah I'm a slow worker. As a college student I don't have quite as much time as I'd like to work on the helmet so it went slowly with long breaks. Just one weekend here, another there, etc.. Anyway, back to the build!

IMG_7292.JPG IMG_7290.JPG
I had roughly finished all of the large flat and curved areas (dome, cheek tubes, back) so it was time to start smoothing out the difficult spots like the trapezoids and eyes. This seemed easy at first but turned out to be somewhat difficult due to the small angle each trapezoid is indented at. I decided not to continue trying to smooth out the eyes as I would just end up cutting them out later anyway so that saved quite a bit of time.

_MG_0608.jpg _MG_0617.jpg
*I finally decided to stop being lazy and start taking photos with my actual camera. If you're anything like me you love seeing some sharp photos of a project build*
So I noticed that the area below the teeth was too flat and didn't have enough of a curve to it so I used painters tape to make sure I only put bondo on the areas that needed to be raised. After applying the bondo I would quickly remove the tape before the bondo set then smooth the hard raised edge in with the rest of the helmet. The same applied to the area behind the left ear, it was too flat and lacked the proper curve.

Now I don't know the exact rules of TheRPF and this is the first forum/online community I've been apart of but I believe I'm not supposed to follow my own posts so I will wait for any replies from other members before I proceed. Feel free to ask or say anything, thank you!
 
I'm really impressed! Your first finished helm almost looks 501st worthy! Pep TK helm builds are super hard to do because the end product needs to be really smooth, and personally I HATE sanding bondo.

Best smooth bondo work I've seen, keep it up.
 
Thanks so much, that means a lot and totally agree about bondo. WORST part but it's all worth it when you finally sand a section super smooth and you can glide your finger easily across.
 
This thread is more than 9 years old.

Your message may be considered spam for the following reasons:

  1. This thread hasn't been active in some time. A new post in this thread might not contribute constructively to this discussion after so long.
If you wish to reply despite these issues, check the box below before replying.
Be aware that malicious compliance may result in more severe penalties.
Back
Top