Gregor444
New Member
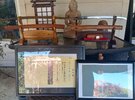
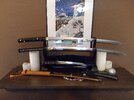
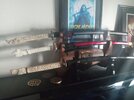
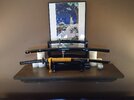
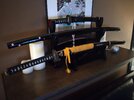
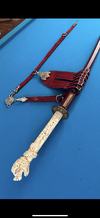
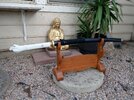
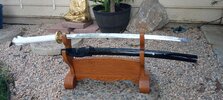
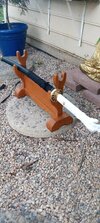
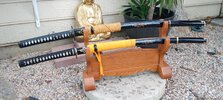
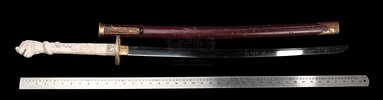
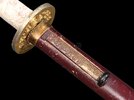
I know how old this is and its July 3rd 2024 but I keep finding JB sword builds after I have done everything the hard way but that is ok it was a good learning experience. I did the same thing and ordered a cheap Highlander sword for the tsuka then found out you can order those pvc Highlander dragon tsukas for $28 off ebay. I had spent many hours removing the blade and glue or epoxy material inside the dragon tsuka when the new one arrived so I made two swords. I have an older Paul Chen Hanwei practical plus katana that I found in a pawn shop for $150 six years ago and I love it. The ito wrap Hanwei used was synthetic leather and falling apart and it would cost $150 to have it wrapped so I mounted it in the tsuka. I cut and glued a heavy MTN bike tube around the tang so it fit like a glove then put it inside the tsuka. I poured liquid silicone rubber into the dragon hilt to fill the empty space and let it sit overnight. I used the same hole where the little fake ruby was for one of the mekugi. Now I can remove the blade easily to clean or tighten up anything loose and the rubber helps absorb impact while adding strength to the tsuka. I coated the exterior with fiberglass before painting. Ziest Armory makes a really nice Hihglander tsuba for $300 but this is a budget build so I ordered a few Highlander tsubas from the same ebay dealer $15 each but they are thin. We all know how thick the original H1 tsuba looked but how thick. I used the Prop Store Image of the original screen used sword prop and it looked like it was about 1/4 inch to 1/3 inch thick. I made several tsubas but using JD weld chemical weld product and combined 2 then 3 of the thin Chinese tsubas to make one H1 tsuba. I used bondo around the edge to cover the lines then sanded until it had a nice smooth edge then paint. When I was putting together one of my Kill Bill Bride swords,see pic, I asked Ryansword if they would add the kojiri fitting to the end of the saya. They looked at the pictures I sent and said it looks like a Chinese Military sword fitting and would not look right on a katana. I don't think they watch movies in China sometimes but there was no point in explaining why this katana has a Chinese Guardian Lion (Foo Dog) engraved on the blade or what the menuki and Lioness carving means or why I want the sword to match. Then I started looking at Chinese Jian and other swords and the fittings. I realized the Kojiri on the H1 saya looks like its from a Chinese sword. The other detail on the saya looks like a kozuka blade or something similar fixed to the saya. These are not done and Ive got weathering and paint to do but both are functional 1095 and 1566 steel and very solid feeling. The last pics are the original H1 that sold by The Prop Store.Hey guys,
after going to the Ottawa ComicCon in a variety of hot, heavy costumes, I decided this year to go light. Trench coat Highlander looks comfortable, and it involves a sword, so it's a no-brainer.
Let the build begin!
Picked up the finest Masumura sword eBay could supply for under $32 dollars. It was one of those "red-jewel" Highlander replicas. Just bought it for the tsuka. The tsuba is completely wrong, and the blade is terrible (and metal, not good for ComicCon). The saya is some kind of strange metal / plastic combination. Pretty much garbage. But the handle is nicely cast and workable.
First order of business was getting the thing apart. I figured that there was probably a wooden / plastic peg under the jewel on the handle, and I was right. Drilled it out (a little from both sides) after I popped the jewels out, but still no joy. So i got out my trusty blow torch and heated the blade a bit while hammering every so somewhat gently on the tsuba, forcing the tsuka down and off. Little by little the glue they used softened and I was able to pop the tsuka off. This thing was NOT full tang. Maybe 1/5 tang would be more accurate. The tang ended just after the retaining pin.
Took the handle over to the band-saw and removed the bit of plastic that went under the non-cannon fuchi. Then I filed it down until it was clean, even and level. Much more like the movie version.
To replace the crappy blade I'm using a wooden katana blade from ArtsFeng (artsfeng.com). Great source of reasonable quality / reasonable price sword parts. Did some shaping of the nakago and got it to fit the tsuka nicely.
Next up was replacing the terrible tsuba. I'm not sure where the one that it came with was supposed to be from, but it certainly wasn't Highlander. I found some pictures of some originals on Google and then got an artist who I've dealt with before (alexdon) on Fiverr to convert the picture into a nice clean SVG. Took that SVG into Tinkercad, and generated a 3d model of the tsuba in the proper size (about 80mm seems right). Printed it on my MP Select Mini, and it turned out very nice. I was going to make one on my CNC, but the 3d printer is just so quiet, clean and easy. Plus - it's a wood-bladed sword, with a plastic handle - how strong does the tsuba need to be? Actually, the printed one seems plenty strong enough.
Got everything fitted together, and it's looking pretty nice. Lots of work yet to do, but at least it's well-started. I'll post up some pics tomorrow.
Thanks,
jason
")
Attachments
-
 IMG_20240630_202341473_PORTRAIT.jpg5.7 MB · Views: 84
 -
 IMG_20240630_202235054.jpg2.8 MB · Views: 80
 -
 IMG_20240630_202645346 (1).jpg1.6 MB · Views: 84
 -
 IMG_20240630_200708129.jpg2.8 MB · Views: 81
 -
 img13.jpg69.1 KB · Views: 81
 -
 img15 (1).jpg219.7 KB · Views: 90
 -
 IMG_20240624_154305509.jpg1,018.8 KB · Views: 85