STARGATE 'Movie Version Stargate Model Build' - 4ft dia Gate!

Prop-Builder

Well-Known Member
Hi all,

Well, I dug out some old parts of a 4ft dia Stargate I started many years ago, and fancied having another bash at it. I lacked a lot of reference back in those days and kinda gave up, but after seeing so many pics, models and reference material since then, I feel I now have enough to make further progress on this project.

I have a base ring made out of sheet styrene that I plan to attach resin castings of the smaller pieces as I make them. I am however still baffled by the Chevrons as I have no idea on the side profile of these parts? I do have a 1/1 scale Chevron I acquired years back I could use, but it's in storage right now and can't access it just for the sake of looking at its shape unfortunately.

I plan to do the movie version gate, SG1 and Stargate Atlantis and would appreciate any decent blueprints and reference (including clear screenshots) you can offer to help this build.

Thanks and hope you enjoy the thread! ;)
 
Last edited:
Re: Stargate Build - 4ft Diameter!

That's a tad bigger then the one I built (40Inch/100cm)
there are loads of images all over the web, just look for backstage images, and the recent auctions also have great detail info.

just FYI, don't make any molds, as the MGM spies are all over this board and you will get a CD before you can finish the job :)

4242550.jpeg


4508247.jpeg
 
Re: Stargate Build - 4ft Diameter!

Thanks for the info and pics. That's an amazing piece of work there! Any tips on creating the engravings or are these laser cut? I will need to do these details by hand.
 
Re: Stargate Build - 4ft Diameter!

Looking forward to seeing how this will turn out... I'm a big fan of the Stargate series (SG1 especially). I'd like to eventually get a mini-replica of a Stargate.
 
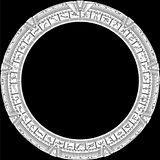
Just remember that there are several key differences to the Movie StarGate, most notably the fact that none of the chevrons glow. The glyphs are also engraved INTO the surface and are NOT raised details, like the TV version. Also, the top chevron is different from the other chevrons. This should help:


Some screenshots of the top chevron:

Good catch! After all these years, I only noticed the top cheveron was different a few weeks ago! :$

-Sarge
 
Thanks for these! :) I thought about practicing my methods on the details and working out the exact layout proportions on a 1/2 scale 1/9 section/segment, before going to work on my 4ft ring I started (don't want to mess up what I've done so far by making mistakes). If the 1/2 scale segment turns out to be anything decent, I could always replicate that into nine sections for a much larger gate too (maybe stick it in the garden)! ;)
 
I'm in the middle of my second house move wth 1 year (hate moving!), so I will have to wait until I'm settled again before I can continue with this project. I did start doing some test pieces on a rough backing just to figure out the best techniques for making the parts.

Who created that image of the gate in the posts above? Is it official blurprints or fan made?
 
It's either fan made or it's the full vector image that the Stargate fan magazine used a lot. This is part of the front detail production used blueprint

stargate-blueprint-sgdetail.jpg-32704d1282917603
 
Great! Thanks for that image. This would help determine measurements and confirm details. One thing puzzles me is that the outer rough edge of the gate seems to extend further outwards than the Chevron 'spikes'. I thought these were exactly level, with maybe the Chevron 'light up' section raised a little higher than the outer 'rough' edging.
 
On the physical gates they are more or less level, it's all within about a 1/4 inch in height and since the detail bits break up the surface, unless your way way way off it won't be noticed. The actual SG-1 gates were reverse engineered/copied (ie pulled molds) from the physical deteriorated movie gate that sat outside in Yuma, Az for years and then cleaned up/modified and the new SG-1 gates made. So that changed tolerances of the blueprint call out too.

As far as scale reference to that pic. Outer diameter of the gate is 20 ft (10ft radius), inner diameter is 15 ft (7.5ft radius) and the gate is 2 1/2 ft wide more or less.

Keep in mind that the SG1 gate blueprints are a hodge-podge of prints directly copied from 'movie' stargate and noted/marked-up/changed to what they physically built/recreated for the series.... In the case of the front detail blueprint, it doesn't even note that they changed all the chevrons to be identical and got rid of the movie style top 'framed' chevron that straddles the glyphs.
 
Well, I've made a start on a 1/2 scale section of the gate finally! This is to give myself some practice on the best techniques when producing the parts for my 4ft gate. It'll also allow me to practically work out the exact proportions and establish it in physical form. The 1/2 section will be one of the 9 'repeated' parts, so I could even copy this later on if I decided to do a complete 1/2 gate. ;)

I've made the backing material from a hard sheet of card coated foam which I will attach all the pieces to. The chevron spikes will be all copied from a single sculpt, and re-detailed to create opposite spikes (left & right). I have an idea on how to easily do the engravings on the top half face of the gate which should work well, but I have other (harder) ideas I can default to if neccessary.

I am using a 6ft rod of wood as a giant compass to draw and cut the huge curves of the gate onto the foam board. I've often done circles and curves this way on my past projects, and the results had always impressed me. I attach pencils and blades onto a re-postionable mount attached to the rod, and a tack glued to the other end. Requires quite a lot of floor space using this technique though.
 
Back
Top