Star Lord's Boot Rocket: Build thread by Nova Props

IronManiac

Sr Member
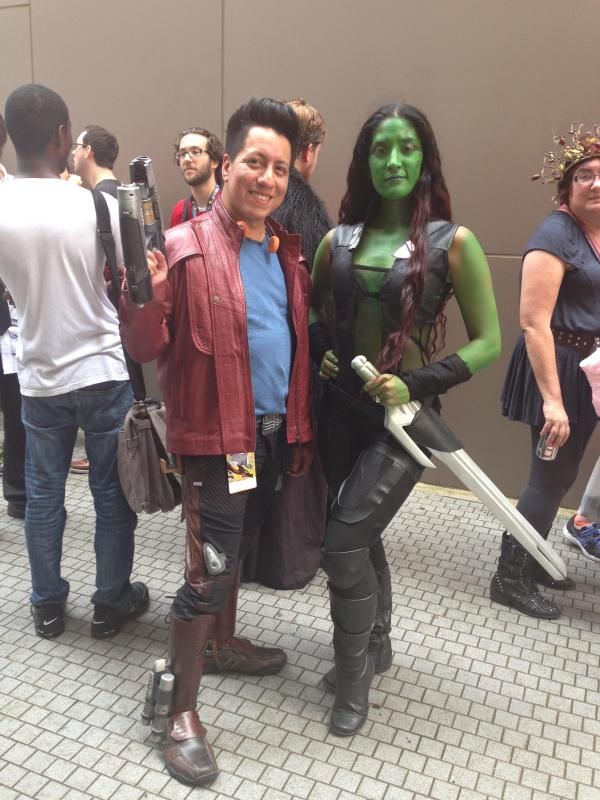
So Daniel Nelms and I have decided to create some really accurate boot rockets for my Star Lord costume. You might have seen our work over in the Project Runs forum, but I wanted to create a build thread to show our process, so here goes.

If you followed my personal Star Lord build thread, you might remember these:

22.jpg


1155.jpg


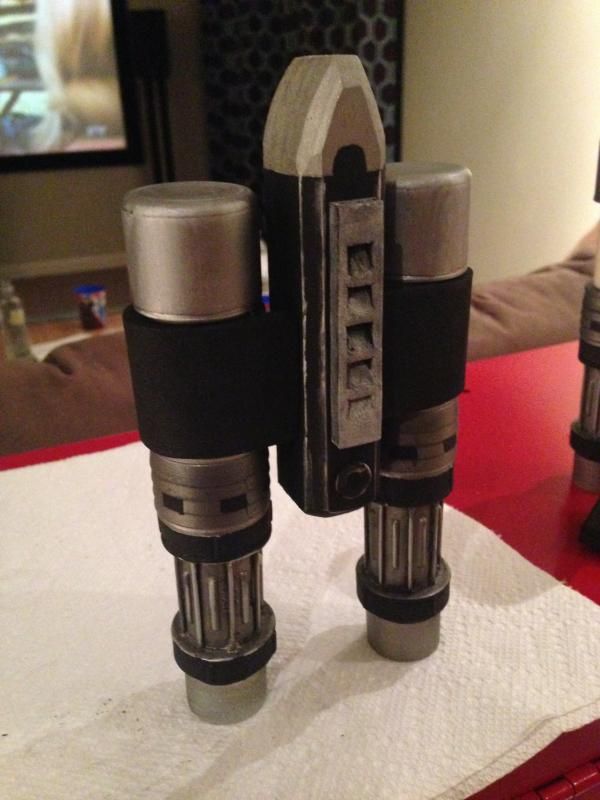
Made from PVC pipe fittings, wood, a bit of foam and some finish nails, I thought these came out pretty well, and I wore them to DragonCon.

1263.jpg


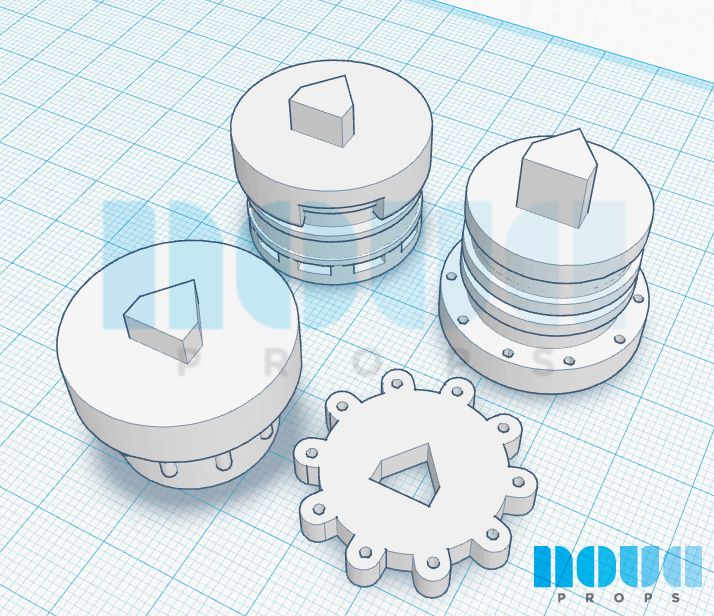
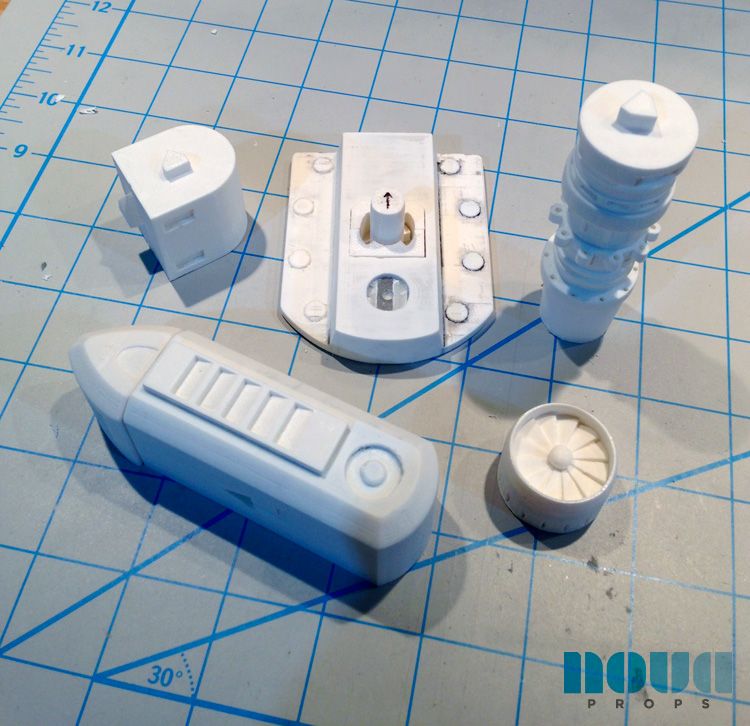
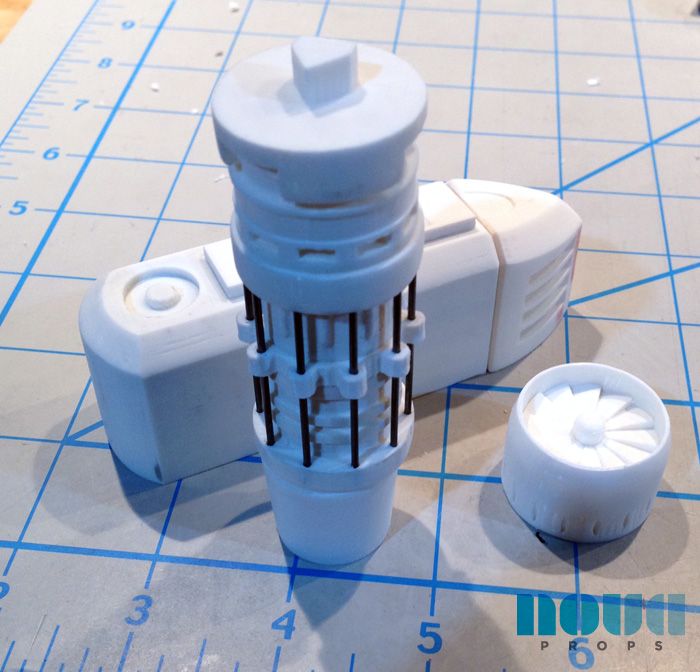
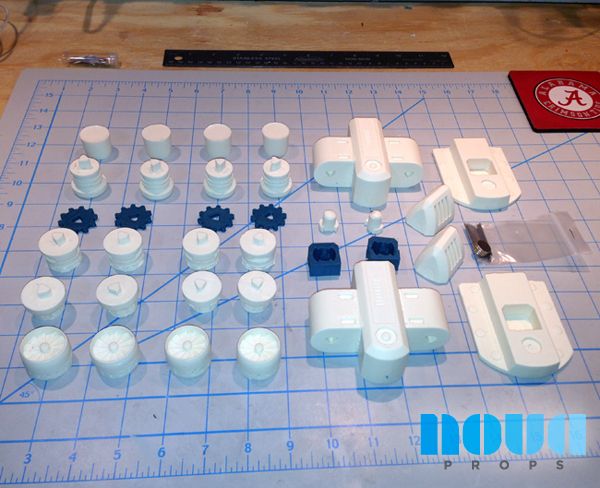
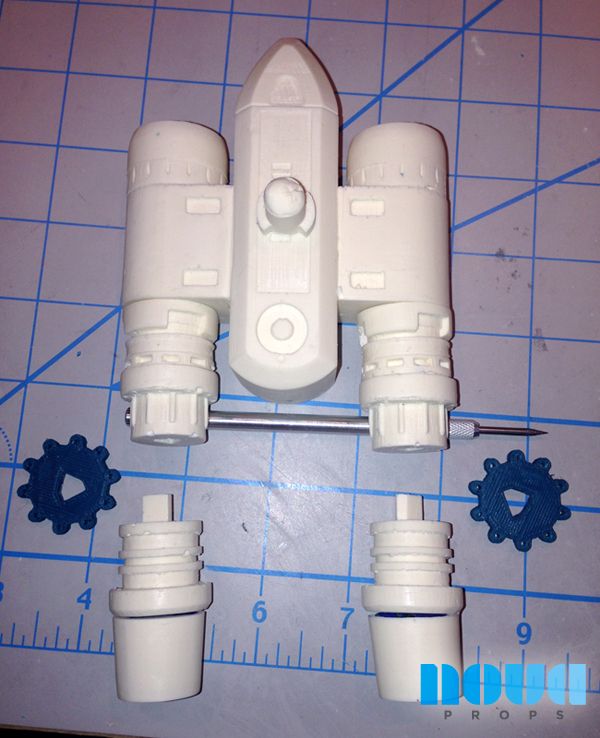
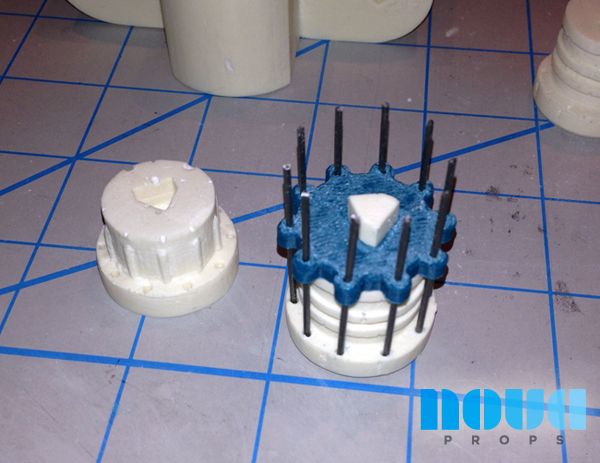
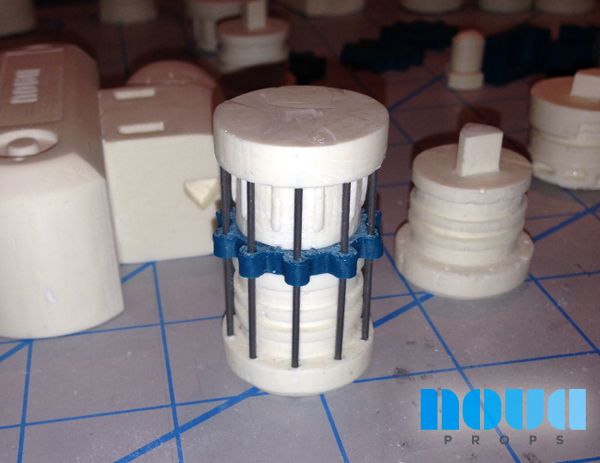
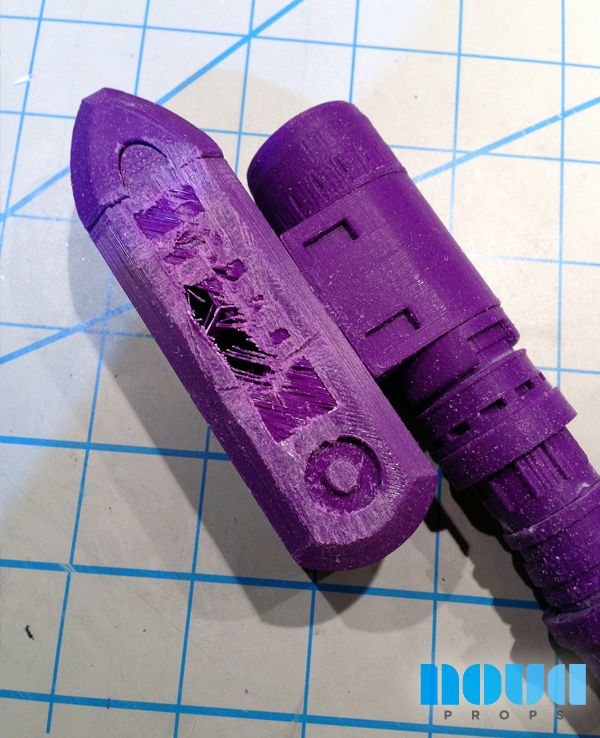
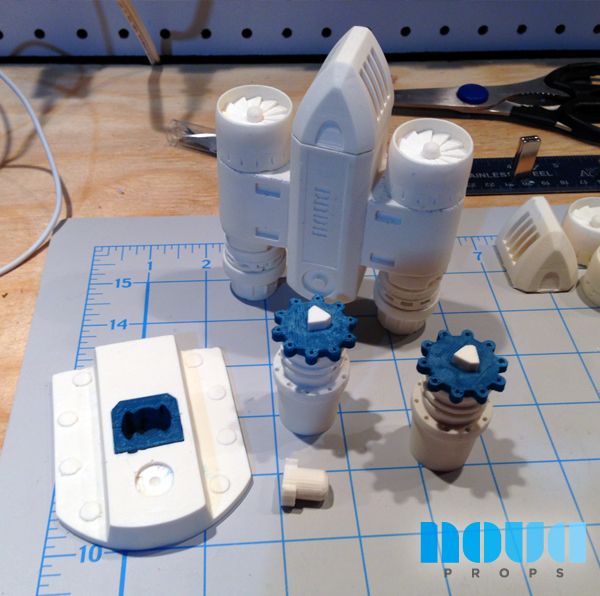
But I decided I could do better. So i downloaded AutoDesk123D design and started learning to model in 3D. After watching some tutorials and James from XRobots, I was able to model an accurate rocket that we could print in 3D.

StarLord_Boot_rocket.jpg


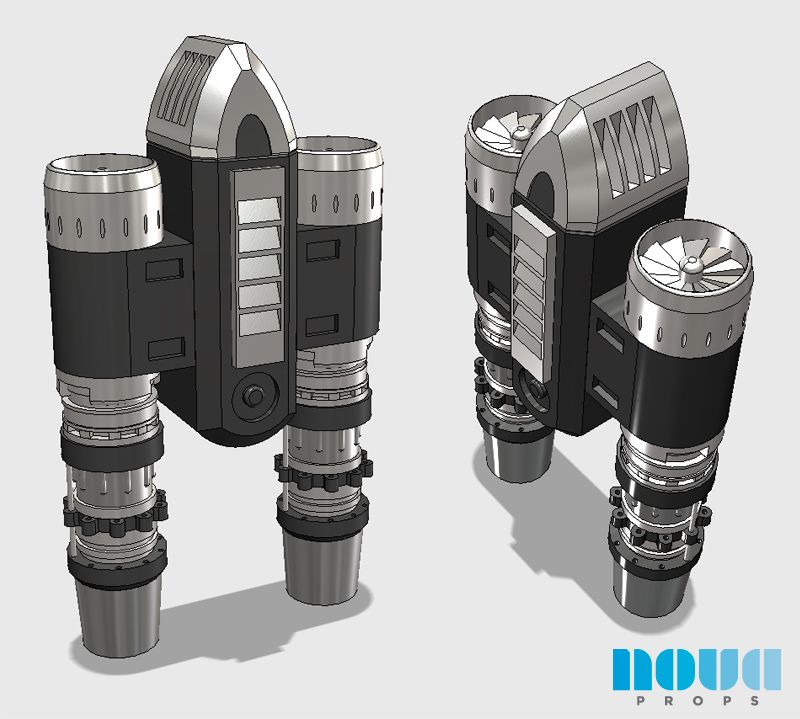
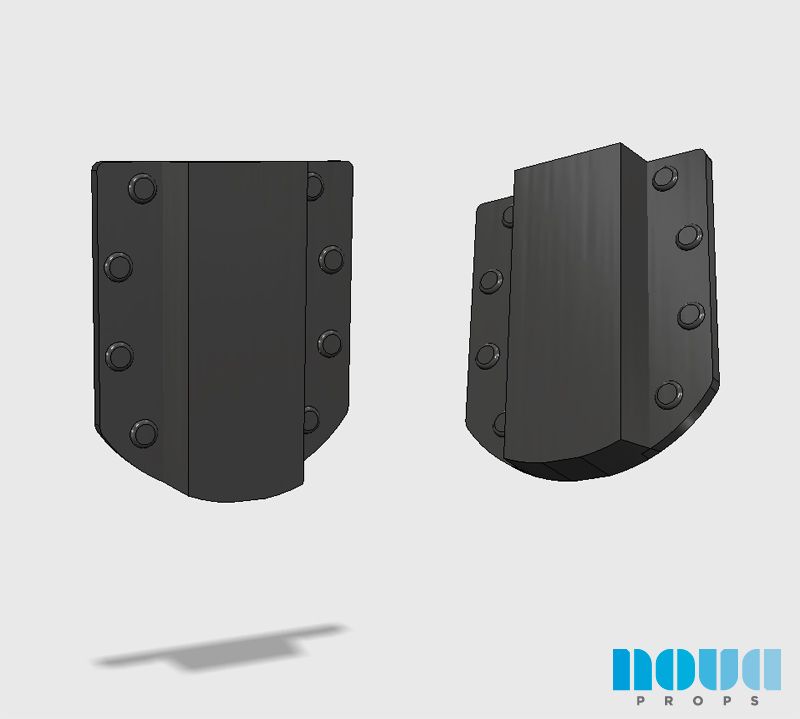
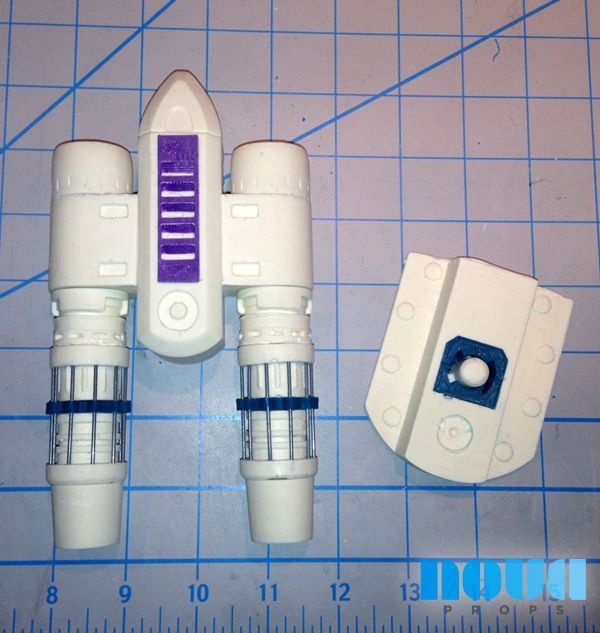
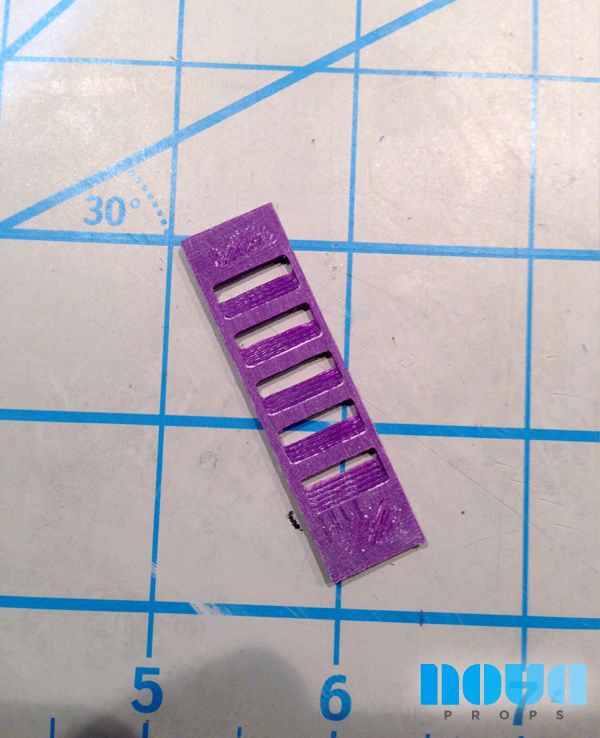
And I went a step further and modeled the mount plate based on costume display pics.

StarLord_Boot_rocket-attach.jpg
 
I wanted to take it further by building it in sections. Daniel and I came up with a peg-and-hole system that will allow the pieces to fit together and lock in only one direction. So we took apart the model and adjusted it with the pegs and holes. The idea is I would paint the pieces separately and assemble them so I don't have to do a bunch of masking in between coats.

StarLord_Boot_fittings.jpg


So Daniel took our files and output them on his 3D printer. Here they are partially assembled. I needed to get them sanded smooth so we could cast them in resin for a final product.

WIP-rocket-parts1-1.jpg


WIP-rocket-parts3.jpg


I gave the sanded pieces back to Daniel to mold and cast in resin, so a while later, i got back this!

all-the-pieces.jpg


Now to start assembly...but things don't always go perfectly the first time...
 
...best laid plans right?

So after I got back the cast parts from Daniel Nelms, i realized a few things. As I started working on an initial assembly, i realized molding and casting is an imperfect science, and I think I had overthought the idea. In my attempts to make things easier to paint, I actually made it much more work to assemble. I also realized that if the parts aren't perfectly cast (and no part ever is really), the pieces don't always fit together 100%.

all-the-pieces.jpg


Here are the parts for a single rocket, partially assembled. Looks neat, but in the end, I think it's just too complicated. Too many pieces, too many places to go wrong. Trying to sand the faces smooth so they join together nicely can easily lead to over sanding or sanding the side crooked, so you end up ruining the part. Not good. I decided the best course of action was to consolidate as many pieces together and recast them as a single piece. Fewer pieces, easier assembly. That means I go from 16 parts per rocket to this:

new-casting-plan.jpg


This should be better. But for now, i'm going to continue assembly on this rocket so I can have at least one finished prototype. So we continue.
 
One of the really fiddly parts of this rocket design are these little rods that are attached around the body of the rocket. It's been a problem to try and figure out how to create something that looks accurate to the movie rocket, but is also something we can actually produce. You can't really 3d print them, they are WAY too small and spindly. they either break during printing, or crack as you try to install them. We want an accurate look, but not impossible to assemble. So we came up with this little idea.

peg-holder-1.jpg


I found some tiny metal rods at a hobby shop, and cut them down to the right length. Then we designed holes into the rockets at the top and bottom to hold them securely in place. But that left us with a few problems. One, the little rods in the movie have bumps on them, and these are smooth. And two, the rods didn't want to stand upright as I assembled it. They kept tilting away from the holes they were supposed to line up with, which made putting them all together a real pain. This 3D printed key was the answer. It gave us something to align all the rods in, and by using our peg and hole from earlier, we could ensure that the rods would all stay aligned with their holes at the top and the bottom.

So I end up with this:

peg-holder-2.jpg


Now the rods look more accurate and are easier to install.
 
So here is the assembled rocket, ready to prime. I'll disassemble the top rocket sections from the bottom so i can get good paint coverage under the metal rods.

assembledflat.jpg


You might also notice the purple vent in the middle. Well, like I said, best laid plans. Daniel accidentally forgot to send me the vent detail. I'm not patient enough to wait, and I had a spare 3D print prototype. So i got out a razor blade, hacksaw, and elbow grease, and got to cutting.

vent-cut.jpg


Oh The Humanity!

But I got what i needed for this painted prototype build.

vent-cutaway.jpg


I'll sand and paint it last and attach it to the rocket at the end. Here's everything ready to be primed.

ready-for-primer.jpg


Next up i'll start painting, and explain what that funny little peg in the front is and why there's a weird hole in the mounting plate.
 
I painted everything silver on Monday afternoon, but this winter weather! I went and checked out the pieces this morning and they were STILL tacky! I have moved them from my garage to a bathroom in the house, so maybe the paint will finally cure today and i can move forward with detail painting and assembly.
 
I do, but i decided just to move it into my basement bathroom for the day, it's heated. Hopefully i will come home to a dry rocket. I've never seen something take this long to dry even in cooler weather. My garage is around 60* even with no heating installed because it's underground it just keeps a good temp. Nice to work in!

The last coat of silver I put on was a bit heavy, so that might be causing it to take longer to cure, too.
 
Sorry for the delay in updates on this one. I painted my first rocket on MONDAY last, and the paint had STILL NOT CURED 5 days later! I think it may have been a bad can of spray paint.. I even put the pieces in my kitchen oven for a few minutes and it still came out tacky. I've decided to just remove the paint and start over, so I've been delayed...literally...watching paint dry.

Anyway, if the weather cooperates with me tonight, i'll be putting a new coat of primer and paint on the rockets tonight so I can finally show you all how our finished pieces will look. Thanks for keeping an eye on my thread!

Thank you. Will PM you and Daniel and see if we can work something out for 2 pairs if i decide to bite :)
 
This thread is more than 9 years old.

Your message may be considered spam for the following reasons:

  1. This thread hasn't been active in some time. A new post in this thread might not contribute constructively to this discussion after so long.
If you wish to reply despite these issues, check the box below before replying.
Be aware that malicious compliance may result in more severe penalties.
Back
Top