So I Built a Vacuum-Former... Mostly

The full size of your rig is 8x4?!

For right now, I am building a 2 x 2 foot (600mm x 600mm) rig and once I am super happy this working, I will move onto bigger things. Based on the results so far, 8 x 4 is certainly do-able.

Cool, well you just seem to have done your homework into perfecting the whole process (I'm over here tripping over myself just trying to get my first decent pull lol).

Sounds like you are where I was when I first started playing with this stuff. Don't get me wrong, many people have made positive forming work including the guy in the SW section that has managed to pull a full 1:1 HIC!

The potential for detail is exponential with the right set up.

It is the ability to use thicker plastic and have thicker walls on the pulled parts. The best vacuum forming seems to be almost paper thin which is perfectly fine for coffee cup lids. I want to be able to make molded plastic parts that are actually usable and strong. Traditionally, if you go thicker and you lose detail with male tools. Using female tools should give the best of both worlds and especially with the suction my system has, no loss of detail.
 
Sounds like you are where I was when I first started playing with this stuff. Don't get me wrong, many people have made positive forming work including the guy in the SW section that has managed to pull a full 1:1 HIC!

Yeah I did see that thread; and for my current applications I believe I can make positive forming work well.

It is the ability to use thicker plastic and have thicker walls on the pulled parts. The best vacuum forming seems to be almost paper thin which is perfectly fine for coffee cup lids. I want to be able to make molded plastic parts that are actually usable and strong. Traditionally, if you go thicker and you lose detail with male tools. Using female tools should give the best of both worlds and especially with the suction my system has, no loss of detail.

Okay so you're going for more thickness; it's good to know what will be required when progressing to thicker material. Right now I'm working with much thinner plastic, actually around 0.01 to 0.013 depending on availability (it needs to be lightweight).

I do have another question, though (if you don't mind). As far as making the buck, I've seen that it's best to use hydrostone for the final mold to vacuum form around. But what silicone would I use to make a mold of the actual shape first? I've seen it around that silicone caulk works well on a small scale. What other cost-effective options are there? I really only need to be able to make two molds from the silicone, so mass production doesn't so much matter.
 
Yeah I did see that thread; and for my current applications I believe I can make positive forming work well.

And I said, there is no reason you can't make this work if you are able to identify issues.


Okay so you're going for more thickness; it's good to know what will be required when progressing to thicker material. Right now I'm working with much thinner plastic, actually around 0.01 to 0.013 depending on availability (it needs to be lightweight).

Yeah I like strength. With materials like ABS, there should be no reason that the part should not be as strong as one made with injection molding. The beauty of vacuum forming is the ability to do a short run relatively inexpensively. I looked into injection molding a few years back. Tooling was hideously expensive (started at $4000 for a basic two part mold) and to get each part down to about $1 each, I would need to produce well over 1000 parts. I just wasn't going to sell them in that kind of volume. I only needed 100 or so and vacuum forming would have been good if the parts had been thicker.

I do have another question, though (if you don't mind). As far as making the buck, I've seen that it's best to use hydrostone for the final mold to vacuum form around. But what silicone would I use to make a mold of the actual shape first? I've seen it around that silicone caulk works well on a small scale. What other cost-effective options are there? I really only need to be able to make two molds from the silicone, so mass production doesn't so much matter.

If you want to use a plaster to make the bucks, you can mold and cast with pretty much anything that releases the original part.

To make tools or molds out of silicone, one needs a high shore silicone. The caulking silicone is just too soft. You will spend more on that stuff just to make one good mold of a part than you would buying a 1KG of a proper molding silicone. Caulking silicones are by nature adhesives, so you need to break them down first. In my tests, I found 10:1 mix of caulking silicone with acetone was a good way to kill off the adhesive, yet leave the silicone in a state that you can still work with - it becomes pour-able or paint-able for about 10 mins.

I use a product called Vario-40 (where 40 is the shore hardness) and it can be used to make molds for female tools and will capture every detail including your finger prints. If I was to make female molds from 100% silicone, I would use more product than I would to make casting molds because I would need thicker walls. Not to say that you could not make a thinner wall mold first and box it in something hard. It can take the heat and being rubber, it makes a perfect seal. I love the Vario-40 because it can be degassed and you change out the hardener to give up to a 6 hour cure time - hence the name Vario. The standard stuff gives a pot-life of 15min and a cure time of 2.5 hours.

There is also a silicone with a shore hardness of A65 which is about the same hardness as a car tyre and it costs about the same as the Vario so I will be looking into that for small female mold tools.

So what is possible here is to make a thin wall mold and let that cure. Add keys with caulking silicone (remember the only stuff that sticks to silicone is silicone). Once that has cured, use a release agent (like good old Vaseline) and box that up and make a shell out plaster like Ultra-cal or even Plaster Of Paris. Assuming the Vaseline prevents the plaster from biting into the silicone, you can remove the soft mold to extract your hard master part. You then have keys to re-align the silicone mold into the hard shell. This is really not that different to making a mother mold with fibre glass which is another material that will work for both male and female tools.

The key point about making a tool for vacuum forming is that you CAN NOT have under cuts. In the case of the female tool, It is possible to make tools that key together for part extraction.
 
Polyurethane resin (yeah, the same kind people use to cast into RTV molds) works good to make bucks. There resins that says it is special for vac forming, but I have found it to not be necessary for what I am doing. I have lost count of how many times I have pulled from these and they show no signs of wear.

DSC04894a_zps363a64f3.jpg


DSC02826.jpg


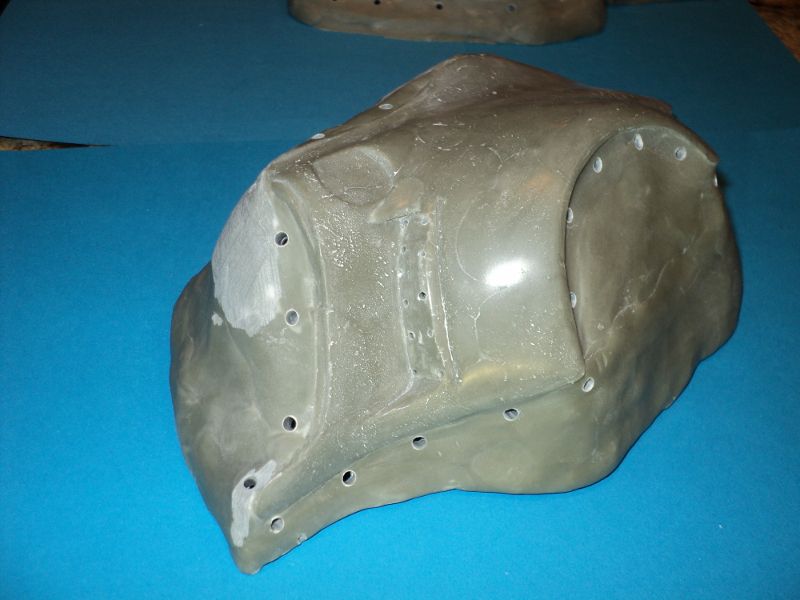
Apoxie Sculpt is also really great stuff. It cures hard as a rock. It has a nice working time and newly mixed product will bond to already cured Apoxie Sculpt if you want to come back later. This buck was made in several stages of curing and adding more apoxie. It is around 1/8 to 1/4 inch thick.

DSC04458_zpse6a2905d.jpg


DSC04696_zps362e9c62.jpg
 
If you want to use a plaster to make the bucks, you can mold and cast with pretty much anything that releases the original part.

To make tools or molds out of silicone, one needs a high shore silicone. The caulking silicone is just too soft. You will spend more on that stuff just to make one good mold of a part than you would buying a 1KG of a proper molding silicone. Caulking silicones are by nature adhesives, so you need to break them down first. In my tests, I found 10:1 mix of caulking silicone with acetone was a good way to kill off the adhesive, yet leave the silicone in a state that you can still work with - it becomes pour-able or paint-able for about 10 mins.

I use a product called Vario-40 (where 40 is the shore hardness) and it can be used to make molds for female tools and will capture every detail including your finger prints. If I was to make female molds from 100% silicone, I would use more product than I would to make casting molds because I would need thicker walls. Not to say that you could not make a thinner wall mold first and box it in something hard. It can take the heat and being rubber, it makes a perfect seal. I love the Vario-40 because it can be degassed and you change out the hardener to give up to a 6 hour cure time - hence the name Vario. The standard stuff gives a opt-life of 15min and a cure time of 2.5 hours.

There is also a silicone with a shore hardness of A65 which is about the same hardness as a car tyre and it costs about the same as the Vario so I will be looking into that for small female mold tools.

So what is possible here is to make a thin wall mold and let that cure. Add keys with caulking silicone (remember the only stuff that sticks to silicone is silicone). Once that has cured, use a release agent (like good old Vaseline) and box that up and make a shell out plaster like Ultra-cal or even Plaster Of Paris. Assuming the Vaseline prevents the plaster from biting into the silicone, you can remove the soft mold to extract your hard master part. You then have keys to re-align the silicone mold into the hard shell. This is really not that different to making a mother mold with fibre glass which is another material that will work for both male and female tools.

The key point about making a tool for vacuum forming is that you CAN NOT have under cuts. In the case of the female tool, It is possible to make tools that key together for part extraction.

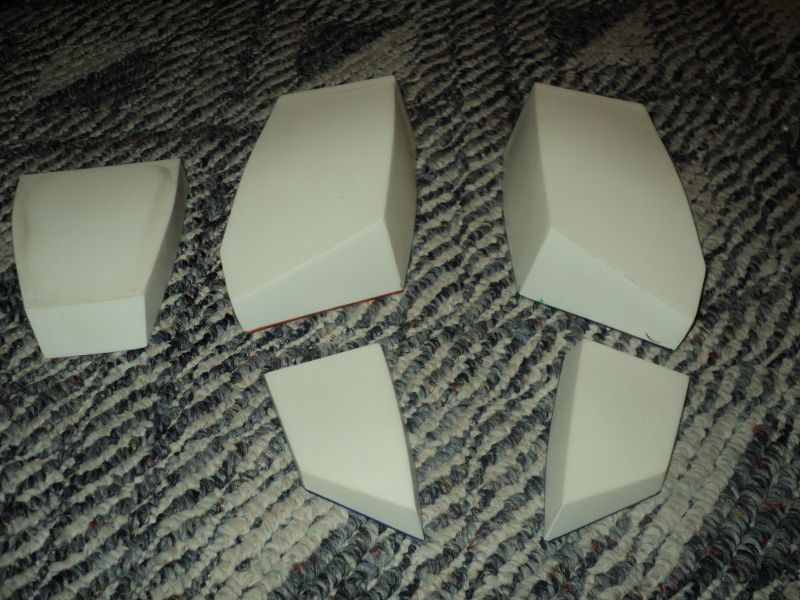
Okay- interesting, I guess the caulking method could work for extremely small scale but the quality clearly would be lacking. I did find some silicone with 30 shore strength that doesn't require degassing ($30 for 1lb/.5kg with shipping). The buck itself is maybe 5-6 cubic inches of volume so I don't think the mould needs to be any firmer for this. Also found a reasonable seller of Ultracal on eBay. This is a very cool process in general.

Keep me posted on your progress with the female molds and updates to your rig! I'd like to see where you end up going with it. I have another R/C-related build I'm working on right now, but this is next on the list (a lot of unforeseen costs lol).

---

sjanish I think one of my family members uses the apoxie sculpt for making customizations on Breyer horses. It's really that strong? That would be good to know for future forming.
 
Okay- interesting, I guess the caulking method could work for extremely small scale but the quality clearly would be lacking. I did find some silicone with 30 shore strength that doesn't require degassing ($30 for 1lb/.5kg with shipping). The buck itself is maybe 5-6 cubic inches of volume so I don't think the mould needs to be any firmer for this. Also found a reasonable seller of Ultracal on eBay. This is a very cool process in general.

It may handle the heat, but I think you find it will compress under the full load of suction. In my system, any air bubbles would expand and pop, and that could even deform the tool.

Keep me posted on your progress with the female molds and updates to your rig! I'd like to see where you end up going with it. I have another R/C-related build I'm working on right now, but this is next on the list (a lot of unforeseen costs lol).

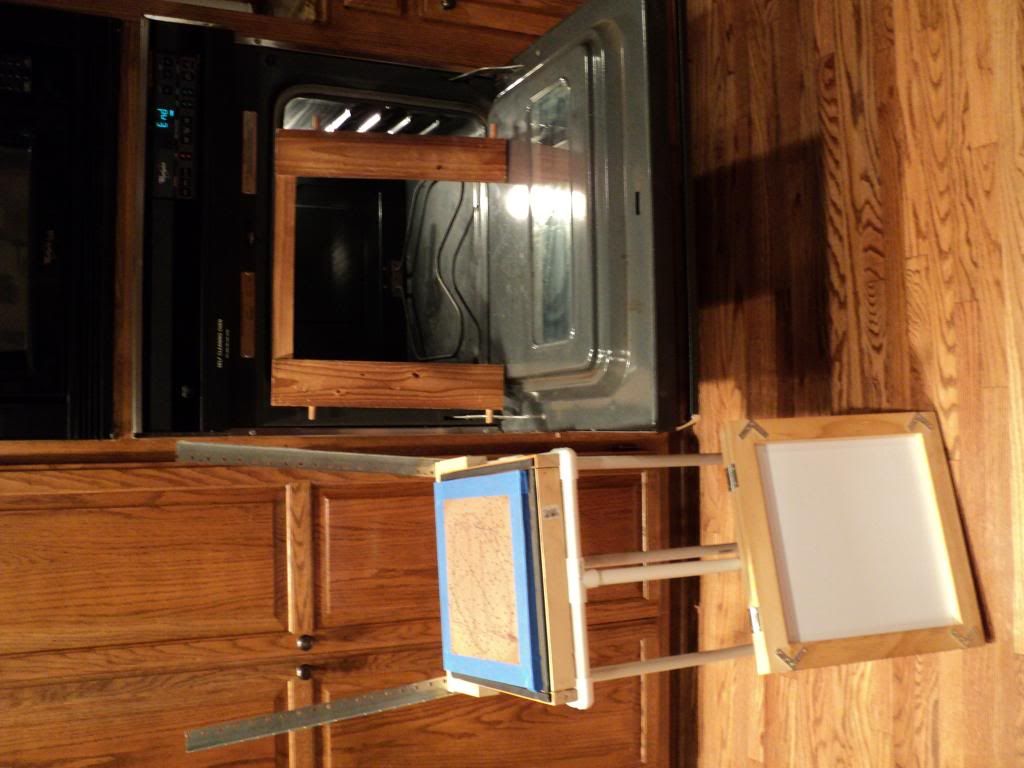
I made a start on a few things today. The rig itself has been cut slightly undersized but is mostly assembled. I am going to have a job sealing it up though. I hope angle alloy and silicone will work here. I am not too concerned about the size at this stage though because it is simply a tester for the final version.

I also mixed up some Ultracal in an attempt to make a female tool from my male tools. Because both parts were "hard" and I even used Plasticine to make a removable plug, I had to break the Ultracal to get my part out. So a FAIL there. I might knock something up out of foam and use the Ultracal on that and see how that goes.

I have heard that apoxie sculpt is strong enough for male tool construction once baked. It certainly would be for a female tool on my rig. I have never used it though.


sjanish I think one of my family members uses the apoxie sculpt for making customizations on Breyer horses. It's really that strong? That would be good to know for future forming.

Neat stuff. Can we see your vacuum former?
 
Last edited:
It may handle the heat, but I think you find it will compress under the full load of suction. In my system, any air bubbles would expand and pop, and that could even deform the tool.

I'm sorry, I meant I think the silicone would work to pour the ultracal in for the buck. I'm not using the silicone as the buck itself. ;)


I made a start on a few things today. The rig itself has been cut slightly undersized but is mostly assembled. I am going to have a job sealing it up though. I hope angle alloy and silicone will work here. I am not too concerned about the size at this stage though because it is simply a tester for the final version.

I also mixed up some Ultracal in an attempt to make a female tool from my male tools. Because both parts were "hard" and I even used Plasticine to make a removable plug, I had to break the Ultracal to get my part out. So a FAIL there. I might knock something up out of foam and use the Ultracal on that and see how that goes.

I have heard that apoxie sculpt is strong enough for male tool construction once baked. It certainly would be for a female tool on my rig. I have never used it though.

Trial and error is the name of the game I guess haha
 
I'm sorry, I meant I think the silicone would work to pour the ultracal in for the buck. I'm not using the silicone as the buck itself. ;)

Trial and error is the name of the game I guess haha

Yes it is. And it can be a costly learning process sometimes as well.

So if you wanted to mold a car part like sjanish did? Yeah sure so long as what your molding from does not react to either acetone or cause a reaction with the silicone. So if you thinned out the caulking silicone with acetone, any parts made of any form streyene like HIPS or ABS are a no go to take a mold from as the acetone will eat those plastics.

If you intend to scuplt the master from clay or Plasticine, just make sure it is silicone safe as some clays contain sulfur and the silicone will not set. As a general rule of thumb, you can not use an air curing silicone followed up with an addition curing silicone for making a mold. You can however make a part from addition curing first and join it with air curing. That is how I made my 2015 jacket (the vest portion anyway).

So if I get time, today will be all about sealing up that rig.
 
The Apoxie Sculpt is way strong enough to vac over. I am tempted to take a picture of me standing on one of that buck, but that would be tempting fate a bit too much. I am using a 12 gallon shop vac, don't know the HP, but there is no way it is strong enough to deform the apoxie.

If you are using RTV to make a mold to pour hydrocal or resin you do not need to degas it under vacuum if you are going to use the castings for vac bucks. Just do your best to not whip too much air into it and you should be fine. Tap it on the sides to get the bigger bubbles to rise before the rtv cures. I use Smooth-On rtv with 45 minute pot life, so plenty of time to play with it before I have to pour. I do degas under vacuum if I am going to pressure cast in the mold. Unless you have huge bubbles or flow issues close to the master it will probably not matter. Any small bubbles that degassing will get rid of will be irrelevant for making male vac buck. Cavx could have problems if he is using silicone to make female buck. The pressure could affect any embedded bubbles and cause deformity at the skin of the mold. At least if I understand his system correctly.
 
Last edited:
Cavx could have problems if he is using silicone to make female buck. The pressure could affect any embedded bubbles and cause deformity at the skin of the mold. At least if I understand his system correctly.

Yes and that is why I would degas my silicone prior to the pour.

Your set up looks good. I think most of my issues were trying to pull too thicker plastic. If I had gone with 1mm or 1.5mm, I think i would have got better results. Anyway, well past the point of no return on this new rig now.
 
Yes and that is why I would degas my silicone prior to the pour.

Your set up looks good. I think most of my issues were trying to pull too thicker plastic. If I had gone with 1mm or 1.5mm, I think i would have got better results. Anyway, well past the point of no return on this new rig now.


Thanks. I look forward to seeing what you come up with. I would love to be able to pull thicker stuff here at home...I don't know what, but if I have the option I think I would eventually find something.

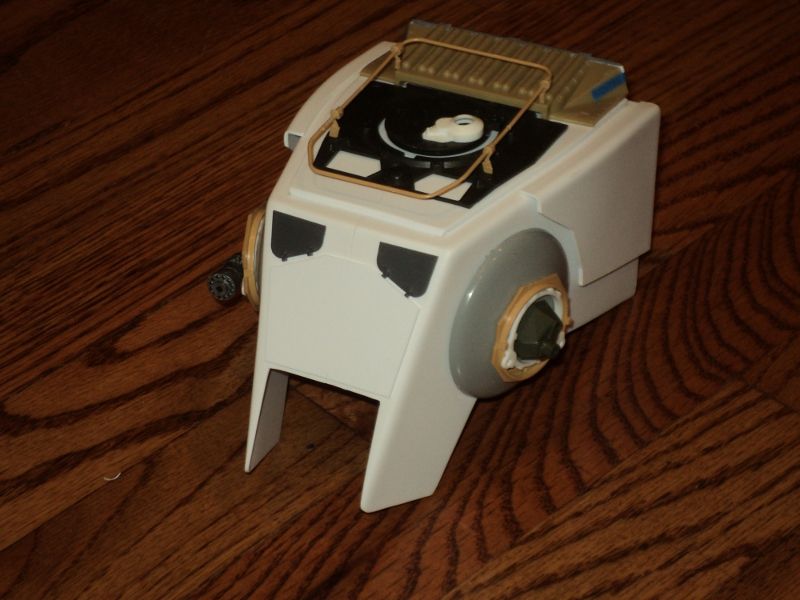
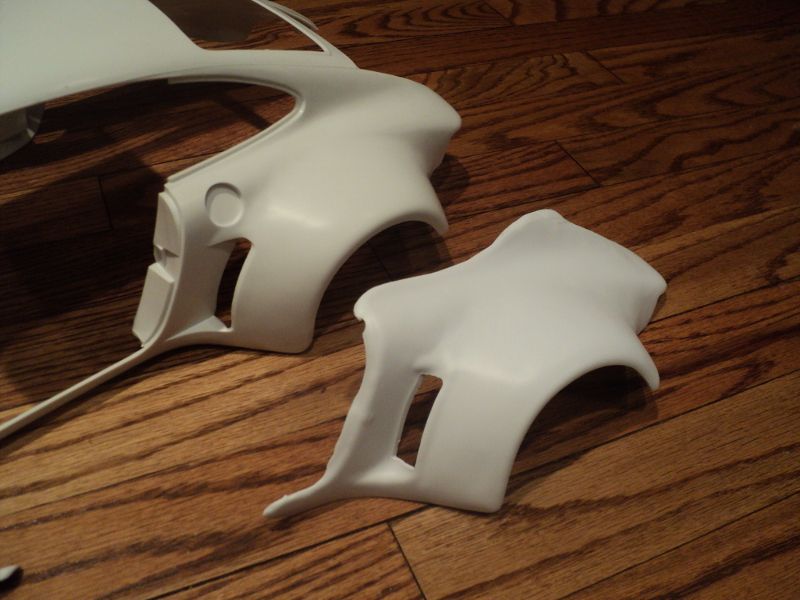
.1 inch is the thickest I have pulled. That Porsche fender started out as .1 and stretches to about .08 inch, which is just about perfect for the original part. The AT-ST head starts as .06 inch. I have never bothered to measure the thickness, but the final parts look nice visually to the original.The way it stretched was a pleasant surprise.
 
I pulled my old vacuum form down today to see if I can recycle any parts. Looks like the heater may be the only thing worth recycling.
 
Just going through videos on YouTube and I found this of interest. What is the rubber mat?

https://www.youtube.com/watch?v=NBfRhE3bjbg

That is pretty slick. A couple of thoughts.

It reminds me of vacuum bags used to do things like apply wood laminates. I saw a How-to about that a few months back on Smooth-on's website.

Also, it reminds me of the flexible PVC sheet used to make shower pans. I don't know how the stuff would hold up to temperature, but it looks similar.
 
And I found another one where they are using pre-cut plastic parts as thick as 1/2", heating them, placing them over the form and pulling a massive rubber mat down and vacuum forming that way. It is impressive.
 
Also, it reminds me of the flexible PVC sheet used to make shower pans. I don't know how the stuff would hold up to temperature, but it looks similar.

I don't think it would be PVC given the fumes that can come off that stuff under heat.

I build that box to go on top of my vacuum chamber. I can get a seal on the base, but can not get one on the lid yet. Given I don't yet have the rubber sheet in there, getting a seal on the base alone and being able to pull 15" was impressive.

So moving forward and now comes the weigh up costing - do I fiberglass the box for both strength and seal or do I simply go and get fabricator to make one for me? This project so far has cost just $55. Fabrication will cost a few hundred. Not sure what fiberglass will cost or how well it will work. I guess the beauty of fiberglass is that I can change things and patch the surface.

It probably is not PVC, there are probably several materials out there that would work. I just had to have a shower pan redone not too long ago and that is what it reminded me of. I guess it would depend on if the heat is extreme enough for long enough to make the PVC release gas. It would not be my first choice if I had other options just because of the thought of chlorine gas.

Fabrications vs fiberglass...I don't feel I know enough to really comment. If money isn't a problem then fabricate, if funds are low improvise.
 
Fabrications vs fiberglass...I don't feel I know enough to really comment. If money isn't a problem then fabricate, if funds are low improvise.

At this stage, I might just go fiberglass which I have never done before.
 
Back
Top