Moska
Sr Member
Hello friends.
During the time of confinement due to COVID-19, I rescued the 1/4 scale Yoda figure of the Screamin brand, which had been forgotten in a closet for many years. I always wanted to build and paint that figure because, in my humble opinion, it is the best model of all the Star Wars saga that that brand released.

On the box it says that it is from the year 1992, but on the instruction sheet it says 1993. ??
As you already know, these vinyl figures are very easy to assemble and, normally, the only demanding task is the paint finish. That was my initial purpose, to make it "from the box" as a mere entertainment and not complicate my life.
But, those of you who have followed some of my threads already know me, I'm unable to resist the temptation when I come up with any idea to improve a model.
In this case, when I was already in the process of painting the figure, it occurred to me that it would be much more interesting if Yoda's posture showed it “using The Force”. It didn't seem too complicated because you only had to modify the left arm, but I was worried about getting the texture of Yoda's clothes afterwards so that it didn't look different from the rest of the model.

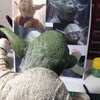
This is the state and original posture of the model before starting its transformation.
I was a bit stuck at that point when, luckily, I discovered an rag in my house that was used to clean the window panes. That rag had the perfect texture to dress Yoda, but I still had to think about how I was going to put those clothes on my figure.
These are different steps I followed to complete the model:
THE LEFT ARM:
I cut the left sleeve of the figure and all the areas that “bothered” for the new posture of the model. This left a large hole in the figure that I filled using pieces of porexpan glued together with white glue to cover the entire cavity. Then I shaped the foam using the heat from my old tin soldering iron. The objective was to create a base with the appropriate volumes so that later the fabric could be glued and that it would remain "natural".

This is the main piece I remove from the model.
For the new Yoda arm I used round wooden bars in which I made the necessary joints to be able to fix the most correct posture. The wooden arm is firmly attached to the model by means of a screw on the figure's back and abundant white glue. Once the position of the arm was decided, I sealed the joints with more white glue and gave it volume using again pieces of porexpan attached to the arm that I later modeled with the tin soldering iron.
CLOTHES:
I finished painting the visible parts of the figure (head, hands and feet) and, before starting to dress it, I dyed the fabric -which was white- so that it took on a slightly tan color. For this I prepared a cup of coffee and immersed the fabric until it was well soaked. Then I washed the cloth with clean water and the color I wanted remained. The rag was made up of four thin layers that could be easily separated by cutting its four sides. And I saw that it was going to be easier to dress him in layers instead of using the full rag. I did some tests and found that it was easy to apply the pieces of each layer by wetting the fabric with water and shaping it by generously applying white glue with a medium-sized round brush. With this technique I could easily make the folds of the clothes and it was also very easy to hide the unions between the different pieces of fabric that I used for each part of the figure. Once dried, the fabric is almost completely rigid and can be handled without any problem.
BELT, POUCH AND PAN FLUTE:
I made the belt and bag using fake leather from an old purse. The flute is made with styrene, Milliput putty and a few pieces of wire.


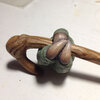
This image corresponds to the pan flute prop Yoda carried in the movies.
CANE:
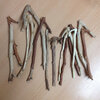
I picked up various twigs from different woods looking for them to have the most similar shape to the cane that Yoda used on screen. In the end the chosen one was a sprig of beech that I modeled lightly with my Dremel to make it more similar to the original.


EYES:
I had only painted the white part which, by the way, is not white. If it is painted in pure white it is very unreal. You have to find a darker shade that works well with the rest of the face. I used a slightly greenish gray shade. I searched the internet for photos of real eyes that had the same shades as Yoda's. I used the eyes of a beautiful girl. I adjusted them to the size of my figure and printed them on virgin decal paper. In this way it not only saved me the delicate work of painting them, but also allowed me to make sure that they were placed perfectly symmetrical and with the gaze directed where I wanted.


HAIR:
The last step was the tedious process of putting the hair in. It seems that Yoda has little hair but, I assure you, it took me many hours to complete this part. The kit provides a bag with "hair" that I applied as follows:
1- Remove a single hair from the bag using fine tweezers.
2- Cut them into pieces of a reasonable measure.
3- Smeared one end of a hair in contact glue so that a small ball of glue adheres to the end.
4- With the tweezers, place it in the desired place.
5- Press the glue ball with a burin to crush it and fix the hair well.
I repeated these steps I think more than 1,000 times to complete Yoda's hair.
Finally, I trimmed the hairs that were too long a little, combed them with a toothbrush and applied a thin layer of Marabou matte varnish to remove the shine that the glue had left. This varnish coat also served as a hairspray and set the figure's hairstyle a bit.


The final result I think is much better than the one proposed in the kit. Both for the new posture and for the realism of the clothes.
BTW, the type of fabric I used I think is called TACK CLOTH.
Once finished, I couldn't resist the temptation to place it on a bookcase in a way that Yoda would “use The Force” to prevent the books from falling. Now it is a point of attraction for everyone who comes to visit my house.


During the time of confinement due to COVID-19, I rescued the 1/4 scale Yoda figure of the Screamin brand, which had been forgotten in a closet for many years. I always wanted to build and paint that figure because, in my humble opinion, it is the best model of all the Star Wars saga that that brand released.

On the box it says that it is from the year 1992, but on the instruction sheet it says 1993. ??
As you already know, these vinyl figures are very easy to assemble and, normally, the only demanding task is the paint finish. That was my initial purpose, to make it "from the box" as a mere entertainment and not complicate my life.
But, those of you who have followed some of my threads already know me, I'm unable to resist the temptation when I come up with any idea to improve a model.
In this case, when I was already in the process of painting the figure, it occurred to me that it would be much more interesting if Yoda's posture showed it “using The Force”. It didn't seem too complicated because you only had to modify the left arm, but I was worried about getting the texture of Yoda's clothes afterwards so that it didn't look different from the rest of the model.

This is the state and original posture of the model before starting its transformation.
I was a bit stuck at that point when, luckily, I discovered an rag in my house that was used to clean the window panes. That rag had the perfect texture to dress Yoda, but I still had to think about how I was going to put those clothes on my figure.
These are different steps I followed to complete the model:
THE LEFT ARM:
I cut the left sleeve of the figure and all the areas that “bothered” for the new posture of the model. This left a large hole in the figure that I filled using pieces of porexpan glued together with white glue to cover the entire cavity. Then I shaped the foam using the heat from my old tin soldering iron. The objective was to create a base with the appropriate volumes so that later the fabric could be glued and that it would remain "natural".

This is the main piece I remove from the model.
For the new Yoda arm I used round wooden bars in which I made the necessary joints to be able to fix the most correct posture. The wooden arm is firmly attached to the model by means of a screw on the figure's back and abundant white glue. Once the position of the arm was decided, I sealed the joints with more white glue and gave it volume using again pieces of porexpan attached to the arm that I later modeled with the tin soldering iron.
CLOTHES:
I finished painting the visible parts of the figure (head, hands and feet) and, before starting to dress it, I dyed the fabric -which was white- so that it took on a slightly tan color. For this I prepared a cup of coffee and immersed the fabric until it was well soaked. Then I washed the cloth with clean water and the color I wanted remained. The rag was made up of four thin layers that could be easily separated by cutting its four sides. And I saw that it was going to be easier to dress him in layers instead of using the full rag. I did some tests and found that it was easy to apply the pieces of each layer by wetting the fabric with water and shaping it by generously applying white glue with a medium-sized round brush. With this technique I could easily make the folds of the clothes and it was also very easy to hide the unions between the different pieces of fabric that I used for each part of the figure. Once dried, the fabric is almost completely rigid and can be handled without any problem.
BELT, POUCH AND PAN FLUTE:
I made the belt and bag using fake leather from an old purse. The flute is made with styrene, Milliput putty and a few pieces of wire.


This image corresponds to the pan flute prop Yoda carried in the movies.
CANE:
I picked up various twigs from different woods looking for them to have the most similar shape to the cane that Yoda used on screen. In the end the chosen one was a sprig of beech that I modeled lightly with my Dremel to make it more similar to the original.


EYES:
I had only painted the white part which, by the way, is not white. If it is painted in pure white it is very unreal. You have to find a darker shade that works well with the rest of the face. I used a slightly greenish gray shade. I searched the internet for photos of real eyes that had the same shades as Yoda's. I used the eyes of a beautiful girl. I adjusted them to the size of my figure and printed them on virgin decal paper. In this way it not only saved me the delicate work of painting them, but also allowed me to make sure that they were placed perfectly symmetrical and with the gaze directed where I wanted.


HAIR:
The last step was the tedious process of putting the hair in. It seems that Yoda has little hair but, I assure you, it took me many hours to complete this part. The kit provides a bag with "hair" that I applied as follows:
1- Remove a single hair from the bag using fine tweezers.
2- Cut them into pieces of a reasonable measure.
3- Smeared one end of a hair in contact glue so that a small ball of glue adheres to the end.
4- With the tweezers, place it in the desired place.
5- Press the glue ball with a burin to crush it and fix the hair well.
I repeated these steps I think more than 1,000 times to complete Yoda's hair.
Finally, I trimmed the hairs that were too long a little, combed them with a toothbrush and applied a thin layer of Marabou matte varnish to remove the shine that the glue had left. This varnish coat also served as a hairspray and set the figure's hairstyle a bit.


The final result I think is much better than the one proposed in the kit. Both for the new posture and for the realism of the clothes.
BTW, the type of fabric I used I think is called TACK CLOTH.
Once finished, I couldn't resist the temptation to place it on a bookcase in a way that Yoda would “use The Force” to prevent the books from falling. Now it is a point of attraction for everyone who comes to visit my house.
