This project has been a long time running, and I don't know that I ever really posted here about it.
It was during Dragon*Con 2008, soon after having seen the Clone Wars movie, that I decided I wanted to make a Rex costume, and I wanted it to have the stylized Clone Wars CG look, rather than the AotC / RotS "realistic" style.
I'll start with the final product. These pics were taken yesterday, and represent my first time wearing the entire thing, all of my own construction:


The helmet has distant ties to a Hasbro voice changer clone helmet. I started with that, filled the seams / reshaped the face then molded / cast it.
I took a cast and cut it up / rebuilt pieces to get the CW v1 helmet. Then I did that twice more to get to where it is now. Each time with the full on silicone mold. Having never done this sort of thing before, I didn't really approach it the best way
This was also my first time building armor like this from scratch. I learned a LOT as I went... If I knew then what I know now, this would have probably taken 1/2 as long!
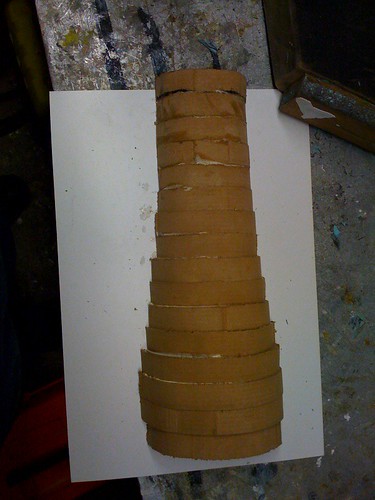
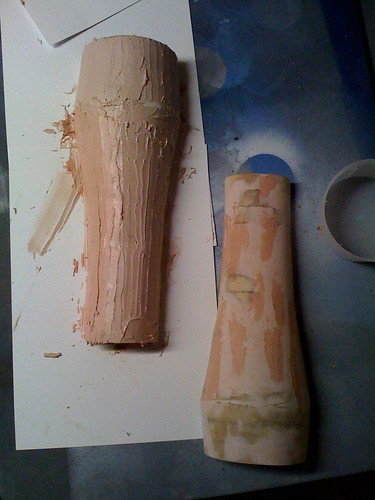
The armor masters are all made from MDF and Bondo. I didn't want to have to sculpt / cast / pour a positive to form off of, so I made the originals out of something that I knew could take the heat/pressure.
I think I went through a 1/2 dozen 4'x8' sheets of 3/4" MDF, about that many smaller 2'x4' pieces (sometimes I had to pick up supplies when I didn't have my truck), and 8 gallons or so of Bondo.
Over the course of this project I bought a lot of tools. Band saw, a few sizes of belt sander, more clamps than I'd ever have imagined, and a LOT of nitrile gloves!
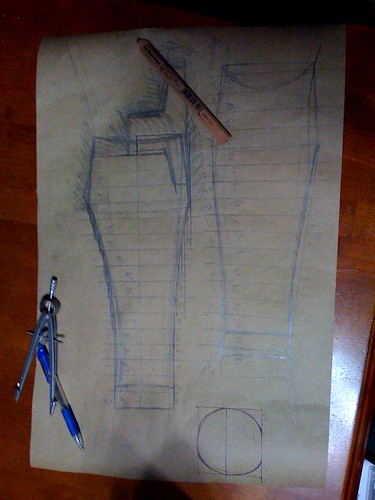
The whole project followed the same general formula:


It's been an interesting trip. Having now done the scratch built suit of armor, I have all new appreciation for how much effort goes into those kits that I used to take for granted.
Remind me never to do that again
It was during Dragon*Con 2008, soon after having seen the Clone Wars movie, that I decided I wanted to make a Rex costume, and I wanted it to have the stylized Clone Wars CG look, rather than the AotC / RotS "realistic" style.
I'll start with the final product. These pics were taken yesterday, and represent my first time wearing the entire thing, all of my own construction:


The helmet has distant ties to a Hasbro voice changer clone helmet. I started with that, filled the seams / reshaped the face then molded / cast it.
I took a cast and cut it up / rebuilt pieces to get the CW v1 helmet. Then I did that twice more to get to where it is now. Each time with the full on silicone mold. Having never done this sort of thing before, I didn't really approach it the best way
This was also my first time building armor like this from scratch. I learned a LOT as I went... If I knew then what I know now, this would have probably taken 1/2 as long!
The armor masters are all made from MDF and Bondo. I didn't want to have to sculpt / cast / pour a positive to form off of, so I made the originals out of something that I knew could take the heat/pressure.
I think I went through a 1/2 dozen 4'x8' sheets of 3/4" MDF, about that many smaller 2'x4' pieces (sometimes I had to pick up supplies when I didn't have my truck), and 8 gallons or so of Bondo.
Over the course of this project I bought a lot of tools. Band saw, a few sizes of belt sander, more clamps than I'd ever have imagined, and a LOT of nitrile gloves!
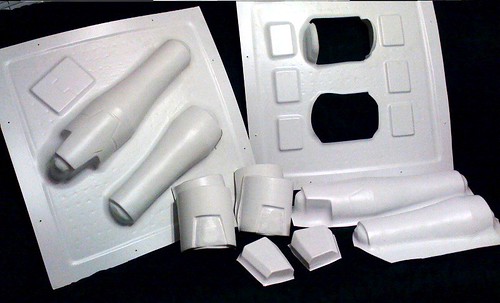
The whole project followed the same general formula:
- Trace body part
- draw armor around it for the desired look
- slice up into 3/4" pieces
- draw those pieces out onto the mdf
- cut
- glue
- sand
- coat in bondo / sand / recoat until happy
- vac form
- assemble
- paint


It's been an interesting trip. Having now done the scratch built suit of armor, I have all new appreciation for how much effort goes into those kits that I used to take for granted.
Remind me never to do that again


