You are using an out of date browser. It may not display this or other websites correctly.
You should upgrade or use an alternative browser.
You should upgrade or use an alternative browser.
Sapper's NX-01 Build - Time it with a slooow calendar!
- Thread starter sapper36
- Start date
SteveNeill
Sr Member
I just realized that you already know about this. Sorry. Brain fart but it's good to see you building this great kit just the same!
Steve
Steve
Thanks for chiming in Steve - Yup - I have a passing familiarity with your build thread... - Couldn't get this doone without you!
Sorry for the radio silence - Took my Scout Troop for a 20-mile hike Saturday - Good God I'm Old!
Got a little bit done Sunday - Started building the support structure for the inside. I took a side blueprint - Marked off where the support tube door will go & cut out the profile - Much to my surprise after I cut them out of Brass they fit pretty close on the first try!
Also picked up some basswood oval plaques at Michael's Art to make the base - one about 16"x11" & the other about a quarter that.
Won't be many updates for the next week - I had to pack up & betten down the hatches because of Hurrican Abigail getting ready to hit in a few days (That's my 18 mo grand-daughter)
Will post a couple update pics when I get a chance.
opal1970
Well-Known Member
Sorry for the radio silence - Took my Scout Troop for a 20-mile hike Saturday - Good God I'm Old!
Ohhh the good ol' days... that brings back memories (that I was trying to forget :lol). 20 miles, that is quite a bit, when I was in the military my longest was 30 Kilometers (about 17 or 18 miles), of course with loaded rucksack etc.
Jason
Chrisisall
Master Member
I've liked this ship ever since I watched Steve's build. Now Ill watch this one.
I need to do one my own self!:cool
I need to do one my own self!:cool
I'm gonna try to make it worth your while.
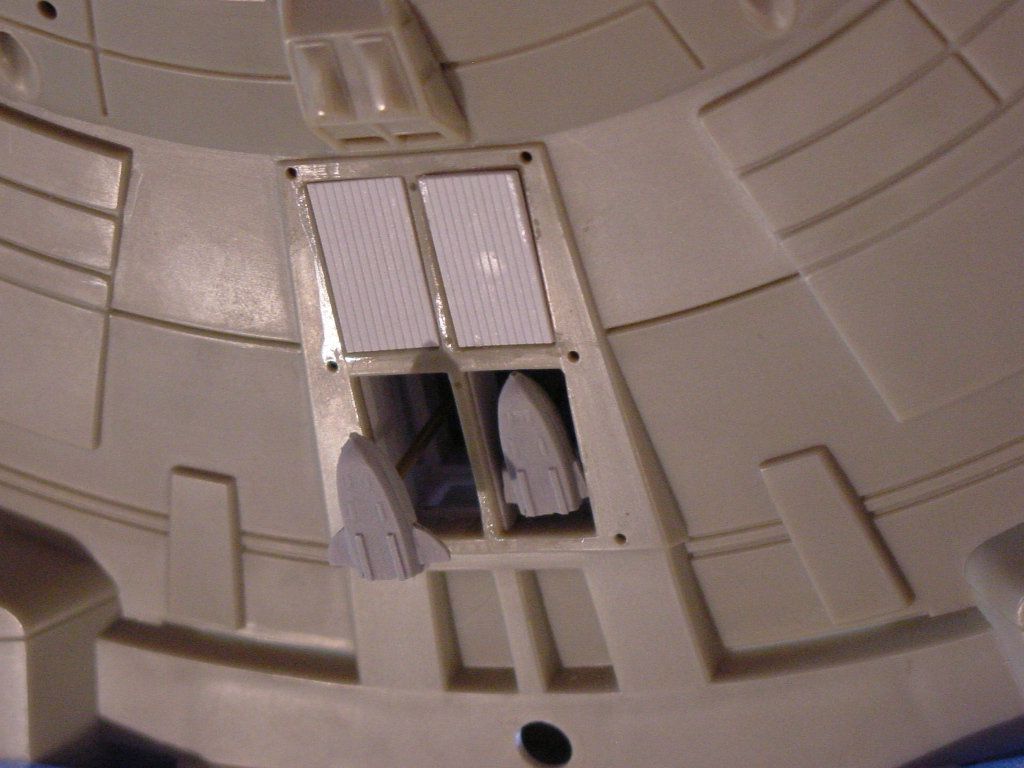
So what have I learned? I started with the 4th season disks and lucked into watching the episode where trip travereses the 50 meters between Enterprise and Columbia at Warp 5 - The episode has great shots looking straight into the shuttle bays. Just what I needed! So what have I learned aboutthe shuttle bays?
1 - I don't think they ever showed the front two bays. I suspect the story point of Enterprise launching short 2 of her 4 shuttlepods was to cover that they only built half the shuttlrebay set.
2 - The doors have two layers - An exterior sliding garage door and two interior hinged doors that swing out. This necessitates a space between the hanger floor and the garage doors. Good for me because now I'll have space for the fiber optics for the spotlights.
3 - The pods launch facing forward
4 - There is a wall or half wall between the forward & aft parking spaces. There seems to be some kind of observation window on the upper deck. THere seem to be ceiling lights on the ceiling of that passageway.
5 - The pods wings retract for storage, launching & retreival
6 - There are 4 or 5 rectangular light fixtures along the inboard side of each pod door on the ceiling. There seem to be 2 more rectangular fixtures on the ouboard side one fore one aft. Plus multiple small track lighing can fixtures.
Trying to get my blueprints done & will post more as get some done. I found some nice phototch to do the walkways - hat should get here next week!
Plus I think I am going to upen up one of the cargo bays two - The extra photo etch should make for some good detailing opportunities there!
OK I'm changing my mind on #3. They never showed shuttles in the two forward berths so on Todd's NX-01 the forward shuttles wil launch facing aft & the rear shuttles will launch facing forward. I think this will work better due to keeping some symmetry in the catwalks & endwalls. If anybody has evidence to the contrary speak now...
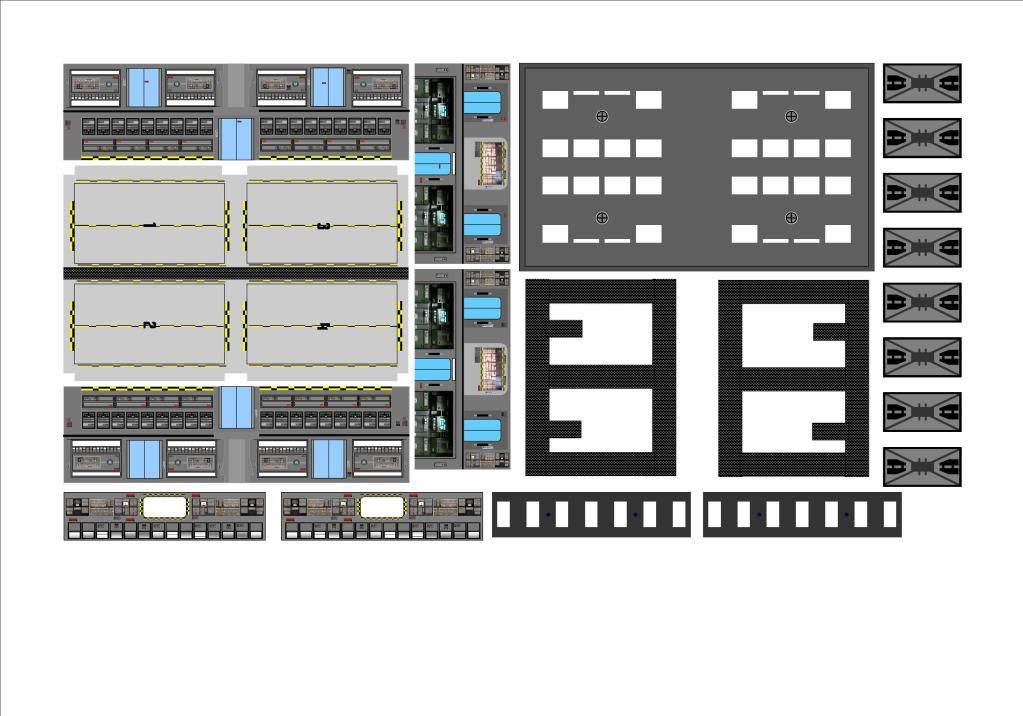
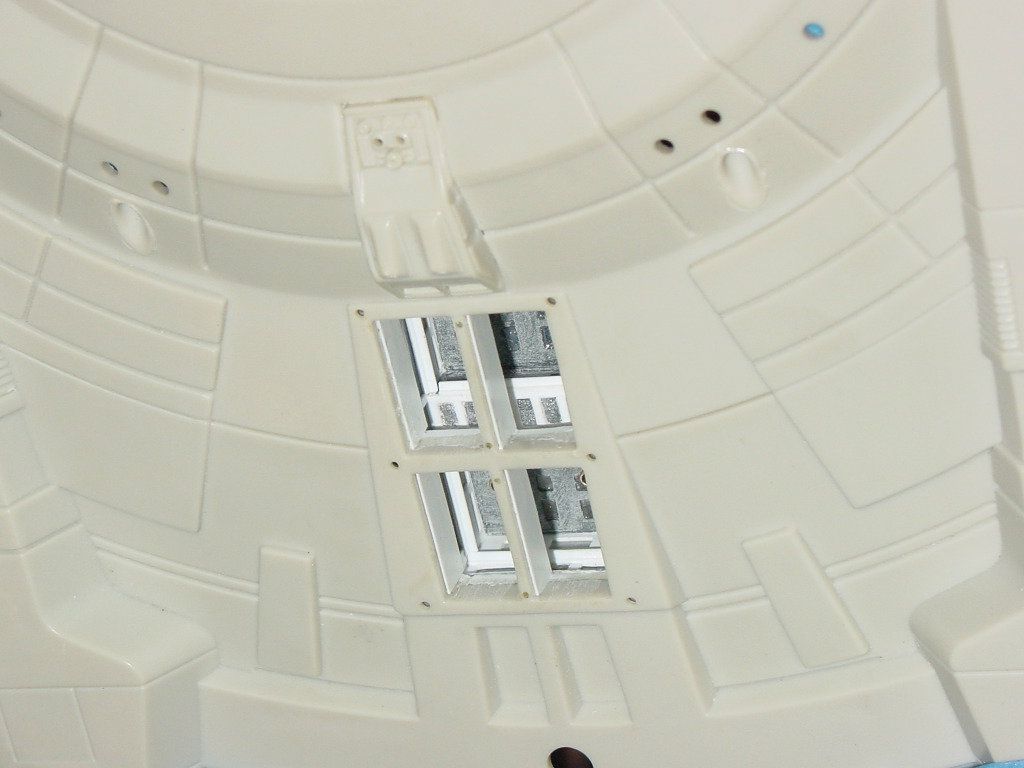
So started my deck plans for the shuttlebay. I'll use these to generate cutounts for floor, walls & ceiling & catwalks plus decals!
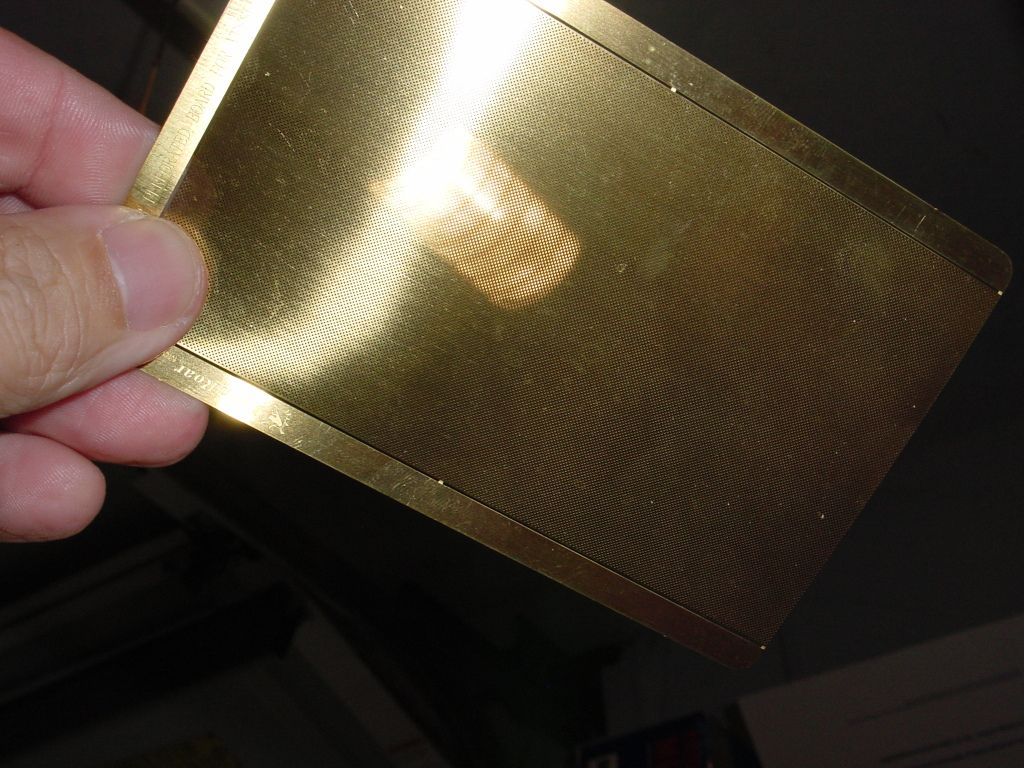
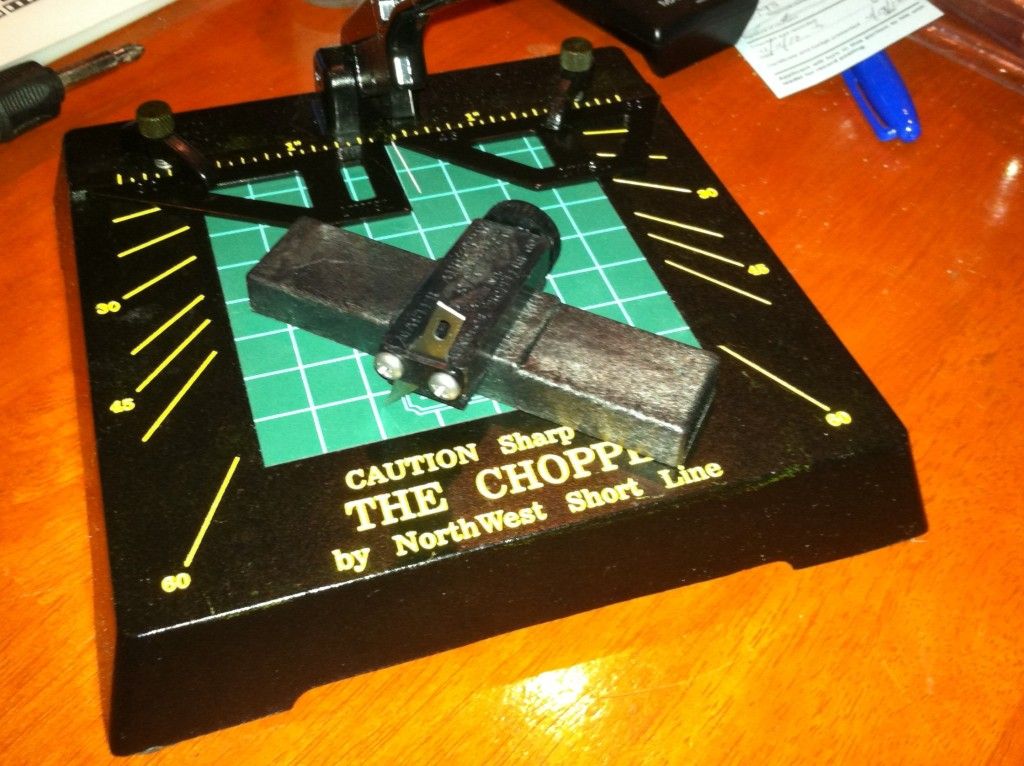
Plus got my Photoetch today - Any suggestions on houw to paint this micro mesh without clogging the openings?
BTW the photo etch came from freetimehobbies.com. it's 1:350 Lion Roar perforated Navy Floor. Not the correct grid pattern but close enough at this scale. And 1:350 KA Models Royal Navy Railing Set - Again - Not perfect but close enough.
So started my deck plans for the shuttlebay. I'll use these to generate cutounts for floor, walls & ceiling & catwalks plus decals!
Plus got my Photoetch today - Any suggestions on houw to paint this micro mesh without clogging the openings?
BTW the photo etch came from freetimehobbies.com. it's 1:350 Lion Roar perforated Navy Floor. Not the correct grid pattern but close enough at this scale. And 1:350 KA Models Royal Navy Railing Set - Again - Not perfect but close enough.
Chrisisall
Master Member
With any luck, I'll be doing a 1/1000 very soon. But an open shuttle bay? I'll leave that to you pros...
Lots of NX action!! :cool
Lots of NX action!! :cool
Chrisisall
Master Member
I SO appreciate the offer, but I just want a nice little NX-01.:coolYour welcome to use my graphics if you want - You could cut out the hatches & build a little box to represent the bay insides. The shuttlepods would be about the size of a grain of rice!
I'll enjoy the bay vicariously through YOUR build!:thumbsup
Chrisisall
Master Member
I eat that for breakfast.:lolBTW Man that plastic was nearly 1/4" thick there!
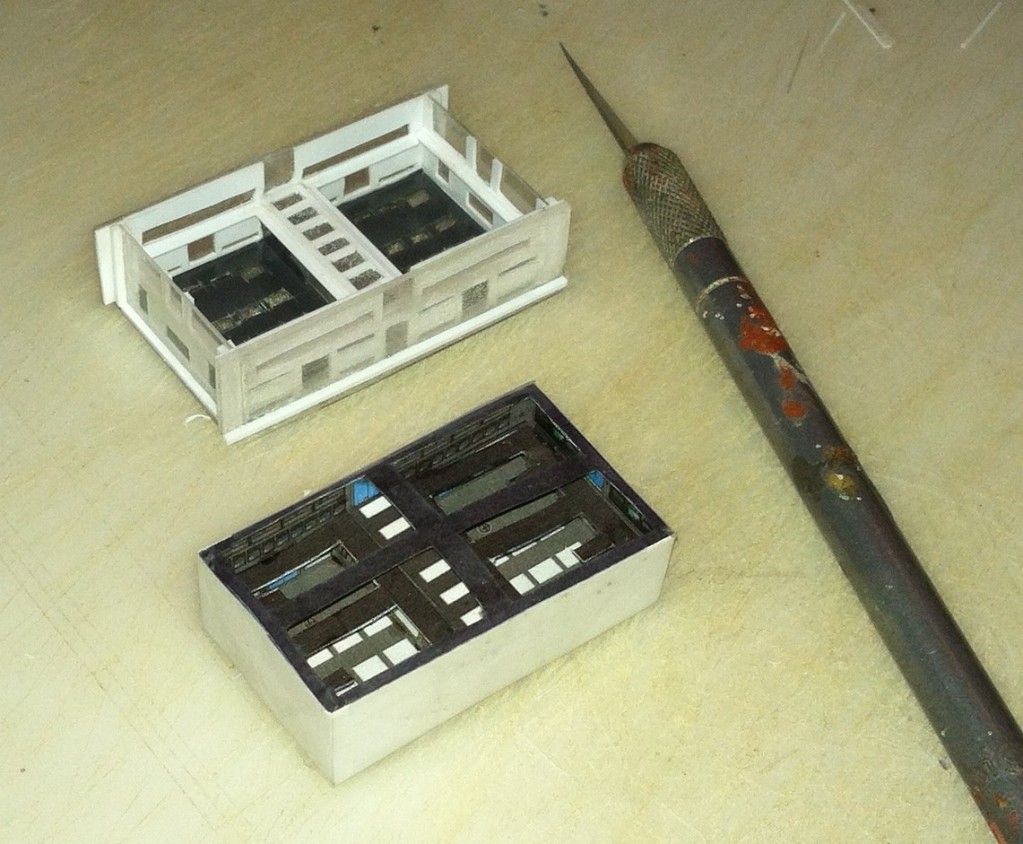
Shuttlebay in place
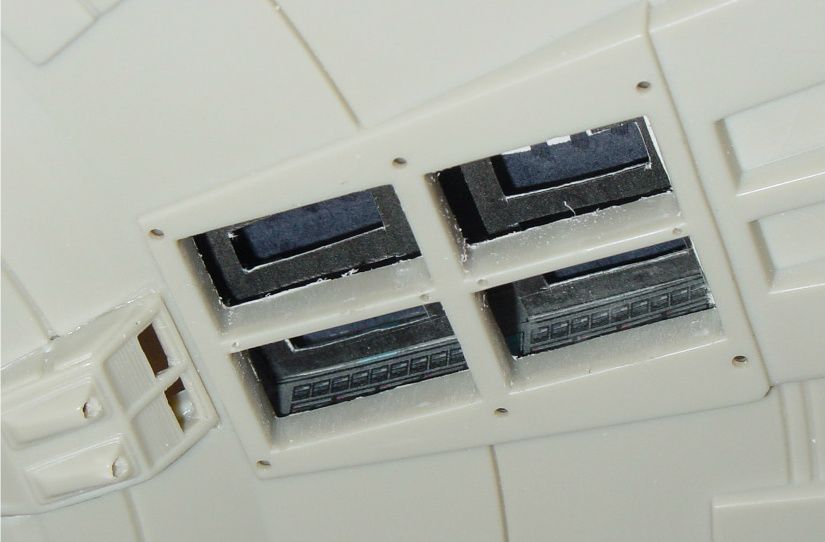
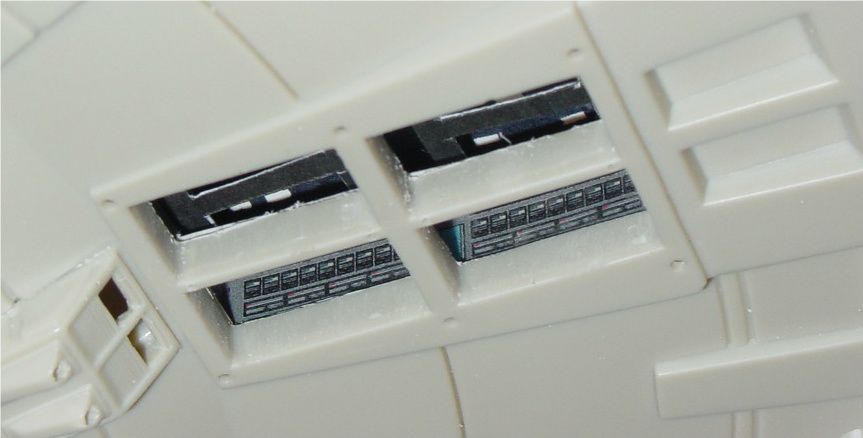
View with Shuttlepods from above
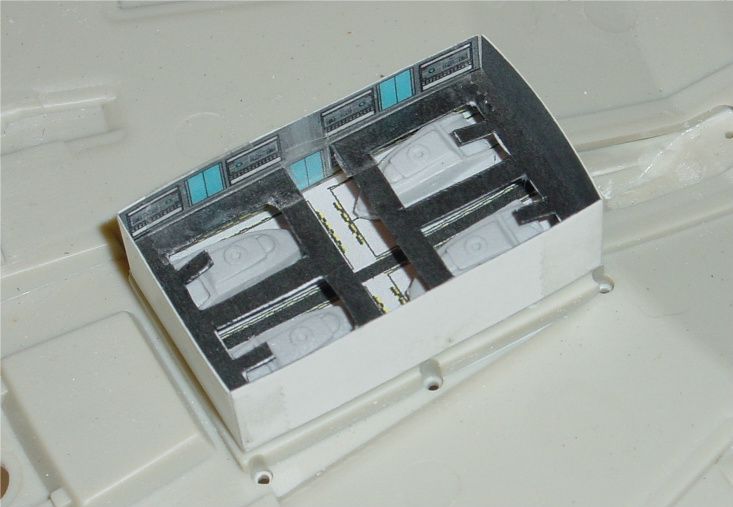
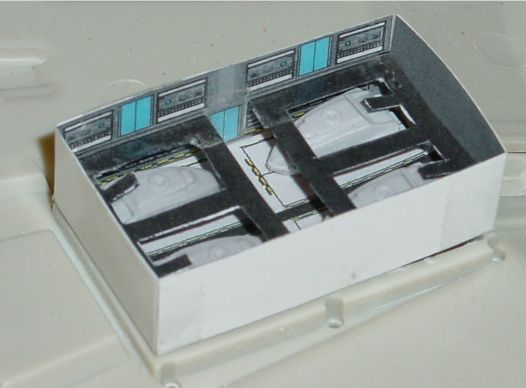
Shot of lights through the catwalk mesh
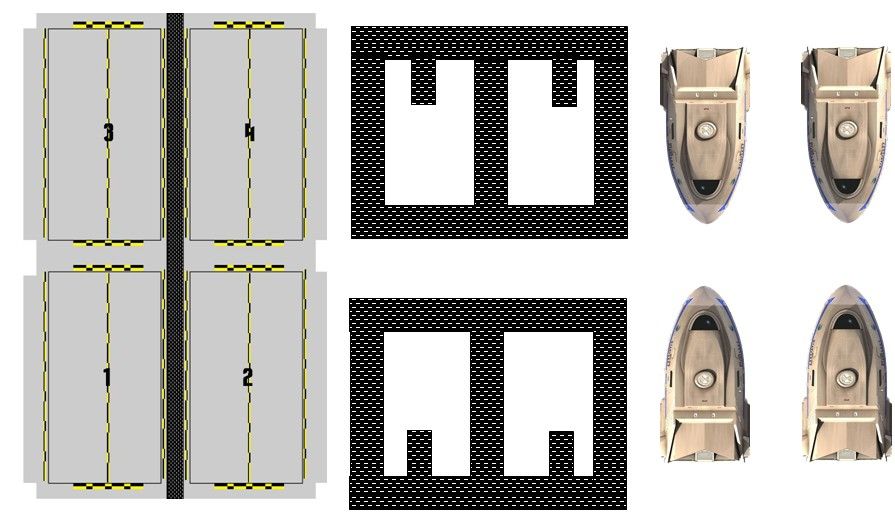
Been doing the graphics work on the shuttlepod bay. Got the port & starboard walls done. Fore & aft & ceiling next. Finally the control booth on the 2nd floor between the fore & aft bays. I cut out the cardboard version to do some test fitting & it looks goo so far. The final shuttlebay will be made from clear plastic then paintd except for lighted areas & decal applied from my graphics. It's nice to se something should be visible through the ports!
View with Shuttlepods from above
Shot of lights through the catwalk mesh
Been doing the graphics work on the shuttlepod bay. Got the port & starboard walls done. Fore & aft & ceiling next. Finally the control booth on the 2nd floor between the fore & aft bays. I cut out the cardboard version to do some test fitting & it looks goo so far. The final shuttlebay will be made from clear plastic then paintd except for lighted areas & decal applied from my graphics. It's nice to se something should be visible through the ports!
Chrisisall
Master Member
This will be so amazing when finished....:eek
")
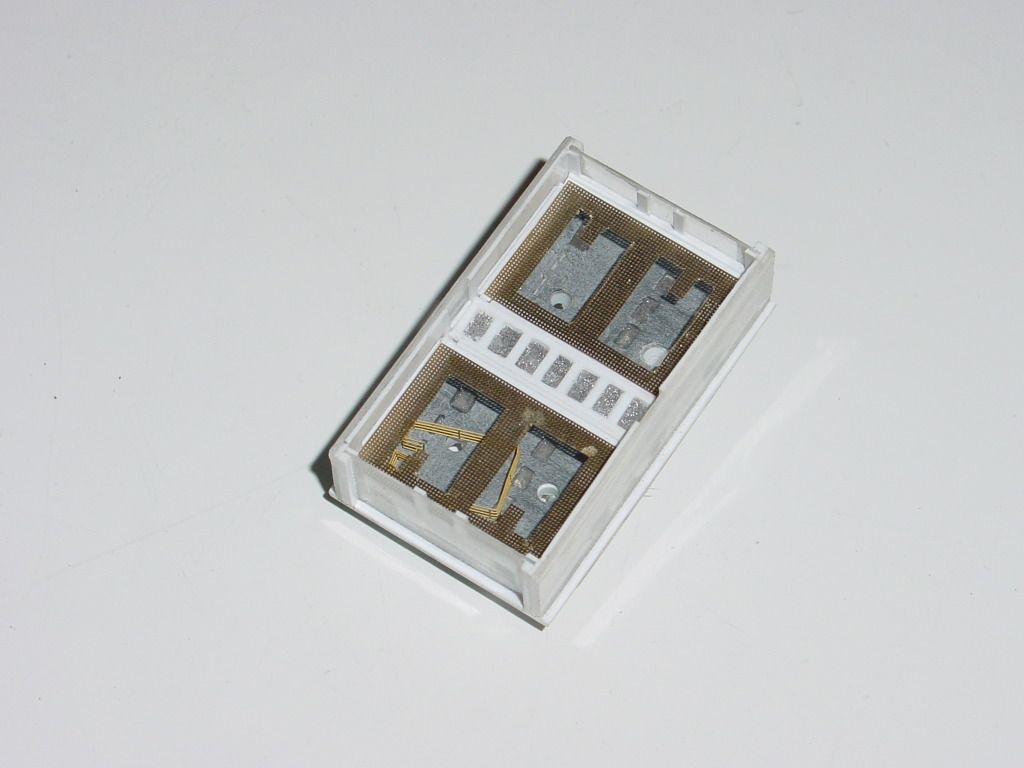
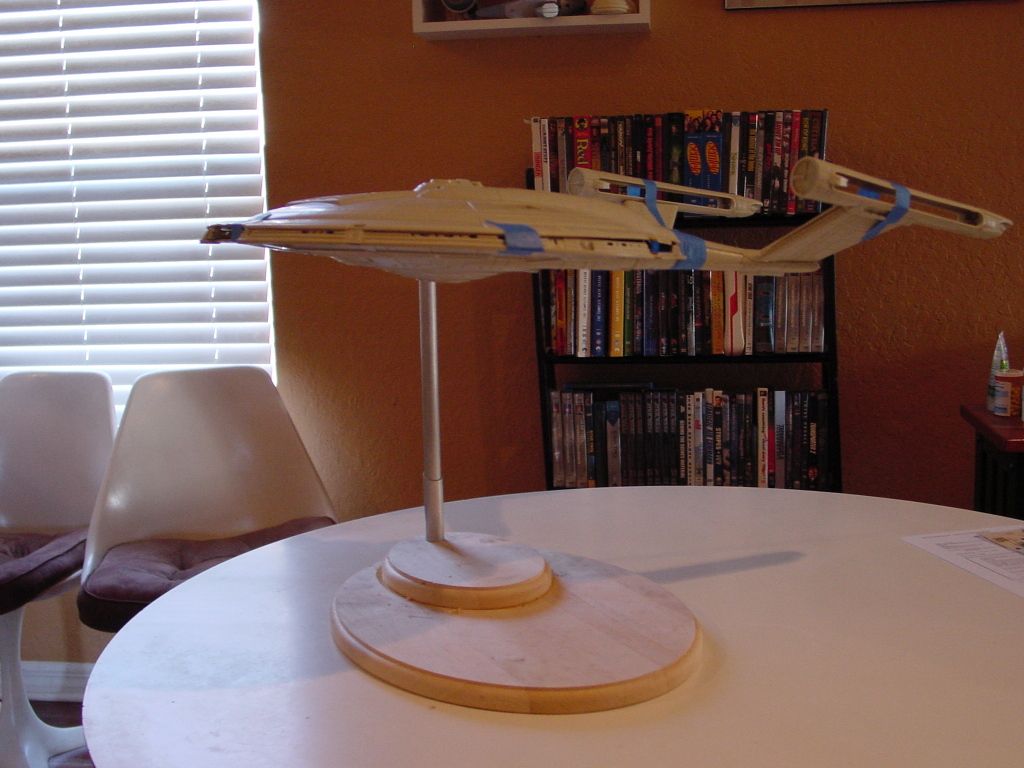
I'm Baaack!
Took Forever! to get cutting the parts relatively square for the shuttle bay - but finally got it manufactured in styrene! Next I need to locate & drill the holes for the umbillical lines for the shuttles & then painting & decaling the shuttle bay which then get put aside while I go back to major assemblies!


Similar threads
- Replies
- 5
- Views
- 779
- Replies
- 3
- Views
- 1,161
- Replies
- 79
- Views
- 9,410