kristen jones
Master Member
Hey all...
So having recently purchased a STELLAR Baker Sonic from RussRep, I have set about working out how to make it BUZZ and WHIRR, as it ought to do!
So I took a dremel to my CO Baker toy, and away i went...!
First, a look at an exploded (NO, not literally! ) RussRep Baker Sonic:
Here's what i kept of the CO toy:
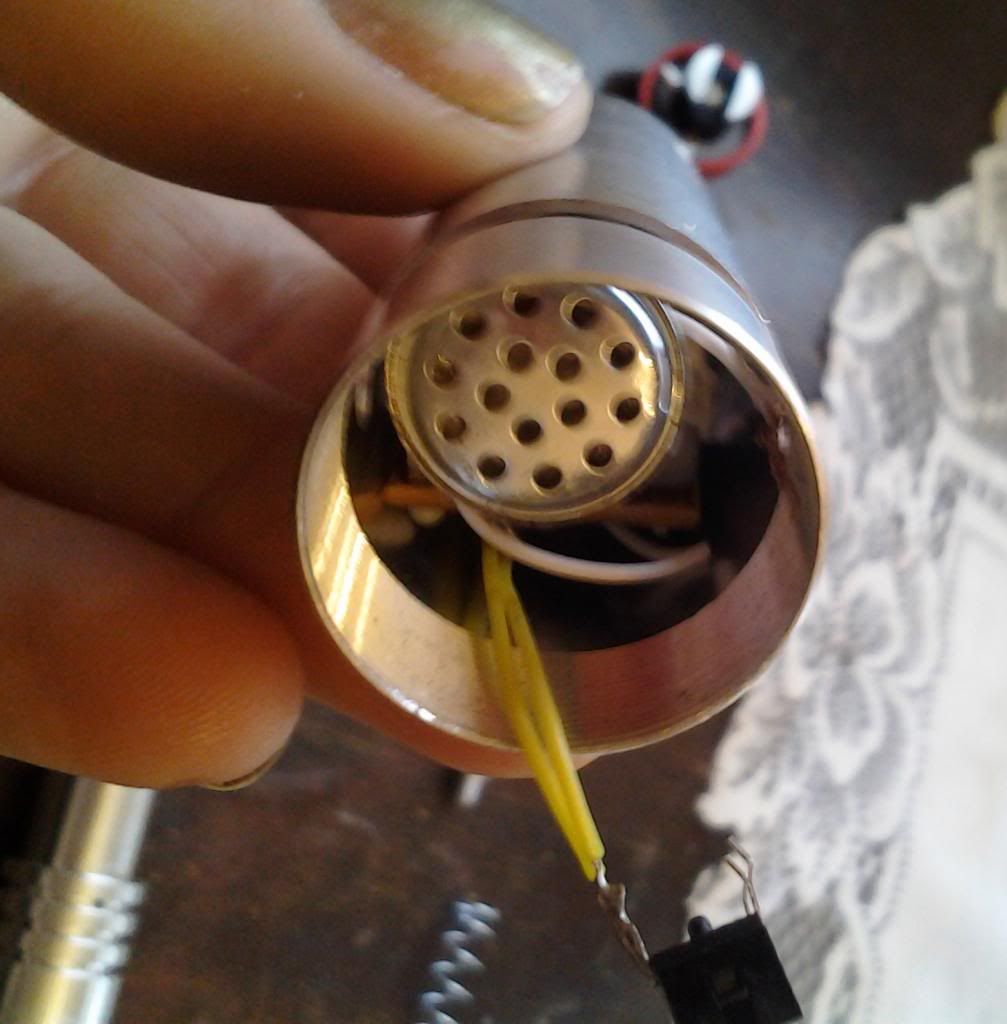
This is roughly where it will sit and be laid out inside:
Looking down from the top of the sonic body, there is this "base" which the central shaft threads into to hold the upper and lower bodies together. The momentary switch which is used in the CO toy will sit here, above the base. The prongs on the bottom of it (after being wrapped in shrink tubing) should allow a press fit into one of those kidney bean shaped slots in the base, and the yellow wires will pass down through to connect to the battery box/PCM/Speaker assembly below...
The momentary switch will be repositioned to work horizontally, as opposed to the vertical position it held in the CO toy. The upper body, as it retracts downward will push the rocker on the momentary switch down while still allowing more downward movement after the sound is engaged.
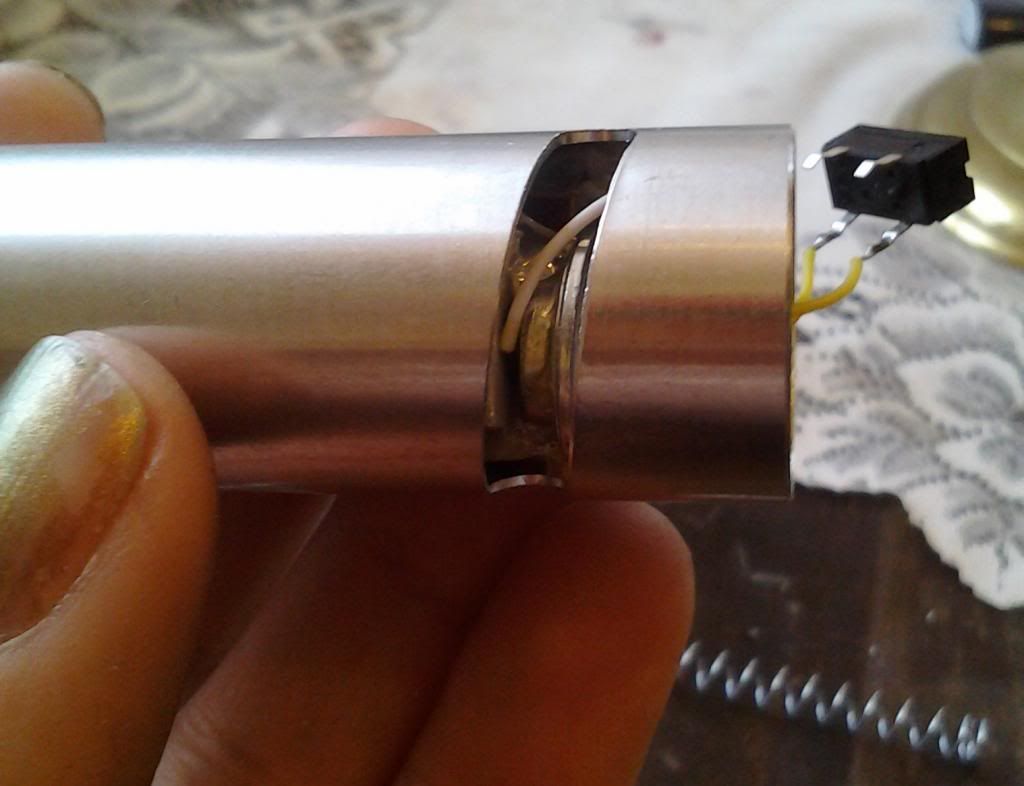
Here is roughly how they will come together:

Here's that Battery Box/PCM/Speaker assembly:
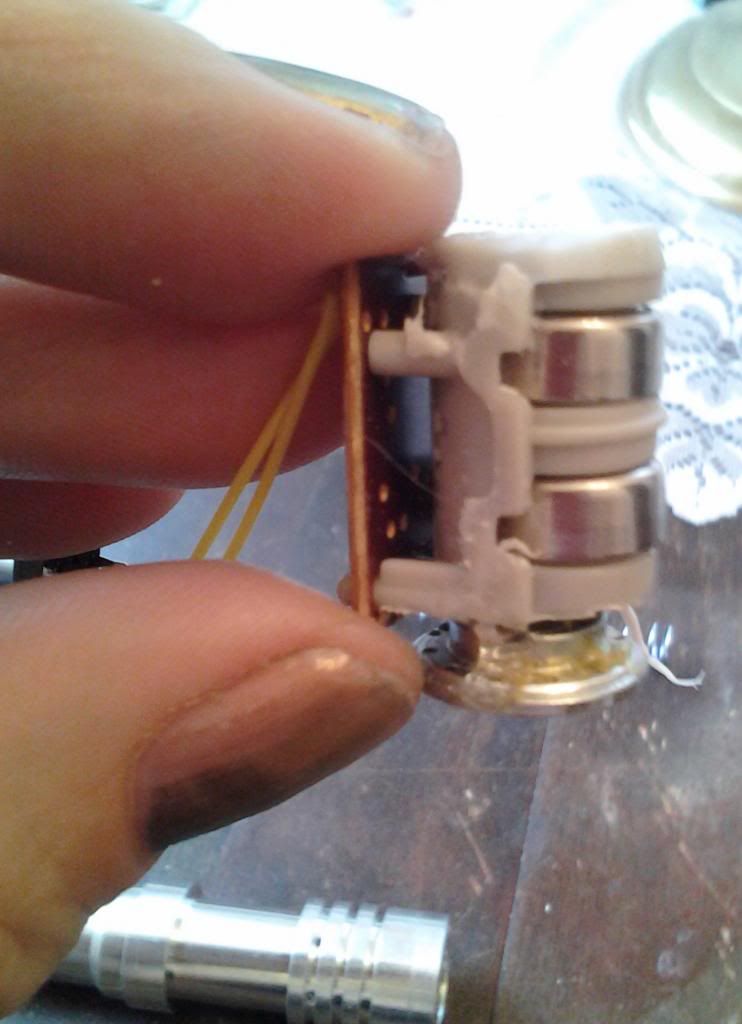
I cut off all of the excess surrounding plastic from the toy, but left enough to insulate the batteries from the surrounding body that they will be slipped inside of. I then hot glued the speaker to the bottom of the assembly so that it will point down toward the bottom endcap of the sonic, and the sound will emanate out through the diagonal slot in the body.
I still have to figure out how best to lengthen the yellow wires to the switch so that I can remove the assembly to replace batteries when needed. i may put quick disconnects on those two leads for that purpose. I also need to disconnect the switch in order to pass the wires through the body, so that will get done when I work out how to solder everything (since one of my speaker wires is damaged too and needs to be re-attached to the PCM)
I'll keep you all updated!
So having recently purchased a STELLAR Baker Sonic from RussRep, I have set about working out how to make it BUZZ and WHIRR, as it ought to do!
So I took a dremel to my CO Baker toy, and away i went...!
First, a look at an exploded (NO, not literally!
) RussRep Baker Sonic:
Here's what i kept of the CO toy:

This is roughly where it will sit and be laid out inside:

Looking down from the top of the sonic body, there is this "base" which the central shaft threads into to hold the upper and lower bodies together. The momentary switch which is used in the CO toy will sit here, above the base. The prongs on the bottom of it (after being wrapped in shrink tubing) should allow a press fit into one of those kidney bean shaped slots in the base, and the yellow wires will pass down through to connect to the battery box/PCM/Speaker assembly below...

The momentary switch will be repositioned to work horizontally, as opposed to the vertical position it held in the CO toy. The upper body, as it retracts downward will push the rocker on the momentary switch down while still allowing more downward movement after the sound is engaged.
Here is roughly how they will come together:

Here's that Battery Box/PCM/Speaker assembly:

I cut off all of the excess surrounding plastic from the toy, but left enough to insulate the batteries from the surrounding body that they will be slipped inside of. I then hot glued the speaker to the bottom of the assembly so that it will point down toward the bottom endcap of the sonic, and the sound will emanate out through the diagonal slot in the body.


I still have to figure out how best to lengthen the yellow wires to the switch so that I can remove the assembly to replace batteries when needed. i may put quick disconnects on those two leads for that purpose. I also need to disconnect the switch in order to pass the wires through the body, so that will get done when I work out how to solder everything (since one of my speaker wires is damaged too and needs to be re-attached to the PCM)
I'll keep you all updated!
Last edited: