Guns Akimbo
Sr Member
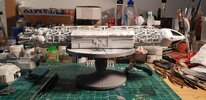
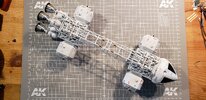
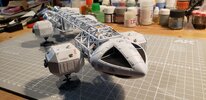
Sorry I didn't get pics from the outset but I didn't want to bore you with another unboxing haha. Anyway, most of the sub-assemblies are done. Rather impressed with the parts fit, some didn't even need glue but I went ahead and did so. Not going to light this one though.

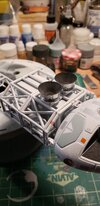
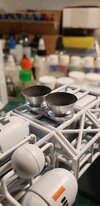
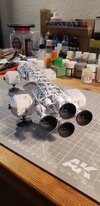
I couldn't resist a wee bit of bling so I sprang for a set of the MPC aluminum bells, which are really nicely machined (yes I'm aware of Mike Reader's parts, but he doesn't make them for this or the larger 1/48 scale Eagle). The inners were primed and sprayed w/flat black Tamiya.


The two-piece spine took awhile to clean up. Mold lines were easy to scrape/sand but getting the corners was a right PITA. I risked hollowing out the vernier thrusters using three sizes of twist bits and a tiny ball grinder Dremel bit (turned by hand), and have to say the results are better than I hoped. I only broke one little bell off.


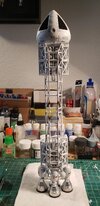
The "shoulder pods" went together nicely, but the seams are right on the edges and are difficult to fill and sand where there is adjacent surface detail. The command module seams were minimal and cleaned up surprisingly easily. No putty was needed here.

I couldn't resist adding a few greeblies to the fore and aft internal module surfaces. I didn't want to overdo it, this isn't a SW vehicle...

I plan on hitting it with gray Stynylrez and giving it a finish that I saw online: 23ml of Tamiya gloss white with 1 drop of sky blue and 1 drop of silver. From what I could tell it's pretty close to the diamond white of the original filming models.
To be continued...
I couldn't resist a wee bit of bling so I sprang for a set of the MPC aluminum bells, which are really nicely machined (yes I'm aware of Mike Reader's parts, but he doesn't make them for this or the larger 1/48 scale Eagle). The inners were primed and sprayed w/flat black Tamiya.
The two-piece spine took awhile to clean up. Mold lines were easy to scrape/sand but getting the corners was a right PITA. I risked hollowing out the vernier thrusters using three sizes of twist bits and a tiny ball grinder Dremel bit (turned by hand), and have to say the results are better than I hoped. I only broke one little bell off.
The "shoulder pods" went together nicely, but the seams are right on the edges and are difficult to fill and sand where there is adjacent surface detail. The command module seams were minimal and cleaned up surprisingly easily. No putty was needed here.
I couldn't resist adding a few greeblies to the fore and aft internal module surfaces. I didn't want to overdo it, this isn't a SW vehicle...
I plan on hitting it with gray Stynylrez and giving it a finish that I saw online: 23ml of Tamiya gloss white with 1 drop of sky blue and 1 drop of silver. From what I could tell it's pretty close to the diamond white of the original filming models.
To be continued...
Last edited:

